Usage of Collaborate tool in REVIT
1.
AIM:Open an architectural template. Using the Manage tab set project base point and project shared coordinates for the project
PROCEUDRE:
- Open Revit file->In architectural template
- Click on Architecture Tab->Datum->Grids
- Create a vertical and Horizontal grid lines->Rename the one grid line
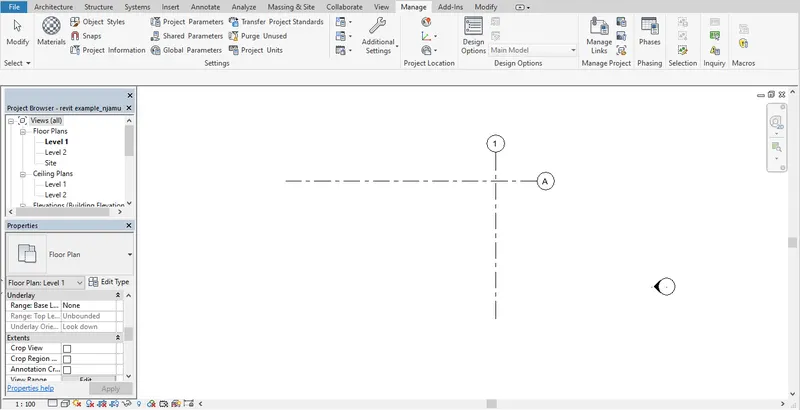
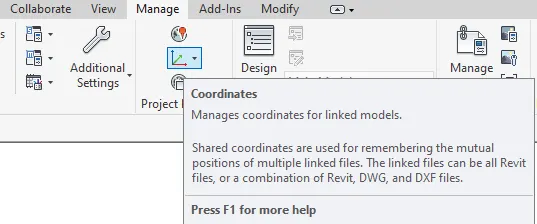
- Go to manage tab->Project location panel
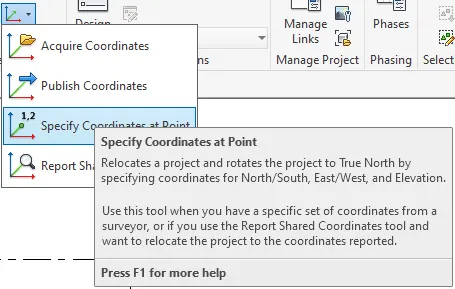
- Select the co-ordinates.
- Select "specify co-ordinates on points"
- Now select Horizontal grid line->A new window will open
- Specify the co-ordinate as 0->CLick ok.
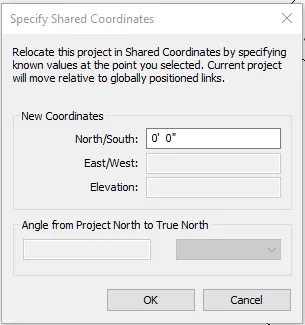
- Similarly click on vertical grid line->Enter the value as 0
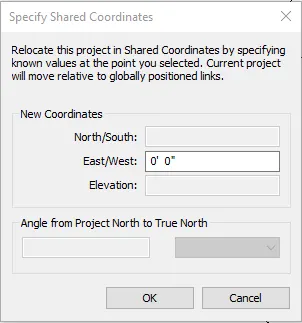
- Now the project base point is set as 0,0.
- Go to file menu->Save-as the file.
2.
AIM:Open another new file but with a structural template. Using the manage tab set project parameters the same as the architectural model. Copy the parameters from the architectural model to the structural template or enter the parameters manually into the structural model
PROCEUDRE:
- Open Revit file->Structural template
- Click on Structure Tab->Datum->Grids
- Create a vertical and Horizontal grid lines->Rename the one grid line
- Go to manage tab->Project location panel
- Select the co-ordinates.
- Select "specify co-ordinates on points"
- Now select Horizontal grid line->A new window will open
- Specify the co-ordinate as 0->CLick ok.
- Similarly click on vertical grid line->Enter the value as 0
- Now the project base point is set as 0'-0",0'-0".
- Go to file menu->Save-as the file structure file.
3.
AIM: Re-open the architectural model. Using the tools under the Collaborate tab make the architectural model a central model (enabling simultaneous working on the model)
PROCEUDRE:
- Open The architectural file you previously worked upon
- Go to collaborate tab->Collaborate
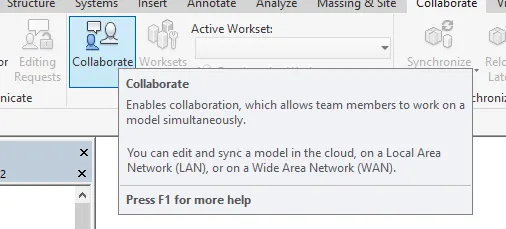
- A new window will open->Select "Collab within network"
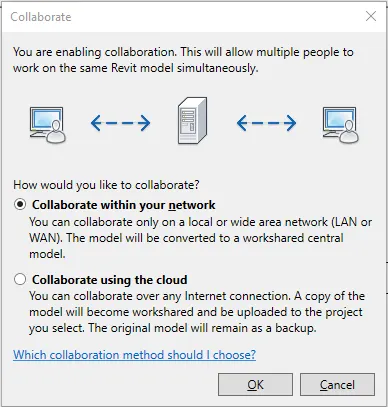
- Click on OK->One dialog box will appear,click yes
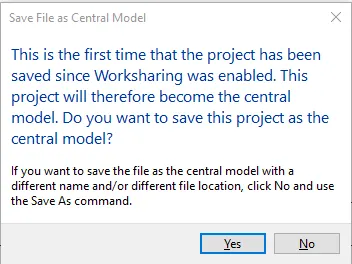
- Click on YES->The central modal is made
RESULT:we created a central file to collab with network
4.
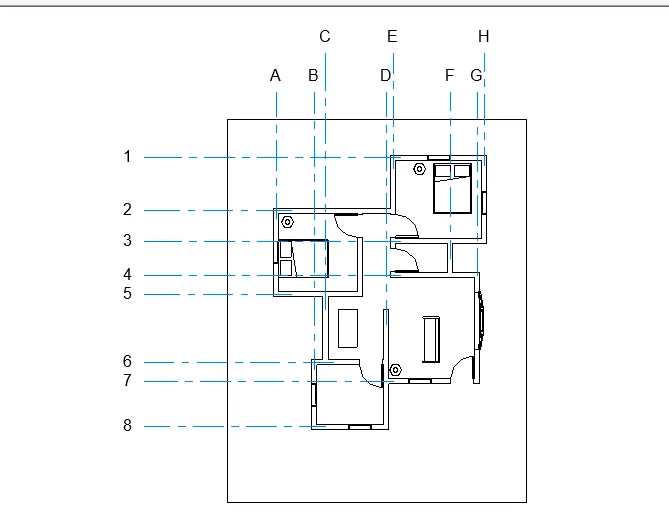
AIM: Create the Grids Longitudinal and Transverse pattern for the project similar to the task done in Week 2
PROCEUDRE:
- Open Revit
- open the architectural plan
- Go to architecture tab->Datum->Grids
- draw the grids from c/c walls of the model
- Name them differently accorid to horizontal and vertical lines
RESULT:
5.
AIM:Synchronize the changes from the local copy to the central file of the architectural model.
PROCEUDRE:
- Go to the central file you saved in the 3rd question //The central collborate file
- Go to collaborate tab->Synchronize with central
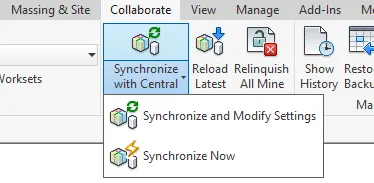
RESULT: The files is now synchronized with the central file
6.
AIM: Open the structural model and use the collaborate tools to save the model as a central file.
PROCEUDRE:
- Go to revit file->Create structural template
- Go to collaborate tab->Collaborate
- A new window will open->Select "Collab within network"
- Click on OK->One dialog box will appear,click yes
- Close the file(CTRL+W)
- Open the file again->click on the file you saved->On open menu,check on "Create new local"
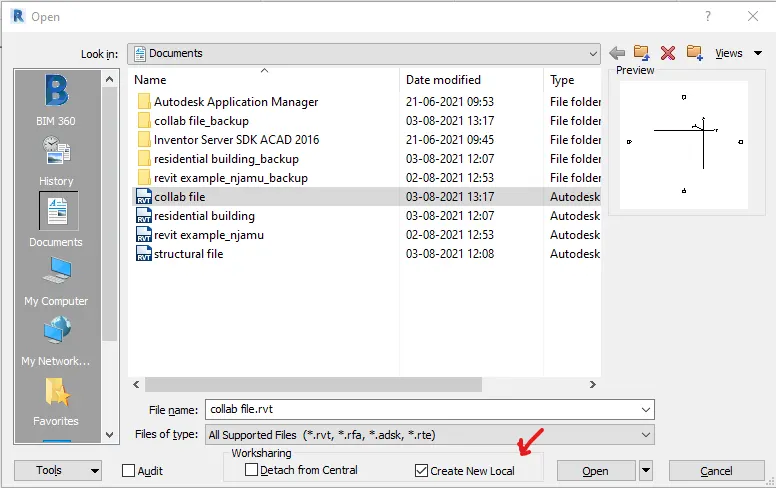
- The file will be opened as central file
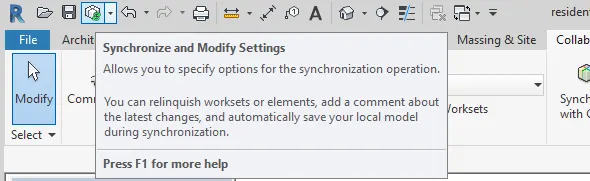
- Check on upper tab for the SYnchronize icon ,if it is on the central file is made
7.
AIM: Under the Collaborate tab, select the grids and levels from the architectural model, and using Copy Monitor try to copy the grids to the structural model. See what happens when the copy monitored grid is moved around in the structural model
PROCEUDRE:
- Open revit
- Open the structural file your made central in the previous question
- Click on "Worksets" Given in bottom ribbon
- Click New->create new worksets and make it active workset.
- Go to Insert tab->link revit
- Select the architectural file from which you want to copy/monitor the grids
- Now the arch file is opened in structural file->Go to Collaborate->Copy/monitor
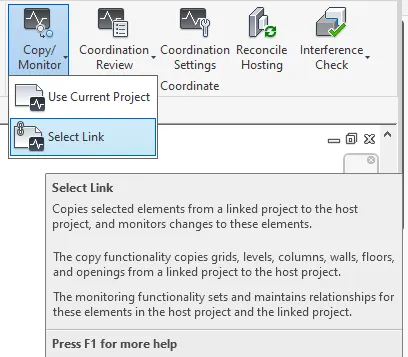
- Select Link->Click inside the Architecture model
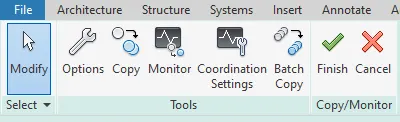
- From the top left menu ,select Copy->Select all Arch. model
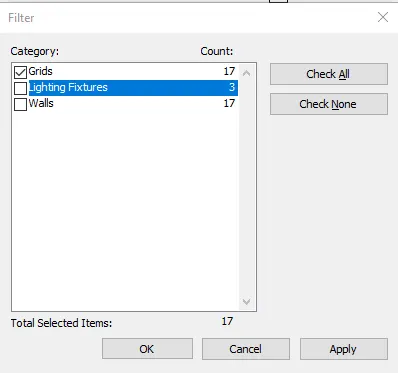
- Go to filter selection->Uncheck all others except grids
- On the Ribbon panel-Click "Finish"
- Go to modify|(Copy/monitor)->Click on tick mark(finish)
- Now open visibilty/Graphics->Revit links tab->Uncheck the arch. file->OK
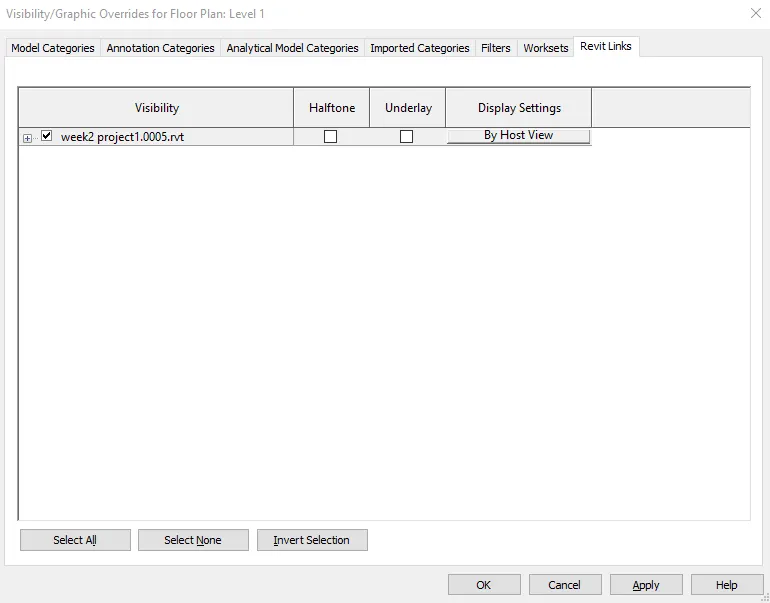
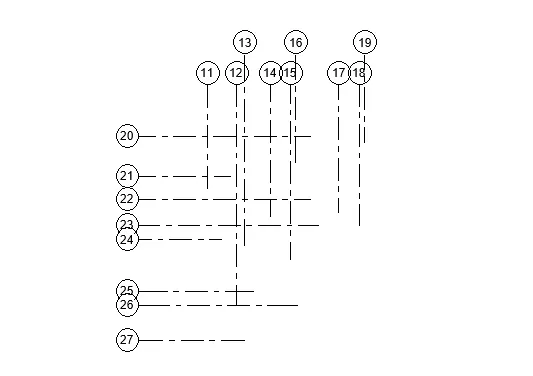
RESULT:Only the grids you selected will be visible in the structural file
8.
AIM: Create another new file with a construction template. Save the new file as a central model. This file will include both architectural and structural model. Under the manage tab, Click manage links to link both architectural and structural files. Save the file and close all the files.
PROCEUDRE:
- Open Revit
- Click on new->create construction template
- Save the file as you need
- Go to collaborate tab->Collaborate
- A new window will open->Select "Collab within network"
- Click on OK->One dialog box will appear,click yes
- Close the file(CTRL+W)
- Open the file again->click on the file you saved as construction template->On open menu,check on "Create new local"
- The file will be opened as central file
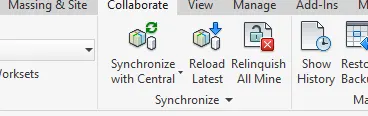
- Click on Collaborate tabe->synchronize with central
- Go to manage tab->Manage Links
- A new tab will open->Click on Add
- Select the architectural and structural file you want in this central file
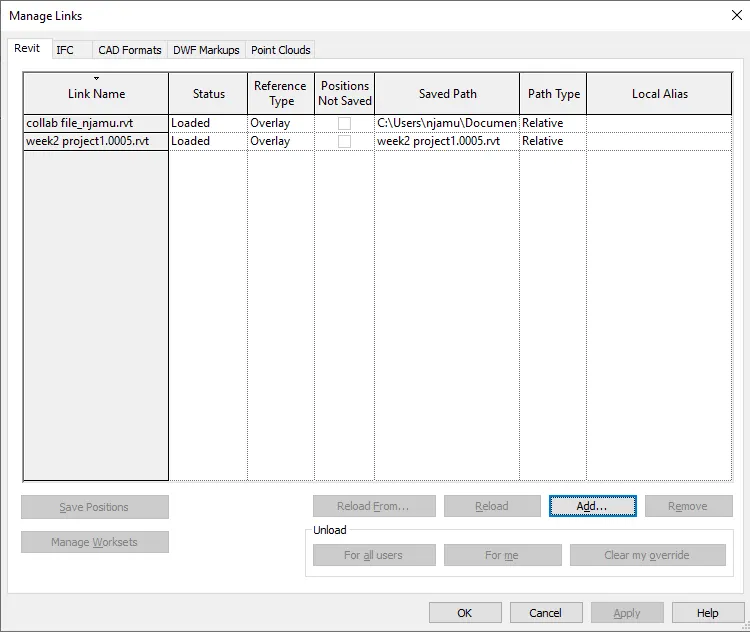 //week2 is architural and collab is structural
- Click on OK->Both the file will be on the Construction file
- Click on save ->Close the file(CTRL+W)
RESULT: we created a construction central file and adde to two different files in it
9.
AIM: Are the grids from structural and architectural model matching in the construction template created? If yes the model is set up for project 2. If not work on the shared parameters and linking options under Manage links
( Hint: origin to origin, by shared coordinates or by project base point to base point ) to link the models in an appropriate manner
PROCEUDRE:
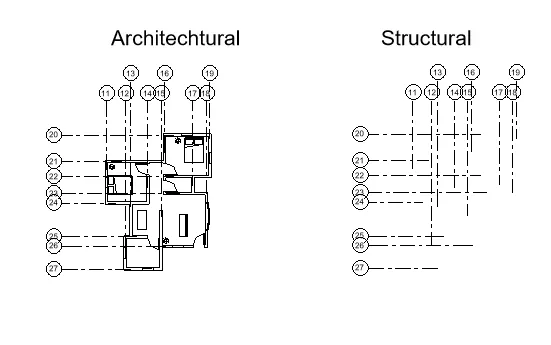
The link of architectural and structural file saved in construction central file is not mathing. therefore changes is to be made
STEP1
- Go to architectural file
- Click on manage->Visibility/graphics
- expand the site heading->Check on "Project base point" and "survey point "
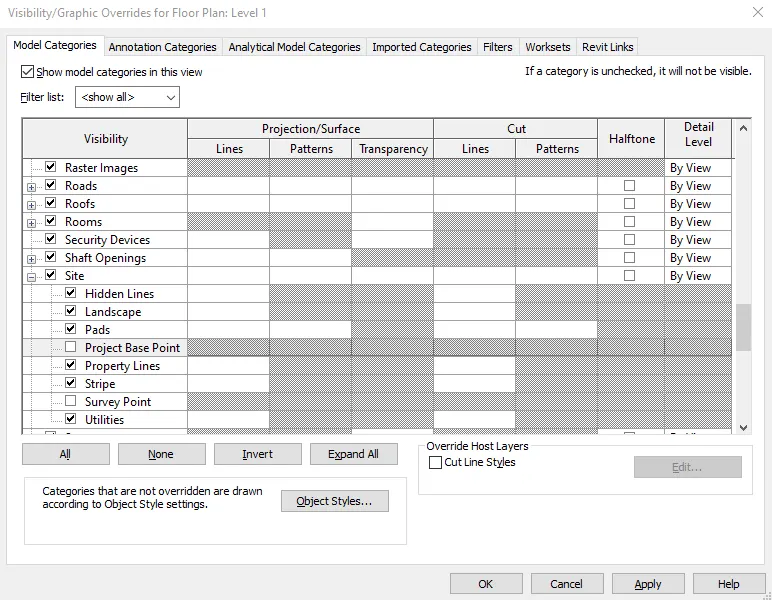
- Now the survey and origin points will be visible->Move the project origin to the point you want as origin
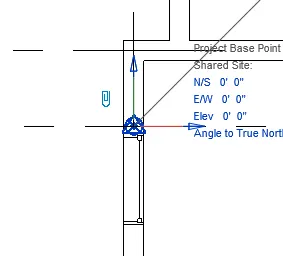 //Click on the clip sign till the Red line shows to allow to move orgin
- Save the file
STEP2
- open the structural file
- //Repeate the same method used in architectural file to set the origin point
- //Set the origin where you want it
- Save the file
STEP3
- Open the construction file your created before
- Go to manage tab->Manage Links
- A new tab will open->Click on Add
- Select the architectural and structural file you modified in the above steps
- //Keep in mind when selecting the the file,check the positioning
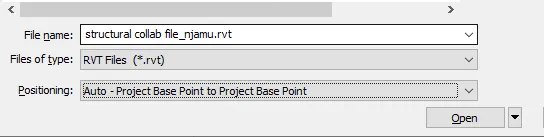
RESULT: We had created a construction file in which architecture and structural file were not aligned properly,which is now corrected
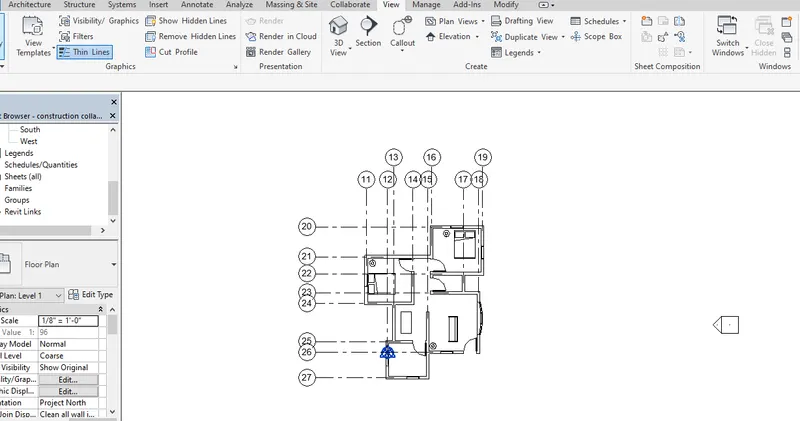 //The origin are aligned for the draweing
10.
AIM:List a flow chart of a project tree set up in terms of Construction model, Architecture & Structure model, in this exercise and understand how many people can work on the same project using Revit simultaneous
ANSWER:
For Construction:
- walls
- doors
- windows
- staircase& lifts
- components
- roofs
- materials
For architectural
- Foundation
- Columns
- beams
- Tie beam
- plinth beam
- Floor
- ceiling
- Trusses
- staircase
The primarily objective os structural analysis is to analyse the construction and architectural design made is capable of resisting the load from the above strcuture or not during its entire life period.If the design is not properly made it could cause huge loss in capital and human life loss. The work of strcutral design comens after the srchitectural design is done wiht thw desings of plan.So we can say that 3 people/group can work in a project.