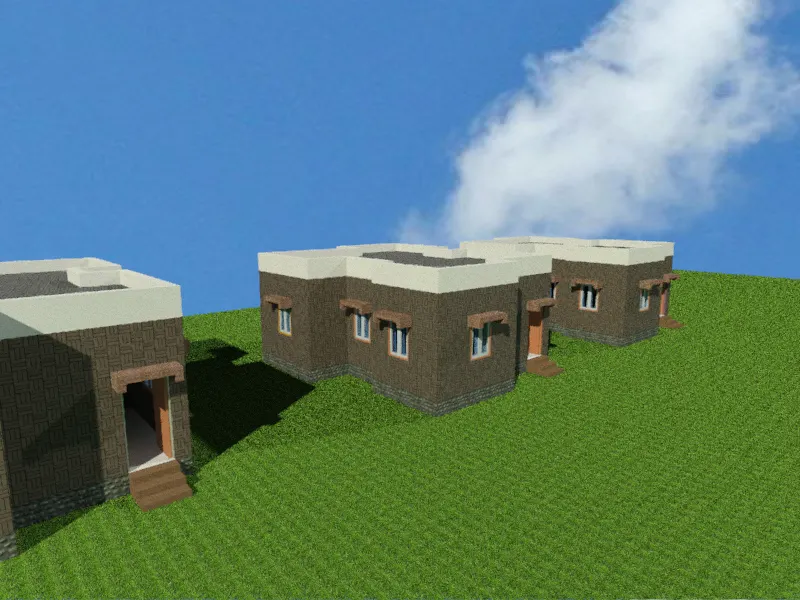
Project 2_Creating a 3D rendered model for a Residential Building in AutoCad
1.
AIM:Create a 3d rendered view of residential building
PROCEDURE:
- creating the plan
- extruding walls
- Subtracting windows and door space
- creating plinth beam
- creating the roof
- creating door 3d
- creating windows
- adding material into objects
STEP1
- Go to top view
- create the plan
Command:XLINE
- draw a vertical and horizontal line
Command:TRIM
- Trim the extra line coming out of the edge
STEP2
Command:OFFSET
- Take offset of vertical and horizontal lline of 9" //for exterior wall starting from down left
- Take offset of the inner line of 10' in horizontal and 8' vertical direction //For the kitchen
- Take offset of 9" for walls
- Take offset of 10' in horizontal 12' in vertical direction //For hall and tv room
- Take offset of 9" for walls
- take offset of 8'6" from kitchen walls and 7' vertcally //For the dining hall
- make 6" inner wall
- Take offset of wall 10' in vertical and 10' in horizontal direction //For bedroom 1
- Take offset of 3' in hprizontal direction //For walk passage
- Take offset of 6'6 in horizontal and 4'6 in vertical direction //For bathroom
- Take offset of 6" for wall
- takeoffset of 10' in horizontal and 10' in vertical direction //For bedroom2
STEP3
Command:TRIM
- TRIM the extra lines exceeding the corners of the room //To make the wall partition clear
Command:LINE
- Draw lie of 9" vertcally in exterior wall
Command:OFFSET
- Offset the line for 3'width //For the width of door and window
- Draaw line and take offset of 4'6" for the Hall window //Bigger in size (3PANEL)
Command:COPY
- Select the lines for the winodws and copy it tp places required //On exterio and interior walls
//D1 is the main enterance door
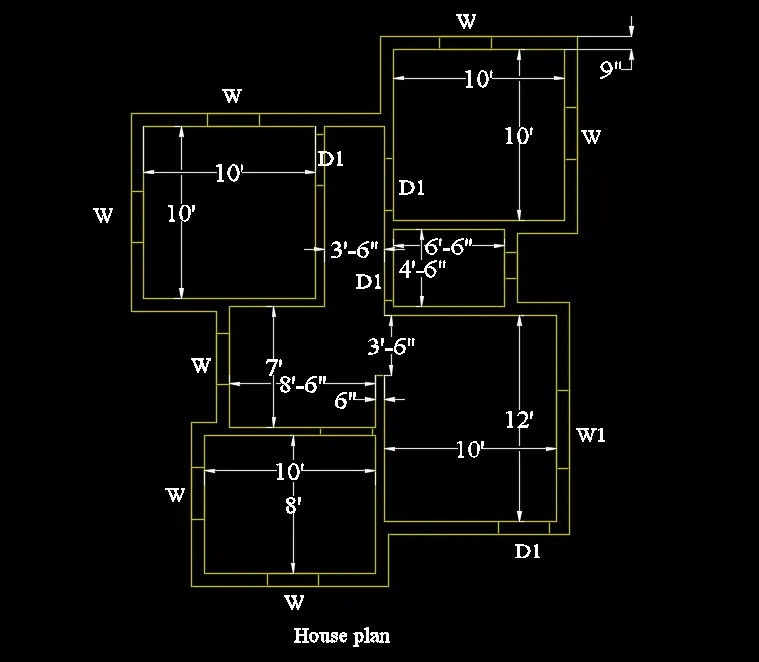
STEP4
Command:PRESSPULL
- Select the region in between walls
- Select multiple //To pull multiple walls
- Select the region in between the windows and doors //Pull in upwards direcion
- Enter the height as 10'
- Select the winodows region and pull it to 3' height //To keep windows at 3'height
Command:COPY
- Copy the object you created in the above command
- paste it on the above of the window from the top side //So thst the open area for winodows is left
- Paste on the the top the door lintel
//Double click on the object above door and edit height as 3'6" //For the hright of door ill be 6'6"
STEP5
Command:RECTANGLE //Making the winodw W
- Create a rectangle of 3'x4'
- Offset it for 2" inside //For winodow border
- Offset it for 3" inside //For Mullien of window
Command:LINE
- Draw a line in the middle of the window
- Take offset of 3" on both side of that line //For making area of glass
Command:TRIM
- Trim the extra line from the winodow
STEP6
Command:BOUNDARY
- Select the inner face of the window border ,click OK //Whole winodw is region now
Command:SUBTRACT
- select the object from which u want to subtract //Select the window
- slect the object u want to subtract //Select the mullien and glass
STEP7
Command:PRESSPULL
- Select the region between the border and pull it for 9" //Thickness of the window border
- Select the mullien and give thickness of 7"
- Select the glaass and give width of 2" //Thickness of glass
Command:MOVE
- Select the mullien and move it 1" into the middle of window border //To show the panel arrangement of window
- Select the glass of window and move 2.5" into the mullien //To keep glass in middle of window
//Repeat the above steps for the 3 panel window [W1] having 4'6" width
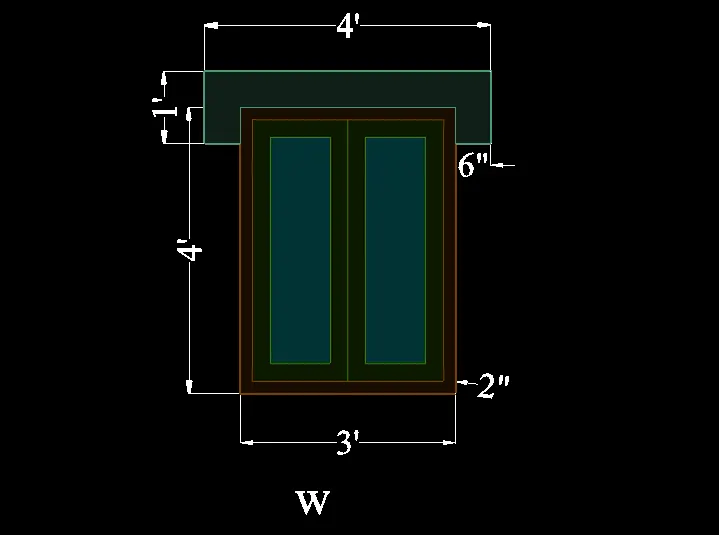
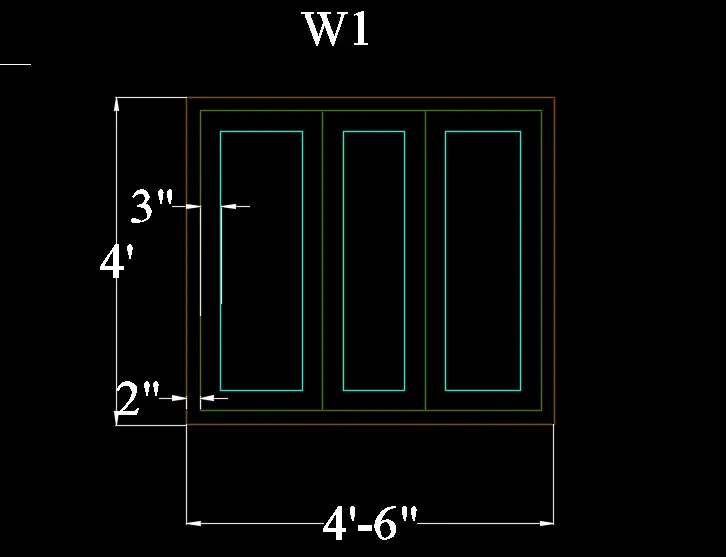
STEP8
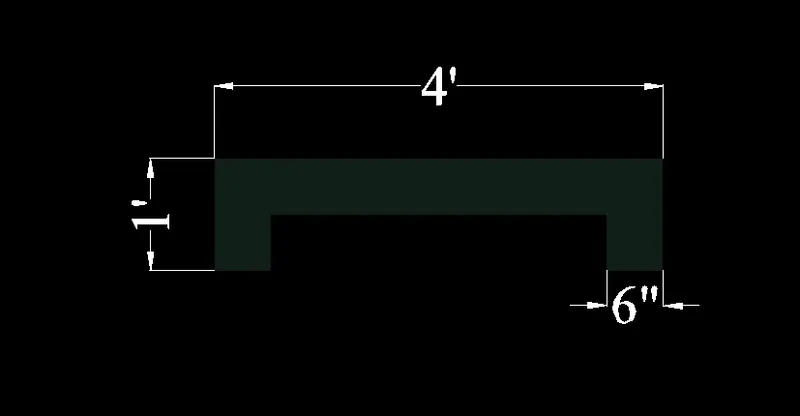
Command:LINE //MAking CHHAJJA
- draw linne of 4' horizontal
- Move 6" downwards
Command:MIRROR
- select the 6" line
- mirror it tot the other end of the line //To make sideline of chhajja
Command:OFFSET
- JOIN the line
- select the line and offset it for 6" inwards //The width of chhajja
- Join the end of the offset
STEP9
Command:PRESSPULL
- Select the region inside the chhajja
- Pull the length of 1'6" //The chhajja length
Command:COPY
- Copy the chhajja
- Select the inside edge of chhajja as basepoint //To make it easier to copy above winodow
- Paste it on the above of windows
//Repeat the above procdure for 4'6" window witht the width change
STEP10 //MAKING DOOR
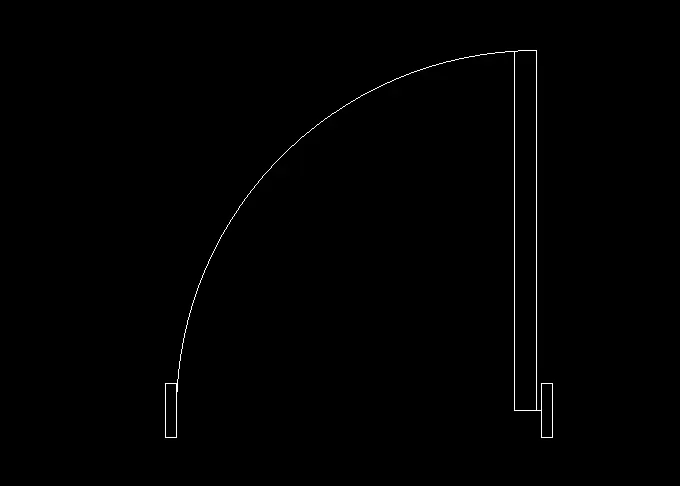
Command:RECTANGLE
- Go to top view
- Create a rectangle 0f 4"x1"
- Draw a line of 3' between them //Center to center
Command:MIRROR
- select the rectangle
- Select the midpoint as baase line //To mirror the object
- mirror it on the other side
Command:LINE
- Draw a line of 0.5" for the hinge
- draw a line of 2'9" in lateral direction of hinge //for the door panel
STEP11
Command:CIRCLE
- Take hinge as center point
- Draw the circle to meet the other border of the door //It show the swing of doorr
Command:TRIM
- Tri the extra edges of the circle
STEP12
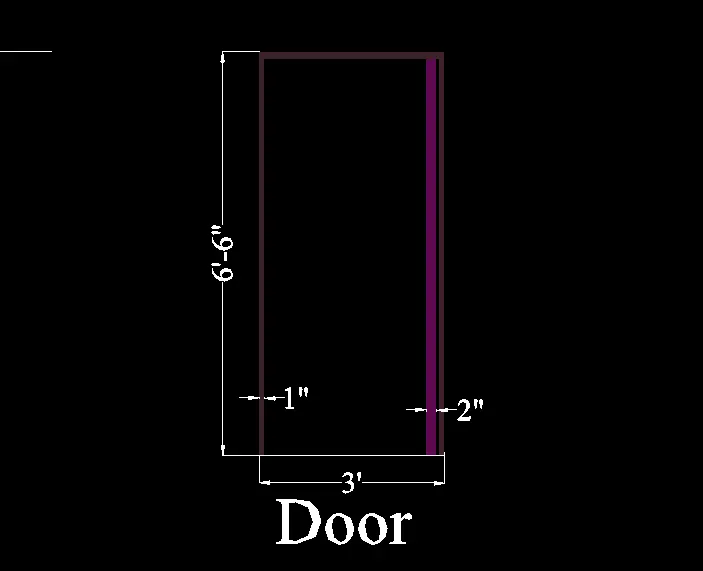
Command:PRESSPULL
- Select the border and give height of 6'6 inch //Fpr the panel height
- Select the door panle and give height of 6'5" //Fpr the door height
Command:COPY
- Selectt eh door
- select the bottom borderline as basepoint and paste it to their desired location
STEP13
Command:PLANESURF
- Select two point sin betwwen which u want to form a surface //It creates surface under the objects
Command:CAMERA
- Create a circle on the surface
- presspull the cylinder at an viewing height
- place the camera at the height of cylinder //To make the view angle in rrendering
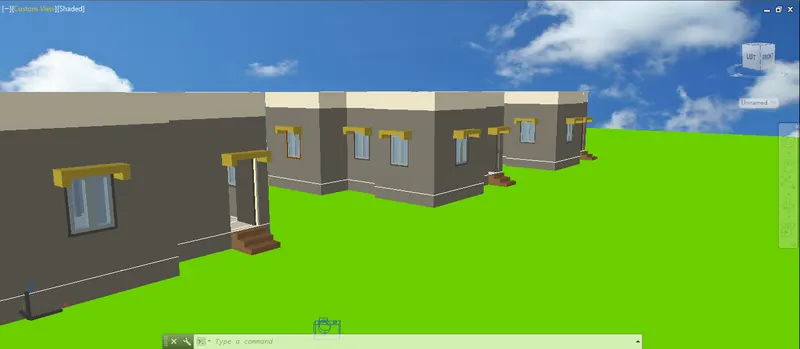
//house before adding materials
STEP14
Command:SUNSTATUS
- Activate th sun status which will give sunlight according to th time
Command:VSSSHADOWS
- Click on "FULL shadow " to get the shadow caused by the sunWall
STEP15
Command:MATBROWSEROPEN
- Open the panel //To got the the various texture for rendring
- Go to autodsek library
- Select the various texture given according to the requirement //Under title type, and category
- Select the tecture u want and click upload symbol //To move it to your palette
- Select the object and click "assig to selected object" //To assign the texture to that object
//Here are some texture used in the 3d drawing
| WALLS | WEAVE-BROWN |
| WINDOW BORDER | RED OAK-STAINED DARK LOW GLOSS |
| WINDOW MULLIEN | STEEL BLUE |
| GLASS | BLUE-GLAZING |
| STAIRS | RUNNING-BROWN |
| PLINTH SLAB | RUBBLE-RIVER ROCK |
| FLOORING | TERRAZO-WHITE(1) |
| ROOFING | WHITE-FLAKING |
| CEILING | SPANISH TILE |
| DOOR PANEL | RED OAK-STAINED DARK LOW GLOSS |
| CHHAJJA | HEADER |
| PLANESURFACE | GRASS (CUSTOM IMAGE) |
STEP16
Command:BACKGROUND
- Select the custom image from the system
- Adjust the image to "stretch" //To fit the image properly to the backgeound
Command:CAM 1
- Camera angle saved for rendering purpose
- Save another camera angle for more height view CAM 2
Command:RR
- Command is used to render the 3d drawing
//After completion of all applying texure Copy and paste the house 2 more for view purpose
RESULT:
FROM CAM 1
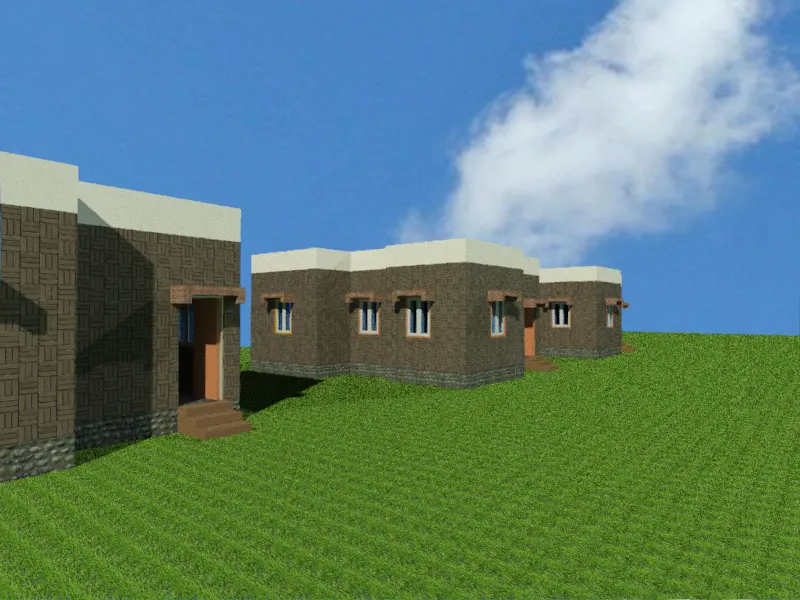
FROM CAM2