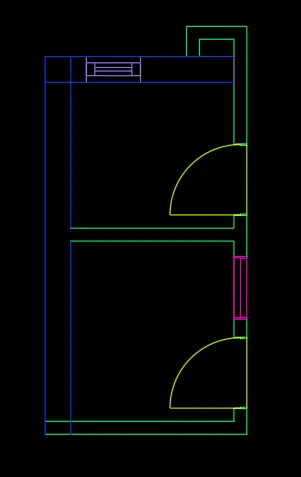
Creating a Residence Layout, Seating plan, Toilet and Utility room plan using AutoCad
1.
AIM:To make the plan of the house
Procedure
STEP1
Command: XL
XLINE
Specify a point or [Hor/Ver/Ang/Bisect/Offset]:
Specify through point: //horizontal and vertical line To make the lower left corner of the house
Command: TR //Trim the extra lines
TRIM
Current settings: Projection=UCS, Edge=None
Select cutting edges ...
Select objects or <select all>:
STEP2
Command: O
OFFSET
Current settings: Erase source=No Layer=Source OFFSETGAPTYPE=0
Specify offset distance or [Through/Erase/Layer] <11'-7 1/2">: 9" //Take the offset for the exterior walls
STEP3
Command: F
FILLET
Current settings: Mode = TRIM, Radius = 0'-0.00" //To use at the corner for walls
Select first object or [Undo/Polyline/Radius/Trim/Multiple]:
Select second object or shift-select to apply corner or [Radius]:
Command: O
OFFSET
Current settings: Erase source=No Layer=Source OFFSETGAPTYPE=0
Specify offset distance or [Through/Erase/Layer] <11'-7 1/2">:6' //Space for the stairs and then 9inch wall
// Using offset,Trim and fillet we make the outer exterior walls according to the dimensions
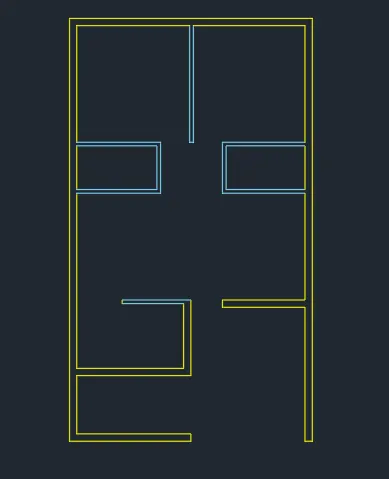
STEP4
Command: L //For making D1 doors
LINE
Specify first point:
Specify next point or [Undo]: 0.5 //For hinge 0.5 inch
Specify next point or [eXit/Undo]: 2'11.5 //The width of the door
Specify next point or [Close/eXit/Undo]: *Cancel*
Command: LINE
Specify first point:
Specify next point or [Undo]: 2'11.5 //For making the swing length of door
Specify next point or [eXit/Undo]: *Cancel*
STEP5
Command: C //Center at the joint of hinge and door
CIRCLE
Specify center point for circle or [3P/2P/Ttr (tan tan radius)]:
Specify radius of circle or [Diameter] <2'-6.00">: 2'11.5
Command: *Cancel*
Command: TR //Trim the extra circumference of the circle
TRIM
Current settings: Projection=UCS, Edge=None
Select cutting edges ...
Select objects or <select all>:
STEP6
Command: CO //To Copy the door at their location in the plan
COPY
Select objects: Specify opposite corner: 3 found
Select objects:
Current settings: Copy mode = Multiple
Specify base point or [Displacement/mOde] <Displacement>:
Specify second point or [Array] <use first point as displacement>: *Cancel*
//In similar way the D2 and D3 door are made acoording to the dimensions and copy to their location
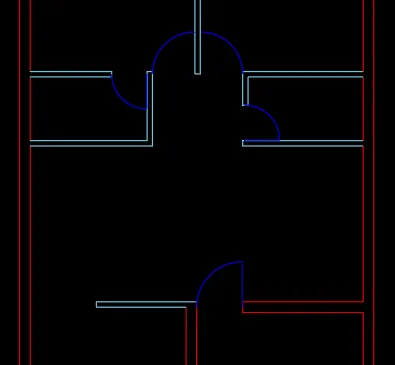
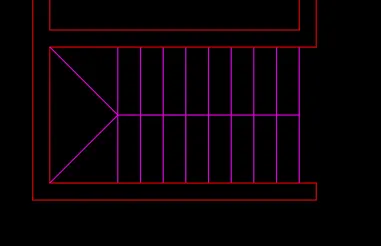
STEP7
Command: O //For making the stairs
OFFSET
Current settings: Erase source=No Layer=Source OFFSETGAPTYPE=0
Specify offset distance or [Through/Erase/Layer] <6'-0.00">: 3' // To take the center of the rail
Select object to offset or [Exit/Undo] <Exit>:
Specify point on side to offset or [Exit/Multiple/Undo] <Exit>:
Command: OFFSET
Current settings: Erase source=No Layer=Source OFFSETGAPTYPE=0
Specify offset distance or [Through/Erase/Layer] <3'-0.00">: 3'-0.00" //To make clearance of the resting area of stairs
Select object to offset or [Exit/Undo] <Exit>:
Specify point on side to offset or [Exit/Multiple/Undo] <Exit>:
STEP8
Command: CO
COPY
Select objects: 1 found //Selecting the tread
Select objects:
Current settings: Copy mode = Multiple
Specify base point or [Displacement/mOde] <Displacement>:
Specify second point or [Array] <use first point as displacement>: A
Enter number of items to array or [9]: 9 //For 8 tread we input 9
Specify second point or [Fit]: 1' //Distance between tread
Specify second point or [Array/Exit/Undo] <Exit>: e
STEP9
Command: O //To make window
OFFSET
Current settings: Erase source=No Layer=Source OFFSETGAPTYPE=0
Specify offset distance or [Through/Erase/Layer] <0'-9.00">: 1'3 //taking offset from the left side
Select object to offset or [Exit/Undo] <Exit>:
Specify point on side to offset or [Exit/Multiple/Undo] <Exit>:
STEP10Command: OFFSET //Offset for windows width
Current settings: Erase source=No Layer=Source OFFSETGAPTYPE=0
Specify offset distance or [Through/Erase/Layer] <1'-3.00">: 6'
Select object to offset or [Exit/Undo] <Exit>:
Specify point on side to offset or [Exit/Multiple/Undo] <Exit>:
Command: OFFSET
Current settings: Erase source=No Layer=Source OFFSETGAPTYPE=0
Specify offset distance or [Through/Erase/Layer] <6'-0.00">: 3.5 //Offset for windows panel
Select object to offset or [Exit/Undo] <Exit>:
Specify point on side to offset or [Exit/Multiple/Undo] <Exit>:
STEP11Command: TR
TRIM
Current settings: Projection=UCS, Edge=None
Select cutting edges ... //Trimming the extra llines
Select objects or <select all>:
Select object to trim or shift-select to extend or:
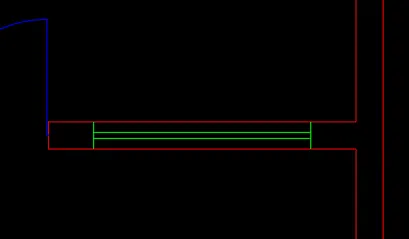
RESULT:
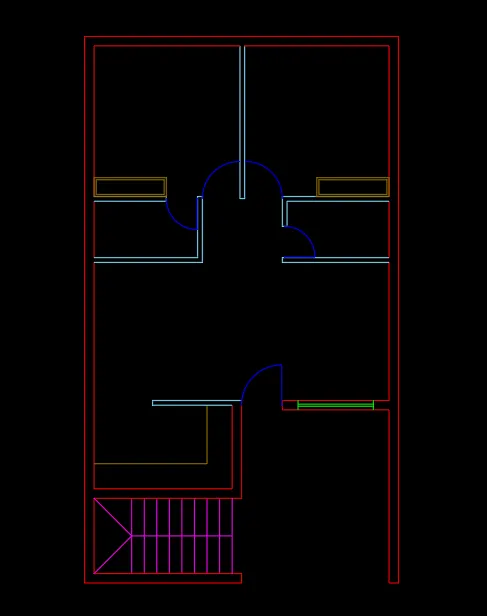
2.
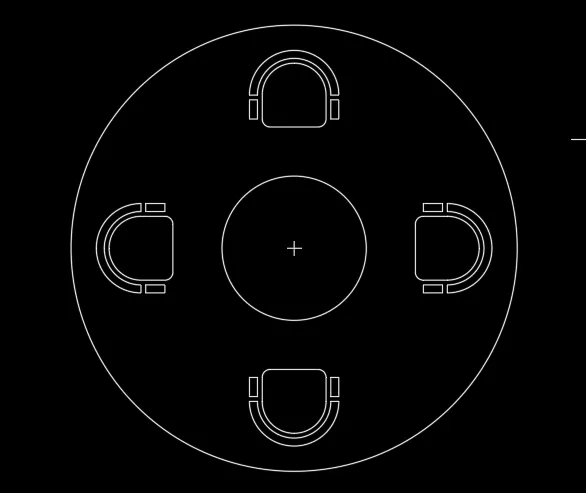
AIM:To make outdoor seating with canopy
Procedure
STEP1
Command: C
CIRCLE
Specify center point for circle or [3P/2P/Ttr (tan tan radius)]:
Specify radius of circle or [Diameter] <35.50>: 452 //To make the inner circle
Command: C
CIRCLE
Specify center point for circle or [3P/2P/Ttr (tan tan radius)]:
Specify radius of circle or [Diameter] <452.00>: 1398 //To make outer circle
STEP2 //For making the seats
Command: RECTANG
Specify first corner point or [Chamfer/Elevation/Fillet/Thickness/Width]:
Specify other corner point or [Area/Dimensions/Rotation]: @400,400
STEP3
Command: F
FILLET
Current settings: Mode = TRIM, Radius = 50.00
Select first object or [Undo/Polyline/Radius/Trim/Multiple]: M
Select first object or [Undo/Polyline/Radius/Trim/Multiple]: R
Specify fillet radius <50.00>: 200 //To make upper fillet
Select first object or [Undo/Polyline/Radius/Trim/Multiple]:
Specify fillet radius <200.00>: 50 //to make lower fillet
Select first object or [Undo/Polyline/Radius/Trim/Multiple]:
STEP4
Command: O
OFFSET
Current settings: Erase source=No Layer=Source OFFSETGAPTYPE=0
Specify offset distance or [Through/Erase/Layer] <100.00>: 30
Command: OFFSET
Current settings: Erase source=No Layer=Source OFFSETGAPTYPE=0
Specify offset distance or [Through/Erase/Layer] <30.00>: 50 //To make the arm rest of the seating
Command: O
OFFSET
Current settings: Erase source=No Layer=Source OFFSETGAPTYPE=0
Specify offset distance or [Through/Erase/Layer] <50.00>: 30
Select object to offset or [Exit/Undo] <Exit>:
Command: OFFSET
Current settings: Erase source=No Layer=Source OFFSETGAPTYPE=0
Specify offset distance or [Through/Erase/Layer] <30.00>: 120
Select object to offset or [Exit/Undo] <Exit>:
Specify point on side to offset or [Exit/Multiple/Undo] <Exit>:
STEP5
Command: TR
TRIM //Trim the extra lines of the arm rest
Current settings: Projection=UCS, Edge=None
Select cutting edges ...
Select objects or <select all>:
STEP6
Command: _arraypolar
Select objects: Specify opposite corner: 13 found
Select objects: //Select the seating
Select grip to edit array or [ASsociative/Base point/Items/Angle between/Fill angle/ROWs/Levels/ROTate items/eXit]<eXit>: I //Number of Items
Enter number of items in array or [Expression] <6>: 4
Select grip to edit array or [ASsociative/Base point/Items/Angle between/Fill angle/ROWs/Levels/ROTate items/eXit]<eXit>:e
RESULT:
3.
AIM:To make sketch of toilet and utility room
Procedure
STEP1
Command: XL //For creating horizontal and vertical lines for corner of the room
XLINE
Specify a point or [Hor/Ver/Ang/Bisect/Offset]:
Specify through point:
STEP2
Command: TR //To trim the extra lines
TRIM
Current settings: Projection=UCS, Edge=None
Select cutting edges ...
STEP3
Command: O //To provide the thickness of walls
OFFSET
Current settings: Erase source=No Layer=Source OFFSETGAPTYPE=0
Specify offset distance or [Through/Erase/Layer] <1.00>: 300
Command: OFFSET
Current settings: Erase source=No Layer=Source OFFSETGAPTYPE=0
Specify offset distance or [Through/Erase/Layer] <300.00>: 150
STEP4
Command: OFFSET
Current settings: Erase source=No Layer=Source OFFSETGAPTYPE=0
Specify offset distance or [Through/Erase/Layer] <150.00>: 1900 //To provide the width of the room
Command: OFFSET
Current settings: Erase source=No Layer=Source OFFSETGAPTYPE=0
Specify offset distance or [Through/Erase/Layer] <1900.00>: 2100 //To provide the length of the room
//Use the offset command to make the thickness of wall as the STEP3
STEP5
Command: O
OFFSET
Current settings: Erase source=No Layer=Source OFFSETGAPTYPE=0
Specify offset distance or [Through/Erase/Layer] <150.00>: 1700 //taking the length of the room
STEP6
Command: OFFSET
Current settings: Erase source=No Layer=Source OFFSETGAPTYPE=0 //For creating the small vent room
Specify offset distance or [Through/Erase/Layer] <300.00>: 201
Command: OFFSET
Current settings: Erase source=No Layer=Source OFFSETGAPTYPE=0
Specify offset distance or [Through/Erase/Layer] <201.00>: 402
elect object to offset or [Exit/Undo] <Exit>: e
//Use the offset command to make the thickness of wall as the STEP3
STEP7
Command: F
FILLET
Current settings: Mode = TRIM, Radius = 0.00 //to remove the extra line from the corners
Select first object or [Undo/Polyline/Radius/Trim/Multiple]:m
STEP8
Command: O //Making opening for the vent
OFFSET
Current settings: Erase source=No Layer=Source OFFSETGAPTYPE=0
Specify offset distance or [Through/Erase/Layer] <150.00>: 180 //offset from the left
Select object to offset or [Exit/Undo] <Exit>
Specify point on side to offset or [Exit/Multiple/Undo] <Exit>:
Command: OFFSET
Current settings: Erase source=No Layer=Source OFFSETGAPTYPE=0
Specify offset distance or [Through/Erase/Layer] <180.00>: 631 //Offset for the vent size
Select object to offset or [Exit/Undo] <Exit>:
STEP9
Command: O
OFFSET
Current settings: Erase source=No Layer=Source OFFSETGAPTYPE=0
Specify offset distance or [Through/Erase/Layer] <832.00>: 180 //making the size for window
Command: OFFSET
Current settings: Erase source=No Layer=Source OFFSETGAPTYPE=0
Specify offset distance or [Through/Erase/Layer] <180.00>: 728
STEP10
Command: TR
TRIM
Current settings: Projection=UCS, Edge=None //Trim the extra edges
Select cutting edges ...
Command: O
OFFSET
Current settings: Erase source=No Layer=Source OFFSETGAPTYPE=0
Specify offset distance or [Through/Erase/Layer] <728.00>: 150 //clear distance from the corner for the door
Command: OFFSET
Current settings: Erase source=No Layer=Source OFFSETGAPTYPE=0
Specify offset distance or [Through/Erase/Layer] <150.00>: 828 //Opening for the door
//Dimension for door ,windows and vents designs are assumed
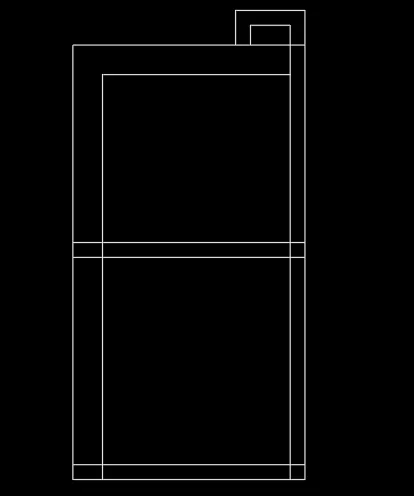
RESULT: