TO TAKE MIDSURFACE AND MESHING OF IP SUBSTRATE
AIM : TO TAKE MIDSURFACE AND MESHING OF IP SUBSTRATE.
PROCEDURE :
STEP 1 : Import the CAD File to ANSA.
Goto 'File'>'Open'>Select the CAD File>'ok'.
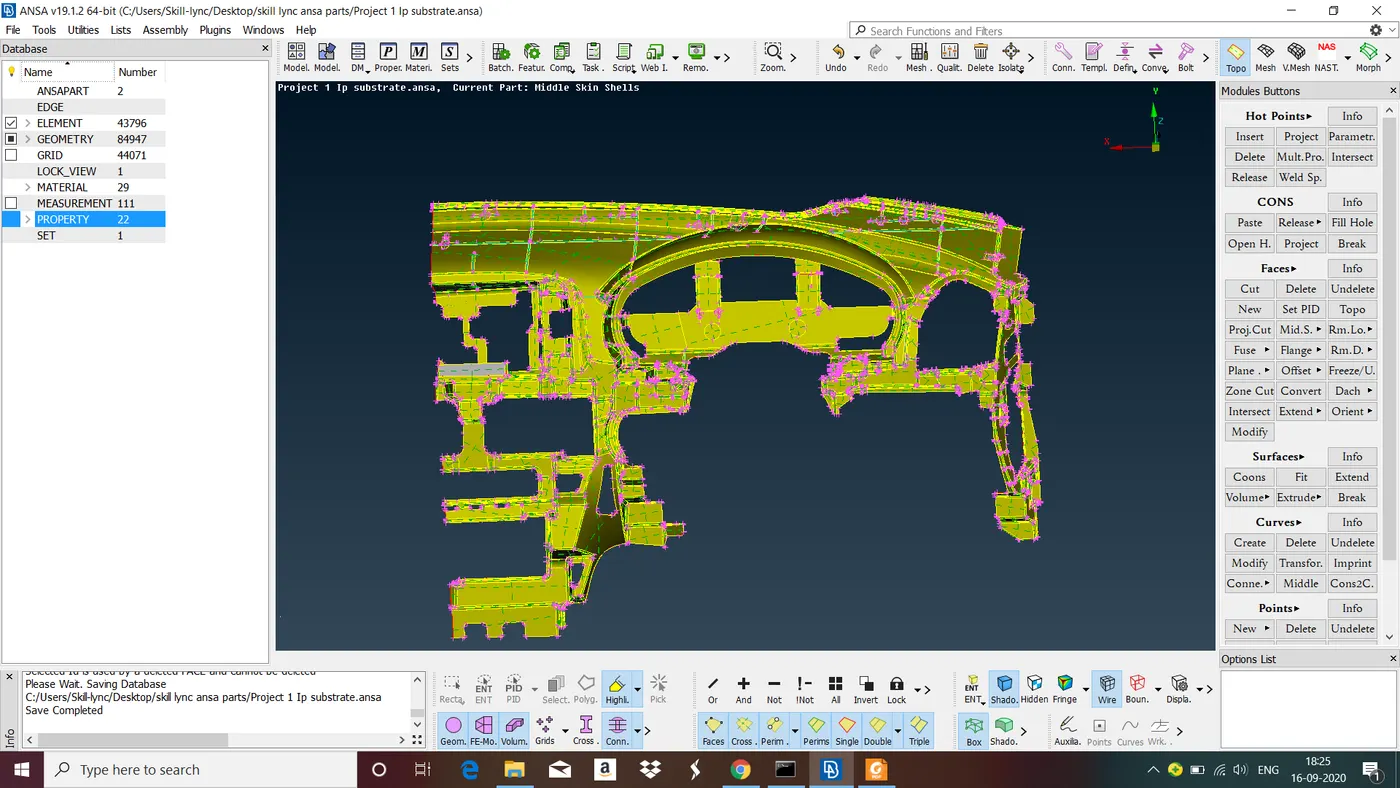
Fig : IP Substrate
The CAD file is read and topology is applied. You should see the part as shown. Change the view of the part to better understand the geometry. Notice that as by default you are in ENT (Entity) display mode, you see red, yellow and cyan CONS (Curves ON Surfaces). The coloring has to do with the connectivity of the Faces.
Red: a SINGLE free edge CONS.
Yellow: a DOUBLE CONS shared by two neighboring connected Faces.
Cyan : a TRIPLE CONS shared by three or more connected Faces.
To make things clearer you can activate and deactivate the visibility of each of the three types of CONS separately using the SINGLE, DOUBLE and TRIPLE flag buttons.
STEP 2 : Geometry Cleanup
De-activating here the DOUBLE flag shows only the free red and triple cyan CONS. Apart from the free edges there are other opening (gaps, untrimmed Faces etc.) that must be corrected.
Goto 'Checks Manager'> select 'Geometry'>'Execute'.
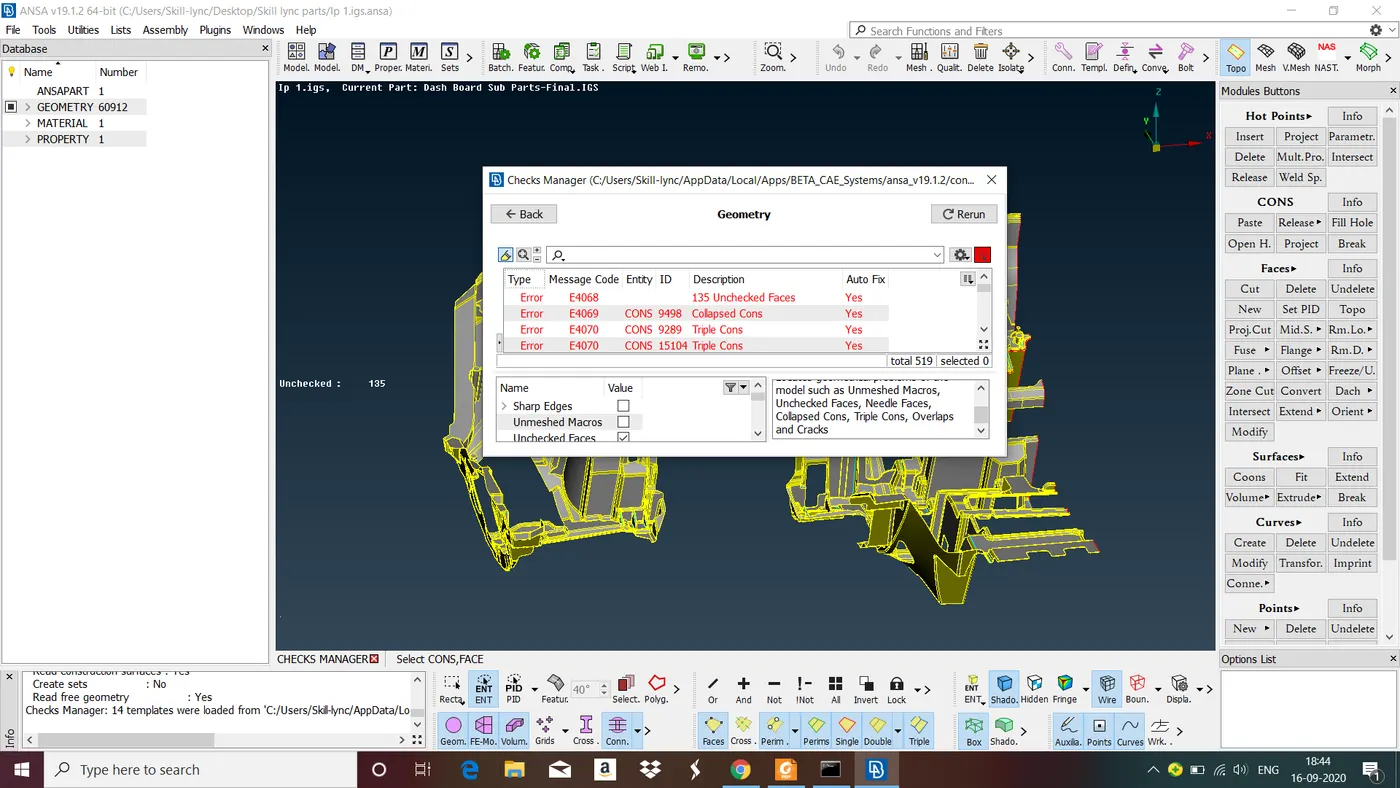
Fig : Checks Manager showing geometrical errors present in the given model.
To resolve these errors ANSA provides a option called fix, to do this select all errors right click>select 'fix'.
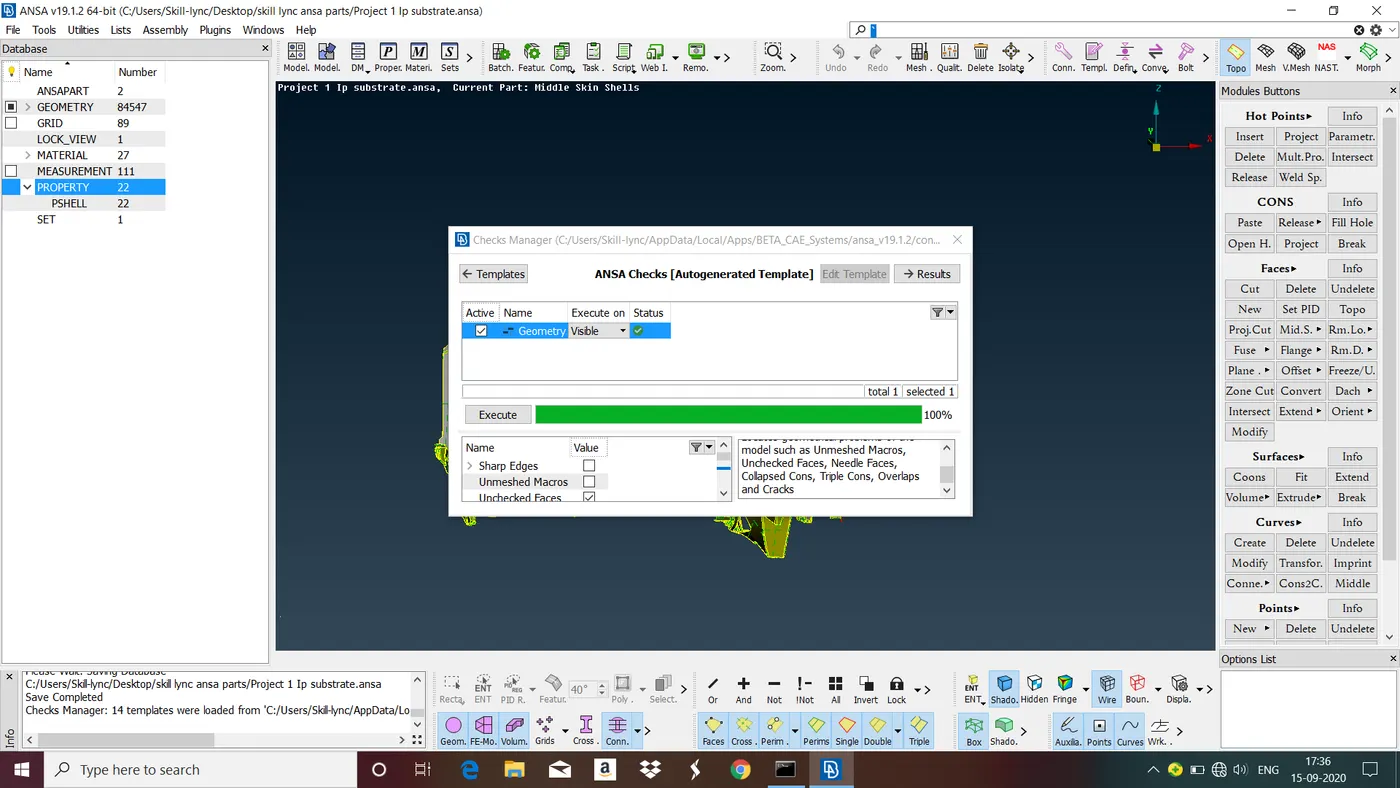
Fig : Model free from geometrical errors after performing geometry cleanup.
Now the model is ready for to take Mid Surface.
STEP 3 : MidSurface Generation.
Use Offset, Middle, Skin and Casting option can be used to take the midsurface.
Since the given model has non uniform thickness along its length so we have to use Offset and Middle option to take the Midsurface.
To use Offset option Goto 'Offset' in 'Faces'>select the surface that you want to take mid surface and middle click>give offset value>ok>select 'no' for 'delete original faces' dialogue box.
To use Middle Option goto Middle in Faces>select one side of the surface and select opposite side of the surface.
After generating midsurfaces assign seperate Property ID(PID) based on thickness.
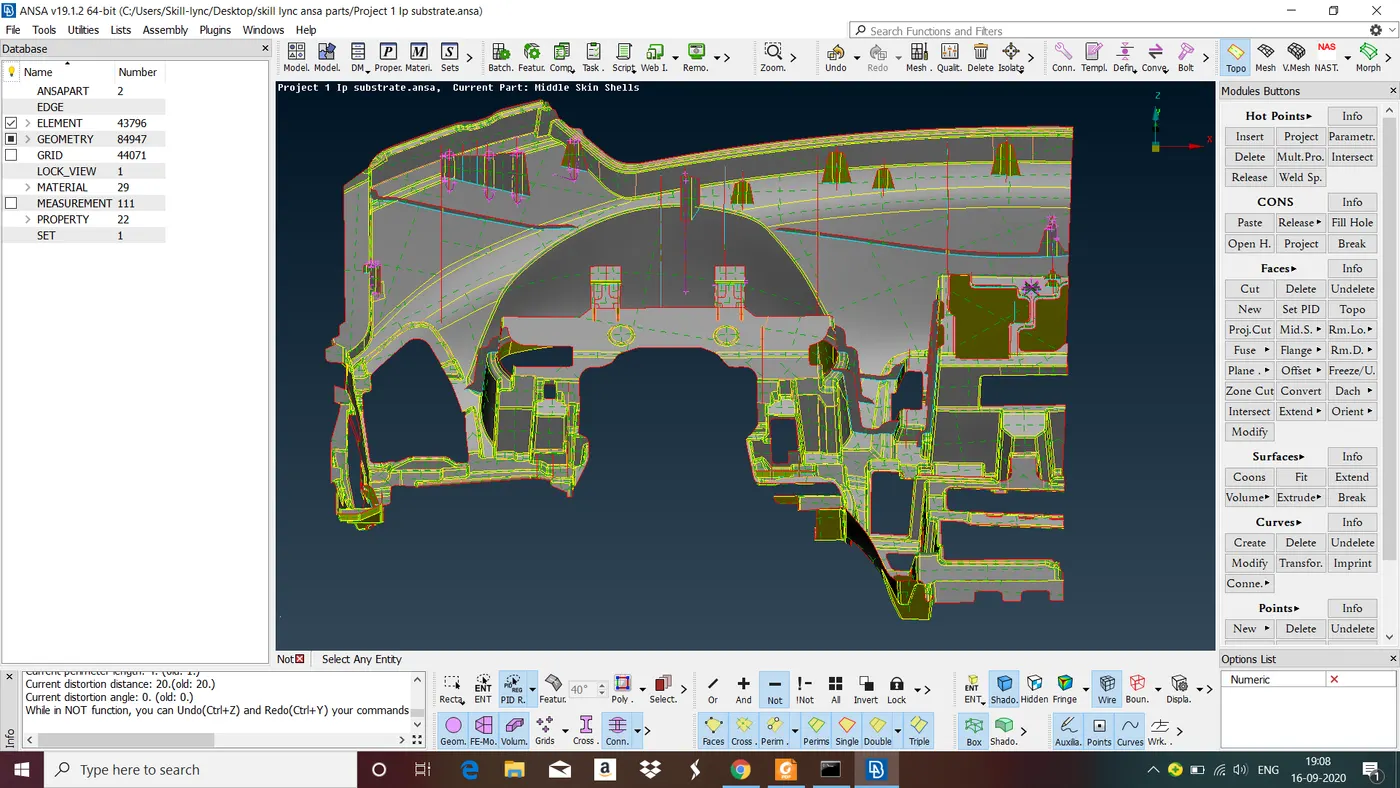
Fig : Model After generating Midsurface.
After Midsurface generation check for geometrical errors.
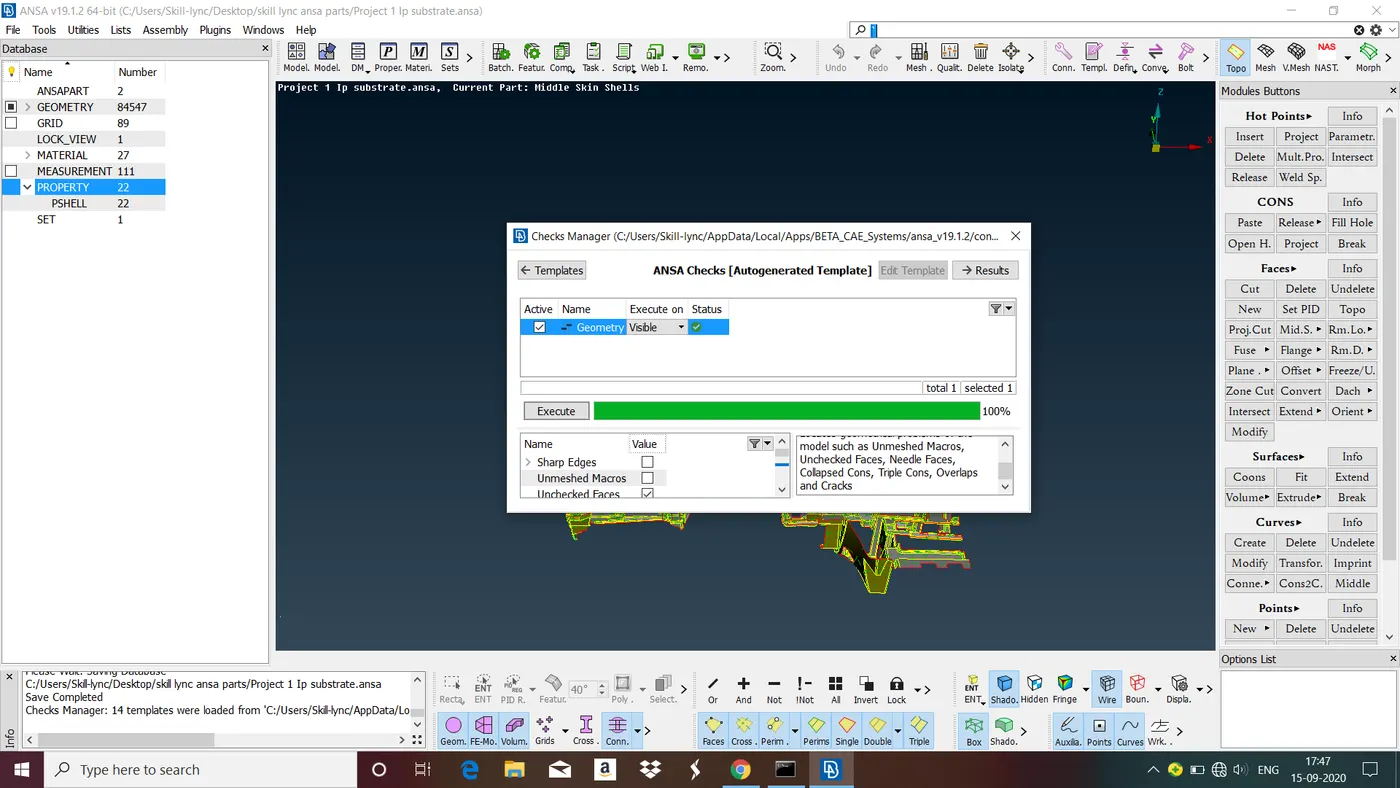
Fig : Checking for geometrical errors for midsurface and found zero errors.
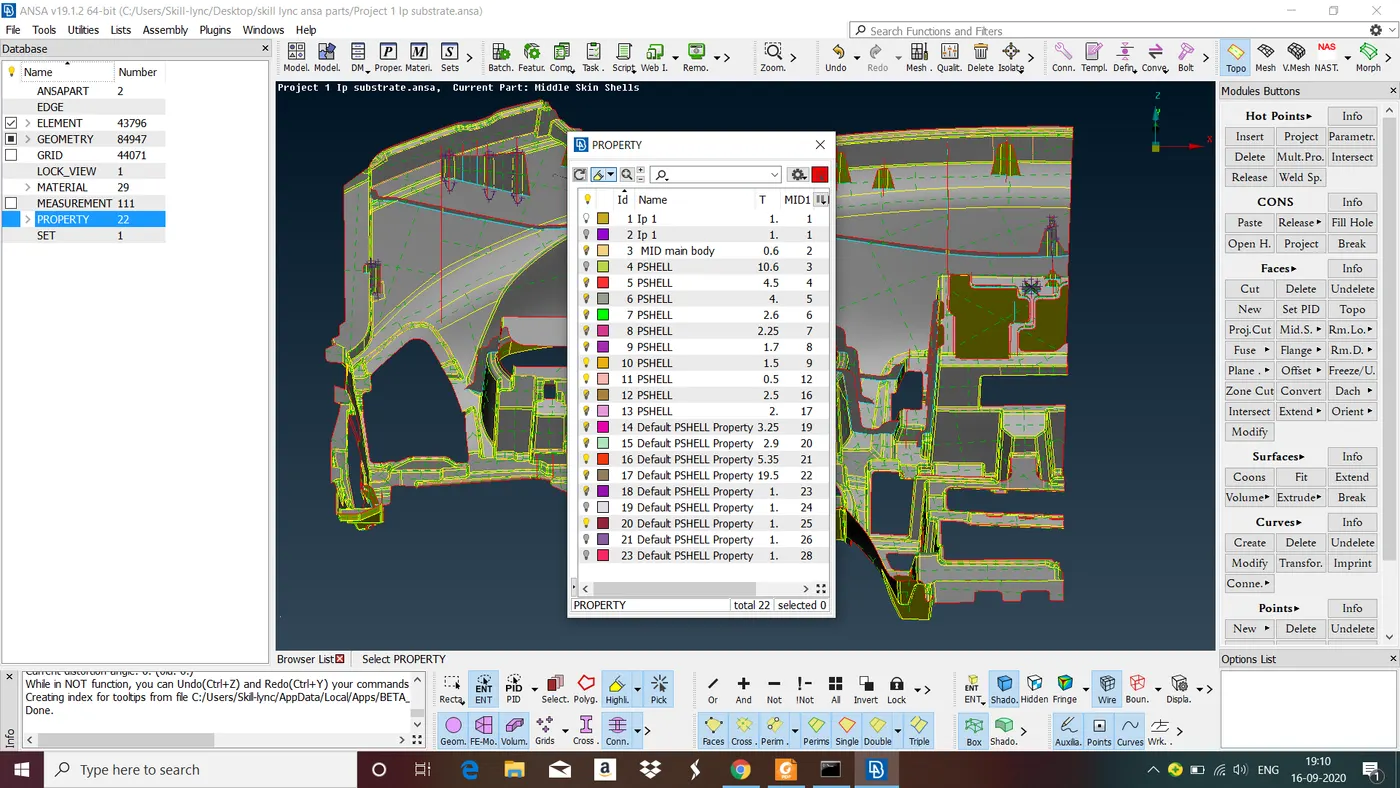
Fig : Seperate PID created after generating midsurface based on thickness.
Now the Model is ready for Meshing.
STEP 4 : MESHING
A Mesh is a network that is formed of cells and points. It can have almost any shape in any size and is used to solve partial differential equations. Each cell of the mesh represents an individual solution of the equation which combined for the whole network results in a solution for the entire mesh.
Before start Meshing first give Mesh Parameters and Mesh Quality Criteria.
| S.No | Mesh Parameters | Value |
| 1 | Target Length | 4 |
| 2 | Minimum Length | 2 |
| 3 | Maximum Length | 6 |
|
S.No |
Quality Criteria |
Value |
|
1 |
Aspect |
3 |
|
2 |
Warpage |
15 |
|
3 |
Skewness |
45 |
|
4 |
Jacobian |
0.7 |
|
5 |
Minimum Quad Angle |
45 |
|
6 |
Maximum Quad Angle |
135 |
|
7 |
Minimum Tria Angle |
30 |
| 8 |
Maximum Tria Angle |
120 |
|
9 |
Tria Percentage |
15 |
Now start meshing entity by entity using various types of meshing tools provided by ANSA to get good mesh flow.
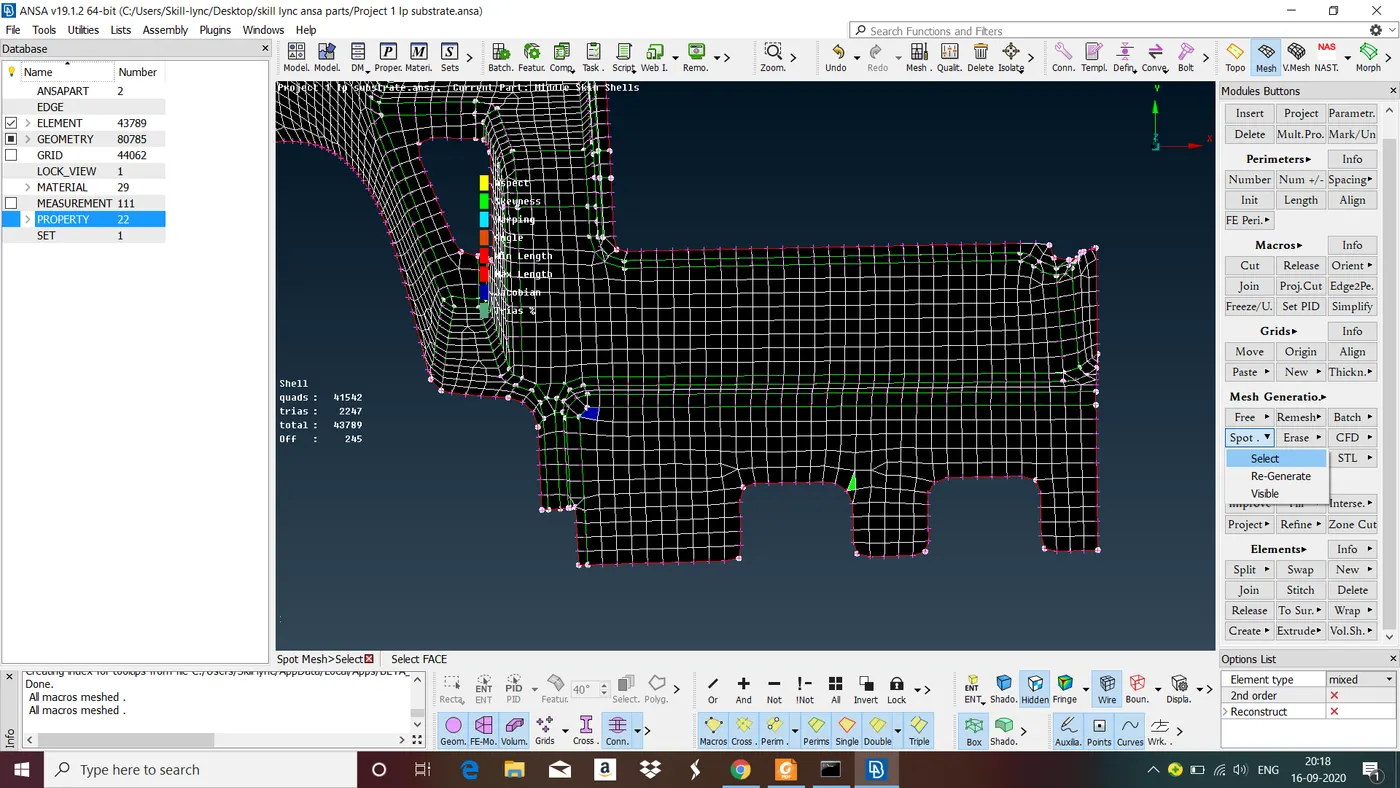
Fig : Meshing using 'Spot' option Mesh Generation.
But in the above figure we can see there are some mesh quality errors present in the mesh. Try to avoid mesh quality errors by doing proper defeaturing and using 'Reconstruct' option.
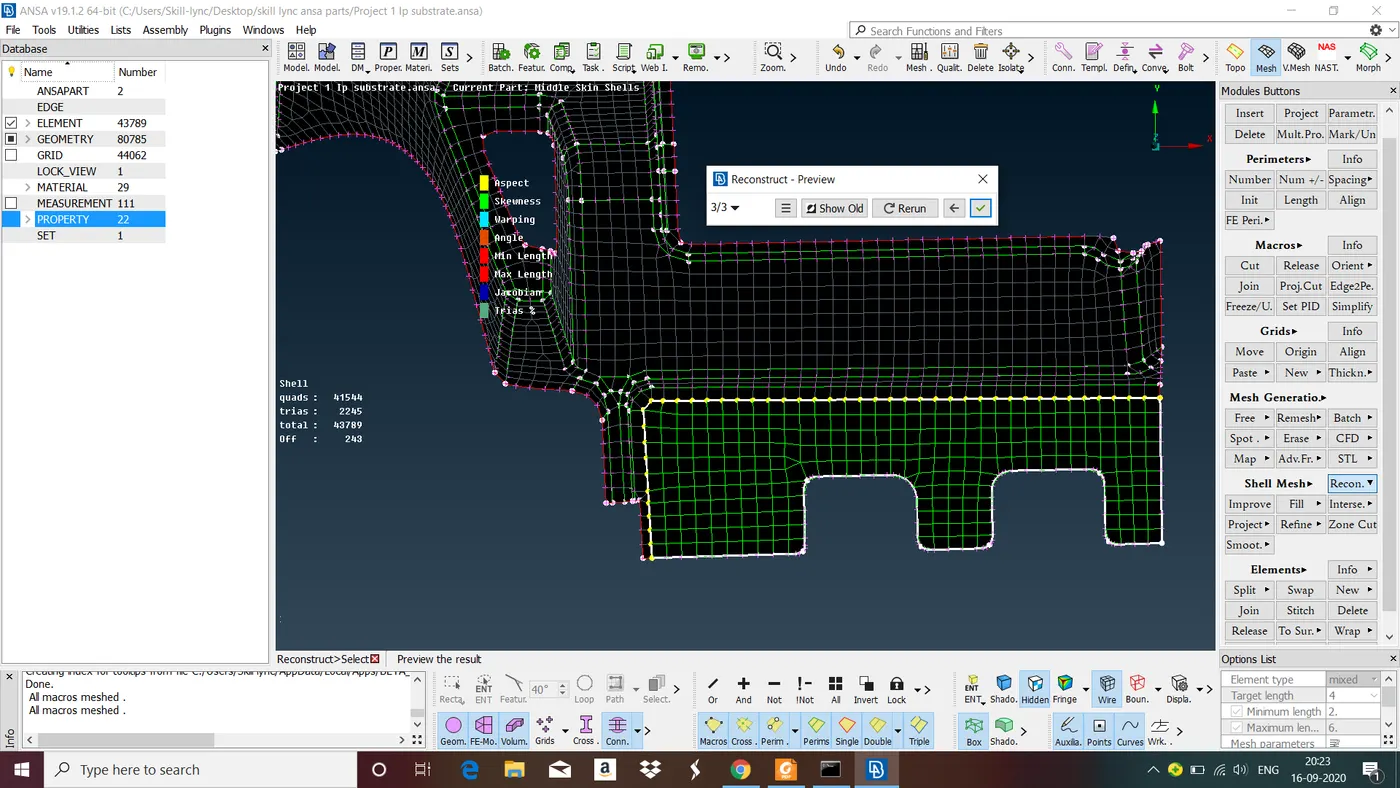
Fig : Resolving mesh quality errors by using 'Reconstruct' option.
But we can see there are some trias present in the mesh. Try to avoid tria concentration by using 'Split', 'Swap' and 'Join' Options.
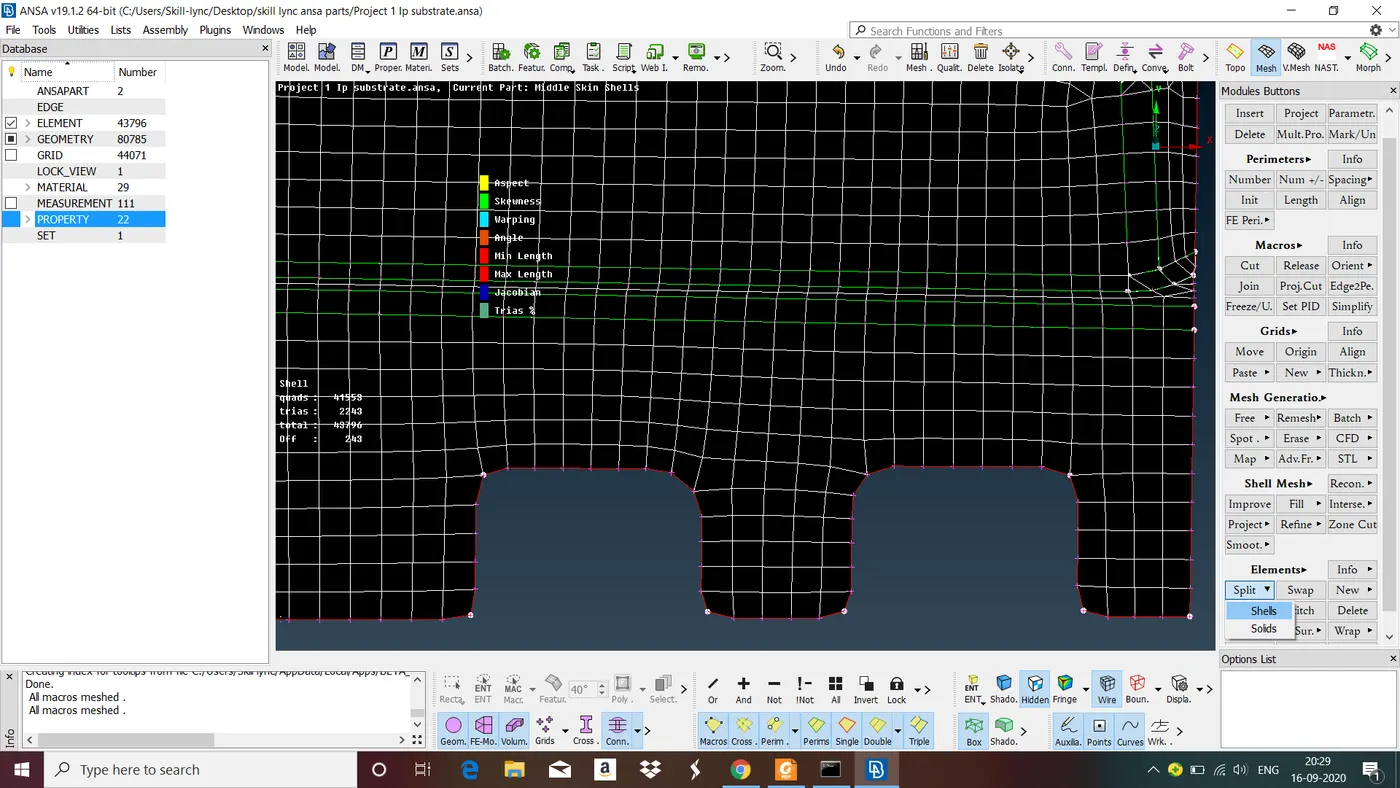
Fig : Removing trias by using 'Split' option.
Follow the same steps everywhere to mesh and to get good mesh flow.
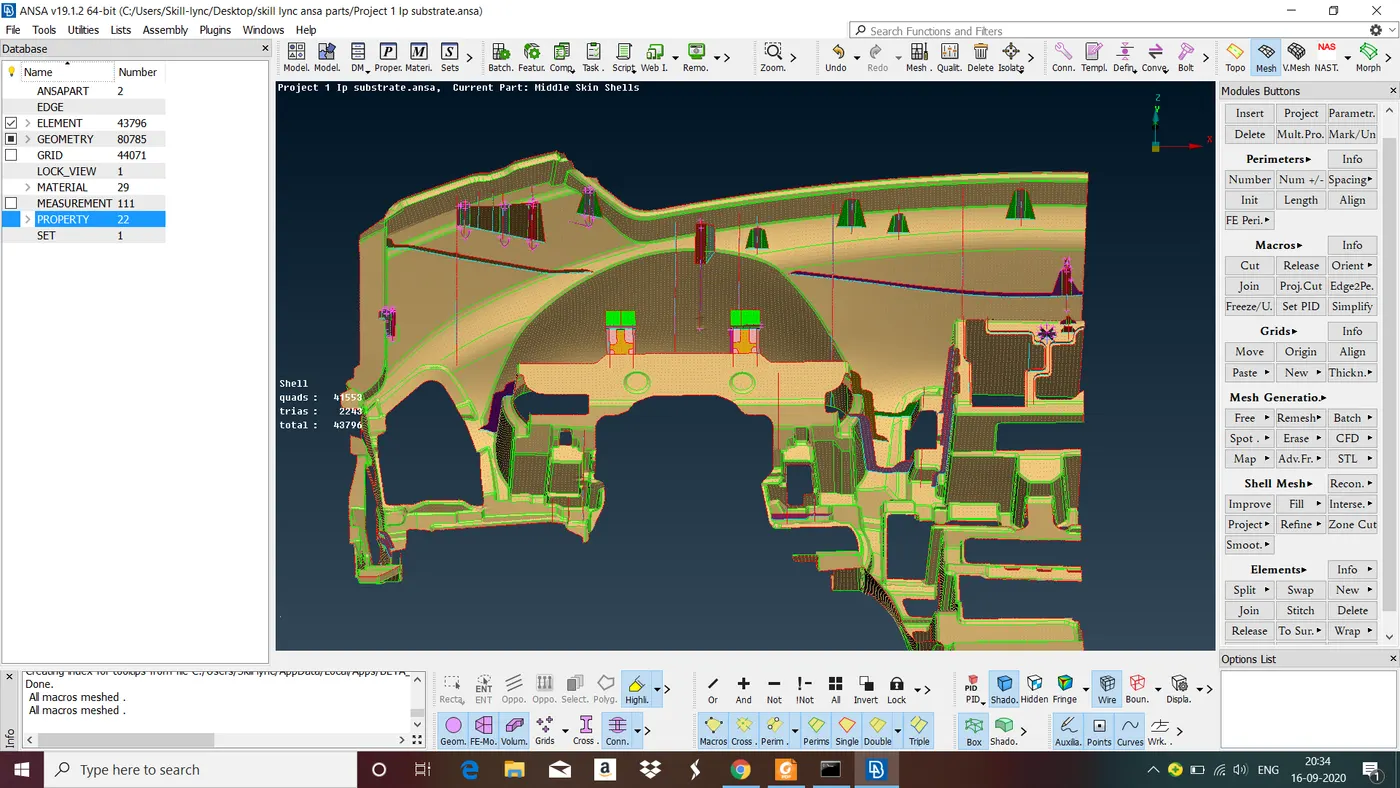
Fig : Model after Meshing
LEARNING OUTCOME : In this challenge we have learned all the steps involoved in geometry cleanup, midsurface generation and meshing.
CONCLUSION : In this challenge we have followed all the steps invloved in geometry cleanup, midsurface generation and meshing and obtained good mesh flow.