Mid surfacing and meshing of Hood Model
Challenge: Hood design
- Aim:
Understanding the basic commands used in ANSA software and use these to generate meshing on the Hood for further processes.
- Objectives:
- Understanding the basic commands and their use in different places.
- Forming the mid surface of complex parts.
- Forming the mesh and making sure there is a minimum number of tri elements and errors.
- Understanding the actual structure of the hood and the number of different parts it has.
- Body of Content
The hood or bonnet is the hinged cover over the engine of the motor vehicle that provides access to the engine compartment, or trunk on rear-engine for maintenance and servicing. On front-engine cars, the hood may be hinged at either the front or the rear edge, or in first models, it may be split into two sections, one each side, each hinged along the centre line. Hoods are typically made out of the same material as the rest of the bodywork. This may include steel, aluminium, fibreglass or carbon fibre.
Procedure to start a model for meshing:
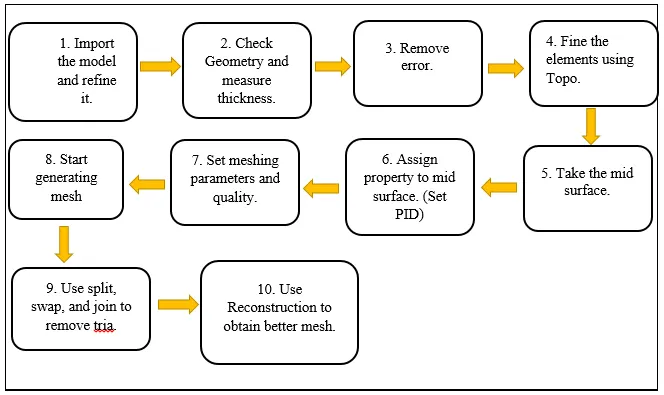 |
3.1 Geometry check:
Separating each part of an assembly is the first step of any geometry check. This is done to check the geometry of individual parts. Performing geometry check and removing the errors using fix command. ANSA itself consists of an auto fix command which is there in the check section by using which it is possible to remove these errors. Still, some errors need to be removed manually like triple cons.
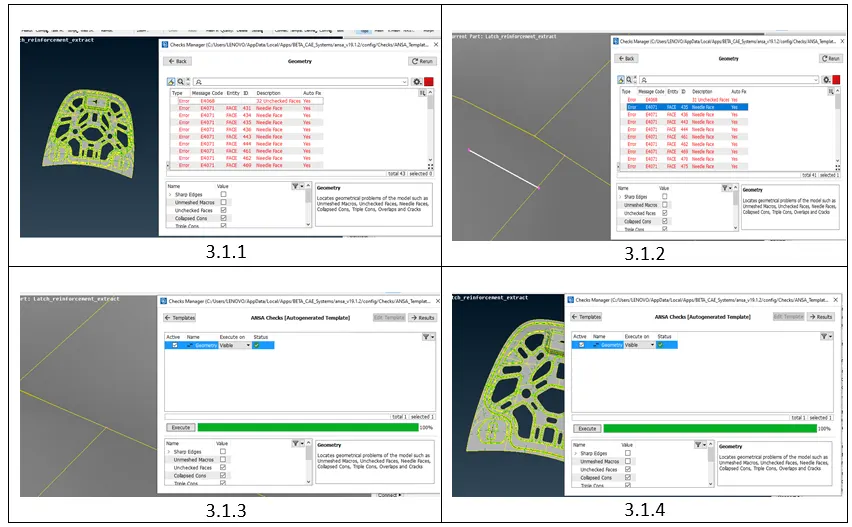 |
Likewise, check geometry for each part and check thickness in order to extract mid surface using offset command.
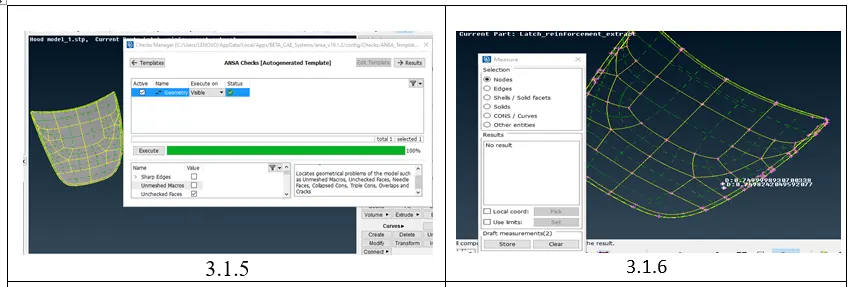 |
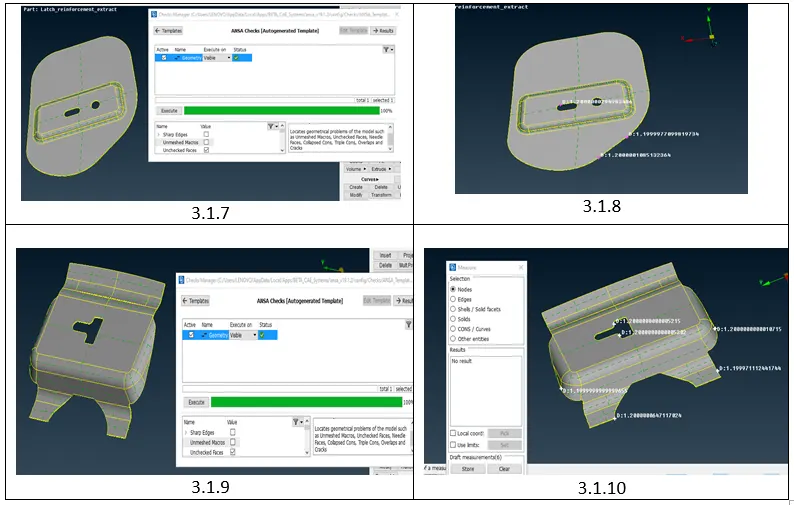 |
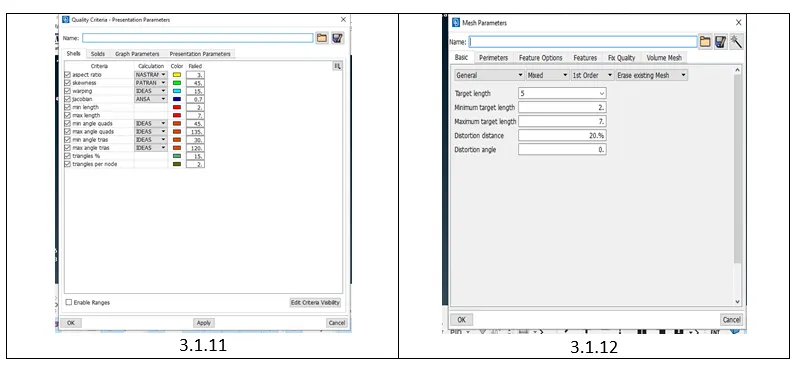
After extracting the mid surface of each part give a separate property for each part using Set PID command. Once the property is given give the meshing parameters and quality given in the challenge itself and save these properties which can be used again. One can assign different colours to these properties for easy identification.
 |
3.2 Meshing procedure:
- Start the meshing by dividing the complete part into several different small areas where individual meshing can be done which will help in obtaining a better mesh and smooth flow. The images given below will show a way of doing this. This is not a standard process, this can be done in many ways depending upon the individual.
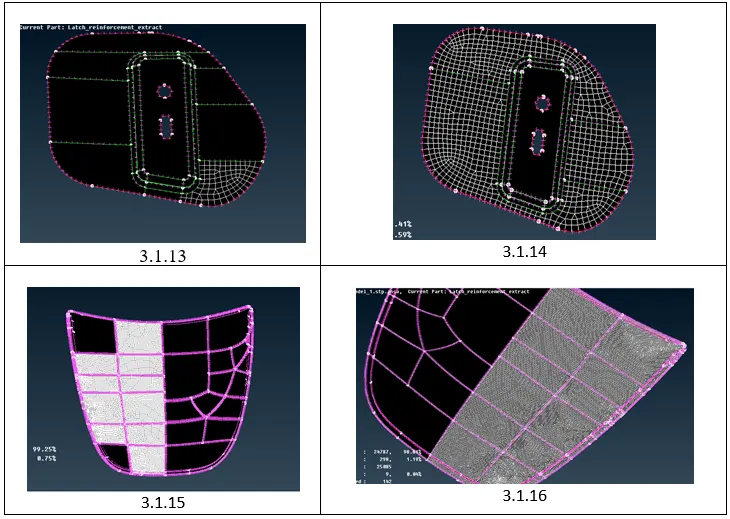 |
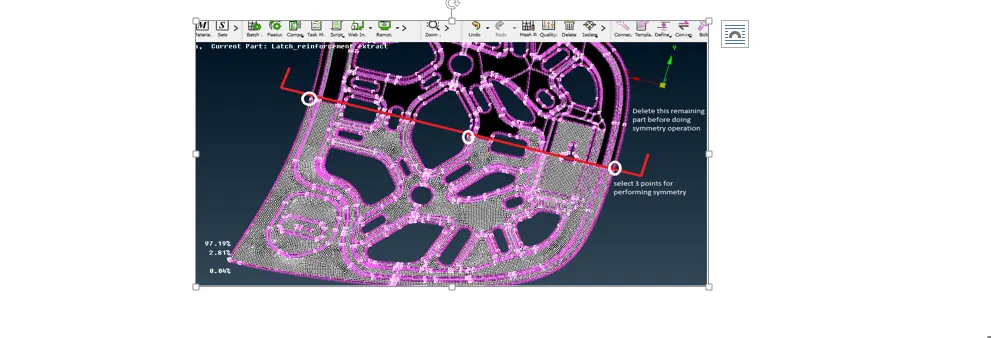
- The images given above is showing how the meshing process is done and in some parts, it is advisable to use Symmetry command to copy the mesh on the other side of the part like the one shown above. Before performing symmetric operation make sure to delete another half of the part on which meshing is not done and has to do done.
- For symmetrical job use Transform à Copy à Symmetry à 3 points plane à select three points on the geometry and accept. It will result in producing a complete part.
- Likewise, do the same process for all the components and try to obtain the best mesh possible. However, sometimes it is necessary to compromise on tri to obtain better mesh and fewer errors.
 |
- Learning Outcome:
- This challenge has enabled me to understand the different ways to take the mid surface out.
- Understanding in the meshing procedure and way of making new corrections in order to form a proper mesh.
- Forming the mesh on intricate areas like fillets, cavities where there is a continuous curve.
- Understanding the different parts of a hood of an automobile.
- Conclusion:
- Obtaining the perfect mesh with contour shapes is not permissible. We have to keep tri elements in such areas to avoid any further distortion in the mesh.
- To achieve a good mesh sometimes it is necessary to compromise on the mesh structure and allow some tri elements near to each other.
- Working on some intricate shapes is leading to compromise on mesh and it is also advisable to remove unnecessary construction lines to form a better mesh.
- Perpendicular construction lines to the feature and edges are always recommended.
- Use commands like symmetry to save time and improve work efficiency.
link for the model --> https://drive.google.com/file/d/1hyx-UXANa0savPqTiNn2b6Dnre5w8Muf/view?usp=sharing