To calculate wind load for industrial steel structures and to apply it by using TSD
1)
AIM: Generate manual wind loading in the design report based IS code as per the following input
TOOLS USED :
- Excel.
- IS codes.
- Calculator.
PROCEDURE :
1. First we have to open MS Excel (optional) to enter the values used for calculations.
2. Next we have to obtain the required standard values from the IS codes.
3. We have to have the dimensions of our project ( length, bredth and height)
4. Assume the wind speed as 39 m/s.
5. Next we have to calculate the wind direction in both the X and Y direction ( +Cpi and -Cpi)
6. We have to calculate :
- External pressure coefficients.
- Internal pressure coefficients.
- Net pressure coefficients.
- Design wind presssure for wall.
- Loading to be appplied on the wall.
-
- Firstly open the Tekla softwear and open the designed model for which you desired to apply wind load.
- Now take the dimensions of the model such as height, lenght,width etc.
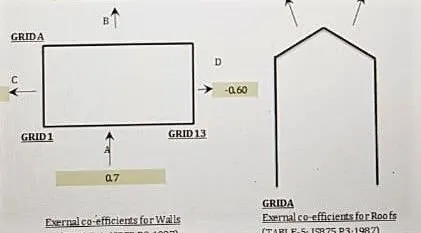
- Now place the values in the Microsoft Excel Worksheet and type the required content.
- Multipy the factors as in when required.
- Here first I will mention question one by one then answer then in the same manner.
-
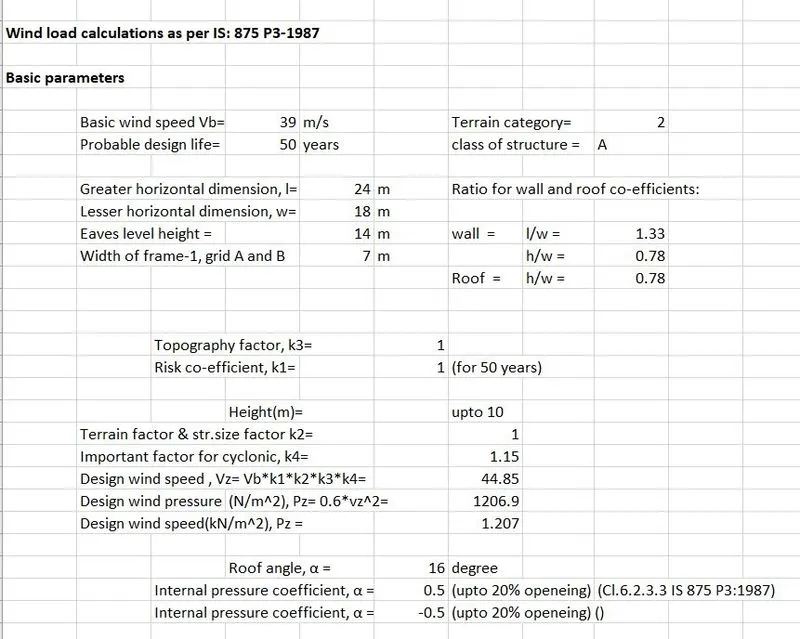
Basic parameters
Basic wind speed Vb=
39
m/s
Terrain category=
2
Probable design life=
50
years
class of structure =
A
Greater horizontal dimension, l =
24
m
Ratio for wall and roof co-efficients:
Lesser horizontal dimension, w =
18
m
Eaves level height =
14
m
wall =
l/w =
1.33
Width of frame-1, grid A and B
7
m
h/w =
0.78
Roof =
h/w =
0.78
Topography factor, k3=
1
Risk co-efficient, k1=
1
(for 50 years)
Height(m)=
upto 10
Terrain factor & str.size factor k2=
1
Important factor for cyclonic, k4=
1.15
Design wind speed , Vz= Vb*k1*k2*k3*k4=
44.85
Design wind pressure (N/m)
(N/m^2), Pz= 0.6*vz^2=
1206.9
Design wind speed(kN/m^2), Pz =
1.207
Roof angle, α =
16
degree
Internal pressure coefficient, α =
0.5
(upto 20% opening) ()
(Cl.6.2.3.3 IS 875 P3:1987)
Internal pressure coefficient, α =
-0.5
(upto 20% opening) ()
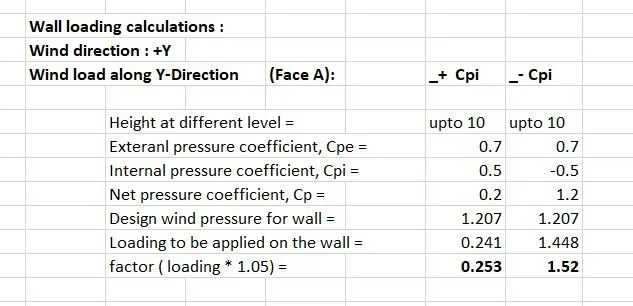
Wall loading calculations :
Wind direction : +Y
Wind load along Y-Direction
(Face A):
_+ Cpi
_- Cpi
Height at different level =
upto 10
upto 10
External pressure coefficient, Cpe =
0.7
0.7
Internal pressure coefficient, Cpi =
0.5
-0.5
Net pressure coefficient, Cp =
0.2
1.2
Design wind pressure for wall =
1.207
1.207
Loading to be applied on the wall =
0.241
1.448
factor ( loading * 1.05) =
0.253
1.52
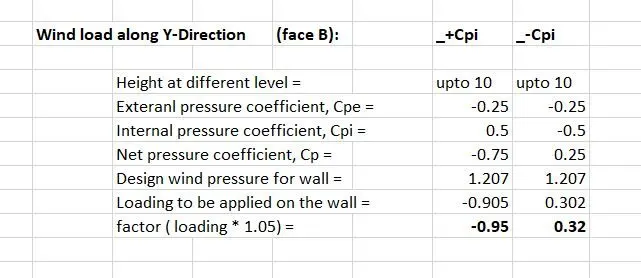
Wind load along Y-Direction
(face B):
_+Cpi
_-Cpi
Height at different level =
upto 10
upto 10
External pressure coefficient, Cpe =
-0.25
-0.25
Internal pressure coefficient, Cpi =
0.5
-0.5
Net pressure coefficient, Cp =
-0.75
0.25
Design wind pressure for wall =
1.207
1.207
Loading to be applied on the wall =
-0.905
0.302
factor ( loading * 1.05) =
-0.95
0.32
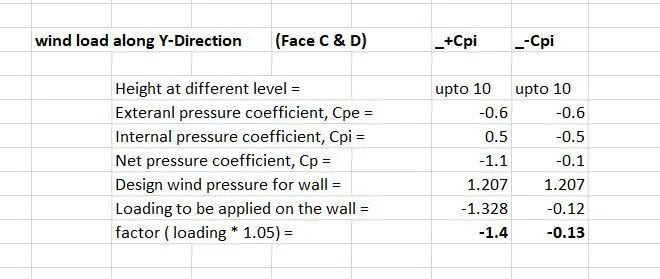
Wind load along Y-Direction
(Face C & D)
_+Cpi
_-Cpi
Height at different level =
upto 10
upto 10
External pressure coefficient, Cpe =
-0.6
-0.6
Internal pressure coefficient, Cpi =
0.5
-0.5
Net pressure coefficient, Cp =
-1.1
-0.1
Design wind pressure for wall =
1.207
1.207
Loading to be applied on the wall =
-1.328
-0.12
factor ( loading * 1.05) =
-1.4
-0.13
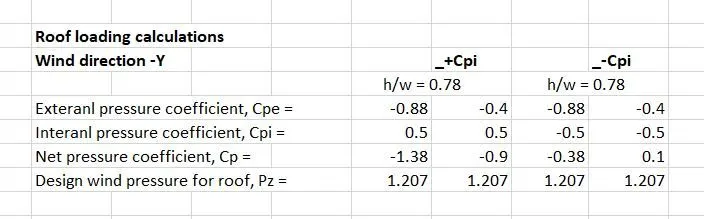
Roof loading calculations
Wind direction -Y
_+Cpi
_-Cpi
h/w = 0.78
h/w = 0.78
External pressure coefficient, Cpe =
-0.88
-0.4
-0.88
-0.4
Internal pressure coefficient, Cpi =
0.5
0.5
-0.5
-0.5
Net pressure coefficient, Cp =
-1.38
-0.9
-0.38
0.1
Design wind pressure for roof, Pz =
1.207
1.207
1.207
1.207
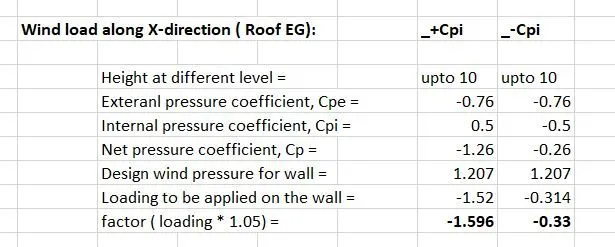
Wind load along X-direction ( Roof EG):
_+Cpi
_-Cpi
Height at different level =
upto 10
upto 10
External pressure coefficient, Cpe =
-0.76
-0.76
Internal pressure coefficient, Cpi =
0.5
-0.5
Net pressure coefficient, Cp =
-1.26
-0.26
Design wind pressure for wall =
1.207
1.207
Loading to be applied on the wall =
-1.52
-0.314
factor ( loading * 1.05) =
-1.596
-0.33
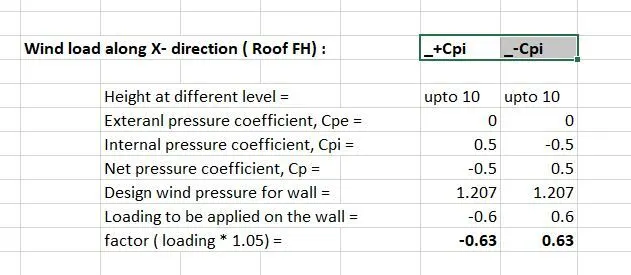
Wind load along X- direction ( Roof FH) :
_+Cpi
_-Cpi
Height at different level =
upto 10
upto 10
External pressure coefficient, Cpe =
0
0
Internal pressure coefficient, Cpi =
0.5
-0.5
Net pressure coefficient, Cp =
-0.5
0.5
Design wind pressure for wall =
1.207
1.207
Loading to be applied on the wall =
-0.6
0.6
factor ( loading * 1.05) =
-0.63
0.63
RESULT :
Thus after we obtain all the above values, we can start our manual calculation.
2)
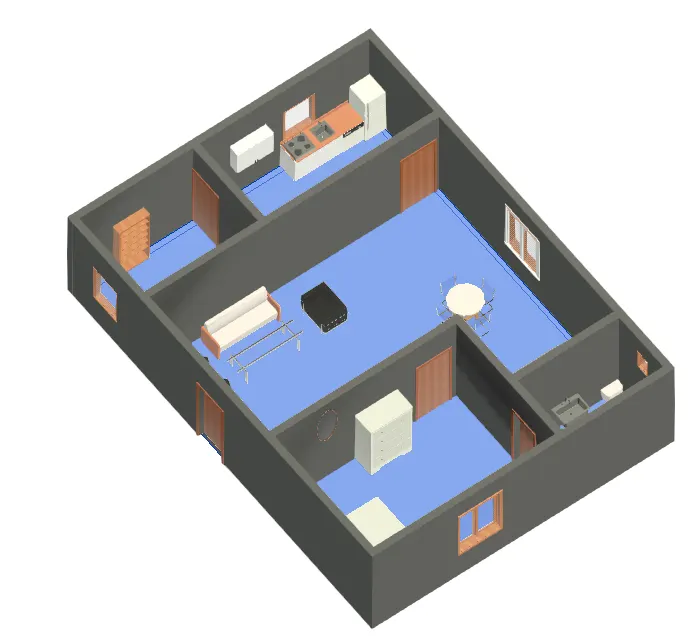
Aim: to create floor and thickness using property browser.
Tools used:
- Floor
- Wall
- Edit
- Property browser
- Copy
- Paste
- Load family
- Levels
Procedure:
- Click on the floor created(from the architecture tab-floor-pick lines and select the boundary lines).
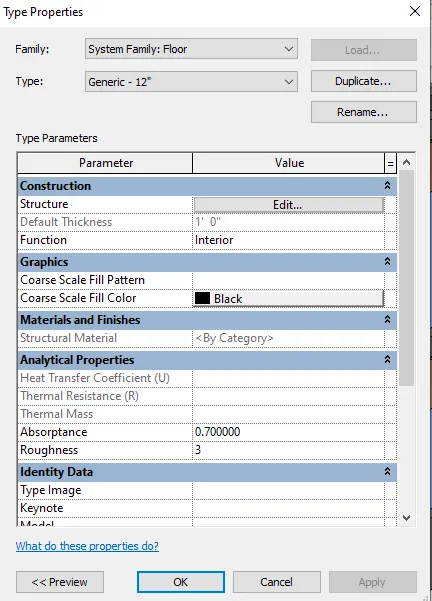
- Click on edit type(generic 12mm floor is created),then type properties dialogue box appears.
- Click on duplicate,enter the name as "new floor".
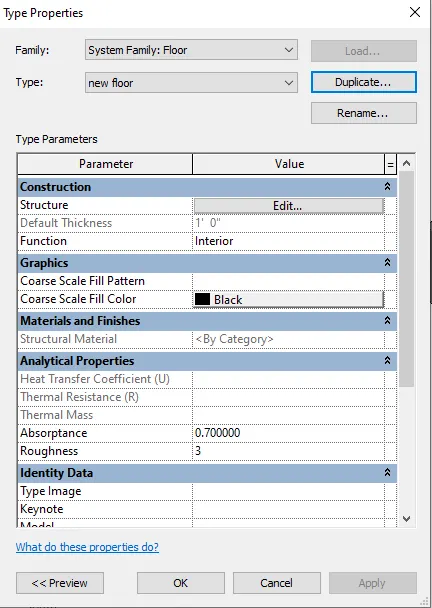
- Type properties dialogue box appears.
- Click on edit in structure.
- In edit assembly dialogue box,we can change the thickness and material and thickness is kept 6".
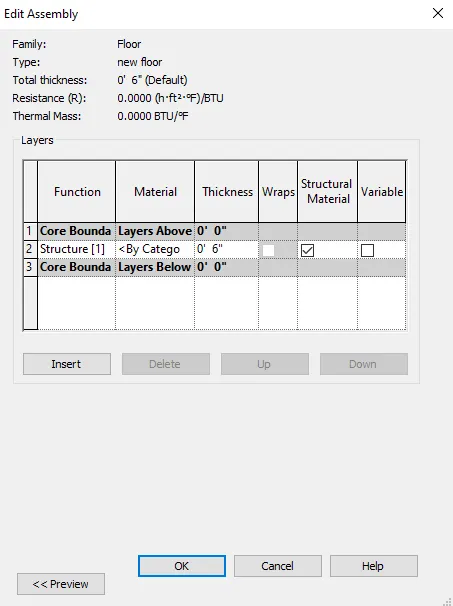
- Click on by category under material tab.
- Select oak flooring from the material browser and click ok.
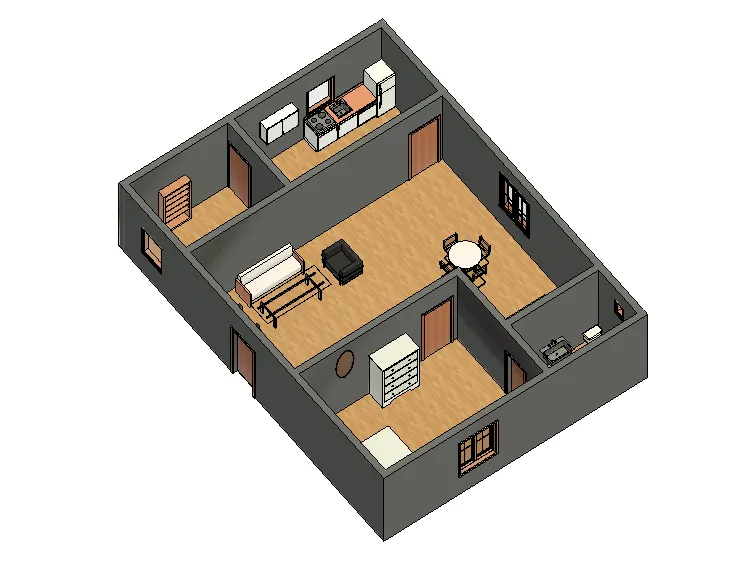
- The wall is placed in aligned to grid 1.
Result: Floor is created and material is assigned.
to add walls on the floor layout,add material of and thickness and make top and bottom of wall constrained.
Procedure:
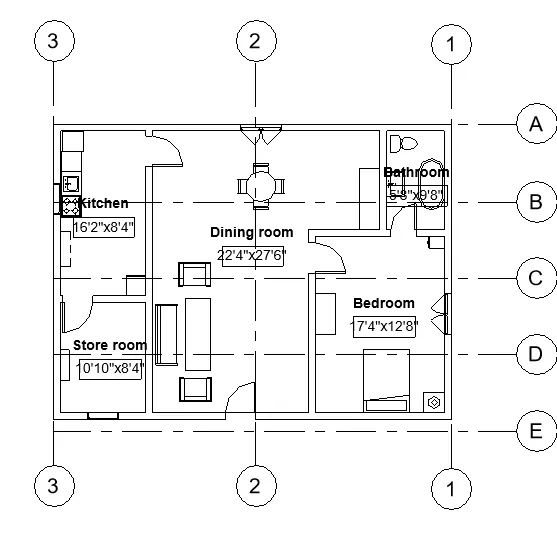
- Walls are created.
- To change the boundaries of wall click on edit profile in modify tab,click draw line or pick lines,then do necessary changes.
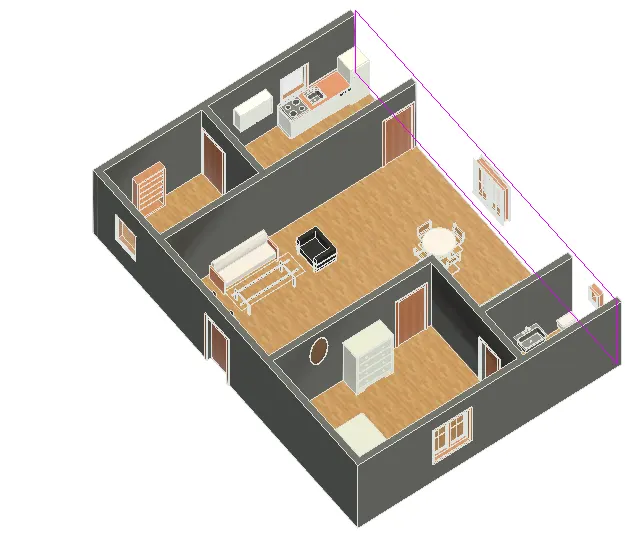
- I dont want any modification for the wall so i have not changed it.
- From the architecture tab,in doors-load family double door sliding is loaded.
- Place the door in the living room.
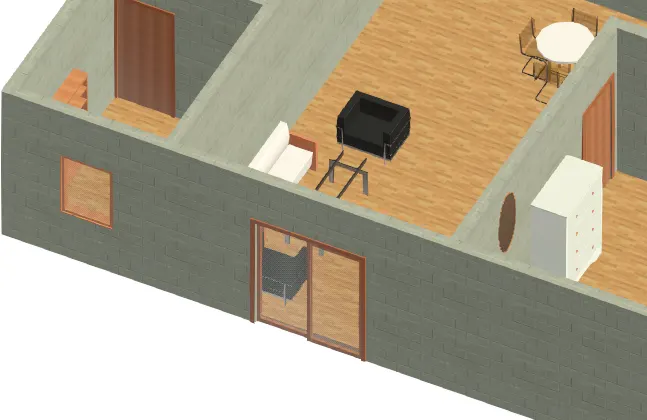
- Change the wall properties by selecting the wall and go to property manager-edit type-create duplicate so we can edit the properties.
- Give the name as wall,select edit from structure tab.
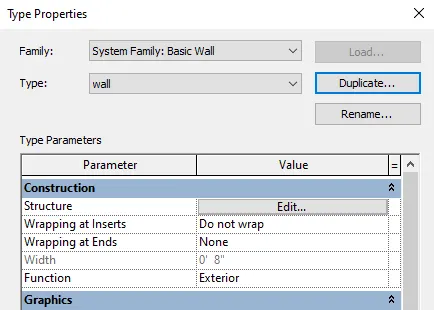
- In the edit assembly dialogue box,click tab under material to change the the thickness.
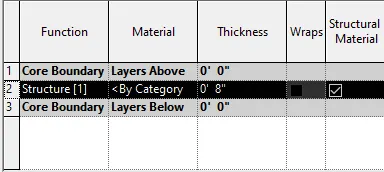
- From the material browser,select concrete masonary unit as material.
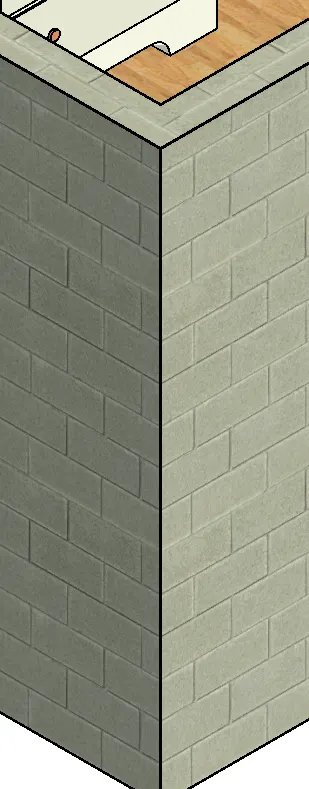
- Click ok.
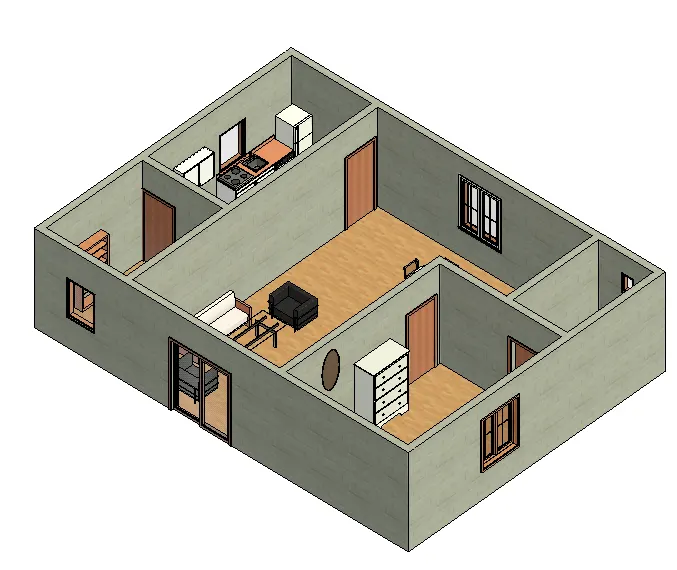
- Select the walls and look at property browser on the left.
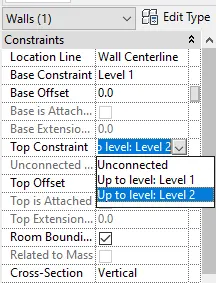
- The base constrain is in level 1 ,in the top constrain select level 2(10').
Result:
- Wall is created
- Material concrete is selected
- Top and bottom of wall are constrained.
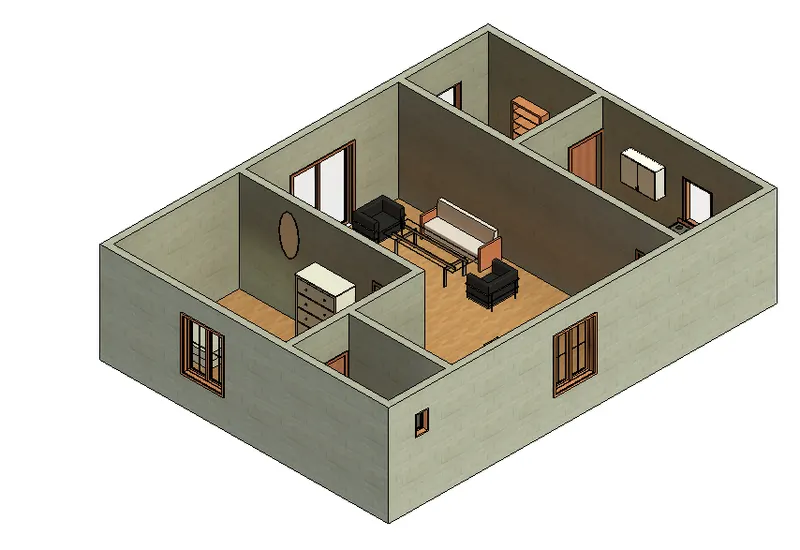
Use of copy and paste aligning the plan to other levels.
Procedure:
- Select the model in 3d view.
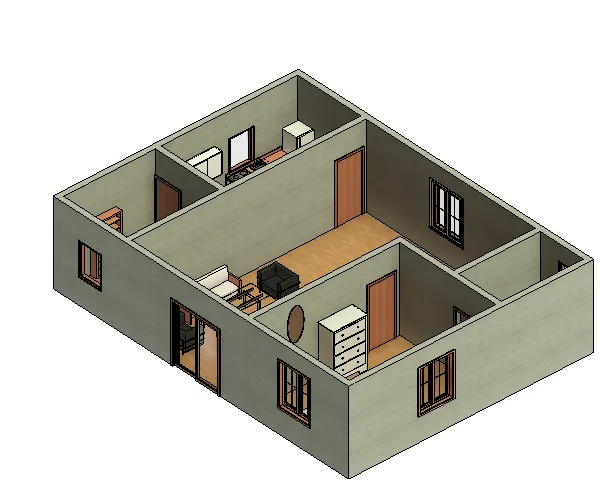
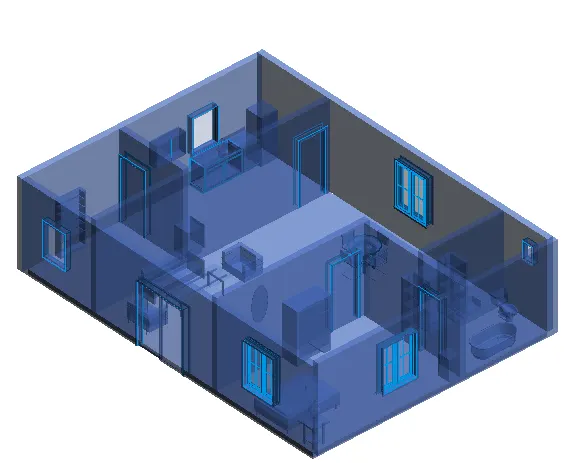
- Click on copy to clipboard.
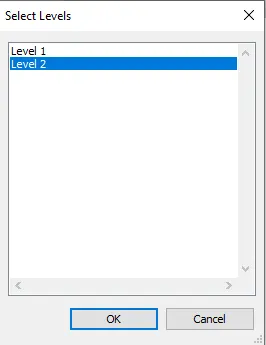
- Select paste and select aligned to selected levels.
- Select level 2 and click ok.
Application of wind load on Model
First Open the last week file of Tekla
Then Click on Load cases option
As we are manually applying the wind loads create the new wind load cases by clicking on add option and rename it
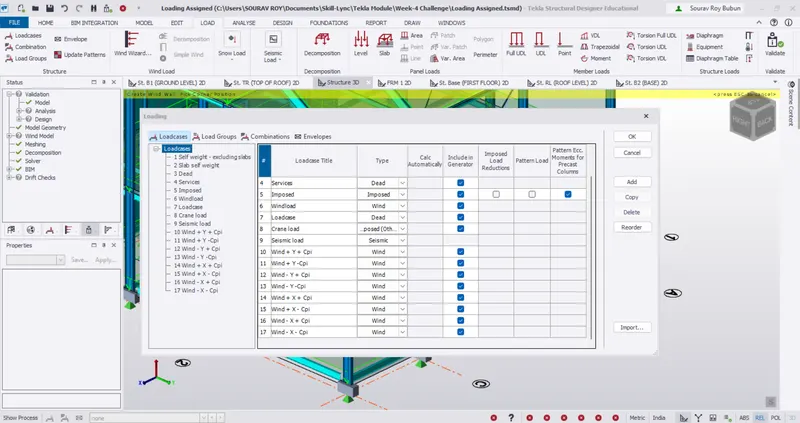
Step-2
For wall section
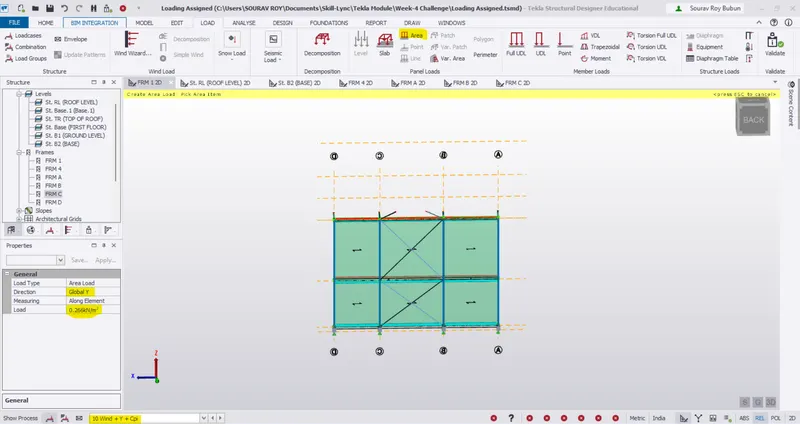
Apply the wind load for 1st Case i.e Wind + Y and +Cpi
The faces A, B, C and D corresponds to frame 1,4, A and D in model .
The negative value of load shows that load is acting away from building and positive value shows it acts towards the building.
A ) Open Frame 1 and apply load 0.266 Kn/m^2
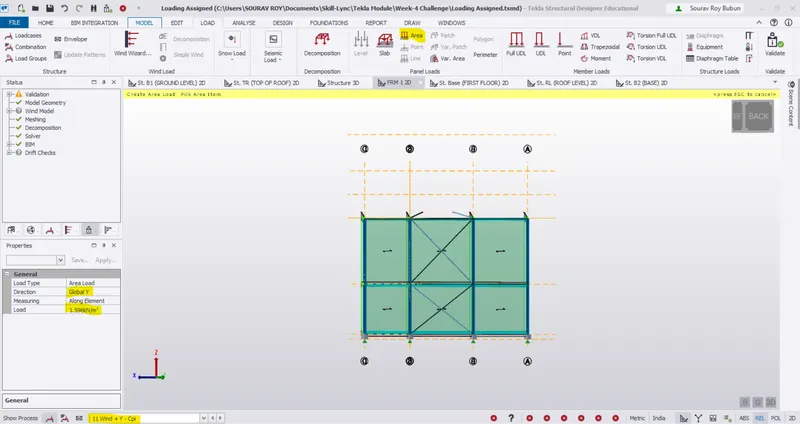
Second case Wind +Y -Cpi
Open Frame 1 and apply load 1.596 Kn/m^2
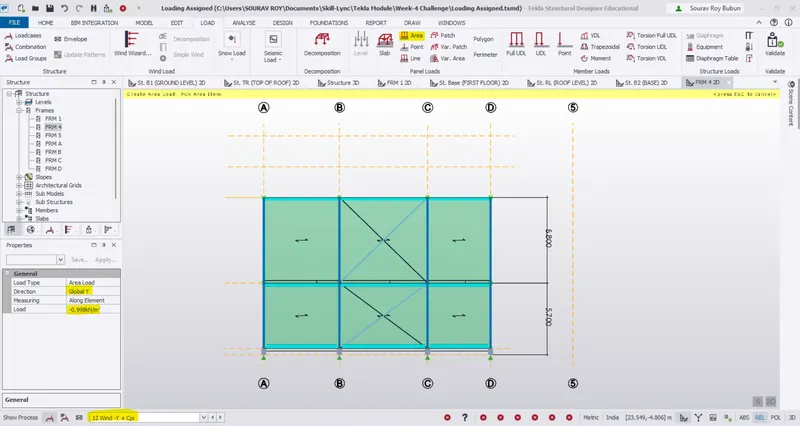
Third case Wind -Y +Cpi
Open Frame 4 and apply load -0.9975 Kn/m^2
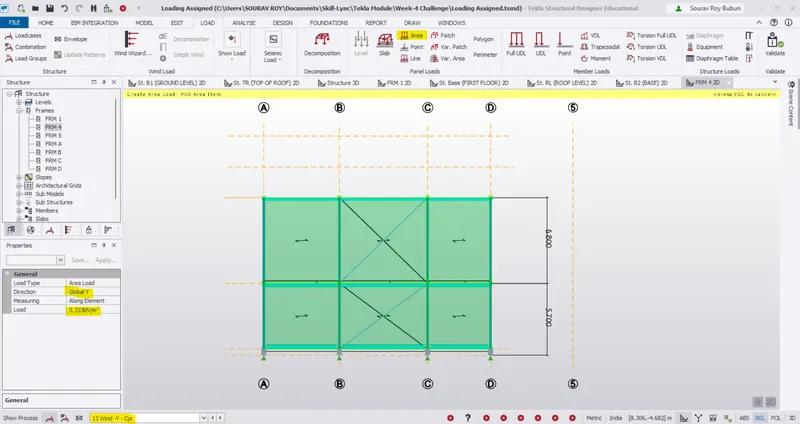
Fourth case Wind -Y -Cpi
Open Frame 4 and apply load 0.3325 Kn/m^2
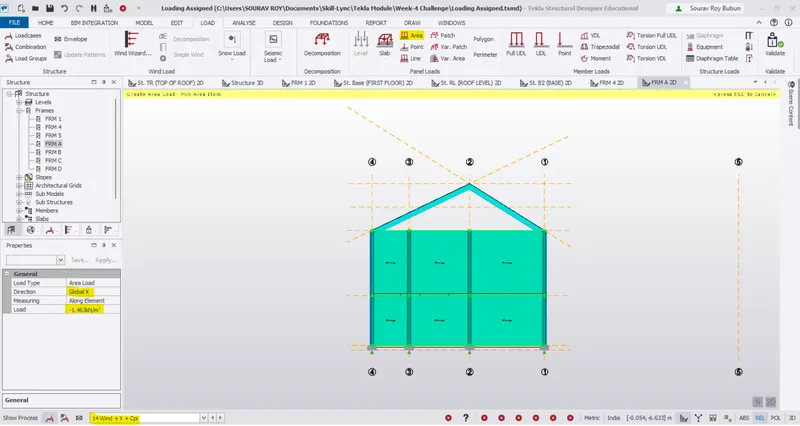
Fifth case Wind +X +Cpi
Open Frame A and apply load -1.463 Kn/m^2
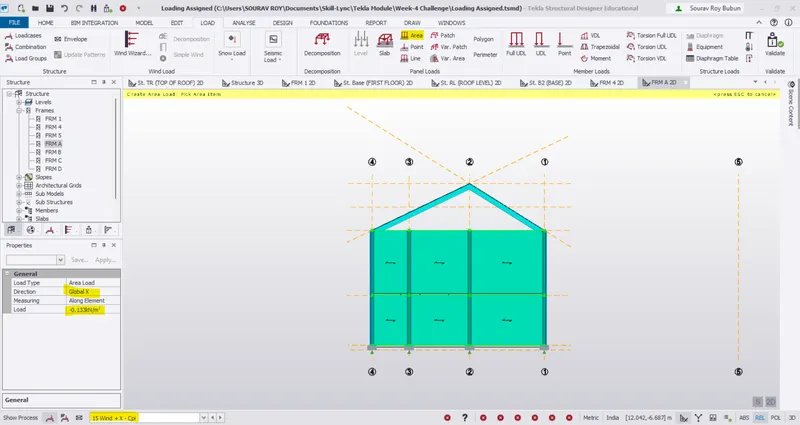
Sixth case Wind +X -Cpi
Open Frame A and apply load -0.133 Kn/m^2
Seventh case Wind -X +Cpi
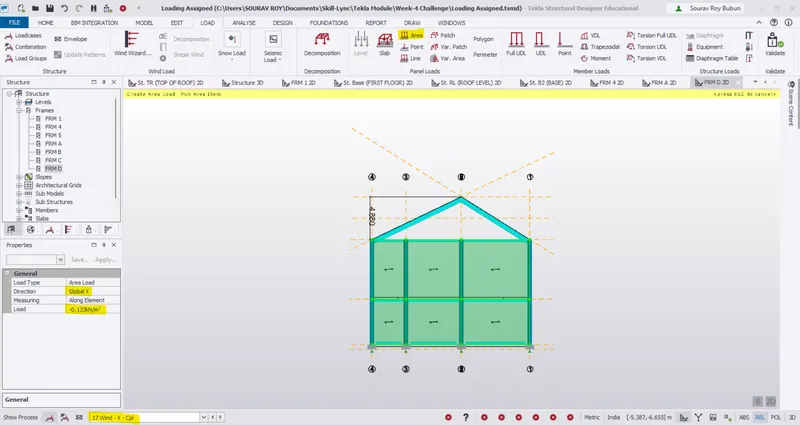
Open Frame D and apply load -1.463 Kn/m^2
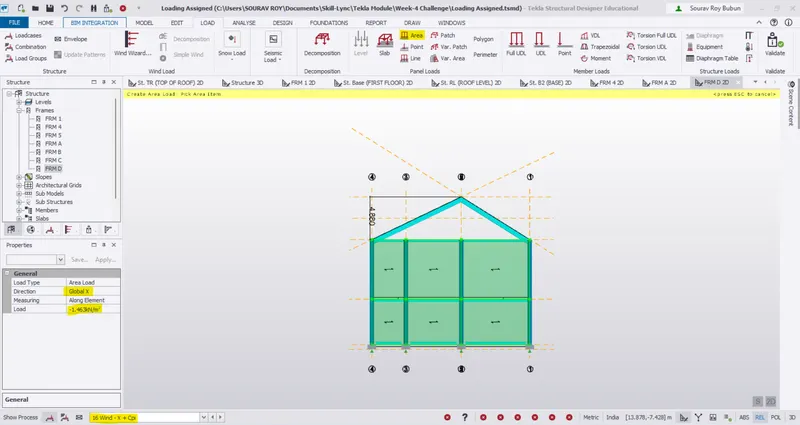
Eighth case Wind -X -Cpi
Open Frame D and apply load -0.133 Kn/m^2
Step-3
For Roof section
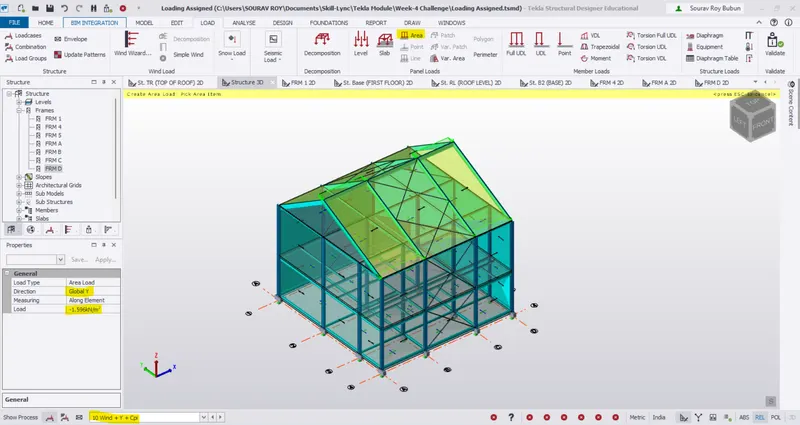
First We will Consider EF side
For, Wind + Y + Cpi
apply load -1.596 Kn/m^2
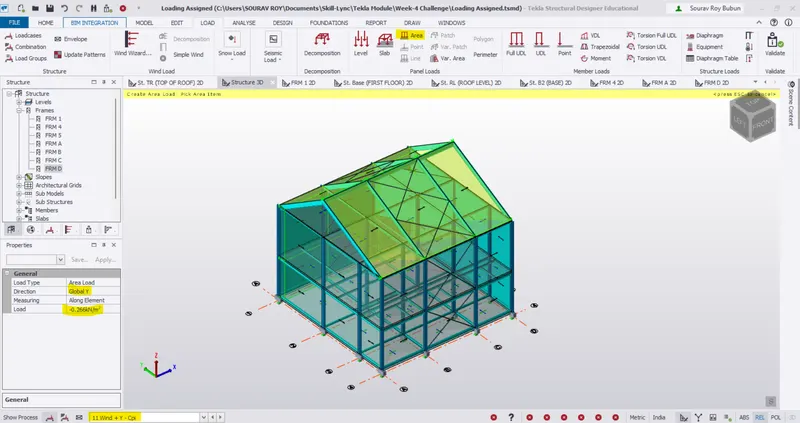
For, Wind + Y - Cpi
apply load -0.266 Kn/m^2
Now We will Consider GH side
For, Wind - Y + Cpi
apply load -1.463 Kn/m^2
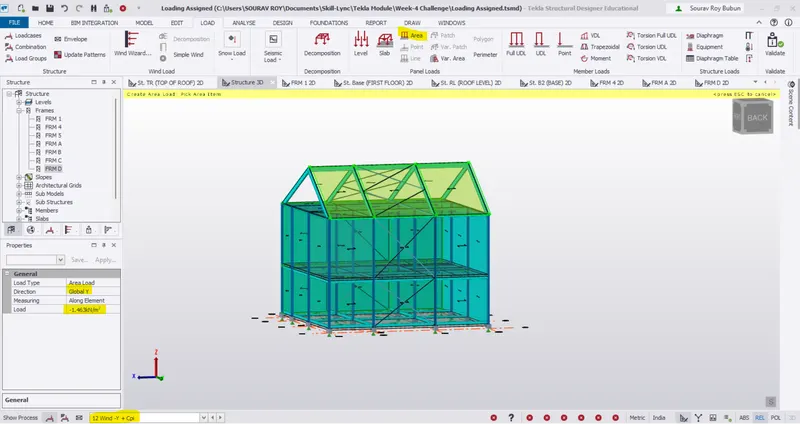
For, Wind - Y - Cpi
Apply load -0.133 Kn/m^2
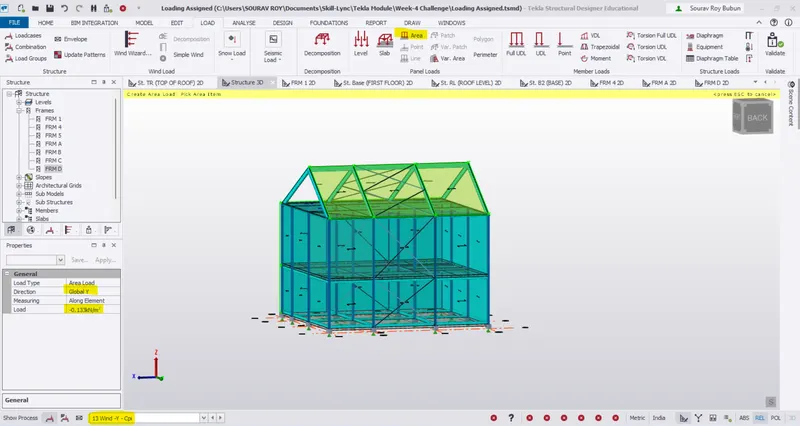
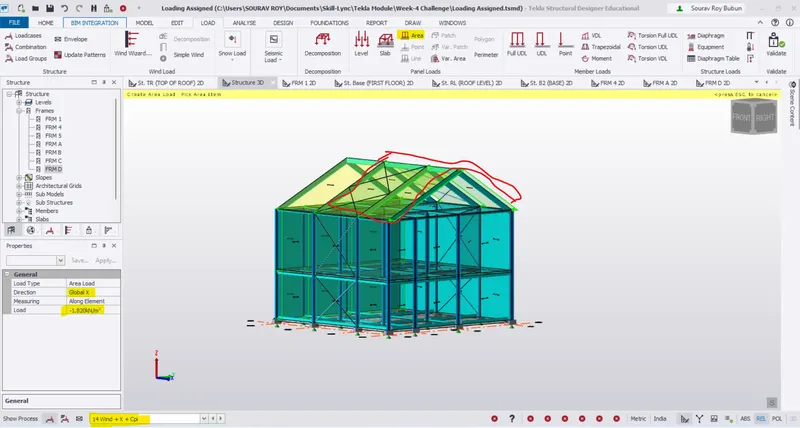
We will consider EG side
For, Wind + X + Cpi
Apply load -1.82 Kn/m^2
For, Wind + X - Cpi
Apply load -0.419 Kn/m^2
- Delete the top door.
Result: The ground plan is copied and aligned to the second level.
3)
Aim :-
separate model generate wind loading using wind wizard
Procedure :-
- Delete previous wind loads
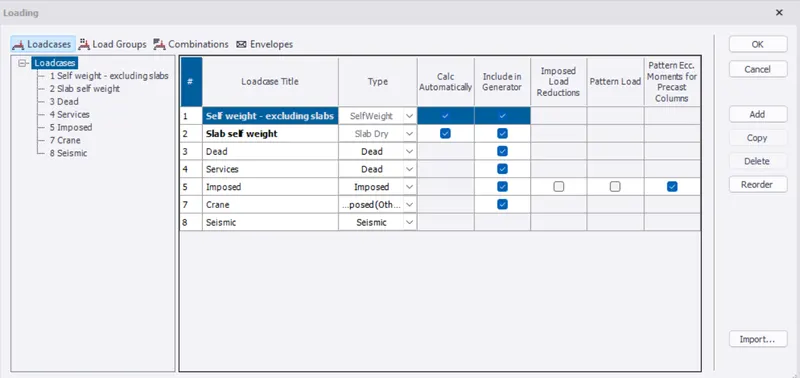
- Now click wind wizard in load tab
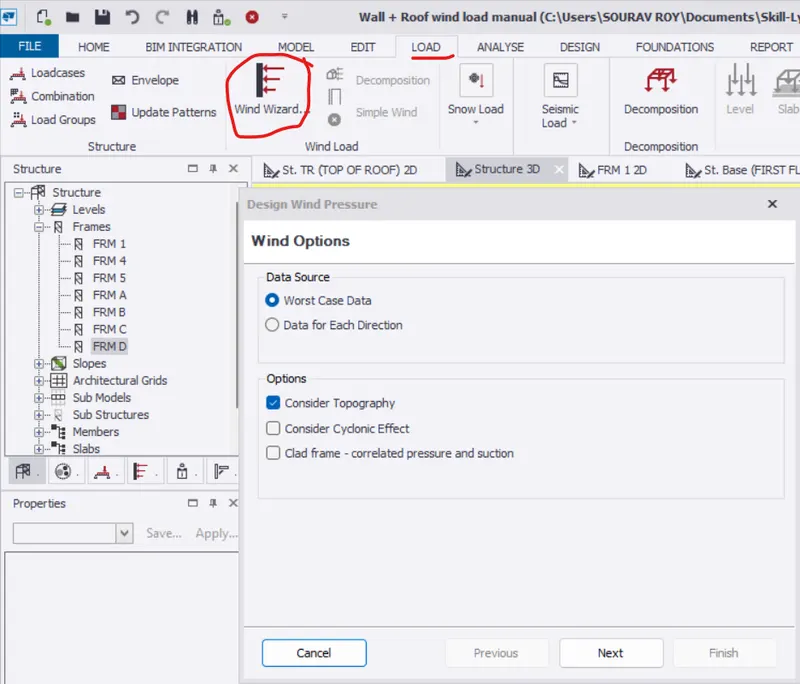
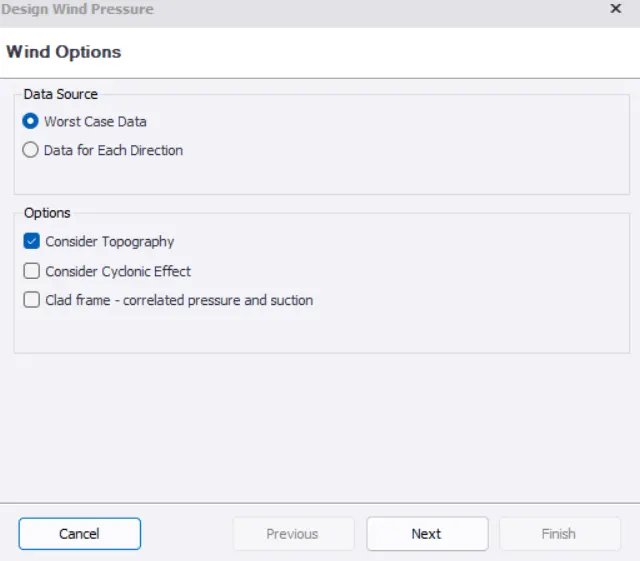
- Click on worst case data and click next
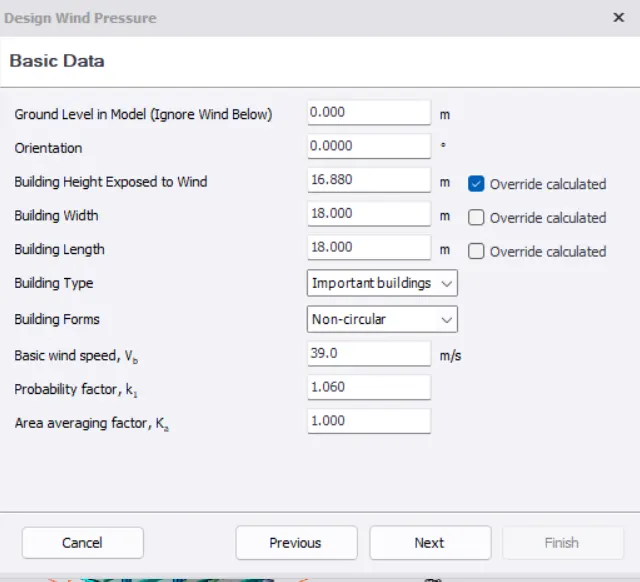
- Set height as 16.88m, Type industrial and wind speed 39m/s and click next
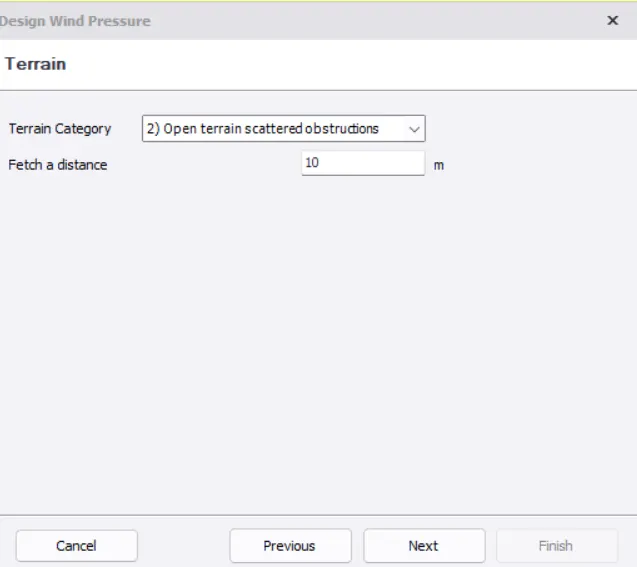
- Set terrain category as open terrain scattered obstruction, fetch a distance as 10m and click next
- Click next for results and direction
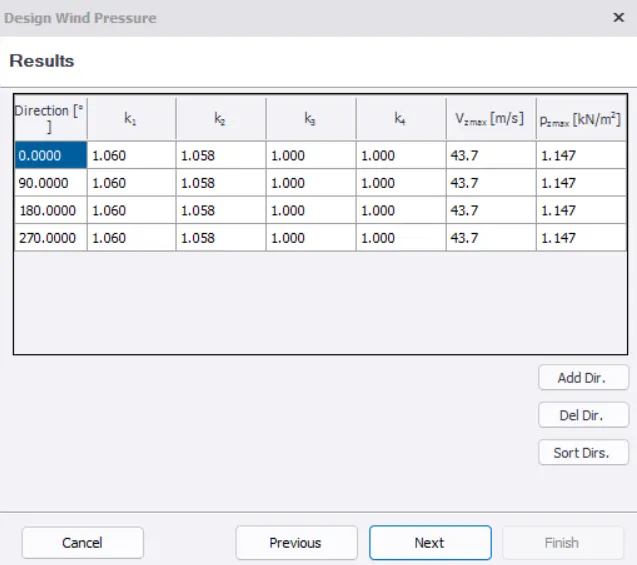
- Click on load cases and add wind loads as shown below
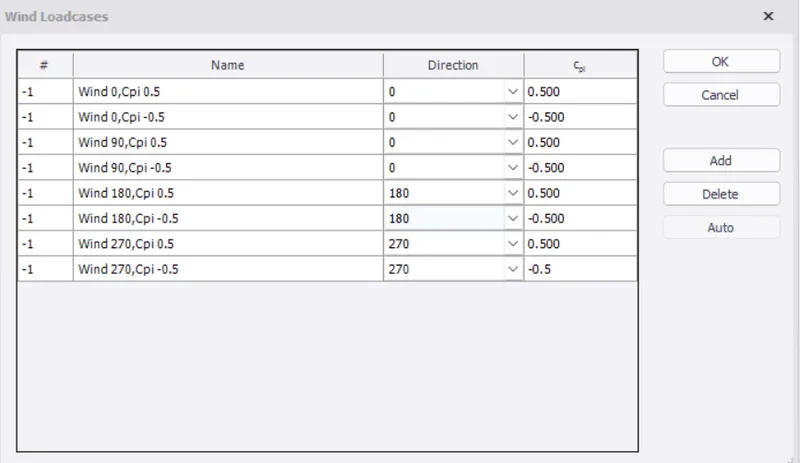
Wind loads are generated through wind wizard
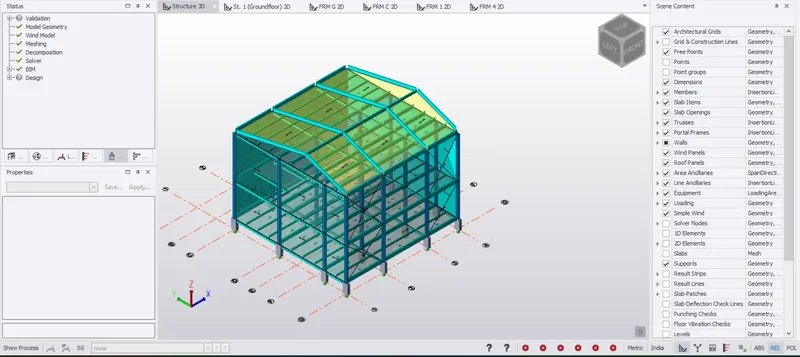
Results -
i) Wind loads and roof loads is calculated based on IS 875 Part III.
ii) The wind load and roof load applied to the steel structure.
iii) A separate model is created and wind load is calculated using the Tekla software’s wind wizard.