To model beams and bracings for industrial steel structures using TSD
1)
Aim -To determine the loading on the beam indicated and analyze the beams and draw bending moment and shear force diagram.
Given Data -
i) The floor system is 120 mm thick normal weight concrete floor
ii) The floor finish and mech loads on the floor is 3 kPa = 3kN/m^2
iii) The live load on the floor is 5 kPa = 5kN/m^2
iv) All beams have cross section 500 mmx750 mm.
So, I =bd^3 /12 = 0.5*0.75 ^3 /12 =0.0176 m^4
v) Modulus of elasticity of concrete is 10 GPa. = 1*10^6 KPa
Procedure -
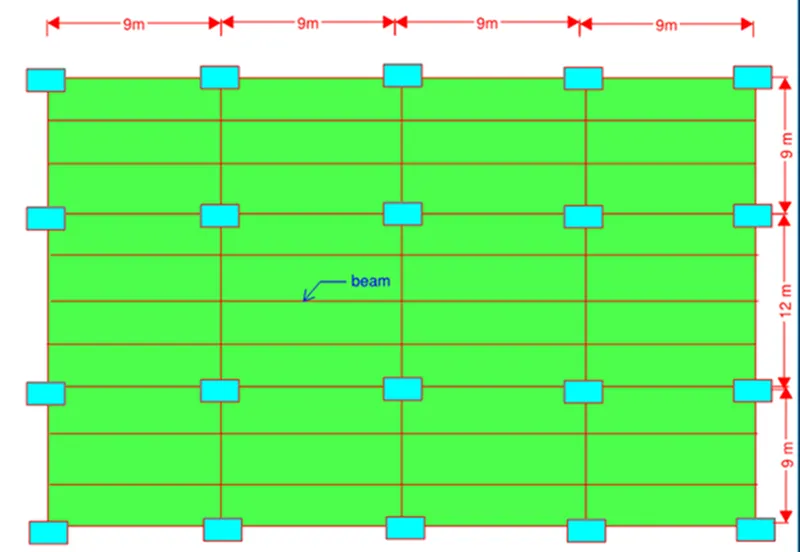
i) Self weight of slab = 0.12*25 = 3kn/m
ii) Self weight of beam = 0.5*0.75*25 = 9.375Kn/m
iii) Floor finish = 3kn/m
iv) Live load = 5kn/m
Total weight = self wt + live load + floor finish
= 3 + 5 + 3 = 11kN/m
Therefore , Load on beam ,
i) Load on beam = Total weight * Tributary width
So , Let us give the names to all the beams in order as B1,B2,B3,B4 starting from left side
i) Load on B1 = W * tributary width+ self weight of beam
= 11* 0.5(3+3)+9.375
= 42.375 Kn/m
ii) Load on B2 = W * tributary width + self wt of beam
= 11* 0.5(3+3)+9.375
= 42.375Kn/m
iii) Load on B3 = W * tributary width + self wt of beam
= 11* 0.5(3+3)+9.375
= 42.375Kn/m
iv) Load on B4 = W * tributary width + self wt of beam
= 11 * 0.5(3+3)+9.375
= 42.75 kN/m
The figure is as shown below for 1st Case - Considered a Continuous beam with simply supported

Step 1 ) Fixed End Moments
For Span AC -
Mac = -wL^2/12 = -42.375*9*9/12 = -286.03Knm
Mca = wL^2/12 = 42.375*9*9/12 = +286.03Knm
For Span CD -
Mcd = -wL^2/12 = -42.375*9*9/12 = -286.03Knm
Mdc = wL^2/12 = 42.375*81/12 = +286.03Knm
For Span DE -
Mde = -wL^2/12 = -42.375*81/12 = -286.03Knm
Med = wL^2/12 = 42.375*81/12 = +286.03Knm
For Span EB -
Meb = -wL^2/12 = -42.375*81/12 = -286.03Knm
Mbe = wL^2/12 = 42.375*81/12 = +286.03Knm
Step 2) End Moment Equation -
For Span AC -
MA = MFab + 4EI/L * Ta + 2EI/L * Tc
= -286.03 + 78125 Ta + 39062.5 Tc
MC = MFca + 4EI*Tc/L + 2EI*Ta/L
= 286.03 + 78125Tc + 39062.5Ta
For Span CD -
MC = MFcd + 4EI*Tc/L + 2EI*Td/L
= -286.03 + 78125Tc + 39062.5Td
MD = MFdc + 4EI*Td/L + 2EI*Tc/L
= 286.03 + 78125*Td + 39062.5*Tc
For Span DE -
MD = MFde + 4EI*Td/L + 2EI*Te/L
= -286.03 + 78125Td + 39062.5Te
ME = MFed + 4EI*Te/L + 2EI*Td/L
= 286.03 + 78125Te + 39062.5Td
FOR Span EB -
ME = MFeb + 4EI*Te/L + 2EI*Tb/L
= -286.03 + 78125Te + 39062.5Tb
MB = MFbe + 4EI*Tb/L + 2EI*Te/L
= 286.03 + 78125Tb + 39062.5Te
Step 3 ) Using Moment Equilibrium eqn
i) Ma = 0
-286.03 + 78125Ta + 39062.5Tc = 0 ......(1)
Considering the equilibrium at C, Mc = 0
ii) Mc = Mcd + Mca
78125Tc + 78125Tc + 39062.5Ta + 39062.5Ta + 39062.5Td = 0
156250Tc + 78125Ta + 39062.5Td = 0.........(2)
Considering the equilibrium at D, Md = 0
iii) Md = Mdc + Mde
286.03 + 78125*Td + 39062.5*Tc - 286.03 + 78125Td + 39062.5Te = 0
156250Td + 39062.5Tc + 39062.5Te = 0 .............(3)
Considering equilibrium at E, Me = 0
iii) Me = Med + Meb
= 286.03 + 78125Te + 39062.5Td - 286.03 + 78125Te + 39062.5Tb = 0
= 156250Te + 39062.5Td + 39062.5Tb = 0 ........(4)
Considering the equilibrium at B, Mbe = 0
iv) Mb = 0
286.03 + 78125Tb + 39062.5Te = 0 .....(5)
Solving above equation
we get ,
Tc = 1.046 x 10^-3 rad
Tb =4.18*10^-3 rad
Te = 1.046*10^-3 rad
Td = -1.84*10^-6 rad
Ta = 4.0*10^-3 rad
Step 4) Substitute the above unknown values in moment equations and get the moment values.
i) MA = MFac + 4EI*Ta/L + 2EI*Tc/L
= -286.03 + 78125Ta + 39062.5Tc
MA = -0.00
ii) MC = MFca + 4EI*Tc/L + 2EI*Ta/L
= 286.03 + 78125Tc + 39062.5Ta
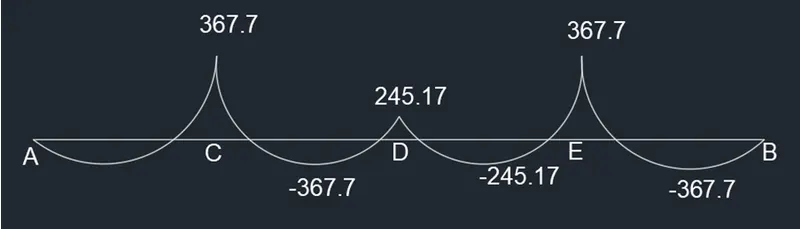
= 367.7Knm
iii) MD = MFdc + 4EI*Td/L + 2EI*Tc/L
= 286.03 + 78125Td + 39062.5Tc
MD = 245.17Knm
iv) ME = MFed + 4EI*Te/L + 2EI*Td/L
= 286.03 + 78125Te + 39062.5Td
ME = 367.7Knm
v) MB = MFbe + 4EI*Tb/L + 2EI*Te/L
= 286.03 + 78125Tc + 39062.5Ta
MB = 0 KNm
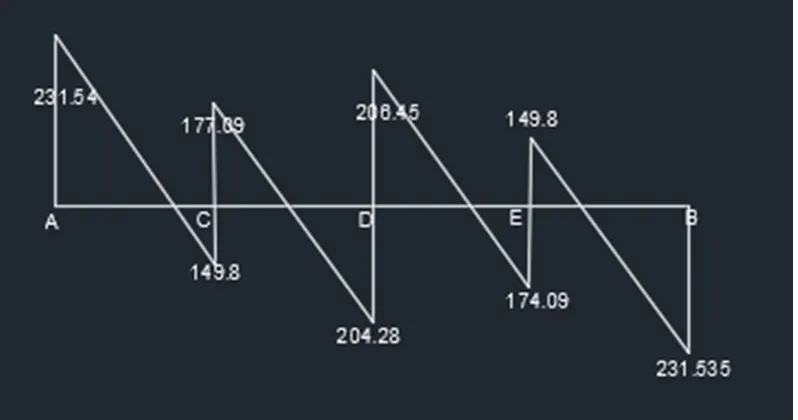
Step 5) To determine the shear forces , consider each span individually,
i) Consider span AC,taking moment about A,
Hc * 9 + 367.59 - 42.375*9*4.5 = 0
Hc = -149.84 KN
Ha + Hc = 42.375*9
Ha + 149.84 = 381.375
Ha = 231.53KN
ii) Consider span CD,taking moment about c,
-367.59 + 245.78 + Hd * 9 - 42.375*9*4.5 = 0
Hd = -204.28Kn
Hc+Hd = 381.375
Hc = 177.09Kn
iii) Consider span DE,taking moment about D,
-225.65 + 367.7 + He*9 - 42.375*9*4.5 = 0
He = -174.9Kn
Hd= 206.45Kn
iv) Consider span EB,taking moment about E,
9Hb - 367.7 - 42.375*9*4.5 = 0
Hb = - 231.535Kn
He = 149.84Kn
SFD
BMD
analysed using check model and analysis is run.
after that we get the different values for area of steel at each beam as shown below.
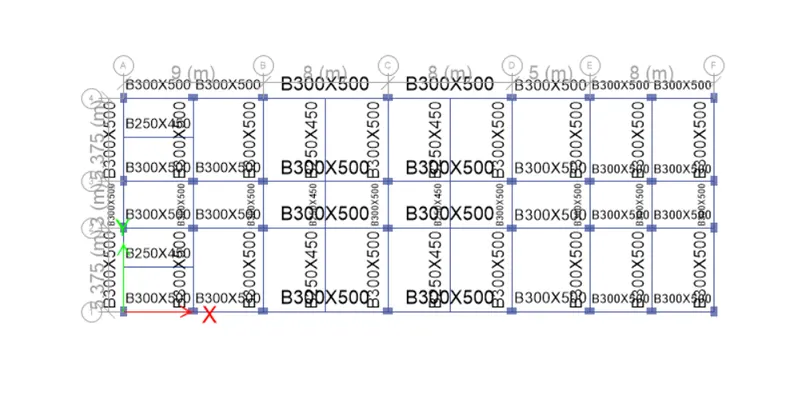
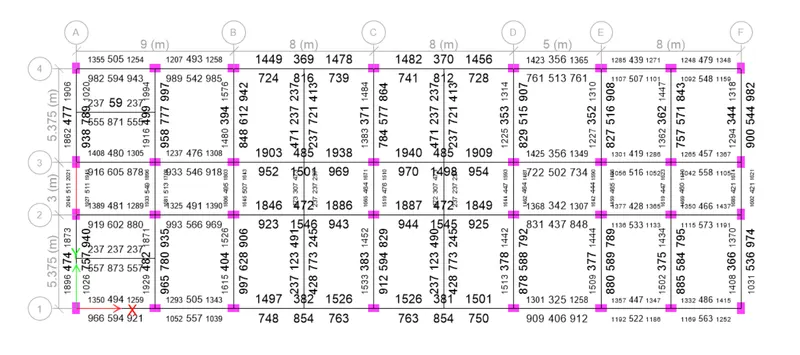
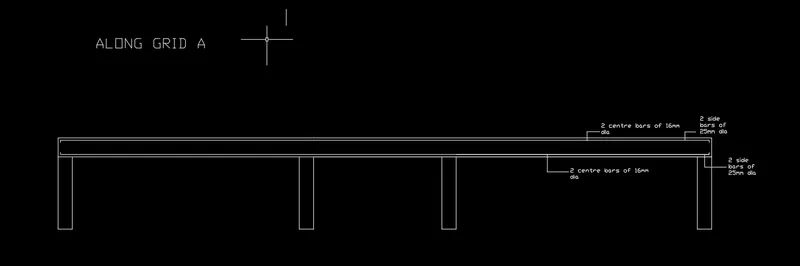
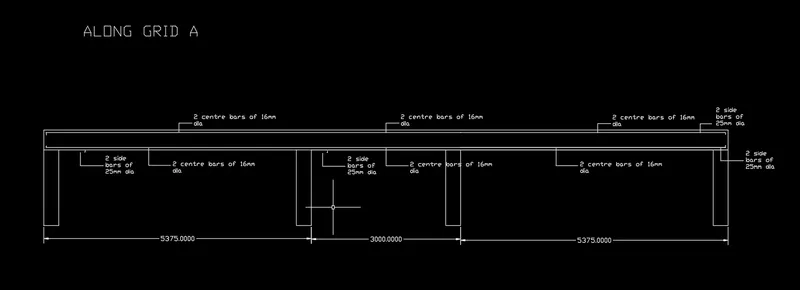
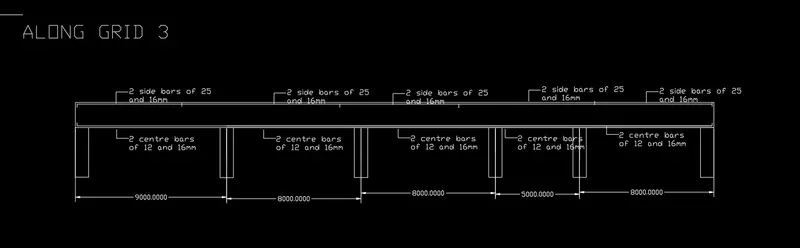
bars calculation is done along grid A and 3.
calculated number of bars is represented in autocad interface as shown in figure.
There are a number of properties of a beam that an Engineer should be aware of as they dictate beam behaviour when subject to a load and ultimately represent possible areas or mechanisms for failure. The main ones being:
- Second moment of area (also referred to as the second moment of inertia): this depends on the cross section profile of the beam and is a measure of the resistance of the shape of the beam to bending.
- Bending moment: usually illustrated on a bending moment diagram, and often related the deflection of the beam, can be used to calculate regions subject to maximum bending forces and consequently most likely to yield. It also illustrates which sections of the beam are in compression or tension.
- Beam deflection: beam deflection tends to be undesirable and correlates to the bending moment.
- Shear diagrams: these are used to illustrate stress concentrations along the beam and provide a means to identify areas of maximum shear forces where the beam is more likely to fail by shear.
>Second moment of area The second moment of area (I) is a property of the shape used to predict the resistance of the beam to bending and deflection. It is calculated from the physical cross sectional area of the beam and relates the profile mass to the neutral axis (this being a region where the beam is subject to neither compression or tension, as labelled in figure 5. It is dependant on the direction of loading; for most beams except both hollow and solid box and circular sections, the second moment of area will be different when loaded from a horizontal or vertical direction.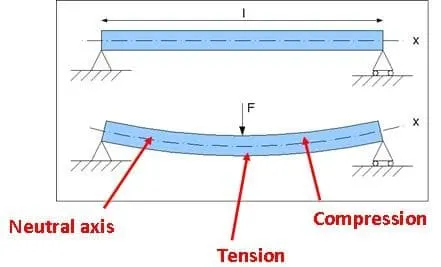
 However, for common beam profiles standard formula are used: I – beam / Universal beam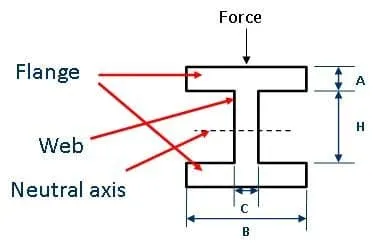
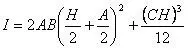 As shown in figure 6, this is only suitable for loading parallel to the web, as loading perpendicular to the web would be less efficient. Box section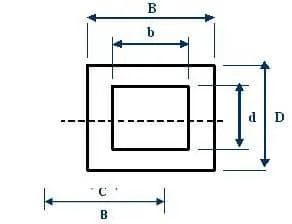
Result :-
Beam properties for First floor and model the beams
2)
Aim :-
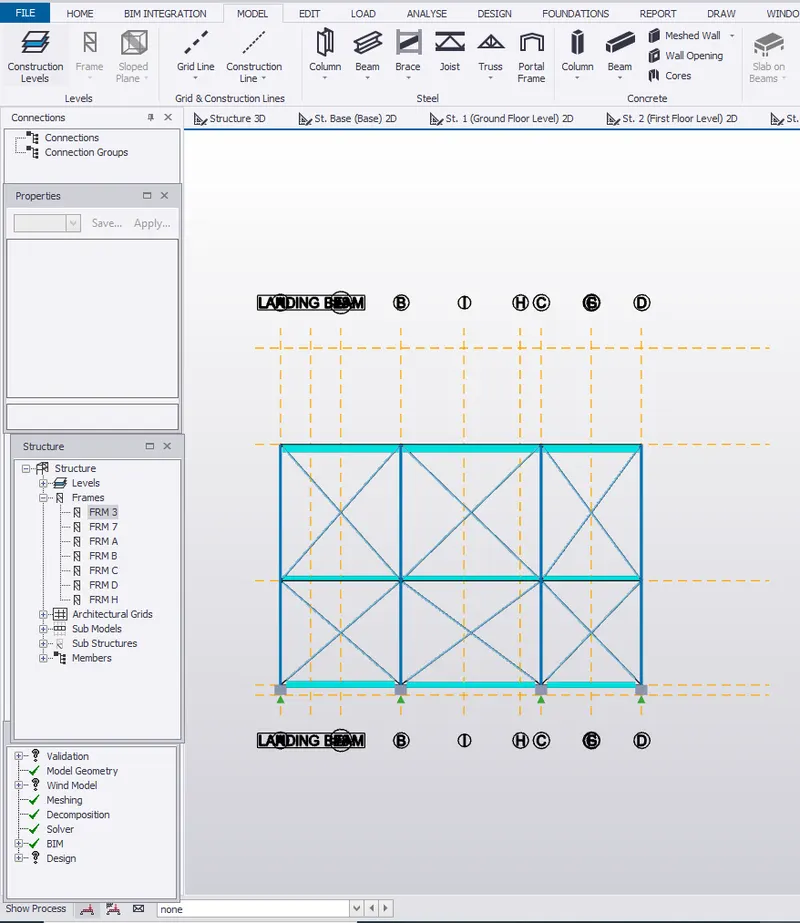
Beam on second floor as roof and moment frame action in one direction and add bracings at locations as per the design intent
Procedure :
Details of the structure:
- Support: Fixed-Pinned(Top and Bottom)
- Concrete Pedestal Size PD1= 600x600mm
- Steel Column C1= MB 300
Steel Beams:
B1= ISMB 300 applied for primary beams at ground floor including staircase landing beam.
B2= ISMB 250 applied for primary beams at first floor including staircase landing beam.
B3= ISMB 225 applied for secondary beams at first floor
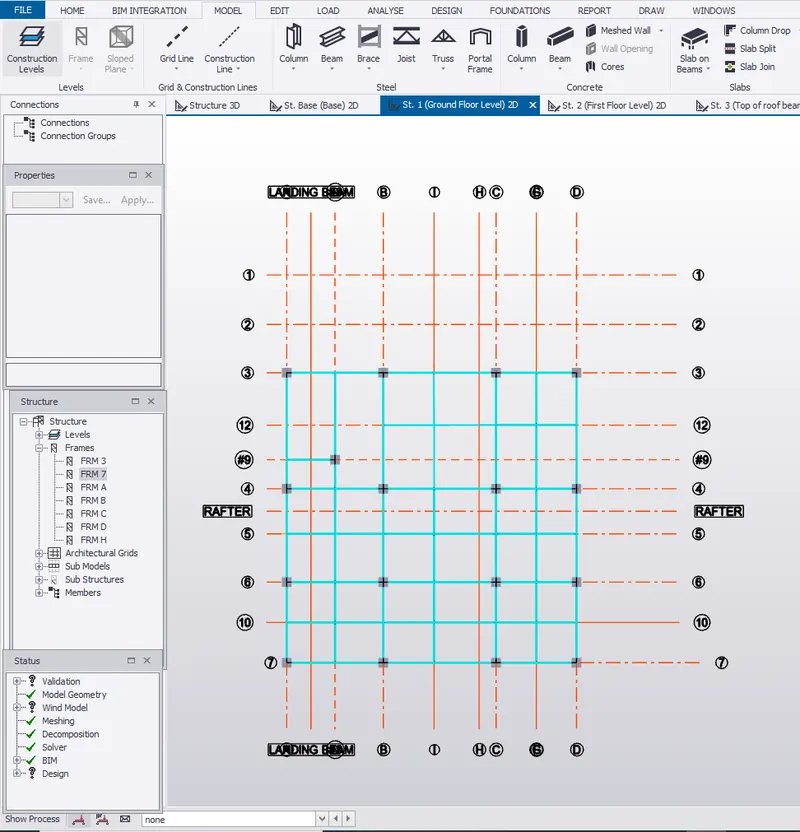
- First floor plan view.
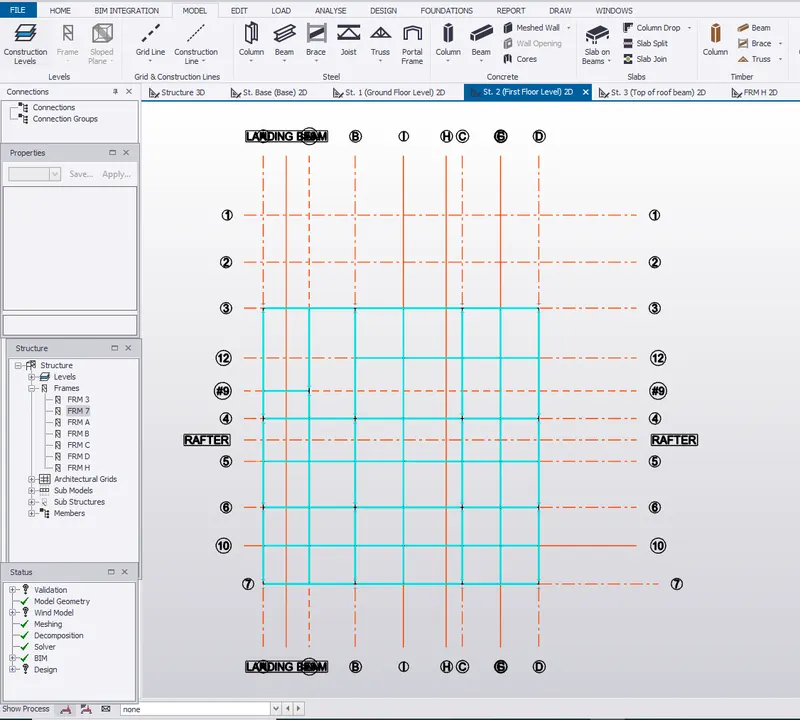
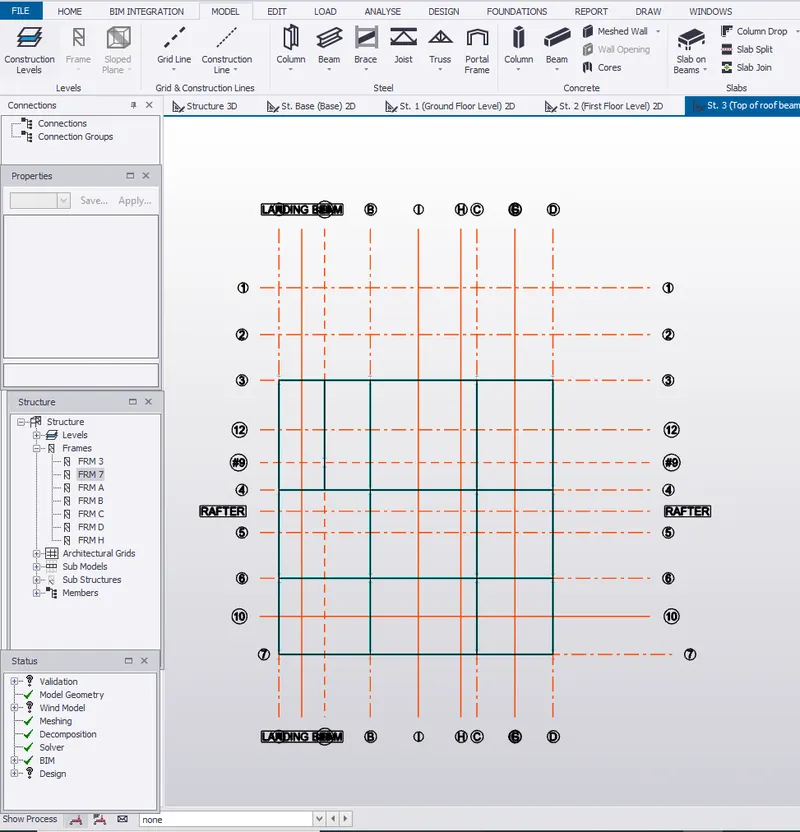
- Second floor plan view= Top of roof beam view
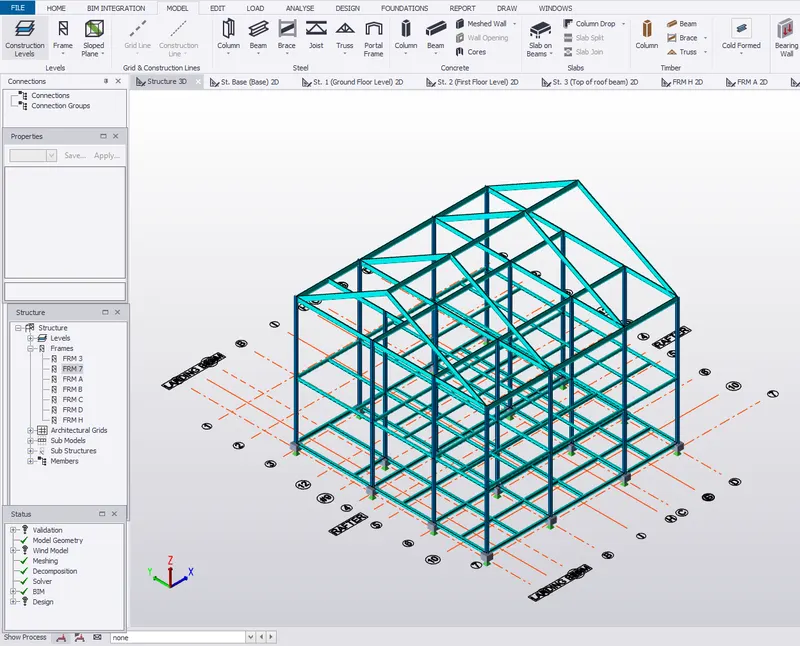
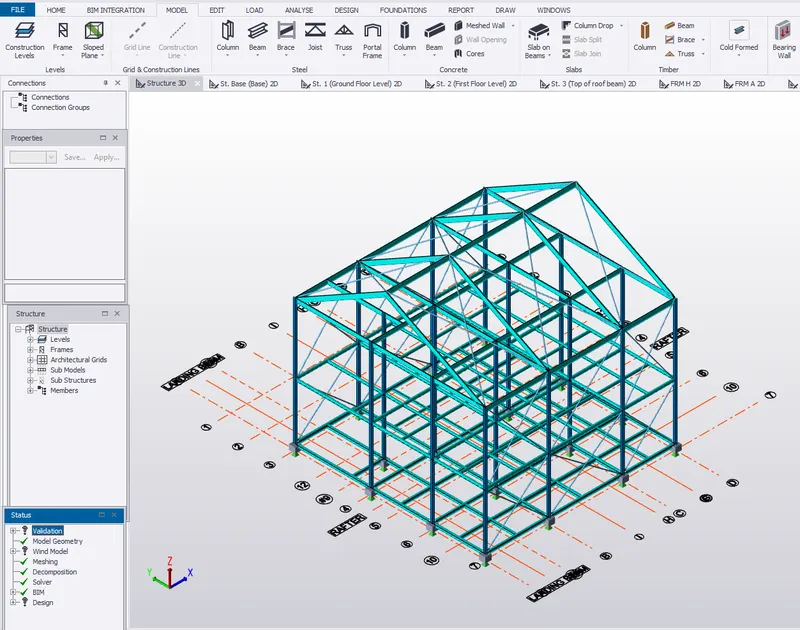
- Structure in 3D view
- Selecting the beam in Manage property sets>Member>Rafter.
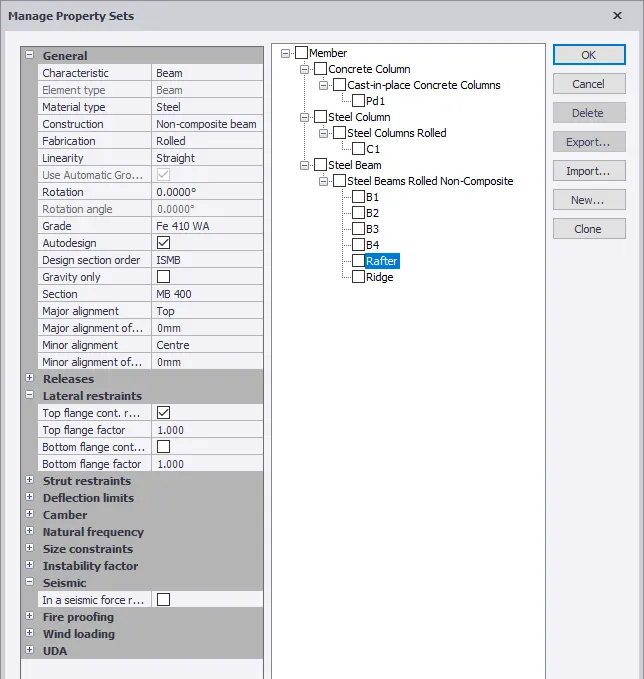 .
.
- Selecting the beam in Manage property sets>Member>Ridge
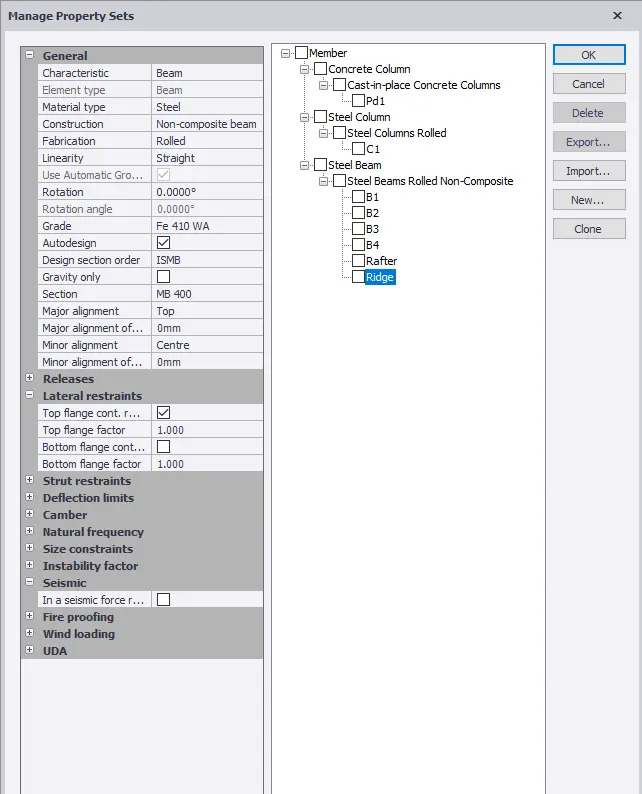
- 3D view after placing Rafters and ridges.
- Selecting Beam in Manage property sets>Member>Bracings.
- Placing X grids in Frame 3.
Result :-
second floor as roof and moment frame action in one direction and add bracings at locations as per the design intent in completed