Project 2
Aim:
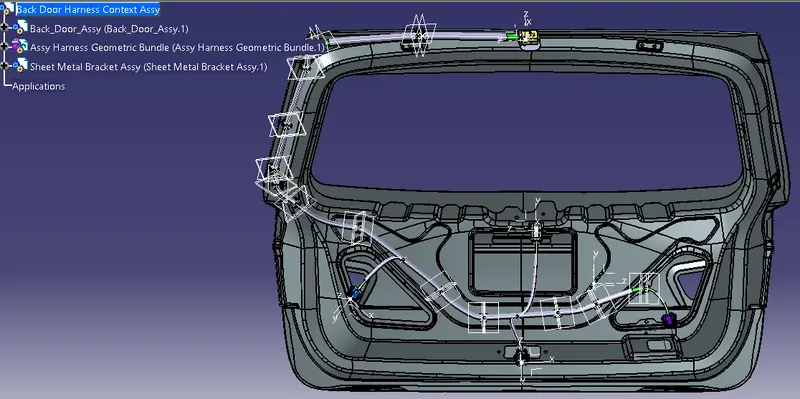
To route the wiring harness on Given car body and Prepare flatten view drawing in CATIA V5.
Objective:
This project shows that the route the Wiring harness on Given car body and Prepare flatten view drawing in CATIA V5.
Application of all Packaging rules, Industry best practices for the harness design.
All necessary details like clearance, clipping/clamping selection, harness fixing requirements, harness continuity should be provided in order to design the wiring harness.
Assumption:
Provide clips/clamps as per requirement.
Make sure that there is no any fauling case while designing the wire harness. Additional clips/clamps may be used to avoid fauling case.
Give additional slack if needed. 5-10% slack is sufficient.
If harness is passing through the closures/doors or tail gates then envelope dimensions during opening and closing of doors shall be considered to provide the slack.
Use of rubber grommet is recommanded if harness is passing through sheet metal panels. Example- firewall, passing to door, tail gate etc.
The branch length should be greater than 50mm.
Minimum distance between two branch points should be at least 50mm.
Minimum distance between clip and branch point should be at least 25mm.
Step 1: Creating Context Assembly
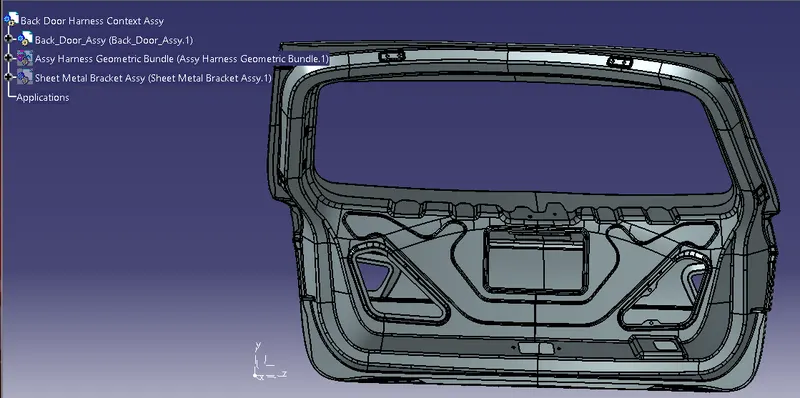
Step-2: Mounting the interconnection connector on the sheet metal bracket and mounting the p-clamps for wire harness
Here, a 12 pole connector "C-776438-4" and mounting cavity "C-1924487-2" is together used as interconnection connector.
The required cad data is downloaded from te.com. First, we have to define 12 pole connector and mounting cavity electrically as below.
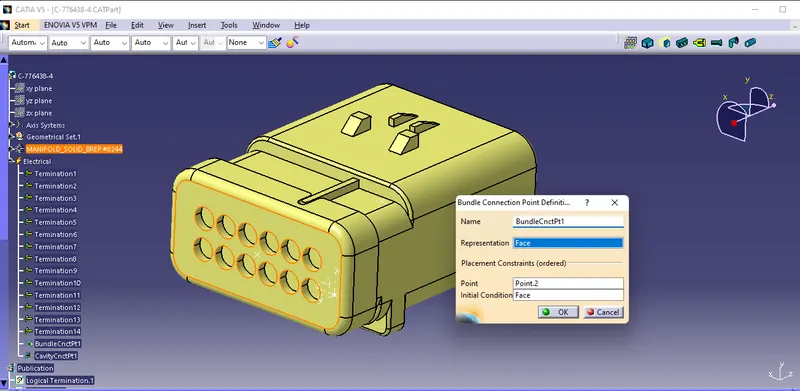
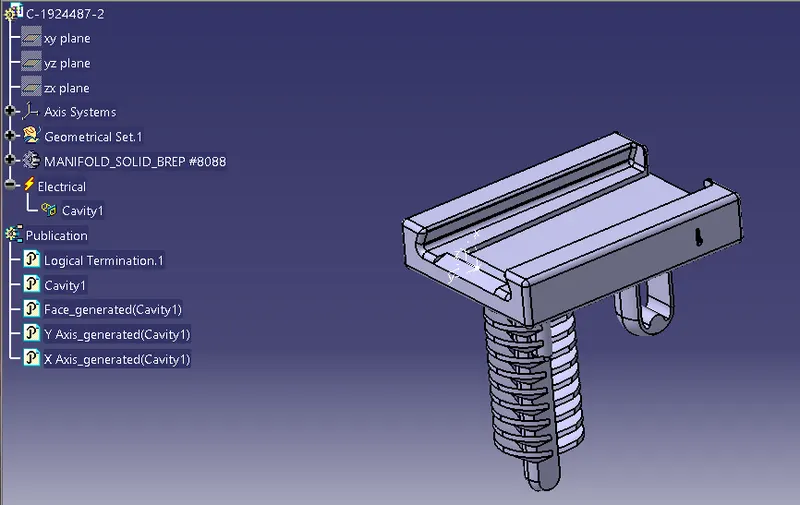
Interconnector:
After defining an interconnection connector electrically, we have mounted it near top slot on the tail gate of the car as shown in below figure.
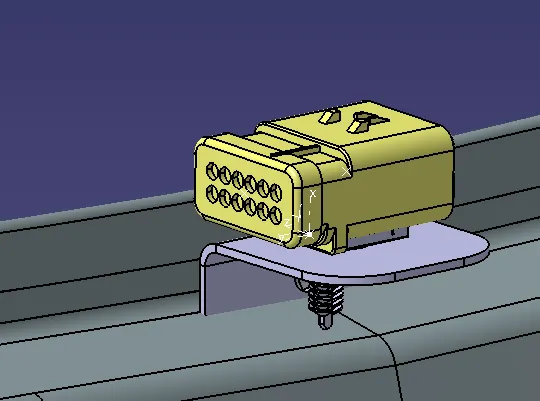
Above figure shows that, both 12 pole connector and mounting cavity are electrically connected together in electrical assembly design workbench.
Now, we have to mount that electrically connected interconnection connector and cavity on sheet metal bracket as shown in above figure.
Step 3: To define 8-pole connector electrically.
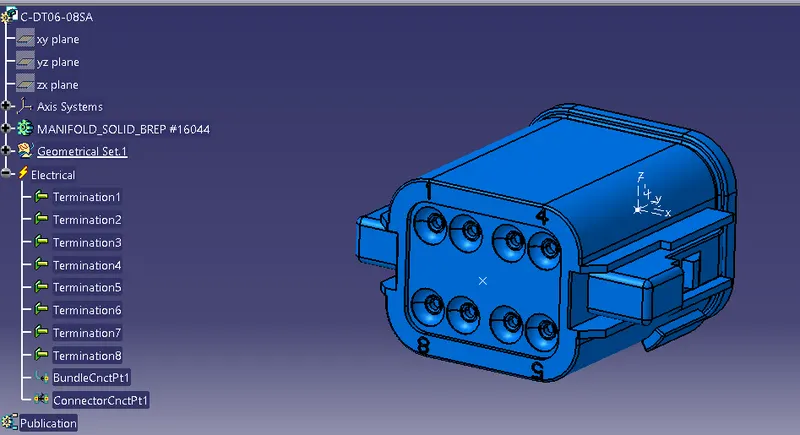
In above figure, we have defined 8-Pole connector electrically for two tail lights of the car.
To define 8-pole connector electrically.
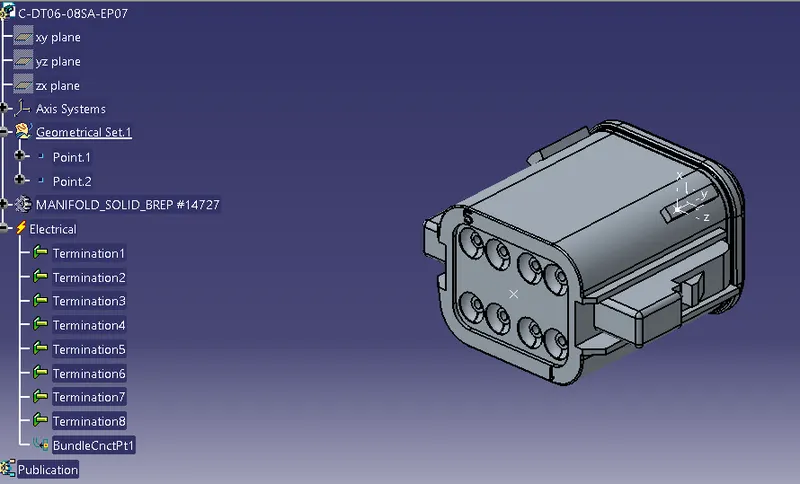
In above figure, we have defined 8-Pole connector electrically for two tail lights of the car.
P-Clamp
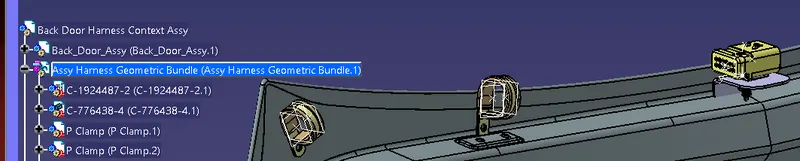
We have to mount 2 P-clamps also on the back door. so before that we have to define P-clamp electrically with geometrical parameters, entry and exit point on both left and right side of the P-clamp as shown in below figure.
Step:4 Bundle routing
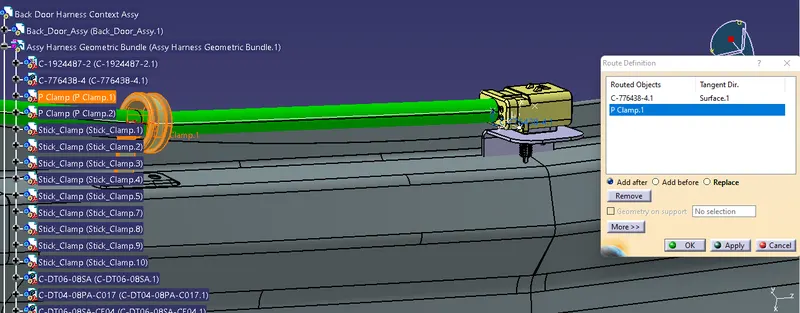
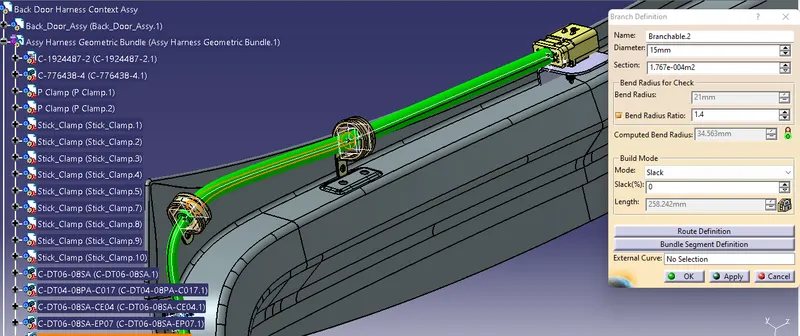
Let, we have started bundle routing from interconnection connector and assumed diameter of main trunk is 15 mm.
The bend ratio is assumed to be 1.4 and appropriate slack maintain between 1-10% is given wherever needed.
Bundle routing from Interconnection connector to 2 P-clamps
Here, we are routing the bundle segment from interconnection connector to 3 P-clamps.
The diameter for this routing path is 15mm and bend radius ratio is assumed to be 1.4
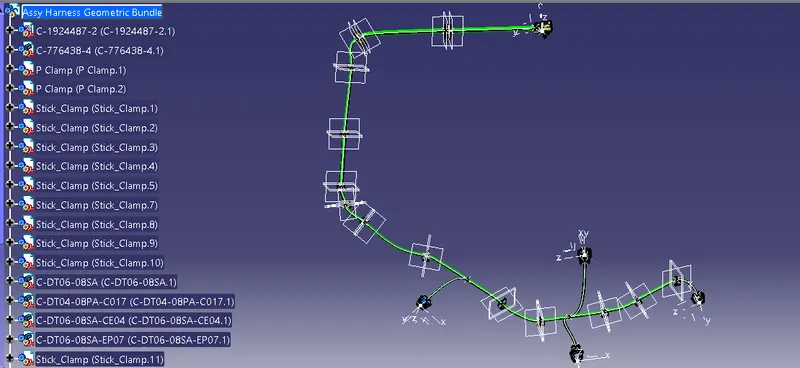
Step:5 Final Geometric Bundle:
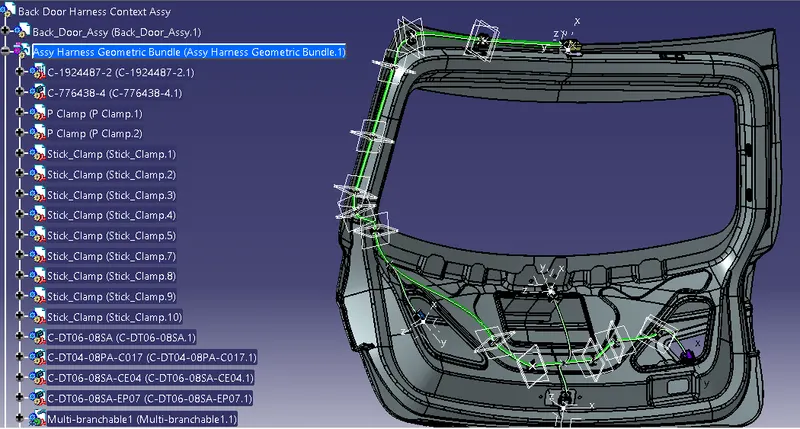
we have done with whole wiring harness routing for the Back Door Harness Design.
Step: 6 Adding protective coverings
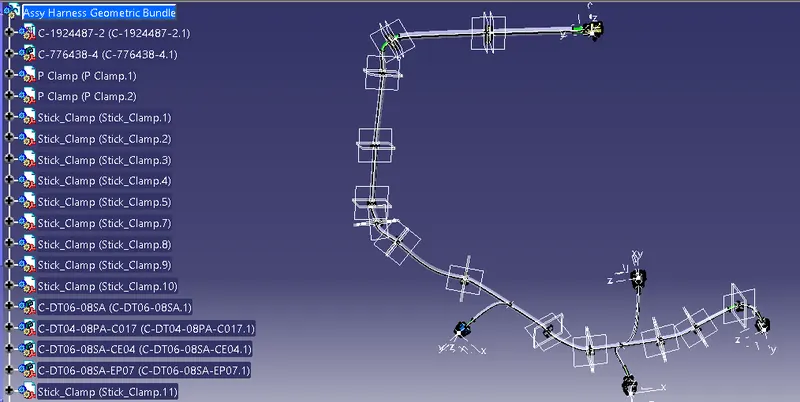
After bundle routing, we have to add protective covering to the harness bundle so that it will get protected from the damage.
Here, we have used Cot tube for the current harness assembly.
We have given start and end extremity wherever needed for the Cot tube as shown in below image.
Step:7 Check Bundle Continuity:
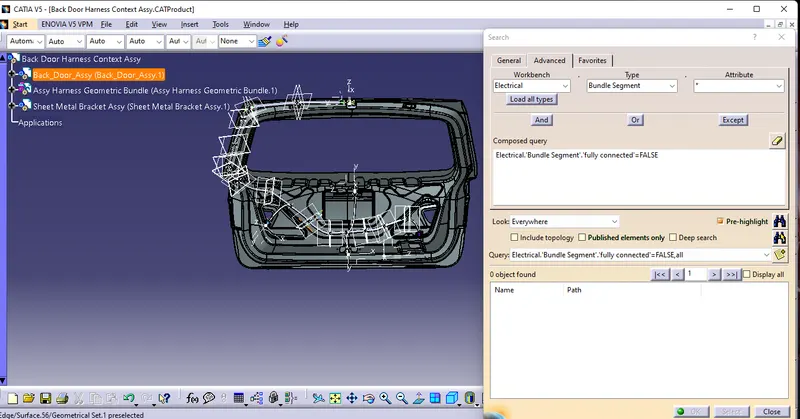
In this step, first we have to make sure that multi-branchable is selected then we have to go in Edit>Search>Advanced>Workbench-Electrical>Type-Bundle Segment>Attribute-Fully Connected
By selecting 'True' option will show all the connected bundle segments while selecting 'False' option will show all the non-connected bundle segments.
Here, we have selected for the 'True' option and searched for results. All the bundle segments are highlighted found showing that all the bundle segments are electrically connected as shown in below figure.
Step:8 Flattening View:
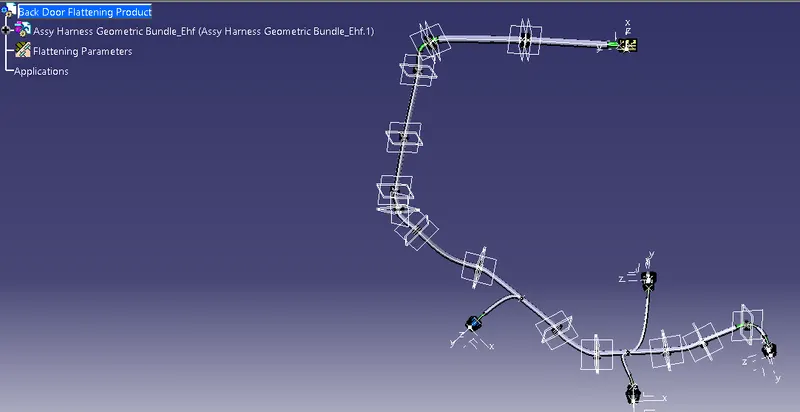
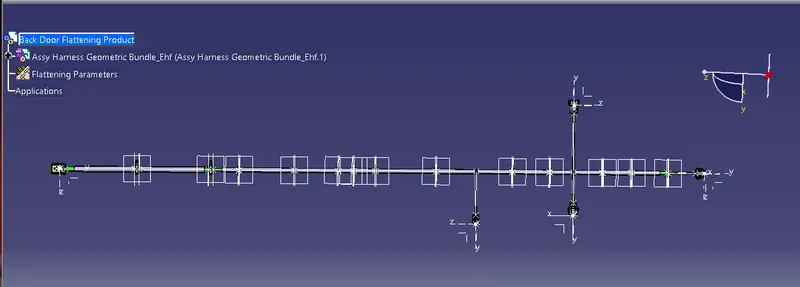
We have extracted the bundle assembly into Back Door Harness Flattening Product file and then flattened the file along face of interconnection connector as shown in above figure.
At this stage, for clarity, we have been hidden the flattening diagram from the drawing view.
Step:9 Drawing For flattening view:
We have to define drawing properties as shown in above figure. It should be noted that in 'Dress up' settings 3D wireframe is always ON.
If this setting is not selected then th bundle segments won't be visible on drawing view.
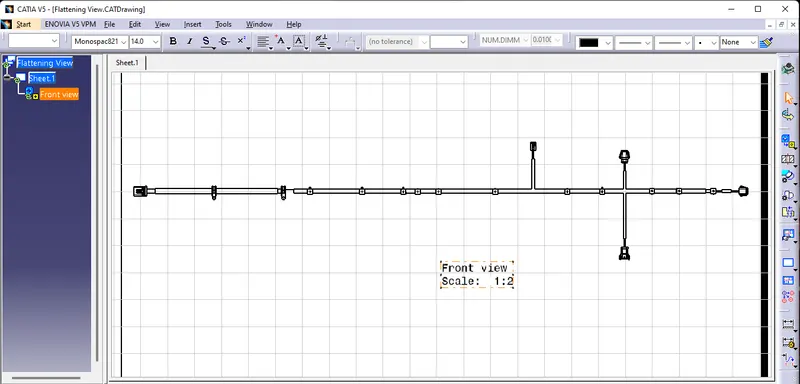
Step:10 Conclusion:
Routing of the wiring harness for the car tail gate assembly has done and prepared flatten-view drawing in Catia V5. Applied all the packaging rules while routing the wiring harness, implemented industry best practices in the harness design. Also, provided details like clearance, clipping selection, harness fixing requirements, harness continuity in order to design the harness.