Assignment 5-RADIOSS Interfaces & Study of Effect of Notches Challenge
OBJECTIVE
To create a mesh(6mm) and connections for the assembly with the required type of connections. And to run model with different cases given in the question.
BUMPER MESHING
Before meshing the model some of the surfaces are not attachedd to that parts. so we need to apply topology for the model.
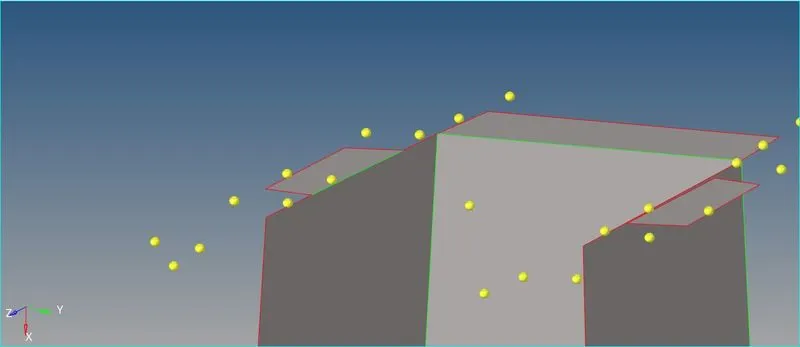
Here extending the surface can joint the surfaces. The beam of the middle surface is overlapping the top surfaces. so we can joint it with self intersecting surfaces.
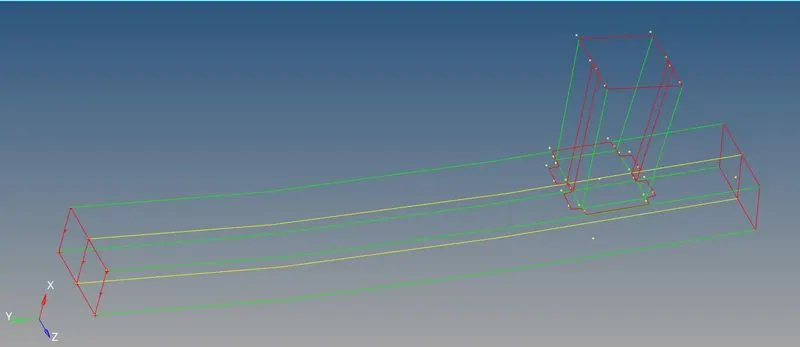
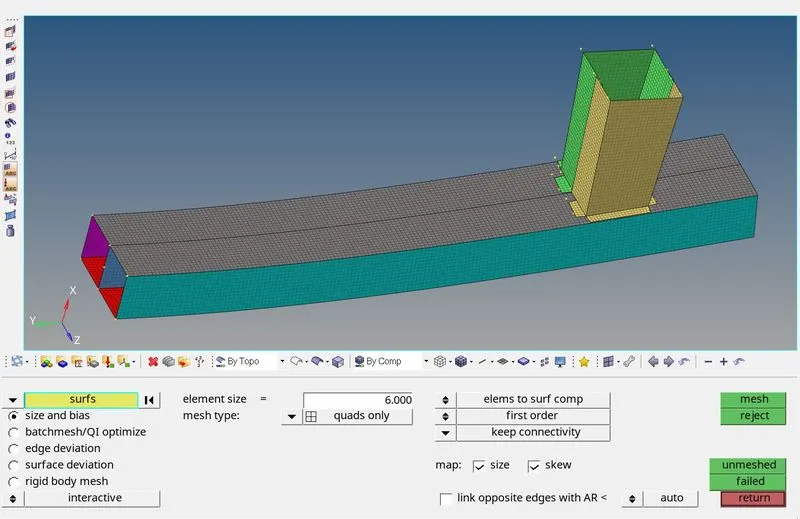
Now mesh every surfaces with quads only and after try to clear all the rotating quads.
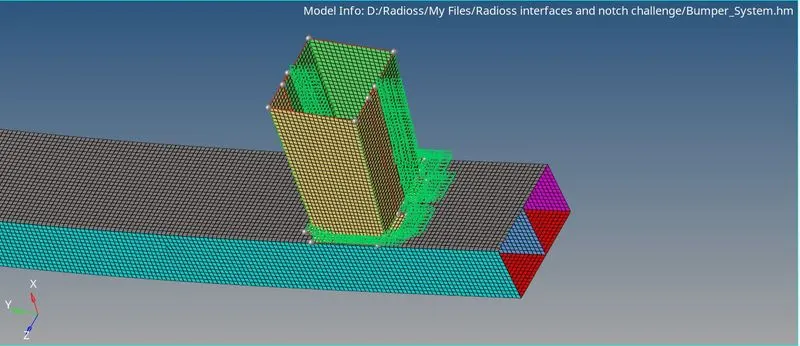
now we need to connect the 2parts with some connections. Here i used rbe2 rigid connections.
CASE SETUP
- Run the crash tube model as it is.
The 1st case is to use the given model crush tube_0000.rad and crush_tube_0001.rad file and import in hypermesh, run the file without any changes. save it in a seperate folder.
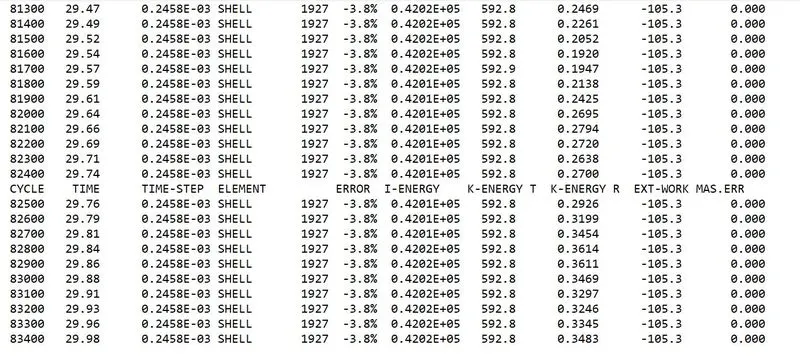
Here the energy error is 3.8%, Internal energy is 0.4202E+05 and the mass error is 0.000.
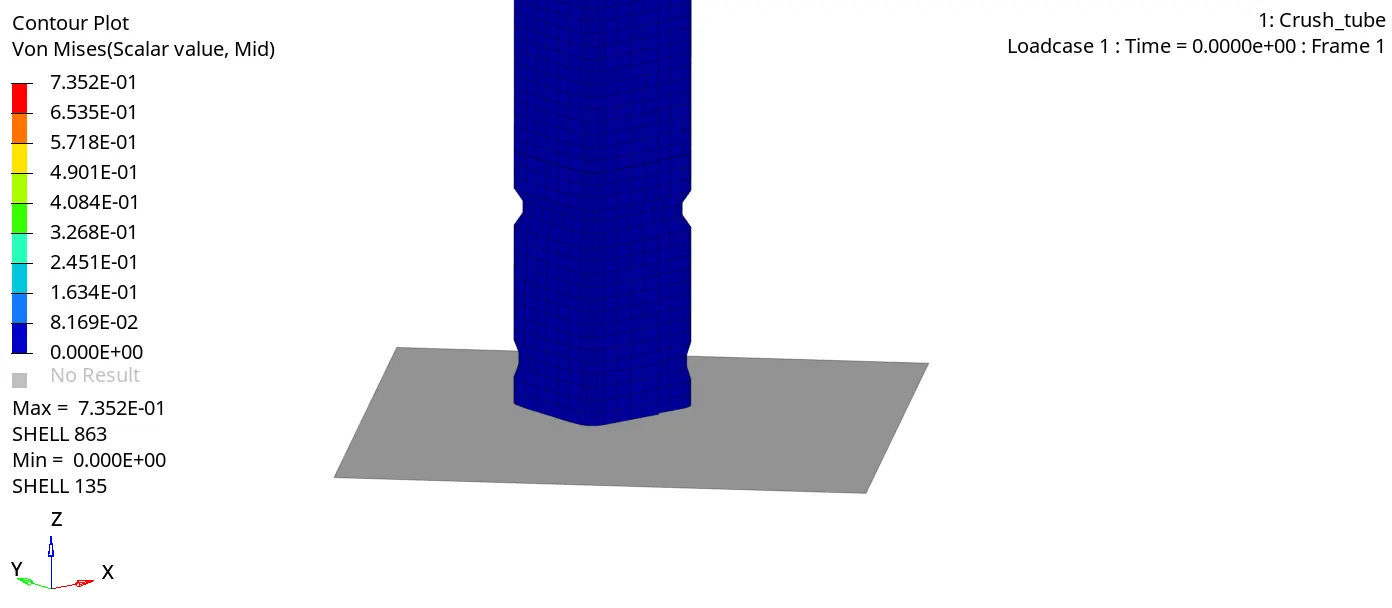
Here at the 1st hit the fillet region failing due to the initial velocity.
then after the 10th frame the bottom of the notch get deformed because of the thickness. At the final the top region crushing the whole part because of the mass.
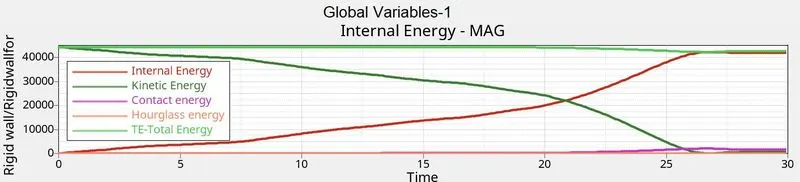
then plot the rigid forces and other remaining energies.
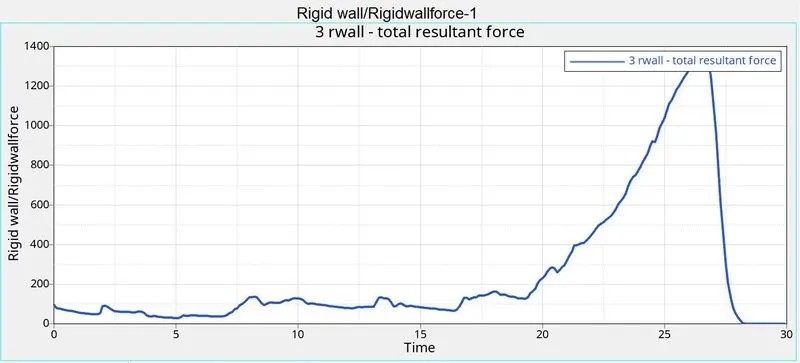
The resultant force in the rigid wall is slightly increasing at the start because of the contact with wall. This sudden peak in the graph represents the tube crushed with some pressure and it pushes the wall with the same velocity.
Internal energy is increasing gradually and then remains constant because the tube is absorbing the energy and then remains same.
For kinetic energy we can see the animation, at 1st energy is high and gradually decreasing. the tube get energy at the initial and at the final it goes down and rests.
At the end of crush the elements are having contact each other, so the contact energy is zero and the final stage it have some contacts.
Total energy is decreases at some point because of contact energy.
Hourglass is reduced due to the shell element properties.
CASE 2
Change the Inacti=6 and run.
Here we're changing the Inacti=6, so we have to open hypercrash application. Import 0000.rad starter file to open a model or simply drag a file. It only support the radioss files.
After import on the tree below groups we can see the components. open it and change inacti into 6. Export the file into seperate folder and name it with 0000 extension.
then we can change the inacti values in hypermesh also.
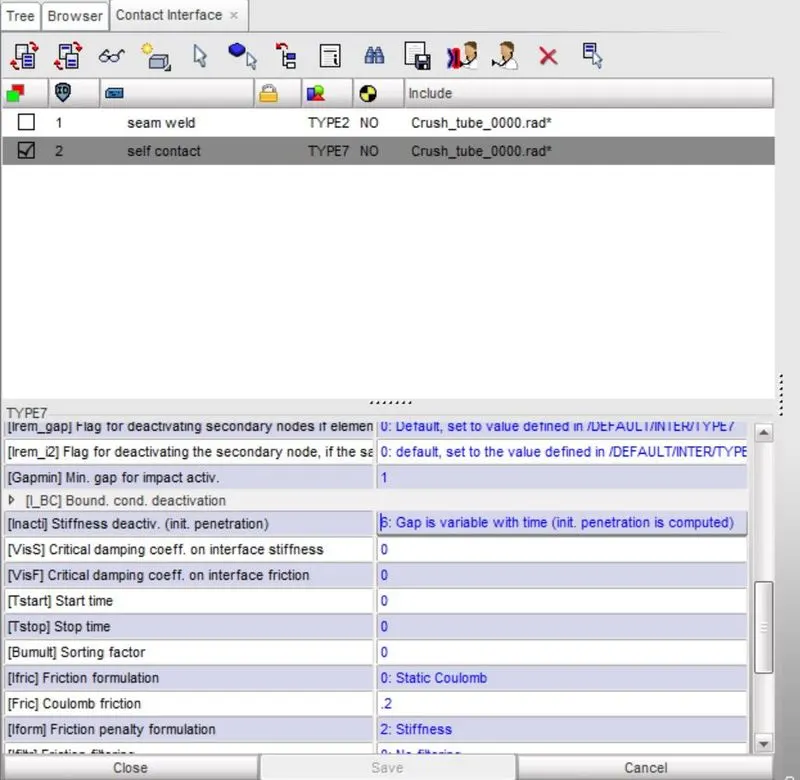
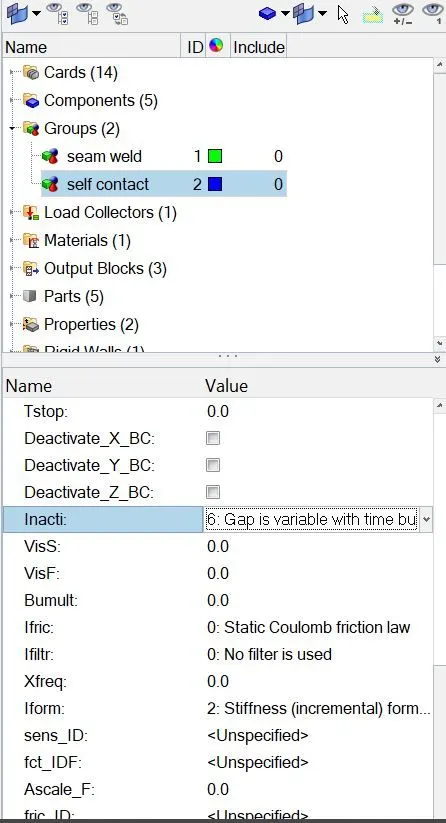
Now import the import in hypermesh and run the simulation and save it in a new folder. lets see the out file results.\
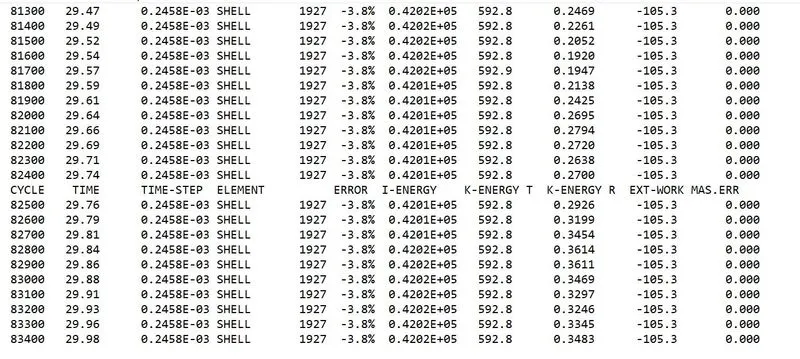
The output of the simulation doesnt make any changes, the energy error and the mass error are 3.8% and 0.000 respectively.
and then import the h3d file and see the deformation of the shell elements.
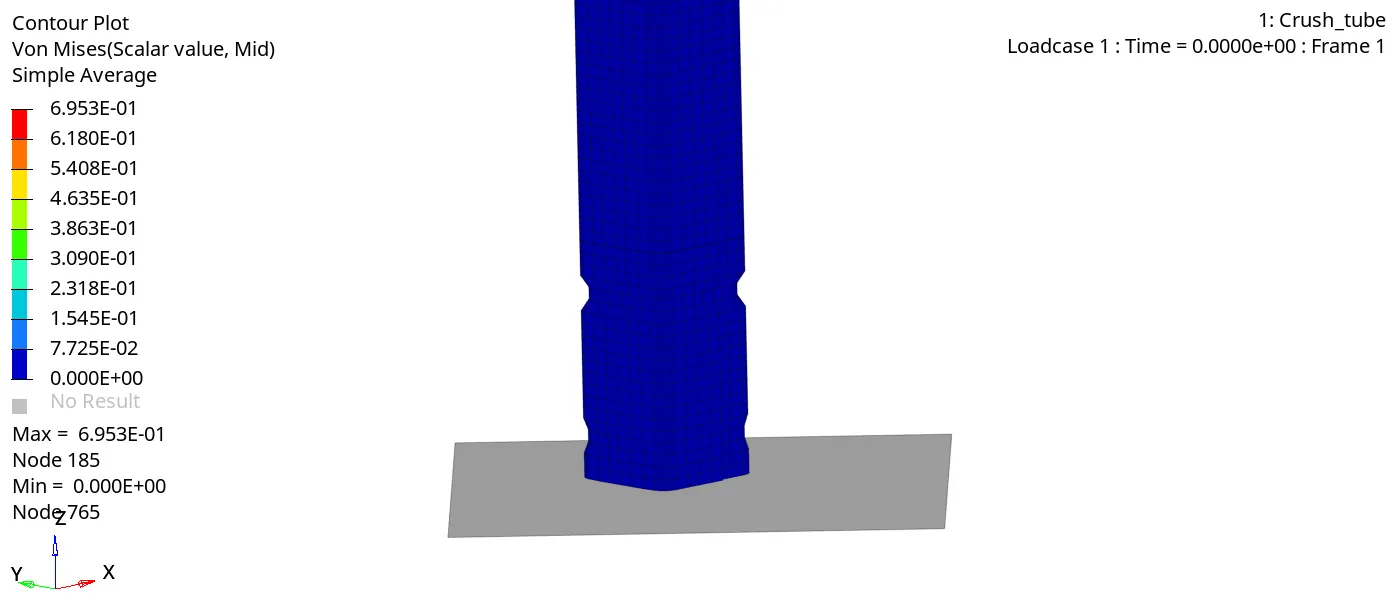
In this animation there is difference between the pervious case in the element deformation, and then lets see we can find any changes in plotting the graph.
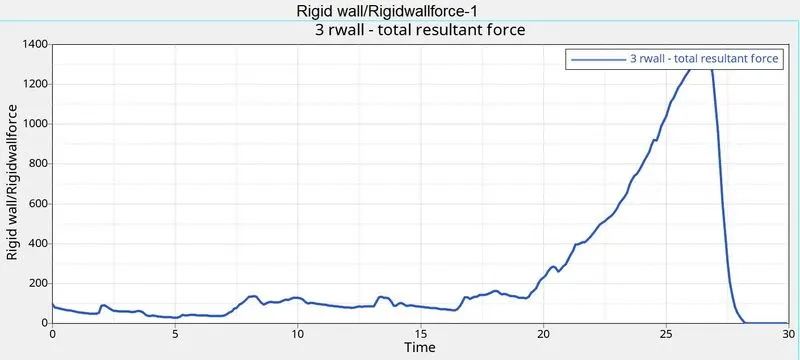
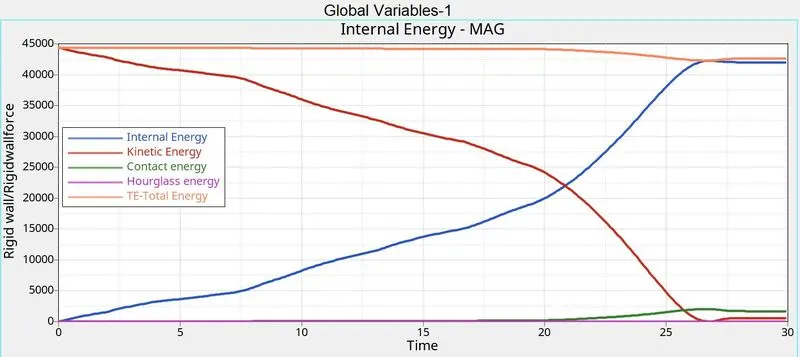
Hence there is no change in the graph and results in the total energy and contact energy is same as the last case. There is no inital penetration in the simulation so inacti is not needed and gives the same results.
CASE 3
Create the type 11 contact and run
We need to create a type 11 contact and run the simulation. To create import the .rad starter file of case 2 and in the solver deck create a inter as type 11 and change the values that recommended in the video.
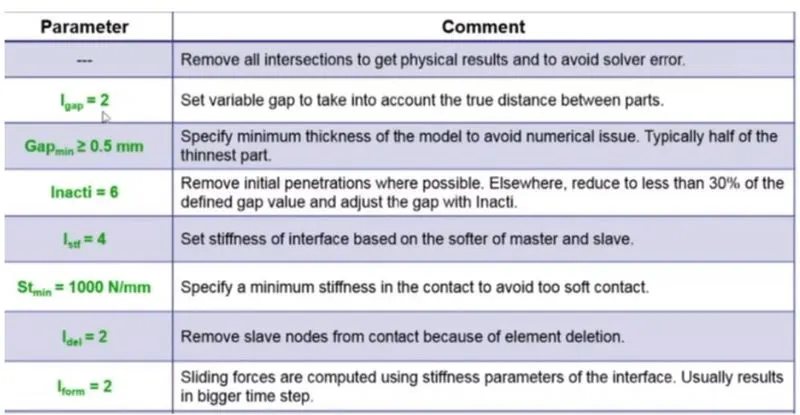
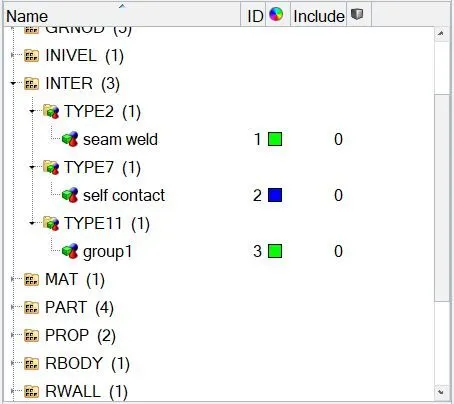
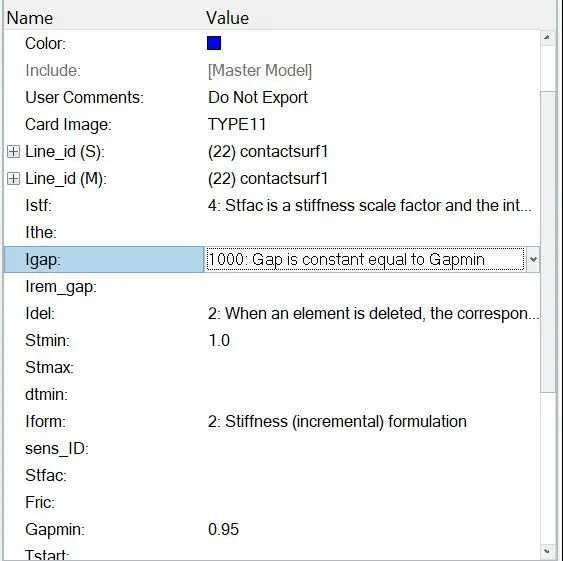
after creating the type11 contact run the simulation and save it in a seperate folder.
Now open the 0001.out file and check the results.
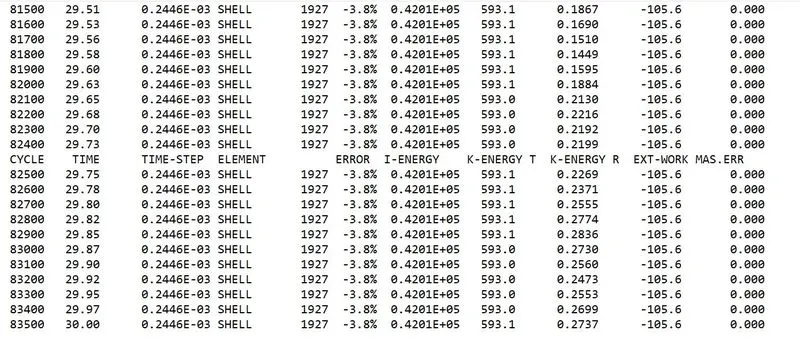
energy error is -3.8% and mass error is 0
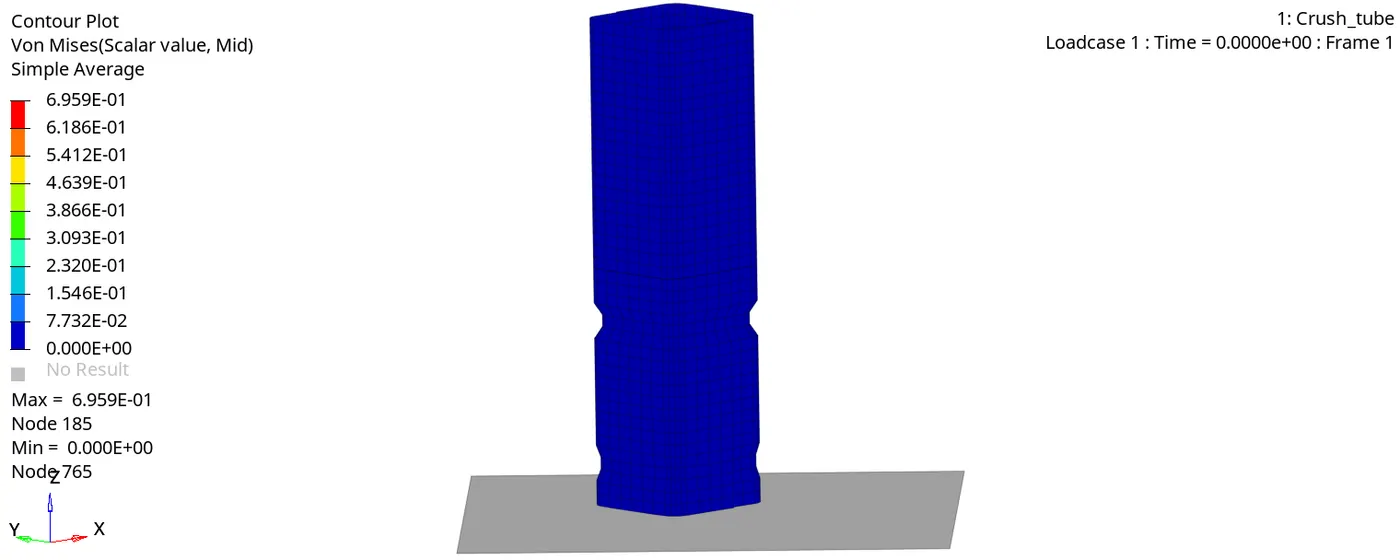
Plot the graphs in hypergraph
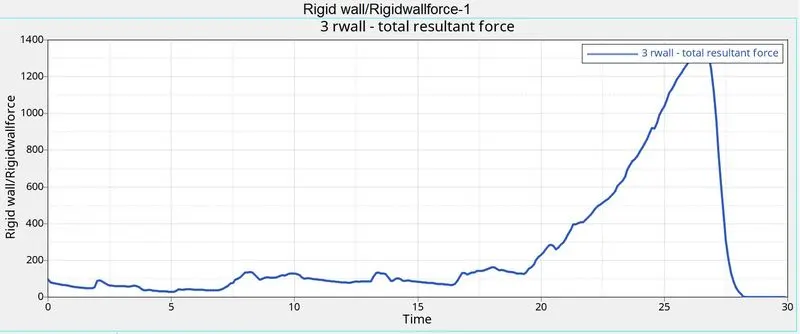
there is no difference in the rigid deformantion when comparing to the previous cases.
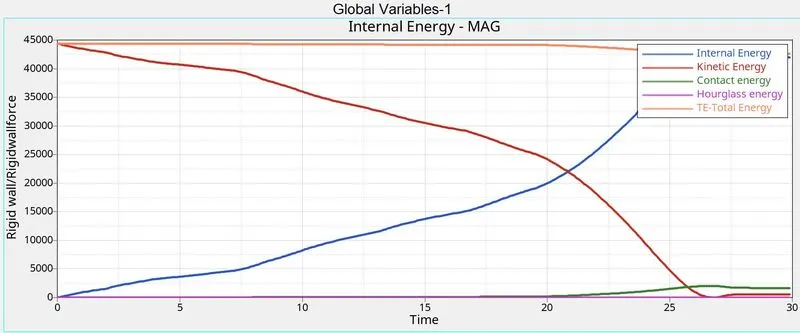
here the internal energy is stopped after the contact to the rigid wall. Internal energy is not increasing after 25 because of the tube is completely crushed and there is no energy transformation.
Hourglass energy is zero because of the qhep element formulation.
CASE 4
Remove both notches and remove boundary condition on rigid body node then run.
In this case we will remove both of the notch and delete the boundary conditions and run the model for simulation.
For deleting the boundary conditions delete the bcs in the tree section.
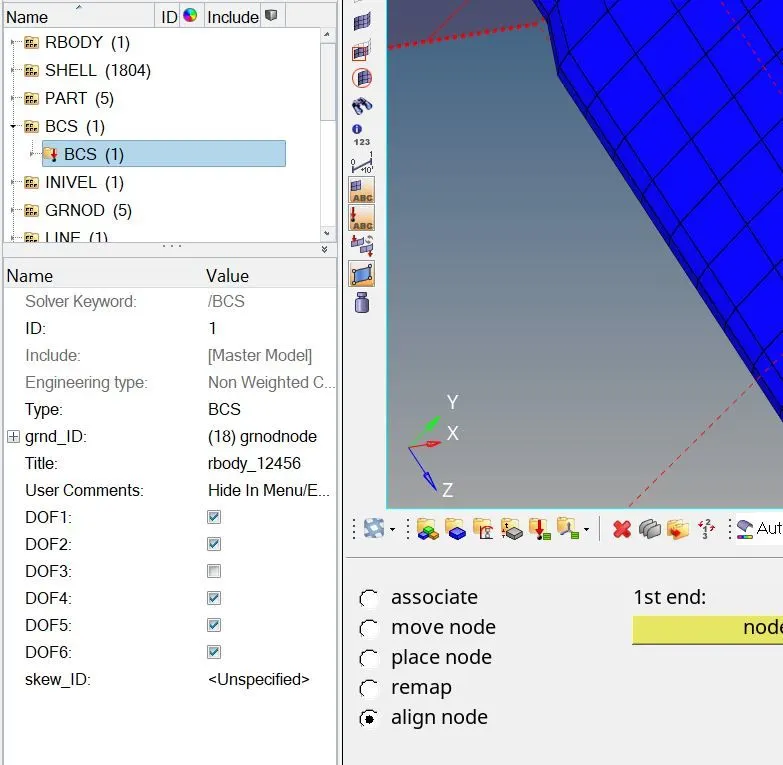
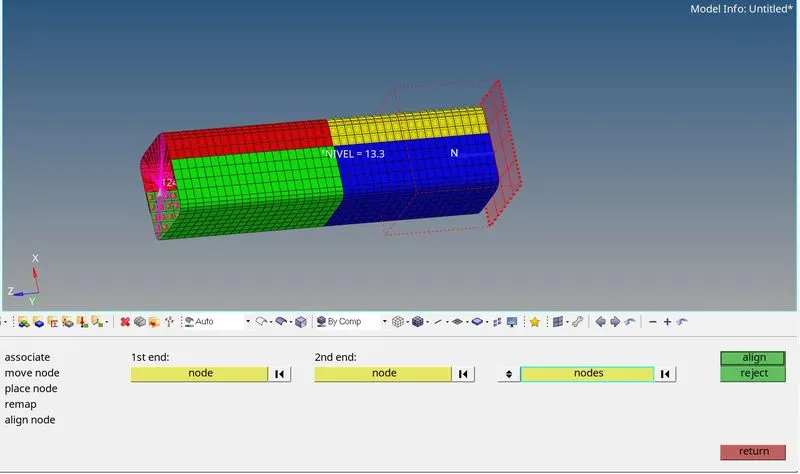
after that remove the notches with the align tool in hypermesh. Align node will use 2 ref node and slave node to align nodes in the same vector.
after aligning all the nodes will run the simulation.
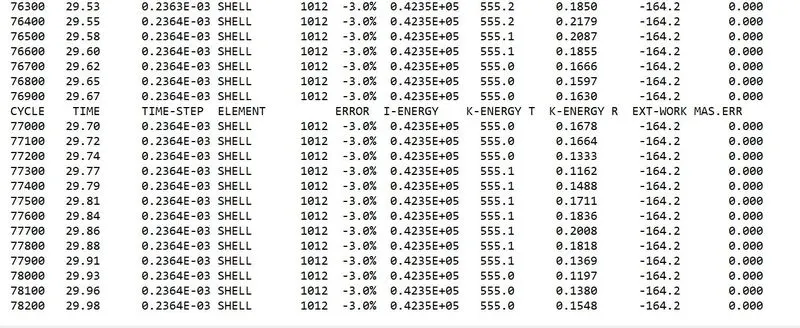
the energy error is -3.0% and mass error is 0.000. Now switch to hyperview and import the simulation and open the hypergraph and plot the rigid forces and plot the remaining energies.
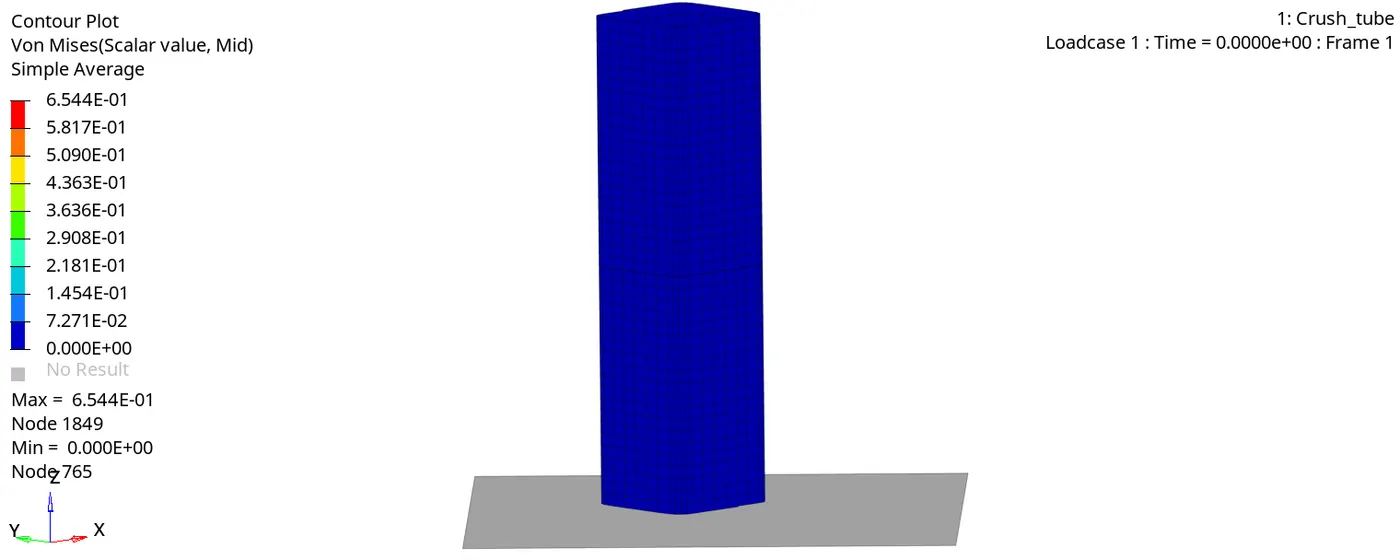
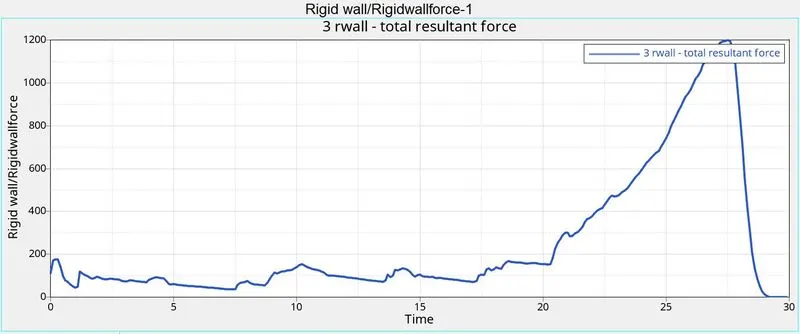
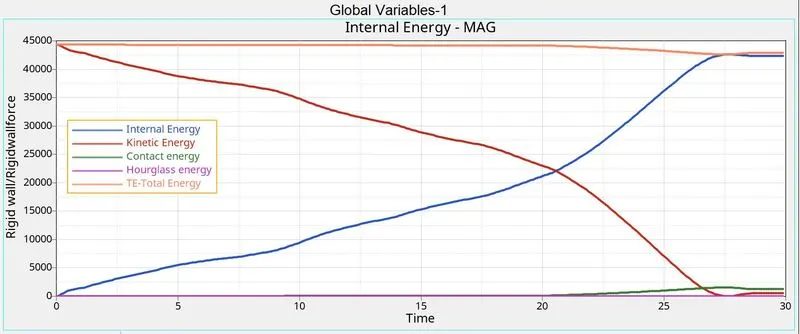
Internal energy is changing in some point because of the buckling happens at the last stage internal energy is constant.
hourglass is also controlled due to the recommended properties.
There is a slight change in the contact and total energy because of the absence of notch and contact between the rigid wall.
CASE 5
Create a new notch in the middle ,select the whole section and run.
In this case we need to create a notch in the middle and run the simulation. So that i created a notch using the translate option and distance option.
The notch created in the middle is shown here.
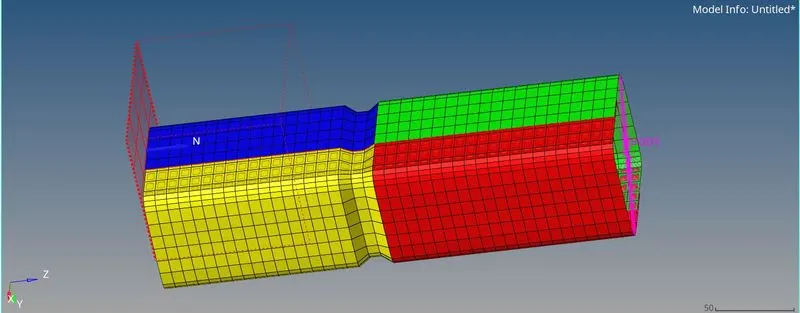
Now run the simulation and open the out file for the results.
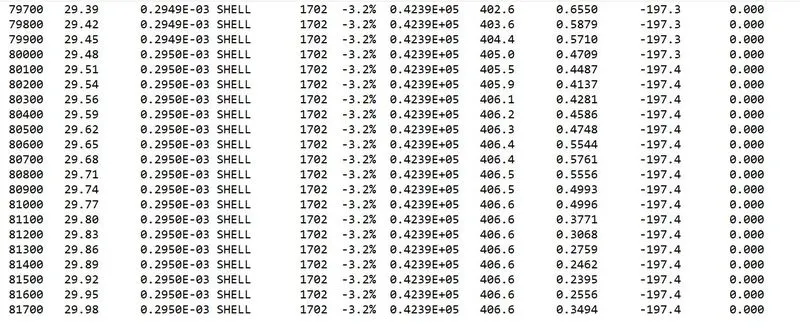
After that run the simulation in hyper view by importing the h3d file and open hyperview to plot the graphs.
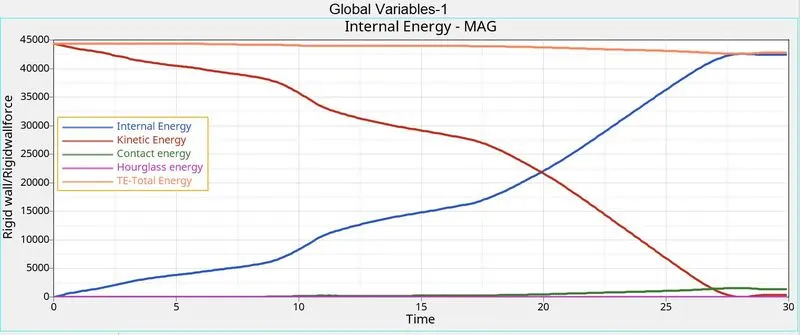
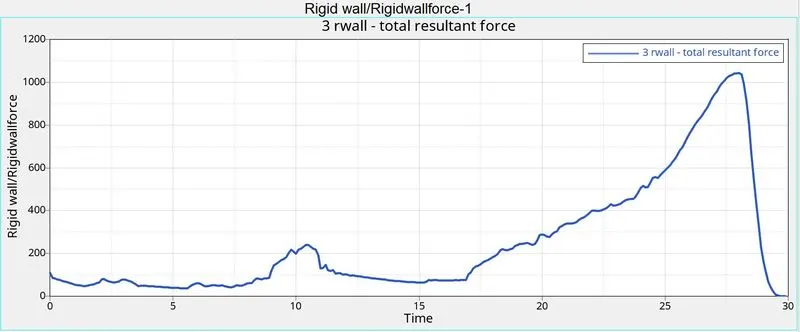
We can see the bottom of the notch completely crashed for the half of the simulation. After that upper part made deformation. so because of the notch present the deformation of the whole part is reduced.
Internal energy and kinetic energy is increasing and decreasing throughout the simulation respectively. The Houglass is totally 0 because of the properties.
CASE 6
Create a new notch with nodes only from opposing 2 faces and run.
In this case we need to create a notch in the two opposite faces only. Like the last case using the translate option use the node to translate on the x or y directions.
After creating the notch run the simulation & save it in a folder.
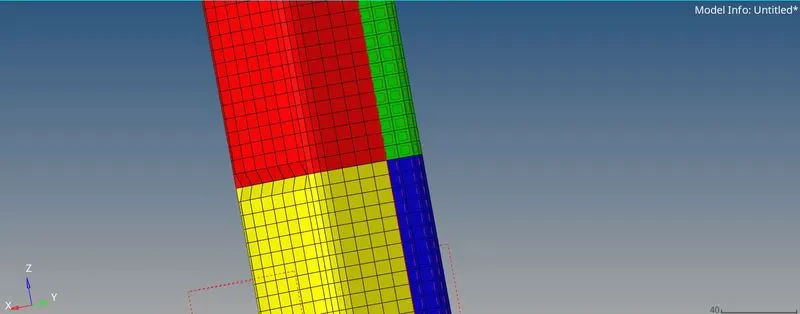
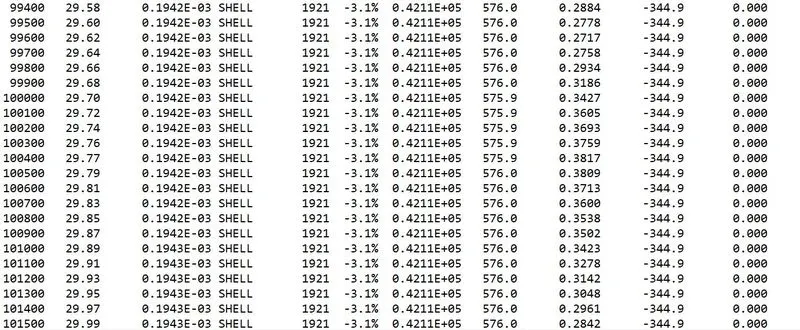
Now the energy error obtained in the results can be checked. -3.1 energy error and mass error is 0.000.
Run the simulation in hyperview by importing the h3d file.
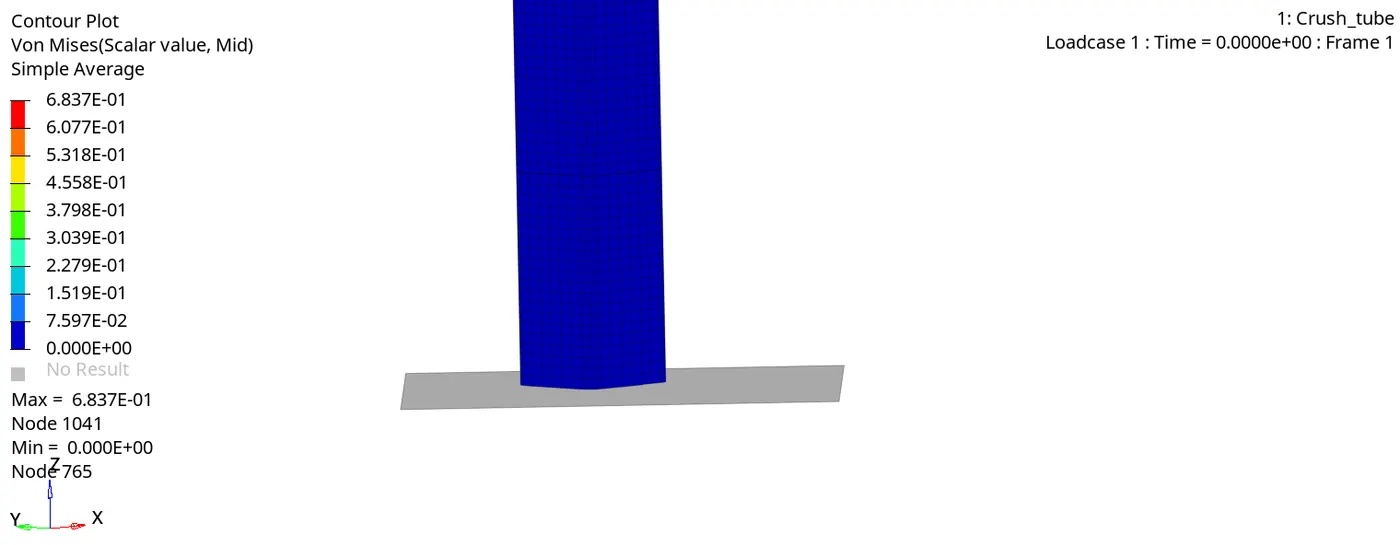
we can see the lower side deformed 1st and then after some point only the top region starts crushing. Beacasue of the notch in the opposite faces, defromation of the lower part make some changes in the visibility.
PLot the rigid wall forces and internal energy, contact and hourglass energy.
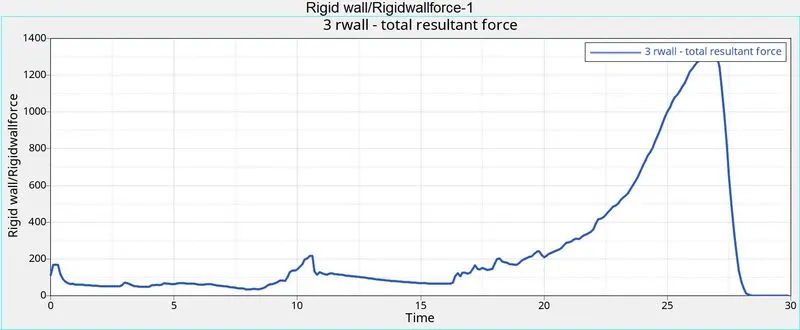
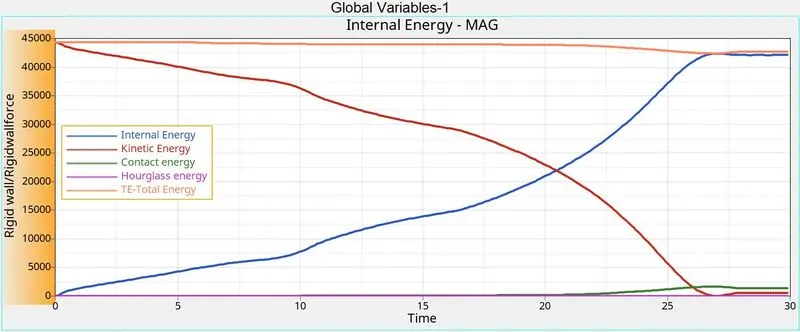
Here internal energy is increasing like the old cases and kinetic energy also decreasing and it finally zero when it becomes completely crushed.
Contact energy and total energy make some changes at last becasue the forces created between the tube and the wall. Hourglass is completly 0 because of the recommended properties.
CONCLUSION
From all the cases inacti is required for the as it removed any initial penetration exsist in the model and it helps to attain accurate results and alos reduces the no of cycles taken to solve. Notches are very important in the model which is absorb some energy in the crash.