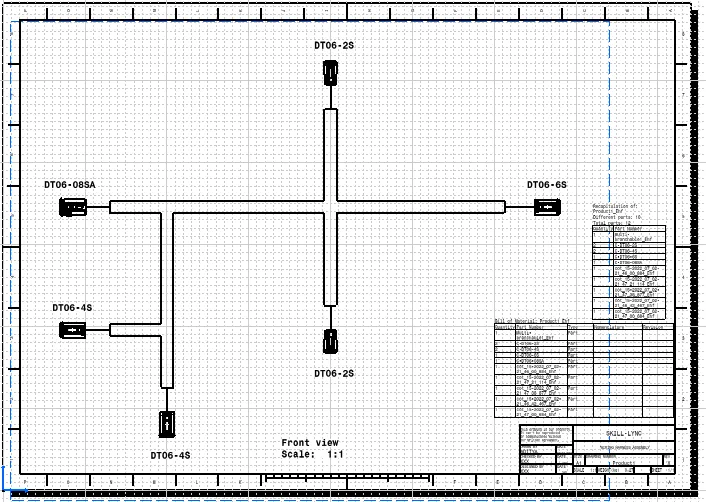
Wiring harness design in CATIA V5 - 3D modeling Week 7 Challenge
A report on week 7 challenge
1) Electrical definations & bundle flattening
- It is necessary to define all the connectors electrically. for that all the connectors should be define as a connector and also their connector connection & bundle connection points must be defined in electrical part design workbench.
- Then bringing all them in 'electrical harness assembly' workbench after preparing their orientation in 'assembly design' to rout the wires in order to connect them by bundle segements to create the harness assembly.
- Further this assembly needs to be check for the proper connections by using search option in edit tool.
- In search option the harness gets inspected for the conectivity between connectors & wires. If all the connections are fully connected, then should be saved all in the same folder & then it could be proceed for the flattening.
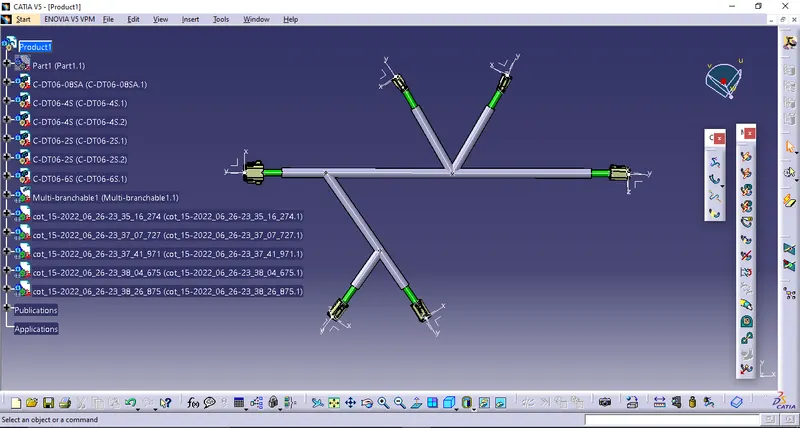
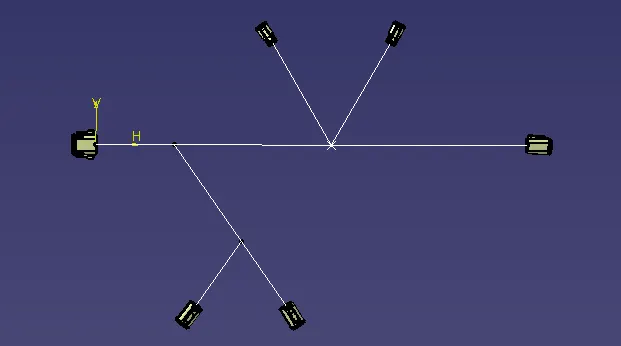
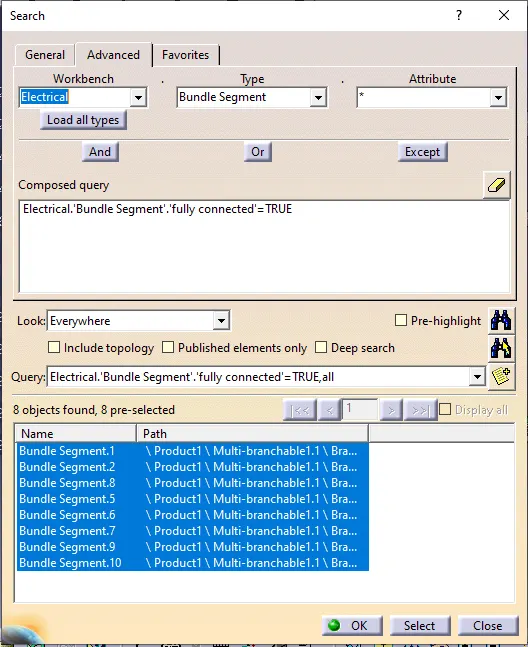
- now open the 'electrical harness flattening' workbench
- start>equipment & systems>electrical harness discipline>electrical harness flattening
- now the flattening parameters needs to be set. for that click on harness flattening parameters>a window will appear>make some changes as shown in pictures.
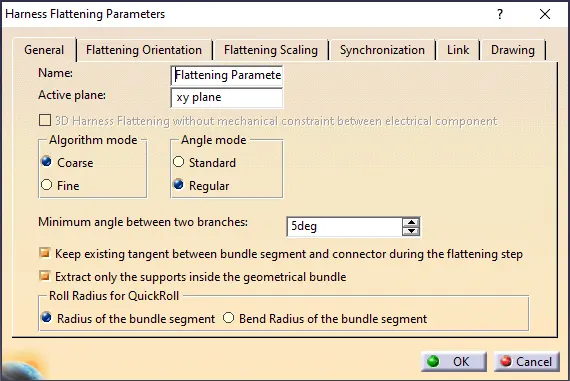
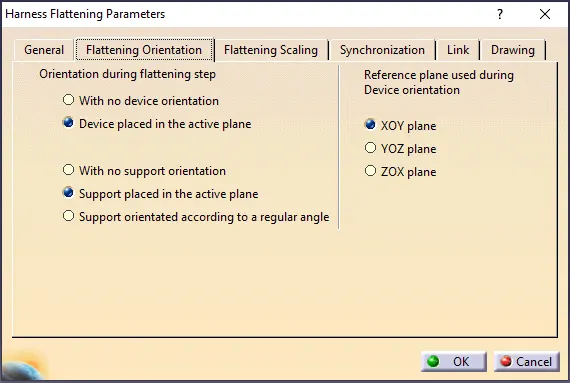
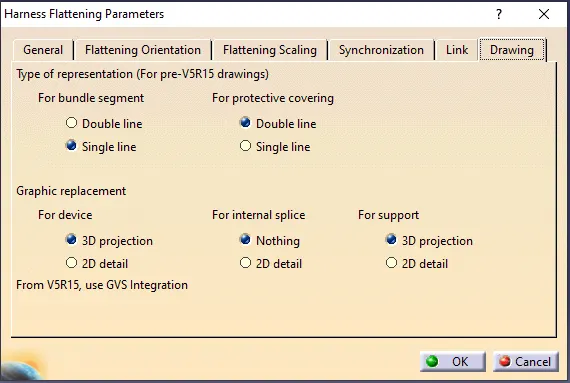
- after doing this click on ok>the remaining options on the toolbar will get activated.
- now go to window>select 'tile vertically'>the both window will be visible partly on either sides.
- click on extract option on the right side toolbar>click on parent(product) of existing assembly on feature tree>the assembly will be extracted in the falttening workbench.
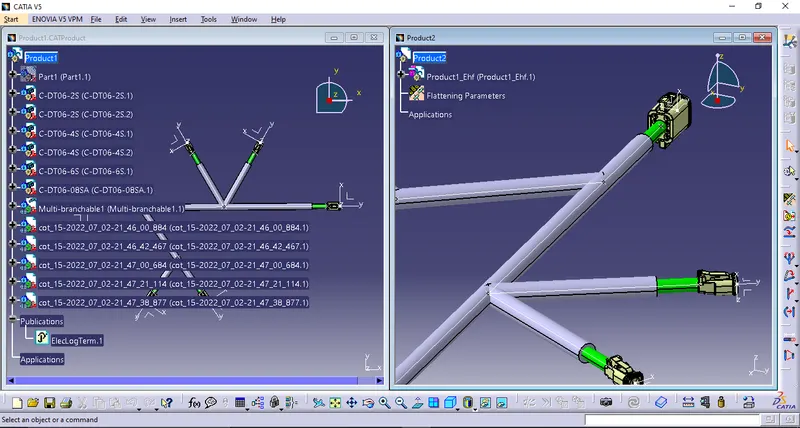
- now maximise the flattening workbench window and get the proper orientation.
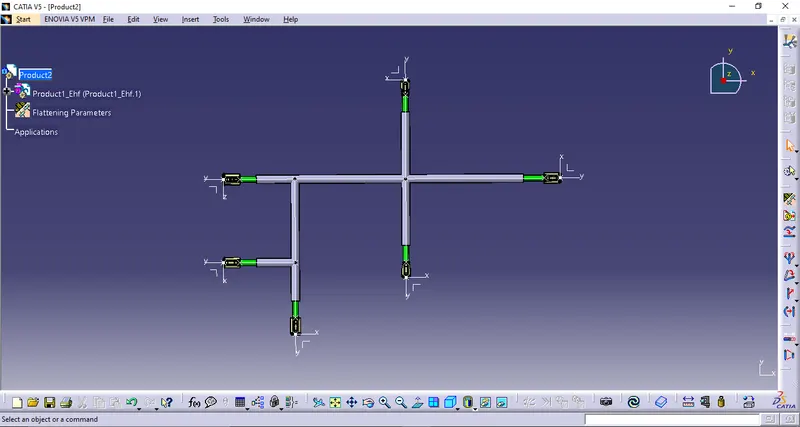
- click on flatten option>a window will pop up>select any plane or surface of any connector in the assemble which is front facing>then select any wire>click on 'select all branches' in the flatten window>ok.the harness will get flatten.
2) Drawing creation
- file>new>drawing>ok>a window will pop up>select 'ISO'>select sheet style>landscape>ok.the drafting workbench will open.
- now click on front view option>switch to the flattening workbench>click on the face of any connector which is front facing>the flattened harness will be replicate on the drawing sheet>click anywhere out of the sheet>it will convert as a 2d drawing.
- now place the drawing properly on the sheet by draging the orange dotted square.
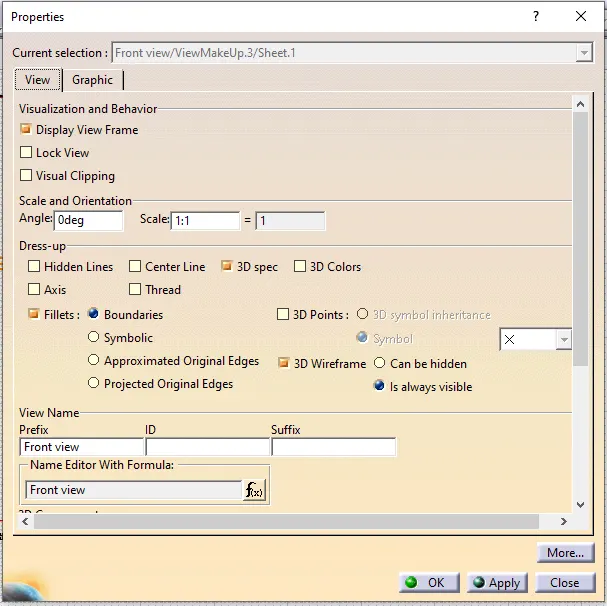
- now it might be necessary to change few sketch properties in order to get all necessary information of the sketch
- for that right click on dotted orange square>properties>a window will appear>and make sure that following options must be enabled.also the drawing scale could be change from here.
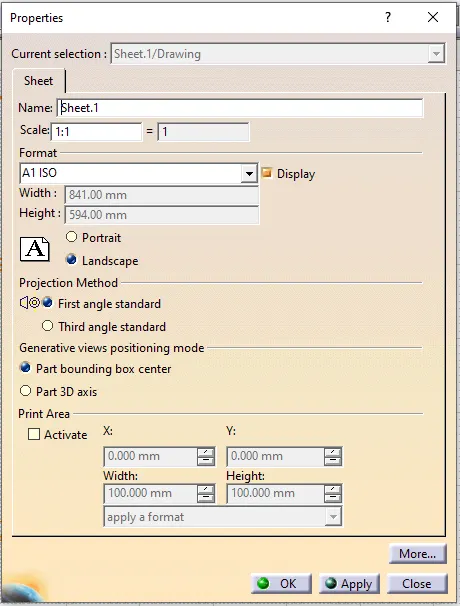
- to make any changes in the sheet properties like sheet size and view, right click on the sheet on the tree manager>properties>a window will appear, from that the changes could be made.
- to add any text annotations on specific locations, go to insert>annotation>text>text>click on the sheet where the annotation needs to be given>a text box will be there>type the text in text editor>ok.
- to add template on the sheet go to edit>sheet background>the background will be gray in colour.
- click on 'frame and title block'>select any sample titleblock from the dropdown>apply>ok.
- after that the sheet background could be turn back in to working views through edit tool.
- to insert the bill of materials chart go to insert>generation>bill of material>bill of material>click on the sheet>the bill charts will be appear>drag them to the desire position.