Hood design-Week 2
AIM:--
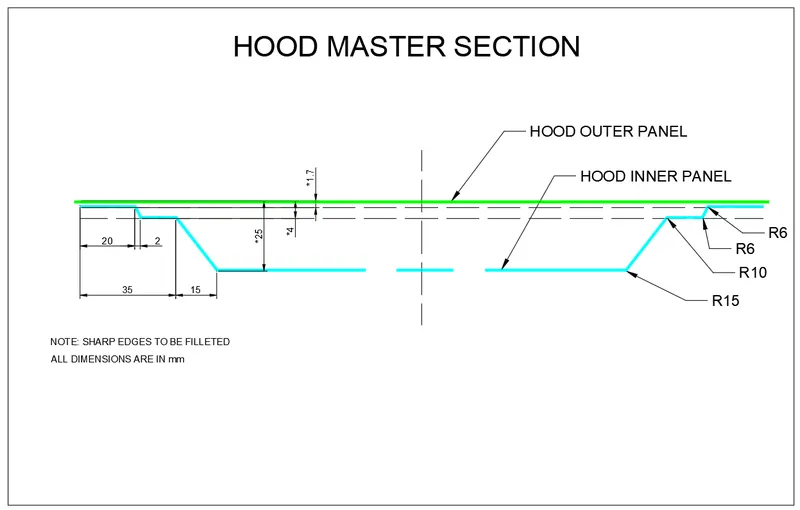
Design Hood Outer Panel, Inner Panel and the necessary reinforcements by following the Master Section mentioned with the Design parameters
Submit an ASSEMBLY of Hood Inner Panel, Outer Panel, Latch, Hinge and the Reinforcements.
A detailed report about the Hood Design which includes a detailed explanation about hood and its components, Latch Trajectory, Mastic Data, Emboss Definitions, Manufacturing process like Deep-Drawing and Hemming, and all the parameters followed in the design.
Master Section:--
ANSWER:--
Hood Outer Pannel
Hood Inner Pannel
Hinges/ Gas stay(Hydraulics)
Striker
Support Rod
Stiffness Pad
Before We Go To Desing The Hood, We have To Look After The "PEDESTRIAN SAFETY" Given By The "EuroNcap"
Safety is the most important criteria in automobile designs which concentrates on both pedestrian and Passengers safety.Pedestrians are particularly at risk in traffic. In most accidents, the pedestrian collides with the front of the vehicle. Legal requirements and consumer protection tests for pedestrian protection have become significantly stricter in recent years, So Now we have to follow the EuroNcap's Rules
EURO-NCAP :--
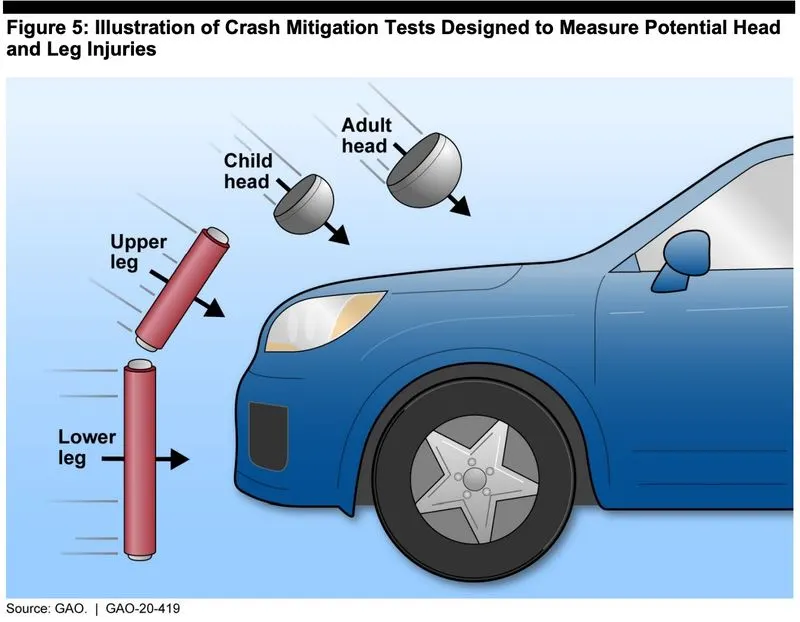
The pedestrian safety system needs to meet several test criteria. (Euro-NCAP, 2011) The tests are designed to evaluate impact to the pedestrian’s different body parts. As seen in Figure , adults as well as children have to be taken into consideration. European Union has set a demand that by 2015, all pedestrian involved in an accident with a car moving 40kph or less must survive.
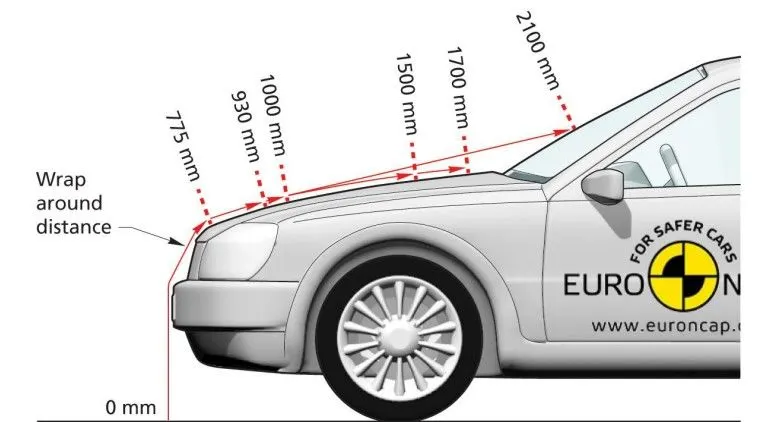
Marking Wrap Around Distances
The headform test area is defined as the outer structure that includes the upper surface of all outer
structures. It includes, but is not limited to, the bonnet, wings, windscreen scuttle, wiper
arms/spindles, windscreen frame, A-pillars and roof. It is bounded by the geometric trace of the
1000mm wrap around line in the front, the Bonnet Side Reference Lines and the 2100mm wrap
around distance (WAD)
The Pedistrian Head Impact Zone's Are
Child Head Impact Zone
1000mm to 1500mm Wrap around distance.
Adult Head Impact Zone
1500mm to 2100mm Wrap around distance.
Understanding the requirements and prepare the master section
prepare the concept/approch to make the final desing
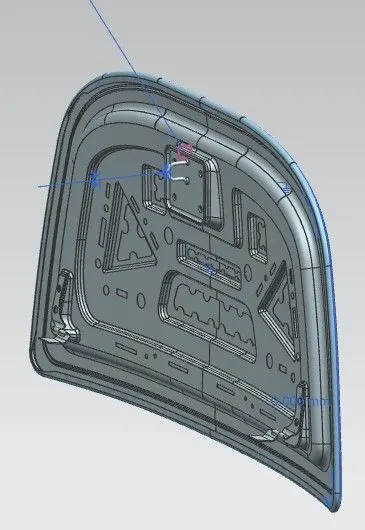
A detailed report about the Hood Design:--
First step is to Understand the master section
Then we have to look to the flanges
Then We have to make the inner pannel by looking the master section
Then We have to create the Emboss
Then we have to give some space for mastic points
Then we have to create the hinge Emboss, where the hinges are fixed
Then after that we have to create the Emboss for the striker
Then we have to we have create hemming form the outer pannel
Then atlast we have to THICKEN the Metal with 0.75mm
THE EXPLANATION OF PARTS AND PARAMETERS USED IN THE HOOD PANEL:--
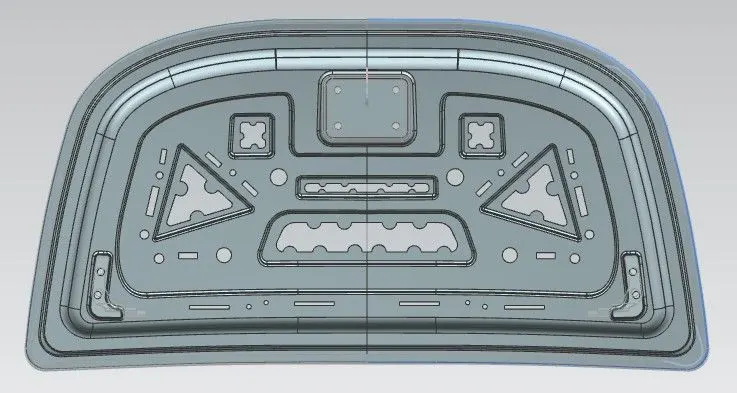
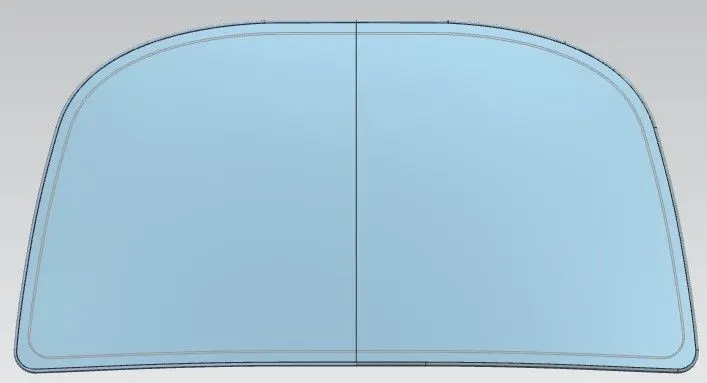
- Hood:--The hood is also known as "BONNET",The hood is an opening body pannel that covers the engine bay in a front engine vehicle,The hood is also considered as another type of door in a vehicle consists of an outer pannel and inner pannel where the inner pannel provides strength and while the outer pannel provides the function such as the metal cover
- Latch/Striker:--Latch is a striker, which is placed over the hood & get attached to the hole provided in engine compartment. thus it is used for locking purpose of hood with engine compartment.
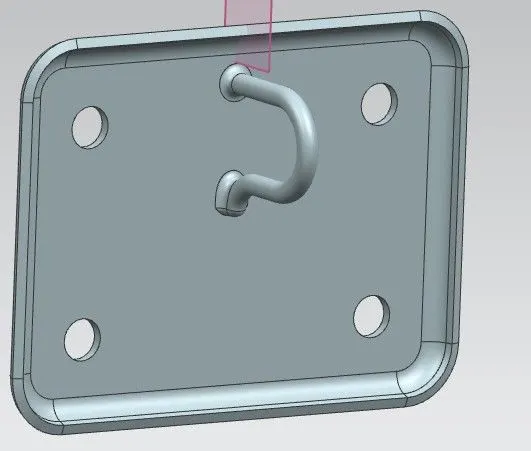
Fig: LATCH/STRIKER
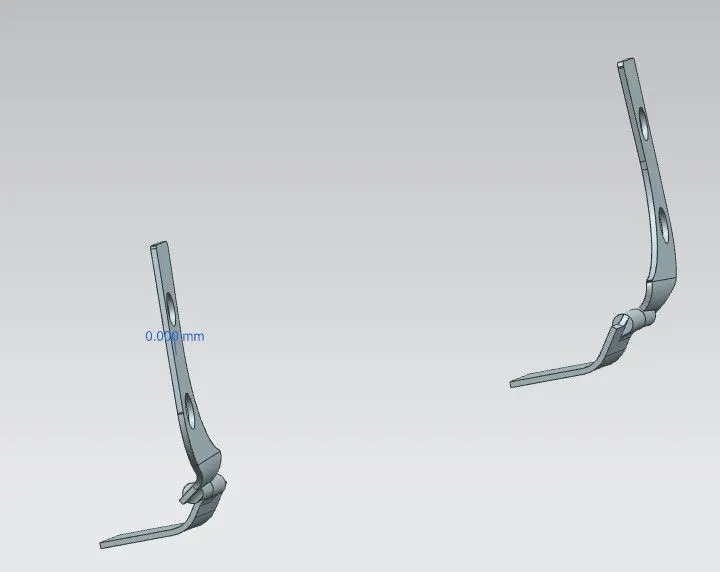
- Hinges:--Hinges is the assembly of components connected to the door and body of the vehicle, linked to each other and capable of rotating around the same axis. Conventional system consists of two hinges for each door, an upper hinge and a lower hinge. A hood hinge mechanism having a pivot pin having a D-shaped cross sectional shape positioned within a recess. The hood and pin are pivotal to a position whereat the D-shaped cross section is oriented to pass through a slotted opening to the recess to thereby allow the hood to be removed or installed on the vehicle. One side of the hinge is connected to the hood inner pannel and the other side of the hinge is connected to the engine part
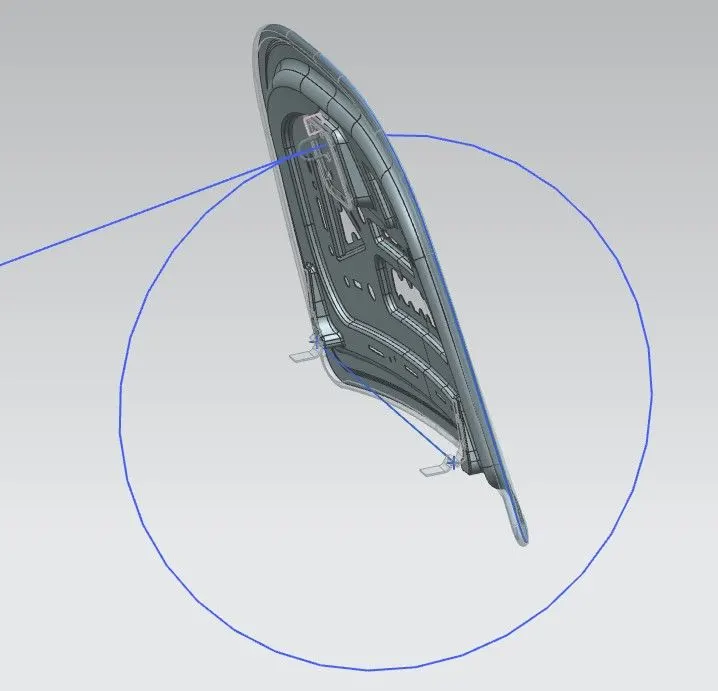
- Latch Trajectory:--While assembling the latch with the hood panel it is strictly recommended that the position of latch striker should be placed such that the latch striker exactly fit into the lock hole in the engine compartment. Keeping this in mind, the latch striker is placed on the inner hood panel using latch trajectory path. This path is created using the the hinge axis taken as reference to draw a big trajectory path.And From that center Axis the latch will be perpendicular
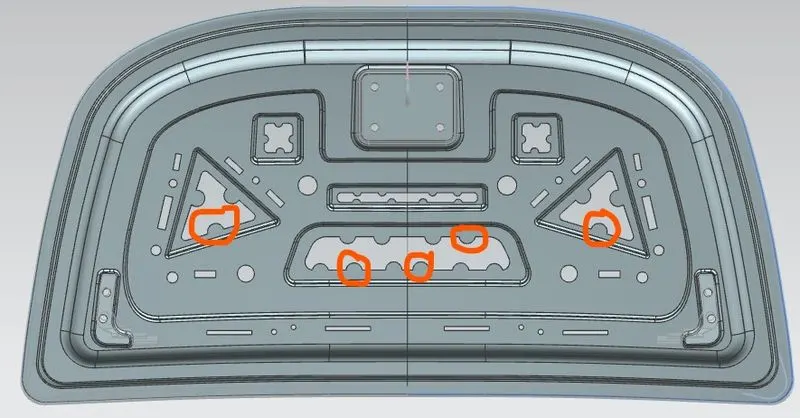
- Mastic Data:-- As we know that the main purpose of the outer panel is for the aesthetic looks. Thus we cannot use bolts or welding. This has to be done with the help of the hemming and mastic sealants. Mastic sealants are elastic compound that behaves like the rubber. It is placed between the outer and inner panel. Initially is it in paste form, but after the hot furnace bath it gets hardened and thus it joins the outer and inner panel. Mastic sealant has the tendency to increase the strength of the panel and has influence of 80mm diameter. The minimum gap between the inner hood panel & outer hood panel is 2 mm.In below figure its shown where this sealants will be placed
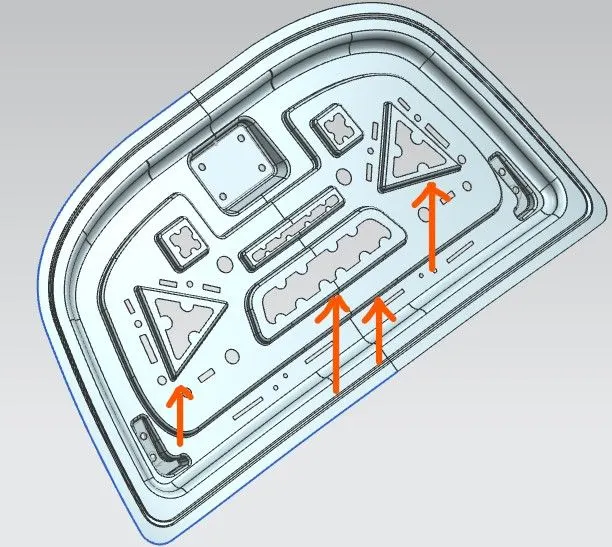
- Emboss :-- Embossed surface plays an important role in car hood panel while crashing or accident of car. Because during the collision, hood is most affected part which sustains all the impact forces while crashing. most of the impact forces are directly flows in the direction of collision & thus can harm the driver sitting under the car, thus to overcome this problem generally, V or Y shaped embosses are given in inner hood panel. so that, the impact forces coming in the direction of collision is diverted towards the corner point of the hood & driver couldn't be harmed.
- Deep Drawing:--Deep drawing is a sheet metal forming process in which a sheet metal blank is radially drawn into a forming die by the mechanical action of a punch. It is thus a shape transformation process with material retention. The process is considered "deep" drawing when the depth of the drawn part exceeds its diameter.
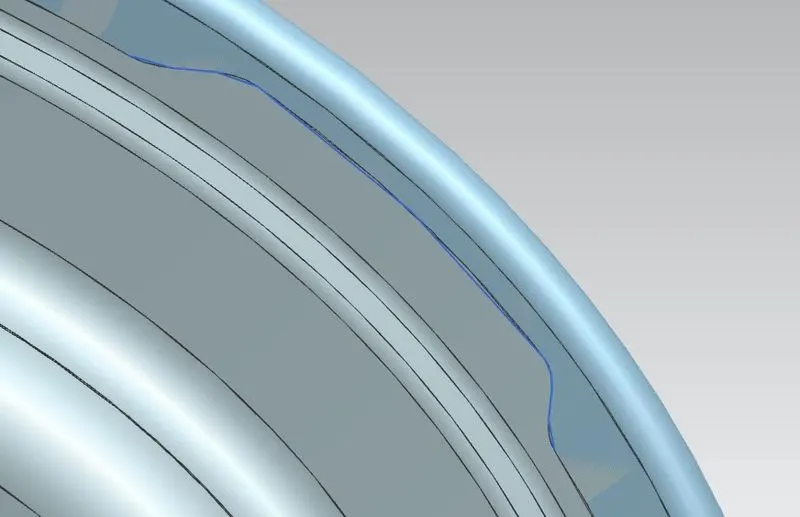
- HEMMING - Hemming processs is basically used to join the inner hood panel & outer hood panel together.With giving the proper edge relifes
Hemming Data:
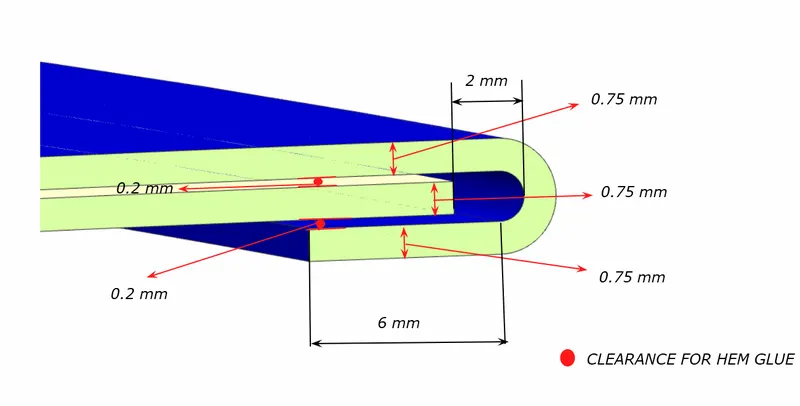
Relief rear section:
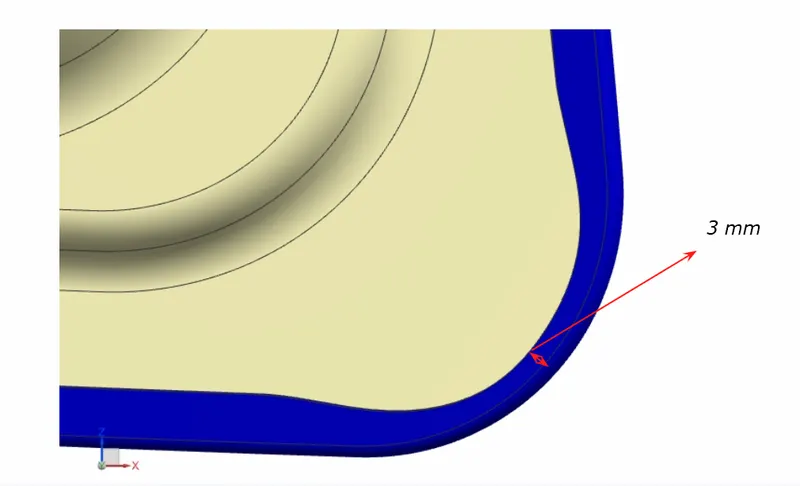
Front relief:
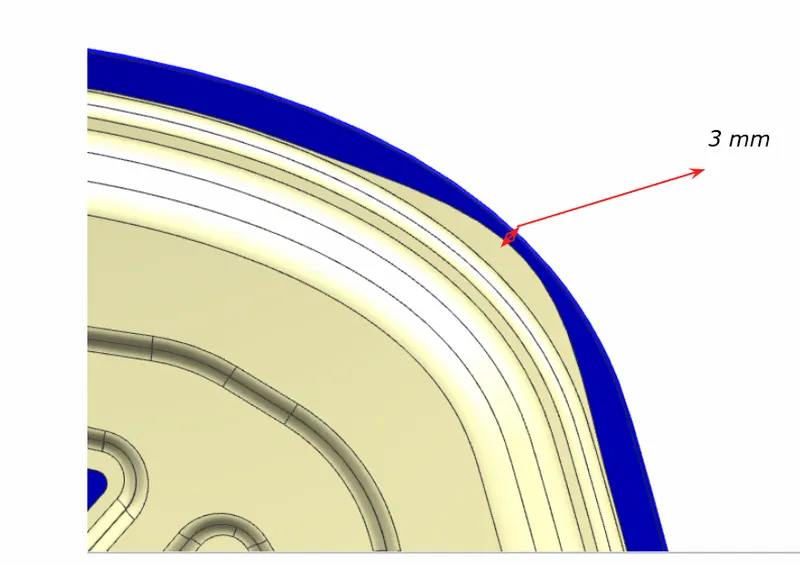
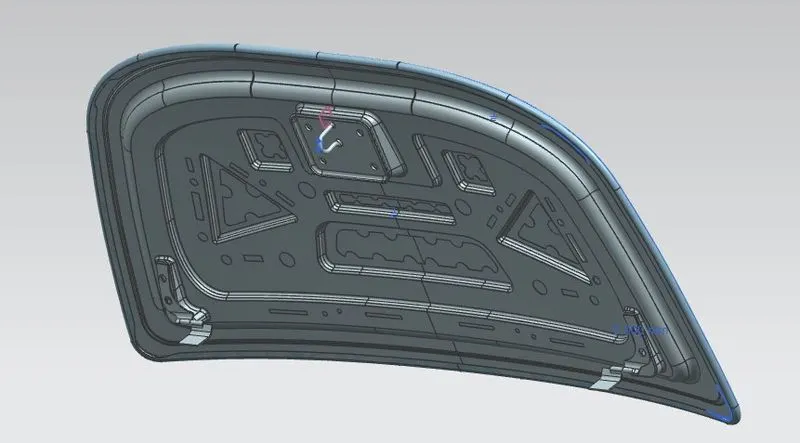
BELOW FIGURE SHOWS THE ASSEMBLY MODEL OF THE HOOD:
BELOW FIGURE SHOWS THE RELIEF REAR SECTION:
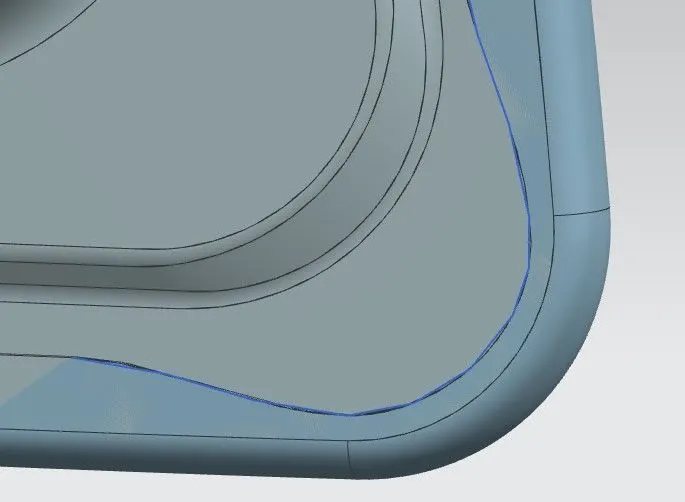
BELOW FIGURE SHOWS THE FRONT RELIEF SECTION
CONCLUSION:--
- In this Challange I have learnt to design the model & assembly of car hood panel & the basic commands on NX cad model software.
- I have also learnt about the pedestrian safety requirements used in car, so that driver is left with no harm during frontal collision.
- Along with this, I have also learnt about the manufacturing process used in the car hood panel i.e. hemming & deep drawing process.
- And at last got to know what are all the components that have been used in hood.