Hood design-Week 2
Hood design
Aim
The aim of the project is to understand the concepts of hood design and to design and develop the hood assembly of a car with reference to the master section provided and by following all the design parameters.
Hood / Bonnet
A car hood panel is one of the most important components of the BIW (body in white), it is considered as the closure sheet-metal component. A hood panel consists of two panels that are hemmed together to form the automotive hood assembly.
The hood or bonnet is the hinged metal part cover over the engine of motor vehicles. The term car hood is a North American term, used primarily in America and Canada. Hood comes from the Old English word hod which means a hood, a soft covering for the head. Interestingly, hood is used by British English-speakers to refer to the waterproof cloth top covering the passenger compartment of a car or pram.
Hoods can open to allow access to the engine compartment, or trunk on rear-engine and some mid-engine vehicles for maintenance and repair. Hoods are typically made out of the same material as the rest of the body work. This may include steel, aluminum, fiberglass, or carbon fiber. However, some aftermarket companies produce replacements for steel hoods in fiberglass or carbon fiber to make the vehicle lighter.
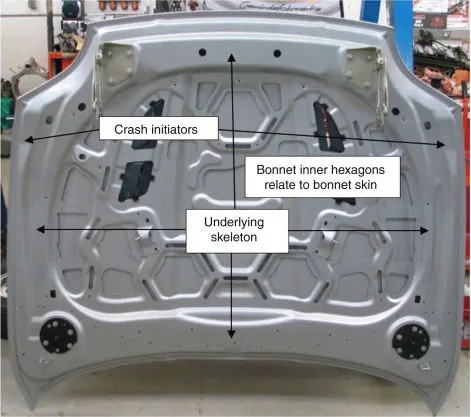
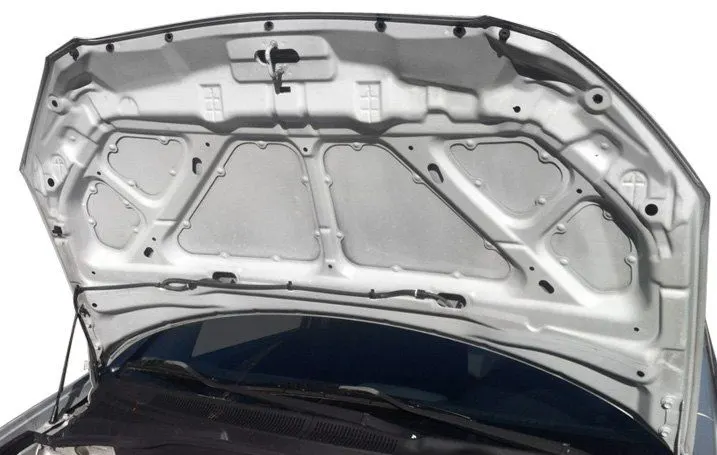
The hood release system is common on most vehicles and usually consists of an interior hood latch handle, hood release cable and hood latch assembly. The hood latch handle is usually located below the steering wheel, beside the driver's seat or set into the door frame. On race cars or cars with aftermarket hoods (that do not use the factory latch system) the hood may be held down by hood pins. Some aftermarket hoods that have a latch system are still equipped with hood pins to hold the hood buttoned down if the latch fails. Besides functioning as an engine compartment cover, the hood of modern compact SUV can also help to manage the impact energy of a pedestrian’s head in a vehicle-pedestrian impact.
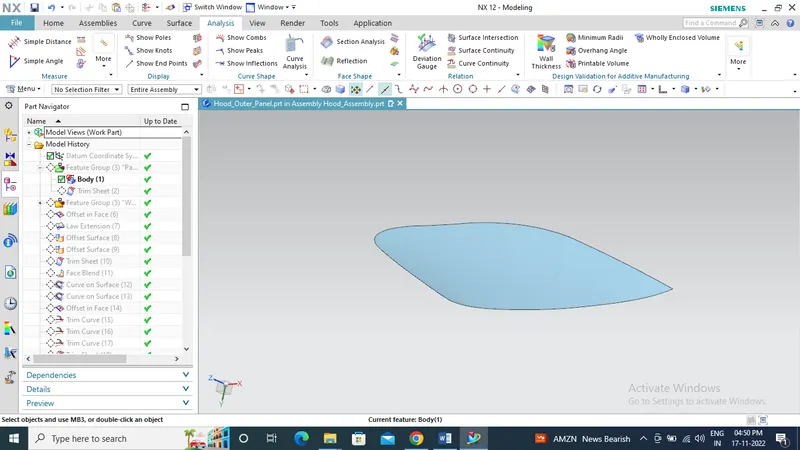
Input received- hood outer panel class A surface
Master section
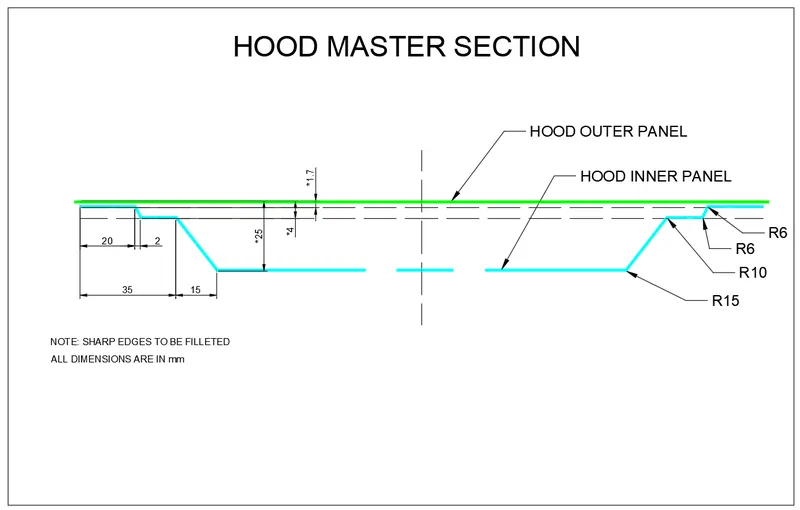
Main Components of a Hood
1) Hood outer panel
Hood outer panel is the aesthetic surface which is visible once the hood assembly is in closed condition. It is very weak and not capable of handling force during impact thus which is joined to the inner panel by hemming process to get the required strength for the hood assembly.
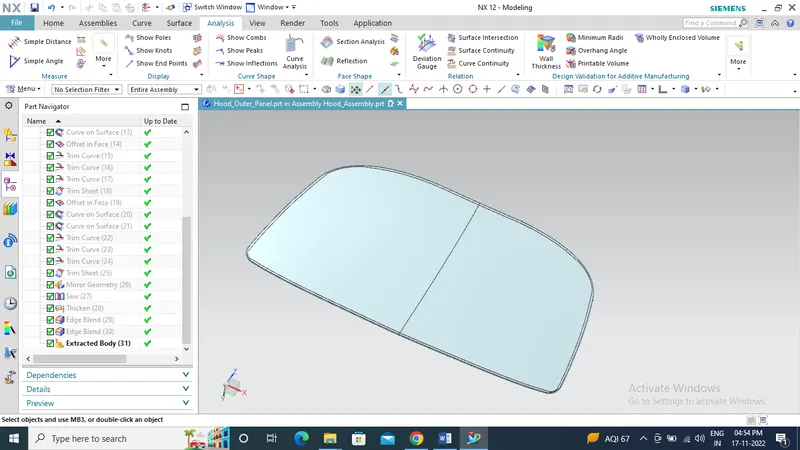
solid body of hood outer panel
2) Hood inner panel
The main components of a hood assembly are attached to the hood inner panel which include all the engineering features and strengthen the hood assembly. Hood Inner panel is provided to improve rigidity, durability, and pedestrian protecting performance by comprising a composite structure in which a multi-cone structure and a frame structure.
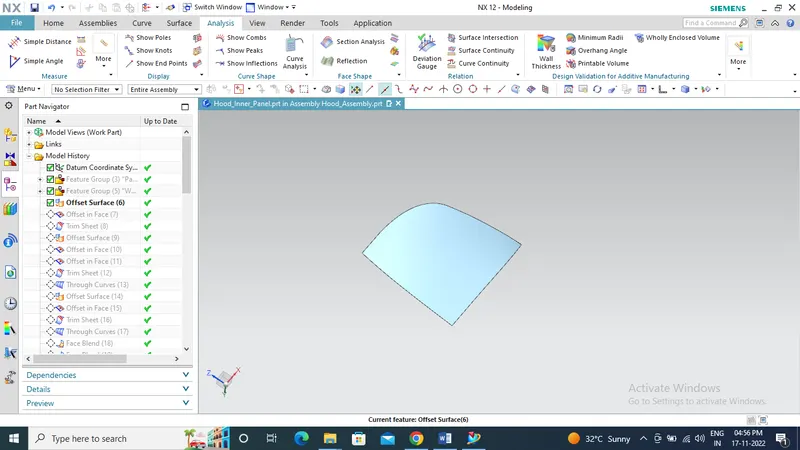
half side of hood inner panel for working
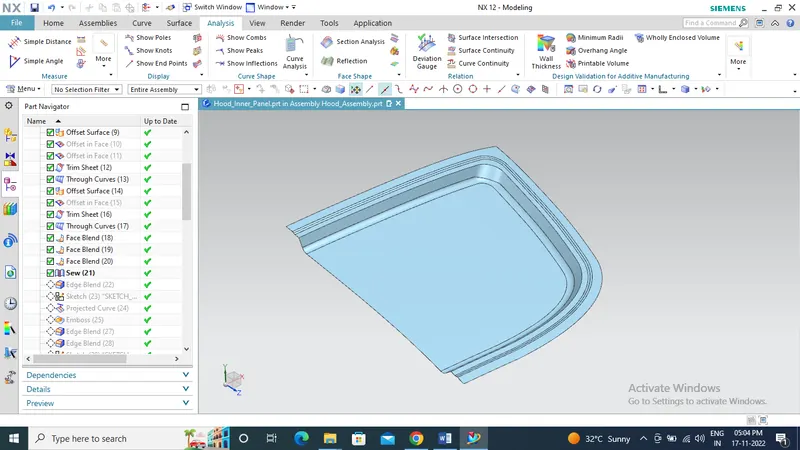
outer surface of required section as per master section
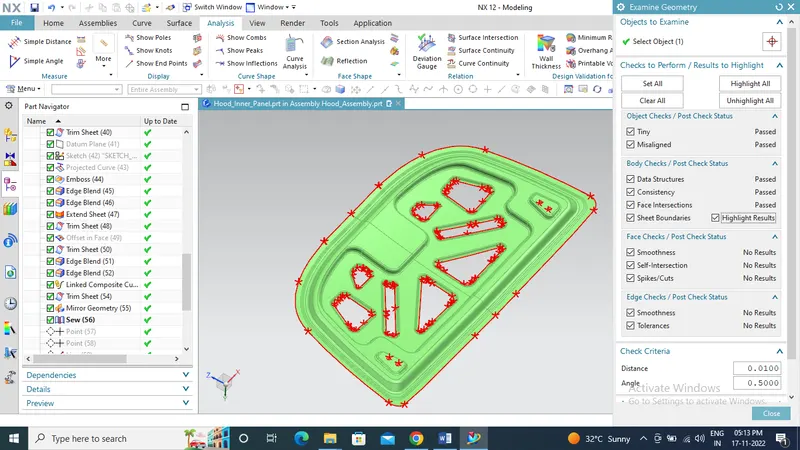
mirror surface with emboss
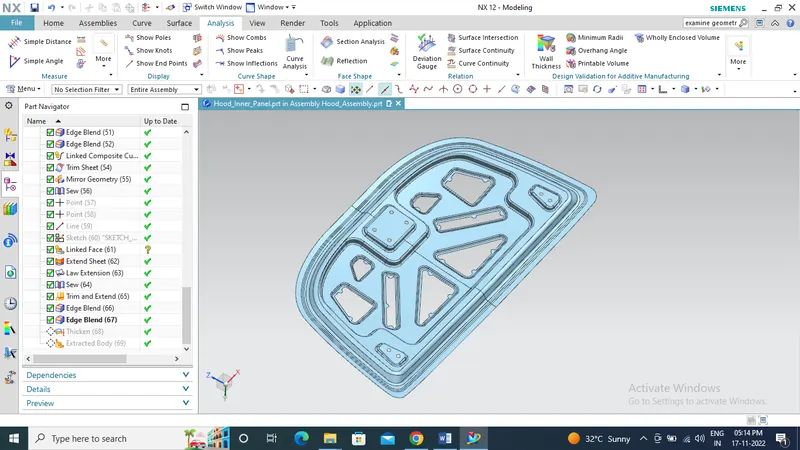
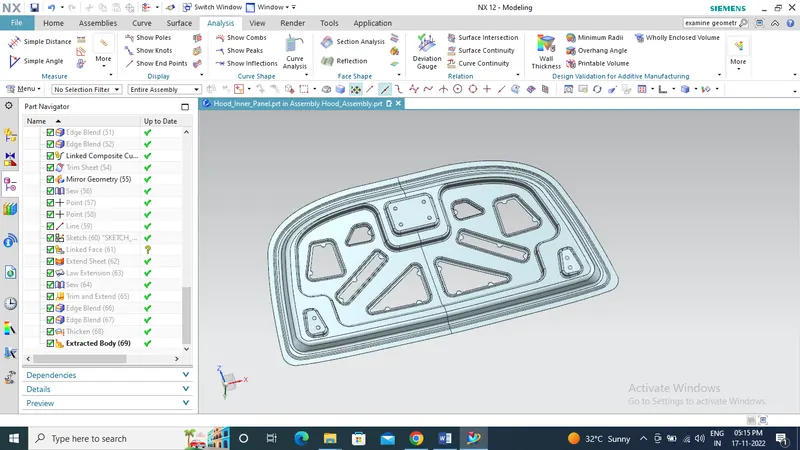
Final thickened surface of hood inner panel with all engineering features
3) Hinges
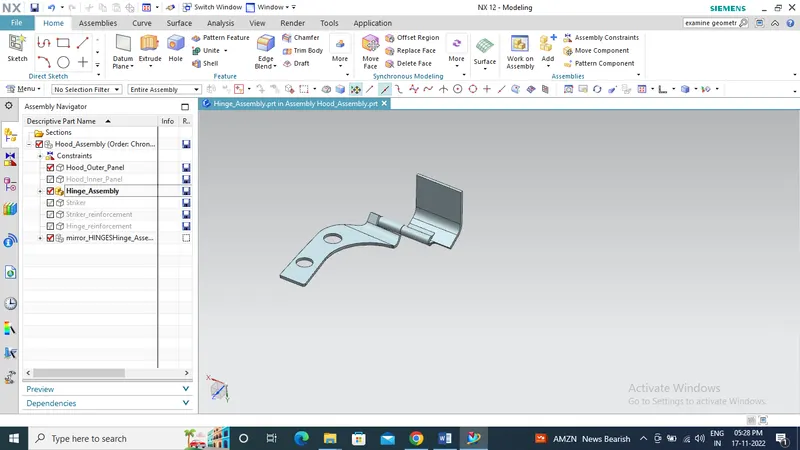
Hinges are used for swinging operations and also fixed the hood assembly to the main body of the vehicle. Hinge maintains trouble-free operation over time and should be able to withstand harsh use or even slamming of the hood occasionally.
4) Striker and Latches
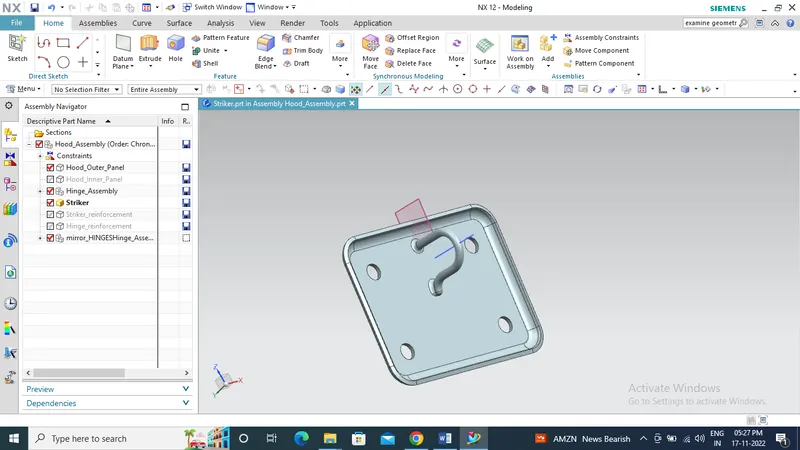
Striker and latches are for locking the hood assembly with the engine compartment. The striker will be positioned on the hood inner panel and latches will be there on the engine compartment. By using the lever inside the vehicle we can release the latches and thus unlock it from engine compartment.
5) Latch Trajectory
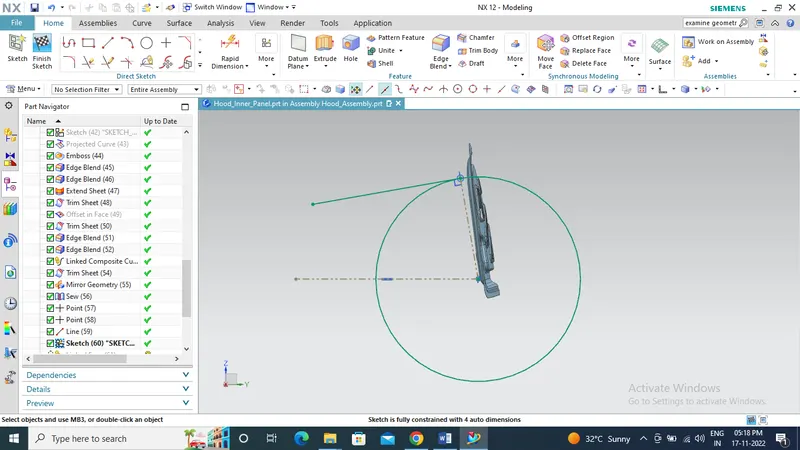
Latch trajectory is the position where the latch is in exact contact with the striker which is fixed to the inner panel of the hood. The position can be determined by drawing a circle by taking the center point as the hinges axis point which will concentric with each other. Then a tangent line was created with respect to the circle which starts from the inclined line is drawn through the circle which ends on the circumference of the circle at an angle between 80-90 degree. The striker is positioned by creating a line through the midpoint of the hook striker then which is aligned with respect to the tangent line of the circle.
6) Mastic data
Mastic adhesive was developed specifically to bond exterior automotive panels to the vehicle’s inner panel structure, such as on roofs, doors, and hoods. This one‐component synthetic rubber sealer remains elastic after curing to reduce panel flapping and to prevent panel distortion.
Thinner automobile panels help reduce vehicle weight, but are prone to flutter and excessive in‐cabin noise due to aerodynamic effects at highway speed. Mastic adhesive is suitable for a variety of metals and is an excellent choice for assemblies where aluminum and other alloys are used which fill gaps and channels within the auto body that are vulnerable to wind, thereby blocking the flow of air that can generate unpleasant noise at driving speeds.
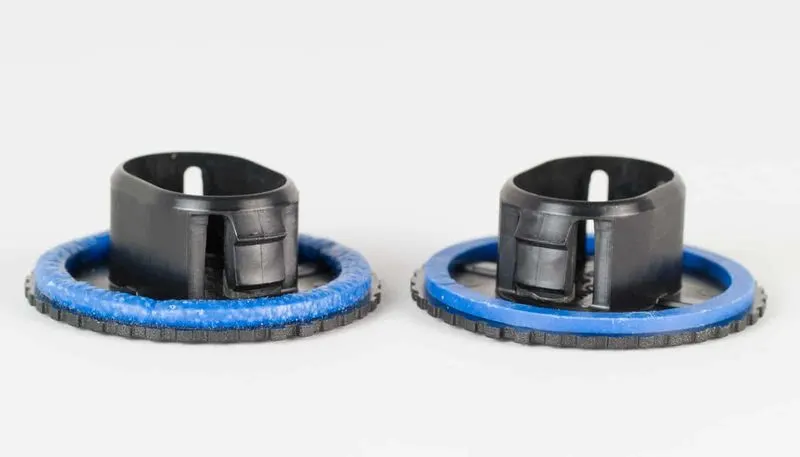
A standard mastic adhesive used for hood assembly should expand up to 5mm after applying heat and have a coverage of 80mm from the center thus the positioning of mastic can be determined and give provisions for them on the hood inner panel.
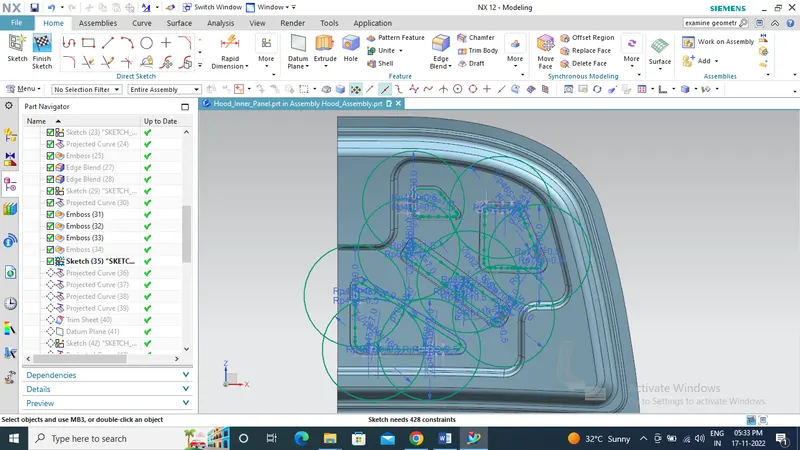
create the position of the mastic adhesive
7) Emboss
Emboss represents the union of several souls that give life to a singular product. Sheet metal embossing is a stamping process for producing raised or sunken designs or relief in sheet metal. This process can be made by means of matched male and female roller dies, or by passing sheet or a strip of metal between rolls of the desired pattern.
Embossed steel is ideal for customers looking to add aesthetic touches or functional improvements to a product. Embossing can help disperse liquid more effectively, reduce friction and static, bolster metal panel stiffness and rigidity, obscure dirt and blemishes for a consistent appearance, increase metal surface area for acoustic or heat transfer and improve traction, embossed panels have greater spanning abilities.
In the hood design emboss are provided to strengthen the hood assembly and divert the impact force acting during a crash to the edges and towards the hinges there by minimizing the effect of crash to the passengers and pedestrians.
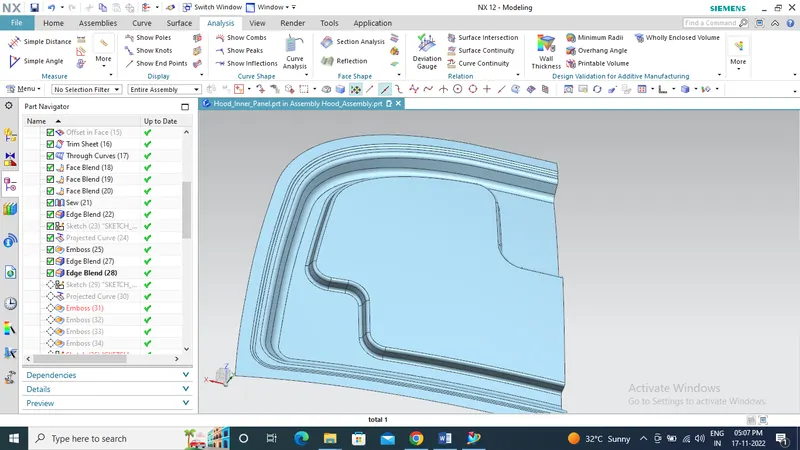
first embossed applied to the hood inner panel
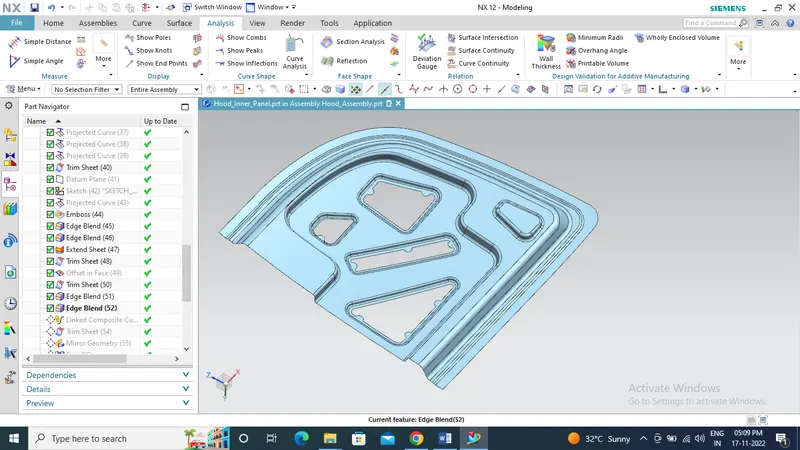
hood inner panel with hinge emboss
Manufacturing process
The production process of the outer panel of the hood mainly includes blanking, deep drawing, trimming, turn-up, and side turn-up. Among them, deep drawing is a key process to ensure the quality of part.
1) Deep drawing
Deep drawing is one of the most widely used processes in sheet metal forming. Apart from its use in many other sectors, it is applied in the automotive industry for the manufacturing of car body parts.
The deep drawing process is a forming process which occurs under a combination of tensile and compressive conditions. A flat sheet metal blank is formed into a hollow body open on one side or a hollow body is formed into a hollow body with a smaller cross-section.
In the automotive industry, deep drawing is usually carried out using rigid tools. The rigid tools consist of a punch, die and binder. In deep drawing, the plate holder closes after the metal sheet blank has been inserted.
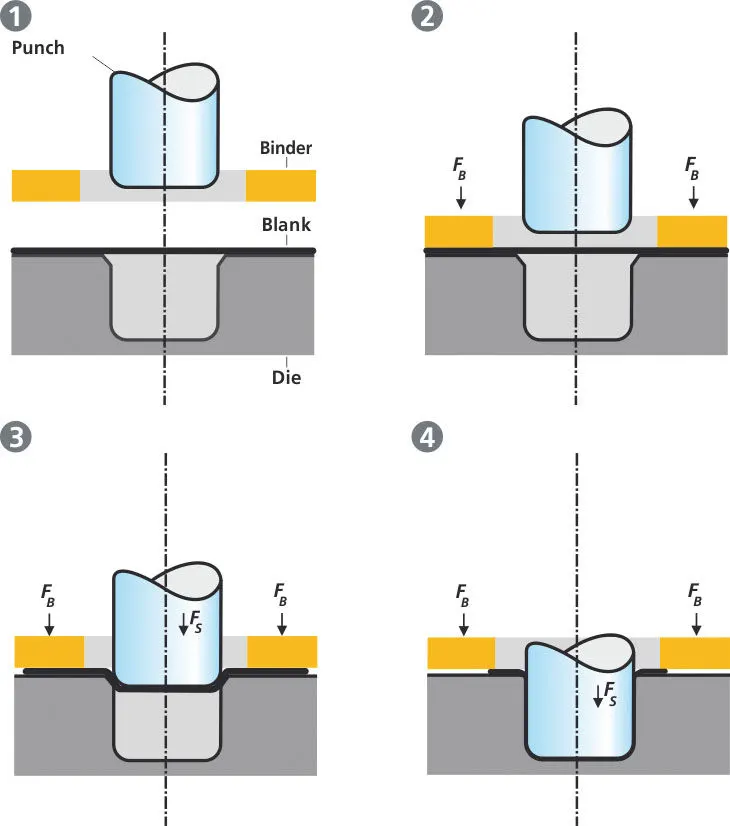
Next the sheet is clamped between the die and the binder. This process slows down the flow of the sheet while it is being drawn and thereby prevents wrinkles from forming under the binder. The punch stretches the sheet over the die radius and forms it in the die. The amount of punch force necessary for forming is thereby continually increased up to the lower dead center of the punch.
Whereas in pure deep drawing there is no reduction of sheet metal thickness, forming is achieved in stretch forming purely as a result of a decrease in sheet metal thickness. Stretch forming is extensively used for the forming of only slightly curved parts with low depth of draw (e.g. roofs, doors).
When drawing complex car body parts in practice, there is usually a combination of stretch and deep drawing involved. It is necessary that the sheet metal is stretched as well as possible without reaching the material’s limits.
2) Hemming
Hemming is a forming operation in which the edges of the sheet are folded or folded over another part in order to achieve a tight fit. Normally hemming operations are used to connect parts together, to improve the appearance of a part and to reinforce part edges.
In car part production, hemming is used in assembly as a secondary operation after deep drawing, trimming and flanging operations to join two sheet metal parts (outer and inner) together. Typical parts for this type of assembly are hoods, doors, trunk lids and fenders.
The accuracy of the hemming operation is very important since it affects the appearance of the surface and surface quality. Material deformations, which occur during the hemming process, can lead to dimensional variations and other defects in parts. Typical hemming defects are splits or wrinkles in the flange, material overlaps in the corner areas or material roll-in. This is why it is important to use simulation tools in order to, on the one hand, better understand the hemming process and, on the other hand, significantly reduce the number of “trial and error” loops during tryout und production.
There are various types of hemming operations, Conventional die hemming & Roll hemming
a) In conventional die hemming, the flange is folded over the entire length with a hemming tool.
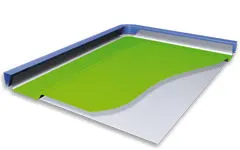
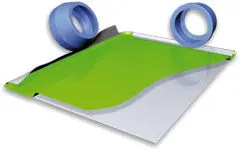
conventional die hemming process Roll hemming process
b) Roll hemming is carried out incrementally with a hemming roller. An industrial robot guides the hemming roller and forms the flange. Roll hemming operation can also be divided into several pre-hemming and final hemming process steps. Roll hemming is very flexible to use and tool costs are significantly lower as compared to those of conventional die hemming. However, the cycle times are much higher since the hemming is realized using a hemming roller which follows a defined path.
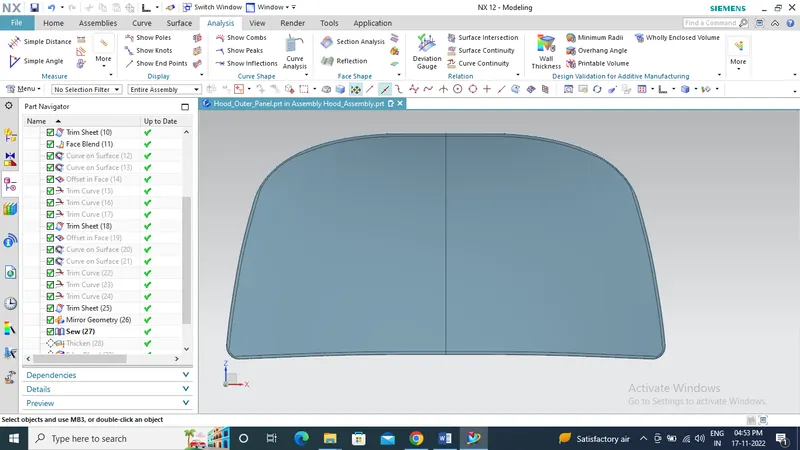
hood outer panel with hemming surface and relief in corners
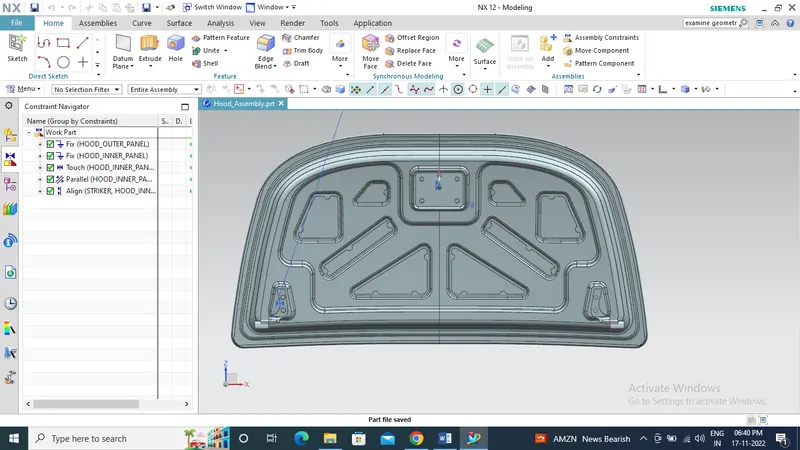
fully constraint hood assembly with all engineering features
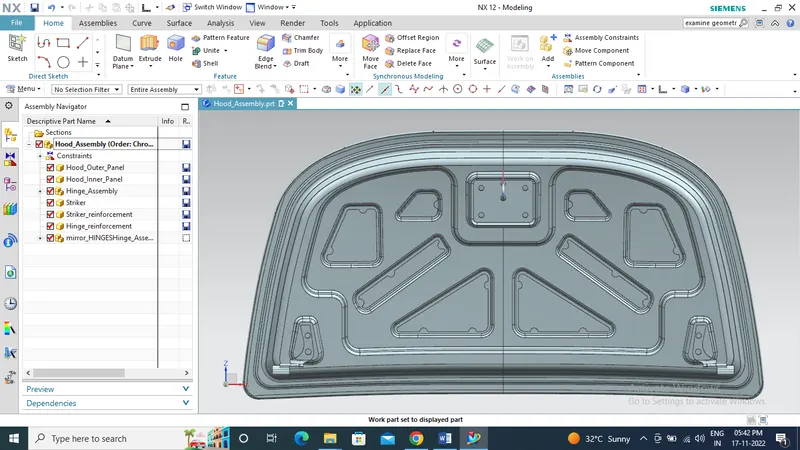
final hood assembly
Conclusion
Thus understand the design guidelines of hood, it parts and the manufacturing process behind it and develop the complete hood assembly with all engineering features.