Week - 4 - 2D meshing for Plastic components
Objective:-
- We have to create a mesh for the given Modal "Plastic Bottle cap"
- for which we have to look for geometrical errors first before performing any operation on it
- then we have to create a mid surface out of the cap
- if the geometry has non-uniform thickness then we have to use manual methods for extracting mid surface
- then again we have to check for the geometrical errors in the mid surface
- then we have to mesh the mid surface using 2d elements and appropriate given criteria file inputs
- then we have to fix all the failing elements by using the appropriate tools required
- then we have to assign thickness to all the surfaces having different thickness separately by creating a property for each one of them
Introduction:-
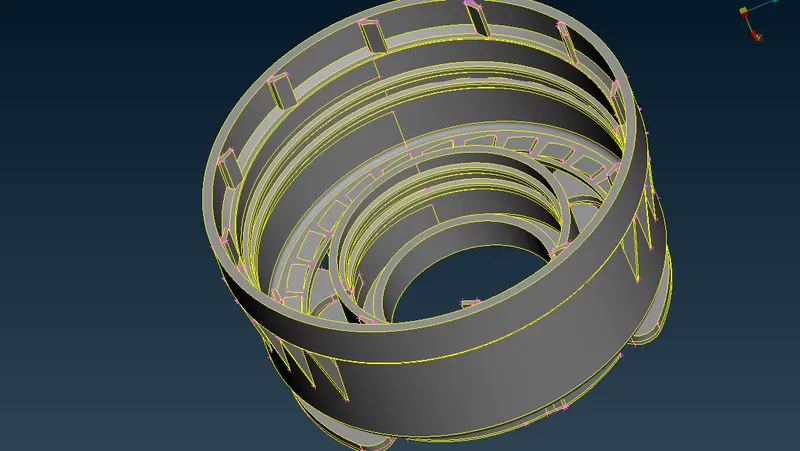
- this is a modal of a cap of a bottle which is a plastic component with variable thickness throughout the surfaces
- the modal was in (.ansa) format
- the modal has a lot of ribs, structures, and surfaces with different thicknesses
- so we have to use the manual method for extracting the mid surface such as offset tool, middle tool, etc
- then we have to use many other tools such as middle curve, transform for creating the mid surface of the small ribs and threads
- and for the small surfaces which are repeating along an axis in a circle there, we will create 2 points using COG(edges) tools
- and then using those two points as the axis of rotation for making our work much easier.
This is the modal that we received
Theory:-
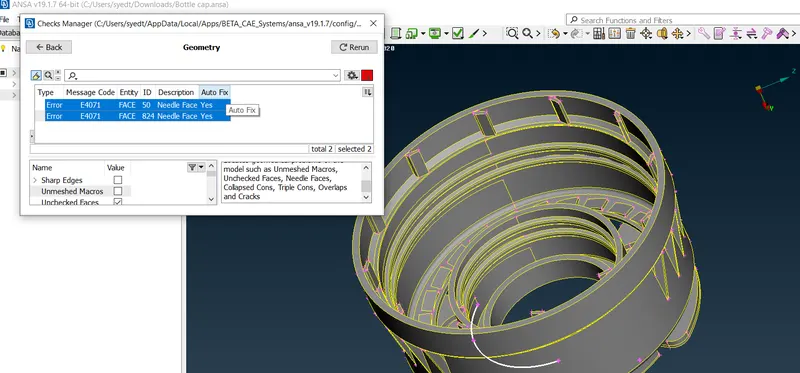
- after opening the given modal in ANSA first we looked for geometrical errors
- by using Checks--> Geometry
- there we found a few geometrical which we fixed using the fix option in there
- Then after fixing all the geometrical errors we moved towards creating the mid surface of the geometry
- so for which we measured the thickness of the geometry at various position using the measure tool by selecting two perpendicular hot points
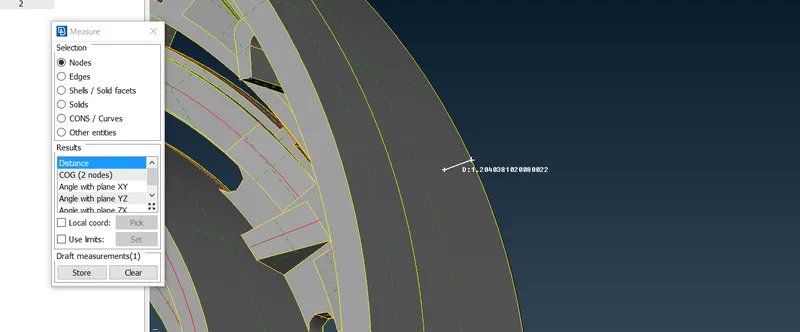
- so after measuring the thickness we came to know that the modal is not uniform in thickness.
- that why we have to use a manual method for extracting the mid surface out of it.
- for which we used many different tools for different conditions except the mid surf tool
- such as faces--> offset, faces--> middle, faces--> toppo, etc
- we started extracting the mid surface from the bottom side of the cap
- so there we mostly used faces--> offset after measuring the thickness and using half of that value for offsetting.
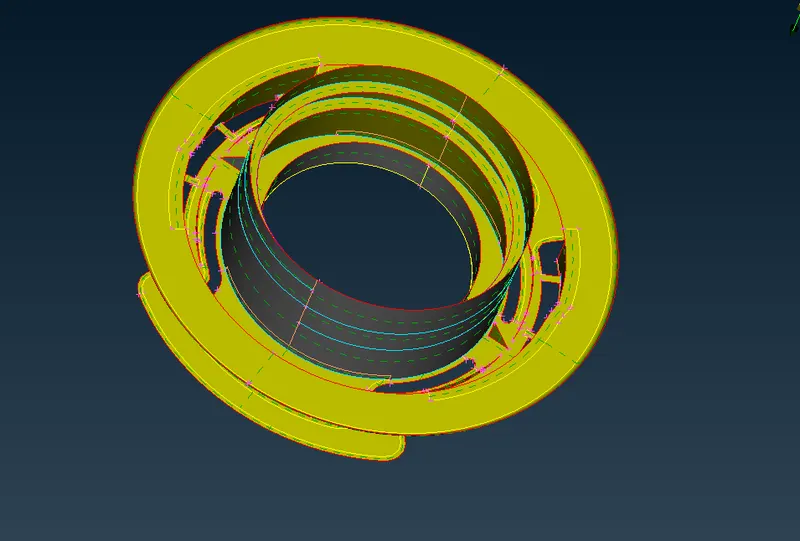
- for the incomplete surfaces we used faces--> new --> fitted, existing surf, and coons.
- to fill all the voids between the surfaces (perpendicular surfaces)
- for extracting the mid surface of threads we used curve--> middle
- and selected two upper-end cons of threads and created a mid curve between them
- and then we used Auxiliaries--> fine to make the curves of the mid curve better curved
- then we projected that mid curve line on the base surface which is our mid surface of the hollow cylinder
- then using these two lines we created a surface between them using faces--> fitted tool
- resulting in the mid surface of the threads.
using curves-->middle to create the mid curve between the two cons of thread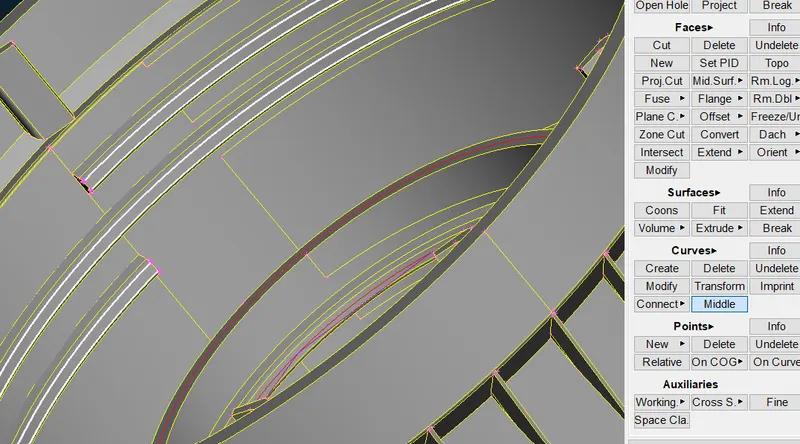
after projecting the mid curve on the surface using project-->cons
using these two cons we created surface which is our mid surface of the thread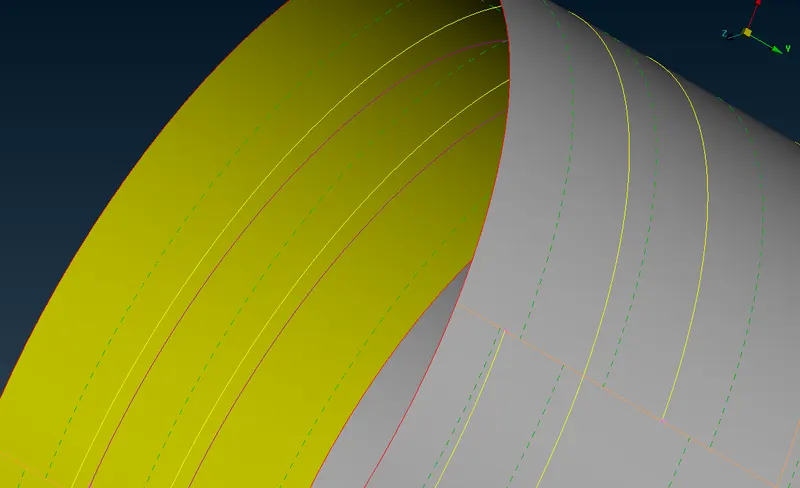
- after creating the mid surface of the thread we moved much above on the geometry
- for creating a mid surface of these small ribs and surfaces
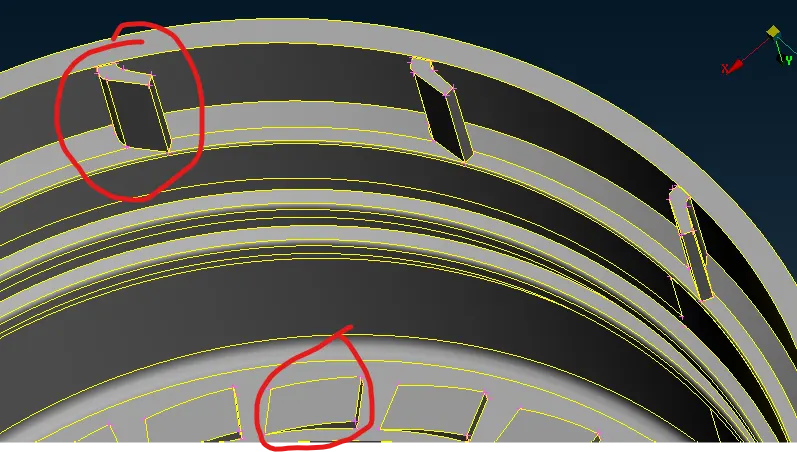
- for the lower one repetitive component, we again used curve--> middle to create a mid curve between these two cons
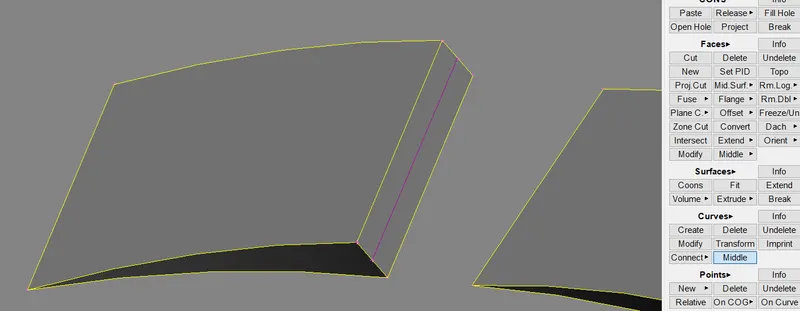
- then we projected the con of the other end of this surface on the mid surface
- then using those two cons we created a new surface using faces-->new-->fitted
- which resulted in the mid surface of this particular component
- as we after observing in there we came to know that there are two triple cons around this structure
- and the gap between them is very small so it might lead to element failure over there
- so to avoid that we joined these two triple cons by creating a new surface in the gap region
as shown in this figure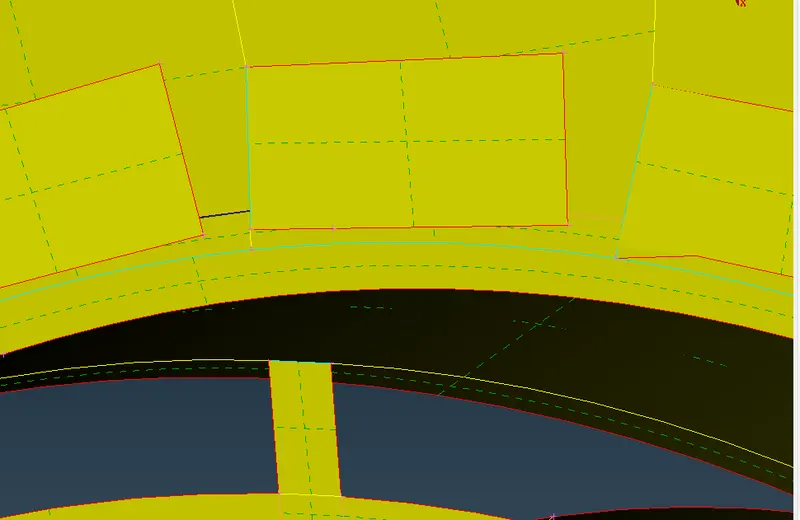
- then after observing we saw that this structure is repetitive along the circle.
- so to avoid the hard work of creating each place on this surface we used the transform tool to rotate this one single surface along the circle to leading to create the desired number of the same surfaces along the circle.
- for which we required two points at the centre which can act as the axis of rotation
- so for which we used points-->COG-->edges
- there we selected one circle and created a centre point of that circle using this COG tool
- and again we created a centre point of a circle but this time of a circle which is at some different height than the previous one
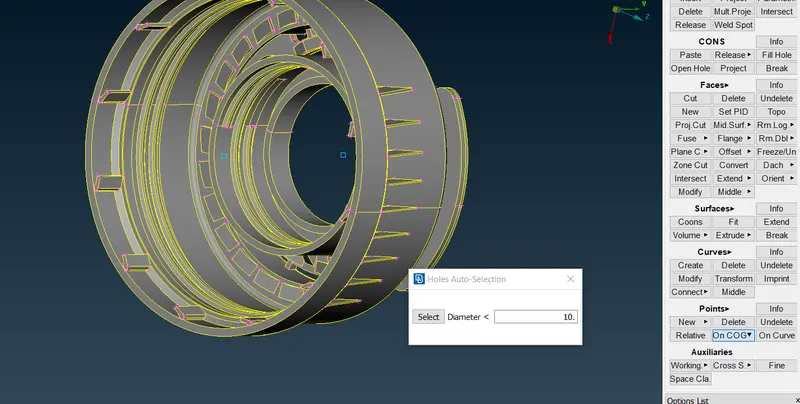
- after getting these two points we can easily rotate the same surface along the circle
- using transform--> copy--> select entities--> rotate--> select the point one as x --> select the point as dx
- and number of steps as 25 as more 25 surfaces are required and angle = 360/no of surface(which is 26)
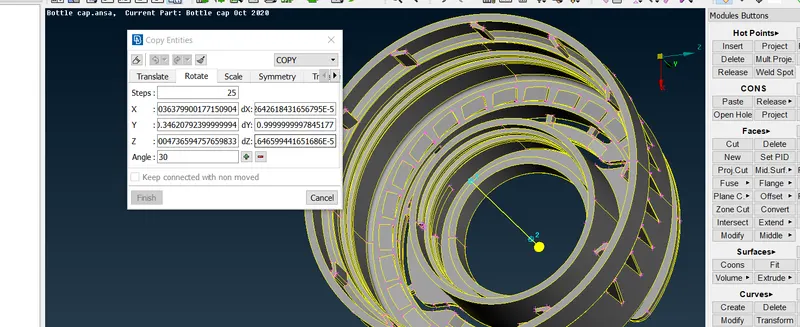
- that's how we got the surfaces for all the same dimension surfaces
- we followed the same procedure for other surfaces which has conditions like this
like this one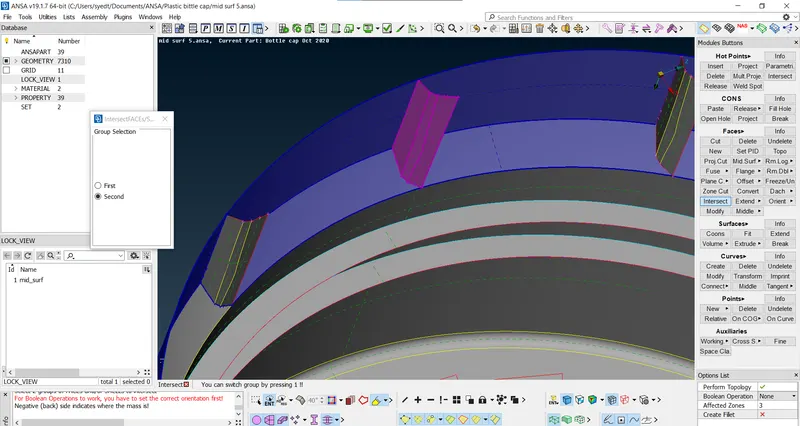
- whereas we used intersect command too for these surfaces to create a connection with the base surface after using the offset tool for creating the mid surface of this one
- at some places, we used faces--> middle too to create the mid surface
- but mostly we used the offset tool to get the mid surface
- at last, we used auxiliaries-->fine to get better mid surface curves
- that's how we by following these procedures we created mid surface for the whole geometry
complete mid surface of bottle cap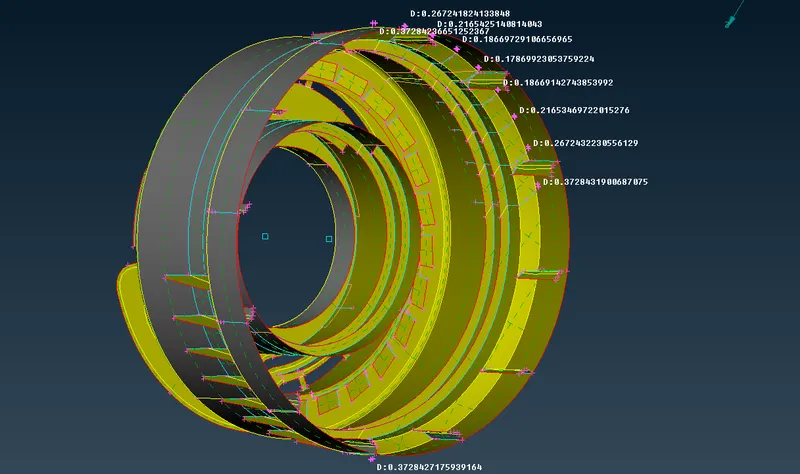
- after getting mid surface we did a geometry check once again to check for any geometrical errors
- then after we moved towards doing the 2d meshing of the mid surface
- by using the given criteria file inputs and mesh quality inputs
- we meshed the whole surface one by one looking again and again after meshing for the failing elements
- and fixing them using the appropriate tool required
- such as for some areas at the edges mostly due to the triple cons many elements were failing
- so to fix them we used macros--> edge2perimeter tool to create a cut over there
- and then by using faces-->delete we deleted those very small surfaces
- and again at someplace where we had more than 1 triple con
- many elements were failing there some of them because of the presence of extra unnecessary hot points
- so to fix that we used hot points--> delete and reconstructed that area
- and by using tools such as reconstruct, split, swap, paste we fixed numerous amount of failing elements
- and finally got a mesh with zero failing elements.
fixing of failing elements at edges due to triple cons using edge2perimeter tool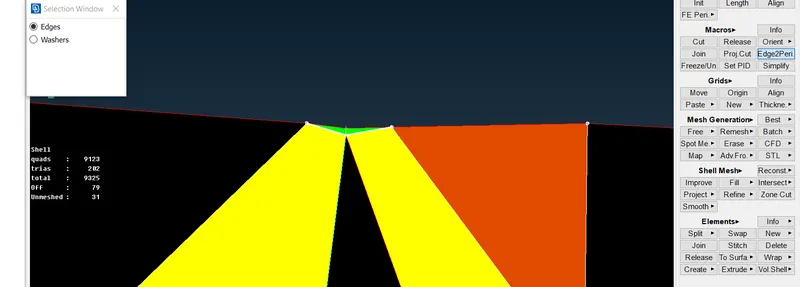
fixing of failing elements using paste tool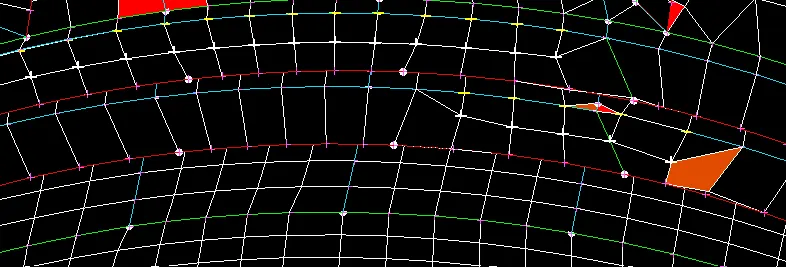
complete mesh of bottle cap with zero failing elements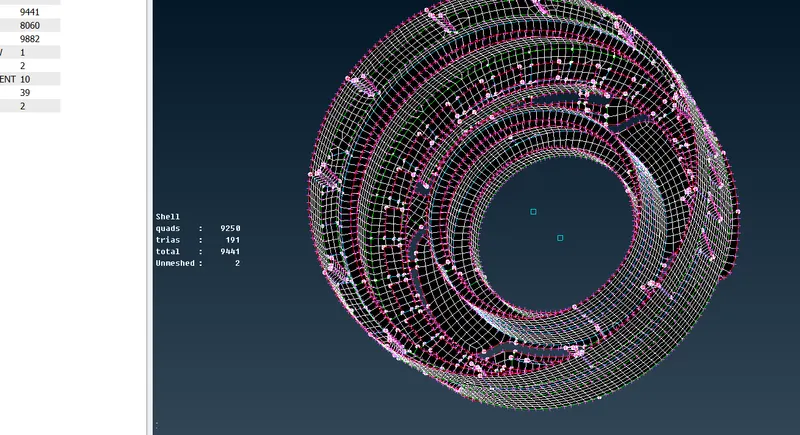
Conclusions:-
- In this project we learned a lot of things and about many new commands
- such as we learned how to use the transform tool to rotate the entities using 2 center points
- we learned how to create those 2 centre points with different height
- we learned how to use the edge2perimeter tool to fix failing elements
- we learned how to create the mid surface of a plastic component using the manual method
- we learned how to have a better mesh flow
- and how to avoid the tria concentration