Week 6-Meshing of Hood Challenge
Objective:-
- To do mid-surfacing of each part of the hood separately.
- To do auto and manual clean-up of the geometries as required.
- While doing the manual clean-up toggle the required lines and create lines to make boxes within the geometry for having a better mesh.
- And add or remove nodes in the manual clean-up.
- To do a mixed mesh of very good quality
- To do a quality check after creating a mesh and to do required clean-ups to eliminate failing elements.
Introduction:-
- In this project, we are asked to create a 2D mesh for the given geometry by doing the required steps as mid-surfacing and clean-ups.
- This is a hood of a car which is basically the front side cover that mostly covers the engine part of the car
- And it also plays a huge role in the aesthetic looks of the car so it must be made of strong, light, and fairly the material should be heat resistant
- The hood has 4 parts such as
- outer extract
- Inner extract
- Hinge extract reinforcement
- Latch extract reinforcement
- The outer Extract is the smoothest part because only this is the part that is mostly visible
- and the inner extract contains many sections for other components such as for the latch and the hinge
Theory:-
- So for creating mesh for each part we needed to do a lot of things before to make the component ready for meshing
- first we turned on the By toppo mode
- Such first we downloaded the model given to us in the challenge section and then we imported that model to Altair HyperWorks
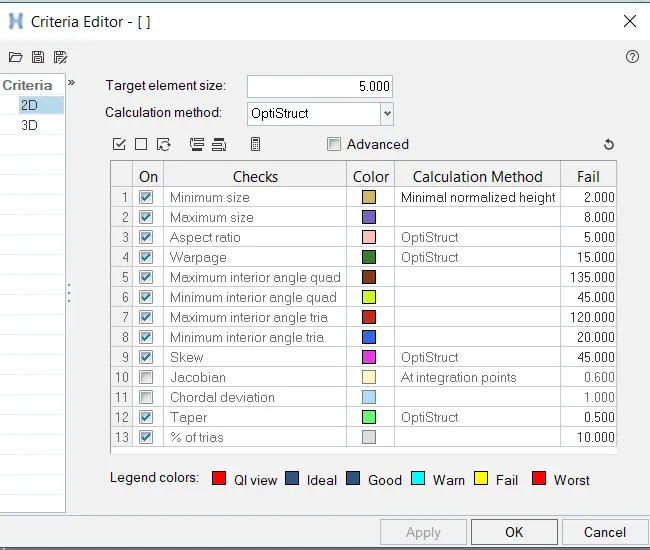
- For the Quality Index, we used the given values in the challenge
- for that, we used the preferences tab in that "criteria file setting"
- there we inserted the values for the given quality checks as
- So then we created mesh component by component first we did for the Latch reinforcement extract
- FOR LATCH REINFORCEMENT EXTRACT:-
- for the latch, we first hid the rest of the parts except the latch
- then we first created a mid surface of the latch
- for mid surfacing, we used "Offset+Planes" from extraction options in the mid surf
- then we extracted the mid surface
- then we deleted all the solid part of the latch
- then we did an auto clean-up followed by the required manual clean-up
- after this, we assigned material, property, and thickness to the extracted mid surface of the latch reinforcement
- Now we did a 2D auto mesh on the surface
- We did 2D auto mesh many times as where the mesh was not good at all
- then we went for "Quality Index"
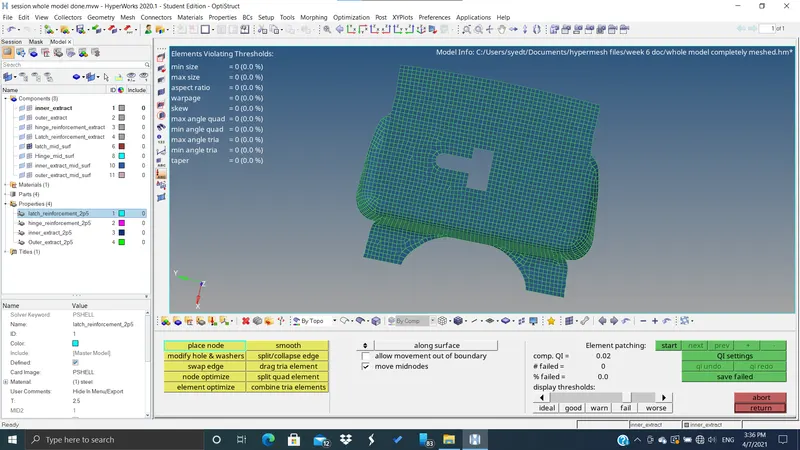
- In the quality index, we looked for the failing elements, trias at edges, trias concentrating at one place, and other things which can affect the quality of the mesh, and then we used clean up tools to fix them such as "swap edge" for swapping the edges of the trias at the edges
- "element optimization" for the skew failing, wrapping aspect ratio failing, and size dis-order element
- "drag-tria elements" for dragging the opposite trias and merging them into quads to reduce the no. of trias
- and other clean-up tools also such as "place node", "split quad element", "combine tria elements".
- finally, we used a "smooth" tool from "2D" and "auto mesh" for making the distorted mesh to a good quality mesh.
- Meshed and quality checked Latch Reinforcement Extract:-
-
- FOR HINGE REINFORCEMENT EXTRACT:-
- Similarly for the hinge, we hid the rest of the parts except Hinge
- Then we Deleted the Solid part of the Hinge
- Then we created a mid surface of the hinge by using "Offset+Planes" in the mid surfacing extraction options
- then we did an auto clean-up followed by manual clean-up
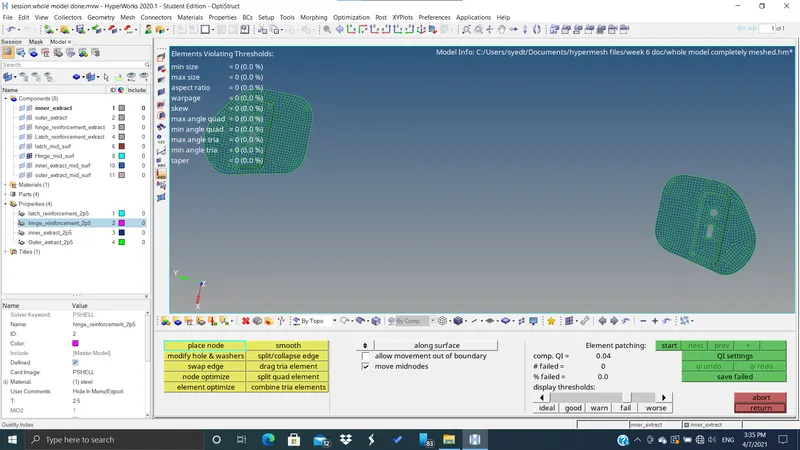
- after this, we did a 2D auto mesh with mixed elements
- then we did the same procedure as we did for the latch
- Meshed and quality checked Hinge Reinforcement Extract:-
-
- FOR INNER EXTRACT:-
- Similarly, for the inner extract, we first hid all the other parts except the inner extract
- we deleted all the solid parts of the inner extract
- then we did the mid surfacing using "skin offset" in the auto mid surf extraction option
- then after that, we did a manual clean-up in that we deleted the lines where the gap between lines were less than 2, added washers split where ever required
- we made boxes by creating lines for making meshing easier over the surface of the inner extract
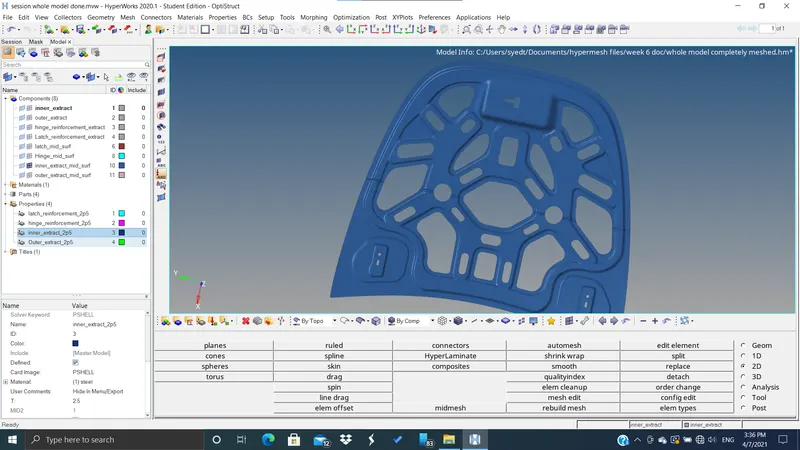
- then after complete manual clean-up, we moved to 2D auto mesh
- then we did re-mesh where ever required and then
- we did the same quality index for the whole component
- we assigned thickness, property, and material.
- Meshed and quality checked Inner extract :-
-
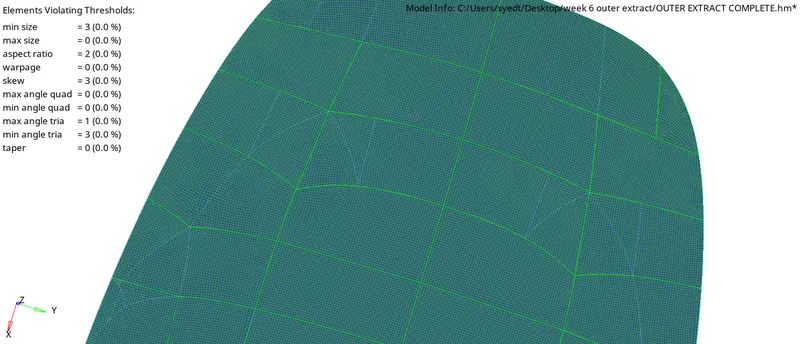
- FOR OUTER EXTRACT:-
- for the outer extract again we followed the same procedure as the inner extract
- first, we did a mid surf
- then we did a manual clean up
- and made boxes for better mesh using lines
- and then we did a 2d auto mesh
- then we used the clean-up tools for making the quality of mesh
- Meshed and quality checked Inner extract:-
Conclusion:-
- we learnt how to use the "extraction" option of auto mid surf for different types of geometry
- we learnt to do manual clean-up for making the geometry simple thus resulting in a better quality of mesh
- we learnt to use 2d auto mesh more than once for the already created mesh for eliminating the failing elements
- we learnt to do quality check by assigning our own values
- we learnt to use different clean-up tools for different types of failures.