Week 12:Project-1-Meshing of Door Inner Panel Challenge
Situation:-
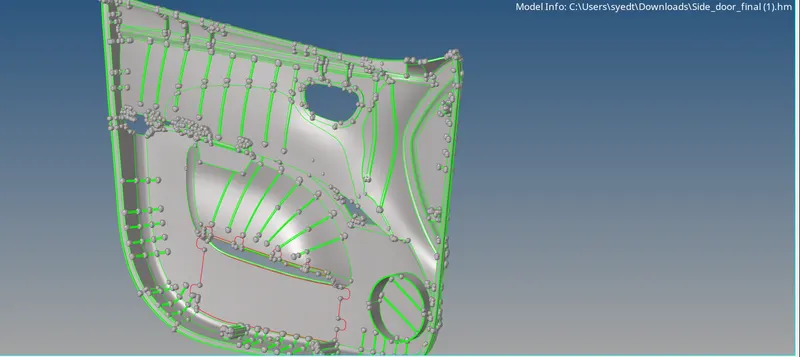
- Here the situation is that we got a Modal in (.hm) format of an inner side door of a car so we imported the modal using the import modal option in the Altair Hyperworks
- this side door is basically made of plastic and it has a lot of uneven surfaces and sections
- this is basically inside part of a car door it has sections for the handle of the door, section for keeping things such as water bottles.
- here we have a modal of a plastic component of a side door and we have to create a 2d mesh of it
- first, we downloaded the file given in the challenge
- then after observing the surfaces we come to know that it has no solid part and also the surface looks quite fine means no irregularities or glitches so we need to delete or create any surfaces
- this, the surface of the inner side door holder has a lot of uneven surfaces ribs, and edges so we have to be careful about that too
- this a very huge surface so we have to think about dividing the modal into several simple surfaces by trimming the surface using trim with lines(axis)
- this is the modal that we received
Tasks:-
- so here we after importing the modal we will have to look for the irregularities or defects in the modal
- then we have to divide the whole surface into simpler 4 surfaces so that our works get easier
- then we will have to extract the mid surface of each surface by calculating the thickness of the surface by using node projection on the surface
- then we have to start meshing the mid surface using the 2d automesh
- part by part
- and after meshing one surface we have to fix the failing elements
- using the quality index tool
- and the criteria file settings given in the challenge
- and after doing this we have to assign thickness for all the different components having different thickness
- so we have to create material and property, property for each different thickness component
- then we have to do the same for the other 3 surfaces that we have divided
- after completing that we have to make sure that there aren't any edges between the elements of these 4 different divided surfaces
Actions:-
- so we are working on the optistruct solver
- so first we import the model into HyperWorks
- then we after properly inspecting we divided the whole surface into 4 different components
- using surface edit tool ( trim with surface/ planes)
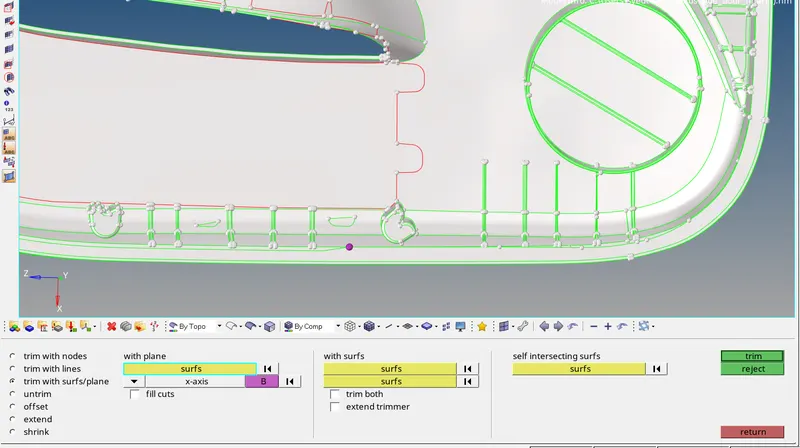
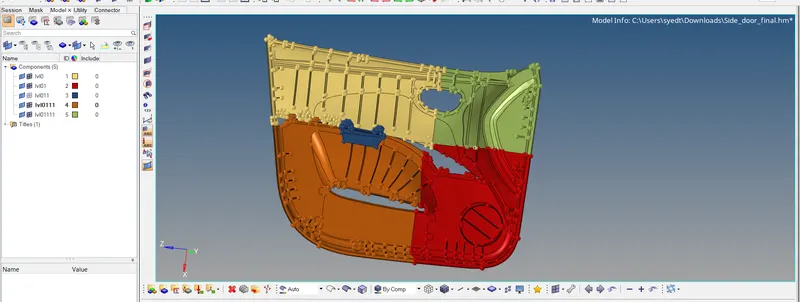
- after trimming the surface into 4 different sections we moved each component into a different collector
- by using the "organize" tool

- after moving each surface into different collector by creating new 4 different collectors and then using the organize tool to move them if we turn element color mode to "by component" we can see we have successfully moved each one of them
- now after this, we have to measure the thickness of these components for mid surfacing so we will start with one first
- so have used project tool "nodes to surfaces" for measuring the thickness of various sections
- and after calculating we used the offset tool in "surface edit" to get the id surface
- but before that, we have to create a component named "mid_surf_1" and similarly for each component
- then we after duplicating the selected surfaces into the newly created component we click on offset by giving the proper offset value
- then for creating mid surf of ribs we have used the midline tool
- to create a midline using the extreme end line of the rib
- and then we used the "trim with lines" tool to project that line on the base mid surface
- and after this using these two lines we created the mid surface of the ribs by using the ruled tool from the "surface tool"
- and we used the final edit tool in the mid surfacing tool to create a mid surface for the two same surface component
- then used the imprint option from the final edit tool to project the lines of the components on the base mid surface
- in this way we created the mid surface of each divided component
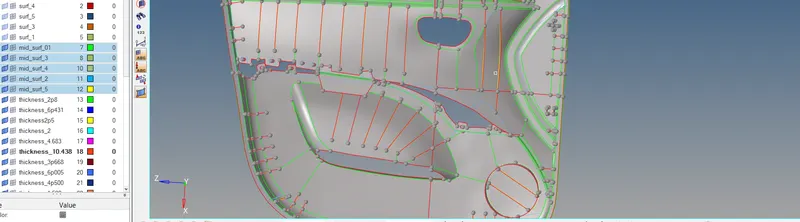
- after creating the mid surf now we moved towards meshing the surface
- and we meshed the surface using the given Criteria file settings
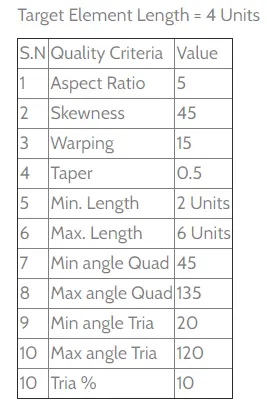
element quality check their reasons and their solutions for fails
- we meshed the surface part by part and kept eliminating the failing elements
- by using the quality index tool
- we turned element color mode to "by the quality of elements" so that we get to know why the element is failing
- and can do the proper required solution for it this mode also helps us see the failing while meshing too
- then based on that we can use proper re-mesh options too
- so after meshing the component we fixed all the failing elements based on their reason for failing
- such as if elements are failing for aspect ratio(which is the ratio of the length of the largest side to smallest)
- then we can use the re-mesh option or place node( from the quality index) to move the node so that the length of the smaller side increases and the aspect ratio decreases and vice versa
- if the element is failing for the skewness(which is 90- the smallest angle between the diagonals)
- then we use re-mesh or place node so that the angle increases
- if the element is failing for the warpage then we can use several tools to eliminate that
- like we can use element optimize tool from the quality index
- or splitting quads into trias, etc
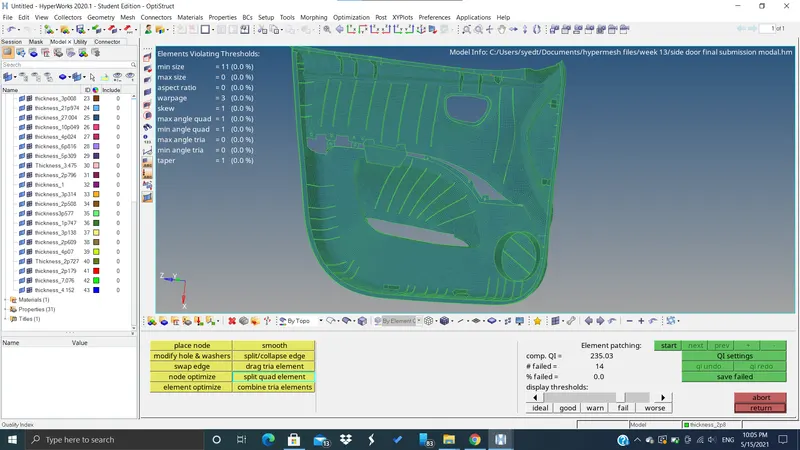
- in this way, we can solve the failure of elements and that's what we used for fixing all the failing elements here
- after fixing all the failing we did the same procedure of meshing for all the other 3 divide components
- then after the completion of the mesh
- we checked for free edges between the elements of these 4 components and made sure all the necessary element connection are okay
- then after doing this we assigned thickness to each component which has a different thickness.
- we assigned thickness by creating material and property for each component having variable thickness
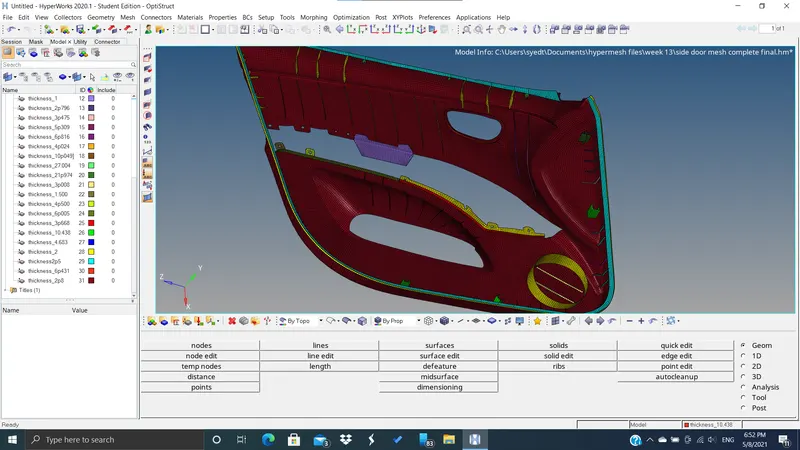
after complete quality check
Conclusion:-
- we learned types of failure and the ways to fix them
- we learned to develop a better mesh flow
- we learned to use several different tools of HyperWorks
- such as imprint in final edit tools of mid surfacing
- and several surface trims
- we learned to do mid surfacing in a much more efficient way