Creating Bar Bending schedule, Different Door types, and Creation of standard drawing templates using AutoCad
Aim:
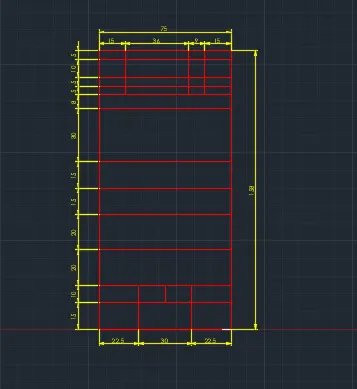
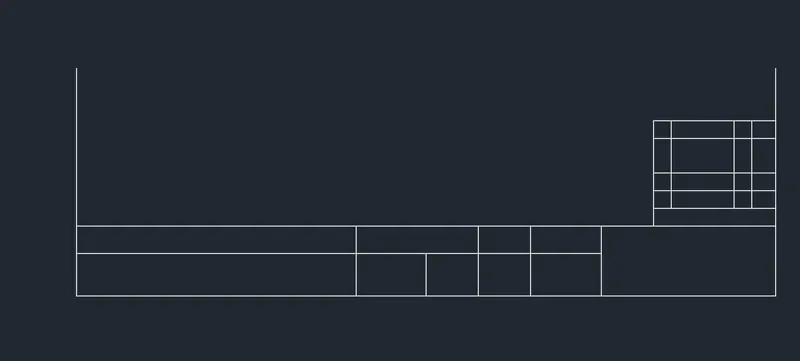
To create templates and convert as shown in the figure using AutoCAD.
Procedure:
STEP:-1
- In the command prompt type UNITS and press enter.
- Select the required units as desimal and select the required insertion scale.
- Select layer settings from ribbon tab.
- From the layer settings tab select create layer option.
- Enter the required layer name, select the line type and color.
- Set the created layer as current layer.
- In the ribbon tab, select line tool.
- Specify the starting point using cursor.
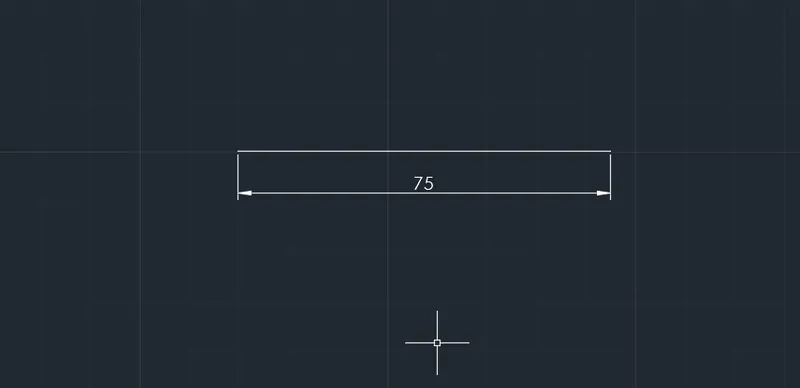
- Draw the line of required length as 75 and press enter.
STEP:-2
- Type offset in the command prompt and press enter.
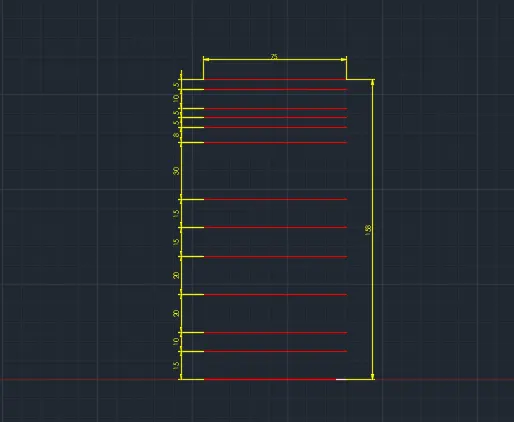
- Enter the vertical offset distance as 5,10,5,5,8,30,15,15,20,20,10,15 in the command prompt and draw the horizontal line.
- Select the previous object to offset.
- Type offset in the command prompt and press enter.
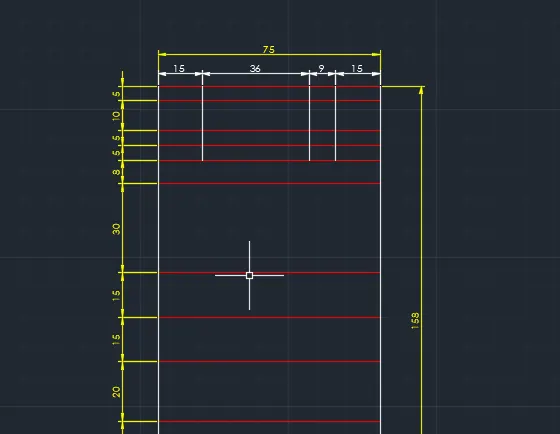
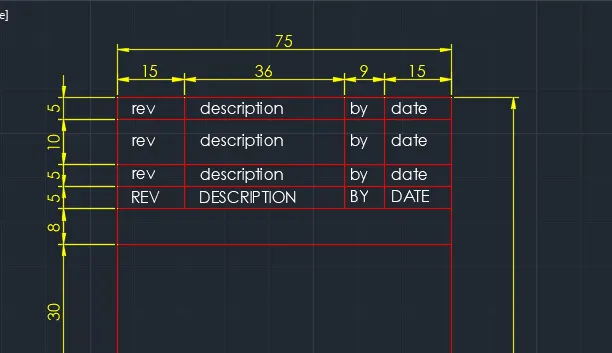
- Enter the Horizontal offset distance as 15,36,9,15 in the command prompt and draw the horizontal line from the left line.
- Select the previous object to offset.
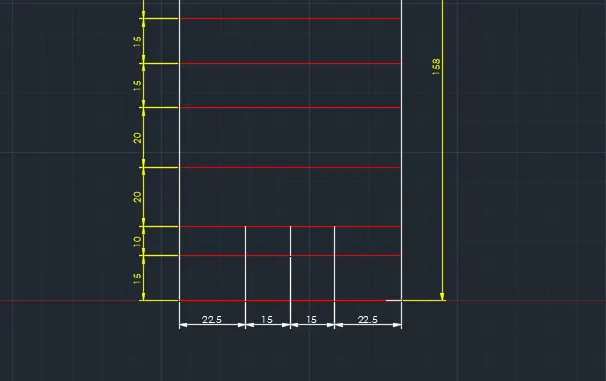
- Enter the Horizontal offset distance as 22.5,15,15,22.5 in the command prompt and draw the horizontal line from the left line.
STEP:-3
- Select text tool from ribbon tab and press enter.
- Select the M line text option.
- Using cursor mention the starting point of text.
- Specify the angle of rotation and press enter.
- Now the enter the required text.
- Specify the next point to enter the text.
STEP:-3
- From the ribbon tab, select line tool.
- Specify the starting point using cursor.
- Draw the line of required length and press enter.
- Select layer settings from ribbon tab.
- From the layer settings tab select create layer option.
- Enter the required layer name, select the line type and color.
- Set the created layer as current layer.
- Now, select text tool from ribbon tab and press enter.
- Select the single line text option.
- Using cursor mention the starting point of text.
- Specify the angle of rotation and press enter.
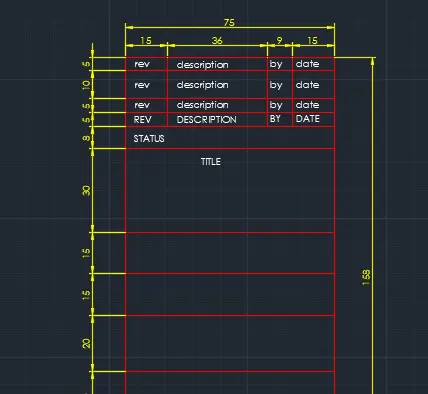
- Now the enter the required text.
- Specify the next point to enter the text.
STEP:-4
- Select text tool from ribbon tab and press enter.
- Select the M line text option.
- Using cursor mention the starting point of text.
- Specify the angle of rotation and press enter.
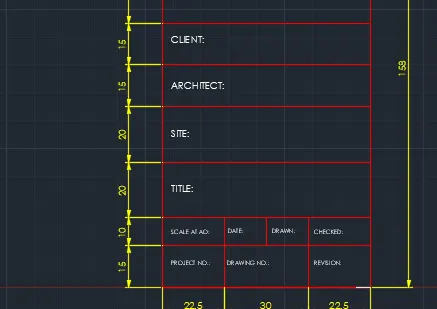
- Now the enter the required text.
- Specify the next point to enter the text.
STEP:-5
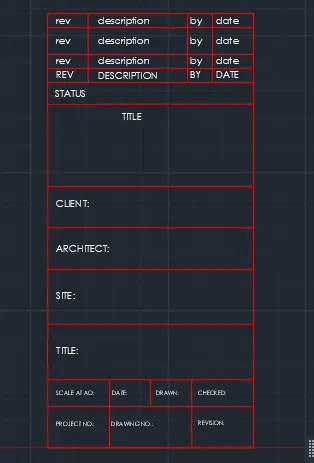
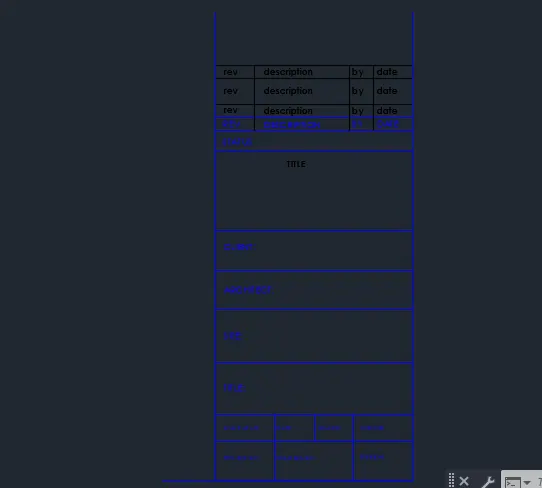
STEP:-6
- Type "B" in the command prompt and press enter.
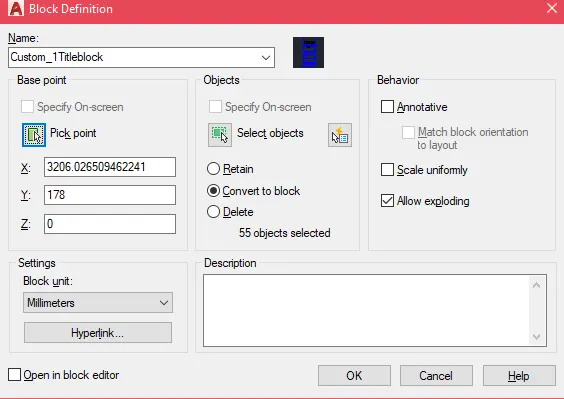
- In the block definition tab, enter the name of the block.
- Click on the "pick point" and in the workspace click on the created object to mention the pick point.
- Then click on the "select objects" and in the workspace select the mentioned object using cursor.
- Click ok.
- In the command prompt type insert and press enter.
- Created block will be shown, click on it.
- Based on the pick point object can be placed anywhere in the required place.
STEP:-7
- From the ribbon tab, select line tool.
- Specify the starting point using cursor.
- Draw the line of required length and press enter.
- Select layer settings from ribbon tab.
- From the layer settings tab select create layer option.
- Enter the required layer name, select the line type and color.Set the created layer as current layer.
STEP:-8
- From the ribbon tab, select line tool.
- Specify the starting point using cursor.
- Draw the line of required length and press enter
STEP:-9
- Select text tool from ribbon tab and press enter.
- Select the M line text option.
- Using cursor mention the starting point of text.
- Specify the angle of rotation and press enter.
- Now the enter the required text.
- Specify the next point to enter the text.
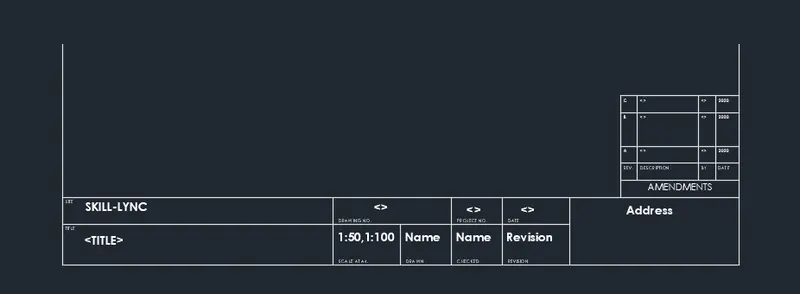
STEP:-10
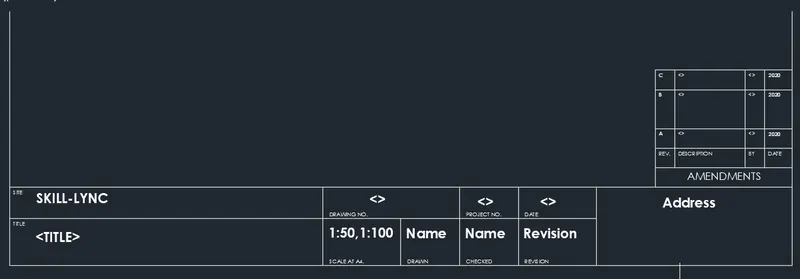
STEP:-11
- Type "B" in the command prompt and press enter.
- In the block definition tab, enter the name of the block.
- Click on the "pick point" and in the workspace click on the created object to mention the pick point.
- Then click on the "select objects" and in the workspace select the mentioned object using cursor.
- Click ok.
- In the command prompt type insert and press enter.
- Created block will be shown, click on it.
- Based on the pick point object can be placed anywhere in the required place.
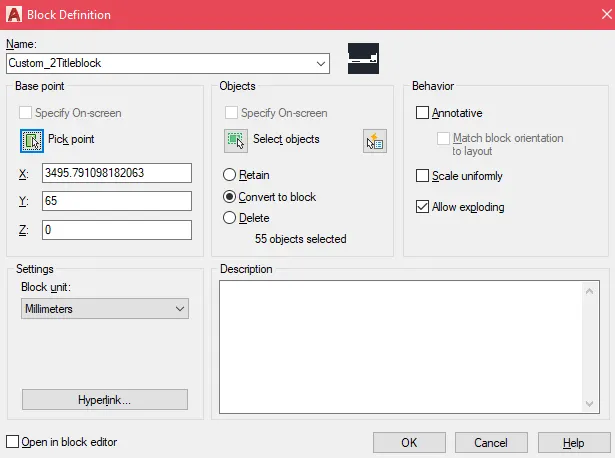
2.
Aim:
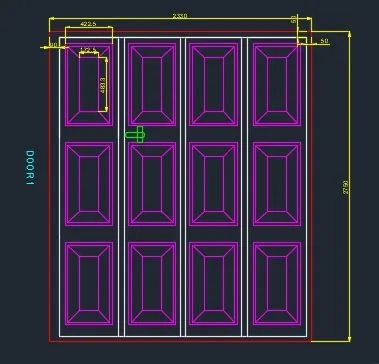
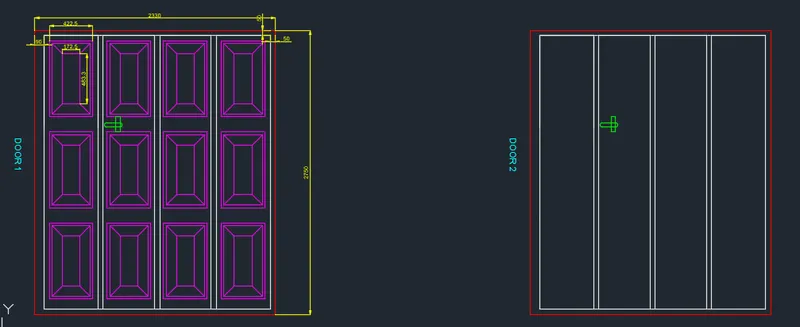
To create door type for warehouse as given in the figure using AutoCAD
Procedure:
STEP:-1
- In the command prompt type UNITS as Matric and press enter.
- Select the required units and select the required insertion scale.
- Select layer settings from ribbon tab.
- From the layer settings tab select create layer option.
- Enter the required layer name, select the line type and color.
- Set the created layer as current layer.
- In the ribbon tab, select Rectangle tool.
- Specify the starting point using cursor.
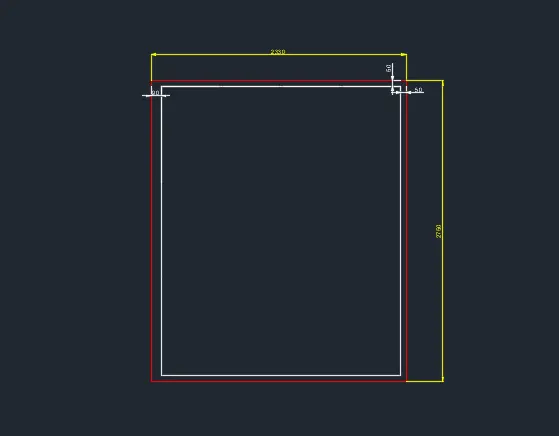
- Draw the Rectangle of required length as 2330 and width as 2750 and press enter.
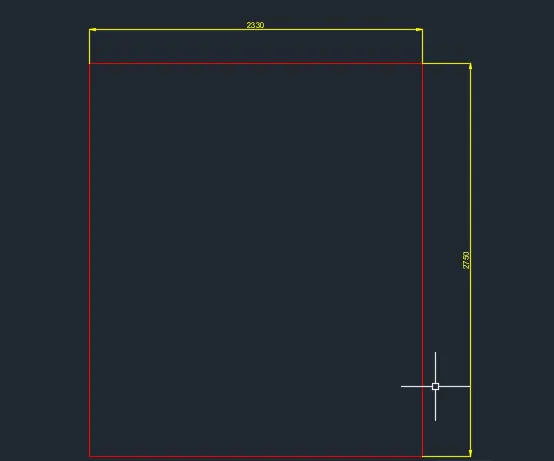
- Type explode command for making the rectangle indivisual.
- Type offset in the command prompt and press enter.
- Enter the offset distance as 90 from the outer most leftline and 5o offset from other lines.
STEP:-2
- Select reactangle tool from ribbon tab and press enter.
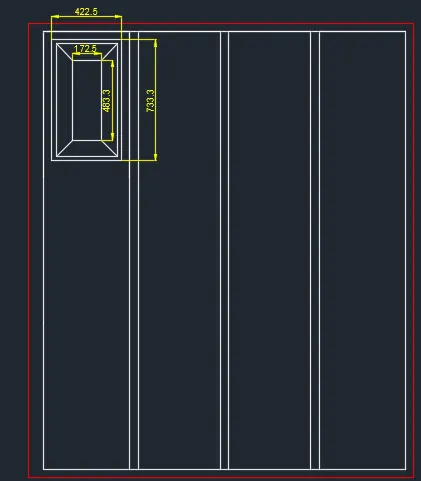
- Specify the starting point and drag the cursor to create a rectangle.
- Type offset in the command prompt and press enter.
- Enter the offset distance in the command prompt.
- Select the object to offset.
- Repeat the offset command as per the required dimensions.
STEP:-3
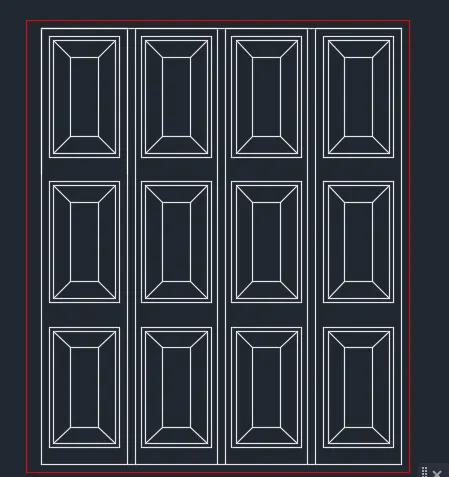
- Select the created rectangle using cursor.
- Type "copy" in the command prompt and press enter.
- Select the base point and press enter.
- Move the copied object and place in horizontal direction as per the required drawing.
- Now select the previously created objects and type copy in the command prompt.
- Select the base point and press enter.
- Place the copied objects.
STEP:-4
- Select the dimension tool from ribbon tab.
- Specify the starting point and mention the next point to display the dimensions.
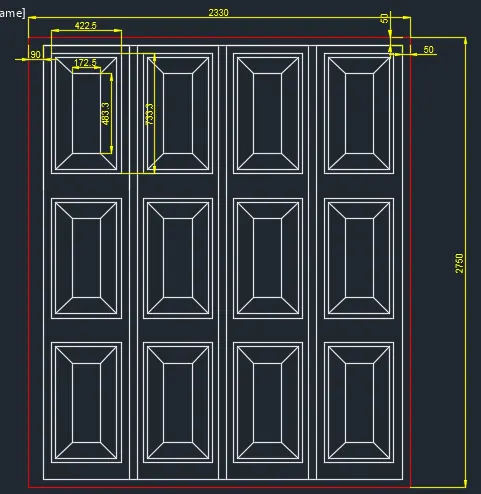
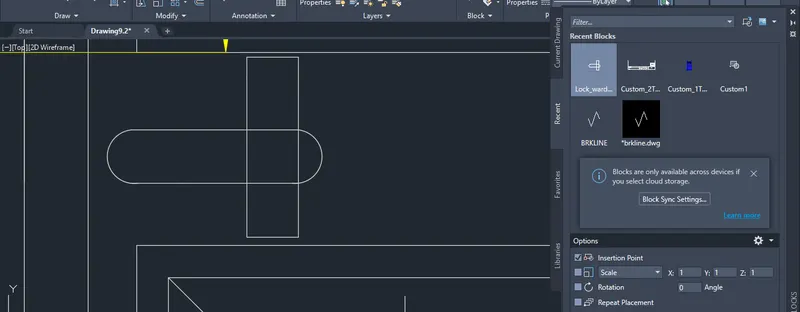
- We have to creat the lock of the door by using rectangle command and the filet command.
- Then save that as a block.
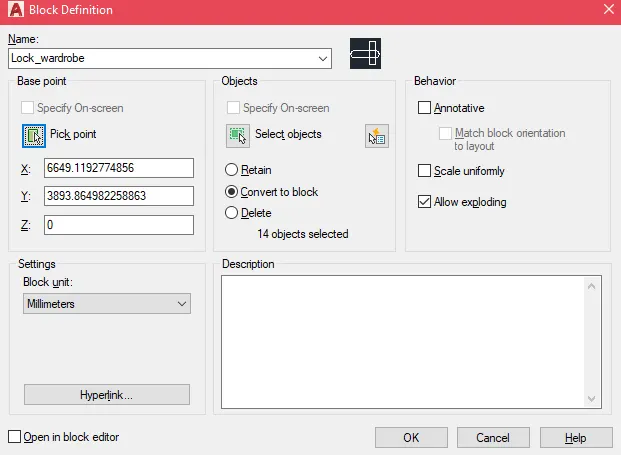
- Insert the lock at the apropriat location by i command.
STEP:-5
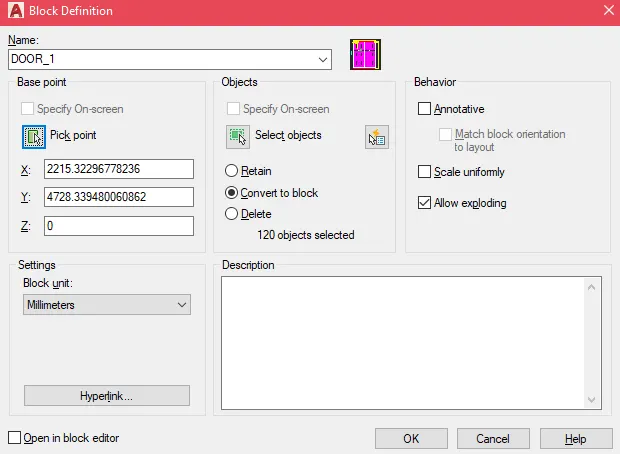
- Type "B" in the command prompt and press enter.
- In the block definition tab, enter the name of the block as "DOOR1".
- Click on the "pick point" and in the workspace click on the created object to mention the pick point.
- Then click on the "select objects" and in the workspace select the mentioned object using cursor.
- Click ok.
- In the command prompt type insert and press enter.
- Created block will be shown, click on it.
- Based on the pick point object can be placed anywhere in the required place.
STEP:-6
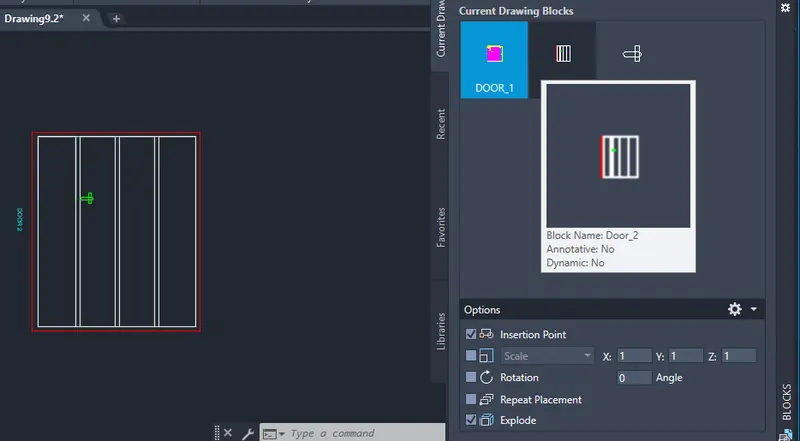
- Type insert in the command prompt and press enter.
- From the insert tab select the created block to place it.
- Choose the explode command for editing the Block.
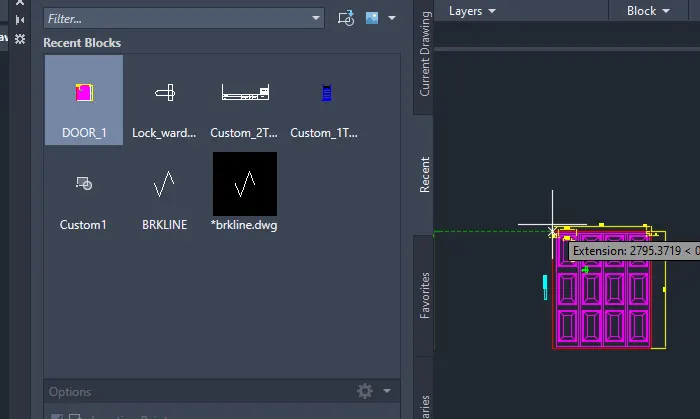
STEP:-7
- Edit the block by the block edit command.
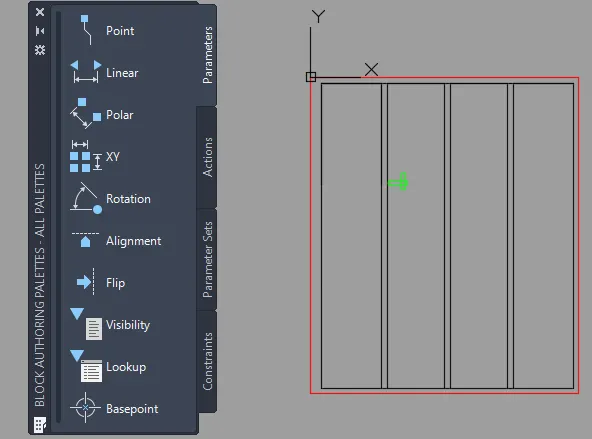
STEP:-8
- Edit the text as Door 2.
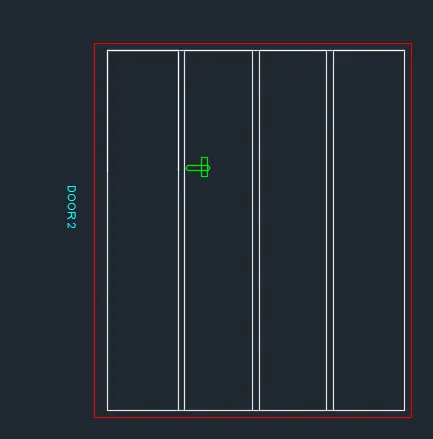
STEP:-9
- Type "B" in the command prompt and press enter.
- In the block definition tab, enter the name of the block as "DOOR2".
- Click on the "pick point" and in the workspace click on the created object to mention the pick point.
- Then click on the "select objects" and in the workspace select the mentioned object using cursor.
- Click ok.
- In the command prompt type insert and press enter.
- Created block will be shown, click on it.
- Based on the pick point object can be placed anywhere in the required place.
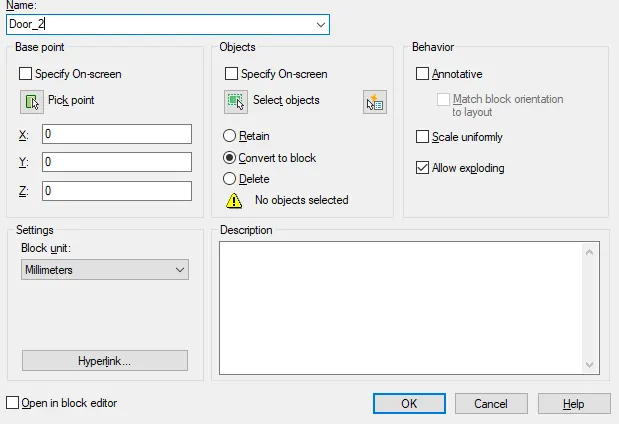
STEP:-10
- Type insert in the command prompt and press enter.
- From the insert tab select the created block to place it.
3.
Aim:
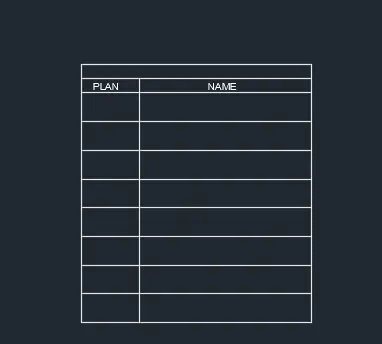
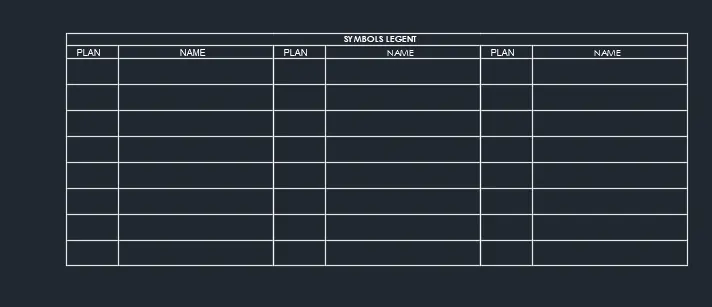
To draw the given figure using AutoCAD.
Procedure:
STEP:-1
- In the command prompt type UNITS and press enter.
- Select the required units and select the required insertion scale.
- Select layer settings from ribbon tab.
- From the layer settings tab select create layer option.
- Enter the required layer name, select the line type and color.
- Set the created layer as current layer.
- In the ribbon tab, select line tool.
- Specify the starting point using cursor.Draw the line of required length and press enter.
- Type offset in the command prompt and press enter.
- Enter the offset distance in the command prompt.
- Select the object to offset.
- Repeat the offset command as per the required dimensions.
- Select text tool from ribbon tab and press enter.
- Select the single line text option.
- Using cursor mention the starting point of text.
- Specify the angle of rotation and press enter.
- Now the enter the required text.
- Specify the next point to enter the text.
STEP:-2
- Copy the previously created objects using cursor.
- Type "copy" in the command prompt and press enter.
- Select the base point and press enter.
- Move the copied object and place in horizontal direction as per the required drawing.
- Now select the previously created objects and type copy in the command prompt.
- Select the base point and press enter.
- Place the copied objects.
- Select text tool from ribbon tab and press enter.
- Select the single line text option.
- Using cursor mention the starting point of text.
- Specify the angle of rotation and press enter.
- Now the enter the required text.
- Specify the next point to enter the text.
STEP:-3
- Select the circle tool from ribbon tab and press enter.
- Specify the starting point and press enter.
- Using cursor draw the required circle with radious 3.
- Press esc.
- Select line tool from ribbon tab and press enter..
- Draw the line of required length 10 and press enter.
- Press spacebar, using line command draw the required perpendicular line of length 4.
- Rotate the line and placed at the apropriat position.

STEP:-4
- Type "B" in the command prompt and press enter.
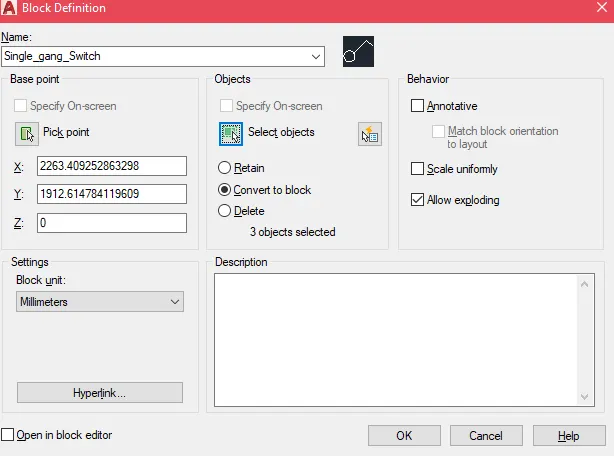
- In the block definition tab, enter the name of the block as "Single gang switch".
- Click on the "pick point" and in the workspace click on the created object to mention the pick point.
- Then click on the "select objects" and in the workspace select the mentioned object using cursor.
- Click ok.
- In the command prompt type insert and press enter.
- Created block will be shown, click on it.
- Based on the pick point object can be placed anywhere in the required place.
STEP:-5
- Select the circle tool from ribbon tab and press enter.
- Specify the starting point and press enter.
- Using cursor draw the required circle with radious 3.
- Press esc.
- Select line tool from ribbon tab and press enter..
- Draw the line of required length 10 and press enter.
- Press spacebar, using line command draw the required perpendicular line of length 4.
- Rotate the line and placed at the apropriat position.
- Take the offset of 2mm from the 4mm parpedicular line.

STEP:-6
- Type "B" in the command prompt and press enter.
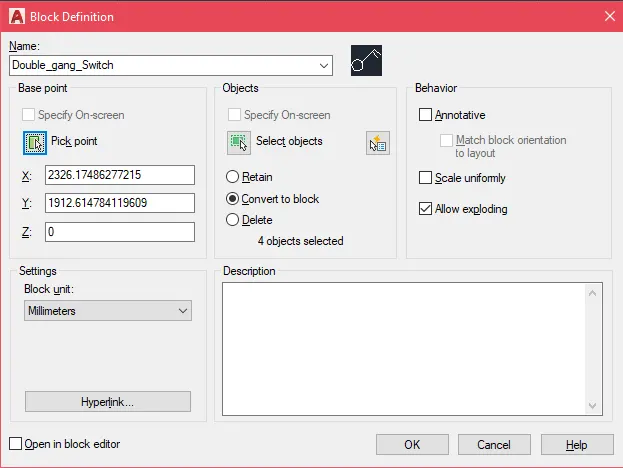
- In the block definition tab, enter the name of the block as "Double gang switch".
- Click on the "pick point" and in the workspace click on the created object to mention the
- pick point.
- Then click on the "select objects" and in the workspace select the mentioned object using
- cursor.
- Click ok.
- In the command prompt type insert and press enter
- Creaed block will be shown, click on it.
- Based on the pick point object can be placed anywhere in the required place.
STEP:-7
- Select the circle tool from ribbon tab and press enter.
- Specify the starting point and press enter.
- Using cursor draw the required circle with radious 3.
- Press esc.
- Select line tool from ribbon tab and press enter..
- Draw the line of required length 10 and press enter.
- Press spacebar, using line command draw the required perpendicular line of length 4.
- Rotate the line and placed at the apropriat position.
- Take two offset of 2mm from the 4mm parpedicular line.

STEP:-8
- Type "B" in the command prompt and press enter.
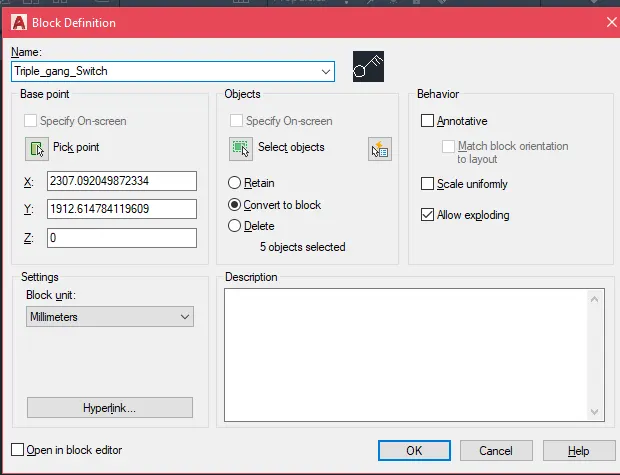
- In the block definition tab, enter the name of the block as "Triple gang switch".
- Click on the "pick point" and in the workspace click on the created object to mention the pick point.
- Then click on the "select objects" and in the workspace select the mentioned object using cursor.
- Click ok.
- In the command prompt type insert and press enter.
- Created block will be shown, click on it.
- Based on the pick point object can be placed anywhere in the required place
STEP:-9

- Type "B" in the command prompt and press enter.
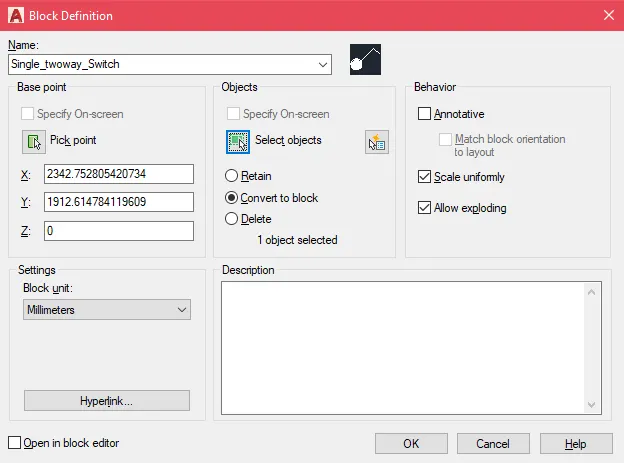
- In the block definition tab, enter the name of the block as "Single two way switch".
- Click on the "pick point" and in the workspace click on the created object to mention the pick point.
- Then click on the "select objects" and in the workspace select the mentioned object using cursor.
- Click ok.
- In the command prompt type insert and press enter.
- Created block will be shown, click on it.
- Based on the pick point object can be placed anywhere in the required place.
STEP:-10

- Type "B" in the command prompt and press enter.
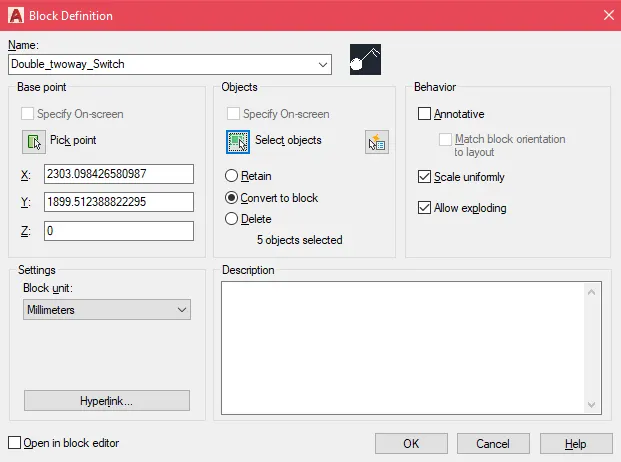
- In the block definition tab, enter the name of the block as "Double two way switch".
- Click on the "pick point" and in the workspace click on the created object to mention the pick point.
- Then click on the "select objects" and in the workspace select the mentioned object using cursor.
- Click ok.
- In the command prompt type insert and press enter.
- Created block will be shown, click on it.
- Based on the pick point object can be placed anywhere in the required place.
STEP:-11

- Type "B" in the command prompt and press enter.
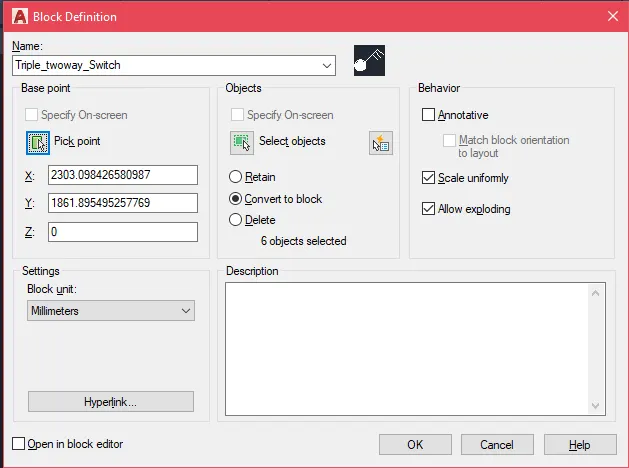
- In the block definition tab, enter the name of the block as "Triple two way switch".
- Click on the "pick point" and in the workspace click on the created object to mention the pick point.
- Then click on the "select objects" and in the workspace select the mentioned object using cursor.
- Click ok.
- In the command prompt type insert and press enter.
- Created block will be shown, click on it.
- Based on the pick point object can be placed anywhere in the required place.
STEP:-11

- Type "B" in the command prompt and press enter.
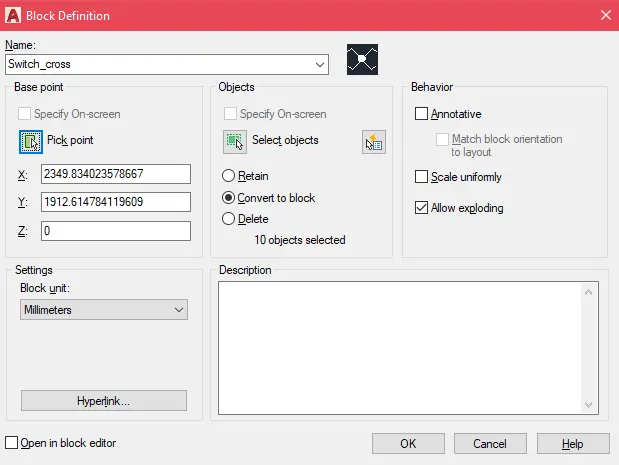
- In the block definition tab, enter the name of the block as "Switch cross".
- Click on the "pick point" and in the workspace click on the created object to mention the pick point.
- Then click on the "select objects" and in the workspace select the mentioned object using cursor.
- Click ok.
- In the command prompt type insert and press enter
- Created block will be shown, click on it.
- Based on the pick point object can be placed anywhere in the required place
STEP:-12

- Type "B" in the command prompt and press enter.
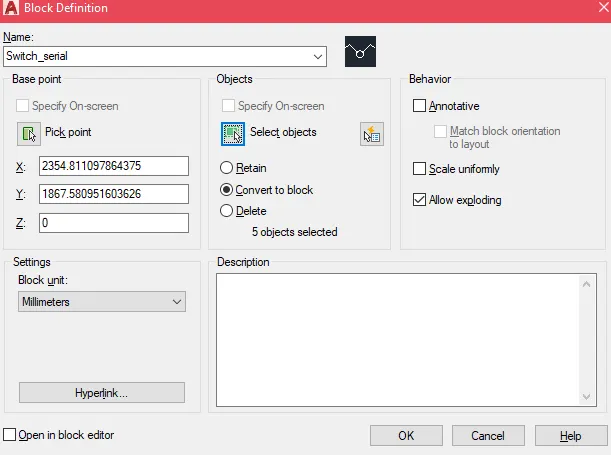
- In the block definition tab, enter the name of the block as "Switch serial".
- Click on the "pick point" and in the workspace click on the created object to mention the pick point.
- Then click on the "select objects" and in the workspace select the mentioned object using cursor.
- Click ok.
- In the command prompt type insert and press enter.
- Created block will be shown, click on it.
- Based on the pick point object can be placed anywhere in the required place.
STEP:-13

- Type "B" in the command prompt and press enter.
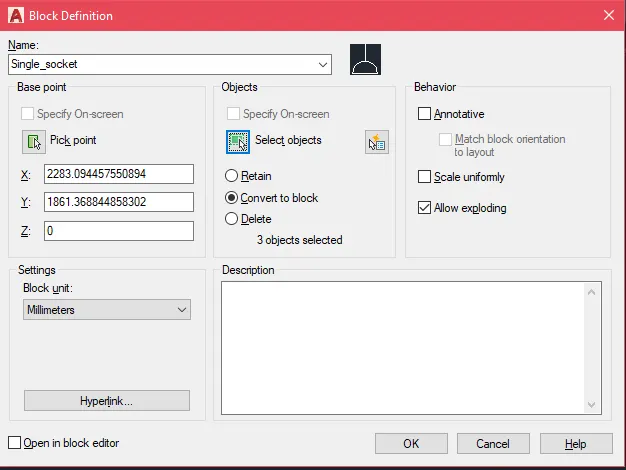
- In the block definition tab, enter the name of the block as "single socket".
- Click on the "pick point" and in the workspace click on the created object to mention the pick point.
- Then click on the "select objects" and in the workspace select the mentioned object using cursor.
- Click ok.
- In the command prompt type insert and press enter.
- Created block will be shown, click on it.
- Based on the pick point object can be placed anywhere in the required place
STEP:-14

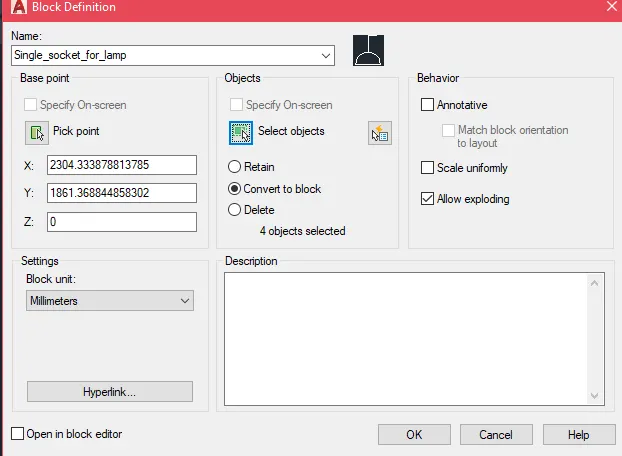
- Type "B" in the command prompt and press enter.
- In the block definition tab, enter the name of the block as "Single socket for lamp".
- Click on the "pick point" and in the workspace click on the created object to mention the pick point.
- Then click on the "select objects" and in the workspace select the mentioned object using cursor.
- Click ok.
- In the command prompt type insert and press enter.
- Created block will be shown, click on it.
- Based on the pick point object can be placed anywhere in the required place.
STEP:-15

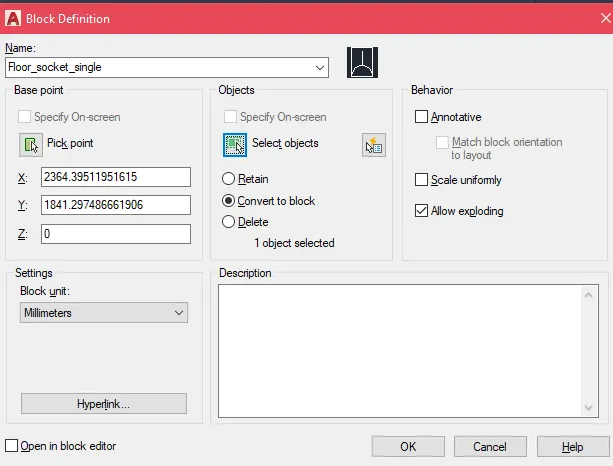
- Type "B" in the command prompt and press enter.
- In the block definition tab, enter the name of the block as "Floor socket single".
- Click on the "pick point" and in the workspace click on the created object to mention the pick point.
- Then click on the "select objects" and in the workspace select the mentioned object using cursor.
- Click ok.
- In the command prompt type insert and press enter.
- Created block will be shown, click on it.
- Based on the pick point object can be placed anywhere in the required place
STEP:-16

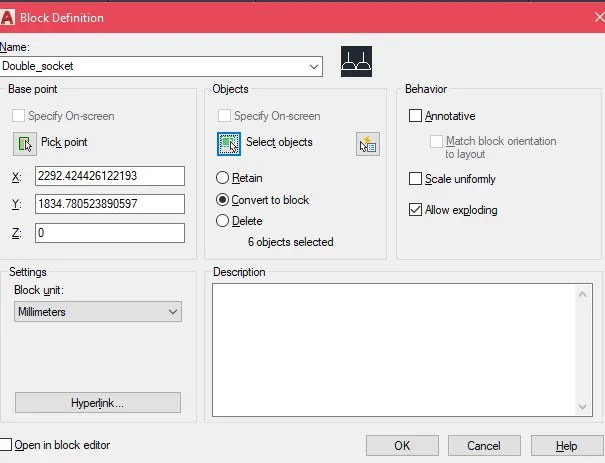
- Type "B" in the command prompt and press enter.
- In the block definition tab, enter the name of the block as "Double socket".
- Click on the "pick point" and in the workspace click on the created object to mention the pick point.
- Then click on the "select objects" and in the workspace select the mentioned object using cursor.
- Click ok.
- In the command prompt type insert and press enter.
- Created block will be shown, click on it.
- Based on the pick point object can be placed anywhere in the required place.
STEP:-17

- Type "B" in the command prompt and press enter.
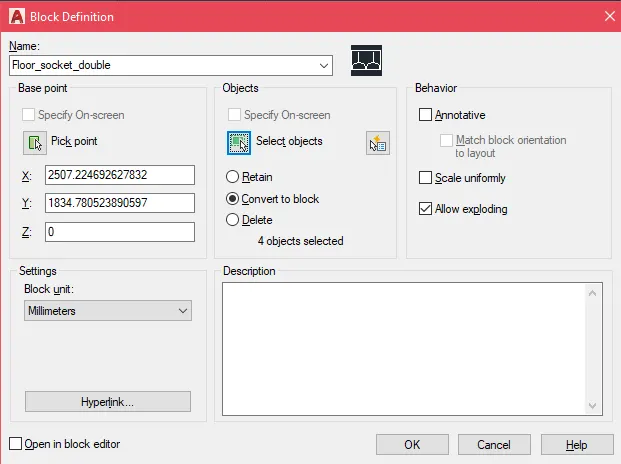
- In the block definition tab, enter the name of the block as "Floor socket double".
- Click on the "pick point" and in the workspace click on the created object to mention the pick point.
- Then click on the "select objects" and in the workspace select the mentioned object using cursor.Click ok.
- In the command prompt type insert and press enter
- Created block will be shown, click on it.
- Based on the pick point object can be placed anywhere in the required place
STEP:-18

- Type "B" in the command prompt and press enter.
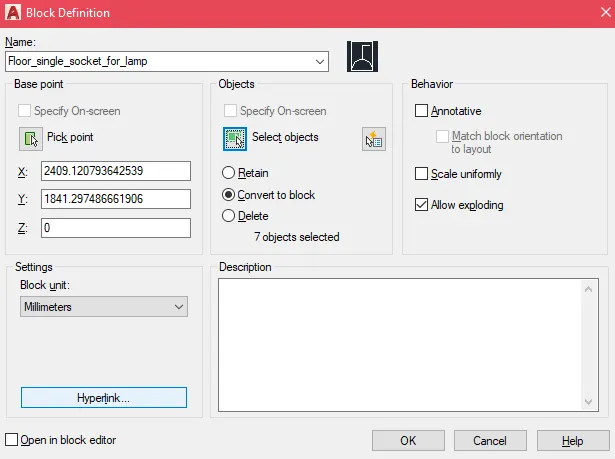
- In the block definition tab, enter the name of the block as "Floor single socket for lamp".
- Click on the "pick point" and in the workspace click on the created object to mention the pick point.
- Then click on the "select objects" and in the workspace select the mentioned object using cursor.Click ok.
- In the command prompt type insert and press enter
- Created block will be shown, click on it.
- Based on the pick point object can be placed anywhere in the required place
STEP:-19

- Type "B" in the command prompt and press enter.
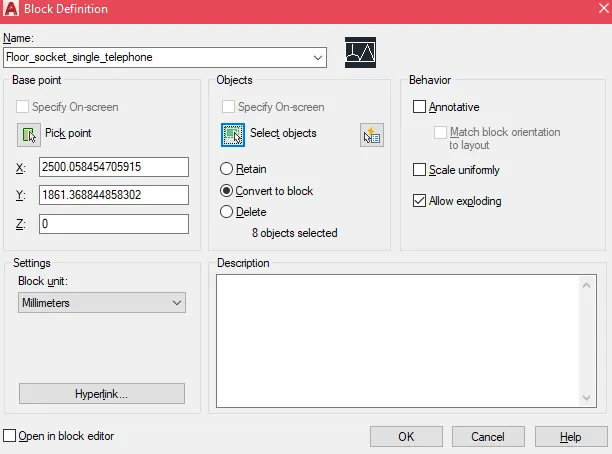
- In the block definition tab, enter the name of the block as "Floor socket single, Telephone".
- Click on the "pick point" and in the workspace click on the created object to mention the pick point.
- Then click on the "select objects" and in the workspace select the mentioned object using cursor.
- Click ok.
- In the command prompt type insert and press enter.
- Created block will be shown, click on it.
- Based on the pick point object can be placed anywhere in the required place.
STEP:-20

- Type "B" in the command prompt and press enter.
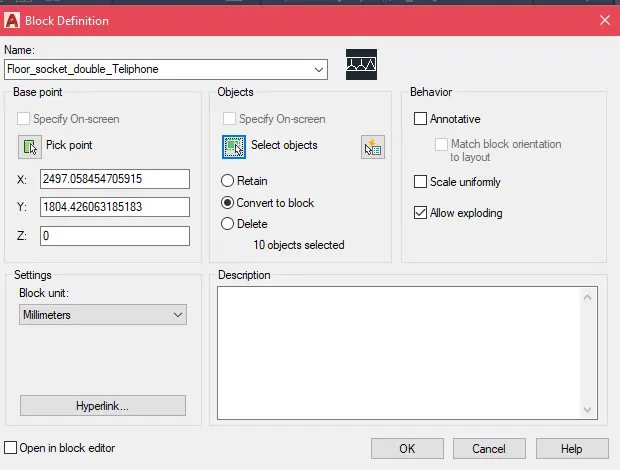
- In the block definition tab, enter the name of the block as "Floor socket double telephone".
- Click on the "pick point" and in the workspace click on the created object to mention the pick point.
- Then click on the "select objects" and in the workspace select the mentioned object using cursor.
- Click ok.
- In the command prompt type insert and press enter.
- Created block will be shown, click on it.
- Based on the pick point object can be placed anywhere in the required place
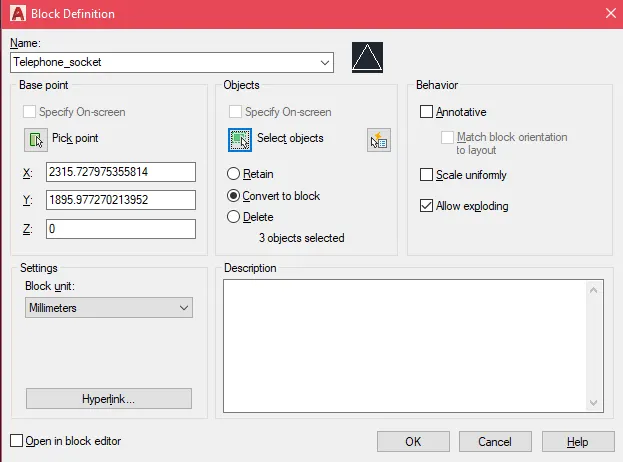
STEP:-21

- Type "B" in the command prompt and press enter.
- In the block definition tab, enter the name of the block as "Telephone socket ".
- Click on the "pick point" and in the workspace click on the created object to mention the pick point.
- Then click on the "select objects" and in the workspace select the mentioned object using cursor.
- Click ok.
- In the command prompt type insert and press enter.
- Created block will be shown, click on it.
- Based on the pick point object can be placed anywhere in the required place
STEP:-22

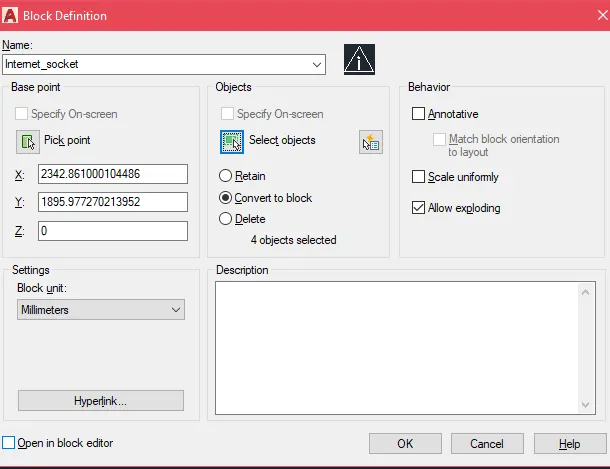
- Type "B" in the command prompt and press enter.
- In the block definition tab, enter the name of the block as "Internet socket ".
- Click on the "pick point" and in the workspace click on the created object to mention the pick point.
- Then click on the "select objects" and in the workspace select the mentioned object using cursor.
- Click ok.
- In the command prompt type insert and press enter.
- Created block will be shown, click on it.
- Based on the pick point object can be placed anywhere in the required place
STEP:-23

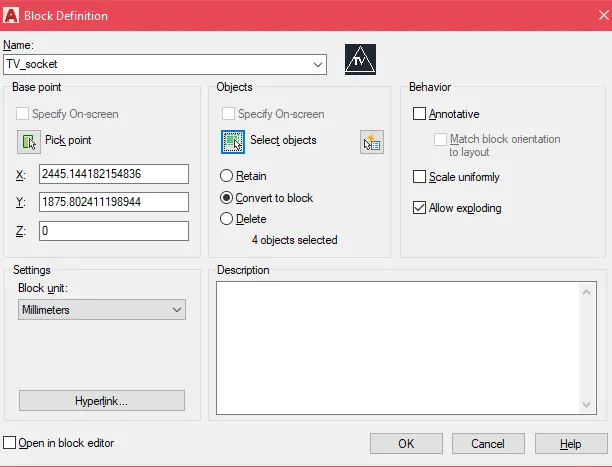
- Type "B" in the command prompt and press enter.
- In the block definition tab, enter the name of the block as "TV socket ".
- Click on the "pick point" and in the workspace click on the created object to mention the pick point.
- Then click on the "select objects" and in the workspace select the mentioned object using cursor.
- Click ok.
- In the command prompt type insert and press enter.
- Created block will be shown, click on it.
- Based on the pick point object can be placed anywhere in the required place
STEP:-24

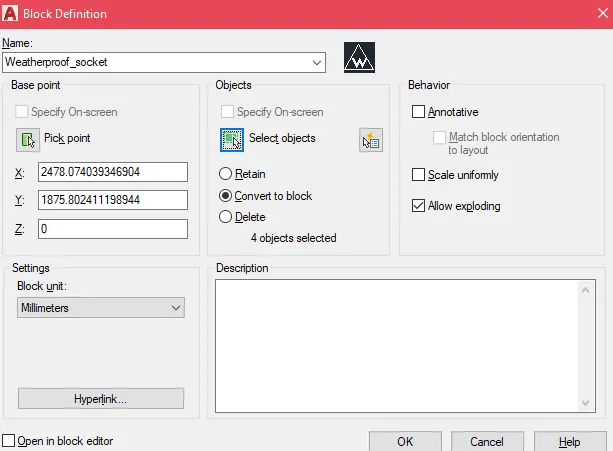
- Type "B" in the command prompt and press enter.
- In the block definition tab, enter the name of the block as "Weatherproof socket ".
- Click on the "pick point" and in the workspace click on the created object to mention the pick point.
- Then click on the "select objects" and in the workspace select the mentioned object using cursor.
- Click ok.
- In the command prompt type insert and press enter.
- Created block will be shown, click on it.
- Based on the pick point object can be placed anywhere in the required place
STEP:-25
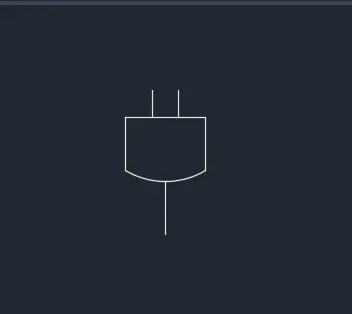
- Type "B" in the command prompt and press enter.
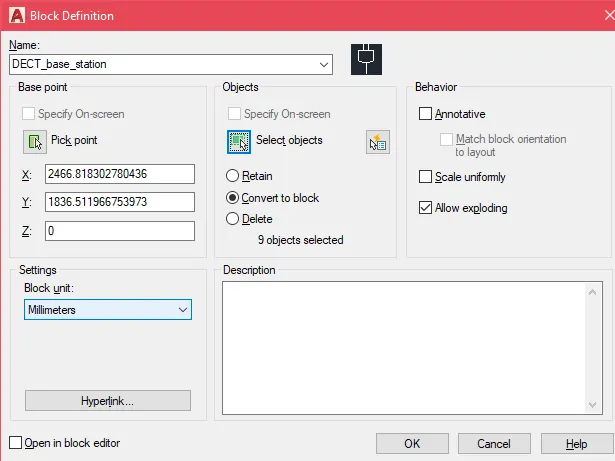
- In the block definition tab, enter the name of the block as "DECT base Station ".
- Click on the "pick point" and in the workspace click on the created object to mention the pick point.
- Then click on the "select objects" and in the workspace select the mentioned object using cursor.
- Click ok.
- In the command prompt type insert and press enter.
- Created block will be shown, click on it.
- Based on the pick point object can be placed anywhere in the required place
STEP:-26

- Type "B" in the command prompt and press enter.
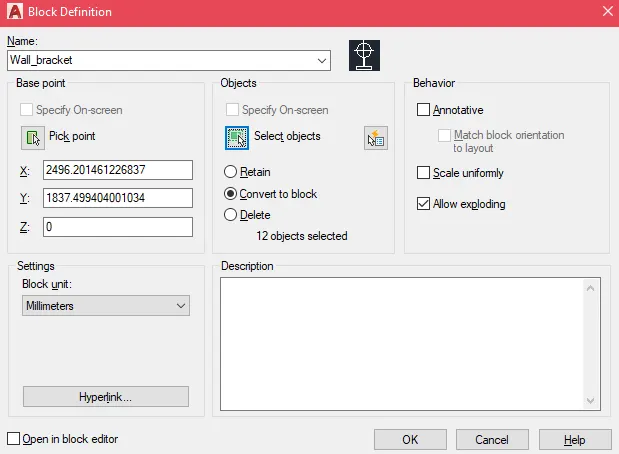
- In the block definition tab, enter the name of the block as "Wall bracket ".
- Click on the "pick point" and in the workspace click on the created object to mention the pick point.
- Then click on the "select objects" and in the workspace select the mentioned object using cursor.
- Click ok.
- In the command prompt type insert and press enter.
- Created block will be shown, click on it.
- Based on the pick point object can be placed anywhere in the required place
STEP:-27
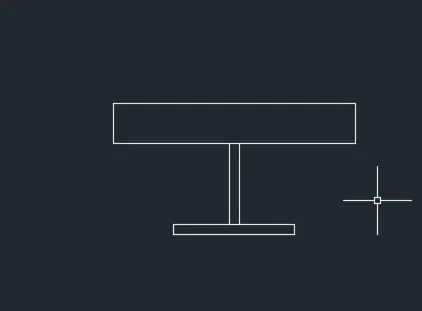
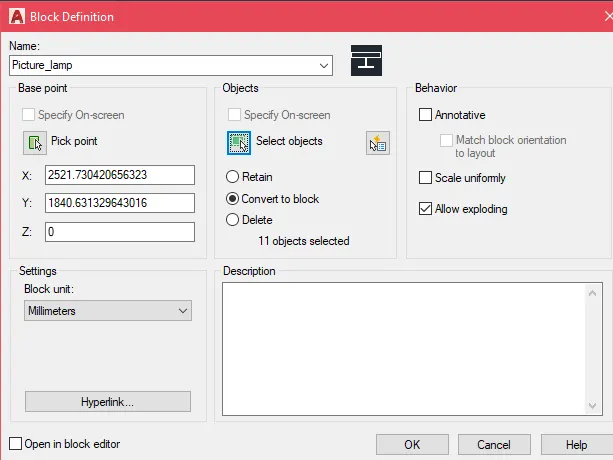
- Type "B" in the command prompt and press enter.
- In the block definition tab, enter the name of the block as "Picture lamp ".
- Click on the "pick point" and in the workspace click on the created object to mention the pick point.
- Then click on the "select objects" and in the workspace select the mentioned object using cursor.
- Click ok.
- In the command prompt type insert and press enter.
- Created block will be shown, click on it.
- Based on the pick point object can be placed anywhere in the required place
STEP:-28
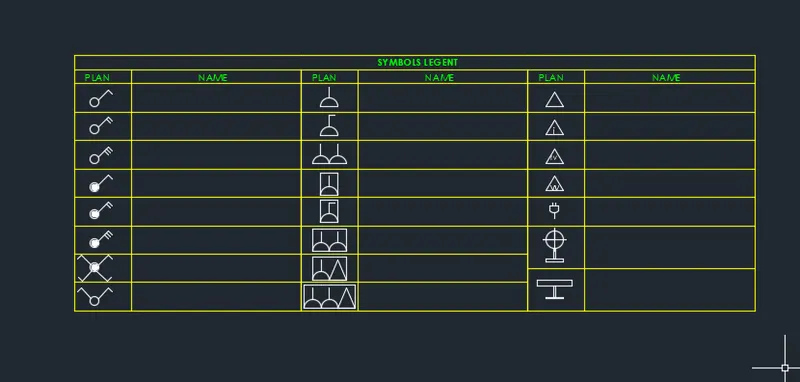
- Type insert in the command prompt and press enter.
- All the created blocks will appear.
- Select the required block and insert.
- Similarly insert all the required block
STEP:-29
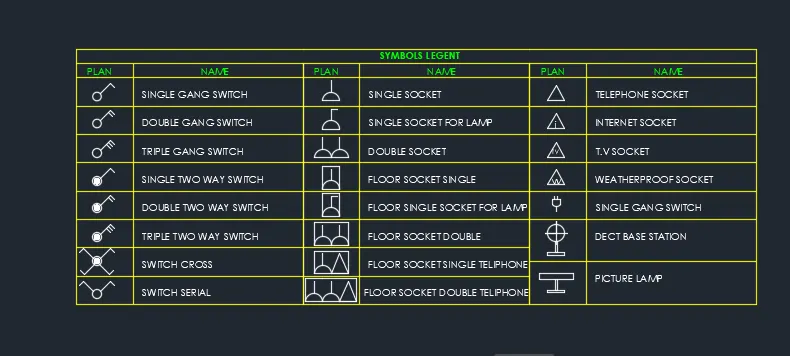
- Select text tool from ribbon tab and press enter.
- Select the single line text option.
- Using cursor mention the starting point of text.
- Specify the angle of rotation and press enter.
- Now the enter the required text.
- Specify the next point to enter the text.
4.
AIM:
To create the door type as block using AutoCAD.
PROCEDURE:
STEP:-1
- In the command prompt type UNITS as Engineering with presision 0'-00" and press enter.
- Select the required units and select the required insertion scale.
- Select layer settings from ribbon tab
- From the layer settings tab select create layer option.
- Enter the required layer name, select the line type and color.
- Set the created layer as current layer.
- In the ribbon tab, select rectangle tool.
- Specify the starting point using cursor.
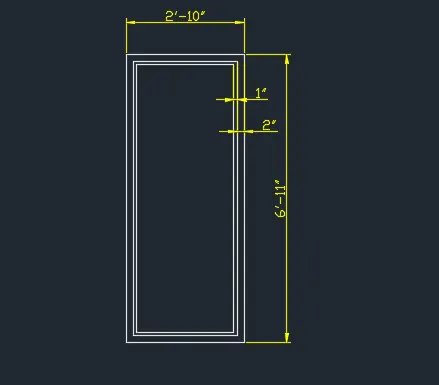
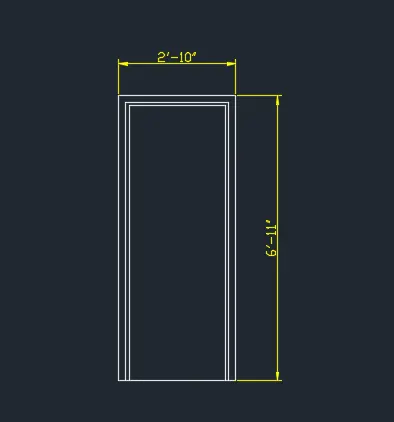
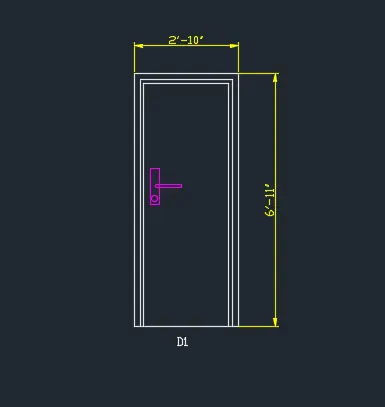
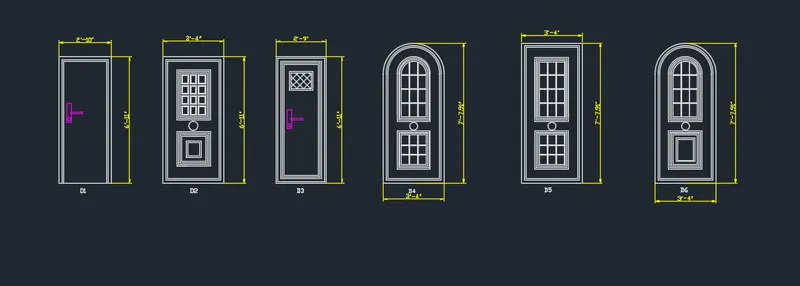
- Draw the rectangle of required length as 2'10" and width as 6'11" and press enter.
- Type offset in the command prompt and press enter.
- Enter the offset distance as 2" in the command prompt.
- Select the object to offset.
- Repeat the offset command as the offset distance 1".
STEP:-2
- Type Trim in the command prompt and press enter.
- Trim the bottom offset line.
- Type extend command toextend the both side offset line and it join to the base rectangle.
STEP:-3
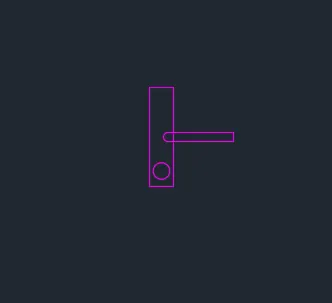
- Now creat a lock for the door using circle,rectngle,arc command.
- After drafting convert it into a block.
STEP:-4
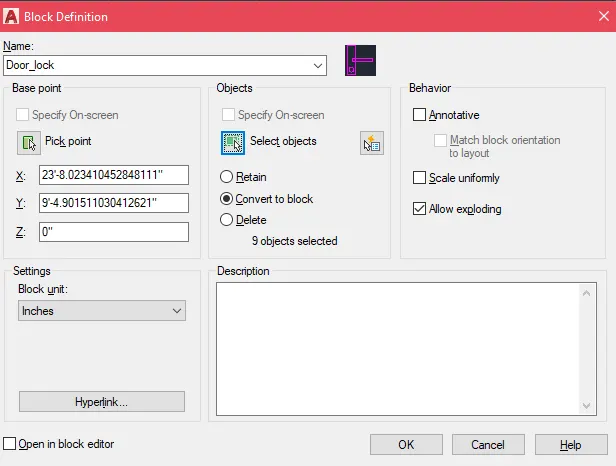
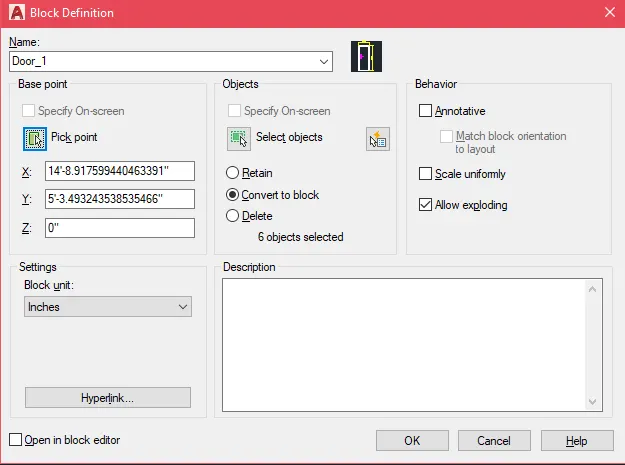
- Type "B" in the command prompt and press enter.
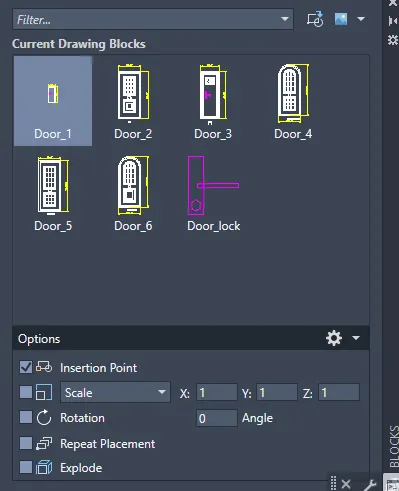
- In the block definition tab, enter the name of the block as "Door 1".
- Click on the "pick point" and in the workspace click on the created object to mention the pick point.
- Then click on the "select objects" and in the workspace select the mentioned object using cursor.
- Click ok
STEP:-5
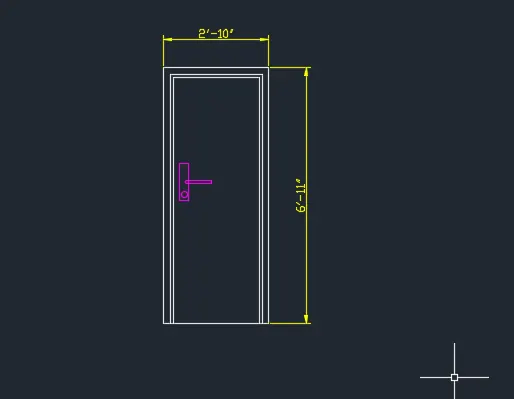
- In the command prompt type insert and press enter.
- Created block will be shown, click on it.
- Based on the pick point object can be placed anywhere in the required place.
STEP:-6
- Select the dimensioning tool from ribbon tab and press enter.
- Mention the starting point and end point to display the dimensions.
- Similarly measure the required dimensions.
STEP:-7
- In the ribbon tab, select RECTANGLEtool.
- Specify the starting point using cursor.
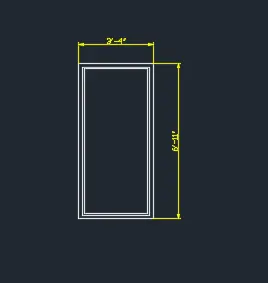
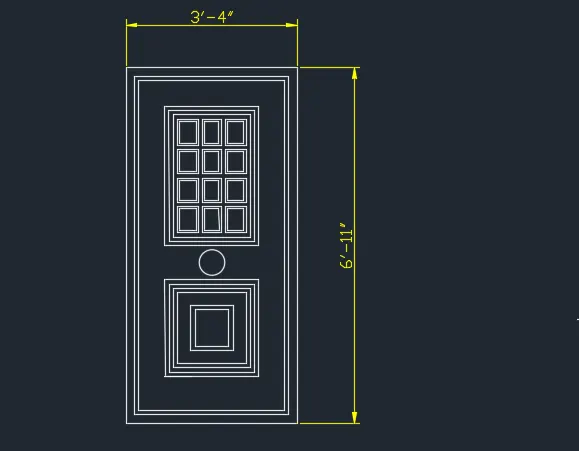
- Draw the line of required length as 3'4" and Width as 6'11" press enter.
- Type offset in the command prompt and press enter.
- Enter the offset distance as 2" in the command prompt.
- Select the object to offset.
- Repeat the offset command as the offset distance taken as 1".
STEP:-8
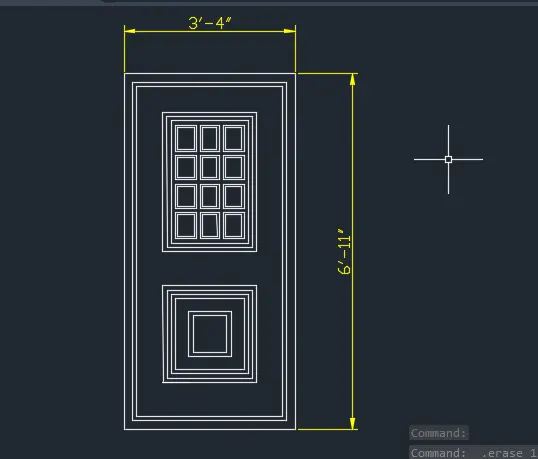
- Select rectangle from ribbon tab and press enter.
- Specify the starting point and drag the cursor to create a rectangle.
- Press esc.
- Type offset in the command prompt and press enter.
- Specify the offset distance and select the object to offset.
STEP:-9
- Select the circle tool from ribbon tab and press enter.
- Create a circle.
STEP:-10
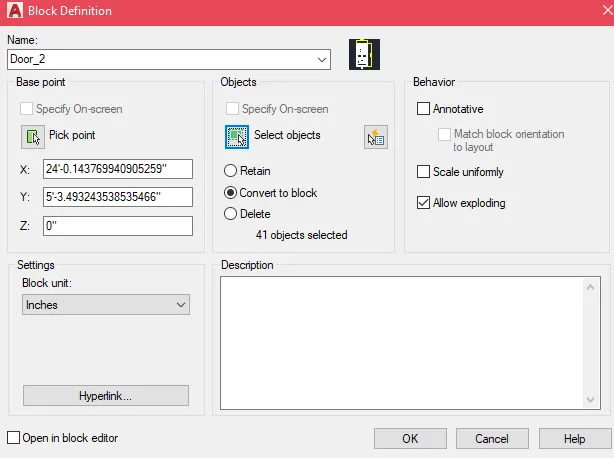
- Type "B" in the command prompt and press enter.
- In the block definition tab, enter the name of the block as "Door 2".
- Click on the "pick point" and in the workspace click on the created object to mention the pick point.
- Then click on the "select objects" and in the workspace select the mentioned object using cursor.
- Click ok
STEP:-11
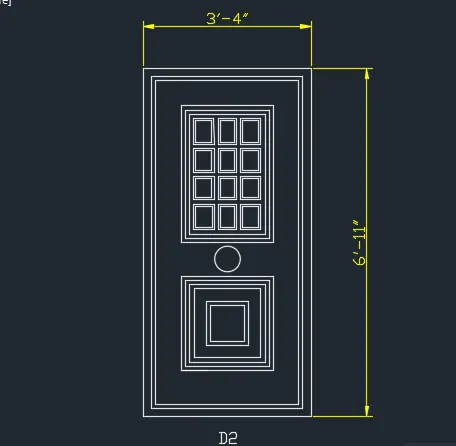
- In the command prompt type insert and press enter.
- Created block will be shown, click on it.
- Based on the pick point object can be placed anywhere in the required place
STEP:-12
- In the ribbon tab, select Rectangle tool.
- Specify the starting point using cursor.
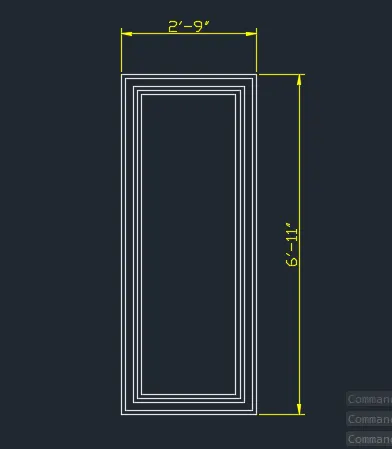
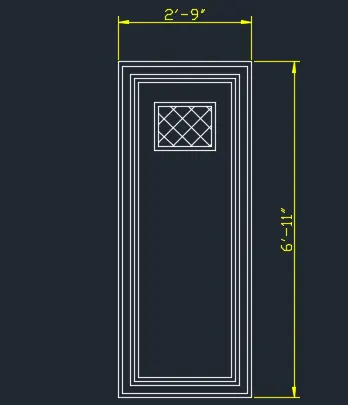
- Draw the line of required length as 2'9" and width as 6'11" and press enter.
- Type offset in the command prompt and press enter.
- Enter the offset distance as 1",2",1",1" respectivly in the command prompt.
- Select the object to offset.
- Repeat the offset command as per the required dimensions.
STEP:-13
- Draw a line using line tool from ribbon tab
- Draw a rectangle using line command.
- Press esc.
- Hatch the rectangle.
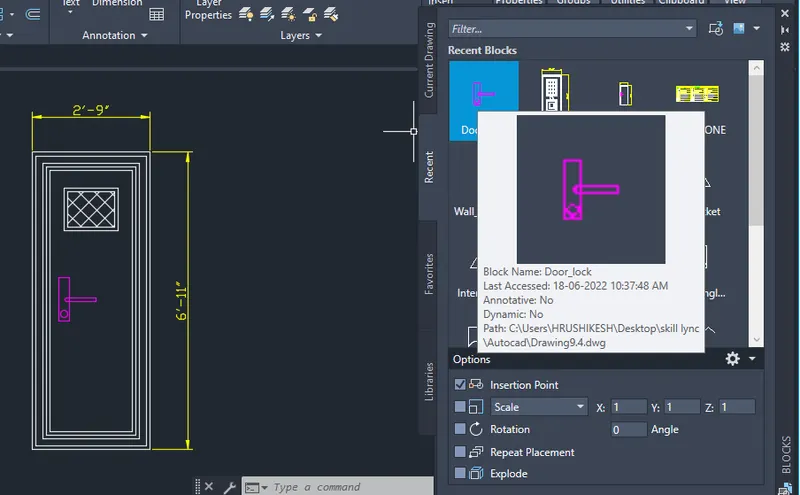
- Insert the door lock which one is previously created by i commaand.
STEP:-14
- Type "B" in the command prompt and press enter.
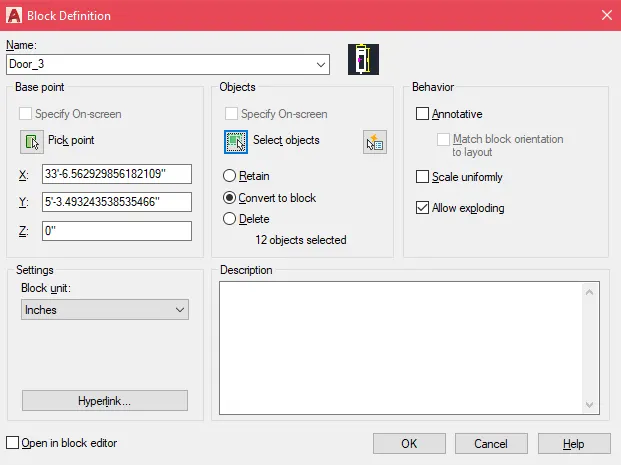
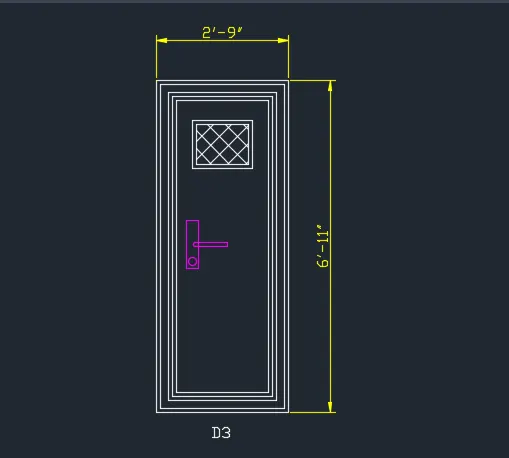
- In the block definition tab, enter the name of the block as "Door3".
- Click on the "pick point" and in the workspace click on the created object to mention the pick point.
- Then click on the "select objects" and in the workspace select the mentioned object using cursor.
- Click ok.
- In the command prompt type insert and press enter.
- Created block will be shown, click on it.
- Based on the pick point object can be placed anywhere in the required place.
STEP:-15
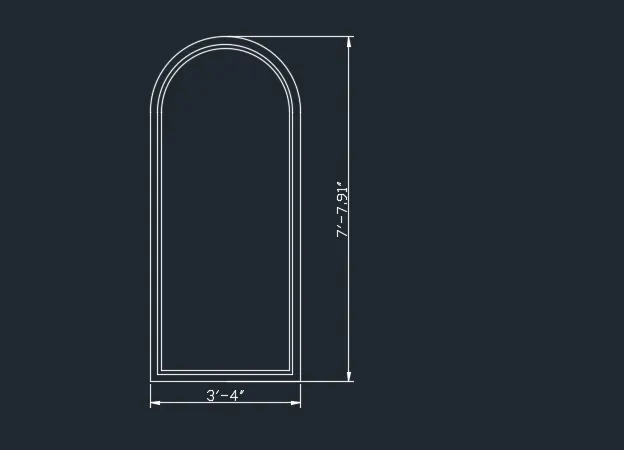
- In the ribbon tab, select Rectangle tool.
- Specify the starting point using cursor.
- Draw the line of required length of 6' and width as 3'4" and press enter.
- Select arc tool from line ribbon tab.
- From the drop down list select "start,end, direction" and press enter.
- Type offset in the command prompt and press enter.
- Enter the offset distance as 2",1" respectively in the command prompt.
- Select the object to offset.
- Repeat the offset command as per the required dimensions
- Select arc tool from line ribbon tab.
- From the drop down list select "start,end, direction" and press enter.
STEP:-16
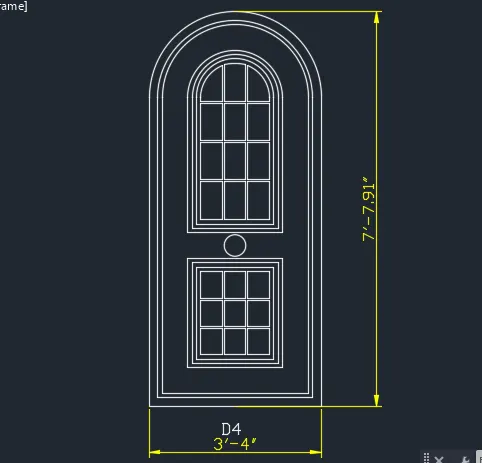
- Type offset in the command prompt and press enter.
- Enter the offset distance in the command prompt.
- Select the object to offset.
- Repeat the offset command as per the required dimensions.
STEP:-17
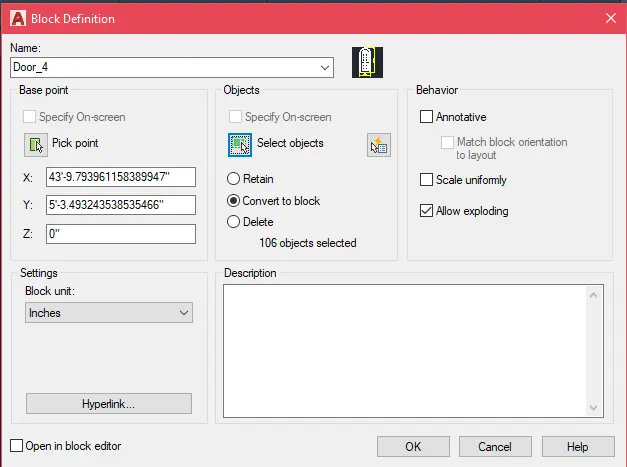
- Type "B" in the command prompt and press enter.
- In the block definition tab, enter the name of the block as "Door 4".
- Click on the "pick point" and in the workspace click on the created object to mention the pick point.
- Then click on the "select objects" and in the workspace select the mentioned object using cursor.
- Click ok.
- In the command prompt type insert and press enter.
- Created block will be shown, click on it.
- Based on the pick point object can be placed anywhere in the required place
STEP:-18
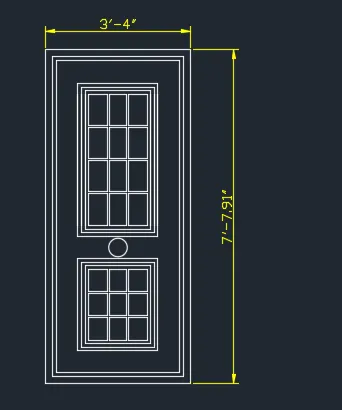
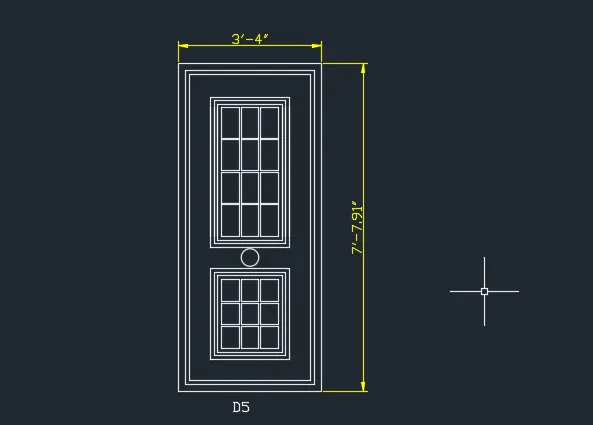
- In the ribbon tab, select Rectangle tool.
- Specify the starting point using cursor.
- Draw the line of required length of 7'91" and width as 3'4" and press enter.
- Select arc tool from line ribbon tab.
- From the drop down list select "start,end, direction" and press enter.
- Type offset in the command prompt and press enter.
- Enter the offset distance as 2",1" respectively in the command prompt.
- Select the object to offset.
- Repeat the offset command as per the required dimensions
STEP:-19
- Type "B" in the command prompt and press enter.
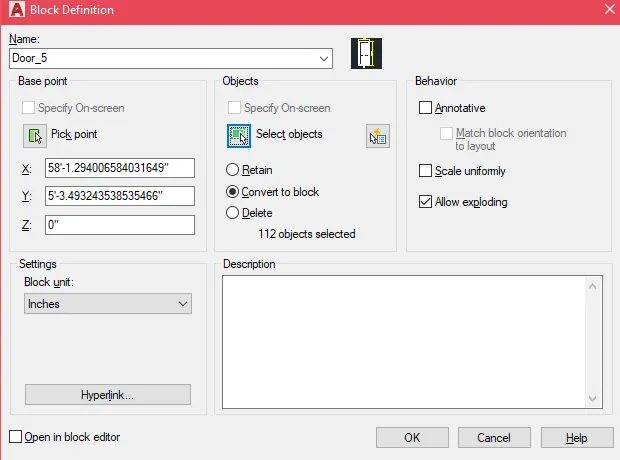
- In the block definition tab, enter the name of the block as "Door 5".
- Click on the "pick point" and in the workspace click on the created object to mention the pick point.
- Then click on the "select objects" and in the workspace select the mentioned object using cursor.
- Click ok.
- In the command prompt type insert and press enter.
- Created block will be shown, click on it.
- Based on the pick point object can be placed anywhere in the required place
STEP:-20
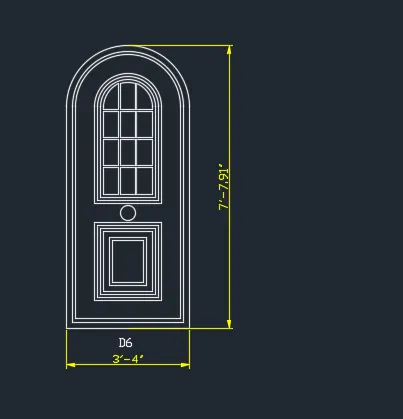
- In the ribbon tab, select Rectangle tool.
- Specify the starting point using cursor.
- Draw the line of required length of 6' and width as 3'4" and press enter.
- Select arc tool from line ribbon tab.
- From the drop down list select "start,end, direction" and press enter.
- Type offset in the command prompt and press enter.
- Enter the offset distance as 2",1" respectively in the command prompt.
- Select the object to offset.
- Repeat the offset command as per the required dimensions
- Select arc tool from line ribbon tab.
- From the drop down list select "start,end, direction" and press enter.
STEP:-21
- Type offset in the command prompt and press enter.
- Enter the offset distance in the command prompt.
- Select the object to offset.
- Repeat the offset command as per the required dimensions.
STEP:-22
- Type "B" in the command prompt and press enter.
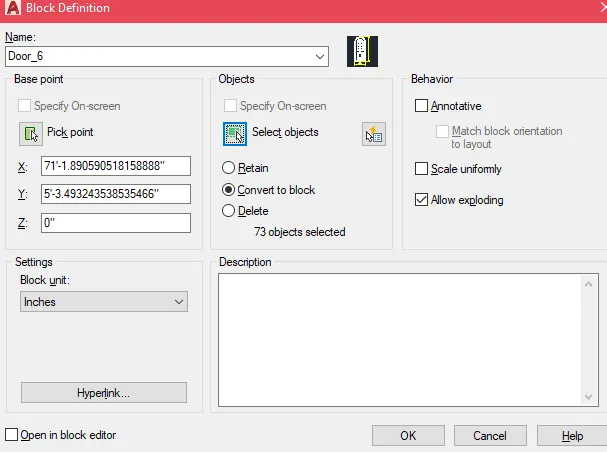
- In the block definition tab, enter the name of the block as "DOOR 6".
- Click on the "pick point" and in the workspace click on the created object to mention the pick point.
- Then click on the "select objects" and in the workspace select the mentioned object using cursor.
- Click ok.
- In the command prompt type insert and press enter.
- Created block will be shown, click on it.
- Based on the pick point object can be placed anywhere in the required place
RESULT:-
Hense all the doors are created as a block.
6.
Aim:
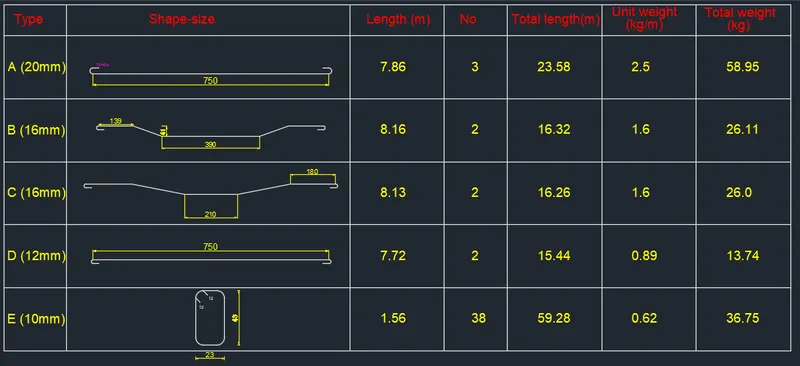
Create each shape as a block as shown in the Figure. Save the block and insert them on the table as shown in the Figure.
Procedure:
STEP:-1
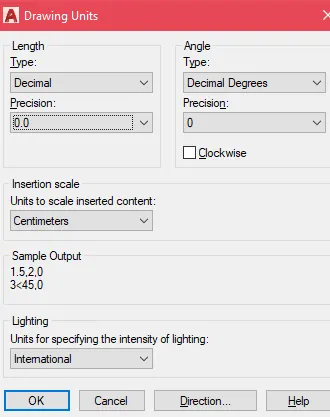
- In the command prompt type UNITS and press enter.
- Select the required units as Desimal and select the required insertion scale.
- Select layer settings from ribbon tab.
- From the layer settings tab select create layer option.
- Enter the required layer name, select the line type and color.
- Set the created layer as current layer.
- From the ribbon tab, select line tool.
- Specify the starting point using cursor
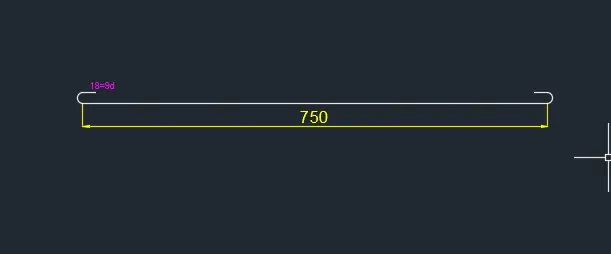
- Draw the line of required length as 750cm and press enter.
STEP:-2
- Select the arc tool from the ribbon tab and press enter.
- From the drop down list, select start,end and direction option.
- Similarly on the other side create the arc.
STEP:-3
- Type "B" in the command prompt and press enter.
- In the block definition tab, enter the name of the block as "A(20mm)".
- Click on the "pick point" and in the workspace click on the created object to mention the pick point.
- Then click on the "select objects" and in the workspace select the mentioned object using cursor.
- Click ok.
- In the command prompt type insert and press enter.
- Created block will be shown, click on it.
- Based on the pick point object can be placed anywhere in the required place.
STEP:-4
- From the ribbon tab, select line tool.
- Specify the starting point using cursor.
- Draw the line of required length as 390 and press enter.
- Specify the next point as (@150<135) and press enter.
- Specify the next point as (@150<45) and press enter.
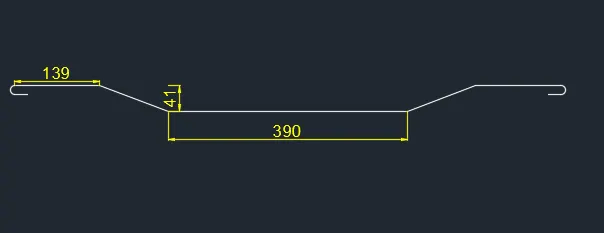
STEP:-5
- From the ribbon tab, select line tool.
- Specify the starting point using cursor.
- Draw the line of required length and press enter.
- Select the arc tool from the ribbon tab and press enter.
- From the drop down list, select start,end and direction option.
- Similarly on the other side create the arc
STEP:-6
- Select dimesnion tool from ribbbon tab and press enter.
- Specify the starting and end point to display the dimensions.
STEP:-7
- Type "B" in the command prompt and press enter.
- In the block definition tab, enter the name of the block as "B(169mm)".
- Click on the "pick point" and in the workspace click on the created object to mention the pick point.
- Then click on the "select objects" and in the workspace select the mentioned object using cursor.
- Click ok.
- In the command prompt type insert and press enter.
- Created block will be shown, click on it.
- Based on the pick point object can be placed anywhere in the required place.
STEP:-8
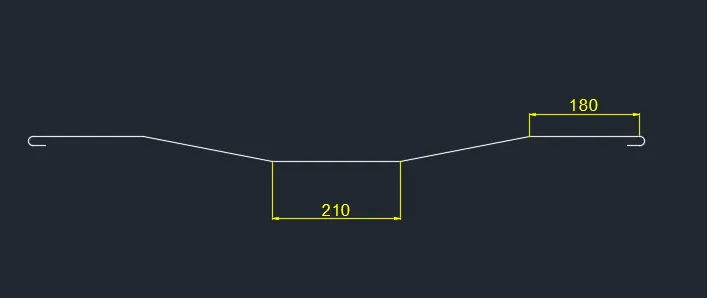
- Type "B" in the command prompt and press enter.
- In the block definition tab, enter the name of the block as "C(16mm)".
- Click on the "pick point" and in the workspace click on the created object to mention the pick point.
- Then click on the "select objects" and in the workspace select the mentioned object using cursor.
- Click ok.
- In the command prompt type insert and press enter.
- Created block will be shown, click on it.
- Based on the pick point object can be placed anywhere in the required place
STEP:-9
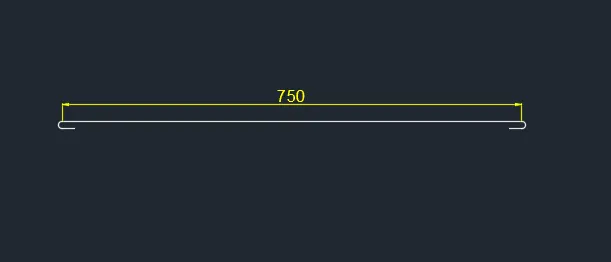
- Type "B" in the command prompt and press enter.
- In the block definition tab, enter the name of the block as "D(12mm)".
- Click on the "pick point" and in the workspace click on the created object to mention the pick point.
- Then click on the "select objects" and in the workspace select the mentioned object using cursor.
- Click ok.
- In the command prompt type insert and press enter.
- Created block will be shown, click on it.
- Based on the pick point object can be placed anywhere in the required place.
STEP:-10
- Select rectangle tool from ribbon tab and press enter.
- Specify the starting point and drag the cursor to create the rectangle.
- Type fillet in the command prompt and press enter.
- Specify the radius as per the requirement.

STEP:-11
- Select line tool from the ribbon tab.
- Select the starting point as top filleted object and draw a line.
- Again draw a line using line tool

STEP:-12
- Select dimension tool from ribbon tab and press enter.
- Select the first point and menstion the end point.
- Now the dimension displays.
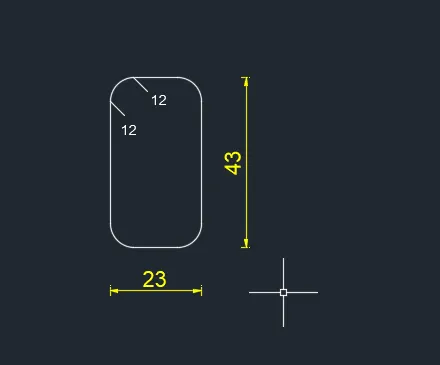
STEP:-13
- Type "B" in the command prompt and press enter.
- In the block definition tab, enter the name of the block as "D(12mm)".
- Click on the "pick point" and in the workspace click on the created object to mention the pick point.
- Then click on the "select objects" and in the workspace select the mentioned object using cursor.
- Click ok.
- In the command prompt type insert and press enter.
- Created block will be shown, click on it.
- Based on the pick point object can be placed anywhere in the required place
STEP:-14
- Select the line tool from ribbon tab and press enter.
- Specify the starting point and press enter.
- Draw another line in downward direction.
- Similarly draw all the lines.
- Press esc.
- Select line tool from ribbon tab and press enter.
- Specify the starting point and press enter.
- Draw another line in horizontal direction.
- Similarly draw all the lines.
- Press esc.
- Select text tool from ribbon tab and press enter.
- Select the single line text option.
- Using cursor mention the starting point of text.
- Specify the angle of rotation and press enter.
- Now the enter the required text.
- Specify the next point to enter the text
STEP:-15
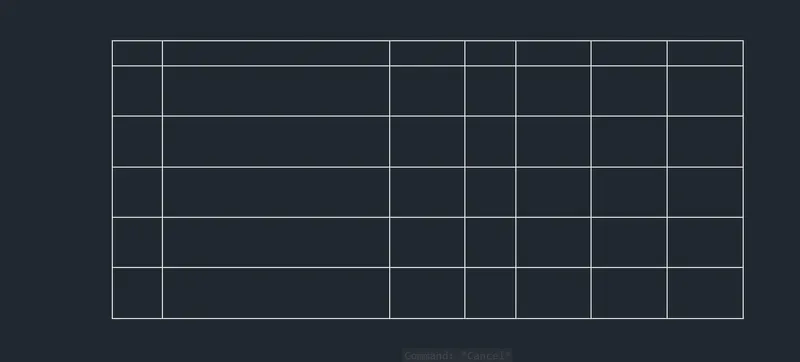
- Select line tool from ribbon tab and press enter.
- Specify the starting point and press enter.
- Draw another line in horizontal direction.
- Similarly draw all the lines
STEP:-16
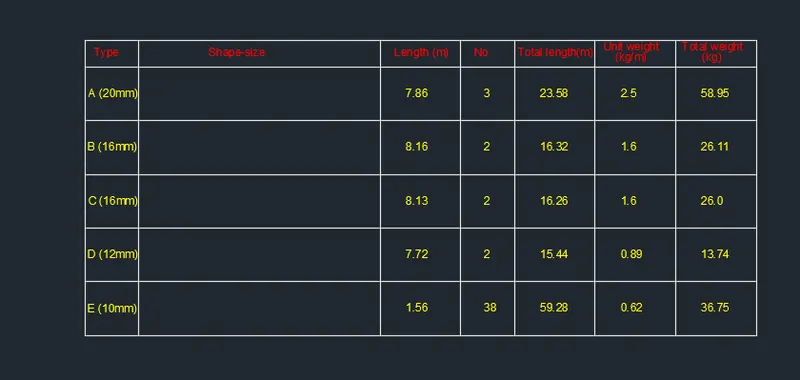
- Select text tool from ribbon tab and press enter.
- Select the single line text option.
- Using cursor mention the starting point of text.
- Specify the angle of rotation and press enter.
- Now the enter the required text.
- Specify the next point to enter the text.
STEP:-17
- Type insert in the command prompt and press enter.
- From the insert box, select A and place in the required place.
- From the insert box, select B and place in the required place.
- From the insert box, select C and place in the required place.
- From the insert box, select D and place in the required place.
- From the insert box, select E and place in the required place.
RESULT:-
Hense all the shape are created as a block and insert them in the table.