Design and assembly of an Automobile Hood.
Aim: Design and assembly of an Automobile Hood.
Introduction: A hood or commonly known as a bonnet, is a hinged cover over the engine compartment of modern passenger cars. The main purpose of a hood is to allow access to the engine compartment for maintenance and repairs. Apart from this, it also provides safety to the passengers inside the vehicle and for the pedestrians.
Based on different road conditions and other surrounding factors, different countries have set up different design parameters for the optimized design of a hood keeping in mind passenger and pedestrian safety. Different organizations have come up with different regulations for hood design based on the region and road conditions there. Such examples are A-NCAP, Euro-NCAP, C-NCAP, etc.
In this project, we are given an input class A surface and a master section for the development of the inner and outer panels. Upon completion of the hood design, we have to assemble the different reinforcements to the hood. This report broadly discusses the design methodology, the tool used, different components in a hood assembly, latch and hinge placement, and other manufacturing techniques such as Hemming.
Design Methodology:
Input Class A and Master Section `->` Creation of base surface for the inner panel from the input data `->` Creation of required reinforcements `->`Providing the required thickness to the panels `->` Assemble the different components
Input Surface:
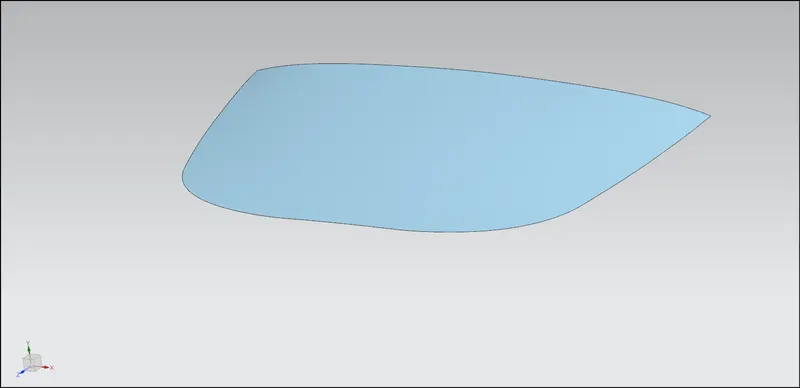
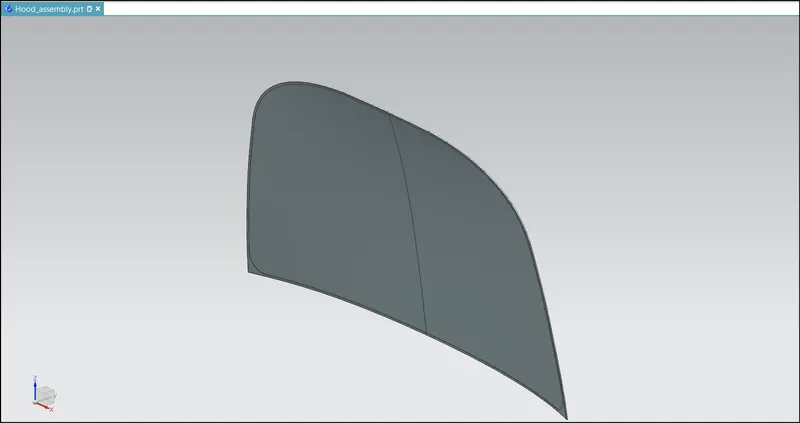
The above-given surface is class A for the outer panel. I have used the same surface for the creation of the base surface for the inner panel. This will be the parent surface for the creation of the whole geometry. For the development of the base inner panel surface, I have followed the below-shown master section.
Design of Inner Panel:
To create the base surface for the inner panel, we have used the above-shown class A surface and master section. NX-12 is used as a tool for designing. Different tools as discussed below are used:
- Offset surface: The offset surface tool creates a copy of the selected surface at a provided distance and direction.
- Emboss: The embossing tool creates a punched surface of the selected closed contour. The punch is created from a selected surface containing the contour sketch/curve. A draft can be provided for the punch from either the end cap or the base surface.
- Trim sheet: The trim sheet tool splits the target surface along the intersection curve of the target surface and the tool surface. The part of the surface on either side of the intersection can be either discarded or retained as per the requirement.
- Through curves: This tool creates a surface between two different surface sections where the shape can change in between sections.
- Law extension: Creates an extended surface based on an open chain contour or a closed contour on the selected target surface. A draft can be provided for the extension.
- Face blend: Creates a curved blend or fillet along two selected surfaces in a provided direction vector. The curve of the blend can be adjusted in terms of radius, width and continuity.
- Extend sheet: Creates an extension of the selected sheet up-to a provided distance.
- Offset in face: Creates an offset of a curve or edge on the target face up-to a provided distance and direction.
- Bridge curve: Creates a, arc between two intersecting or non-intersecting curves. The start and end points of the arc can be adjusted by providing a distance value.
- Project curve: Creates a projection of a selected curve profile onto a target surface. The surface can be linear or curved. The direction of projection can be adjusted by providing a suitable vector.
- Extrude: Creates a surface or a solid based on the selected sketch. The distance and direction vector can be provided manually. Extrude tool can only create a linear profile along a provided direction.
- Sew: The sew tool merges two or more surface bodies into a single sheet or a solid based on the requirement. Any gaps between the surfaces can be closed if they are within the set tolerance range.
- Mirror geometry: This tool mirrors a selected geometry along a plane or a face.
- Curve on surface: Creates a curve on a selected surface by providing the start and end points and their relation i.e., G1 Tangent or G2 curvature.
- Thicken: Creates a solid body with provided thickness and direction.
- Extracted body: Creates a body of the selected geometry that cannot be edited. It can only be changed by editing the parent features and rebuilding the extracted body.
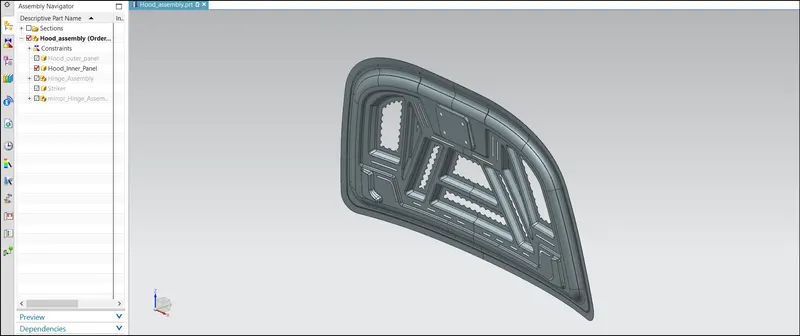
Model of Developed Inner Panel:
Draft Analysis:
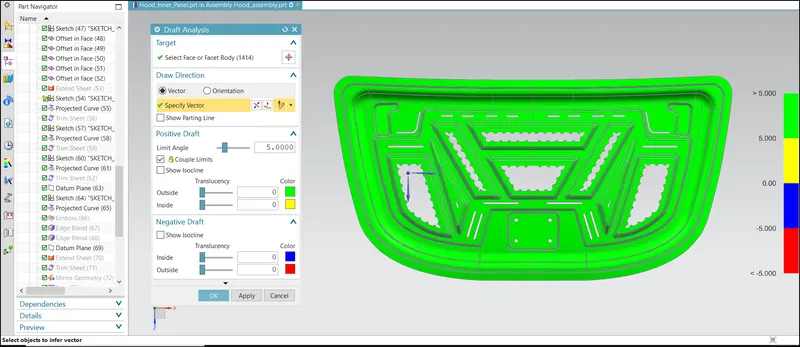
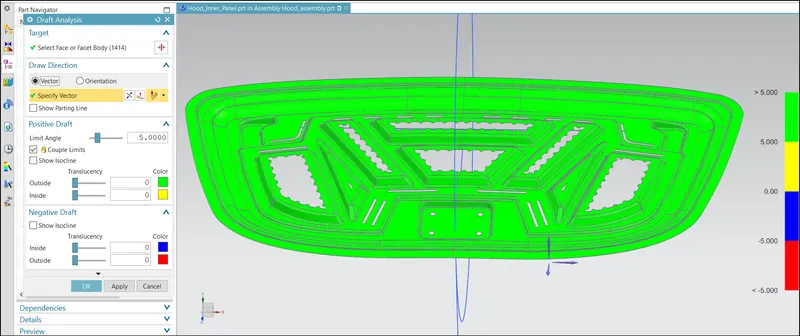
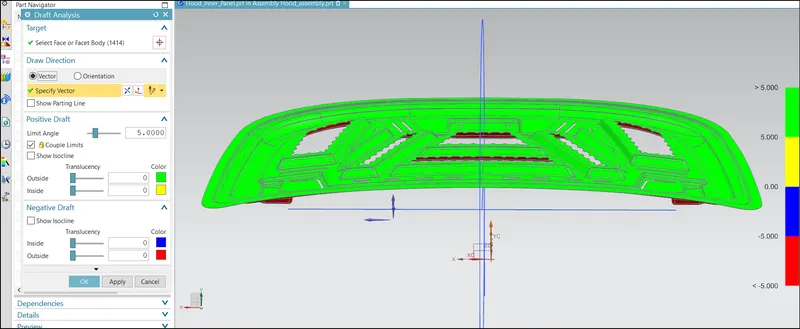
As can be seen from the above images attached that the inner panel clears the minimum draft of 5deg on all faces.
Design of Outer Panel:
To design the outer panel I have used the parent class A surface. In this case, I have to also take care of the hemming process.
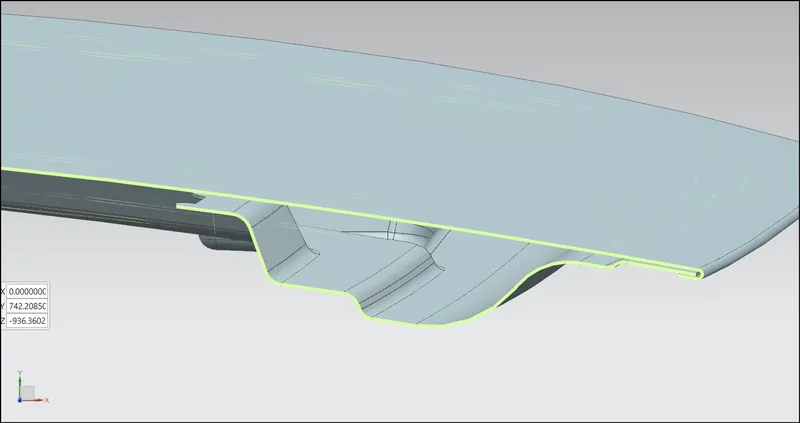
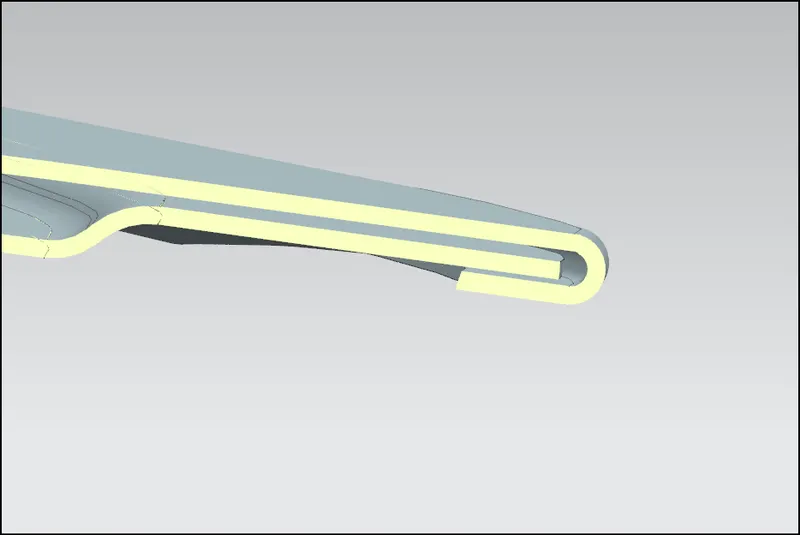
Hemming: The hemming process is used to lock two sheets together by folding one sheet around the other sheet. The hem is created by first creating a perpendicular flange. The flange is then bent beyond 90 degrees in the pre-hemming process. Finally, the hem is created by pressing the flange back on the sheet completely. Hems can be an open type or closed type. To lock two sheets together, generally open flanges are used.
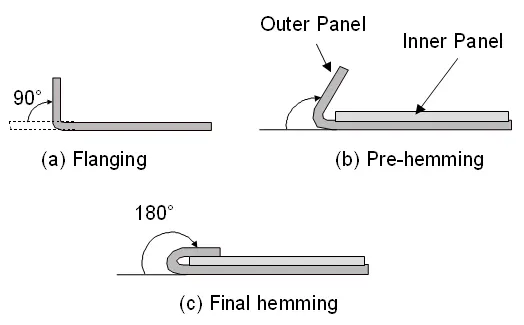
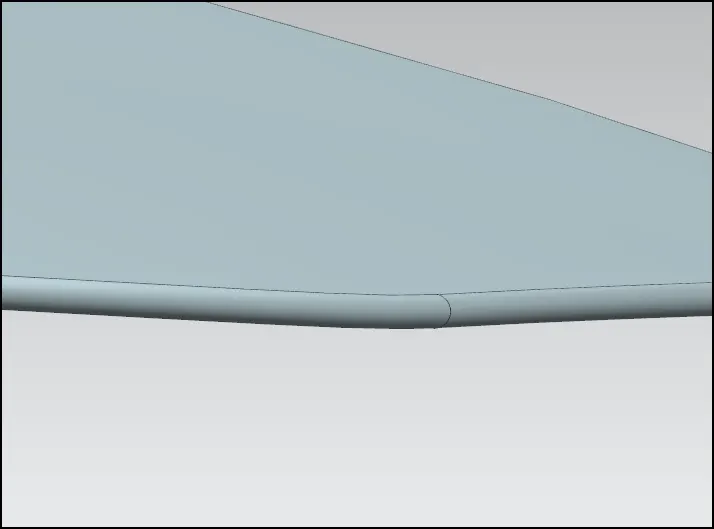
To create these hems and drawn surfaces in a 3d software, we use features such as emboss and offset surface and face blend.
Hemming:
Opening Angle of the Hood:
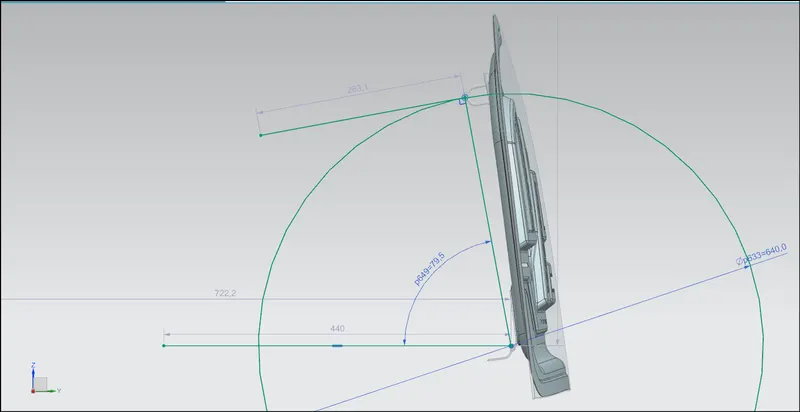
The below images explain how the opening angle is decided for the hood. From the image, it is clear that when a circle is drawn from the axis of rotation of the hood,i.e., through the hinges, and a line is drawn touching the endpoint of the striker, an angle of ~80deg is formed. This will be the maximum angle possible for the rotation of the hood and a mechanism to hold and restrict this movement will be devised accordingly.
Position of striker and hinges:
In the below images, the position of the striker is checked. A line tangent to the circle is drawn. This line is perpendicular to the latch placement and thus verifies the right placement of the striker
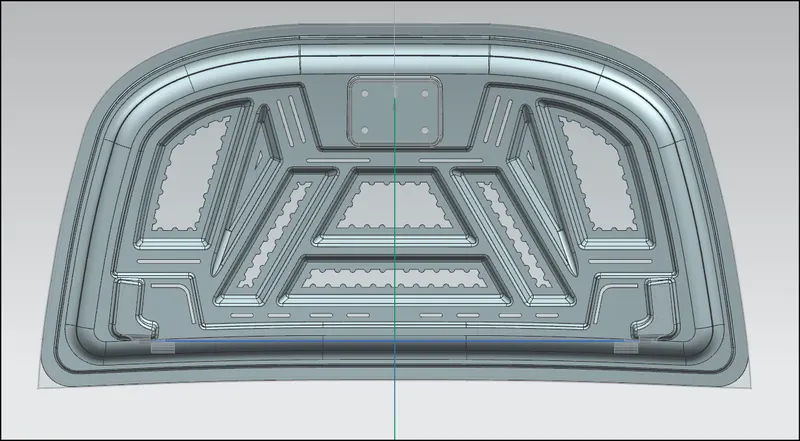
In the image below, an axis is shown which passes through the centre of both the hinges.
Mastic Data:
A mastic sealant is a type of liquid sealant that cures in an elastic state, thus making it flexible while holding the bond of the surfaces that have attached together. It adheres to just about any material making an all-purpose type of sealant.
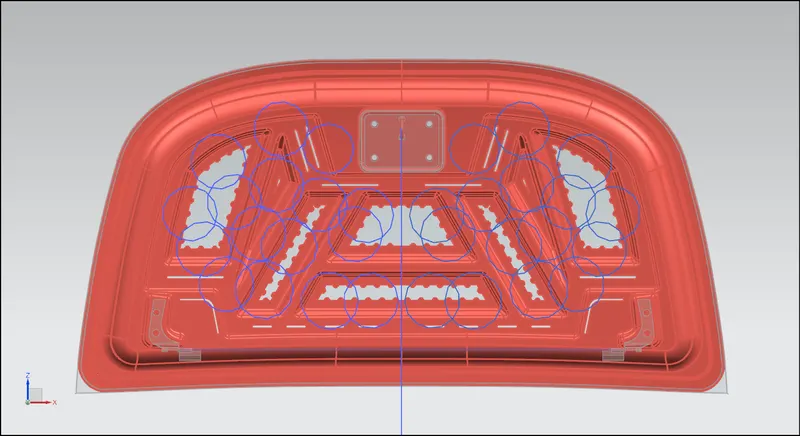
The main purpose of the outer panel is for aesthetic looks. Thus we cannot use bolts or welding. This has to be done with the help of hemming and mastic sealants. Mastic sealants are elastic compound that behaves like the rubber. It is placed between the outer and inner panels. Initially is it in paste form, but after the hot furnace bath, it gets hardened thus joining the outer and inner panel. Mastic sealant has the tendency to increase the strength of the panel and has an influence of 80mm diameter.
Advantages of using Mastic Sealants:
- One positive characteristic of mastic sealant is that it has a very smooth exterior while keeping its rigid form underneath.
- Surfaces do not have to be primed when using this type of sealant, and although applied thick, it adheres smoothly to any surface. It is important that the area to be joined or sealed be clean and dry, just like any other sealant on the market.
- Mastic sealant may be used outdoors as well because of its waterproof quality. It can be applied to rain duct leaks outdoors, for example.
- It is also favored for areas under high or low temperatures such as heater vents or drier vents and contains ultraviolet inhibitors to make sure that it is protected from damaging effects of the sun that will often weaken other types of sealants. That makes it a good choice for use on roofs, or any surface that is constantly exposed to sunlight. Most mastic sealants will also work well with metal because they do not corrode over time.
- It functions well in areas with mild vibration and heat, like heating ducts.
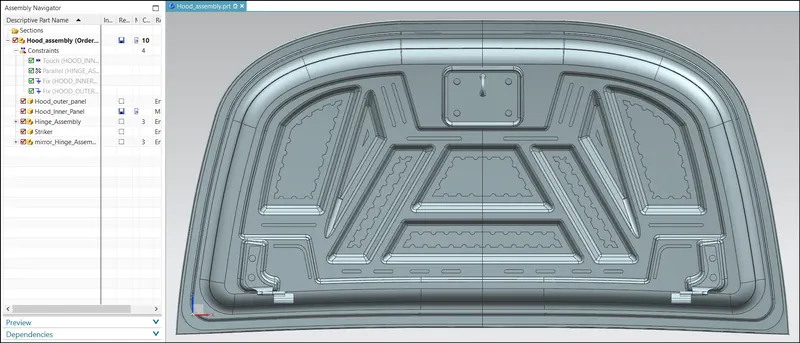
Final Assembly of the Hood:
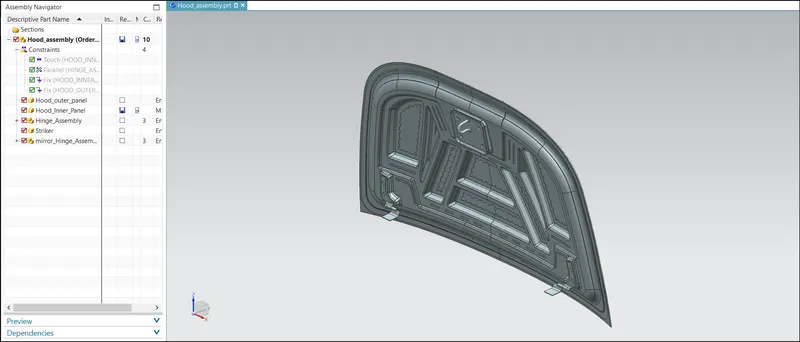
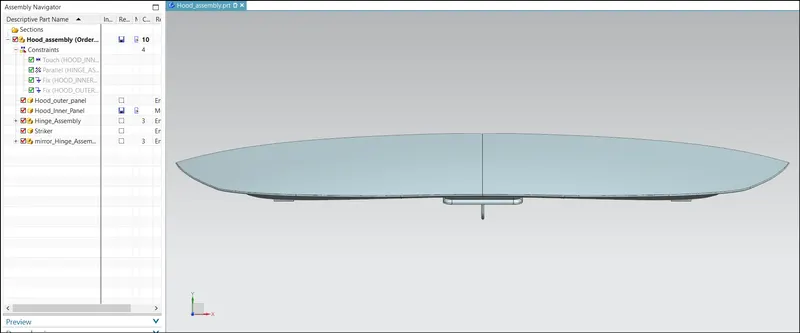
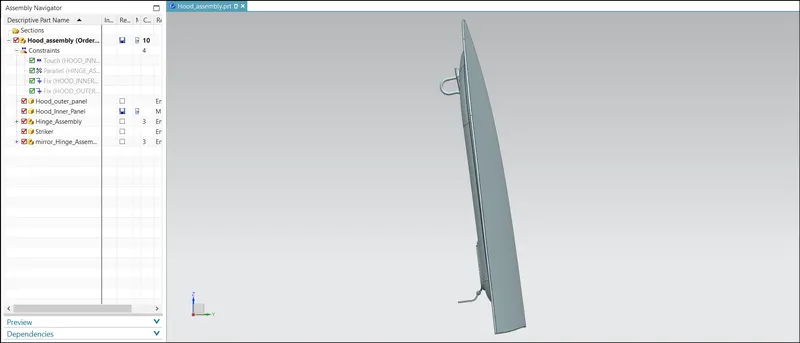
The components are then fixed together using the suitable constraints as shown below in the image.
Key Parameters:
Outer Panel Thickness: 0.75mm
Inner Panel Thickness: 0.75mm