Assignment 6-Frontal Crash Simulation Challenge
Objective :
- To be able to check the unit system of model.
- To create contact interfaces and verify them.
- To check model for penetrations and intersections and
- To be able to create rigid bodies.
- To be able to adjust the COG of model and modify it.
- To be able to check and troubleshoot model quality.
- To be able to set up the model and request output blocks.
Case set up :
1 ) Import the model :
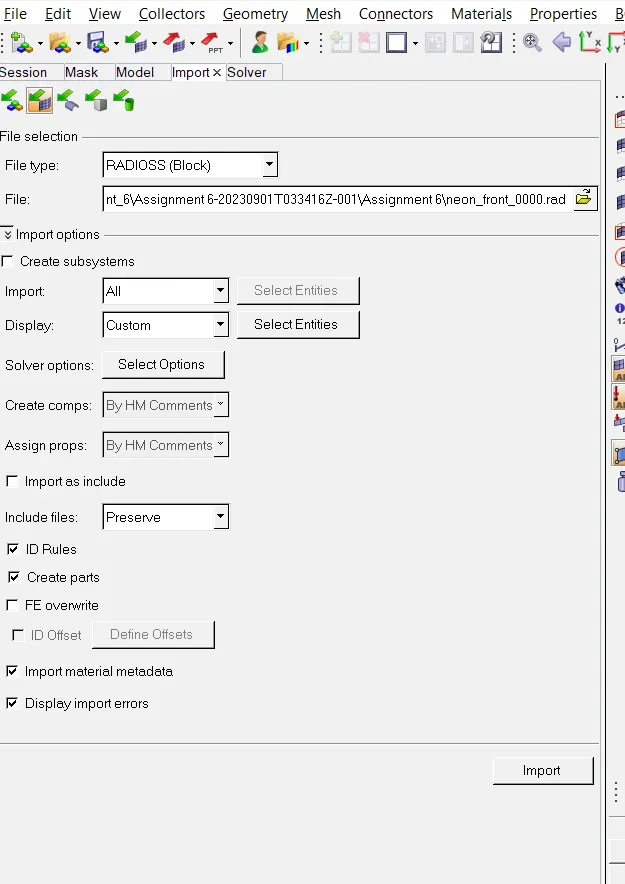
- Go to Tool bar
- Click File > Import > Solver Deck
- Click the select file icon > Select file > click open.
- Click Import.
2 ) Check unit system of model.
- In the model browser check the unit system of model.
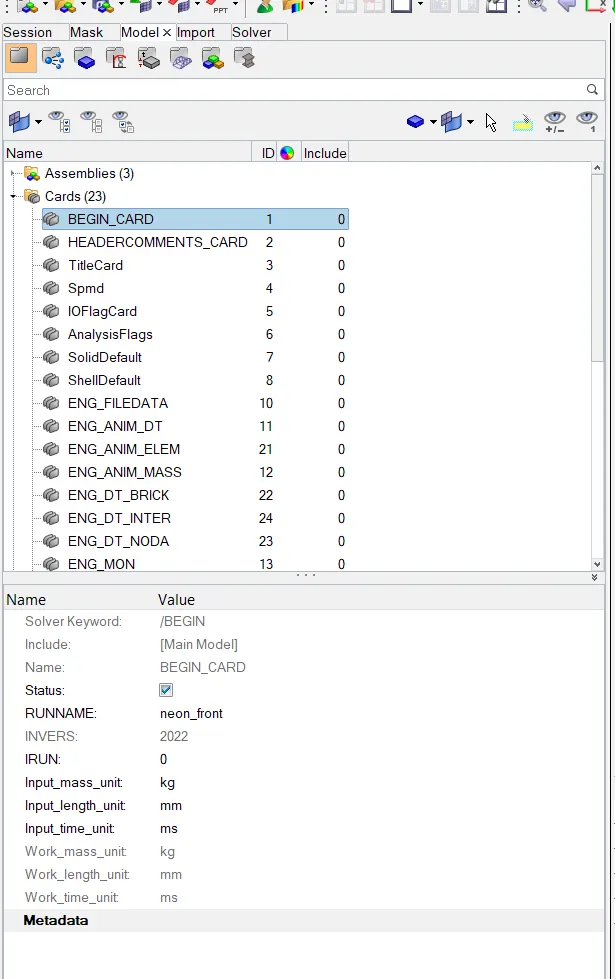
- Click Cards > Begin Card > Check "Input_mass_unit", "Input_length_unit" and "Input_time_unit".
- Here, we will be following " kg, mm, ms " system. As per that our units are correct.
3 ) Create contact interfaces -
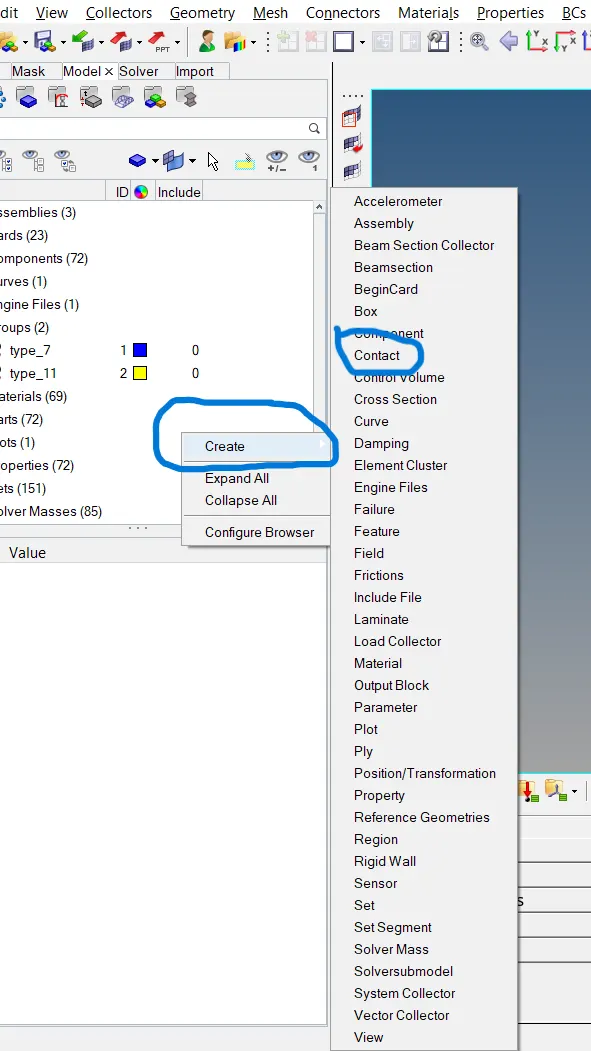
- To create interface go to model browser > click right mouse click > create > contact.
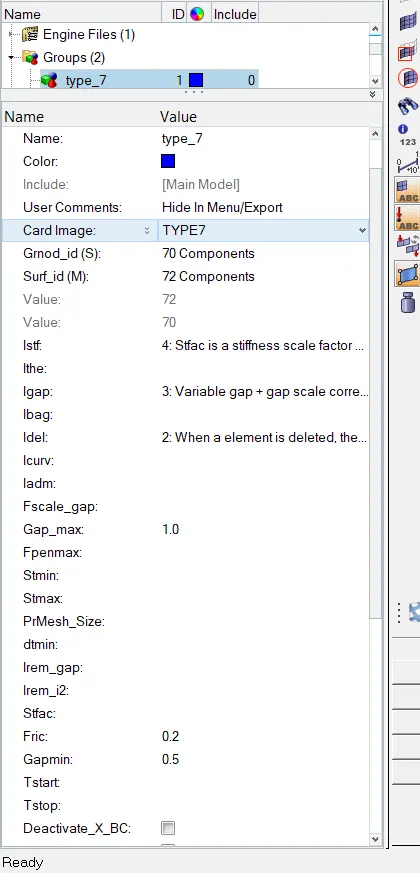
- Edit the contact > change contact name as type 7 > change card image as TYPE7 > select nodes and surfaces and select other parameters accordingly.
- When we car model will crush against the rigid wall - then we have two possible conditions. One is there will be node to surface contact and one is self contact when car will try to crush in rigid wall. Hence, create two contact interfaces type_7.
- Create another contact TYPE11 in same way.
- TYPE_7 is node to surface contact.
- So, this contacts fullfills all the basic requirements of contact.
4 ) Check penetrations and intersections.
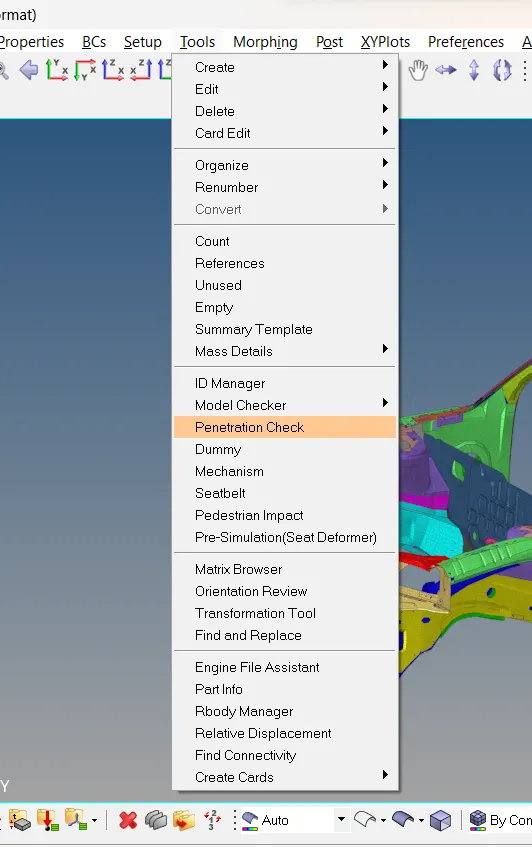
- To, check penetrations or intersections in model go to > tools from menubar > click Penetration check
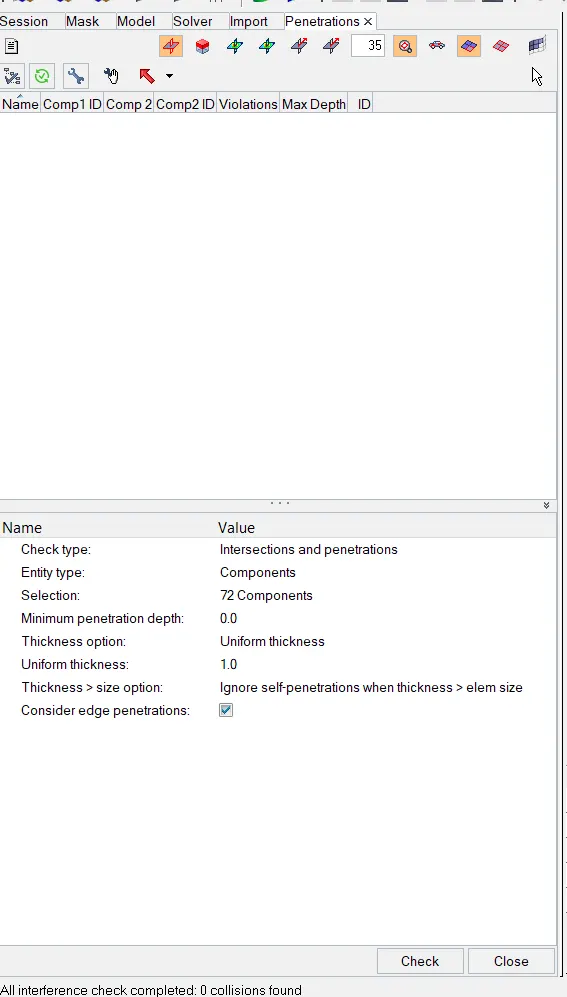
- Invoke the penetration check widget.
- Select check type as " Intersection and penetration ".
- In the entity type select components.
- Give minimum penetration depth as 0.0.
- In the thickness option select " Uniform Thickness. "
- Give uniform thickness as 1.0.
- And tick the checkbox of consider edge penetration.
- And click on Check.
- And if there any penetration it will show on top in penetration browser.
- Click on this icon
 in order to fix the penetration issues automatically.
 - Penetrations can be removed manually. To remove penetration manually click on
 icon to fix the penetrations manually.
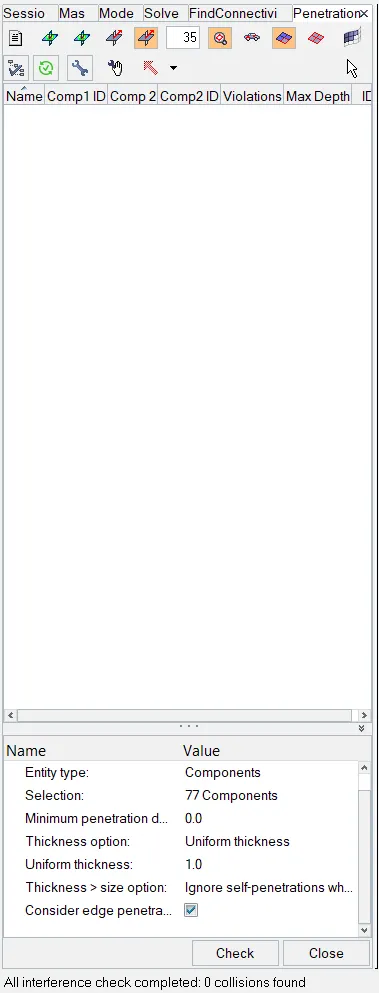
- In our model there are no penetrations.
5 ) Check and correct rigid bodies.
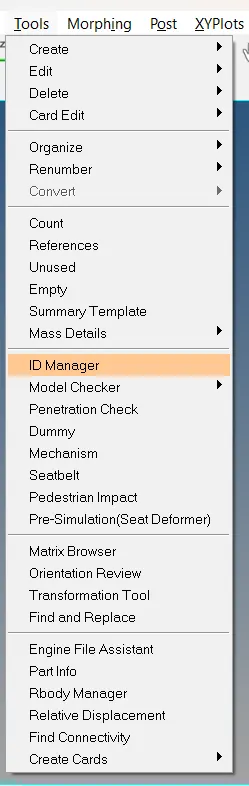
- To check the connectivity of model go to > tools > Find connectivity > a new browser will open.
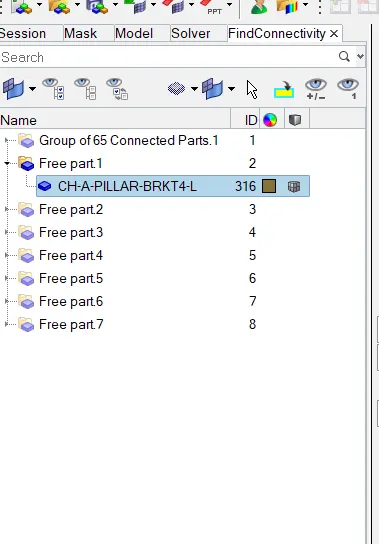
- In above image we can see that 65 parts are connected but 7 parts does not have connectivity.
- Thus, check individual part and confirm either it needs to be connected or not.
- Open first part which is ' CH-A-PILLAR-BRKT4-L'.
- Isolate the part and check. There is no connectivity between ' CH-A-PILLAR-BRKT4-L' and its neighbouring part.
- Create connection between two parts to ensure proper connectivity.
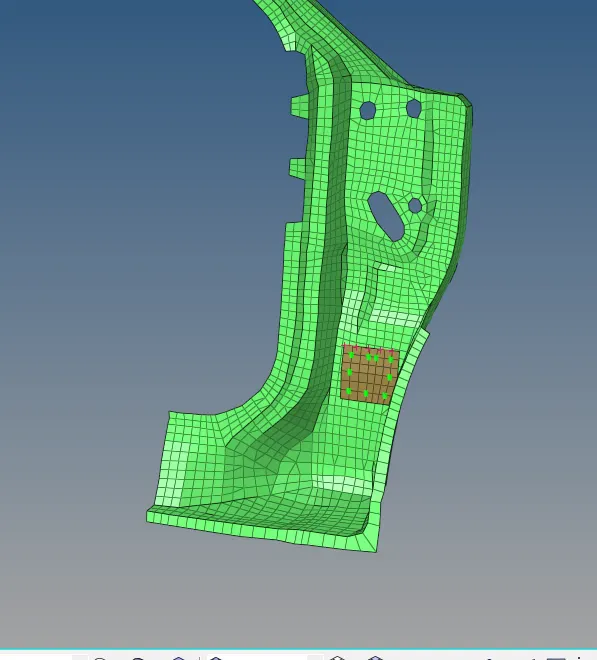
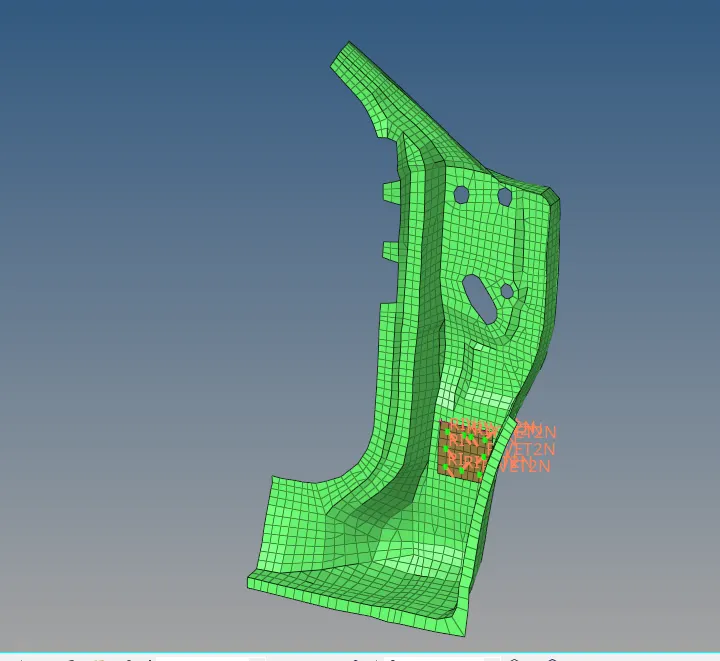
- Go to 1D panel >Rigids > select nodes > click create.
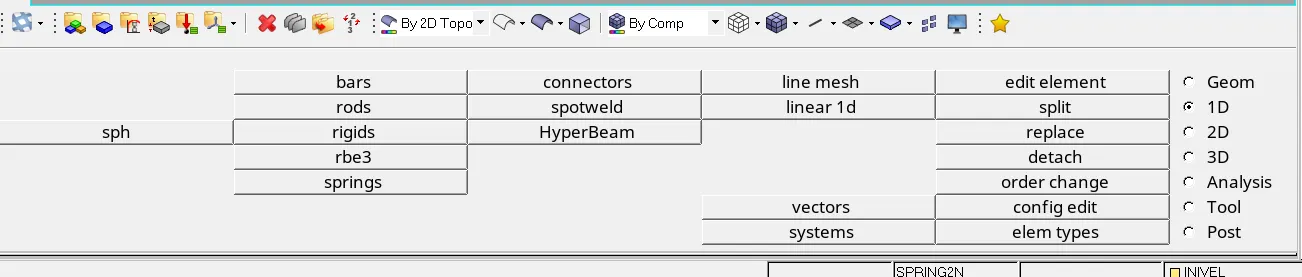
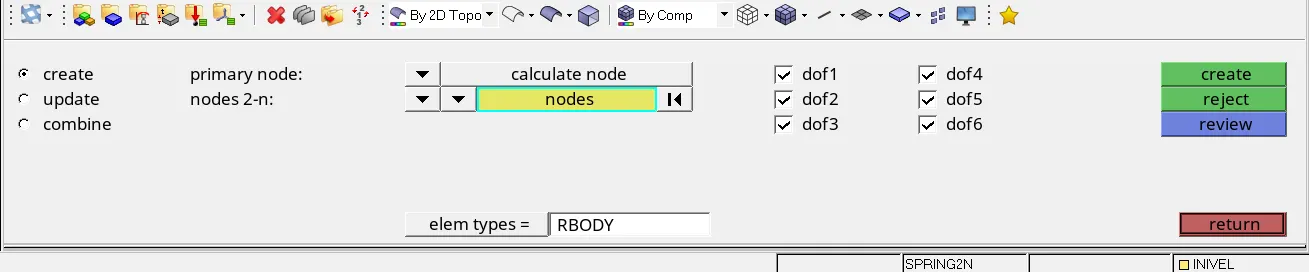
- Do the same procedure for remaining parts.
- Assign material and property to the rigid bodies, same of the original parts.
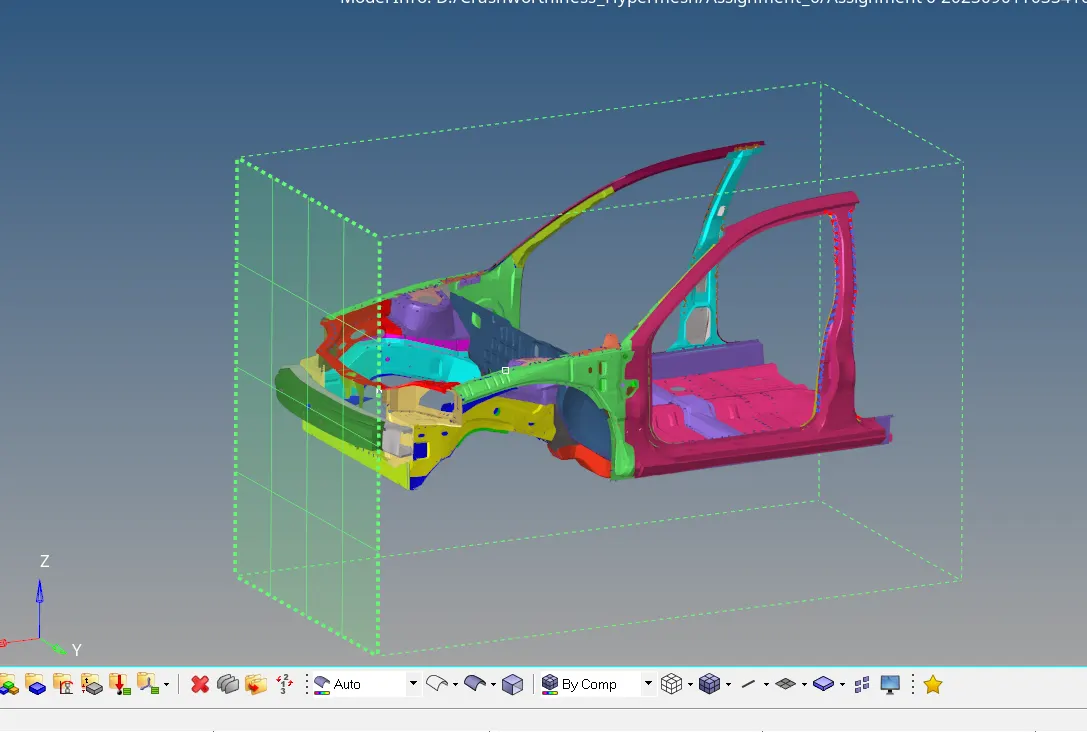
6 ) Create Rigid Wall
- Rigid wall is a part in the model which does not deform in any case. As its name suggests it is rigid i.e., it does not change its shape and size.
- To create rigid wall go to BCS from menubar > create > rigid wall.
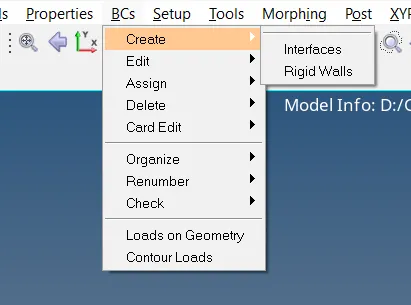
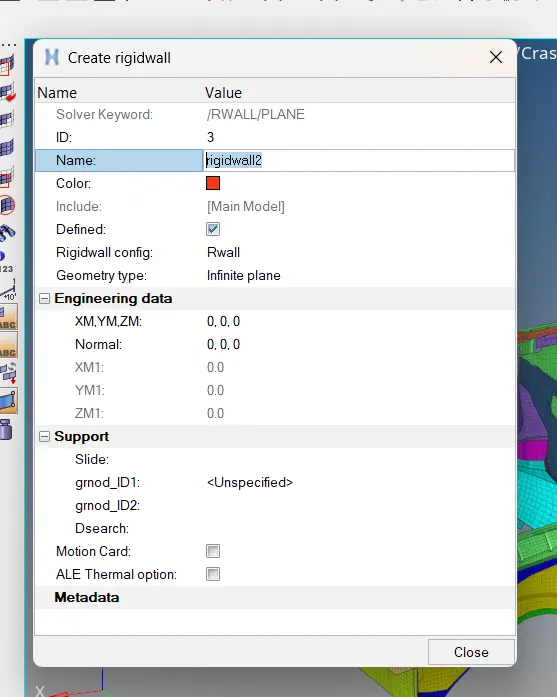
- New window will be created there. Or go to solver browser > right mouse click on white surface > create > rigid wall.
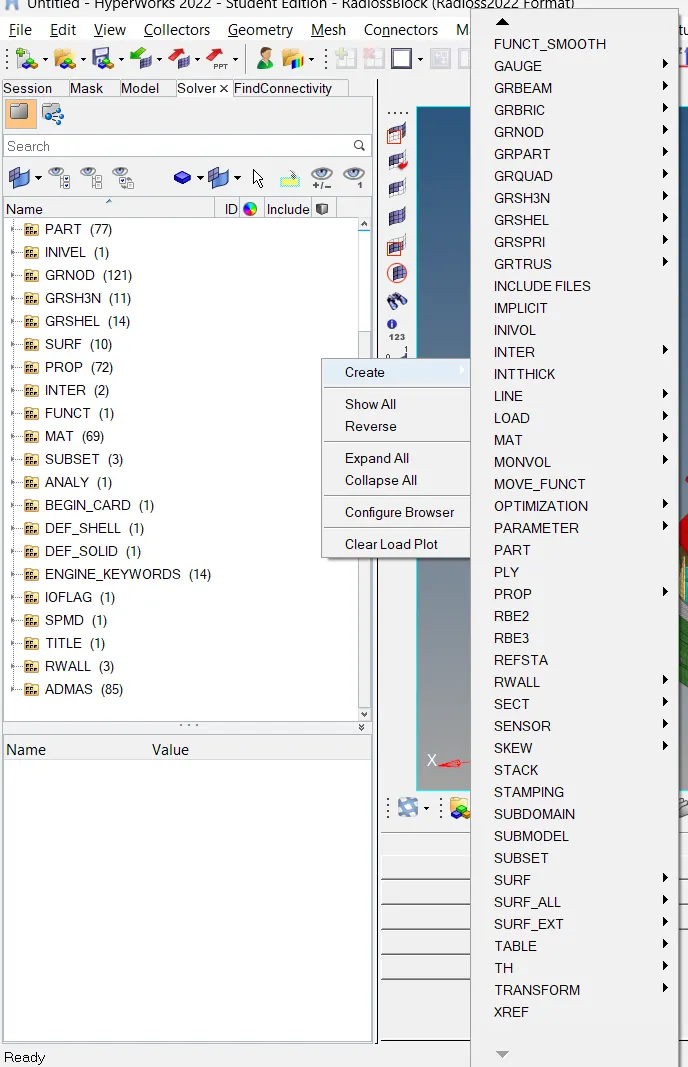
- Now, select all parameters as per our requirement.
- Select geometry type as Infinite plane.
- Select node where we want our rigid wall. (XM, YM,ZM Coordinates. )
- Give normal direction and search distance.
- Select slide option as Sliding with friction > give friction value as 0.1.
7 ) Assign Initial Velocity
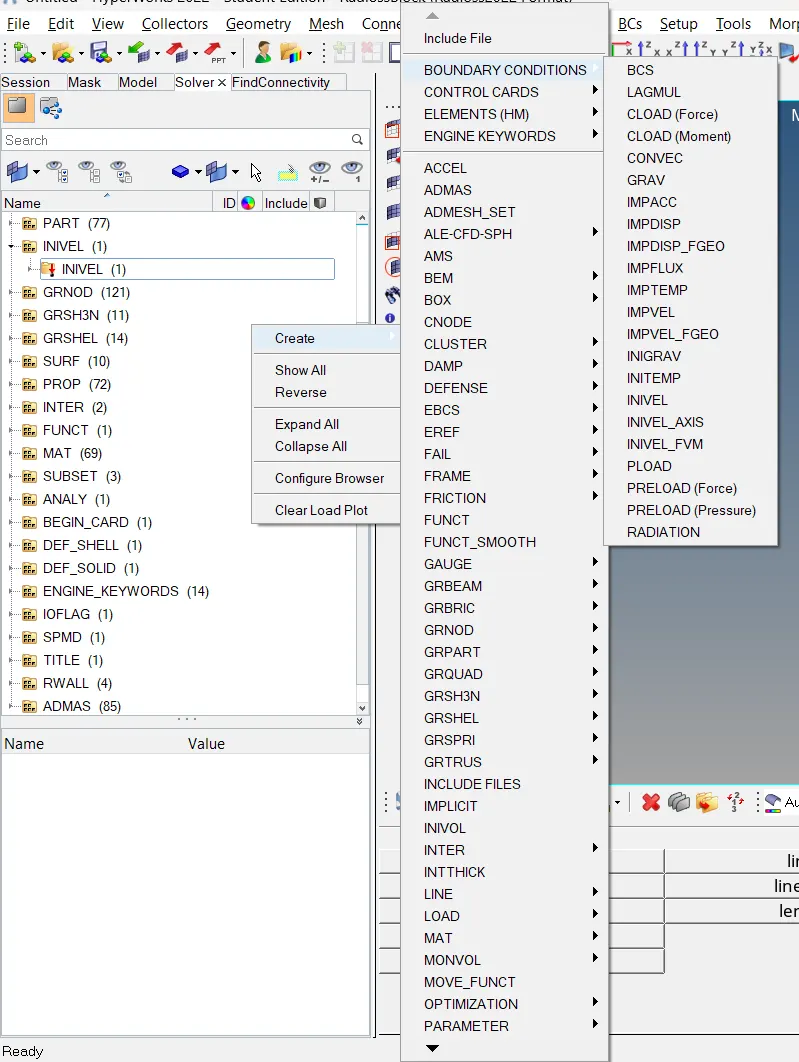
- Go to Solver Browser > Right Click > Create > Boundary Conditions > INIVEL.
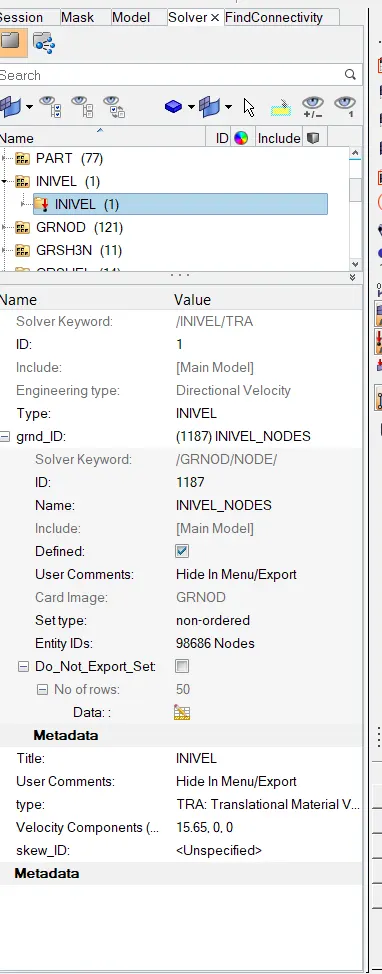
- A new window will open. Select type as INIVEL. INIVEL is for translational velocity and INIVEL/AXIS is for rotational velocity.
- Select all nodes to apply velocity. You can select any no of nodes on which velocity is to be applied.
- Give the velocity components. Give magnitude of velocity which is 15.65 mm/ms.
OUTPUT REQUEST :
1 ) CREATE SECTIONS TO CALCULATE FORCES IN THE RAILS
- Calculate the forces passing through pillars and rails of car model.
- To calculate them create sections around the parts.
- To create section go to solver browser > right click > click sect.
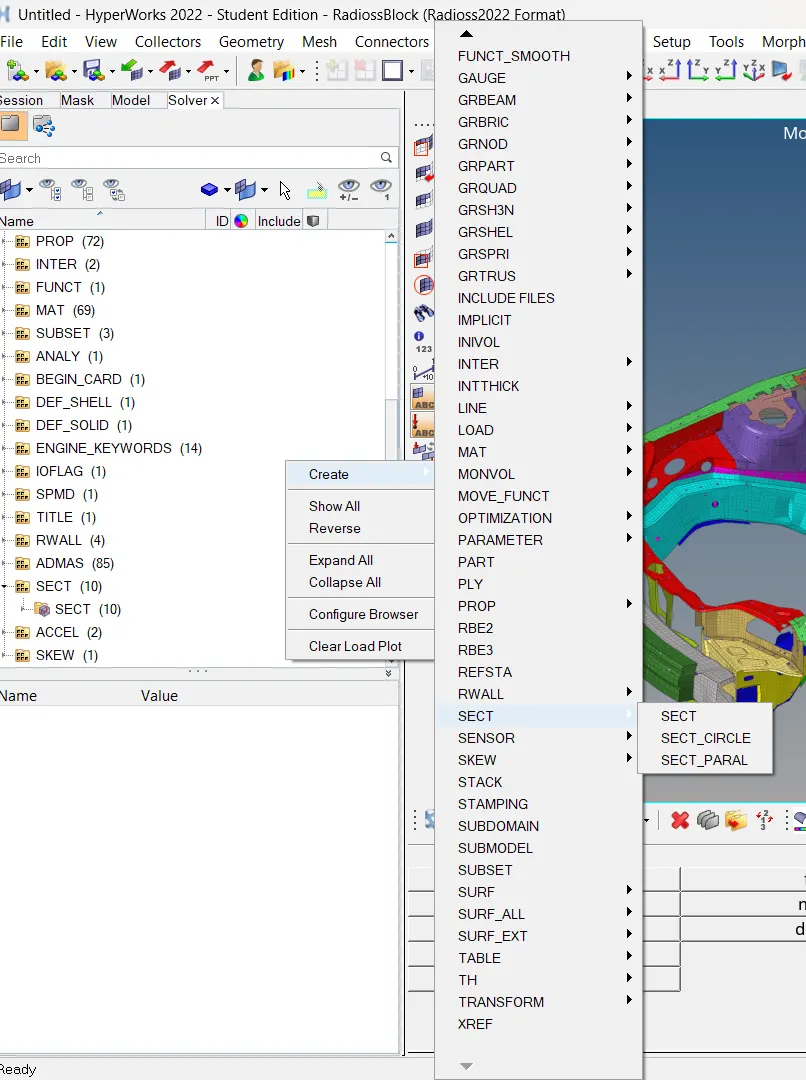
- A new section page will open.
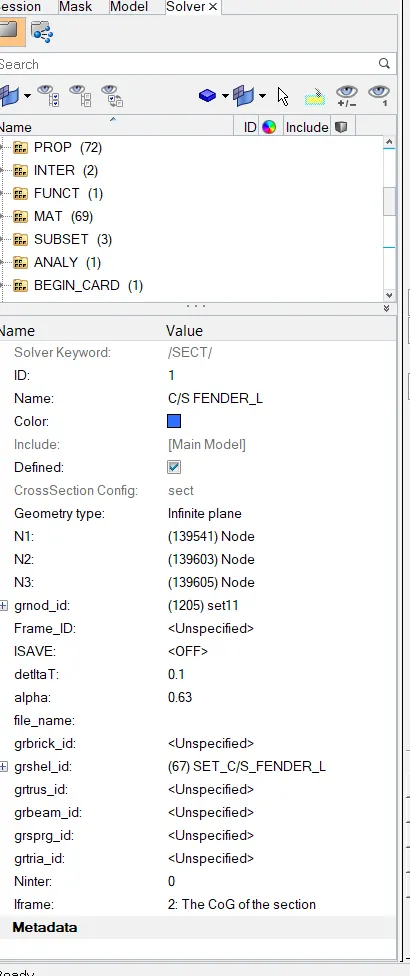
- Change name.
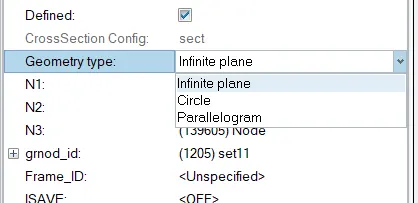
- Select geometry type as Infinite plane in this case from available options.
- Select N1, N2, N3 from model where section has to be created.
- N1 and N2 nodes define local X axis, where N1, N2 and N3 nodes define X-Y plane.
- Define Node Group. Right Click on grnode id > click on create/edit > New dialogue box will open.
- Assign frame_Id.
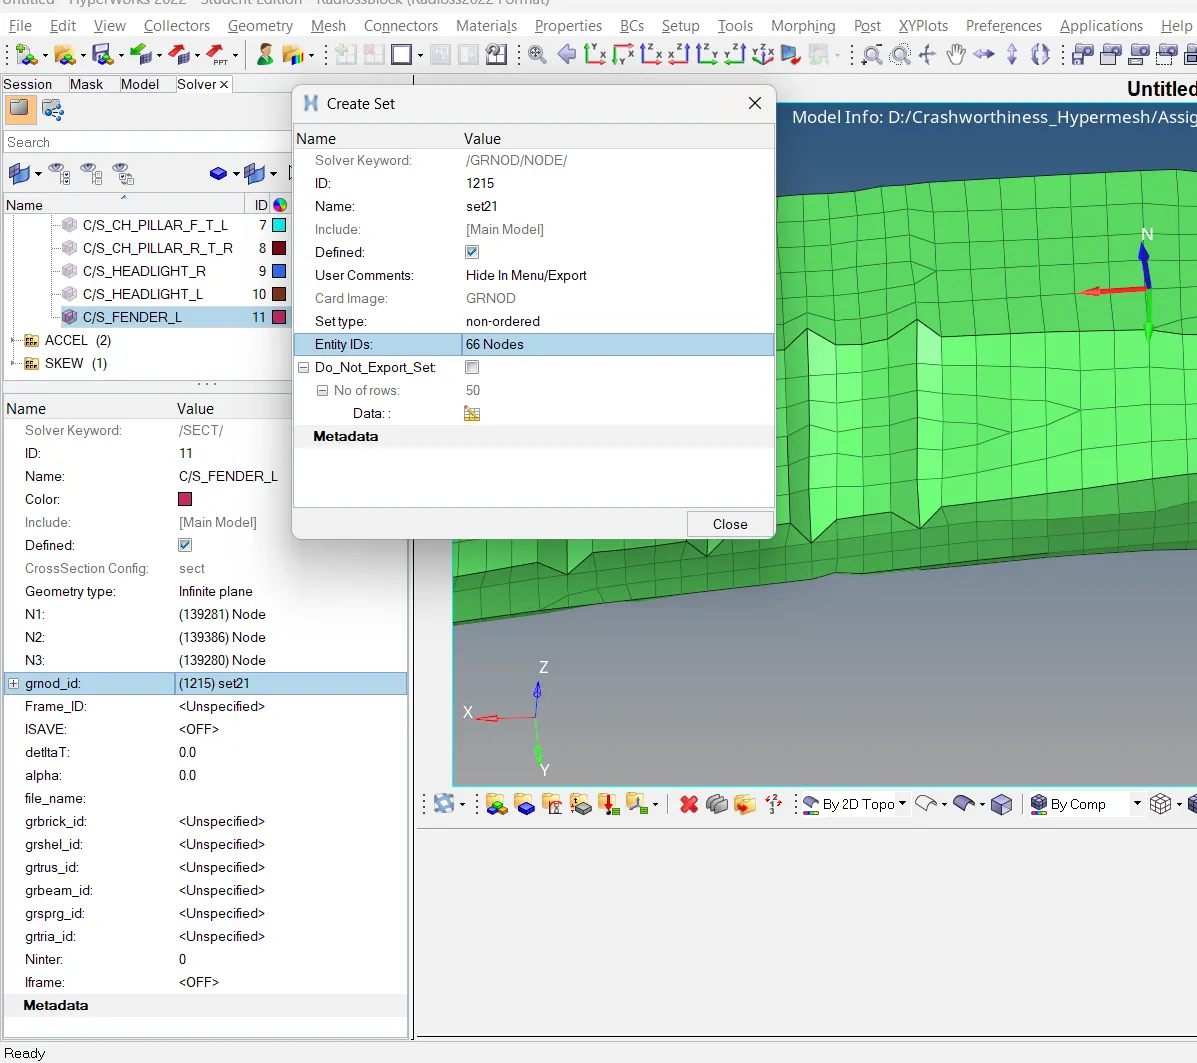
- Select the nodes where section is to be created.
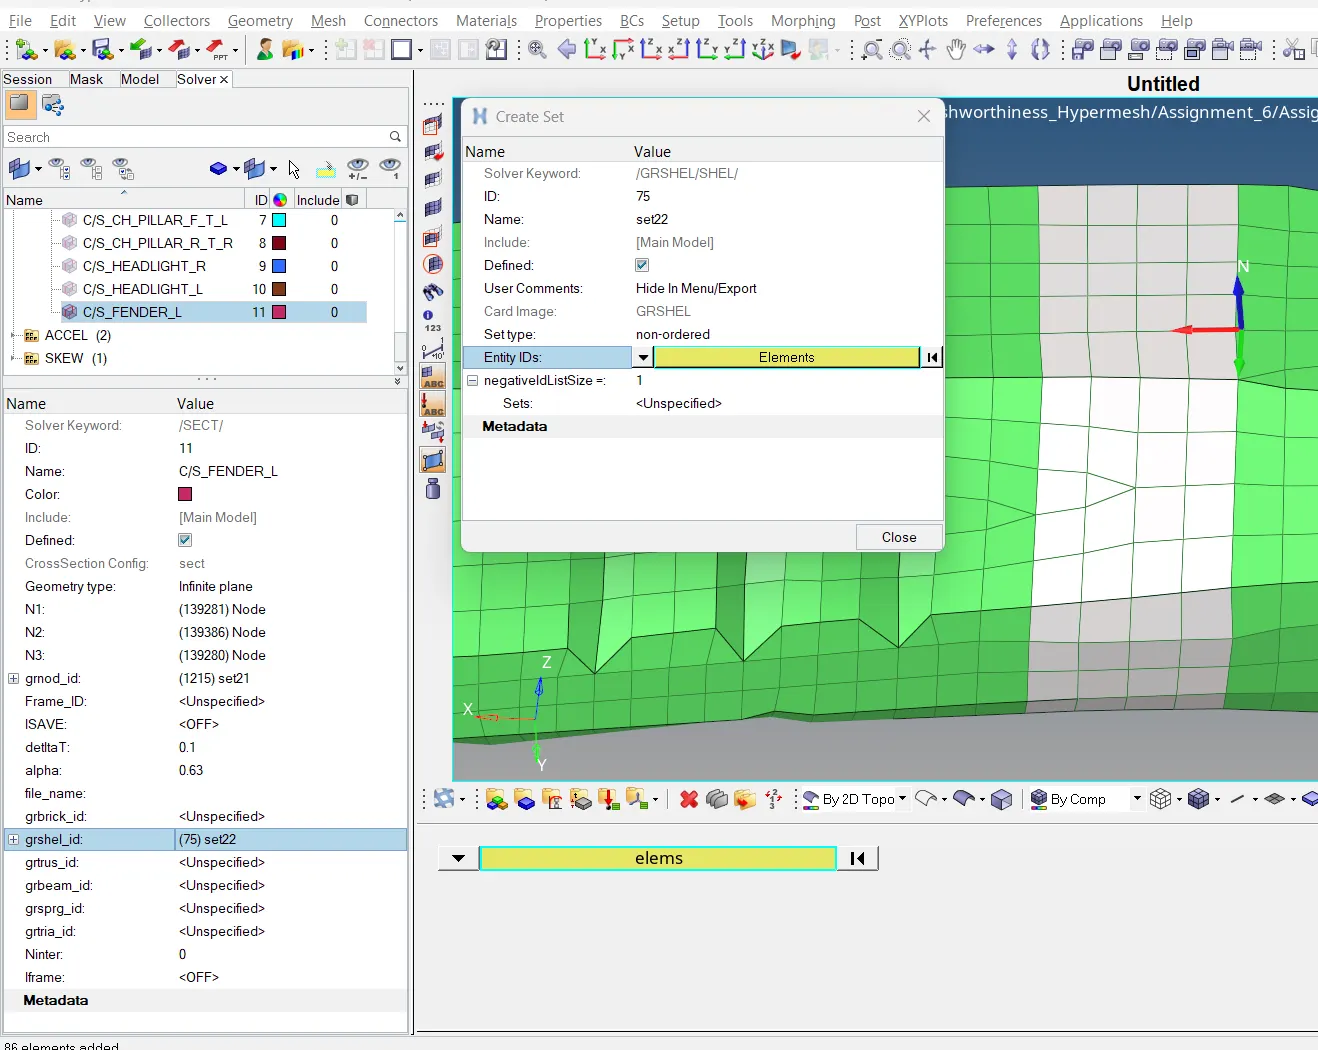
- Select shell element group > right click on grshell_id > Entity_id > select elements.
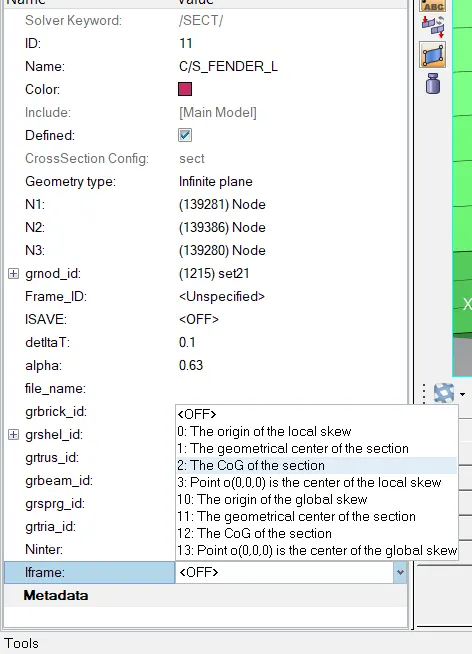
- Give deltaT value as 0.1.
- alpha value is filtering value, give default value as 0.63.
- Select Iframe as 2. ( The CoG of section ).
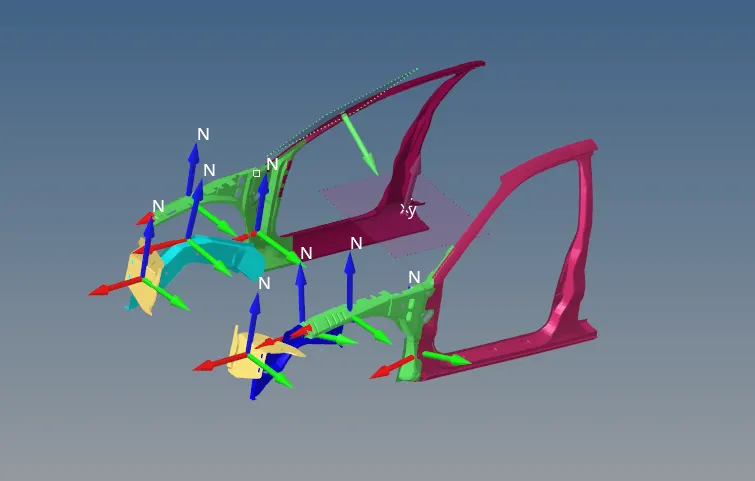
- Follow same procedure to create sections at all the parts- at Fender, headlight, CH_Pillar, CBN_Outer body.
2 ) Create accelerometers at base of B pillars.
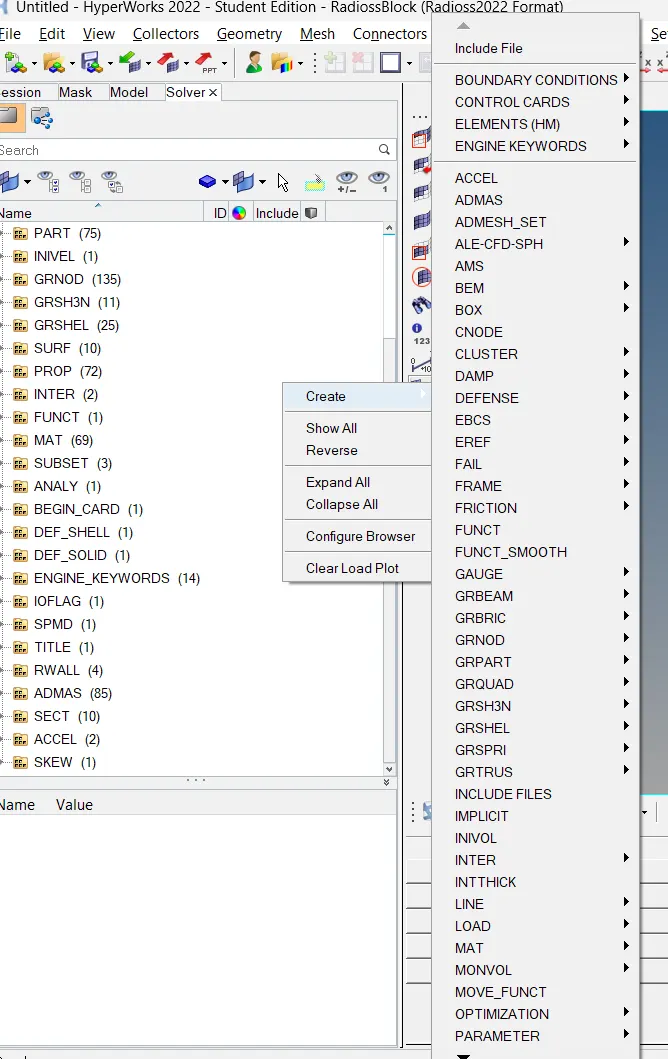
- To create accelerometer go to solver browser > right click > create > accelerometer.
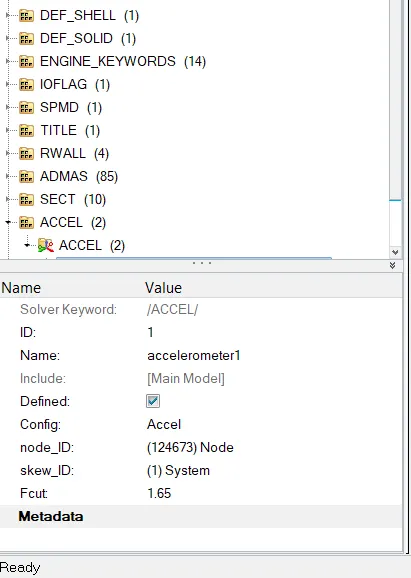
- Select node_Id, skew_Id and Fcut value ( Default ).
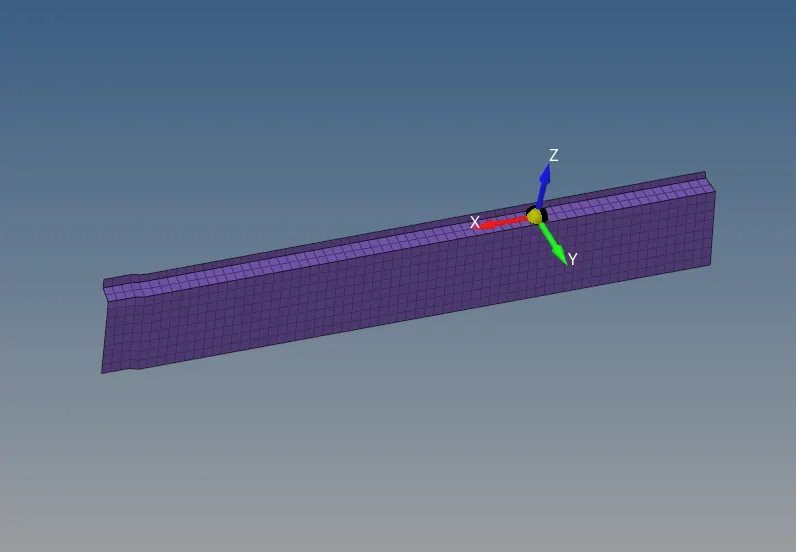
- Accelerometer created at required position.
3 ) Create Intrusions:
- Intrusions is the measure of how much our passanger compartment deform at time of crash.
- There are no. of methods to measure intrusions.
- The one method we are using to measure intrusions is by creating spring.
- Create a spring element between two nodes where intrusion is to be measured and request output file for the same.
- To create Spring element go to 1D panel > springs > spring2.
- Select two nodes and create a spring element.
- Now, to request output file go to > solver browser > right click on solver browser area.
- Click on create > TH > SPRING.
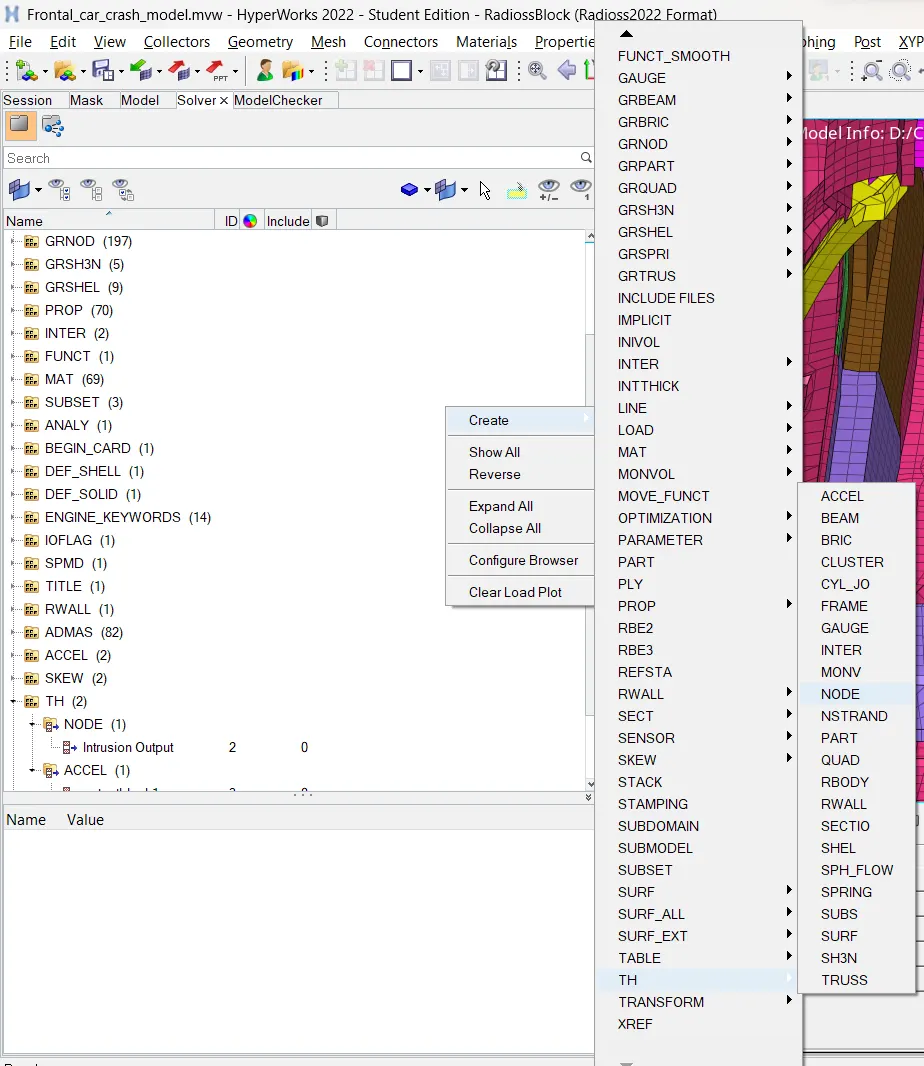
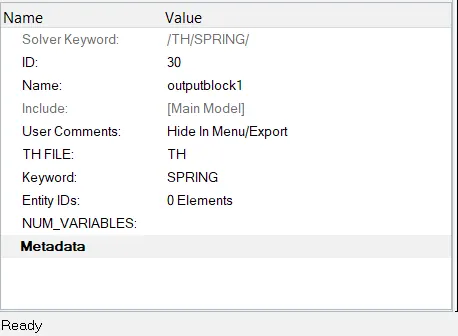
- In the Entity_ids select spring elements.
- Click on NUM_VARIABLES > select 1 > click on DEF.
4 ) Check Model Weight and mass.
- Go to Tools > Mass Details > Mass, CoG , Inertia.
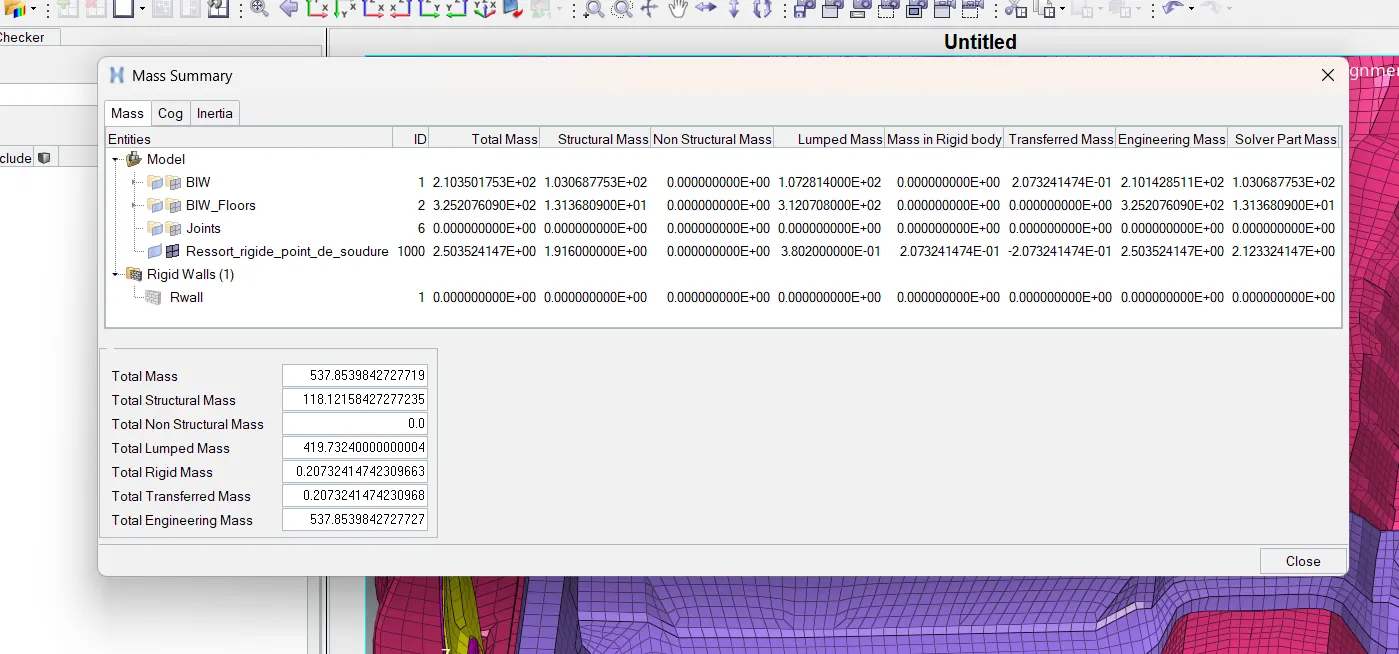
- Total mass of model can be checked which is 538 kg. Also, total classification of mass can be seen.
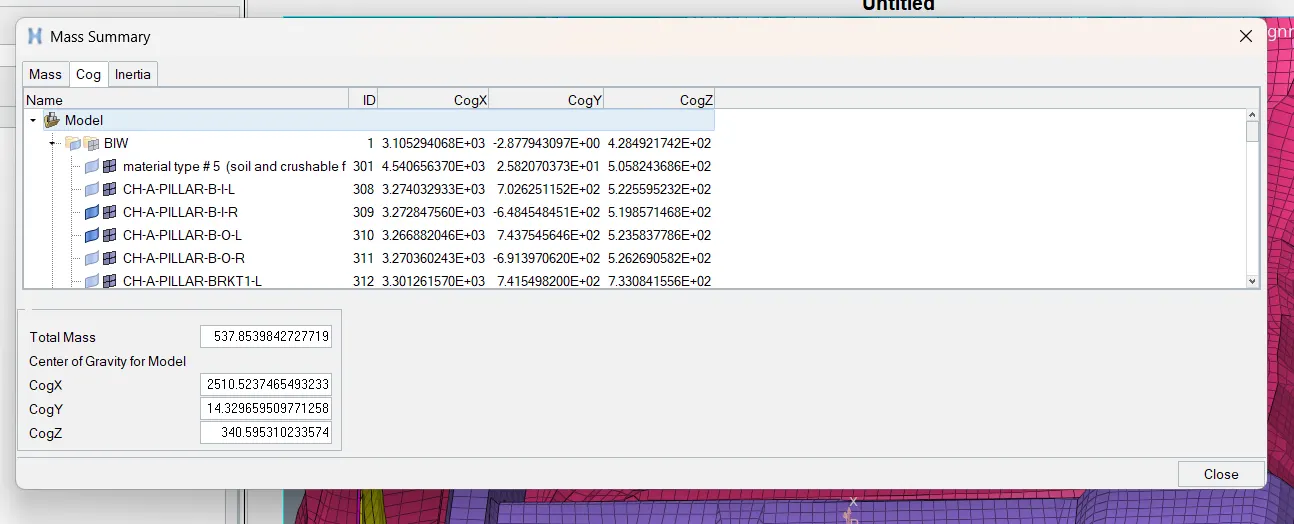
- CoG of model is also checked from this window.
- Where X, Y and Z co-ordinates of COG are shown.
5 ) CHECK MODEL QUALITY
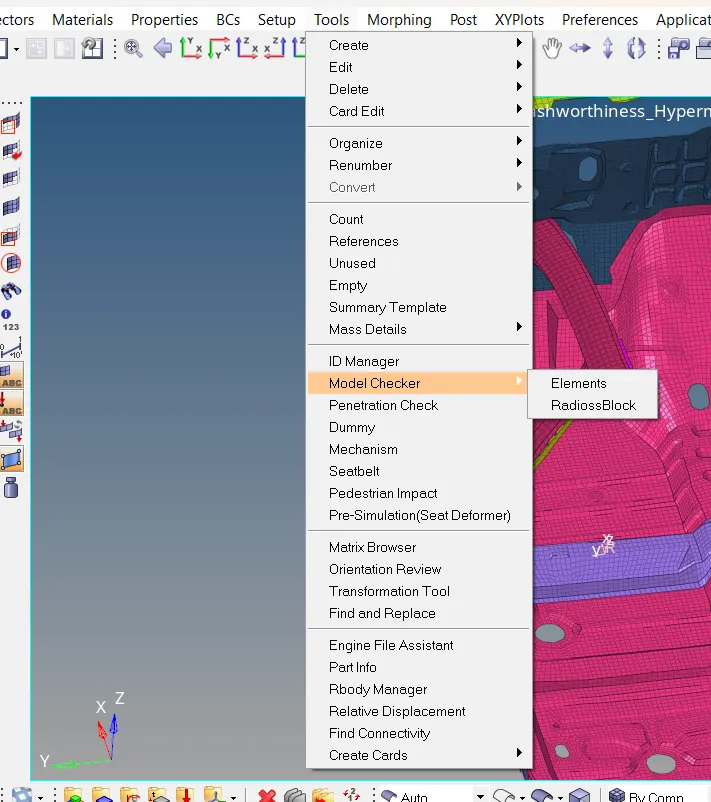
- Go to tools > Model Checker > Radioss Block.
- Check model if there are any errors or warnings and troubleshoot them.
- A new Model Checker Browser will open.
- Right mouse click on Model Checker Browser > Click on Run.
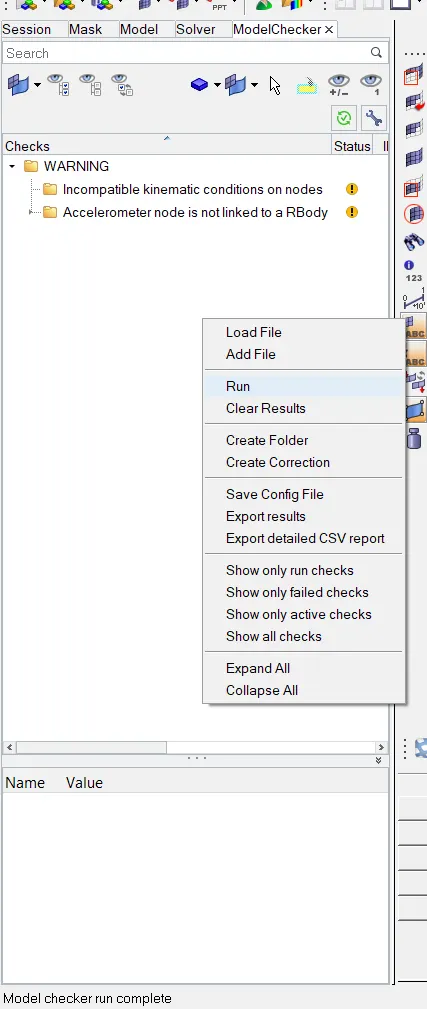
- Once the Run process in completed the solver will show errors and warnings if any.
- Rectify all the errors.
RUN THE SIMULATION :
- Once all the checks are completed, the model is ready to perform simulation.
- To run the model go to > Analysis page > Click on Radioss.

- New page will open.
- Insert "-nt 4" in front of options.
- Tick the checkbox of include connectors.
- Save the file > click on Radioss.

ANIMATION FILE AND RESULTS :
- To view the animation files open "Hyperview".
- To represent the results in graphical forms open "HyperGraph 2D".
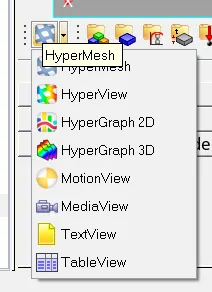
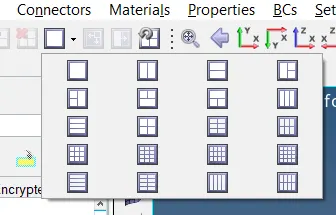
- From PAGE LAYOUT option we can open multiple windows to see different options at a time.
- Load animation and time history files in respective folder.
- Animation files gives us the idea of deformation.
1 ) RWALL Forces :
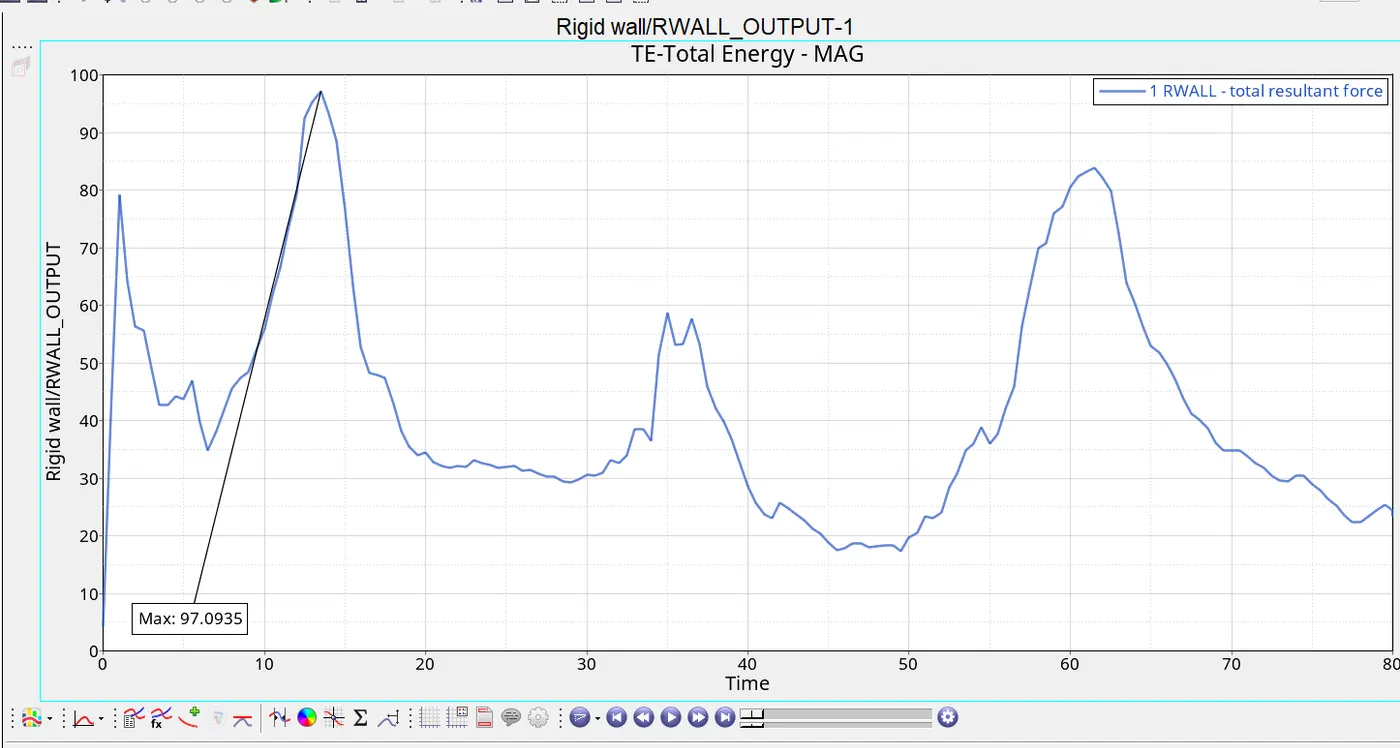
- This are the resultant forces that we get out of rigid wall when car crash into it.
- Max. value of RWALL forces is 97.09 kg-mm/ms^2.
2 ) ENERGY BALANCE
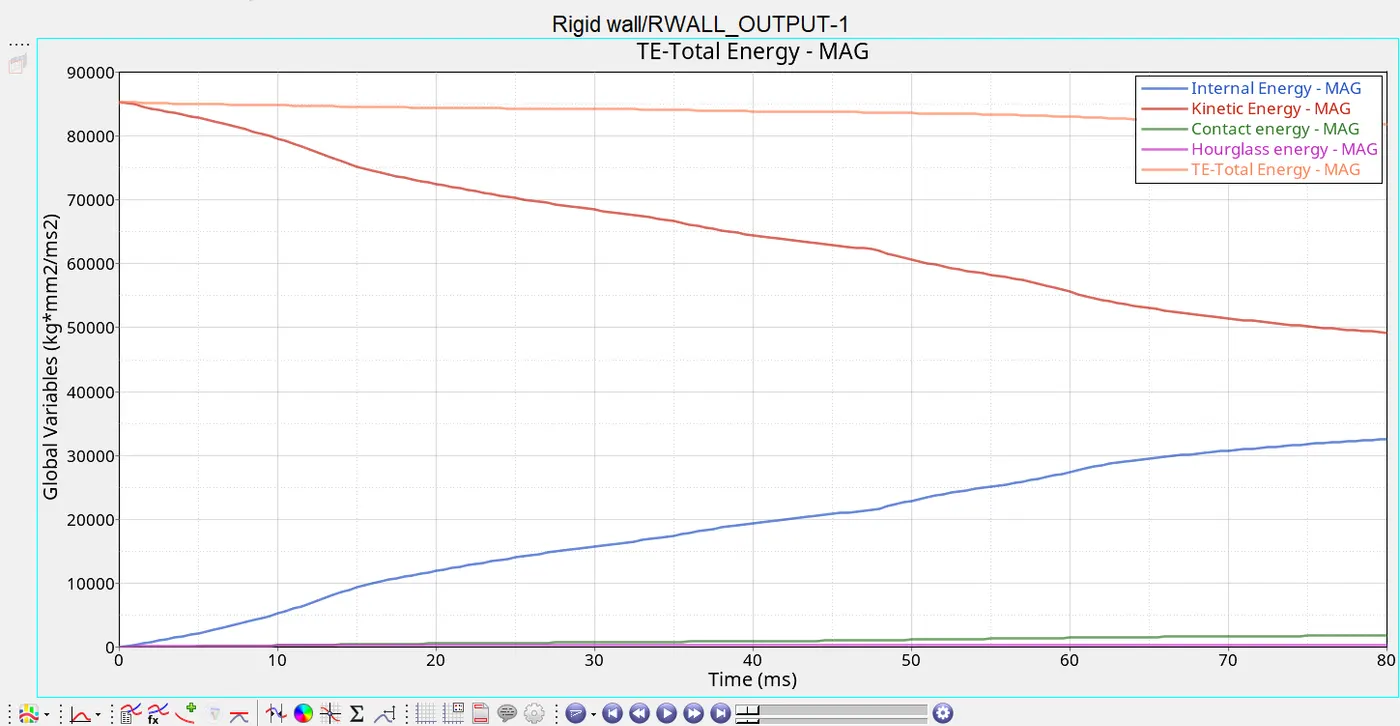
- It is important to plot all energy equation, because they tell us how energy is flowing into the model.
- We do plot INTERNAL ENERGY, KINETIC ENERGY, HOURGLASS ENERGY, CONTACT ENERGY AND TOTAL ENERGY.
- The unit of energy is kg-mm^2/ms^2.
INTRUSIONS :
- We have request spring output as well to measure the intrusions in model.
- We have to springs to measure the intrusions in the passanger compartment.
- Total intrusion for first spring is 220 mm and for second spring is 172 mm.
- These are the resultant elongations.
- Along with this results 0000.rad, 1.rad, .out, 1.out, .h3d files are attached.
- https://1drv.ms/u/s!AgTXmHPGaOKugWZwJ3QLphuzwKMY?e=fblm9x - This is the link for .h3d file.