Week 1 Challenge
1)Answers:
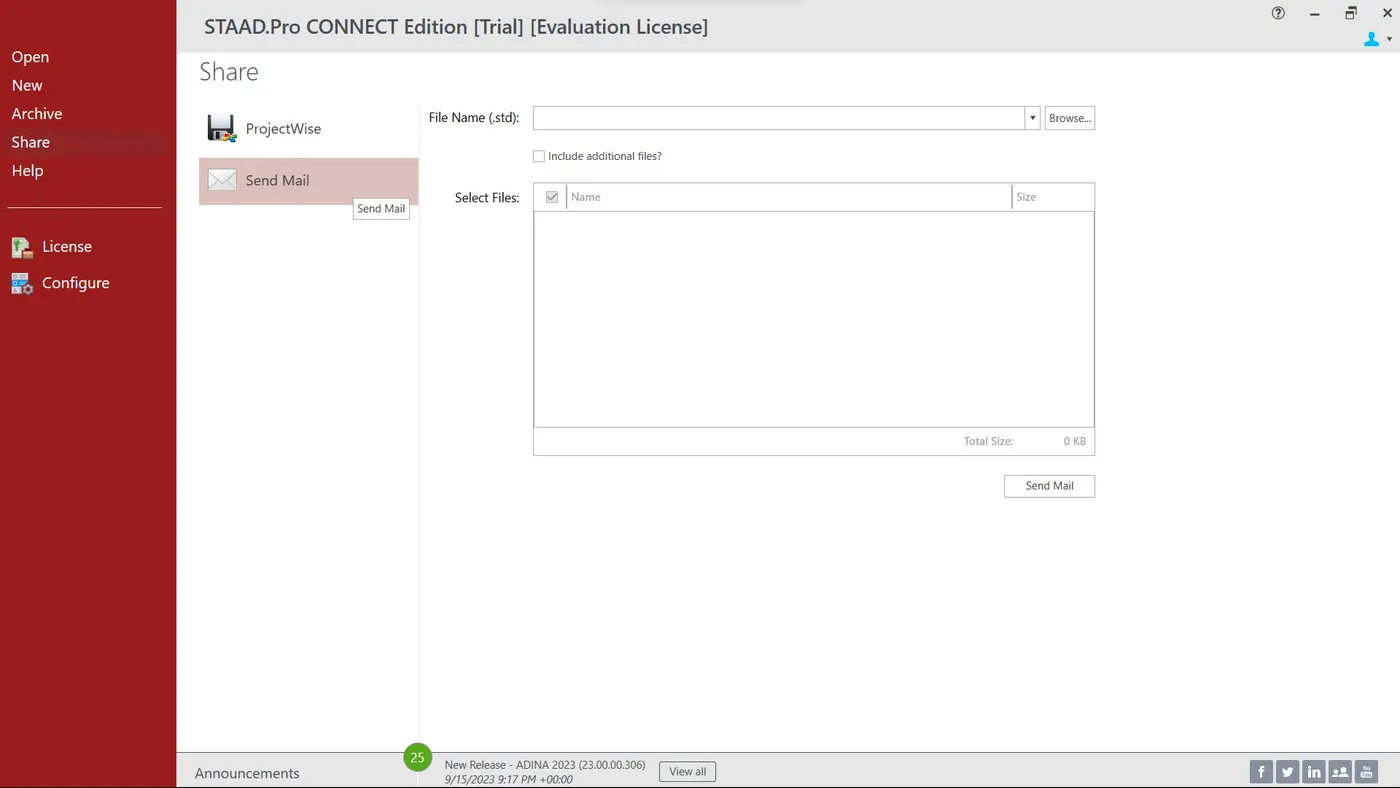
A)Aim:Write the steps involved to upload a .std file through web mail?
Introduction :
- STAAD pro ( Structural Analysis and Deign program is the abbrivation for the STAAD it is the connected version new version used to analize the RCC structure and steel structure by using this software )
- It Include the GUI Graphic User Interface for Visualization and contains various design codes
Procedure :
- Open the software Staad pro in the landing page
- Click on share icon in
- Click on send mail
- Browse the file you want to share
- Click on send mail
- Ensure that you are sign in
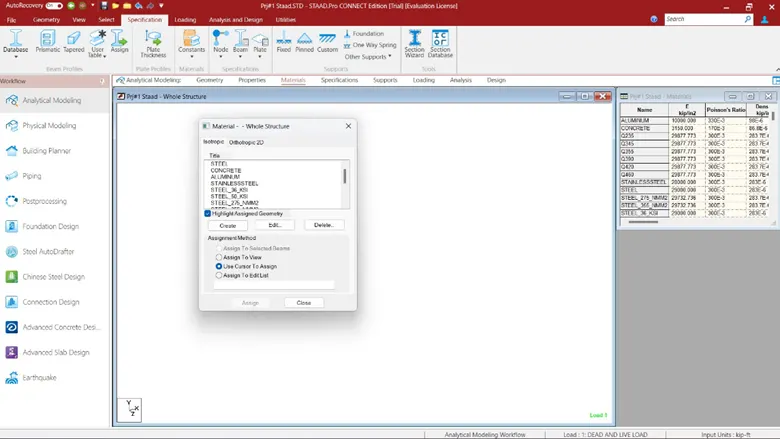
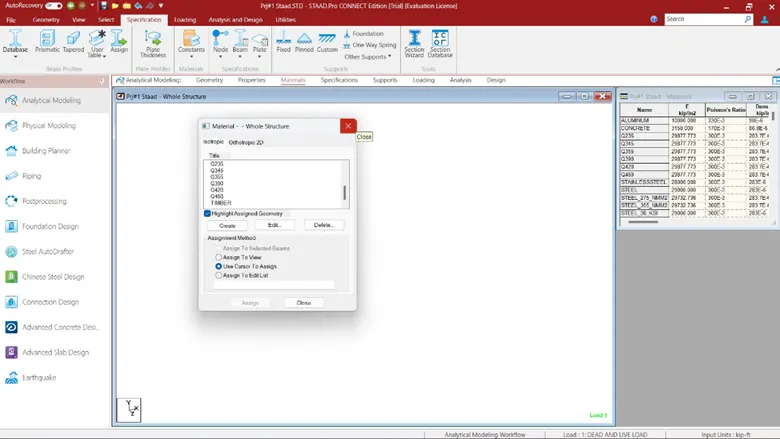
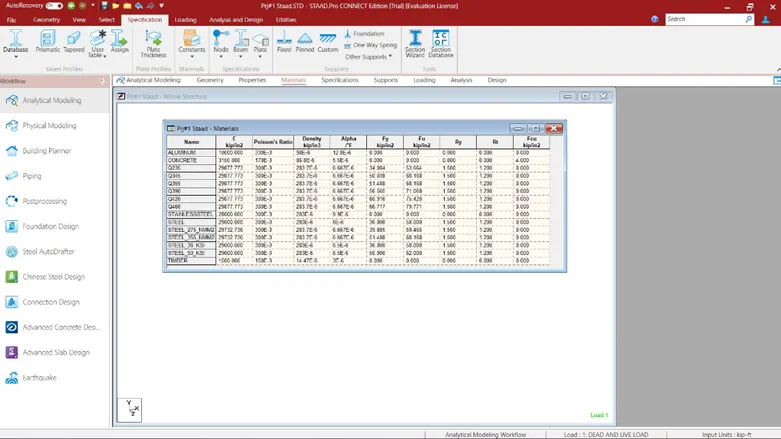
B) The type of materials used in staad pro
C) If you want to get the pictures in an external file ( like a word file, excel file, MsPaint etc.) go to the menu option Edit > Copy Picture, open the application you want and do a paste in there. Files saved through Take Picture option are not directly saved in common picture formats like bmp, jpg, png.
- Press tab,the navigate arrow key to edit menu,then click on take picture
D) There are three methods of creating the structure data:
- Using the STAAD.Pro Physical Modeler interface,
- Using the traditional STAAD.Pro analytical modeling interface,
- Using the command line
The physical model is used to draw structural elements as they are physically constructed. The program will then decompose this into an analytical modeling which is passed to the STAAD.Pro analysis and design engine when you run your model.
The analytical model is a finite element model of the structure which is typically processed directly by the analysis and design engine.
The command input file is a text file which contains the data for your structural model. This file consists of simple English language-like commands. This file is created for you behind the scenes for you when you model your structure using either the physical modeler interface or the analytical model interface.
E)
In STAAD.Pro Physical Modeler, the general order of operations is that you first select physical objects and then assign properties or perform some operation on the selection.
This differs from STAAD.Pro, where there are many tasks in which you select the operation, property, or specification first and then assign that to some list of model objects.
In this example, the operation of assigning profile sections to a selected set of beams is compared.
|
Select the members which all have the same section. |
Add the profile you want to use from the Section Database. |
|
Select the Section tool in the Assign properties group on the Member ribbon tab. |
Select the member property in the Properties dialog. |
| Select the profile to use and click OK. | Use the cursor to click on members with this property |
2)Answers:
A)The program contains a number of parameters that are needed to perform design as per IS 13920 2016. It accepts all parameters that are needed to perform design as per IS:456. Over and above it has some other parameters that are required only when designed is performed as per IS:13920 2016. Default parameter values have been selected such that they are frequently used numbers for conventional design requirements.
Parameter Name |
Default Value | Description |
| EUDL | None | Equivalent u.d.l on span of the beam. This load value must be the unfactored load on span. During design the load value is multiplied by a factor 1.2. If no u.d.l is defined factored shear force due to gravity load on span will be taken as zero. No elastic or plastic moment will be calculated. Shear design will be performed based on analysis result.(Refer note) |
| BRACING |
0.0
|
Beam Design 1.0 = the effect of axial force will be taken into account for beam design. Column Design: Correspond to the terms "Braced" and "Unbraced" described in Notes 1, 2, and 3 of Clause 39.7.1 of IS456:2000 1.0 = the column is unbraced about major axis. 2.0 = the column is unbraced about minor axis. 3.0 = the column is unbraced about both axis
|
| ELY | 1.0 | Ratio of effective length to actual length of column about minor axis. |
| ELZ | 1.0 | Ratio of effective length to actual length of column about major axis. |
| EUDL | None | Equivalent u.d.l on span of the beam. This load value must be the unfactored load on span. During design the load value is multiplied by a factor 1.2. If no u.d.l is defined factored shear force due to gravity load on span will be taken as zero. No elastic or plastic moment will be calculated. Shear design will be performed based on analysis result |
| FYMAIN | 415 N/mm2 | Yield Stress for main reinforcing steel. |
| FYSEC | 415 N/mm2 | Yield Stress for secondary reinforcing steel. |
B)Table for cursors Group
| Tool Name | Description |
| Nodes Cursor | |
| Beam Cursor | |
| Plates Cursor | |
| Solid Cursor | |
| Plates & Solids Cursor | |
| Geometry Cursor | |
| Members Cursor | |
| Select (Text) | |
| Previous | |
| Load |
C)To navigating the model view
- The view window contains a unique control device called the Rotation Gizmo which allows you to select set view orientations or to orient the model in the view about the global axes.
- Click the Rotation Gizmo to display preset views. Click the Invert icon to display the reverse of these views.
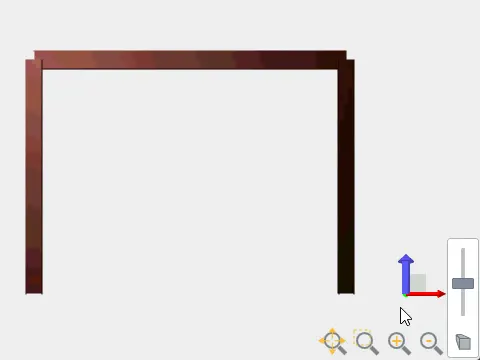
- Click and drag on the Rotation Gizmo axes to rotate the view about that global axis.
- Click on the zoom controls to zoom in or out of parts of the model. Click-and-drag the middle mouse button (i.e., scroll wheel) to pan the view.
- Click on the Perspective control to display the perspective switch and slider.
- To navigating the model view
- The view window contains a unique control device called the Rotation Gizmo which allows you to select set view orientations or to orient the model in the view about the global axes.
- Click the Rotation Gizmo to display preset views. Click the Invert icon to display the reverse of these views.
- Click and drag on the Rotation Gizmo axes to rotate the view about that global axis.
- Click on the zoom controls to zoom in or out of parts of the model. Click-and-drag the middle mouse button (i.e., scroll wheel) to pan the view.
- Click on the Perspective control to display the perspective switch and slider.
D)Explain the procedure to define a “Simply Supported” condition in STAAD Pro
Ans :
- Go to the support command in the tool palet command
- Click on create support command
- There we can get option like fixed support , pin support , Fixed but
- Enforced but support
- Cable support
- Inclined support
E)Name any five topics that you will include while creating DBR.
- DBR Design basis report
- To take up a project from the scrach to the end this is need
- To specify the data and compile data recived and analysis and design of structural element
- It contains the assumption and specification to develop the project
- It will help to avoid the scope and the creep that can derail the projec schedule and lead to budget overness
- Contains the general Column drawing
- Contains the projec planning
It also contains other parts also such as:
Length:The body of the report should be no more than ten double-spaced pages. Detailed design work, drawings, diagrams, engineering analyses, vendor part descriptions (e.g., gears, bearings), parts lists, and references should be referred to in the body of the report and then included as attachments.
Purpose of the Report:The purpose of the report is to describe all aspects of your mechanical design project in a concise and thorough manner.
Audience:Assume that your report will be read by your supervisor (D. Walczyk) and other design and manufacturing engineers working on this project.
Organization:
- Title Page:Include the title of the report, your name, the class, and date of submission.
- Executive Summary:Summarize what was asked for, what you accomplished and how it was accomplished. Include your main results and conclusions. Put this section first in the report but write it last. The summary should stand alone from the rest of the report. Limit it to one page (double-spaced) or less.
- The Problem:Summarize the details of your chosen design project. In addition to the original problem description, include any additional tasks that you have decided to accomplish.
- Design Specifications:List and fully explain the main design specifications used for this project. Many have already been prescribed in the project description.
- The Concept:Using a neat hand sketch, CAD drawing, and/or schematic diagram, describe the final conceptual design for your project.
- Detailed (Embodiment) Design Work:Provide an overview of the detailed design work you have completed. Report on each aspect of the detailed design work, reviewing the work completed in each area, and including sketches and the results of calculations, as appropriate. Include detailed component and assembly drawings (CAD preferably) and any supporting engineering calculations of only the parts you were asked to design in the problem statement as appendices. Whenever appropriate, make sure that you link the detailed design to the concept, design specifications, and problem
- Design Assessment:Summarize the results of your detailed design work :Do your achieve and/or exceed all of the design specifications.What is the overall design recommendation to your engineering supervisor (i.e., D. Walczyk)? For example, should it be abandoned, further developed or pushed into production immediately? Why?Finally, comment on what else needs to be accomplished, beyond what was asked for in the design problem, before an actual prototype can be built.
- References:References should be included. Use an acceptable format.
- Appendices:Include in appendices all material that should be archived for further development of this project, i.e. early concepts, communications with vendors, details on vendor-supplied parts, engineering calculations, and detailed assembly and component drawings.
F)It means that it consist of different materials . i.e a steel deckhouse settled on a concrete shear wall
3.)Answers:
A)Name the structure systems in STAAD Pro? Explain each system?
Ans: They are four structural system in staad pro
| Structure systems | Geometry | Loading | Deformation | Joint |
| Space | 3D | 3D | 3D | Any |
| Plane | 2D | 2D | 2D | Any |
| Frame | 2D | ⊥r to XZ | ⊥r to XZ | Any |
| Truss | 3D | 3D | 3D | Pinned |
B)Explain the coordinate system adopted in STAAD Pro software.
Ans: They are two coordinate syytem in Staad pro
- Global Axis : Gloabal Axis is fixed in the coordiate system
- Local axis : local axis is variable
- This is used for the orientation of the beam with the load varible
C)Elaborate DBR and its uses.
Ans :
- DBR Design basis report
- To take up a project from the scrach to the end this is need
- To specify the data and compile data recived and analysis and design of structural element
- It contains the assumption and specification to develop the project
- It will help to avoid the scope and the creep that can derail the projec schedule and lead to budget overness
- Contains the general Column drawing
- Contains the projec planning
D)Explain the different types of analysis options in STAAD pro.
Ans :
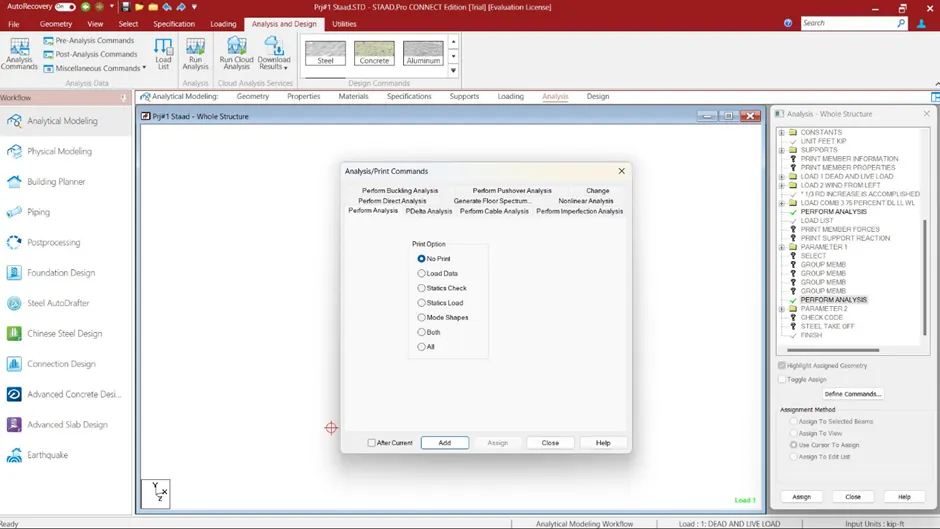
E)Explain the difference between Fixed and Fixed But condition.
Ans :
- In fixed condition the node or the end condition are fixed are restrained with the FX , FY, FZ and the moment are also restrained
- In Fixed But condition the node are Fx and MZ are released as it is horizontal rolled support
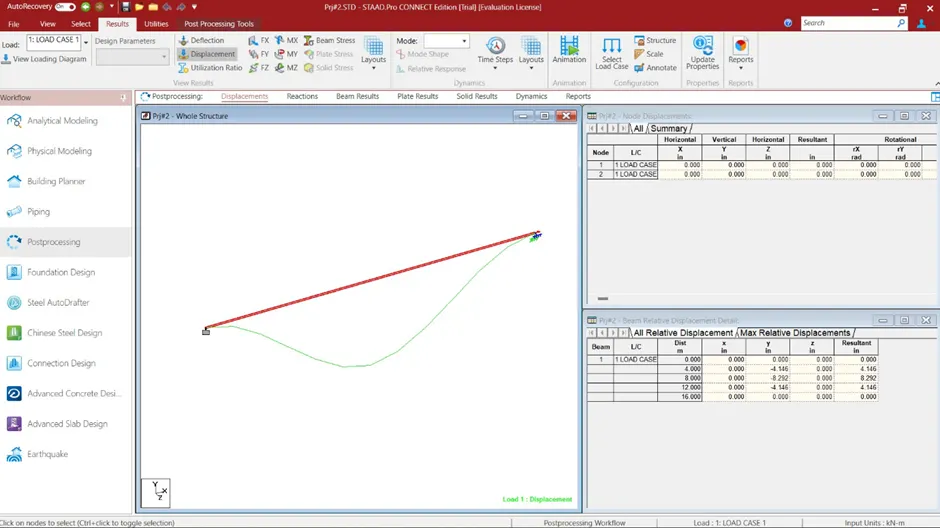
4)Aim : Creating a STAAD Model with the following Specification
a)A beam of span 16m
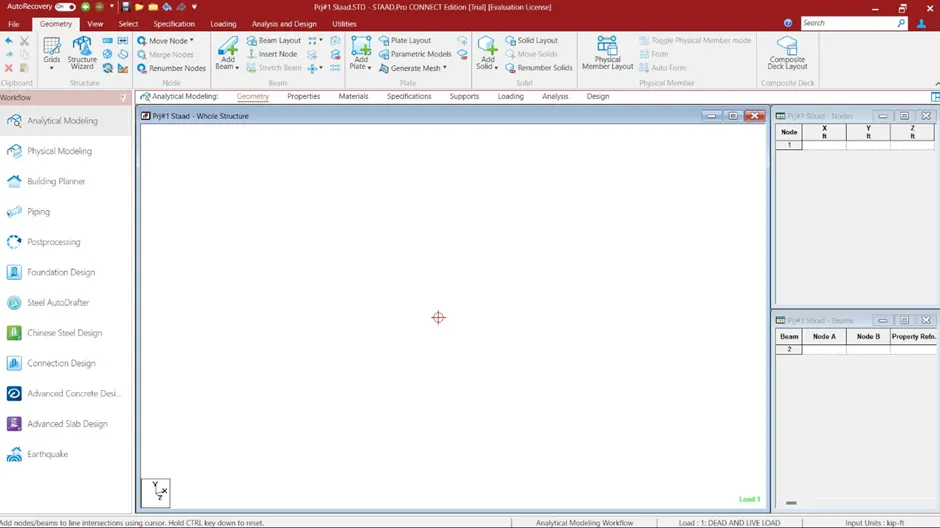
- Grid Dimension are to be given spacing as 1 m and in X and Y direction are 18 Grid
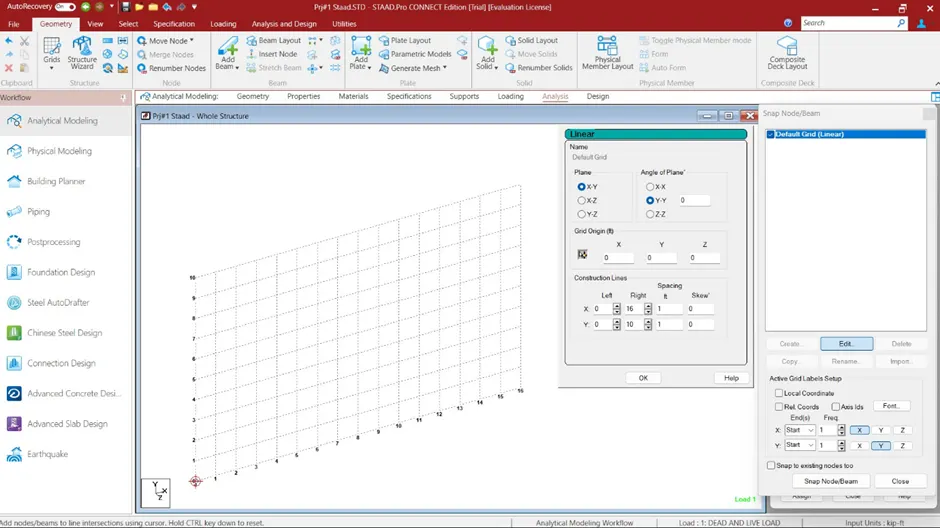
- Click on the Grid menu and Draw a beam of span 16 m
- For the node View click on CTRL +N or Right click and labels and view nodes
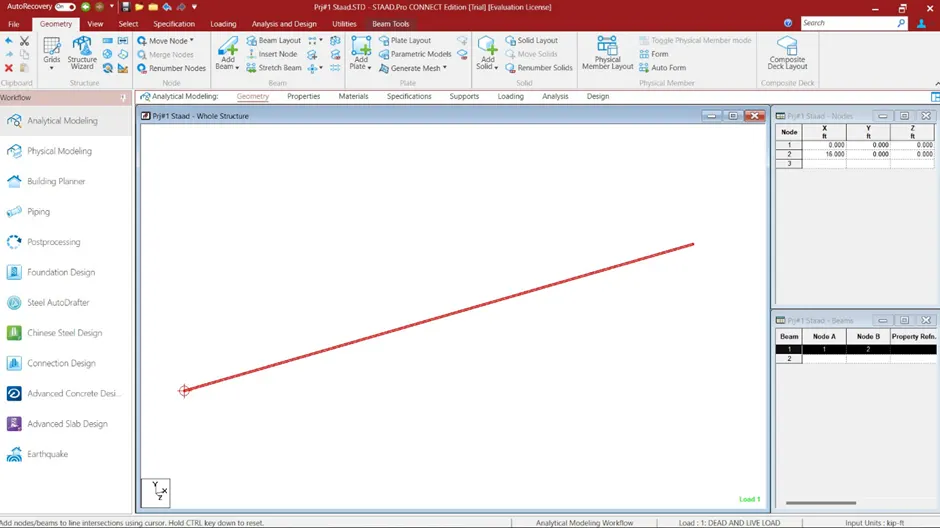
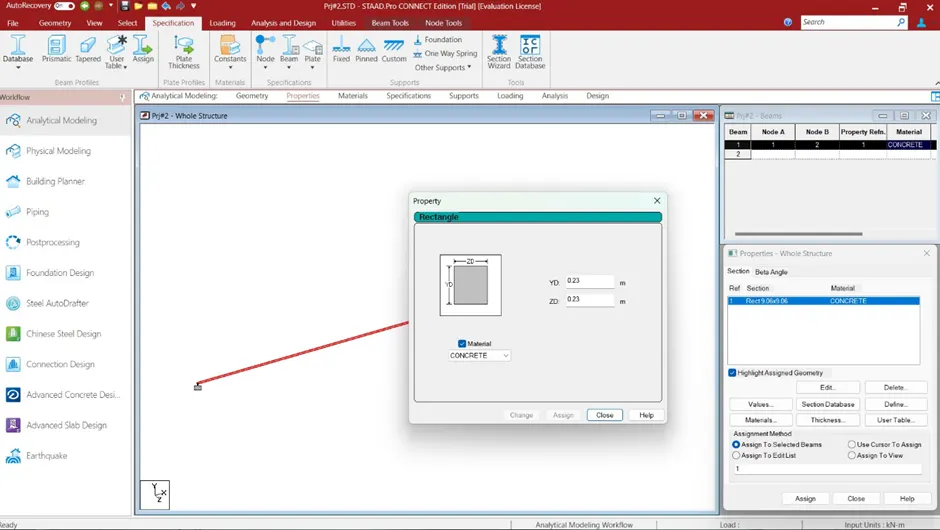
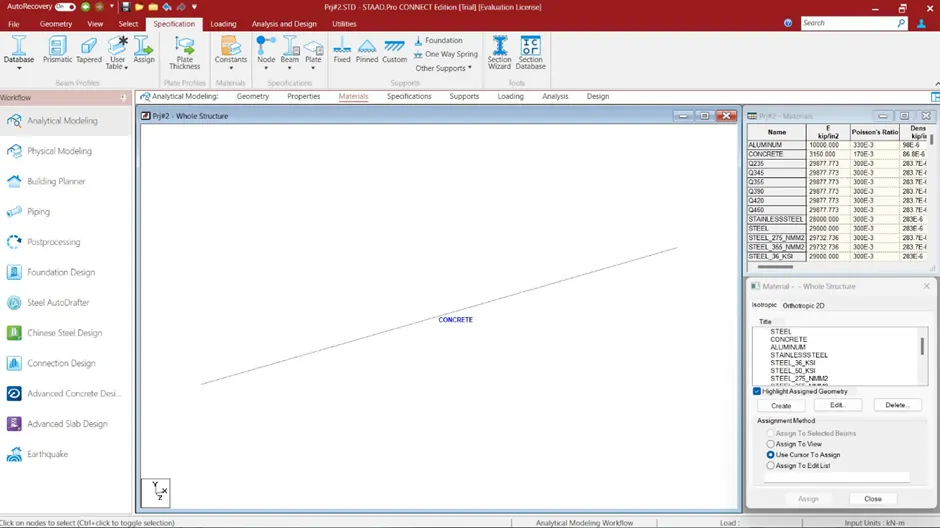
b)Support : Fixed on one end and Roller support(Horizontal) on the other end
- Adding Fixed support and Roller support Horizontal on other end
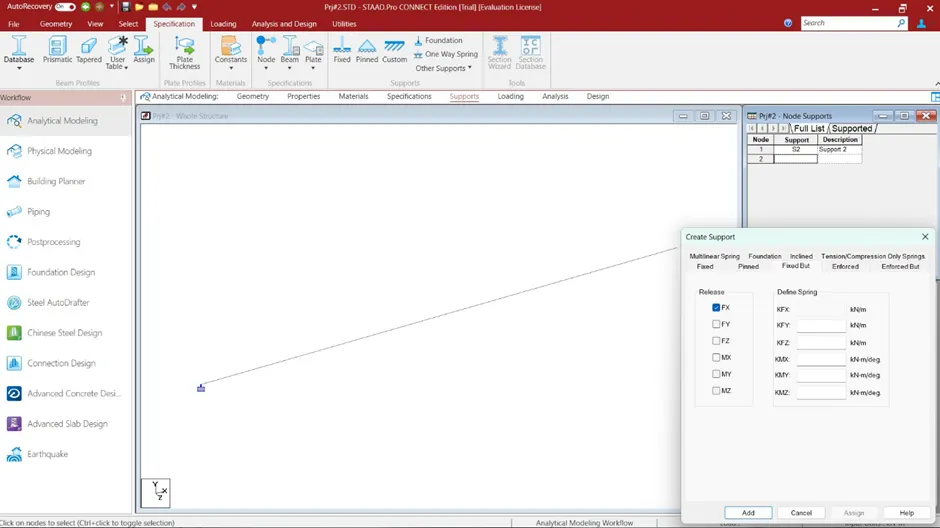
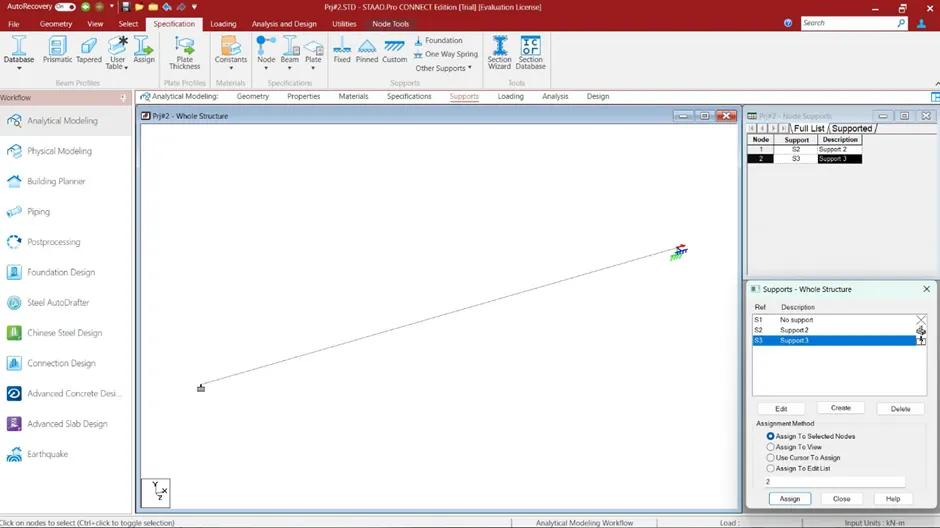
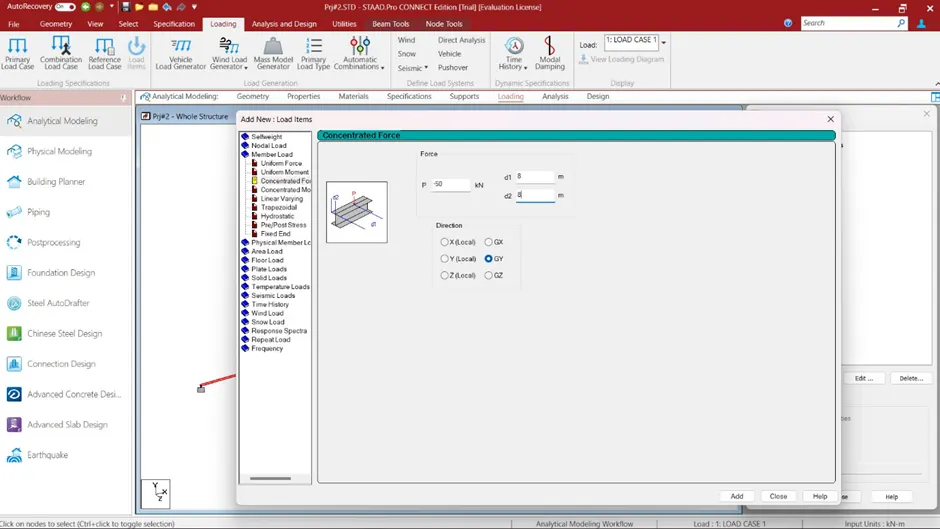
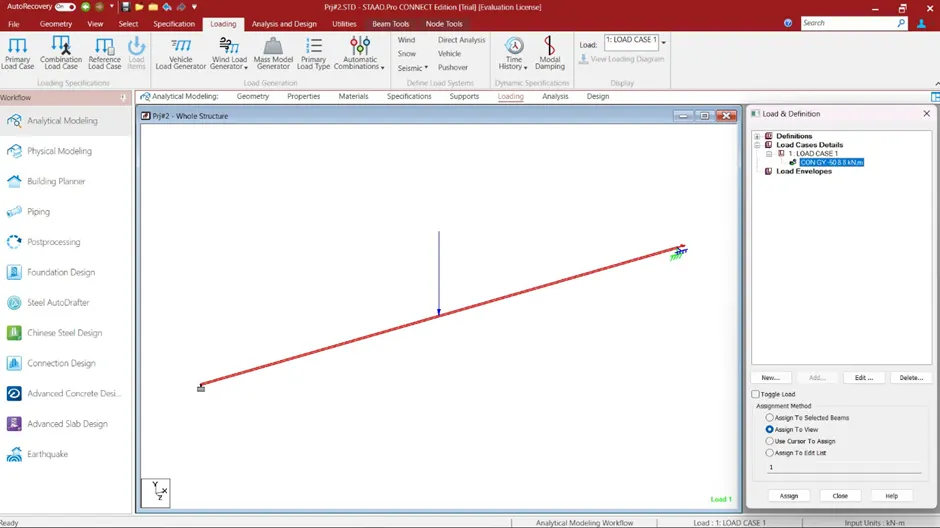
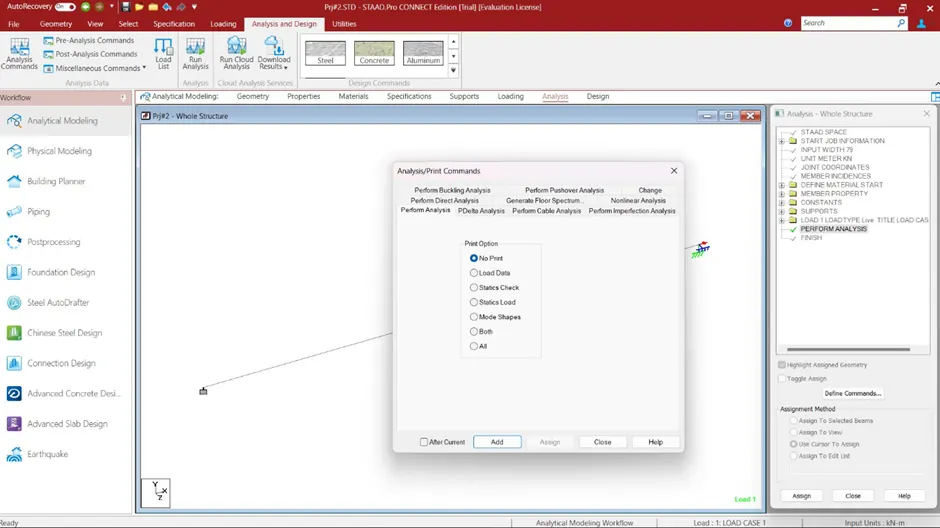
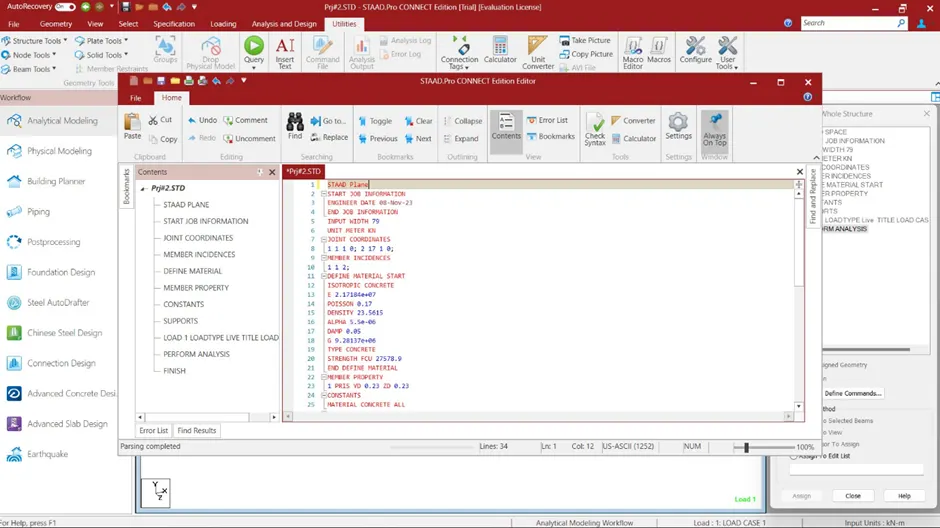
c)A point load of 50 kN at the mid-point
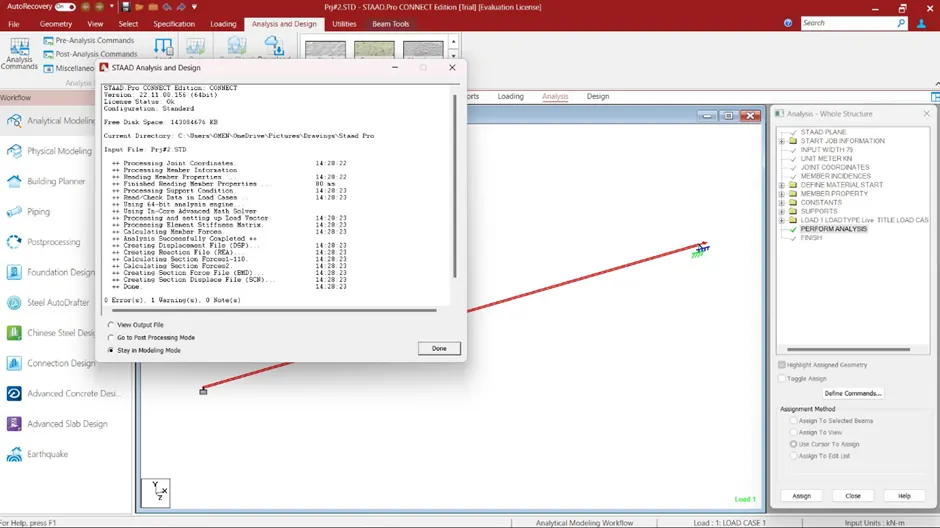
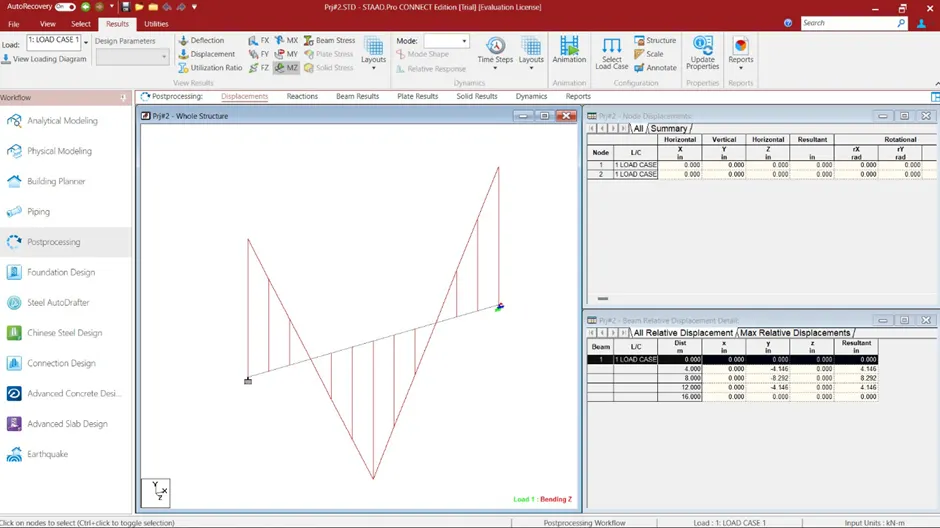
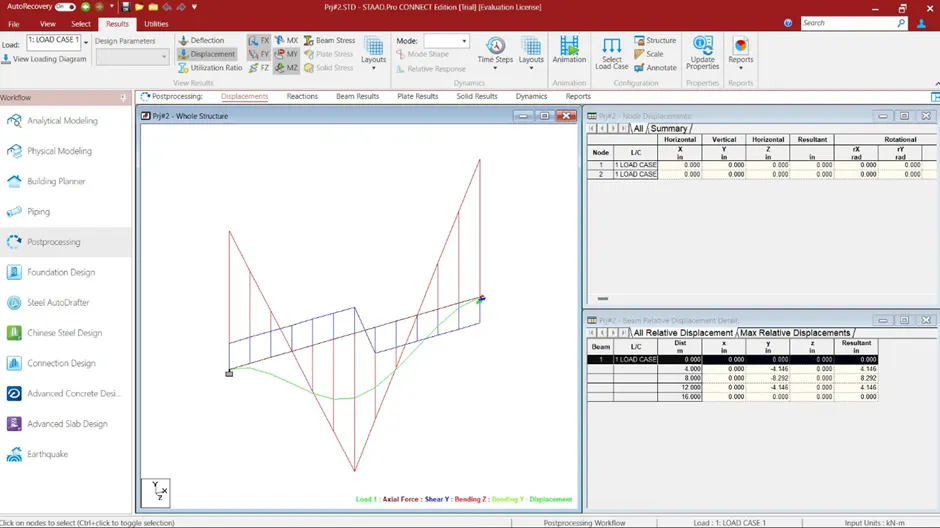
d)Draw SFD and BMD using software