Mechanical · PG program

Post Graduate Program inCAD

An ideal design course for mechanical engineers, this course provides industry-oriented training in CAD software tools like CATIA V5, Autodesk Alias, SOLIDWORKS, and Siemens NX CAD. Training for this CAD course is provided online and will help students develop expertise in fundamental skill sets.

★ 4.8· 30 reviews

Duration
48 weeks
Content
203 hours
Courses
7
Projects
32
Mode
Online
Overview

What you'll
be able to do.

  • This program gives you a thorough understanding of the design process.
  • Students will be able to understand the methodologies in developing a model.
  • Students will gain knowledge on incorporating manufacturing aspects while designing a component.
  • Students will also gain hands-on experience in using software like CATIA & NX CAD which are used in modelling.
  • Sketching and manufacturing are the two specialisations covered in the program.
  • Students can select any one specialisation and gain complete in-depth knowledge of it.

Why this program

  • Develop a keen understanding of how design engineers around the world design engineering components.
  • How to incorporate different aspects of manufacturing into the designs.
  • With this Master's Course, we are offering two specializations for you to choose from.
    • Sketching
    • Manufacturing
  • Job Opportunities
    • Design engineer(OEM/Tier 1)
    • Plastic design engineer
    • Sheet metal/ BIW design engineer
    • Product design engineer
    • Design and release engineer (D&R)
    • Wiring harness engineer/ designer
    • Seating design engineer
  • Higher Education can be pursued in
    • Automobile Engineering
    • Design Engineering
    • Mechanical Engineering
Tools you'll use
CATIA V5Autodesk AliasSiemens NX CADSOLIDWORKS
Curriculum

2 tracks to choose from,
7 courses each.

Get the full syllabus ↓
  1. 01Automotive Sheet Metal Design using Siemens NX CAD / CATIA V56 modules
    1. Vehicle development cycleW01
      • This is an introductory session where you will be introduced to the basics of automobiles along with different models of car bodies.
      • You will learn about the different stages of vehicle development that a car will go through before reaching the customer.
      • You will also learn about the three years of development activity that precedes the development of an automotive model.
    2. Basics of Automotive Body in WhiteW02
      • In this session, you will be introduced to the basics of automotive BIW.
      • You will be introduced to the basics of steel and its properties in detail as steel is an important component used in the construction of automobiles.
      • The steps that are followed in the selection of the material will be discussed as well.
      • You will be given an introduction to cross-functional teams that exist in an organization, and the need to coordinate with them along with examples of master sections and 3D components of the parts for easy and clear understanding.
    3. Design Methodology of a Hood, Fender, Roof, Back Doors, and Side DoorsW03
      • In this module, we will focus on the Hood, Fender, Roof, Side doors, and Back doors.
      • The design procedures for all the afore-mentioned parts can be summarized as follows,
        • Design Requirements
        • Functional Requirements
        • Regulations
        • Gap and Flushness Requirements
        • Safety Requirements
    4. Case study - Converting - Backdoor/Tailgate Inner PanelW04
      • In this module, we will present a real-life scenario where the effect of converting an inner panel from aluminium cast to the steel deep draw part will be shown.
      • Here is a quick summary of this case. The following design parameters were identified as critical and hence were fully described:
        • The seal surface width was the same as the aluminium liftgate
        • Tailgate outer parting was maintained as the same
        • Liftgate thickness was modified
        • Gap and flushness were maintained
      • You will be able to clearly understand these design parameters and the decisions that were made.
      • In this case study, the design guidelines were set through a series of CAE simulations.
    5. Design of key mechanism - Lock and StrikerW05
      • In this module, you will study the anatomy of a Locker and Striker mechanism.
      • In order to be a successful product development engineer, it is very important to understand in detail the development process and design requirements for even the smallest component.
    6. Case study Process and challenges with supplier manufactured partsW06
      • In this module, we will look at two case studies.
      • Both of these studies focus on supplier manufacturing practices.
      • We will discuss the design challenges faced by two Asian Automotive suppliers and then go over the solution methodologies
  2. 02Automotive Plastic Design using CATIA V515 modules
    1. Design Overview In Automotive IndustryW01
      • In this session, you will learn
        • Product Life Cycle
        • Design Life Cycle
    2. Plastics in Automotive IndustryW02
      • In this session, you will learn
        • Types of plastics (Thermoset Plastics, Thermoplastic)
        • Engineering plastic Materials
        • Manufacturing Process
        • Injection Molding
    3. Introduction to CATIAW03
      • In this session, you will learn
        • Basic commands and operation
        • Save feature, pan feature, rotate feature, etc
    4. Sketcher workbenchW04
      • In this session, you will learn the following
        • Commands
        • Rules to follow
        • Working in exercise
    5. Part Design WorkbenchW05
      • In this session, you will learn
        • Pad and pocket
        • Working on exercise
    6. Advanced part designW06
      • In this session, you will learn
        • Boolean operations
        • How to work on a Boolean exercise
        • How to work on After Tool Go modification on Automotive components. (OEM Working procedures)
    7. 2D Drawing creationW07
      • In this session, you will learn to
        • Create a PCB Bracket using Boolean operations
    8. Basic Surface Design WorkbenchW08
      • In this session, you will learn the following
        • Commands (Types of Sweep)
        • Working on exercise
        • Draft analysis
        • How to work on a surface exercise
    9. Advanced Surface Design WorkbenchW09
      • In this session, you will learn the following
        • Commands
        • Creation of Closed body, Thickened body
        • A parting line and parting surface
    10. Creation of Door Switch Bezel and adding thickness to itW10
      • In this session, you will learn
        • How to create tooling direction and do the draft analysis to ensure the part can be taken out of the tool?
        • Adding the right thickness to the part and solving the issues.
        • Create the parting line for the bezel.
    11. Tooling FeasibilityW11
      • In this session, you will learn
        • What is a mounting feature?
        • How to create a locator and dog house?
        • Integrating the mounting features to the base part with Boolean operations
    12. Modeling ExerciseW12
      • In this session, you will learn
        • The Clip mounting feature is in Plastic design.
        • Design considerations for creating this feature
        • Tooling analysis for the clip feature
    13. Drafting WorkbenchW13
      • In this session, you will learn
        • Drafting workbench
        • Creation of detail drawing for the Components
        • Views creations (basic view & section views)
        • Application of GD&T in drawings
        • Template settings
    14. Mold Design ConsiderationsW14
      • In this session, you will learn
        • Creation of Paring line
        • Creation of Tooling axis
        • What is undercut and how to solve it
    15. Complex Mold Design ParametersW15
      • In this session, you will learn
        • Creation of simple mold for the Rear quarter trim Cupholder
        • What are core and cavity
        • Stripper, ejection, and system
        • Draft analysis
      • Designing a mold gives a good working understanding of the molding aspects of a component
  3. 03Automotive Wiring Harness using CATIA V510 modules
    1. Basics of Vehicle Electrical Distribution System & Wiring HarnessW01
      • In this session, you will learn
        • Introduction to Vehicle Electrical Distribution System (EDS)
        • Introduction to wiring harness assembly
        • Wiring harness design process for New Product Development (NPD)
        • Introduction to CATIA V5 electrical workbench
    2. Introduction to CATIA V5 Electrical Workbench & Electrical Part DesignW02
      • In this session, you will learn
        • Customized settings for electrical environment
        • Wiring harness routing process for CATIA V5
        • CATIA V5 – electrical part design
    3. Electrical Part DesignW03
      • In this session, you will learn
        • Clip/clamps/support part definition
        • Backshell definition
        • Protective covering definition
    4. Harness Assembly & Installation – Part 1W04
      • In this session, you will learn
        • Preparation of harness assembly
        • Creating the wire harness geometrical bundle
        • Inserting harness components into a geometrical bundle
        • Positioning your inserted electrical parts
        • Connecting & Disconnecting electrical components
        • Defining the wiring harness routing
    5. Harness Assembly & Installation – Part 2W05
      • In this session, you will learn
        • Wiring harness routing on external references
        • Modifying the wire harness bundle segments
        • Wire harness protective coverings
        • Use of electrical splices
        • Bundle continuity check/analysis
        • Geometrical bundle warnings
        • 3D annotation
    6. Harness Assembly & Installation – Part 3 W06
      • In this session, you will learn
        • Modifying the wire harness bundle segments
        • Modifying the branch point location
        • Deleting bundle segment
        • Bundle continuity check/analysis
        • Geometrical bundle warnings
        • 3D annotations
        • Important commands, tips, & techniques
    7. Wiring Harness FlatteningW07
      • In this session, you will learn
        • Wiring harness flattening workbench
        • Flattening workbench settings
        • Flattening the 3D harness assembly
        • Modify flatten assembly
        • Saving the flatten files
        • Drawing, creation & contents
    8. Component Specifications & Selection GuideW08
      • In this session, you will learn
        • Wiring harness component specifications & selection parameters
        • Available suppliers in the market (India)
    9. Wiring Harness Routing & Packaging Basics – Session 1W09
      • In this session, you will learn
        • Definitions
        • Routing & packaging process
        • Design criteria (generic) for wiring harness
        • Packaging rules & best practices
        • Guidelines for battery cables routing
    10. Wiring Harness Routing & Packaging Basics – Session 2W10
      • In this session, you will learn
        • Clearance management
        • Water ingress protection
        • Thermal protection management
        • Chaffing protection
        • Vibration protection
        • Routing on/near dynamic parts ( engine, wheel)
        • Harness bending rules (harness & battery cables)
        • Interconnection connector parking
  4. 04Automotive Sketching24 modules
    1. IntroductionW01
      • This is an introductory week, we will first look into what exactly is design and then try opening it up with its family tree & branches as Automobile Design is a categorized part of Industrial Design.
      • So, the entire process of it will be explained.
      • We will also be discussing what will be the job of a designer in this role.
      • We will also cover the historical perspective along with evolution in design.
      • Towards the end of the module, we will be looking into trends in Elements of Design.
      • Then we will move on to Shape & Form design & its differences.
        • What is Design?
        • Overview- Industrial Design & Introduction – Industrial Designer
        • Overview- Automotive Design & Introduction- Automobile Designer
        • Design Process-Introduction
        • The Basic Design Process
        • Important roles in the Design Process
        • History of Automobiles
        • Historical perspective on Car Design
        • Evolution of Design
        • Trends in Automobile Design
        • Elements of Design
        • Shapes & Form in Design
        • Introduction to Shapes & Forms
        • What are Forms?
        • Difference Between shape and form
    2. Shape transformation and translationW02
      • In this module, we will be having a recap of the content we learned last week.
      • We will give more emphasis to form design topics and will look into how form design is used to build forms, Shape Translation & Transformation.
      • The two important topics of this week are “Elements of Design” & “Principles of Design” teaching.
      • We are giving more importance to these topics as they help us understand the design philosophy.
        • Transformation
        • Form Design-Continuation
          • Deconstruction
          • Forms in Automotive
          • Speed forms
        • Elements of Design
        • Principles of Design
    3. Introduction to car designW03
      • This week, we will be introducing you to how exactly the exterior body of a car is done.
      • Once this is done, we will move into the aspects that cover automotive design.
      • We will be looking into the entire exterior terminology.
      • This week will also help you understand the industry language for those parts.
      • We will be covering the engineering aspects later. You will finally be starting your practice to generate freehand sketching
        • Automotive Design- Body Styles, Layout, Proportions and Themes
        • Automotive Exterior Terminology
        • Engineering Aspects
        • Introduction to freehand sketching of simple geometries
    4. Introduction to isometric and perspectiveW04
      • This week, we move on to a rather peculiar phenomenon or concept of drawing- perspective.
      • But first, we will be looking at how things work in isometric and then we will start with different types of perspectives.
      • Then once completed we will start sketching in perspective.
      • This will help us understand what are the different parameters one needs to keep in mind while drawing each and every sketch.
      • Moving to a car sketching block, while making one in perspective, it is vital that we understand how it affects the angle.
        • Isometric perspective - Working with Isometric grid
        • Types of perspectives
          • 1 point
          • 2 point
          • 3 point
          • Multipoint
        • Learning sketching in perspective: 1 point, 2-point & 3-point perspective.
        • Working with perspective Grid
        • Sketching car block in 1, 2 & 3-point perspectives freehand
        • Exterior and Interior Design
        • Understanding Exterior proportions
        • Sketching car side view proportion boxes- Sedan, SUV, Sports car, compact car & truck
    5. Sketching of Car’s Front and Rear ViewsW05
      • After that this week will cover the technical side, and how to make a technical drawing.
      • Coming to the Artistic side we will understand the basics to make different shapes & forms to understand the surface.
        • Sketching car ¾ front view, ¾ rearview Box as per proportions
        • Automotive Aesthetics
        • Vehicle Ergonomics
        • Vehicle Packaging & Benchmarking
        • Technical Drawing
        • Understanding Surface Shapes & Form basics
    6. Shading & Basic ReflectionsW06
      • This week, we will start with the basics of shading & reflections.
      • Then after that will try a technique to render with different mediums.
      • Will learn how a project basis is formed by desk & market research.
      • Then coming to the user research, you will be learning how to make a design & mood board depending on your requirement and personality.
      • Once completed we will take inspiration and create forms.
      • We will then try to doodle and draw different shapes. And then finally we will see how a car is sketched by a step by step guide.
        • Basic Rendering Technique using a different medium
        • Desk Research & Market Research
        • User Research- Target User
        • Design & Mood Board- Inspiration Board
        • Inspirational Driven form
        • Doodle & Draw
        • How to draw Car side view- A step by step guide
    7. Introduction to sketching as a communicating toolW07
      • This week, you will learn how to use sketching as a tool to communicate.
      • After that, we will go on to generate new forms and will look at techniques of how to do it.
      • We will also learn about building concept form and the classification of sketches.
      • We will then move on to a step by step guide to making cars in 3/4th perspective views while incorporating concept forms.
        • Form Generation Methods & Techniques
        • Sketches Classification & Basic – Ideation Sketches, Exploratory Sketches
        • Creating Concept forms
        • How to draw Car 3/4 views- A step by step guide
    8. Understanding lights and materialsW08
      • This week, you will try to make a photorealistic render.
      • Then we will move on to understanding how lights & materials work on surfaces.
      • We’ll try rendering techniques & implement all of the learning in the first design project.
        • Photorealistic Rendering
        • Reflection as on Car surfaces- Pencil Rendering & Marker Rendering
        • Design Project- 1
        • Design a Family Sedan
    9. Introduction to Automotive Interior DesignW09
      • This week, you will be introduced to the interiors of the car.
      • Here, you will learn about crucial ergonomics and interior occupant packaging.
      • We will also look into the design for the 95th percentile rule.
      • At last, we will have a brief look at the Panels & Consoles.
        • Car Interior Ergonomics
        • Design for 95th percentile
        • Vehicle Packaging & Benchmarking
        • Understanding the interiors-Occupant Packaging
        • Introduction to Interiors- Instrument panel & Consoles
    10. Sketches Classification & Basic – Explanatory Sketches and Persuasive sketchesW10
      • This week firstly will learn another classification of sketches and will start with the basics for the interior.
      • We will have a look at the interior elements to understand the principle behind each element.
      • After that, we will focus on sketching the interior as a whole.
      • A study of trend Analysis & forecasting will be covered to learn about the upcoming trends so it is easy to predict the future.
        • Understanding the Interior Elements
        • Back to Basics- Forms & Shapes
        • Interior Sketching- 1 Detailed Interior Components
        • Trend Analysis & Forecasting
    11. Automotive TechnologiesW11
      • This week you will be learning about the relationship between automotive technologies and design.
      • We will then be moving to the interior as a whole, here, we will look into each element and discuss its role while experimenting it with different mediums.
      • We will also be having a lesson on sketching with a sketchbook.
      • So, you sketch directly onto your PC digitally.
        • Interior sketching
        • Different mediums for sketching - Explorations & its effects
        • Digital sketching - Sketchbook
    12. Design ProjectW12
      • This week before introducing something new, you will be getting an assignment.
      • You will be making an interior of a car with all the elements.
      • Later on, we will move to digital data & See how to render a car in a sketchbook.
        • Design a Certain type of vehicle interior with all the requirements of Interior needs.
        • Effectiveness of Digital Work & Refinements
        • How to Render cars in sketchbook?
    13. Nature and form, Biomimicry in transportation designW13
      • This week you will understand the influence of nature in form.
      • You will learn the use of biomimicry in design and will implement it in your design.
      • There will be a small project in which you will find and adapt to what nature has to offer.
        • Designing a vehicle while replicating a reptile or any mammal
        • Taking and breaking down its characteristics and using it in your own vehicle.
        • It can be a combination of 2 or a single project.
        • The characteristics of that reptile or mammal should be highlighted.
    14. Products and brand managementW14
      • Here, you have to understand Product & Brand management.
      • The main reason we are focussing on it is because it will help you to create a peculiar product for a potential customer.
      • Later on, we will move onto a new project in which we will redesign a certain car, with its brand intact.
        • Redesigning an existing vehicle (pre-existed or current)
        • Understand the brand what they offer or the reason why they made that particular Vehicle.
        • Propose your Ideas while keeping the form and design intact from that original vehicle.
        • When you look at both of them the resemblance should be there.
    15. Transportation Design - Design of a minimised roadster with a complete interior and exteriorW15
      • In previous weeks, you have covered several Projects in which a particular topic was only in play.
      • This week we will be doing another project which is bigger at play and has all that you have learned.
      • Start with a design process.
      • This particular week, we will decide the concept and ideation.
      • Later on, we will refine the design and finalize the exterior.
        • Exterior Preliminary Sketches
          • Initial sketches for concept generation and ideation for exterior or have an idea in mind what you will propose.
        • Exterior Refinements & Finalization
          • Status updates on whatever changes or refinements suggested on the exterior design & finalize exterior design first.
    16. Interior designW16
      • In this module, you will be focusing on the interior part of the car.
      • As the exterior of the car is finalized, design the interiors with the same process.
      • Start with preliminary concepts and then finalize the interiors.
    17. Transportation design project 2W17
      • This week again, you will start with a new project.
      • The entire process of Research, Boards & Finalization will be followed.
      • More emphasis is given to projects as this is a subject which can only be learnt with hands-on practice and this way you learn and get used to things happening in the industry.
      • For this, we are actually going to design something for the year 2033, in which a lot will be depending on the research that you will do.
        • Mobility Design 2033- Decide your Concept 2033
        • Find a problem, build a solution, think of a concept, decide an action plan, propose proposals and presentations.
          • Design Research- Brand Identity, Target Customer, Concept
          • Sketch Presentation- Form Sketches, Proposal Sketches
          • Rendering- Selected Sketches, Final Rendering
        • Exterior Design
          • Exterior Preliminary Sketches Initial sketches for concept generation and ideation for exterior or have an idea in mind what you will propose.
          • Exterior Refinements & Finalization Status updates on whatever changes or refinements suggested on the exterior design & finalize exterior Design first
    18. Interior designW18
      • Following last week, the exterior is completed and now we start with the interiors.
      • Firstly, try to focus on the elements, after that focus on the design part.
      • Get everything rendered in a sketchbook and submit it as a presentation.
        • Following are the checkpoints to be covered for the same:
          • Interior Preliminary Sketches
        • Initial sketches for concept generation and ideation for interior
          • Interior Refinements & Finalization
    19. Introduction to transportation design (final project 1)W19
      • This week, we are going to start this project which will be completely your own.
      • You will make a brief of what you want to make, decide your users, and follow the entire process of design to take your idea to a final stage.
        • Make your own brief.
        • Design Research - Desk & Market Research.
        • User Research- Target Customer, Design/Mood & Inspiration Board.
        • Research the Automotive technologies.
        • Prepare a Trend Analysis & Forecasting Report.
        • Build for a brand- Product & Brand management Report.
    20. Design Brief- sketching after Ideation, Inspiration and Exploration (Final Project 2)W20
      • This week, you will start with the conceptual phase by taking inspiration.
      • You will then provide the ideations for your design.
      • You have a lot of time to think and explore your ideas.
      • Try to solve/create something better or different from your design.
    21. Exterior design finalisation (Final Project 3)W21
      • This week, our main focus is to finalize the exterior design, the refinements have to be implemented early so that we can make technical drawings of it.
      • Later on, we wish to start with the preliminary sketches of interior design if the entire exterior design is finalised
    22. Interior design sketching (Final Project 4)W22
      • This week we start on the interior design aspect of your design.
      • First, try to think of your vehicle and then start experimenting with the things that you need for your interior.
      • Try to build a relation between interior & exterior and try to be more expressive by using different perspective views.
      • Focus on interior components, the looks and functions.
      • Do an ideation sketch so everything becomes clear.
    23. Interior design finalisationW23
      • This week is totally focused on finalising the interior design.
      • The main focus is to finalise the direction of our ideation and purpose.
      • Later on, work on refinements and finalize the interior with detailed Interior elements sketches.
    24. Final RendersW24
      • In this last week, you will do the rendering & produce your design within a presentation.
      • So the entire design process is clear to someone who will look at the presentation.
      • In the end, we will be having a session where we will be discussing techniques to better present your product.
      • We will also discuss techniques that we need to focus on while designing.
  5. 05Automotive Class A surfacing using ALIAS12 modules
    1. Digital Design Foundation 1, Curves Introduction & Why Use CurvesW01
      • In this session, you will learn
        • Introduction to ALIAS
        • What is Design? About CAID/CAD Design
        • User interface and Navigation Tools
        • Basic Object Selection and viewing
        • Importing Sketches as images or canvases
        • Working with layers
        • Introduction to curve tools. Basics, U’s & V’s, spans.
        • Create Symmetrical Curves
        • Transform Curves, Creating Curve Fillets, Curve Sections and offset curves
    2. Digital Design Foundation 2 & Building and Controlling Simple GeometryW02
      • In this session, you will learn
        • Controlling Geometry, Mirroring, Grouping, and Duplicating Objects
        • Object Lister, CV Sculpting, and Concept Sculpting
    3. Digital Design Foundation 3, Surface Editing & Introduction to Different Continuities W03
      • In this session, you will learn
        • Surface toolbar, edit and shade
        • Difference Between Surfaces and Solids
        • Surfaces from Boundaries
        • Bezier Surfaces
        • Nurbs & Slab Modeling
        • What are Parent Surfaces?
          • Primary Surfaces
          • Secondary Surfaces
        • Sharp Surface Models
        • Primary Fillets and Blends
        • Secondary Fillets and Blends
        • Chord Fillet and Radius Fillet
        • Trimming, Creating Curves on Surfaces
        • Trimming Surfaces, Intersect Surfaces, Filleting Surfaces
        • Adding Variable Radius Fillets
        • G0 - Positional
        • G1 - Tangent
        • G-2 - Curvature
        • G-3 - Curvature
    4. Workflow 1: Concept ModelingW04
      • In this session, you will learn
        • Introduction to Concept Modelling
        • Introduction to Construction Options
        • Dimensions
        • Overlay Canvasses for Design and Presentation
        • Building with Curves & Surface Tools
        • Modelling Approaches and Surface Distribution
        • Working Accurately
    5. Workflow 2: Concept ModellingW05
      • In this session, you will learn
        • Overlay Canvass for Design
        • Surface Understanding by Three-quarter Views
        • Building with Curves & Surface Patching
        • Modelling Approaches and Surface Distribution
    6. Workflow 3: Concept ModellingW06
      • In this session, you will learn
        • Component design
        • Hypothetical surfaces to create patch layout
        • Work more on the Creative side: Imagine the surfaces
    7. Workflow 4: Concept ModellingW07
      • In this session, you will learn
        • Component design
        • Hypothetical surfaces to create patch layout
        • Work more on the Creative side: Imagine the surfaces
    8. Workflow 5: Concept ModellingW08
      • In this session, you will learn
        • Surfaces, patches, and layout
        • The idea of how to divide surfaces
        • Building techniques, and where to start
        • Make your way up to the top
        • Parent Patches- Foundation
    9. Technical Surfacing (A- Class Knowledge)W09
      • In this session, you will learn
        • Introduction to Technical Surfacing
        • Surface Evaluation - Reflection Lines
        • Surface Evaluation - Cross Sections & Comb Plots
        • Construction Tolerances between Surface Patches
        • Transform CV - Fine-Tuning Control Points
        • Working with Trimmed Edges - Fit Curve & Align Project
    10. Class B Surfaces ModellingW10
      • In this session, you will learn
        • A well-thought patch construction
        • Patches with proper CV layout
        • Proper passing of positional, tangent, and curvature surfaces
        • Properly evaluated surfaces
        • Making way up to Class-A Model
    11. Reverse EngineeringW11
      • In this session, you will learn
        • Introduction to Reverse Engineering
        • Working with Mesh Data
        • Working with Sections
        • Creating a Surface onto a Mesh
        • Analyzing and Displaying Deviation
        • Reference Manager for Handling Large Data Sets
    12. Presenting Your DesignW12
      • In this session, you will learn
        • Rendering in ALIAS
        • Hardware Rendering, Shades, Lighting and Environments
        • Creating Image Files
  6. 06Automotive Seating Design using CATIA V516 modules
    1. Introduction to Automotive SeatingW01
      • In this section, we will have a brief Introduction to Automotive Structure, Seats & their Nomenclature.
    2. Current Fashion/TrendW02
      • In this section, we will have a brief on types of Seats, how the seats are defined as per the number of rows in the Car and Number of Movement in the seat.
    3. Component of SeatsW03
      • This section contains information about the parts/component used to design/develop a seat as per the requirement from the customer. It will also have a basic mechanism used in a seat to provide the movements. It is defined in two segments:
        • Front Row Components
        • Rear Row Components
    4. Component Details : FoamW04
      • In this section, we will brief about the components of Foam.
      • The following points will be covered during the course with a hands-on CATIA model.
        • How many types of Foam are available
        • Design Standard for Foam
        • Methods of foam development/Manufacture
        • Defects in Foam
    5. Component Details : StructureW05
      • In this section, we will brief about the components – Structure.
      • The following points will be covered during the course with a hands-on CATIA model.
        • Types of Structure
        • Component of Structure
        • Design guideline
        • The material used in manufacturing
        • Methods used to develop a structure
    6. Component Details : HeadrestW06
      • In this section, you will learn the following.
        • Types of Headrest used in automotive seats.
        • Components used in making headrest
        • Use of Headrest
    7. Component Details : TrimsW07
      • In this section, you will learn the following.
        • Types of Trims used in Automotive
        • The terminology used in Trims
        • Defects during the development of trim
        • Methods to assemble trims
    8. Component Details : PlasticsW08
      • The following points will be covered during the section:
        • Types of Plastic ( Material/Usage differentiation)
        • Nomenclature of plastic parts in the seat
        • Efficient ways to use plastic in a seat
        • Defects occur on plastic components
    9. Component Details : ArmrestW09
      • In this section, you will learn the following.
        • Types of Armrest
        • Mechanism of Armrest
        • Components of an Armrest
        • Manufacturing Defects of Armrest
    10. Component Details : MechanismW10
      • In this course we will brief about details of all the mechanisms used in Automotive passenger seats including types of Mechanism used and nomenclature:
        • Recliner – Work/Function and detail study
        • Track – Work/Function and detail study
        • Height Adjuster – Work/Function and detail study
    11. Seat TestingW11
      • This course will provide a glimpse of testing of seats at Car/Seat level which will include below:
        • Safety-related Test
        • Regulatory related Test
    12. Comfort and InnovationW12
      • This course will provide a glimpse of testing of a seat at Car/Seat level which will include below :
        • Comfort mechanism
        • New Innovation Idea
        • Comfort layouts of Seats
    13. Seat Related IssuesW13
      • This section of the course will not only be generalized to seating but this method can be used all over the globe in any design-related program:
        • 8D
        • Fish Bone Diagram
        • 5D
        • Man-Machine Diagram
    14. DFMEA and PFMEAW14
      • This section of the course will not only be generalized to seating but this method can be used all over the globe in any design-related program :
        • What are DFMEA and PFMEA
        • The process to prepare DFMEA and PFMEA
        • Different Review points of DFMEA and PFMEA
    15. Geometric Dimensioning and Tolerances [GD&T] W15
      • This section of the course will not only be generalized to seating but this method can be used all over the globe in any design-related program :
        • Introduction to GD&T
        • Usage of GD&T in seats
        • Different examples to define GD&T with exercise to do
    16. Program Life CycleW16
      • This section of the course will not only be generalized to seating but this method can be used all over the globe in any program :
        • Life Cycle of a program
        • Different stages a program goes
        • Milestones of Customers
  7. 07Automotive Lighting Design using CATIA V54 modules
    1. Basic of Lighting & Software OverviewW01
      • In this session, you will learn
        • Some Old school phenomena of Physics-related to lighting
        • How basic physics are used in real-time application
        • Basic name and application of Automobile lighting Eg., Headlight, tail light etc.
        • The function of light, eg., Turn indication, High beam, Low Beam
        • CATIA basic model, workbench, some basic commands (in CATIA)
        • Some practice sessions on basic features, Like, boss, Locators (in CATIA)
    2. Basic of Regulation & Start of Making LampW02
      • In this session, you will learn
        • Information about regulations and their function
        • Start making Lamp (Class A analysis) (in CATIA)
        • B surface creation (all into separate parts in CATIA)
        • Feature implementation (in CATIA)
        • More deep information for Regulation and How to Check into 3D
        • Draft analysis, Basic check for Model(in CATIA)
    3. Advance Level of Regulation with 3D Model & Plastics IntroductionW03
      • In this session, you will learn
        • Basic Plastic, understanding while designing parts (in CATIA)
        • Making joining section (Glue, hot plate, Vibration etc)
        • Making all in single files (in CATIA)
        • Publish command in CATIA and join all parts together
        • Making mounting concept with 3,2,1 Principle surrounding check (in CATIA)
        • C regulation into 3D (in CATIA)
    4. Basic Tooling Check & Drawing MakingW04
      • In this session, you will learn
        • Data as per tooling requirement(only basic) in CATIA
        • Start making a 2D drawing from 3D (in CATIA)
        • Tolerance and Dimension (in CATIA)
        • Complete revision (basic only)
        • Making small Lamp again as per regulation, plastic, and Tooling requirement
        • Understanding Industry requirements, Optics, thermal, RFQ, and other key elements to getting into this domain
Industry projects

32 projects
you'll ship.

Our projects are designed by experts in the industry to reflect industry standards. By working through our projects, Learners will gain a practical understanding of what they will take on at a larger-scale in the industry. In total, there are 32 Projects that are available in this program.

Designing of Hood
Automotive Sheet Metal Design using Siemens NX CAD / CATIA V5

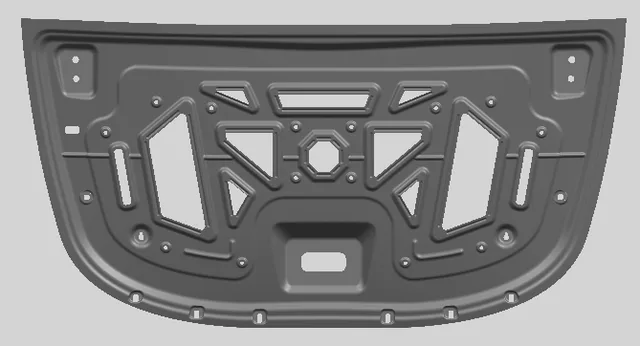
Designing of Hood

In this particular project, you will be working on designing the inner panel of the hood, according to EURO NCAP standards.
Designing of Fender Drip Area
Automotive Sheet Metal Design using Siemens NX CAD / CATIA V5

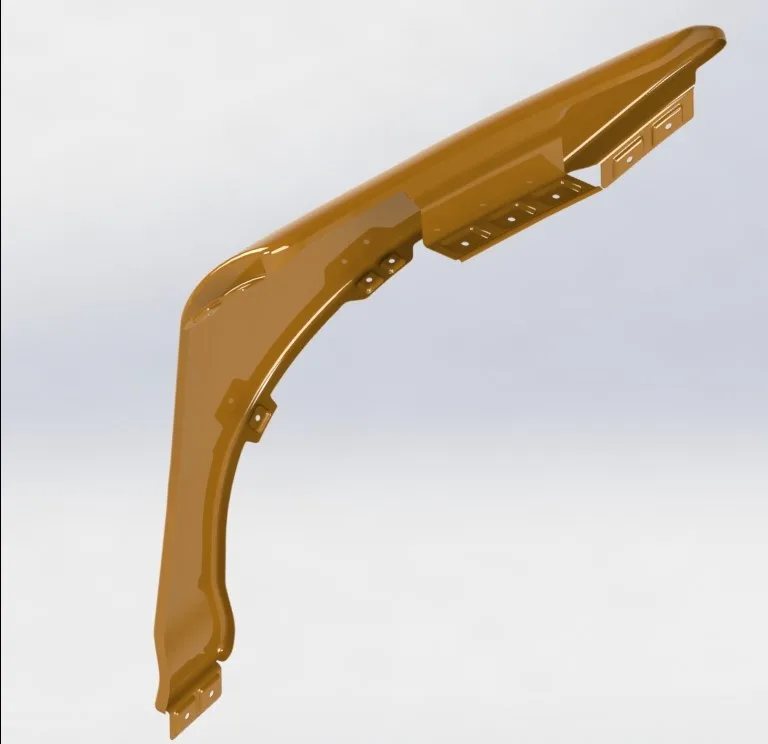
Designing of Fender Drip Area

In this particular project, you will be working on designing the Fender, according to EURO NCAP standards.
Designing of Roof Assembly
Automotive Sheet Metal Design using Siemens NX CAD / CATIA V5

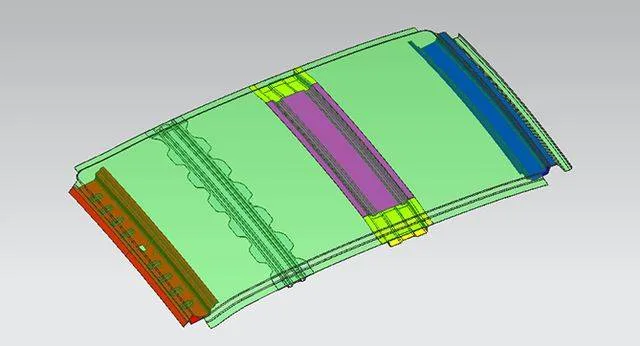
Designing of Roof Assembly

In this particular project, you will design a complete roof assembly with all the necessary reinforcements using automotive standards.
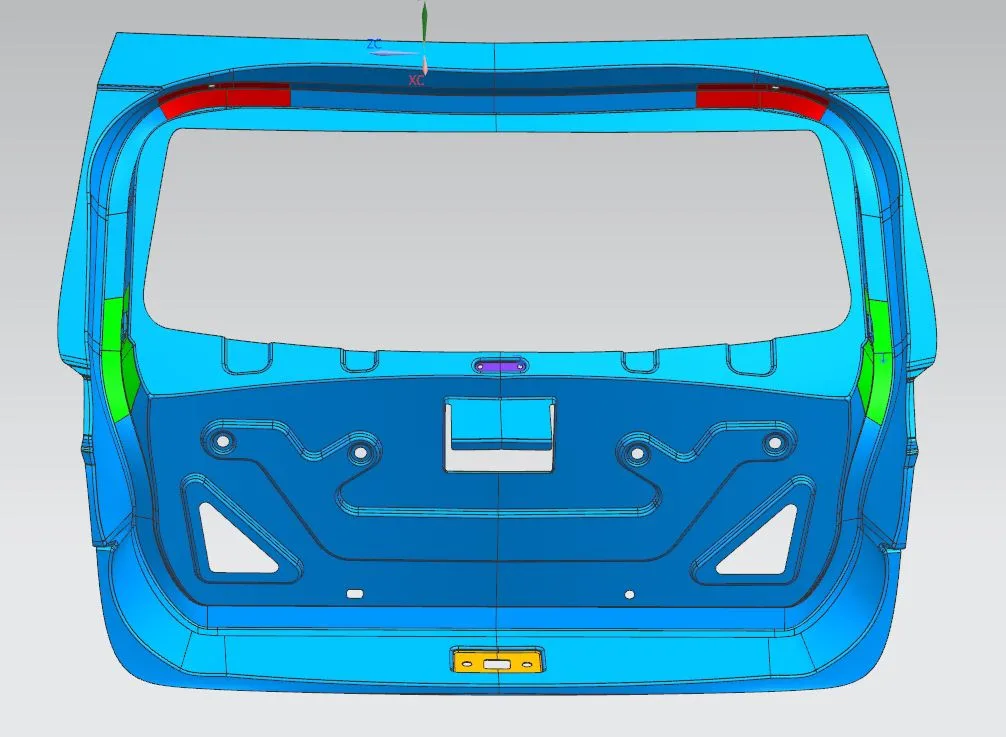
Designing of Tailgate
Automotive Sheet Metal Design using Siemens NX CAD / CATIA V5

Designing of Tailgate

In this project, you will design and develop the complete Tailgate assembly using the given styling data.
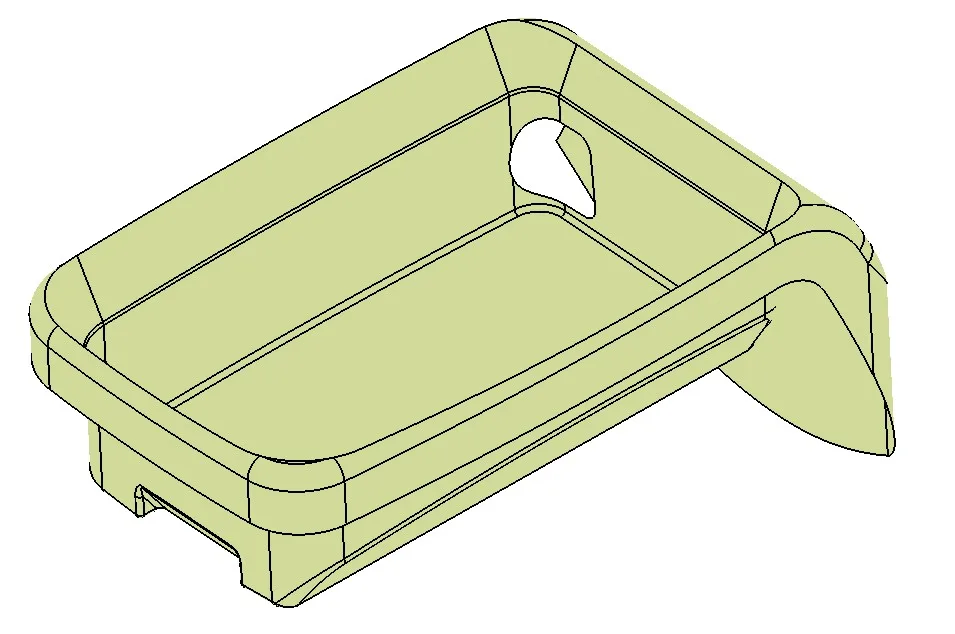
Design of Coin Holder
Automotive Plastic Design using CATIA V5

Design of Coin Holder

In this project, you will design a coin holder plastic trim part from the given Class-A surface. Check if the product is manufacturable.
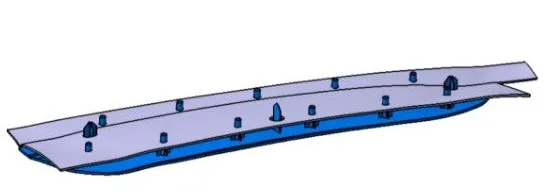
Design of Heat Staking
Automotive Plastic Design using CATIA V5

Design of Heat Staking

In this project, the students will design heat stakes for joining the plastic door. The students will apply the 3-2-1 principle for designing the plastic applique.
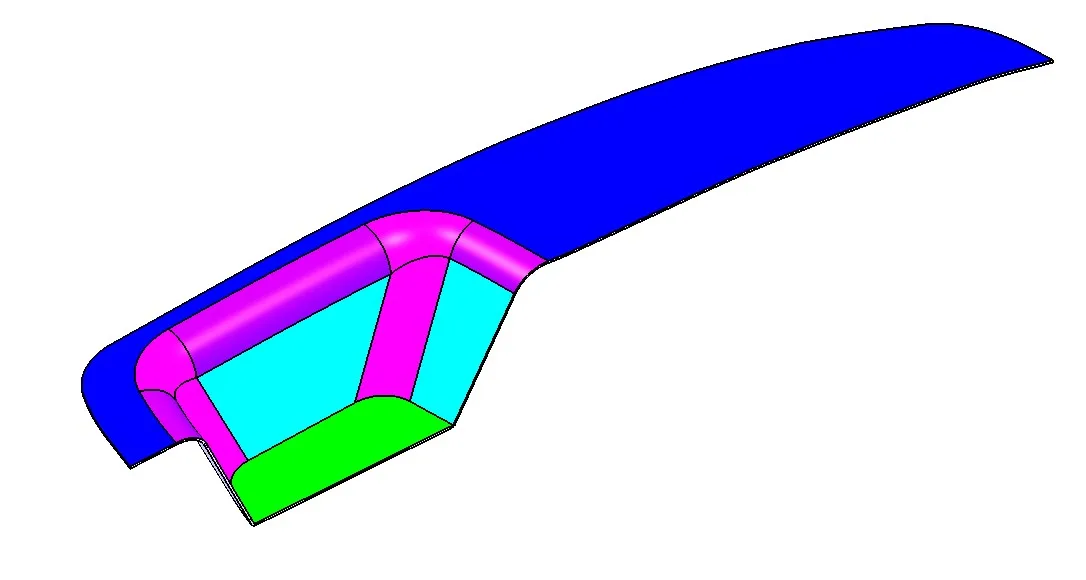
Design of Switch Bezel
Automotive Plastic Design using CATIA V5

Design of Switch Bezel

This project is about the development of a car side door switch bezel. You will be creating the CAD model of the switch bezel from the given inputs.
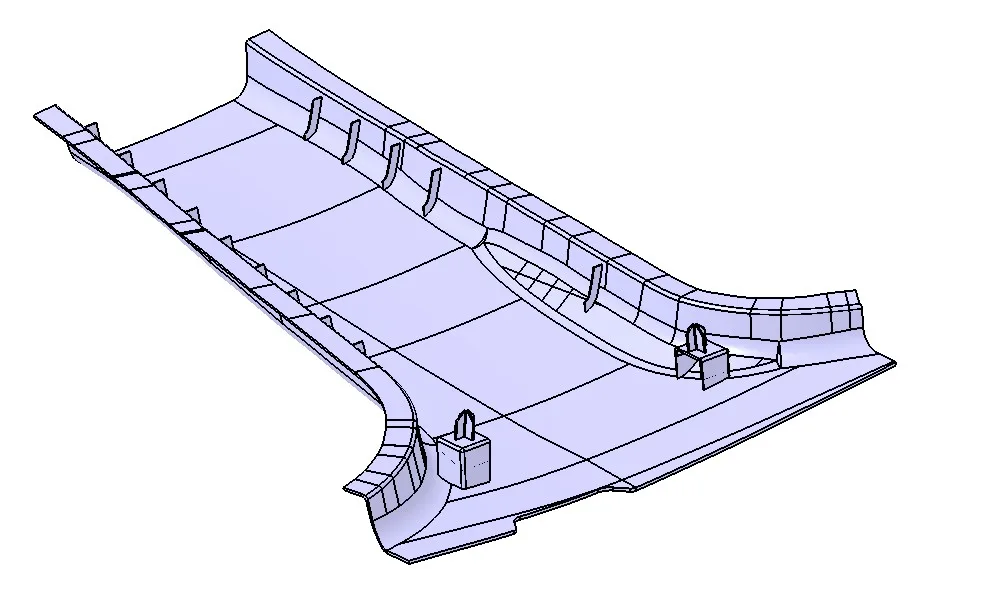
Design of B-pillar Cover
Automotive Plastic Design using CATIA V5

Design of B-pillar Cover

The project deals with the design of a B-pillar cover. The students will create a Plastic B pillar trim from the given class-A surface.
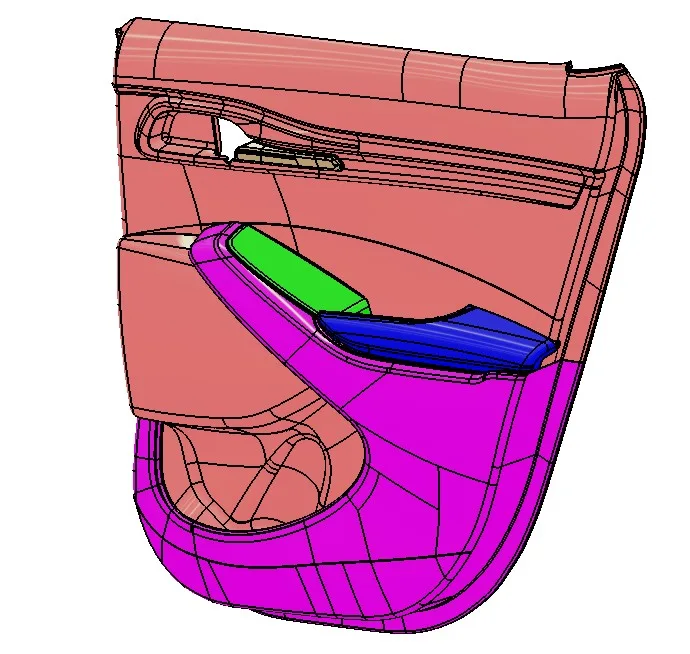
Design of Side door Panel
Automotive Plastic Design using CATIA V5

Design of Side door Panel

In this project, you will create a complete side door panel. You will design all the sub-assemblies like the armrest, map pocket, and the lower substrate.

Creation of Mold for a Table Fan Outer Casing
Mold Design using SOLIDWORKS

Creation of Mold for a Table Fan Outer Casing

This project is about creating the mold for a table fan outer casing with consideration of side cores.
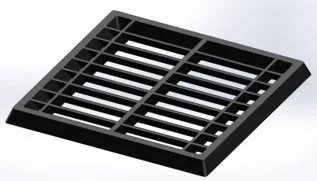
Mold Design of Fan Bezel 
Mold Design using SOLIDWORKS

Mold Design of Fan Bezel 

This project is about designing the mold for a fan bezel. In this project, you will be extracting Core & Cavity for a fan bezel.
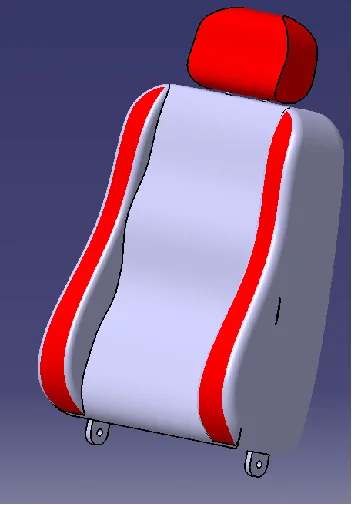
Design of front row back foam
Automotive Seating Design using CATIA V5

Design of front row back foam

In this project, you will design a parametric front row back foam. Use Underbuild / Overbuild Technique and foam terminology standards for making the parts.

+ 20 more projects in the full syllabus

Placements

988 learners placed
from this program.

Companies
327
Median CTC
3.5 LPA
20254 LPA
ATUL AUTO
Design Engineer

Omkar D.
20254 LPA
Inditronics
Intern

Mohanraj M.
20254 LPA
Inditronics
Intern

Kaustubh P.
20254.25 LPA
Inditronics
Intern

Sriya P.
20254 LPA
AVL
Design Engineer

Prithvi R.
20255.5 LPA
Hyundai Motor India
GET

Mukesh
Fee

One fee.
Everything included.

Become job ready with our comprehensive industry focused curriculum for freshers & early career professionals

Premium
₹2,75,000
Inclusive of all chargesEMI from ₹14,375/month
  • Career Service Assurance
  • Personalized Career Services Mentorship
  • 1 Year Access
  • Personalized Page
  • Live Individual & Group Sessions
  • Personalized & Hands-On
  • Job-Oriented Industry Relevant Curriculum
Check eligibility →
FAQ

Questions,
answered.

What are the eligibility criteria for doing this course?

To enroll for this mechanical design course, you must have completed your B.Tech or B.E. in Mechanical, Automotive or any related engineering disciplines.

What kind of challenges are candidates expected to complete during this course?

As this is one of the best design courses in mechanical engineering, you are expected to complete their projects on your own. Skill-Lync’s technical support team will provide the necessary support you need to complete those challenges.

Are students eligible to take up this course?

No, this course is only for professionals with some experience in the industry, preferably mechanical and aerospace engineering.

Does this course offer any job assistance to candidates?

Yes, this mechanical engineering design course offers you an internship of three months if you have opted for the Premium course.

Is there a certificate for completing this Post Graduate Program in CAD?

Yes, you will receive a course completion certificate after the successful completion of the mechanical design course. Also, the top 5% of the scorers will receive a merit certificate.

What kind of support is available if I cannot understand a topic after a session?

During your coursework, you can clear your queries with email and forum support and individual and group video support. You can avail of mechanical design courses with placement by opting for pro and premium courses.

Can I pay the course fee in installments?

Yes, you can pay the CAD course fees in installments with a 0% EMI option.

What is a CAD course?

A Computer-Aided Designing or CAD course will teach you the essential design engineering tools that are used in industries. Through this Post Graduate Program in CAD, you will learn software like CATIA V5, Autodesk Alias, SOLIDWORKS, and Siemens NX CAD.

What is the future of design engineers?

The job for mechanical design engineers is expected to grow by 10% by 2030. Design engineers are responsible for developing new products and innovating the existing ones. The demand for design engineers is never-ending, and you have to consistently upgrade yourselves with the trend of the industry.

What are the available mechanical design engineer jobs?

Across various industries and many automotive OEMs hire CAD engineers in R&D and production departments. Some designations include CAD design engineer, part modeling engineer, and 3D assembly engineer.

Next step

Not sure it's
the right fit?

A counsellor will walk you through the syllabus, projects and fee options — and tell you honestly if another course suits you better.

Get the syllabus + a call back

We'll email the full syllabus and call within one working day.

By submitting you agree to our Terms and Privacy Policy.

Call usEnquire

Talk to a career counsellor

Free 20-minute call. We'll map the right course to where you want to work.

By submitting you agree to our Terms and Privacy Policy.