MIDSURFACING AND MESHING(2D) ON BOTTLE CAP MODEL USING ANSA (PREPROCESSOR TOOL)
AIM :
To perform topology cleanup,midsurface extraction and 2d meshing according to given quality criteria on plastic bottle cap model.
OPERATIONS INCLUDED :
- Topology cleanup
- Geometry checkup
- Midsurface extraction
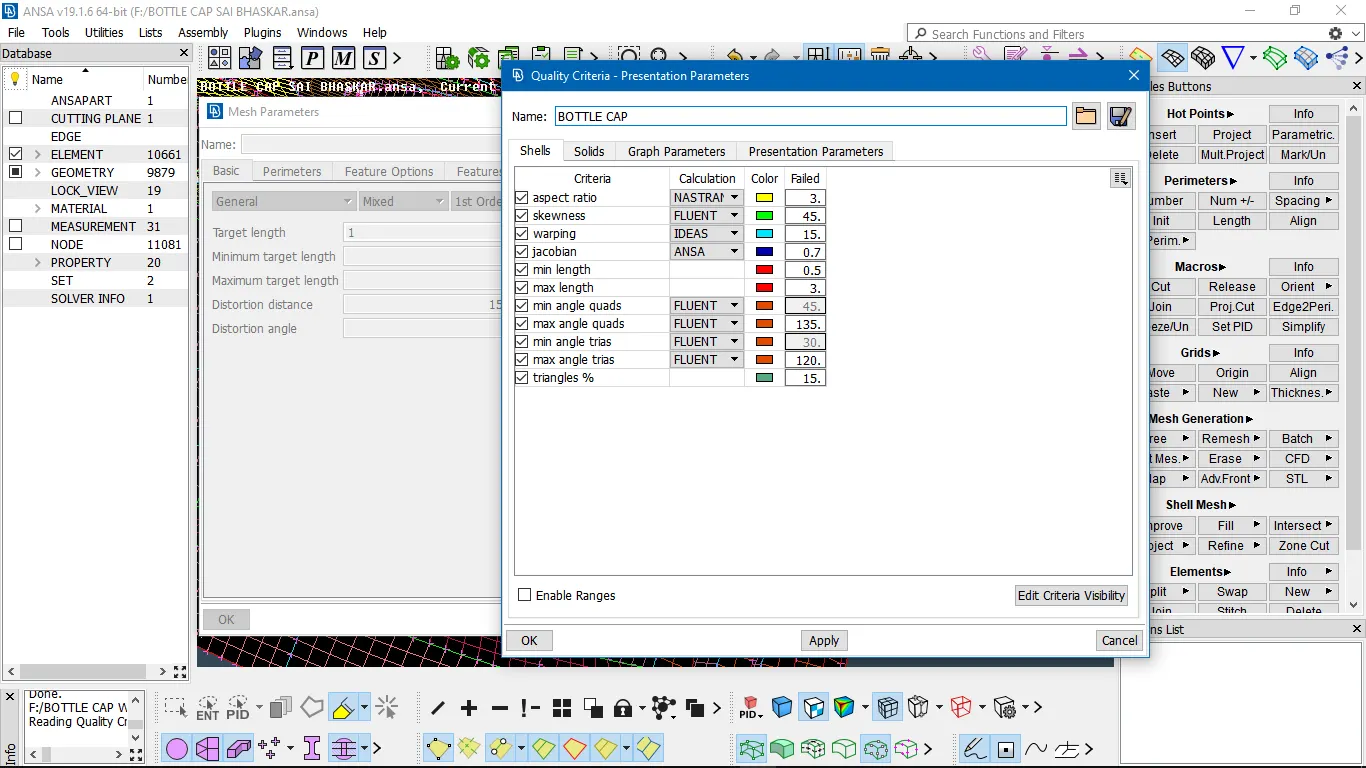
- Assigning quality criteria values
- 2D Meshing
- Assigning thickness to different PID's
PROCEDURE :
-
IMPORTING CAD MODEL INTO ANSA AND CLEANING THE GEOMETRICAL ERRORS
First we import the given CAD part into the Pre-processor ANSA software, at the time of importing the geometrcal model will look distorted without any fine shape like shown below for that we need to change the length parameters.
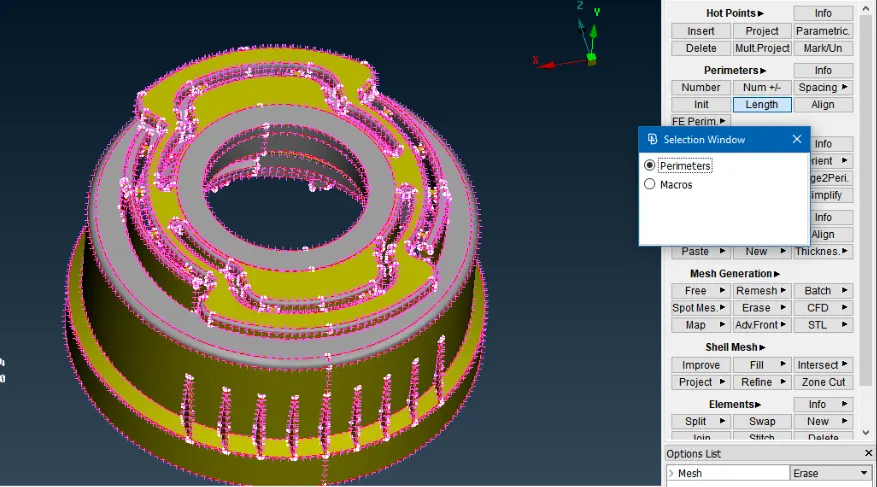
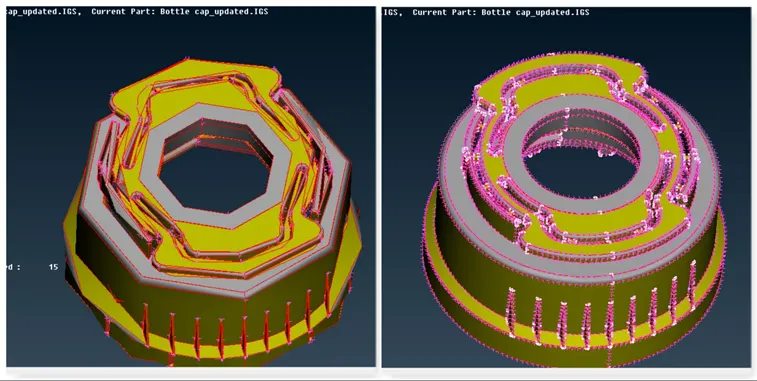
Picture shows the difference after assigning parametric length
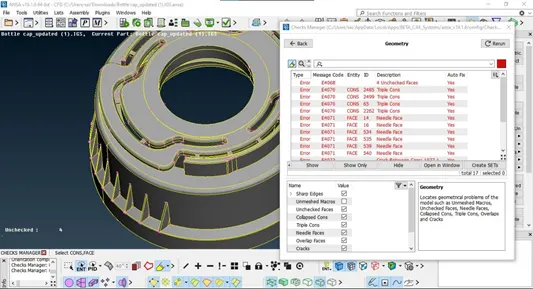
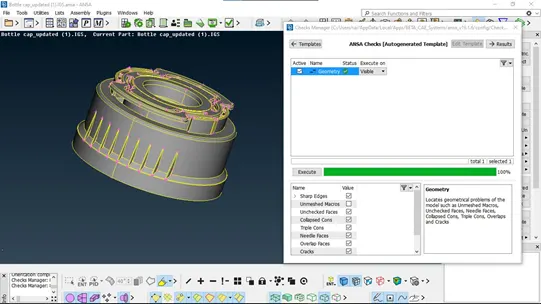
To check wether the model is geometrically fine and constructed and to proceed further for a good midsurfacing and meshing we check for errors like sharp edges,unchecked faces,collapsed cons,needle faces,overlapfaces and cracks using checks -> Geometry tab .After executing the operation it will show the errors as shown below .some of those errors can be fixed automatically using FIX option in the menu,while some other errors cant be fixed automatically so we go for manual fixing.
- MIDSURFACE EXTRACTION
After resolving the geometrical errors of parent surface we proceeded further for mid surface extraction.we take midsurface for components whose thickness is less than 5mm .if the thickness varies or exceeds 5mm then it is suggested to go for solid meshing.
To extract the middle surface the first step is to measure the thickness (in any case if it is not possible to measure the thickness of the body part for eg;slanted surfaces we can make a weld spot and and project it to other side so that by selecting both the welded spots we can make a measurement)
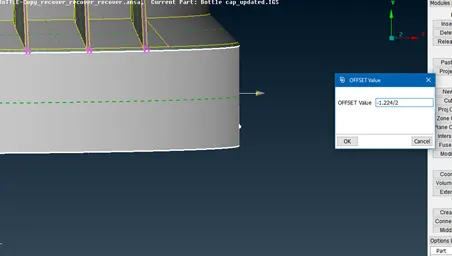
once after meaurements are finished we choose OFFSET under FACES opton in topo module.say for example if the body has a 1.226mm thickness measurement we take offset according to arrow mark shown on the oriented plane surface. since the plane should lie in exact middle we set it as -1.22/2 negative sign indicates that the plane starts offsetting from the base toward the arrow direction.
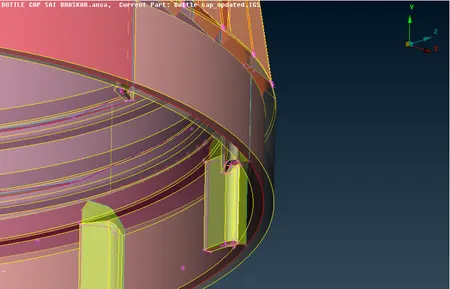
the picture above shows the extracted midplane
some features or complex shapes are unable to process by the offset,they can be extracted using the FACES->MIDDLE or by creating a plane using CURVES->MIDDLE option.once after finished creating those curves we create a face using the consructed curves and extend it to the surface to attach the ribs/fins to the main body as shown below
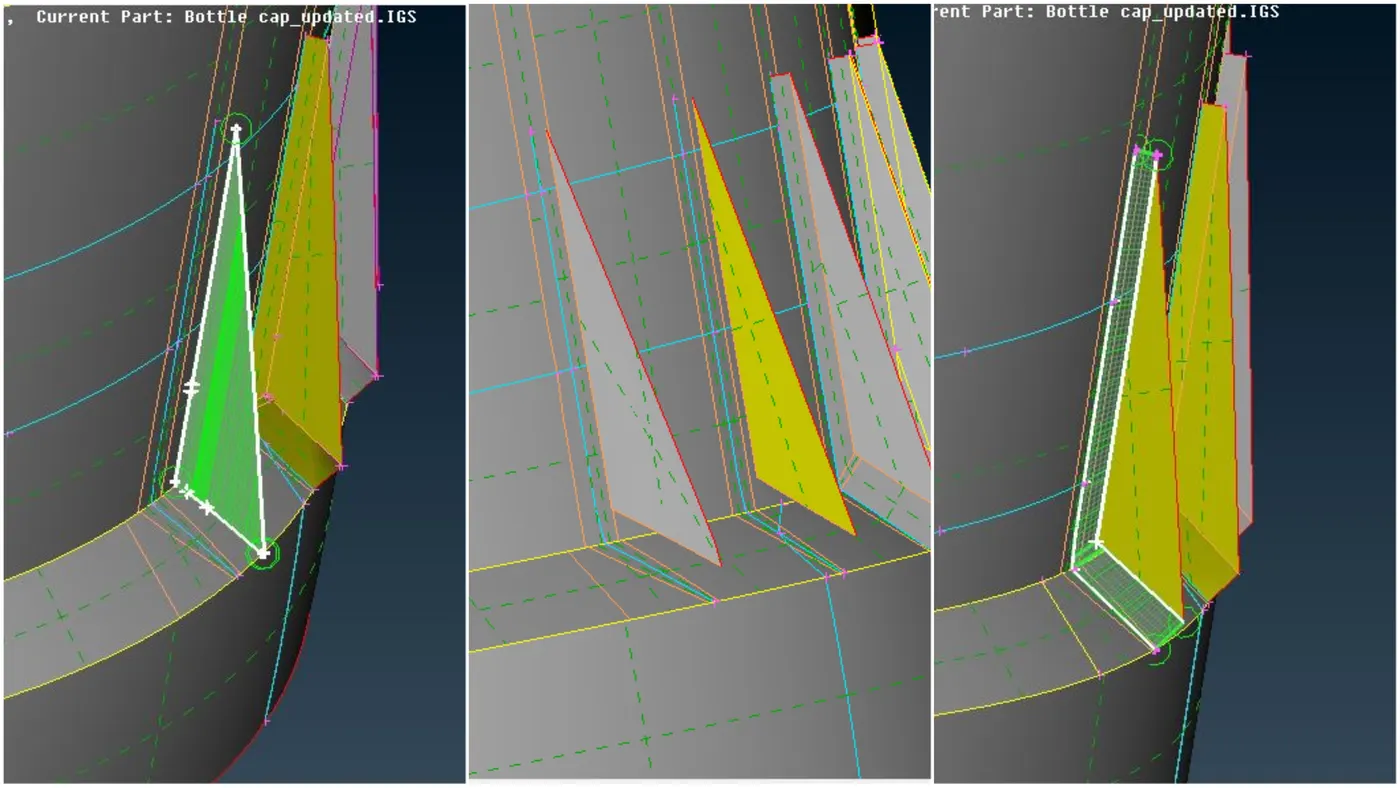
Here are the remaining complex areas where midsurfacing is done.notice that the parent body and midplane is set into different colours and the transparency is enabled so that we can have aclear vision of how the midsurface is aligning.
- Threads
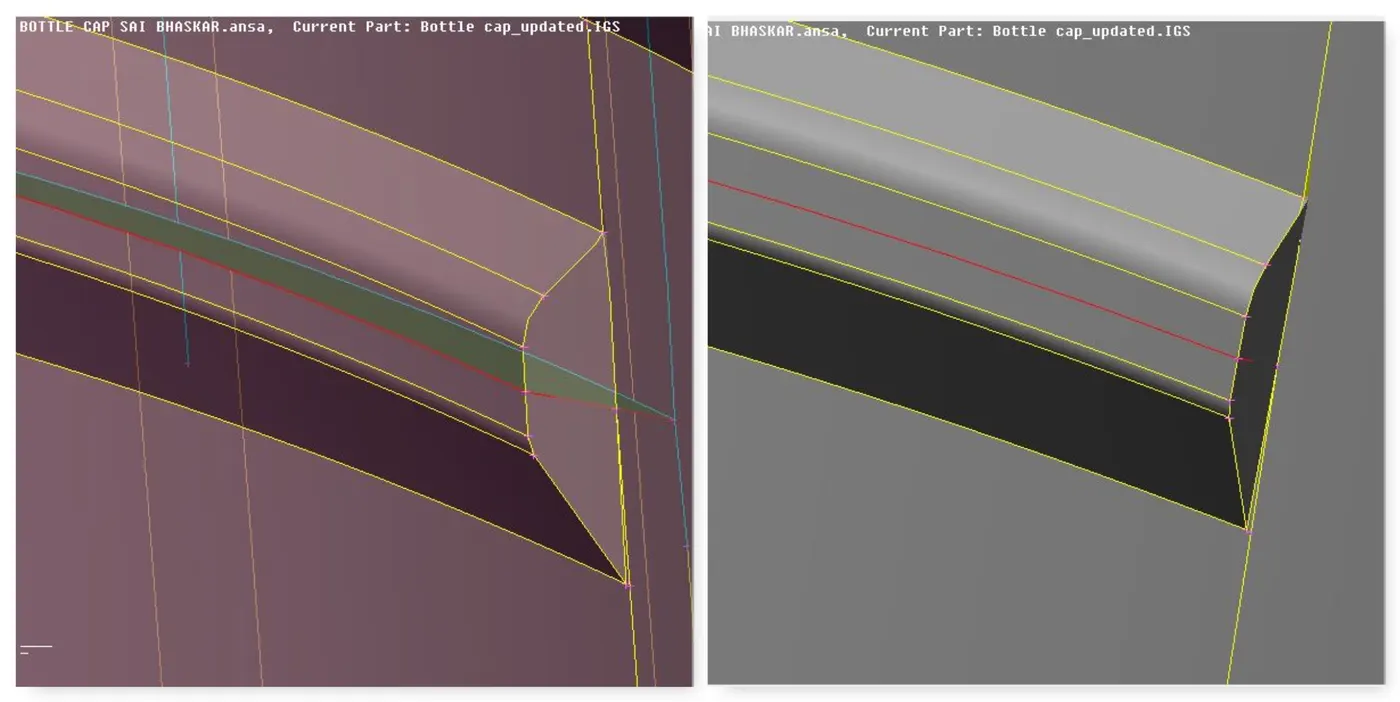
- Main outer body
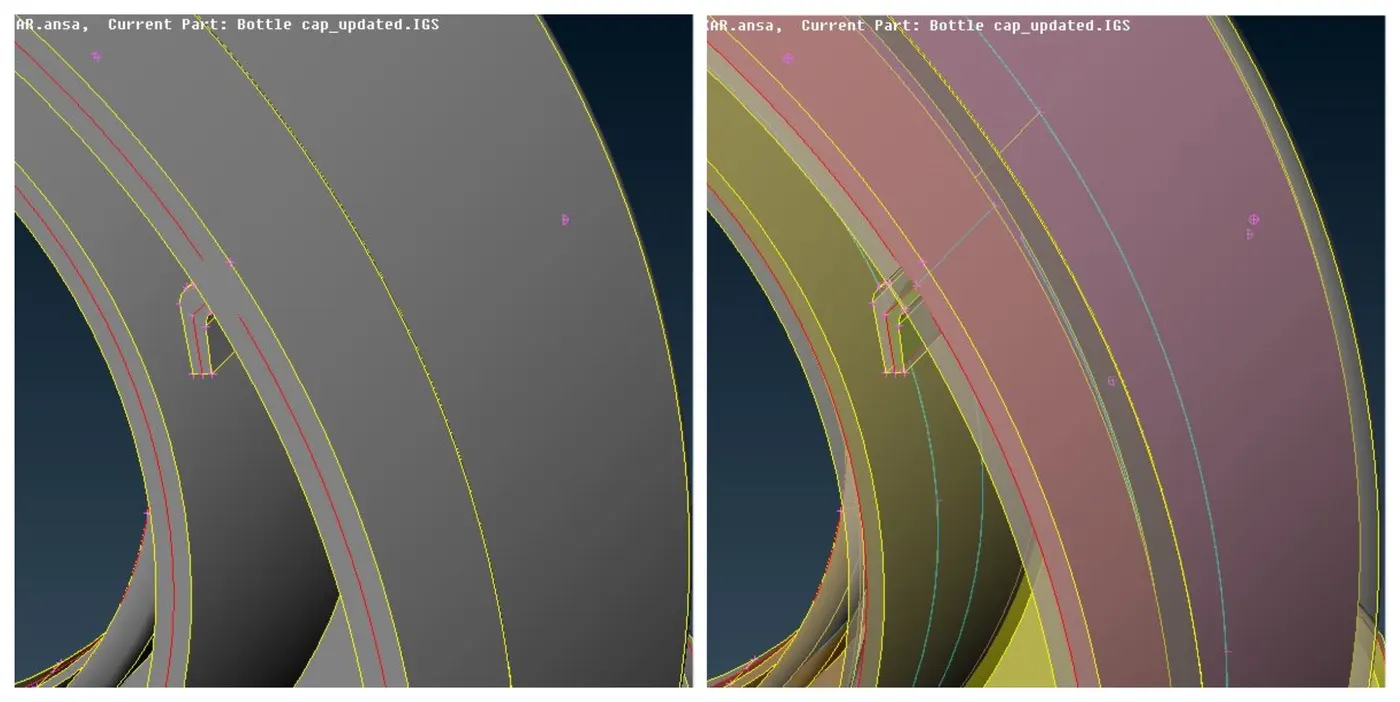
- Opener
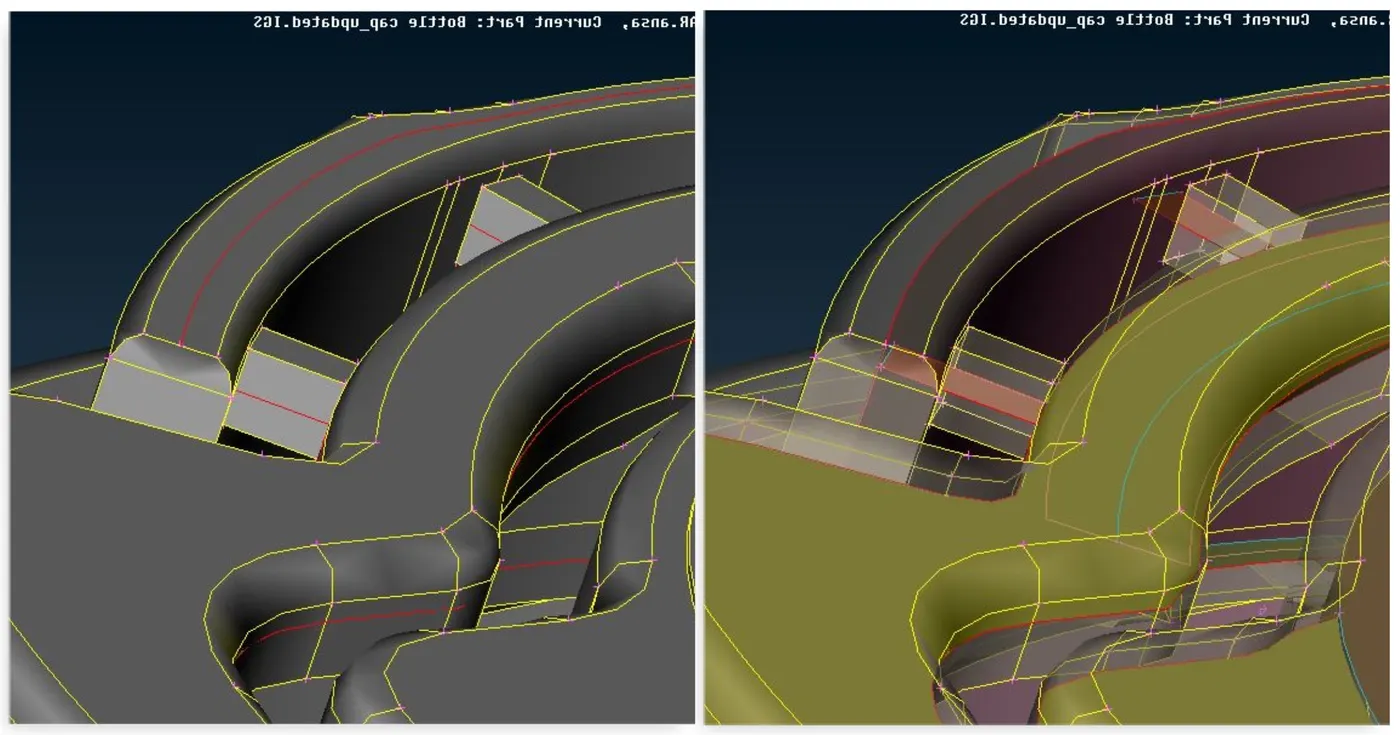
- Teeths
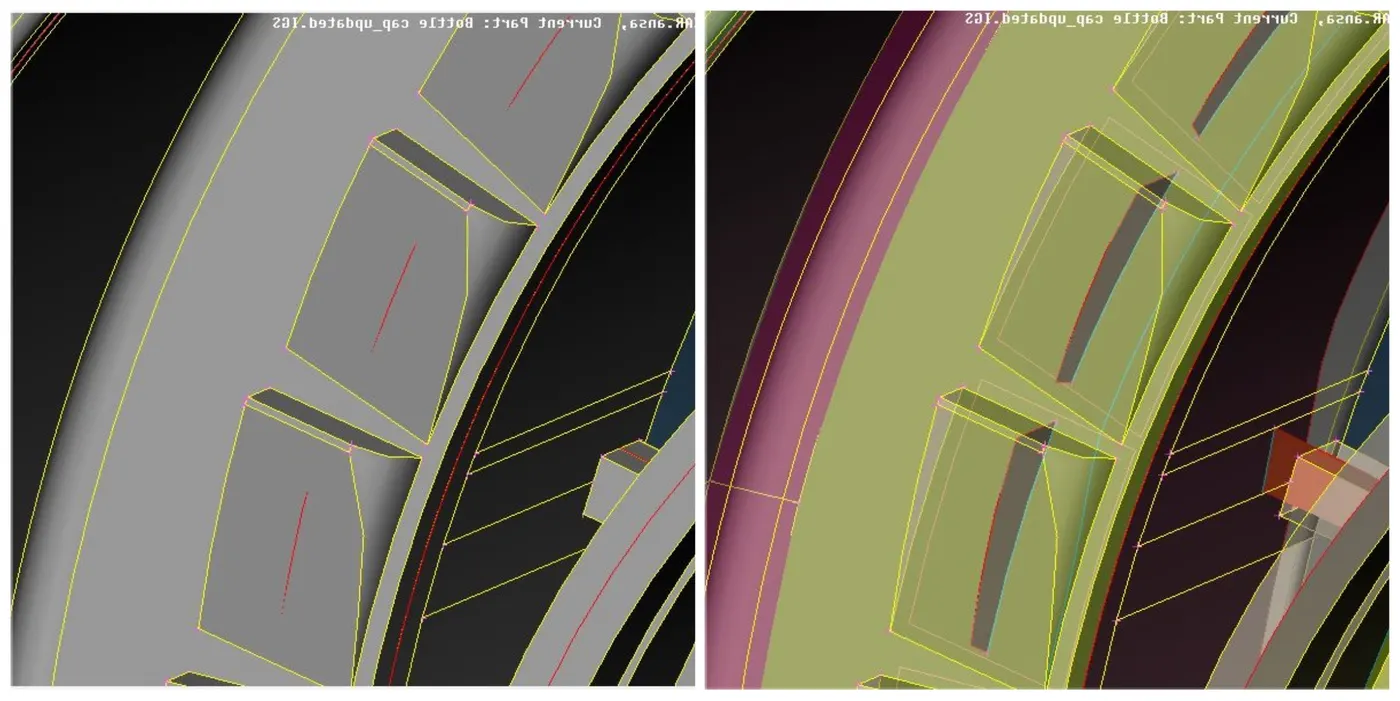
it is to make sure that all the extended parts like fins,ribs,threads,teeth are all attached to the surface and do the geometry checkup once again for fixing issues in midsurface we have done before proceeding further for meshing.
- ASSIGNING THICKNESS TO PROPERTY ID'S
The bottle cap model have so many features with different thickness so we give each and every individual part its own identity by assigning thier respective thickness values by creating PID's as shown below.
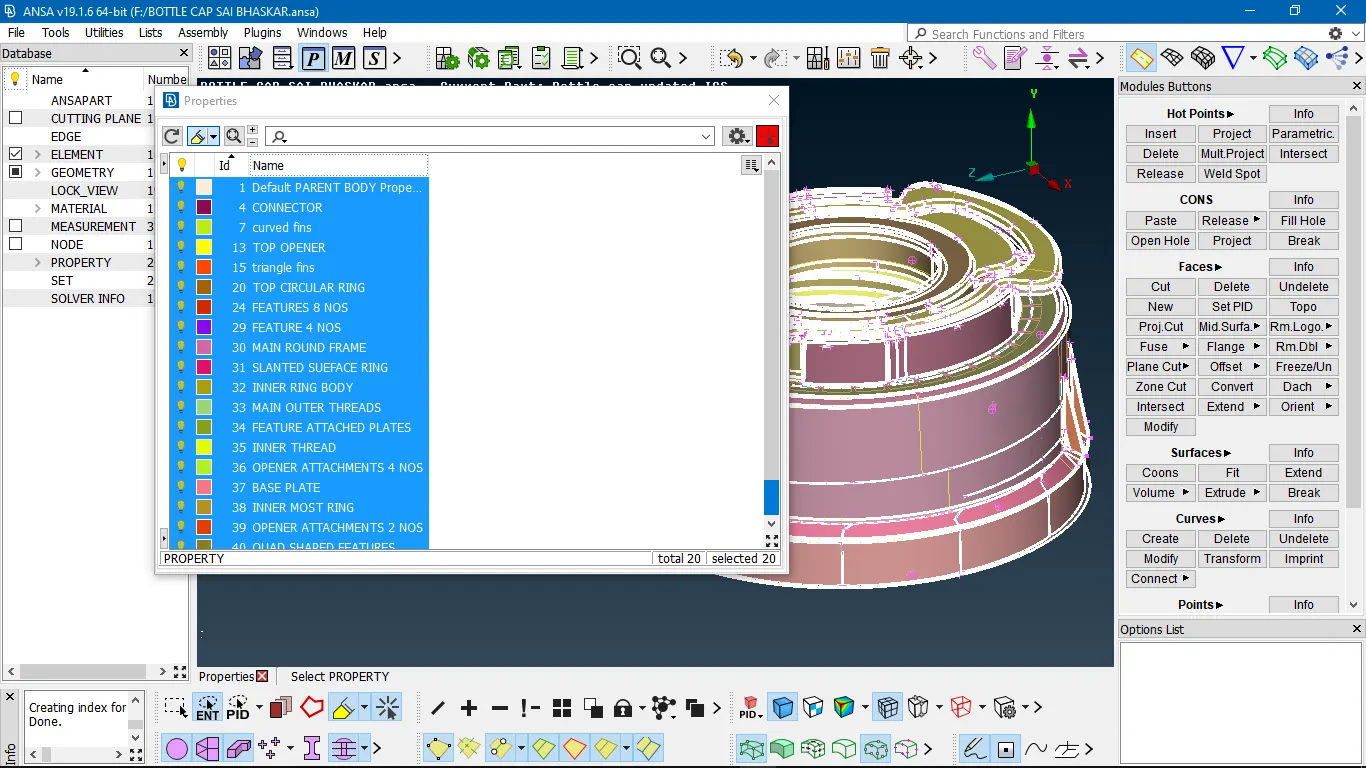
- DEPLOYING 2D MESH ACCORDING TO GIVEN QUALITY CRITERIA
In order to get reasonably accurate results, it is always important to generate a structured mesh with good quality parameters.If Elements are Degenerated they will become too stiff and underestimate the deformations (Field Variables) and its derivatives like strain & stress values become erroneous.
we assigning values to the quality criteria before that we setup element target length,min and max target length under mesh parameters as shown below.
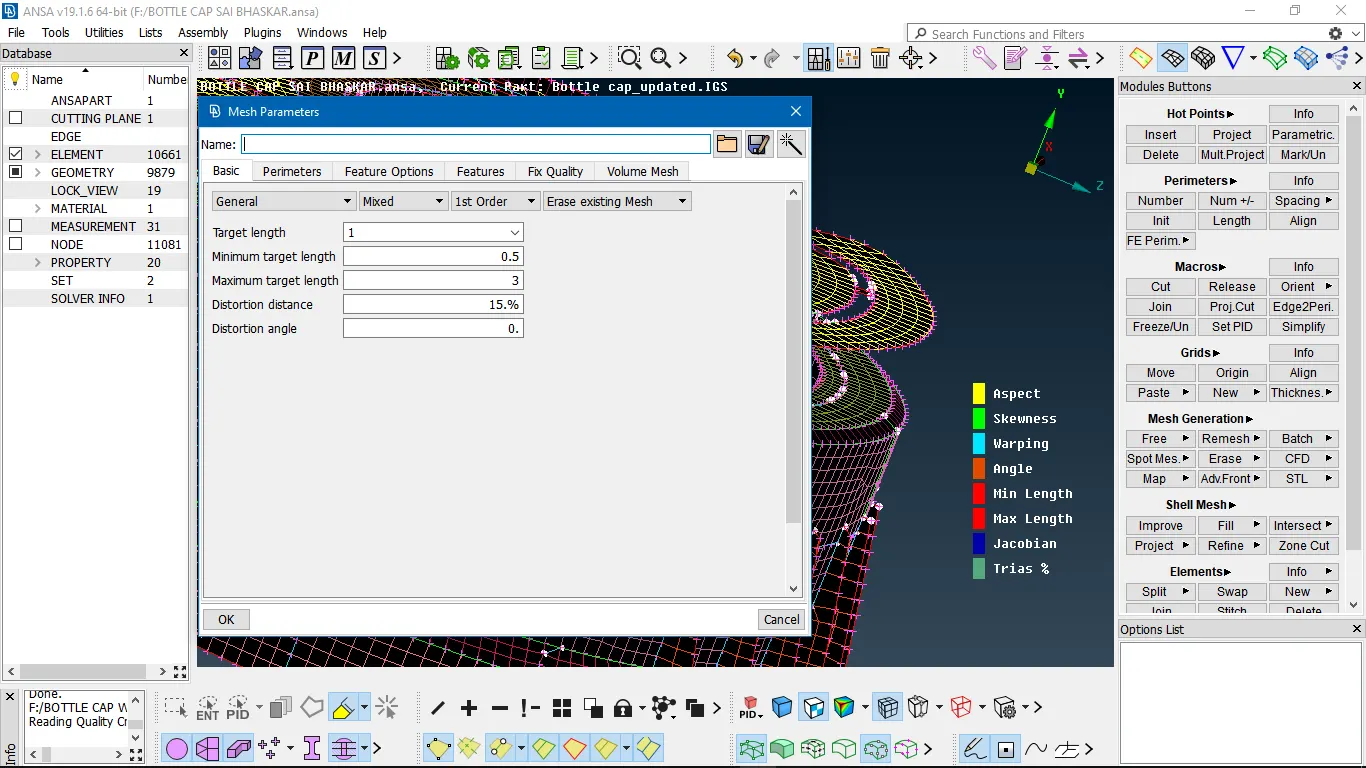
Here is the given quality criteria before we deploy the mesh on the mid-surface
After this we apply "best" mesh part by part which are seperated by construction lines so that we can achieve a good mesh flow by resolving any tias and rotating quads while deploying at the initial stage itself .if the mesh flow is not good we can reconstruct the mesh and choose the appropriate one by observing the off elements and the mesh flow around that area.
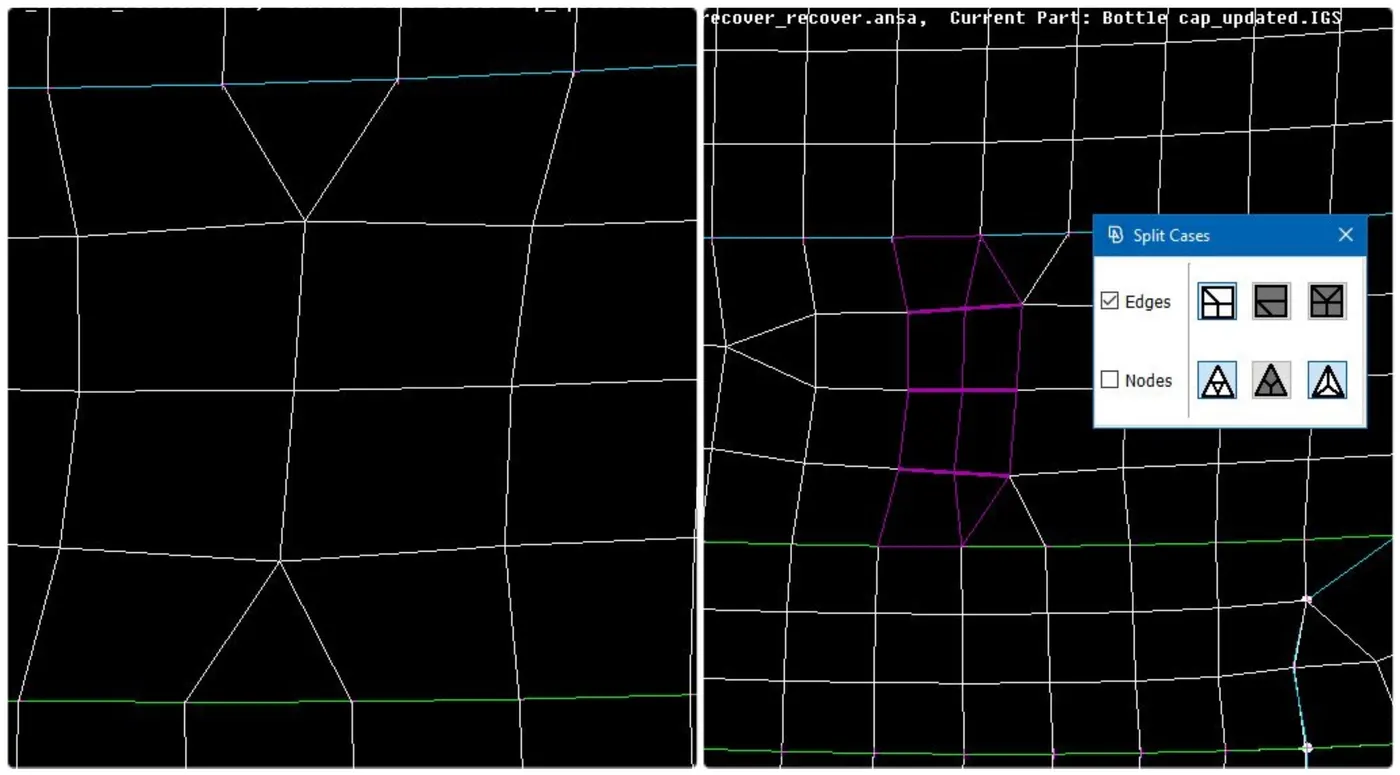
Resolving opposite trias using split function
Reconstructing the area for best possible outcome
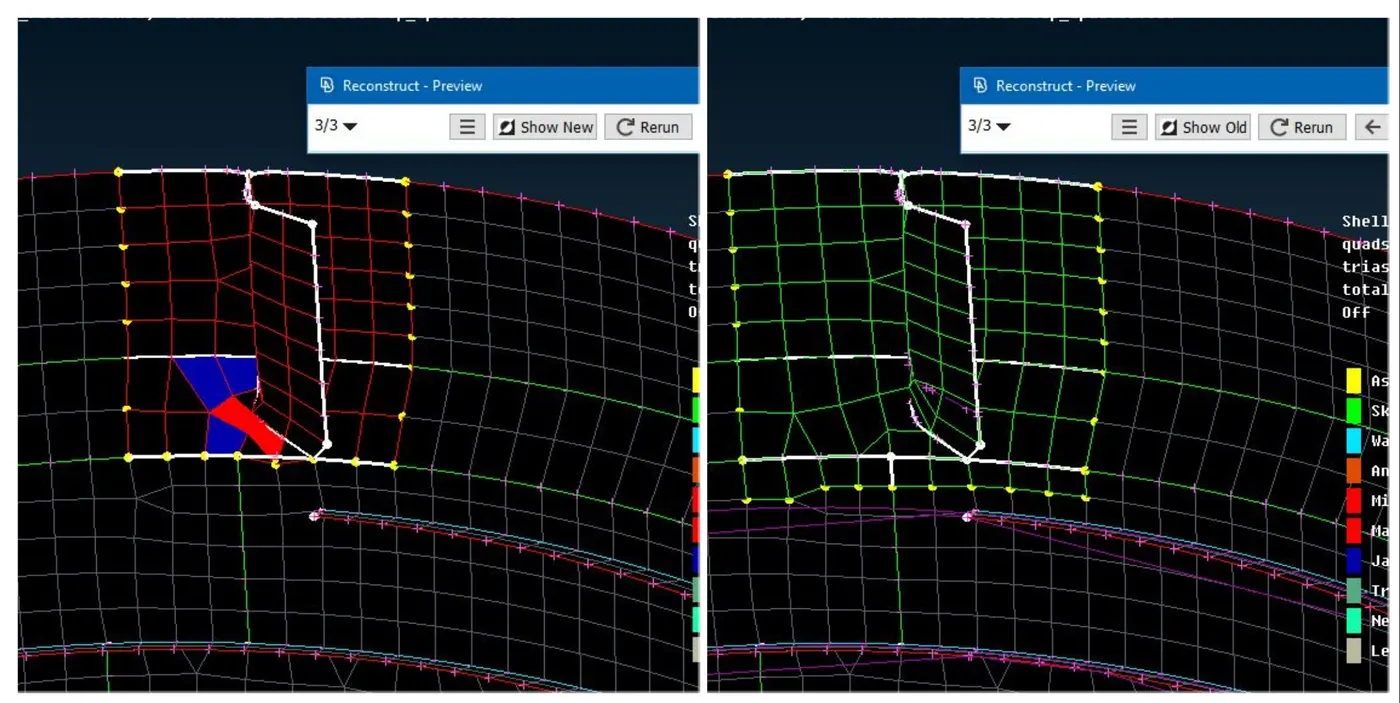
while reconstructing and smoothening the mesh we can remove some of the off elements automatically while some other issues like opposite trias and thier flow direction can be resolved using split,swap,grids->move,paste option under mesh module
Usage of Paste node pairs
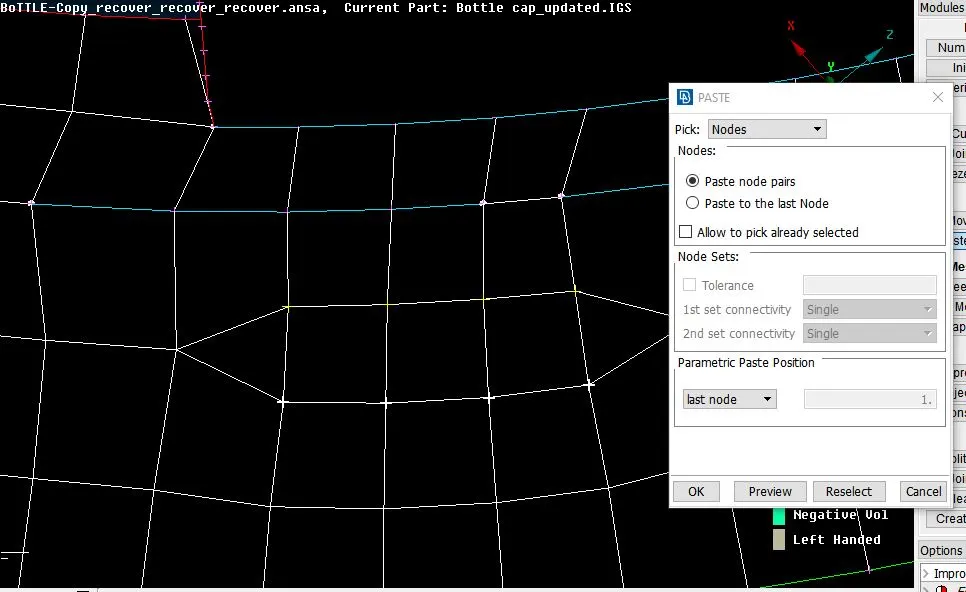
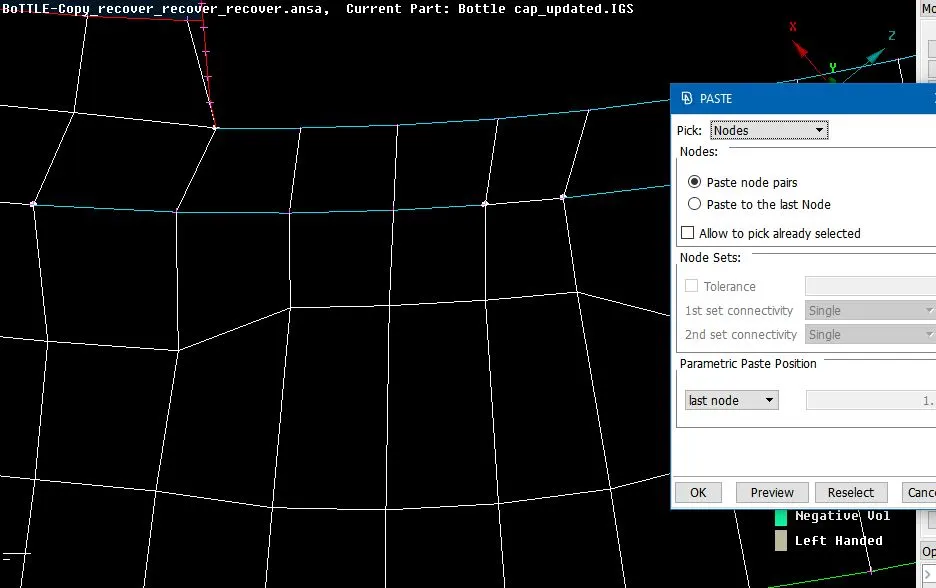
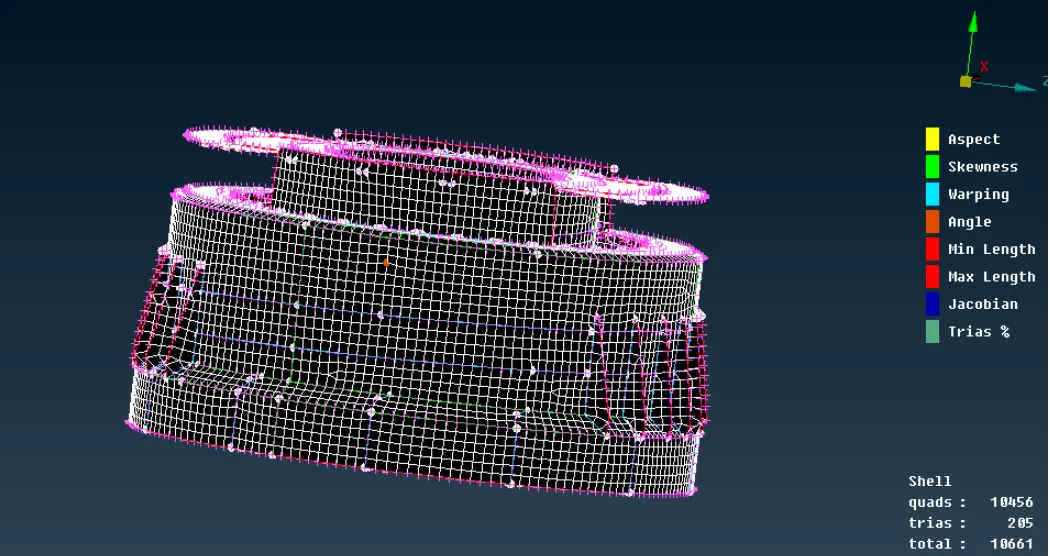
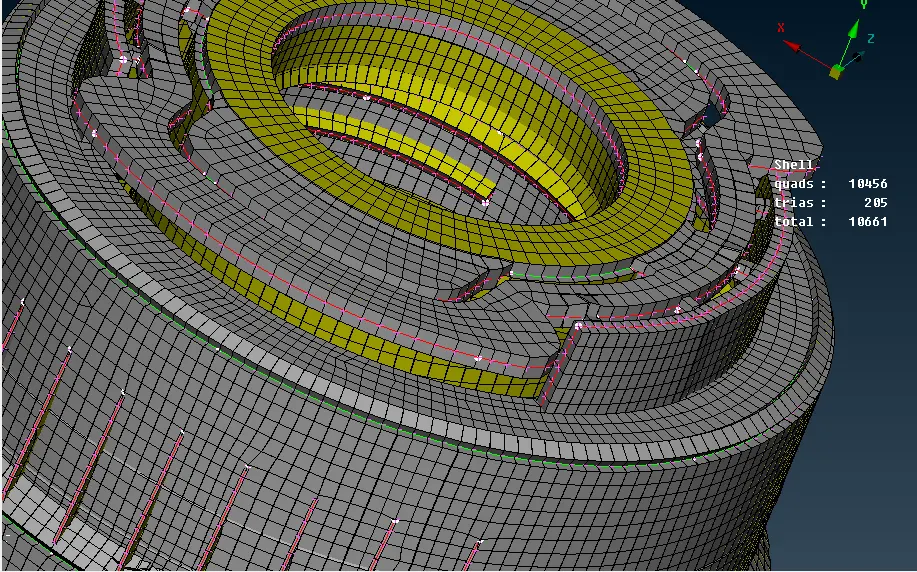
Here is the final result after resoving off elements with good mesh flow and less trias.
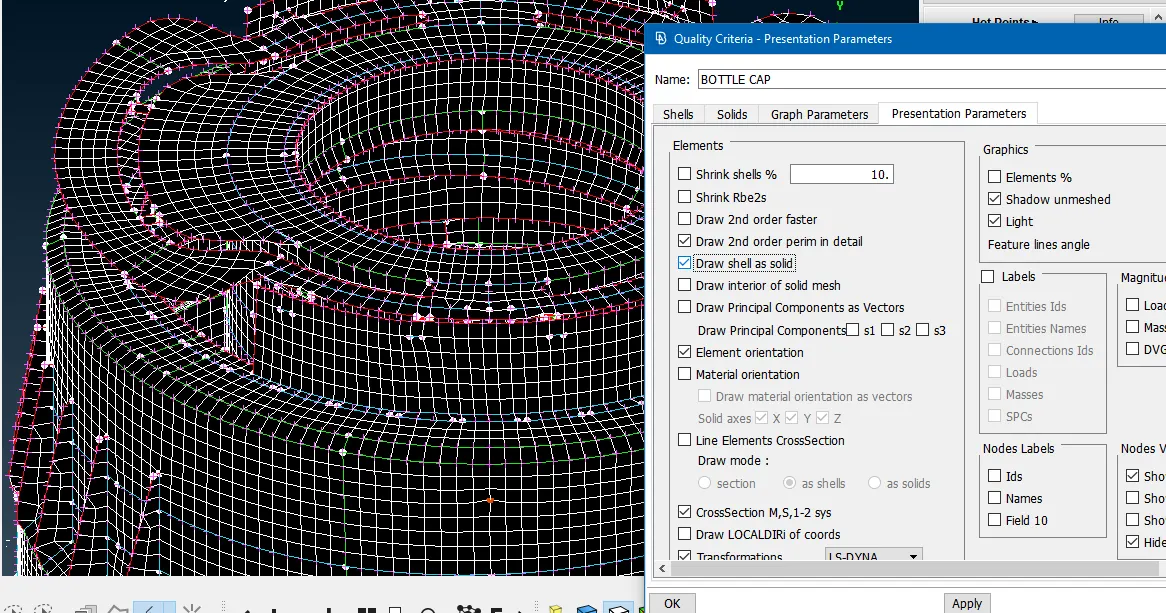
since we assigned thickness for each and every inividual part based on measurement of parent body.we can view them by enabling the 'Draw shell as solids' under presentation parameters tab in quality criteria window.
- LEARNING OUTCOMES
- I get to know how to achieve proper mesh flow by using the commands like split,swap,paste,reconstruct etc
- I get to know that it is important to have the mid surface align exactly in middle and the middle surface edges should be visible and it should touch the edge of the parent surface for proper midsurface.
- Assigning thickness is important for every part .if its not given properly it will effect in bad FEA result.
- Learnt different methods to extract middle surface.
- Learnt how to resolve the off elements under complex areas/features by practising different commands available under mesh module
- RESULT
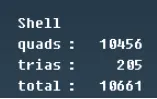
The midsurface is extracted properly with good geometry ,assigned PID's and deployed 2D mesh on the midsurface considering the given quality criterias .the final tria and quad elements are as follows
- CONCLUSION
From the above result it is concluded that there are only 1.92% of tria and 98.07% of quad elements in mesh wich states that the mesh is of good quality and we achieved better mesh flow with less tria elements