Project 2
Aim:- To develop a Project Schedule in P6 for Skill Lync Education Centre Road Construction.
Tools Required:- Primavera P6 software, Raw project details, Various options of P6 such as EPS, Projects, Tools menu, View etc.
Oracle Primavera P6 is a Project/Program Management tool that is used for planning, managing and executing your project work. It is designed to handle large and small projects in a number of diverse industries, such as construction, manufacturing, energy, and IT.
For developing schedule of a Project under Skill Lync EPS,
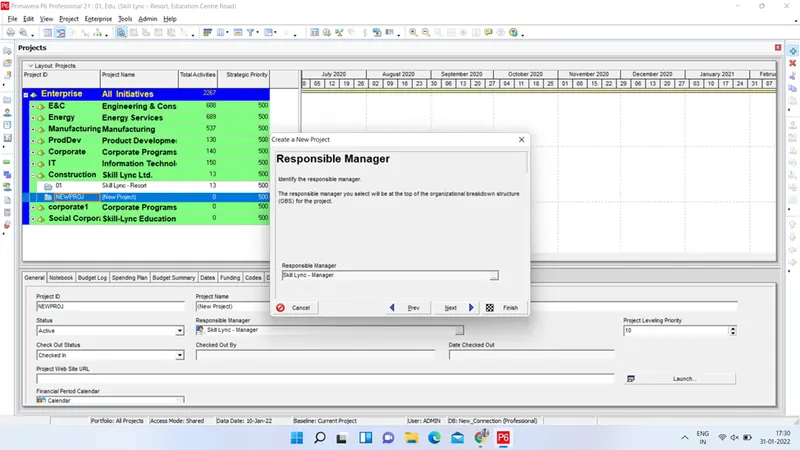
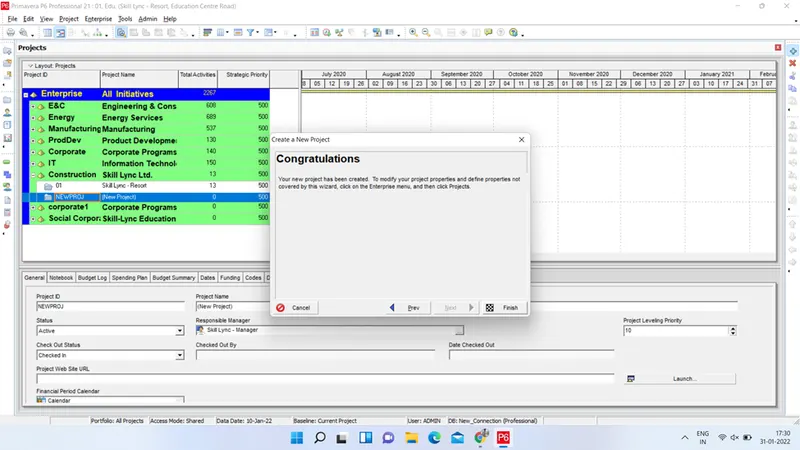
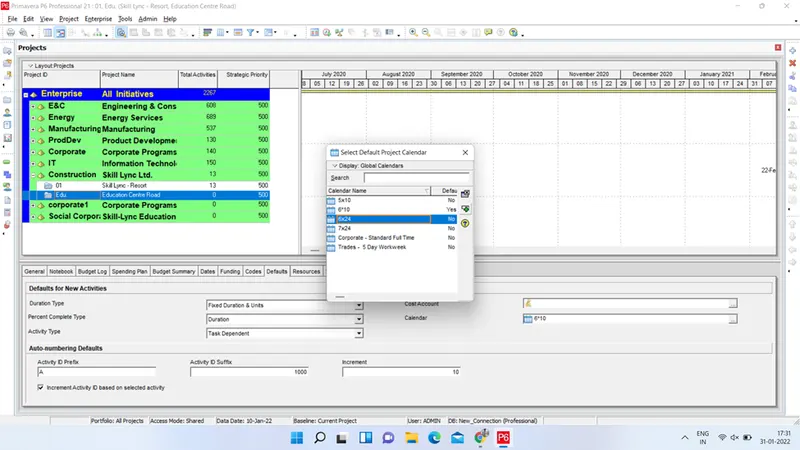
- Launch P6 and Go to Enterprise menu and select Projects. Search the EPS under which Project is to be created and right click on EPS and select ADD. Create the New project with desired name and ID, under suitable EPS. Provide planned Start and Finish date. Fix the rate type as Standard Rate and click Finish. Go to defaults tab at bottom screen and assign project Calendar as 6*24.
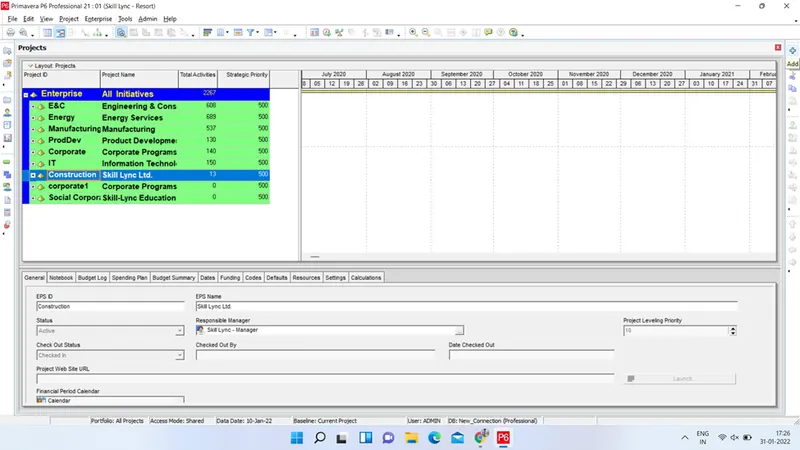
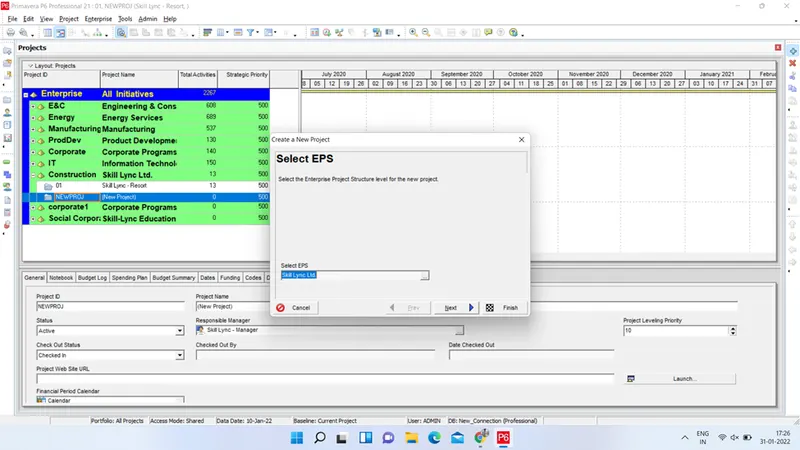
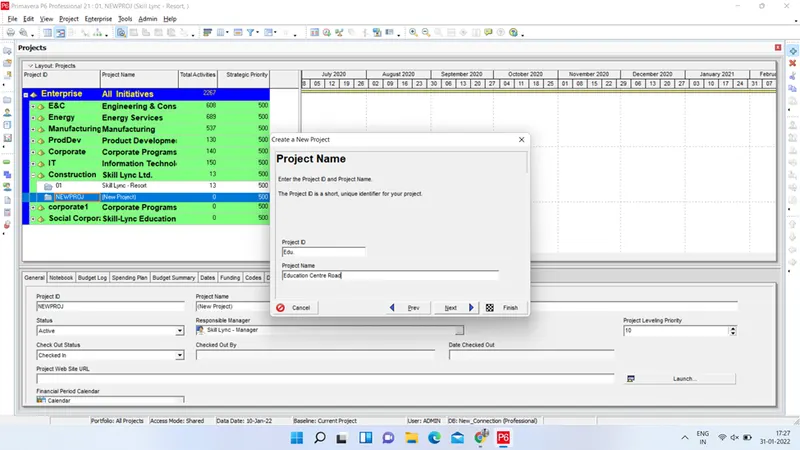
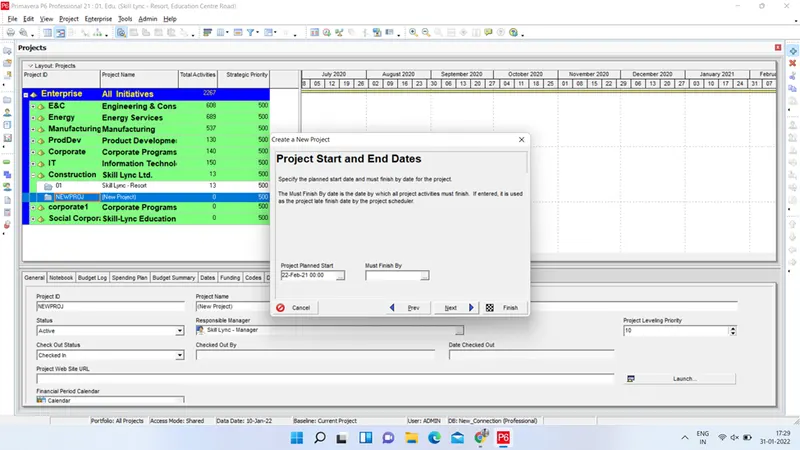
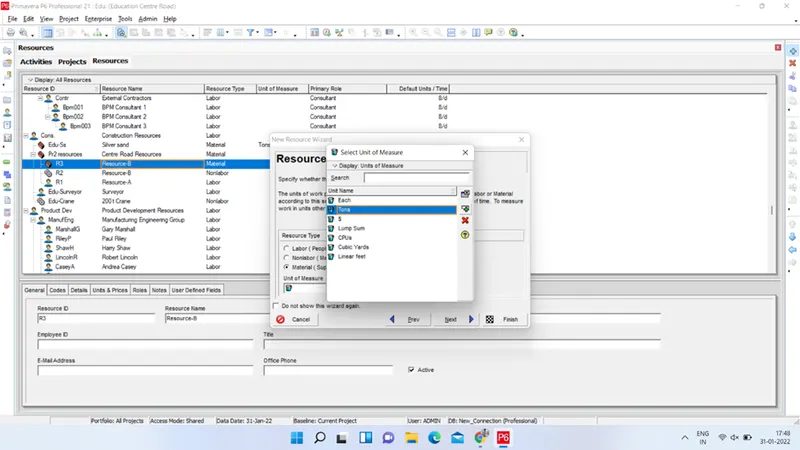
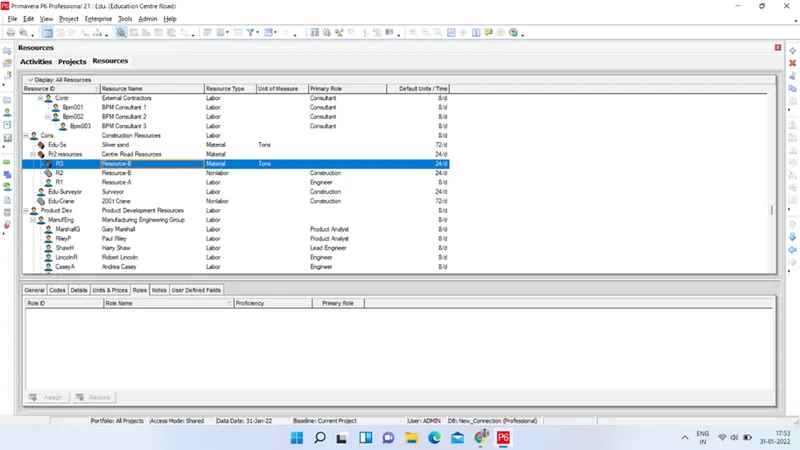
- Now we will add resources for our project. Select Enterprise | Resources from the main drop down menu at the top of the screen. Click the + Add button on the upper right hand of the screen or select Edit | + Add. Type in the Resource ID and Resource Name. Add the first resource by Entering an ID and a name for your resource group and then keep providing details as asked such as Units, Calendars, Roles etc.
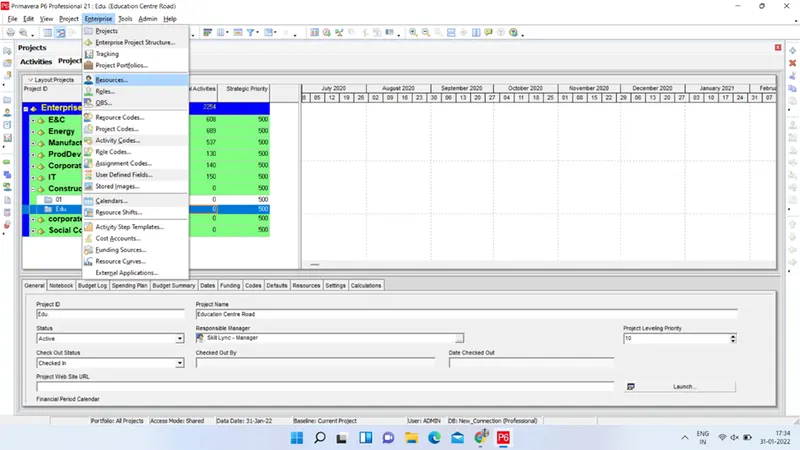
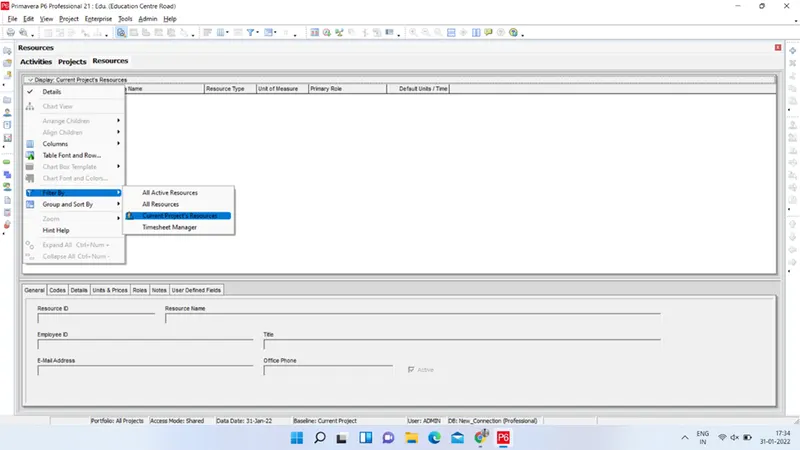
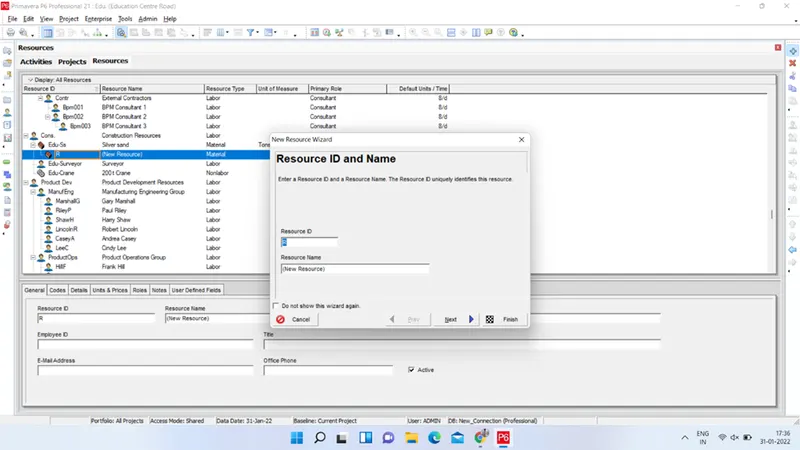
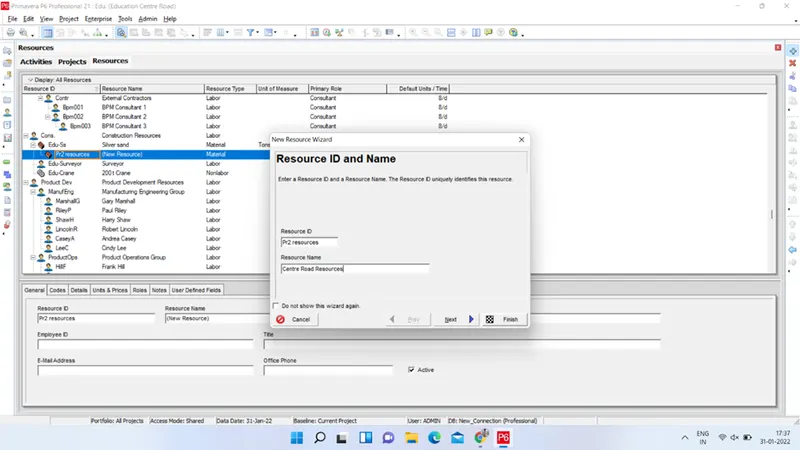
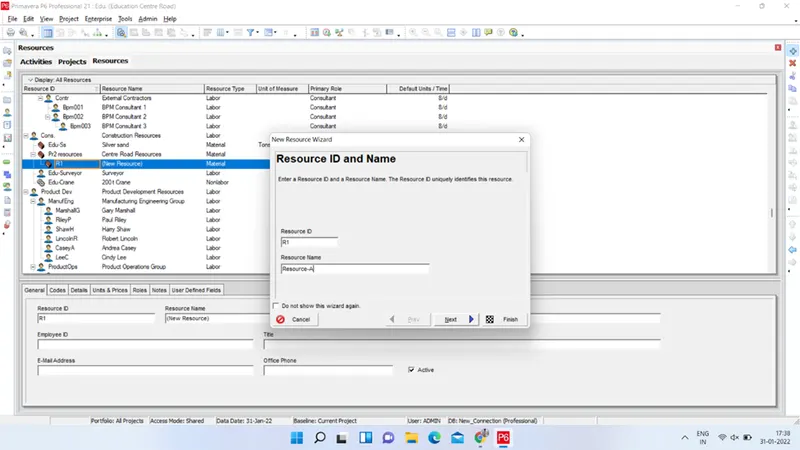
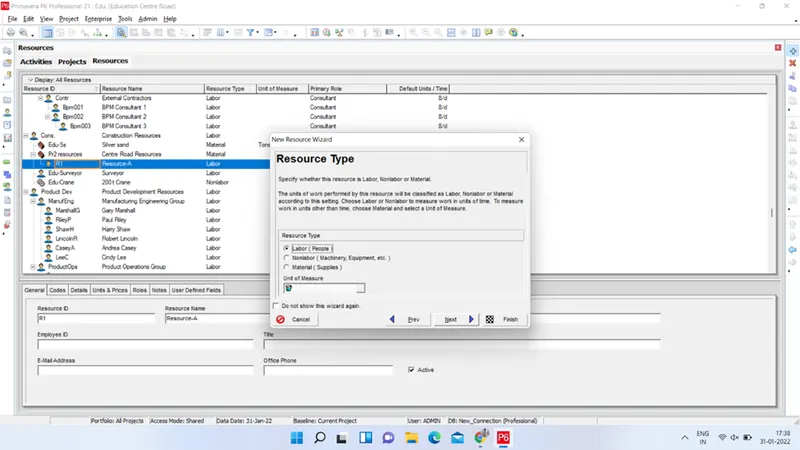
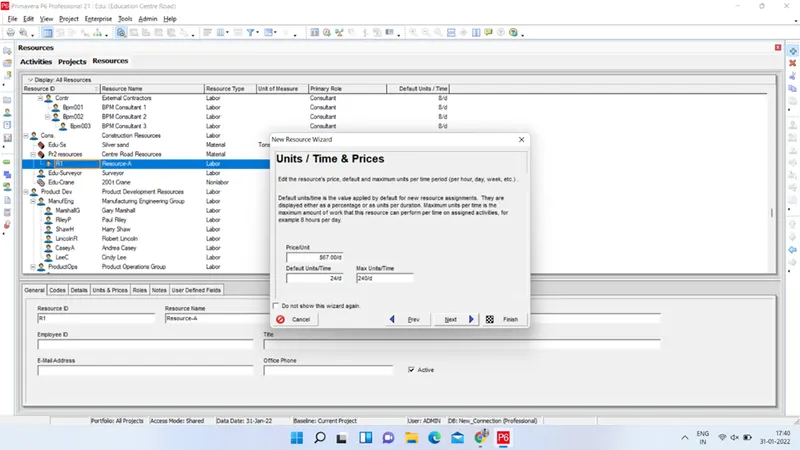
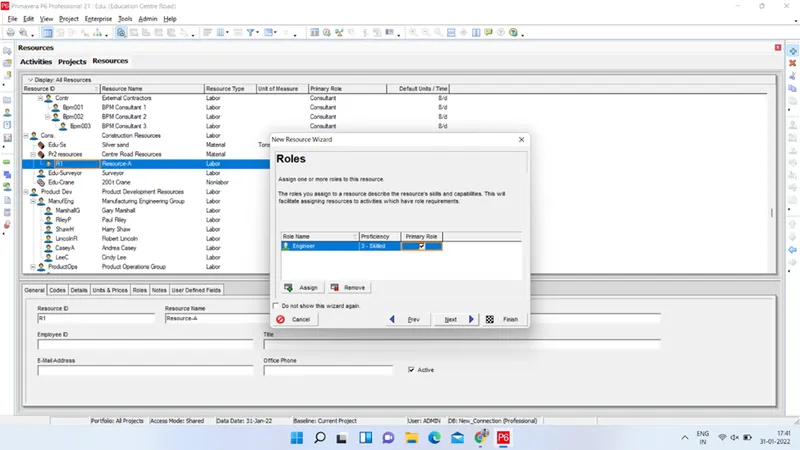
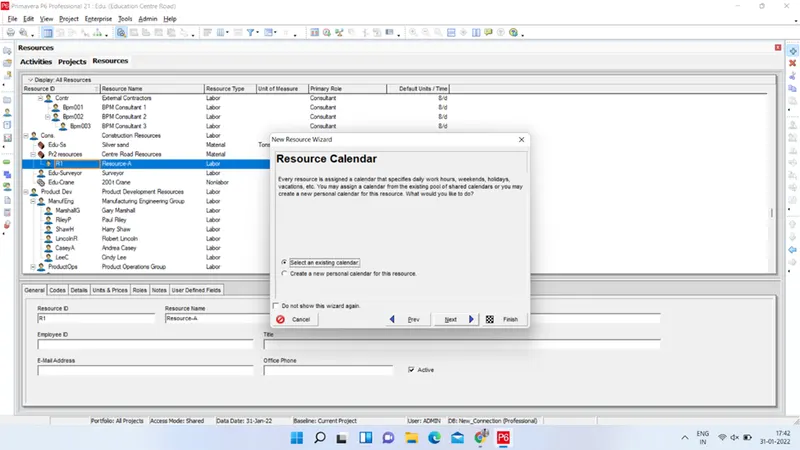
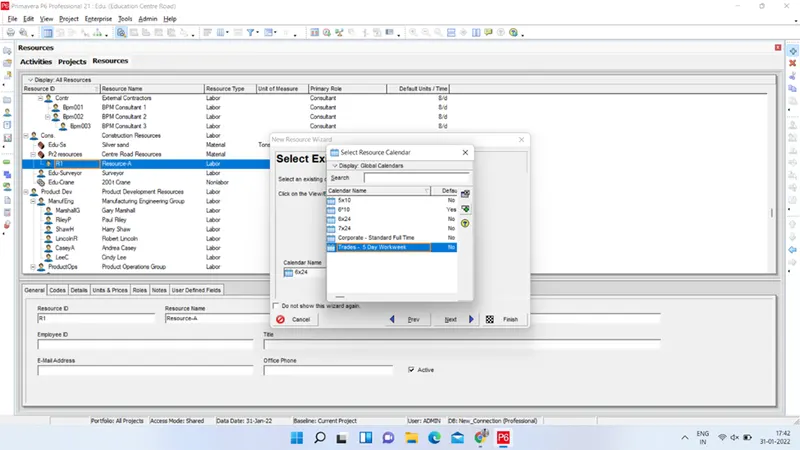
- Similarly add all resources required and click finish.
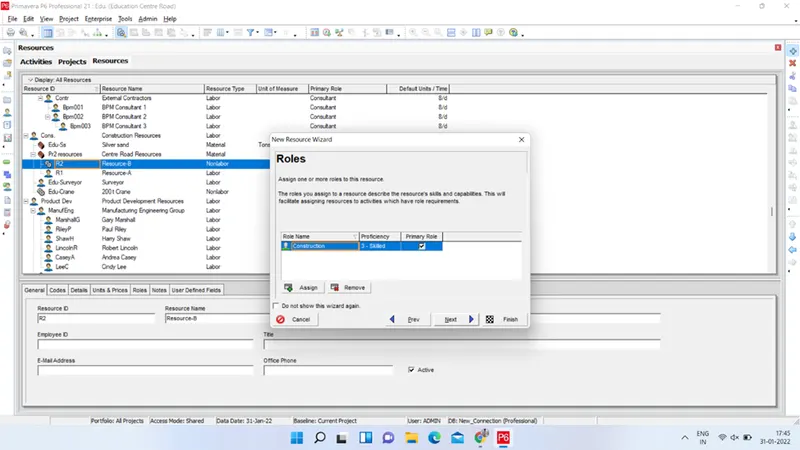
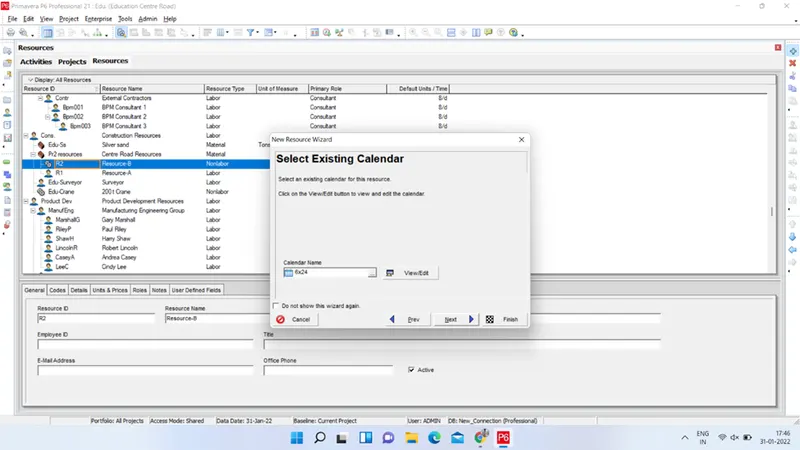
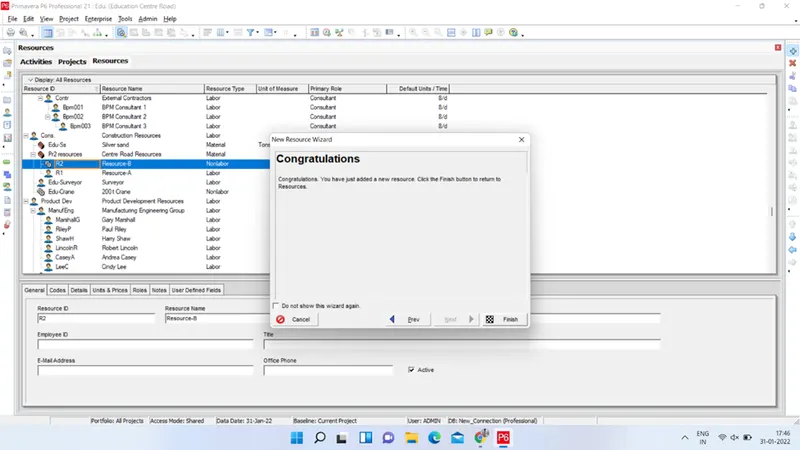
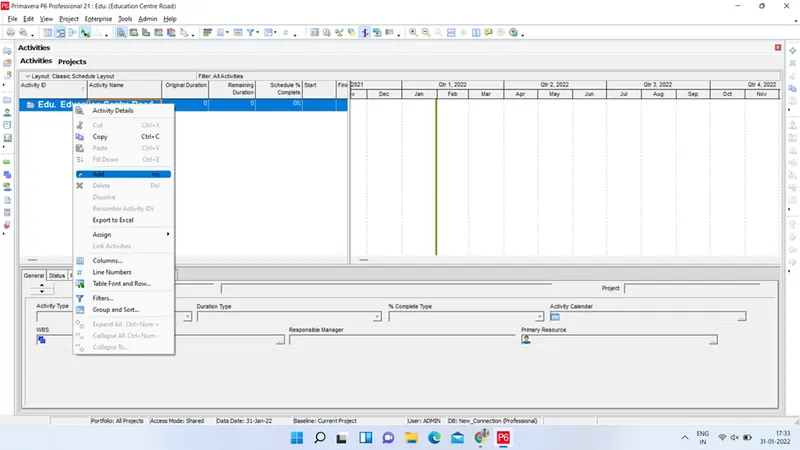
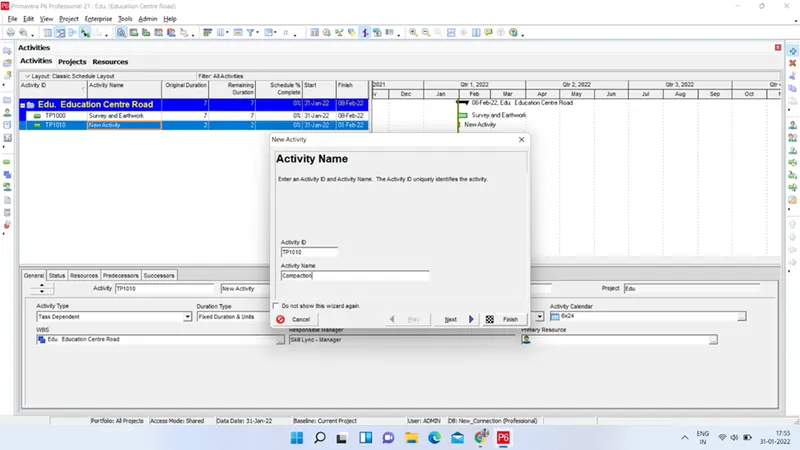
- Now, open the project and right click on activities dialog box. Select Add and start adding Different activities as per requirement. Assign proper activity id with an increment of 10. Add all activities and After adding all activities, enter durations for each activity under Duration column.
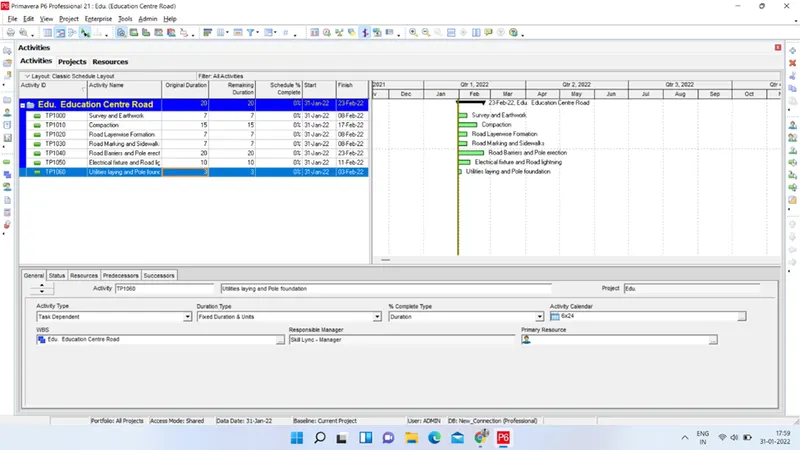
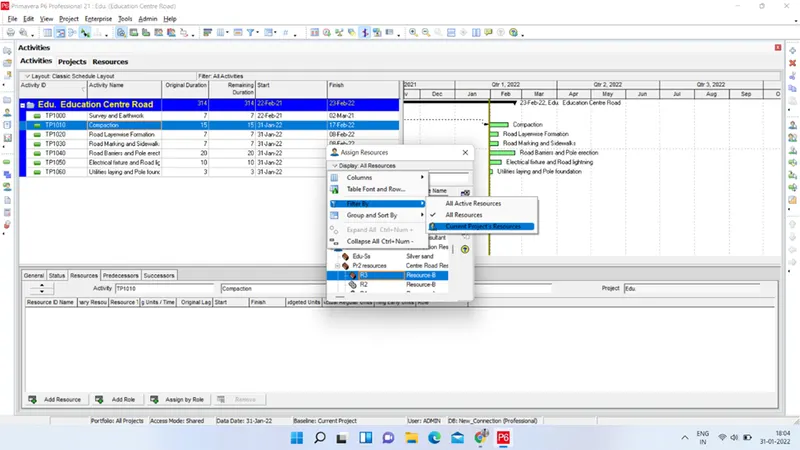
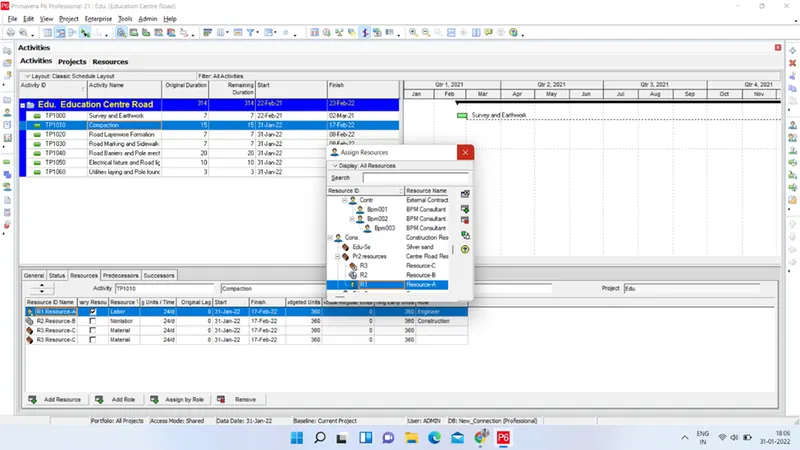
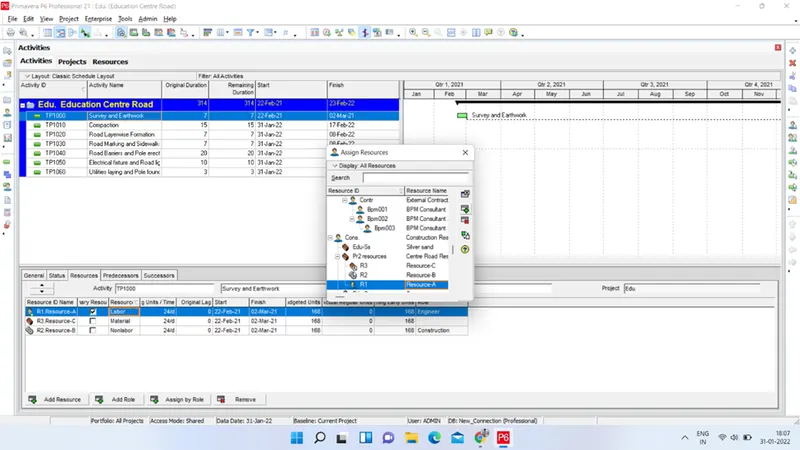
- Assign Resources to the each activity of project by using Resources tab on bottom part available as Activity Details window.
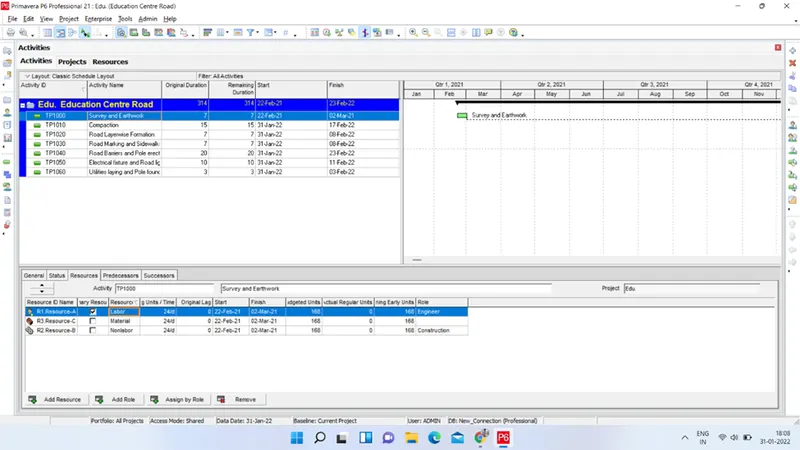
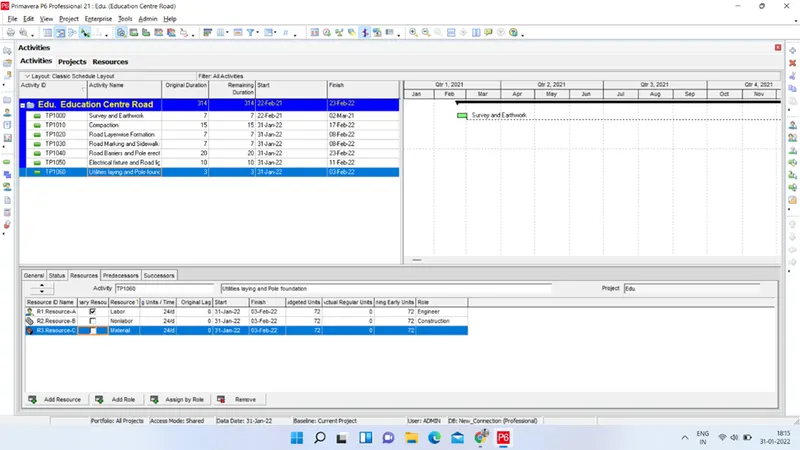
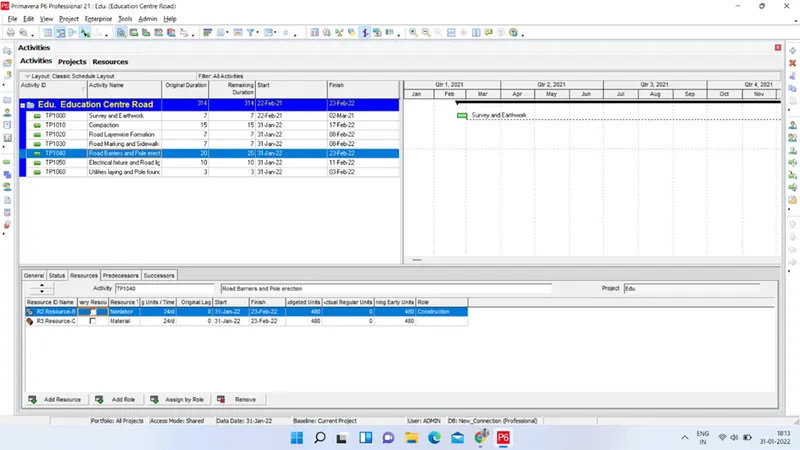
- Right click on Activity window and select Columns. Add Predecessors column and select Apply. Finally click OK. Assign predecessors to all activities using either columns or by dircetly through Gantt chart using Mouse. Assign Suitable realtionships between activities and Lags using Predecessors tab on bottom part of screen.
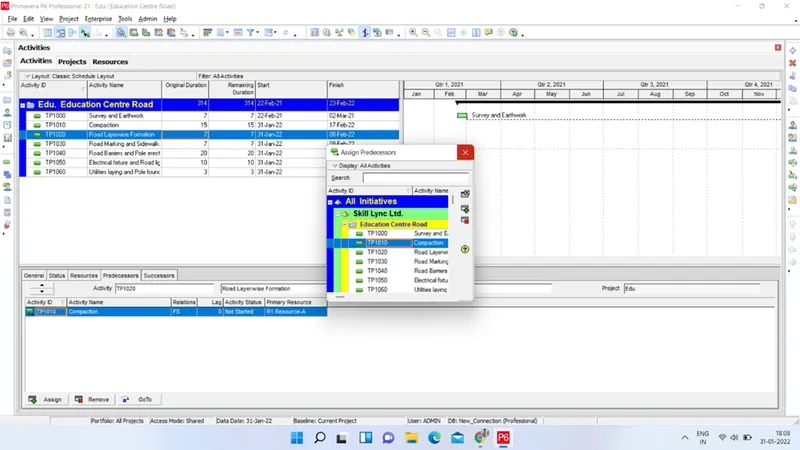
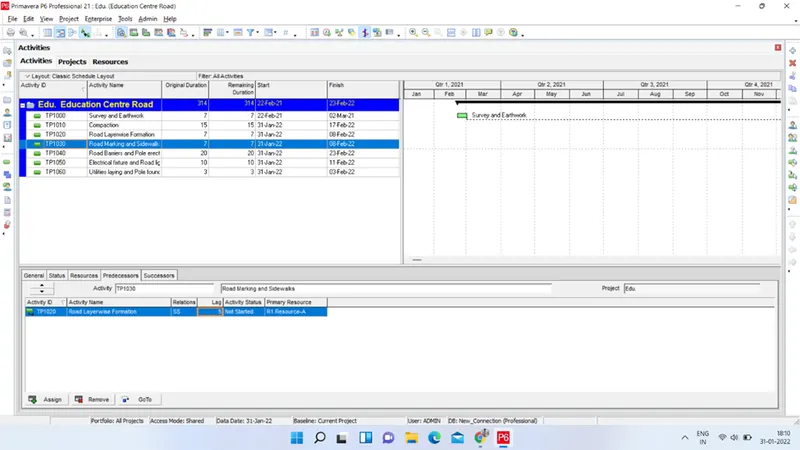
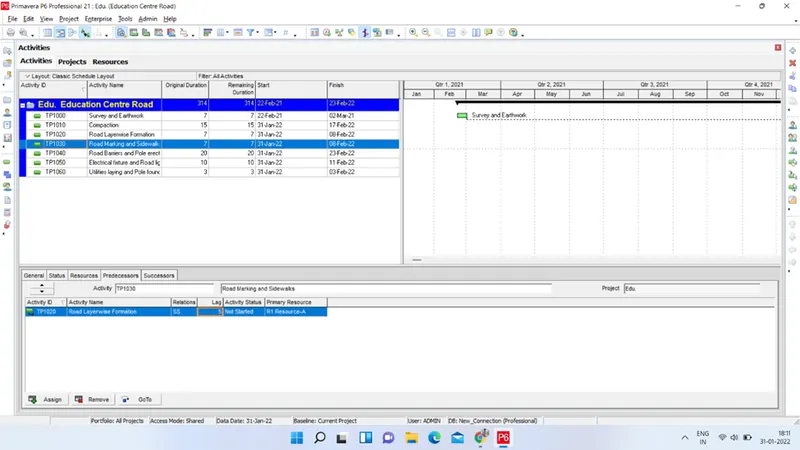
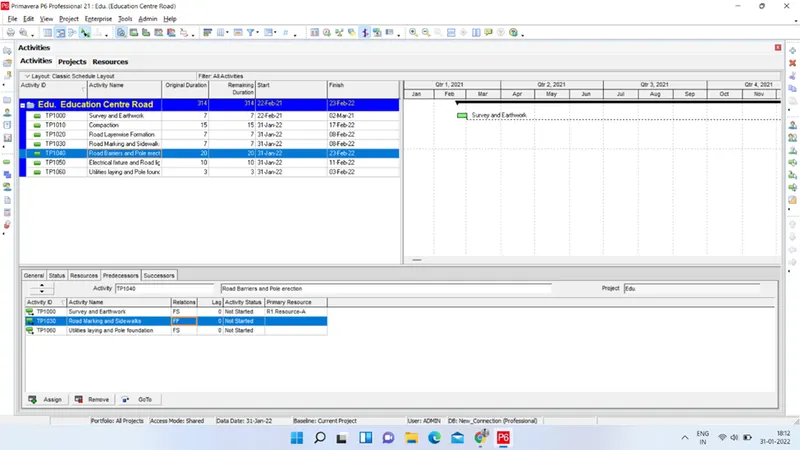
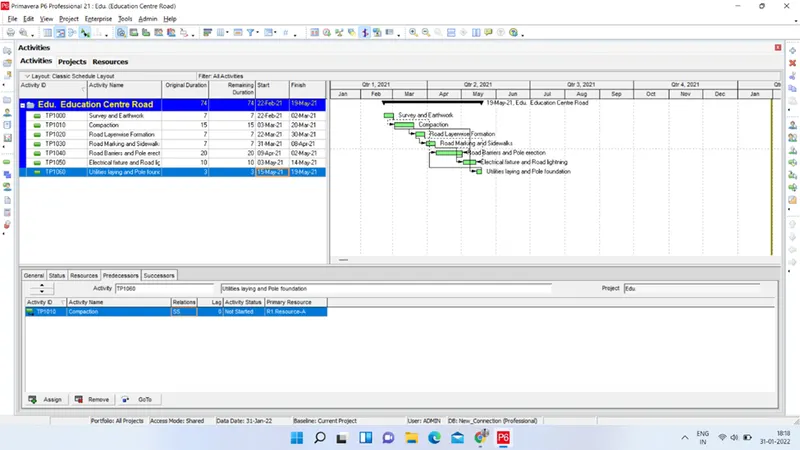
-
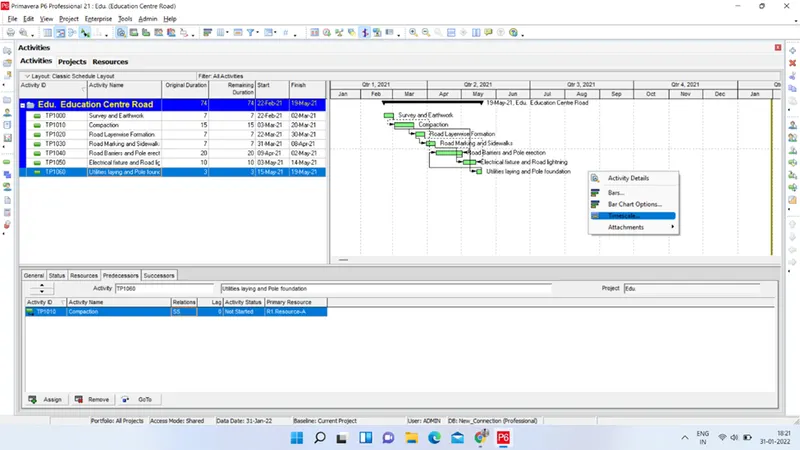
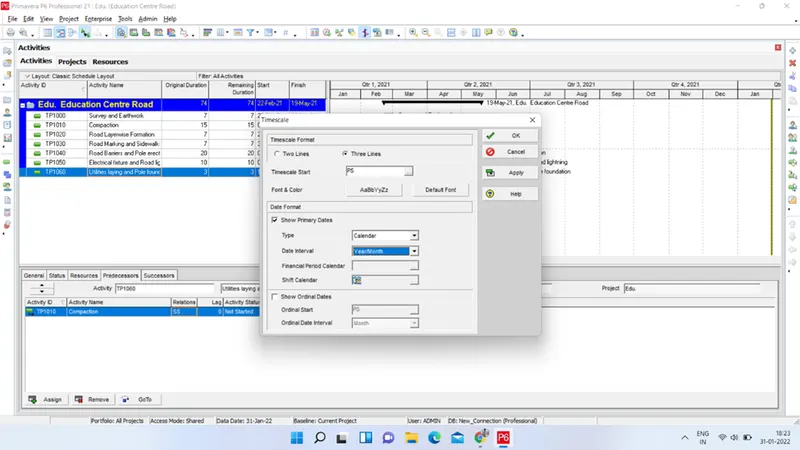
Now we can change timescale by right clicking on Gantt chart area and select Timescales. Go to three tier and set desired changes and click OK.
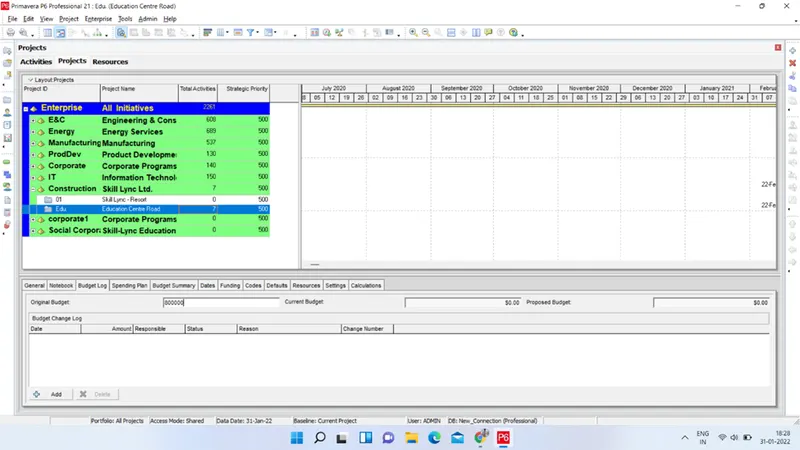
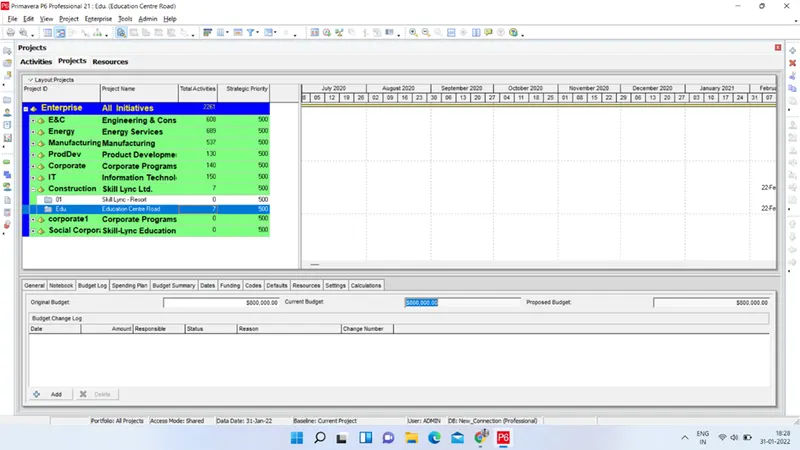
- Now our project with Activity schedule is created. Now we can add various details in it like budgeting, expenses etc. Go to budget log on bottom screen and enter a budget for project.
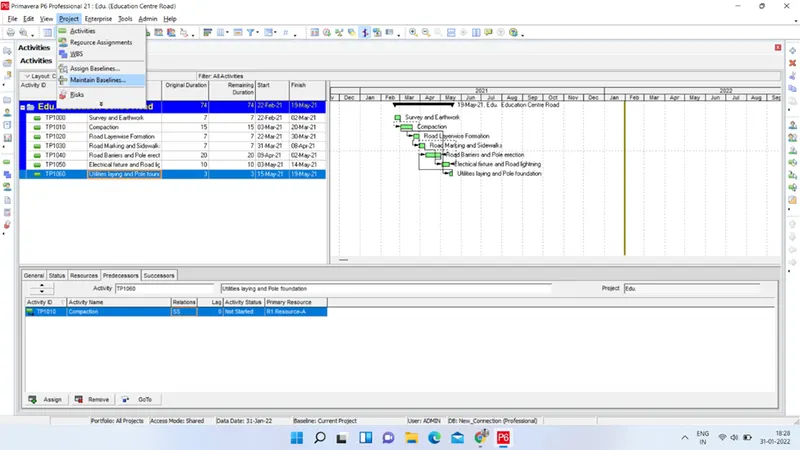
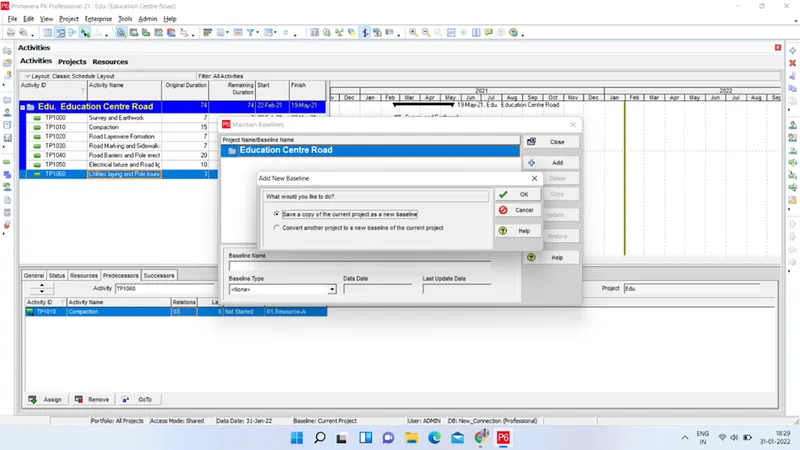
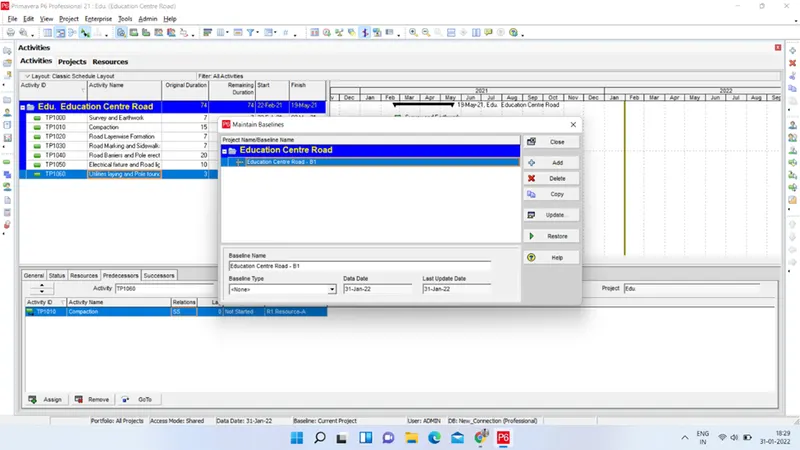
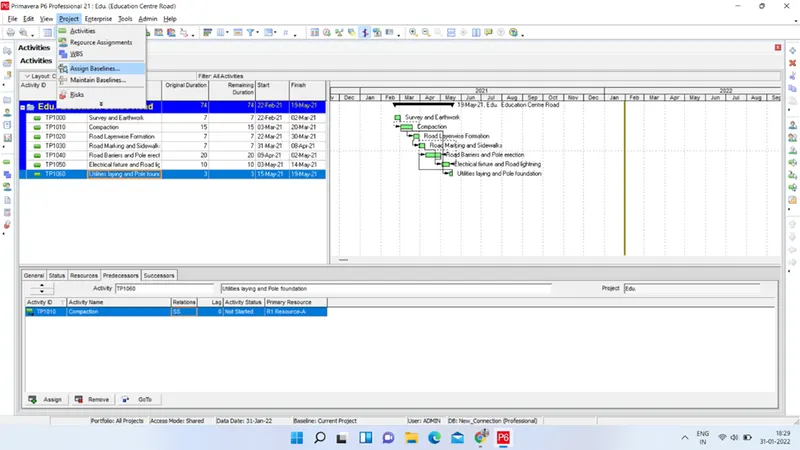
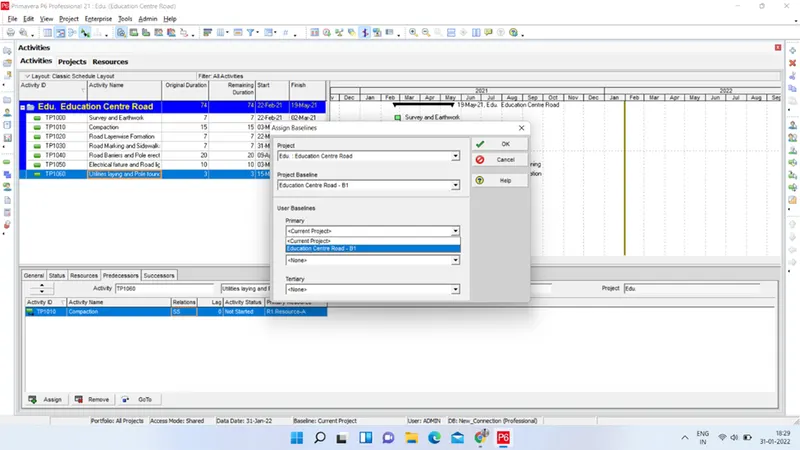
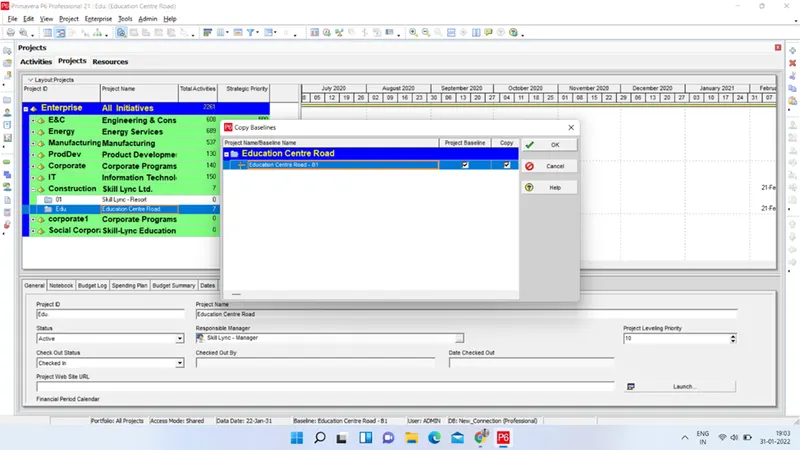
- Using Project --> Maintain Baselines create a baseline and assign it to project using Assign Baselines option from Project menu.
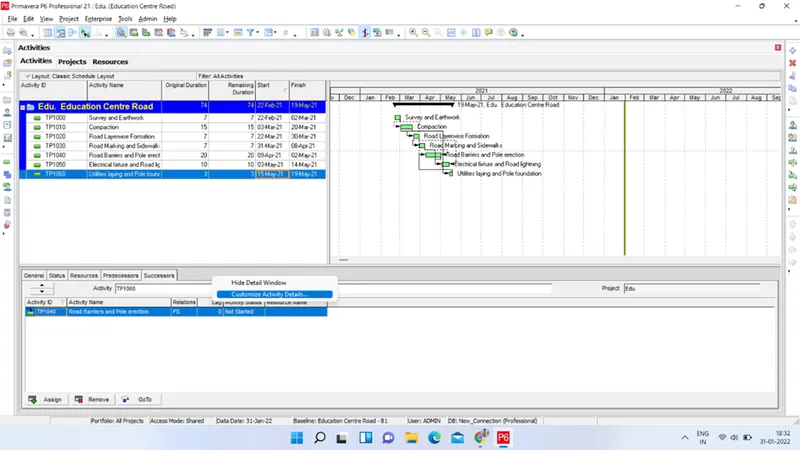
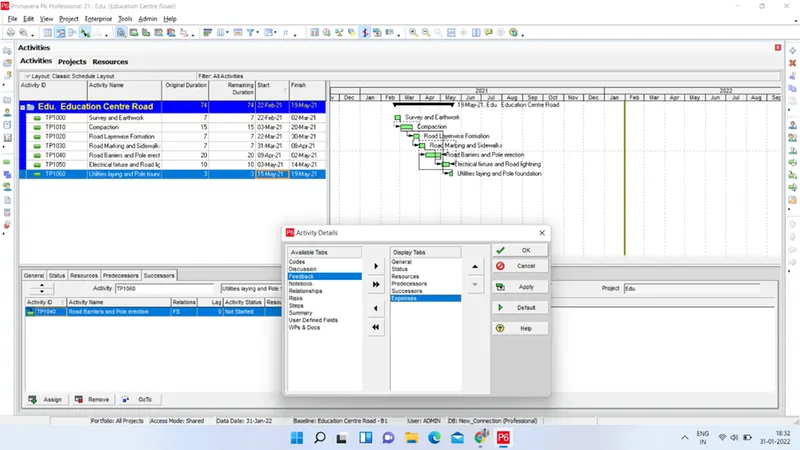
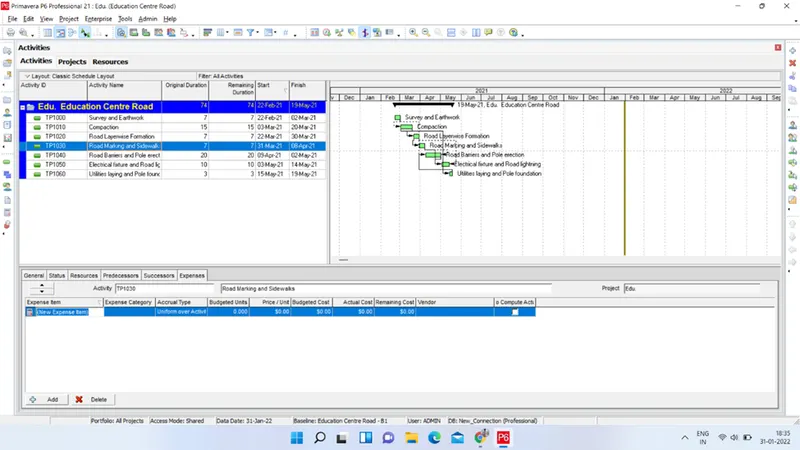
- Add expenses column on activity details window and add the expense details as per project real time data.
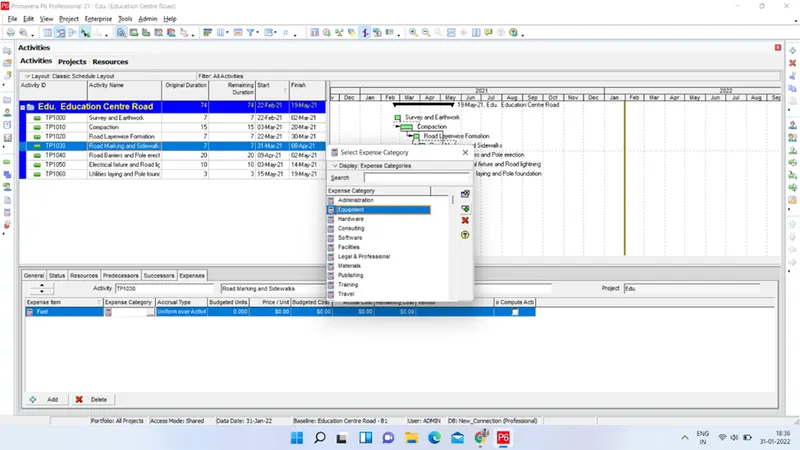
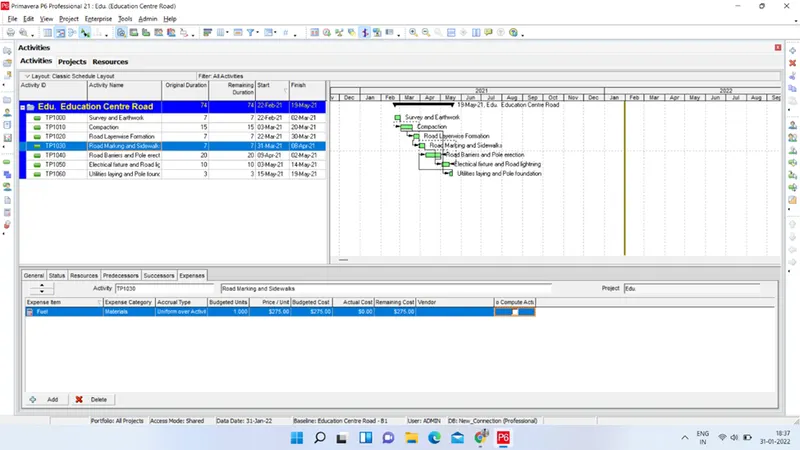
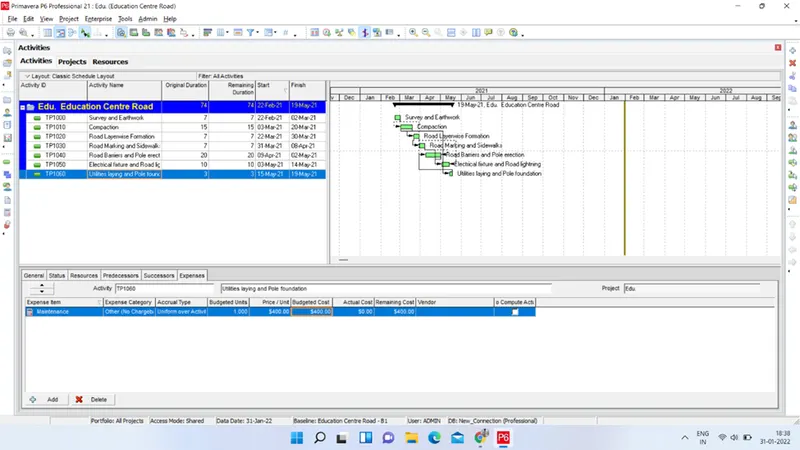
- Now open the Resource Usage spreadsheet and right click on graph area. Select the Resource usage profile options and select Cost in dialog window. Click OK. We will see Resource Usage costs curve for our project resources.
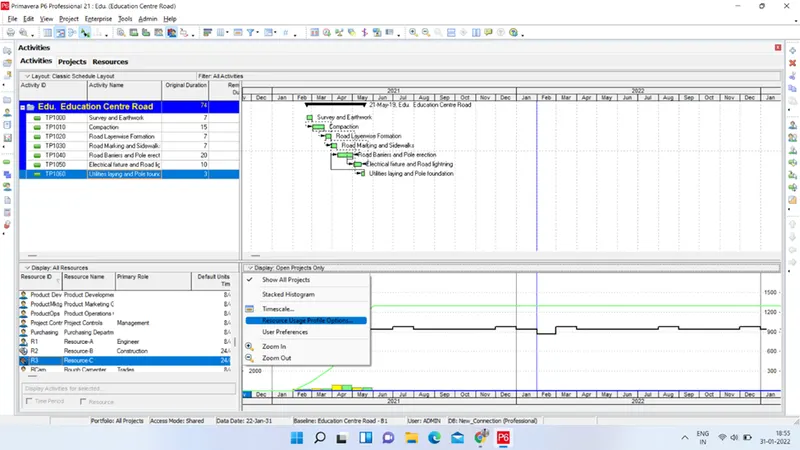
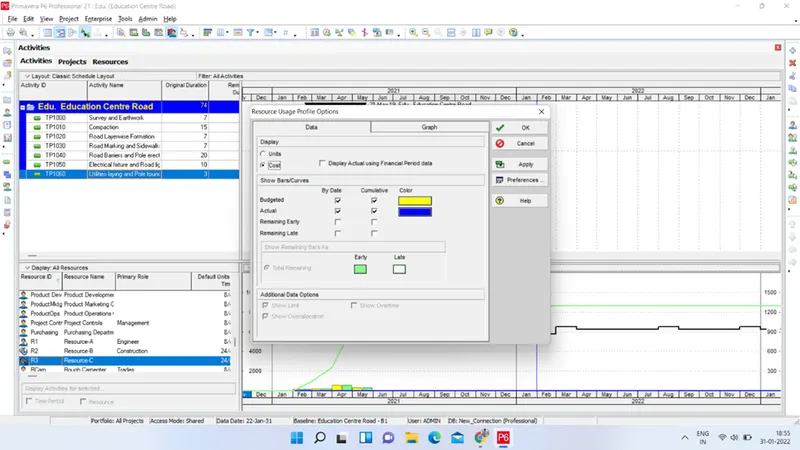
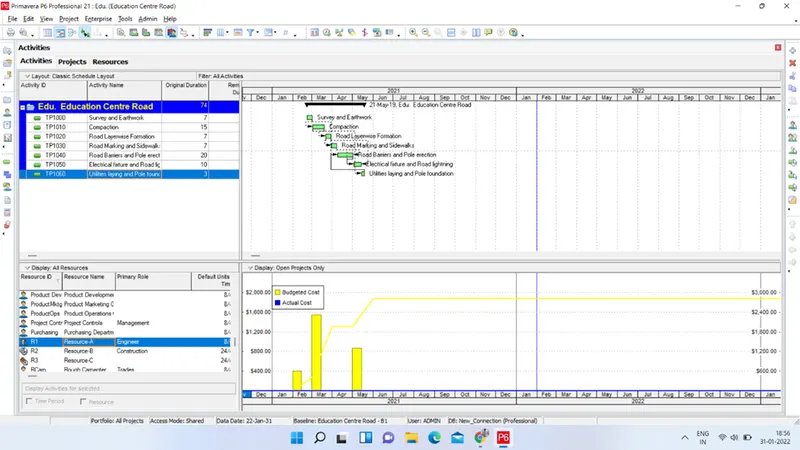
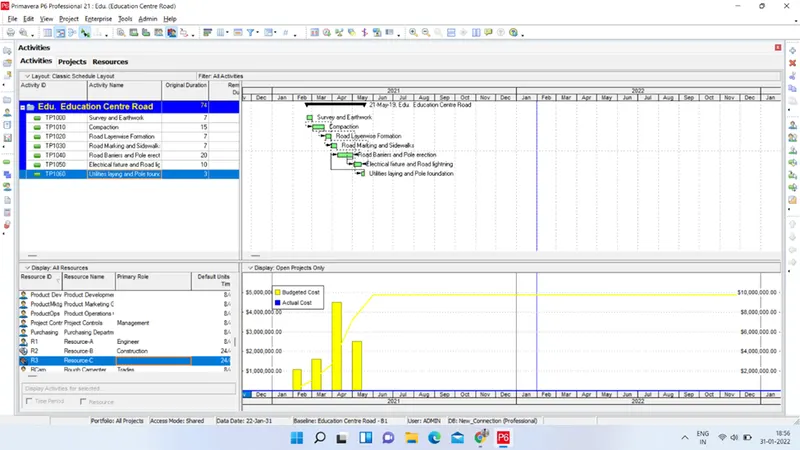
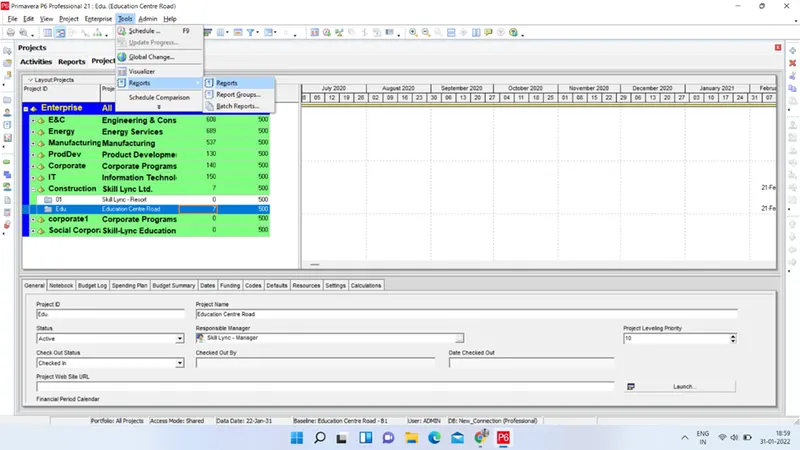
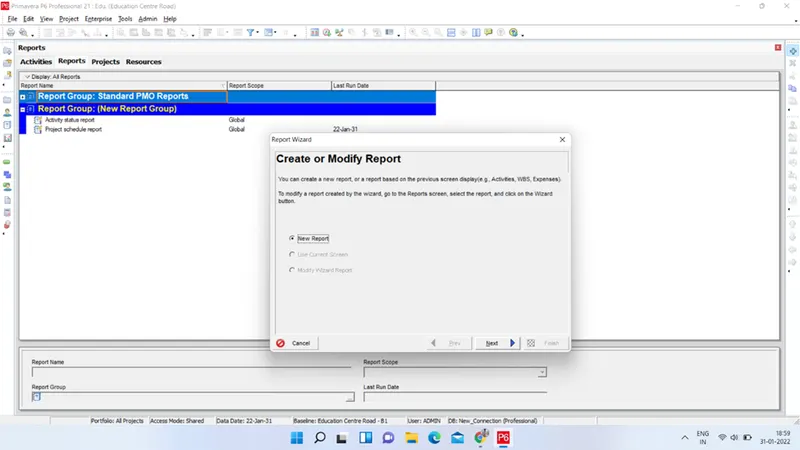
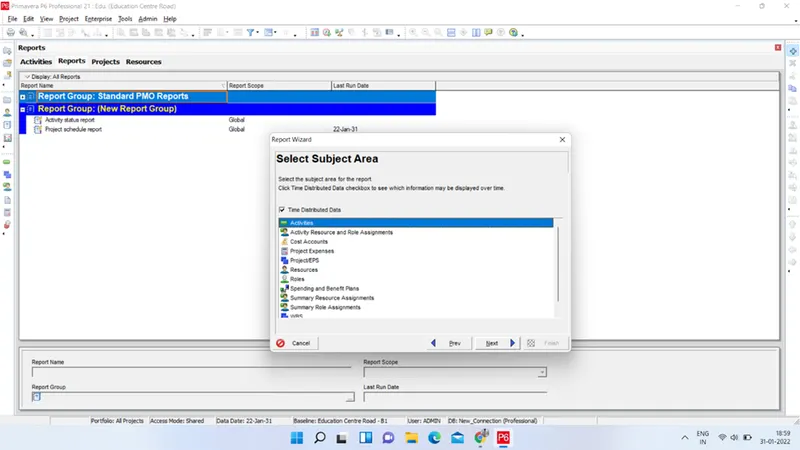
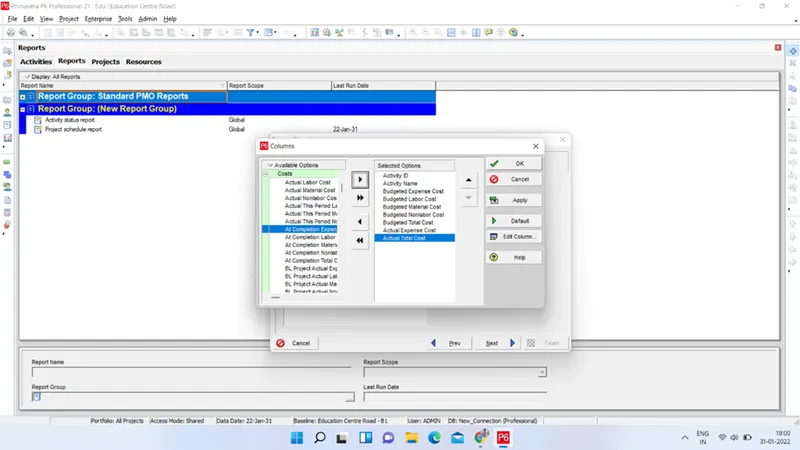
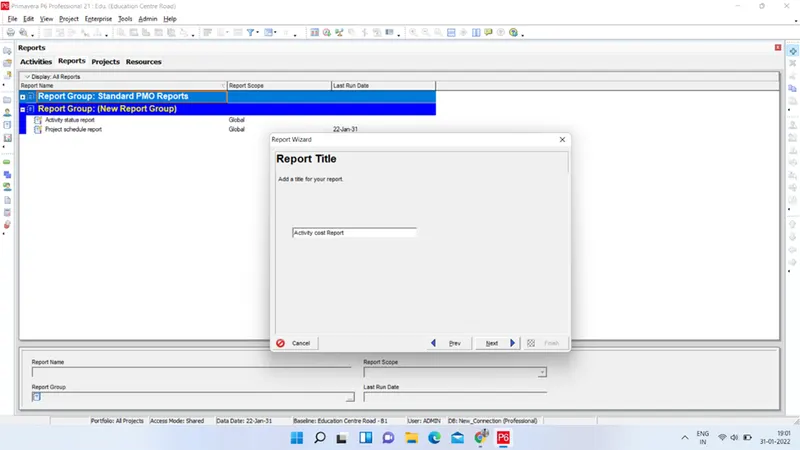
- Now go to Projects--> Reports and create a new activity Cost report using Expenses and budget columns. Preview it and if OK save the report.
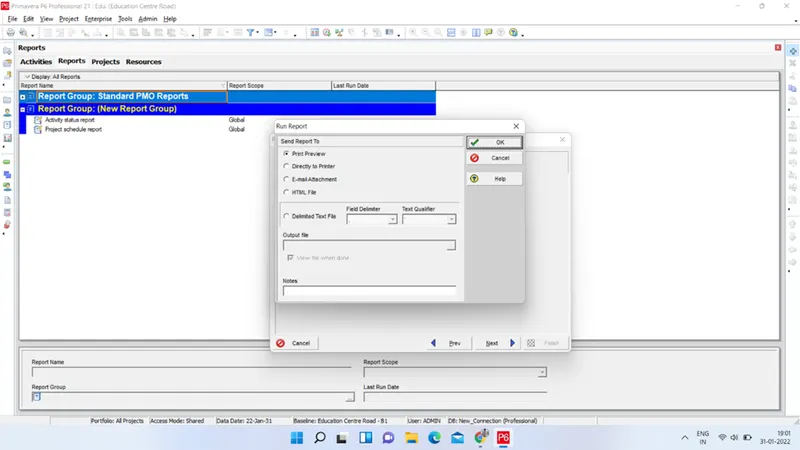
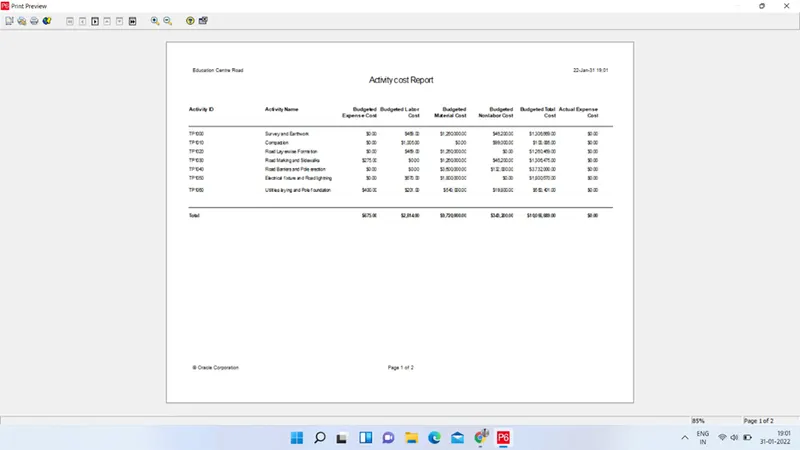
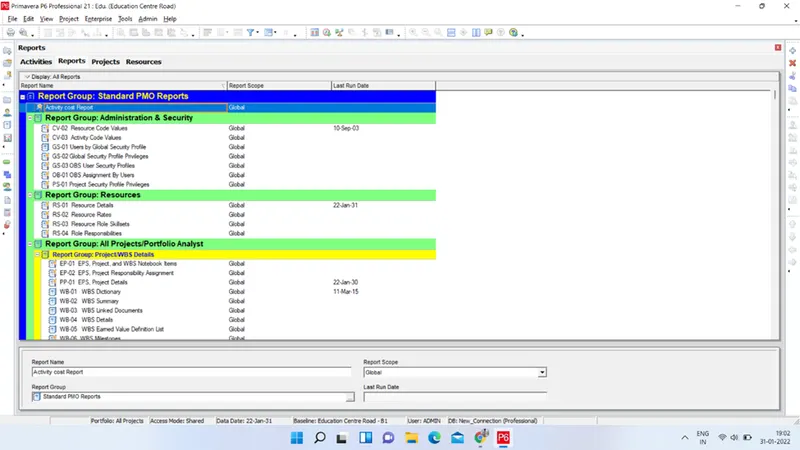
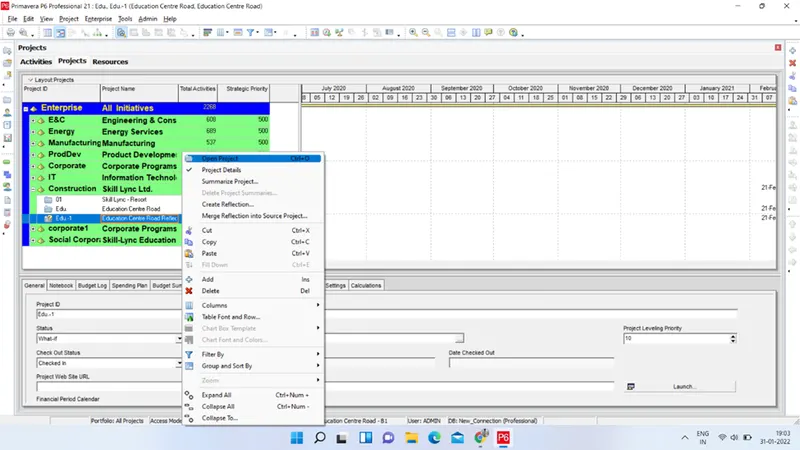
- Now create a project reflection. Right click on our project and select Create Reflection… from the popup menu.This generates a new what-if project distinguished by a folder with a question mark. Right click on the question mark folder and select open from the resulting menu. We now have our same schedule in our reflection.
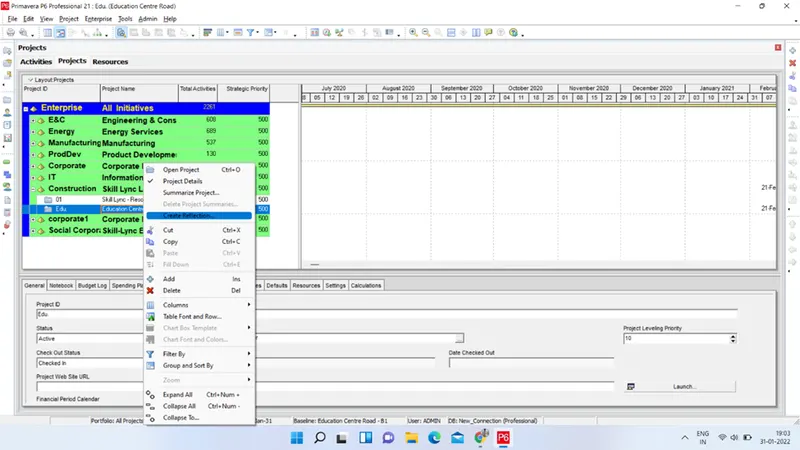
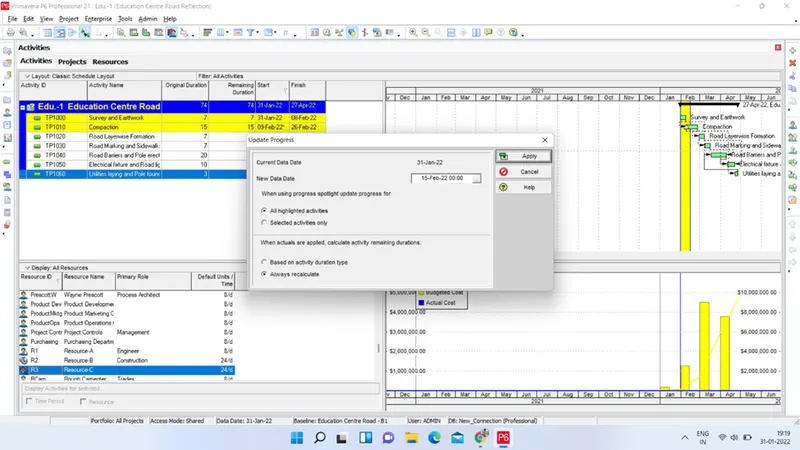
- Open the reflection and go to tools --> Progress. Auto update it after 15 days of start.
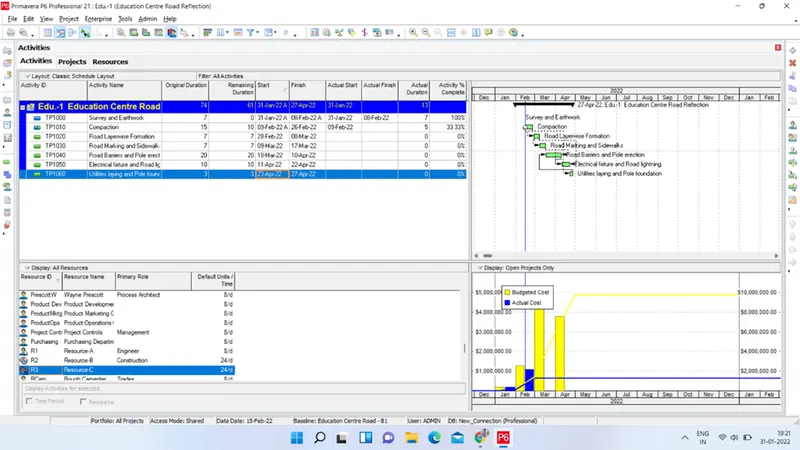
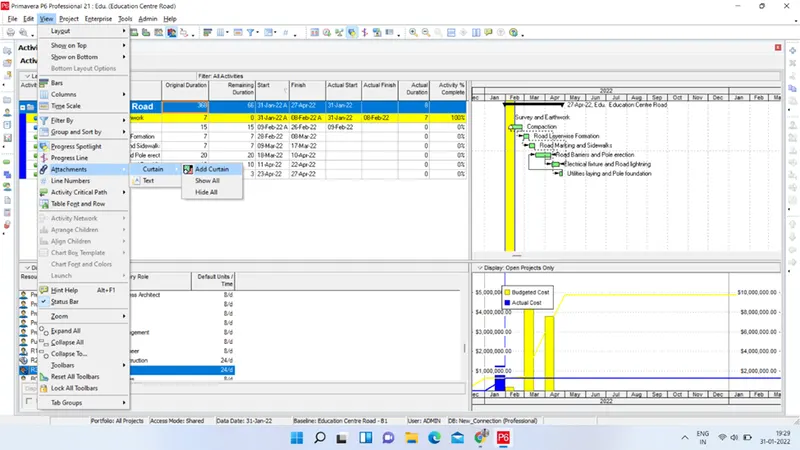
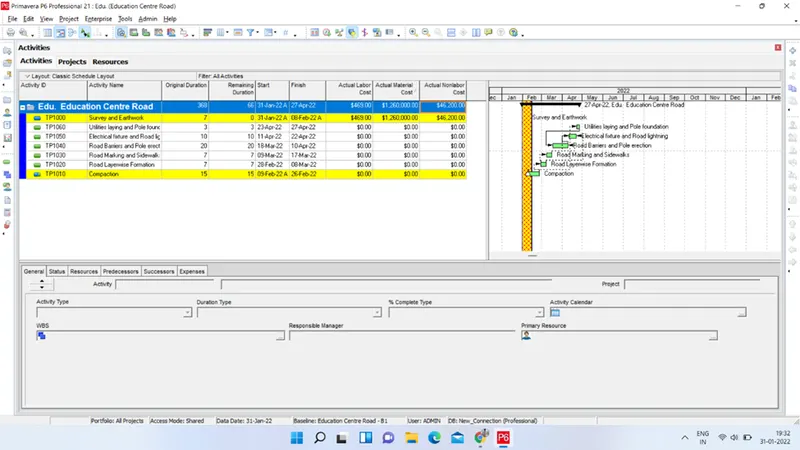
- Go to View-->attachements-->Curtainas-->add curtains. Add curtain to project for 15 days from start.
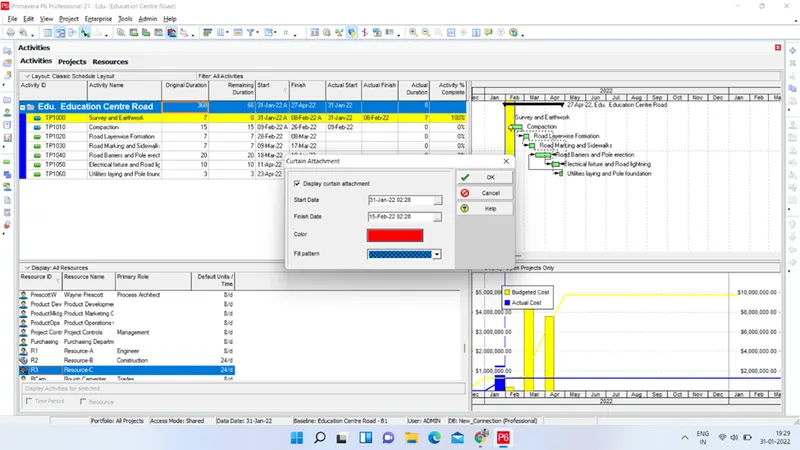
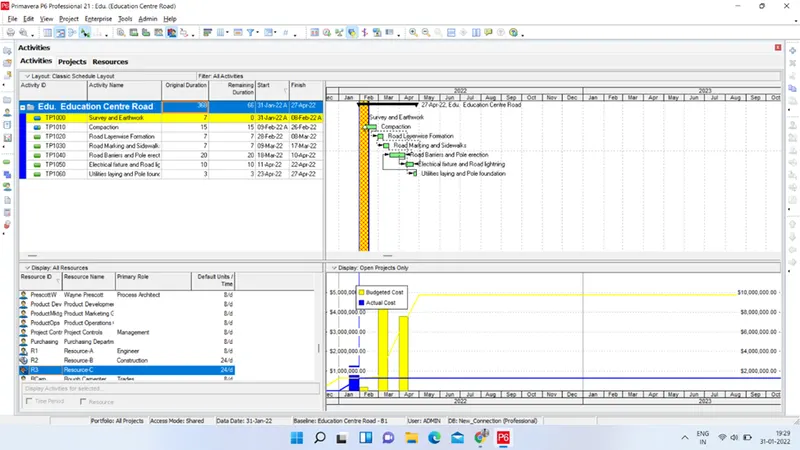
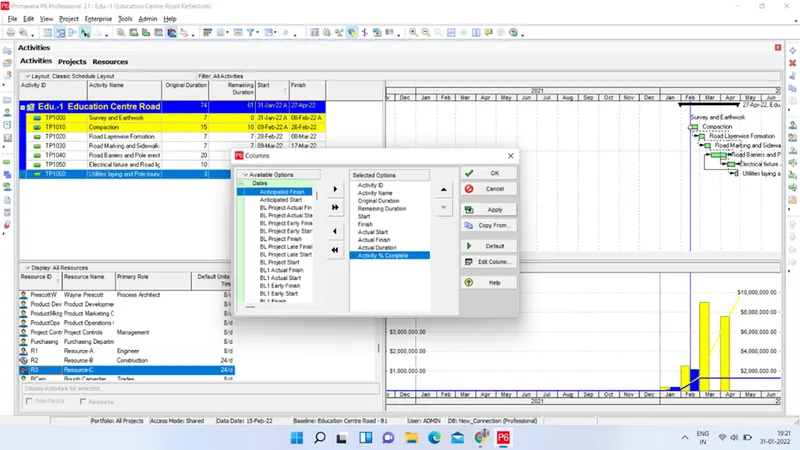
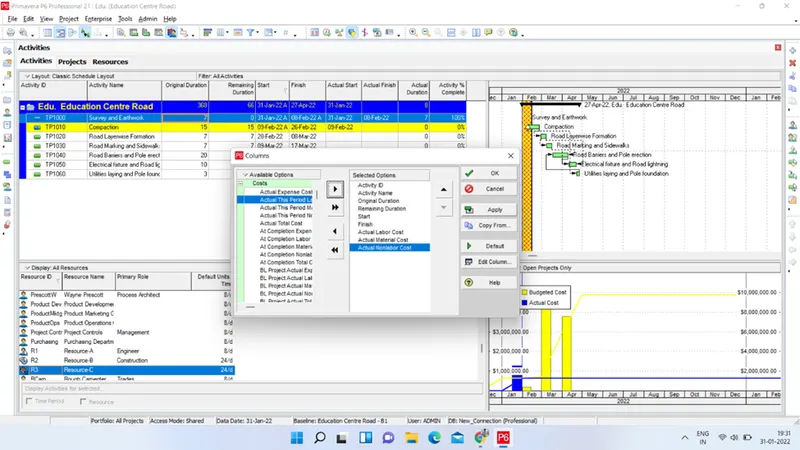
- Curatin is added as desired. Now add columns lie actual labor cost, non labor cost and material cost to the project activity window. We can see actual costs incurred via columns.
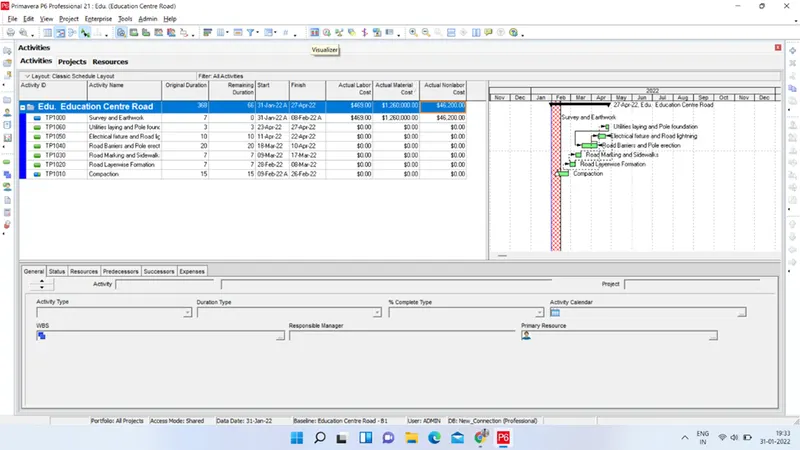
Thus our Project schedule is wholly completed now. We can visualize it through Visualizer option of P6. Select the visualizer from P6 menubar. Once Visualiser is launched follow following steps :-
- Click Add. Select TSLD from options arrived.
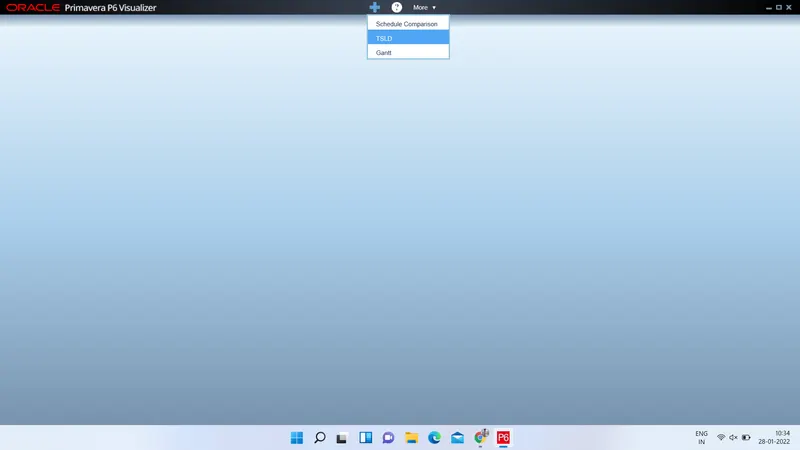
In the Create or Open dialog box:-
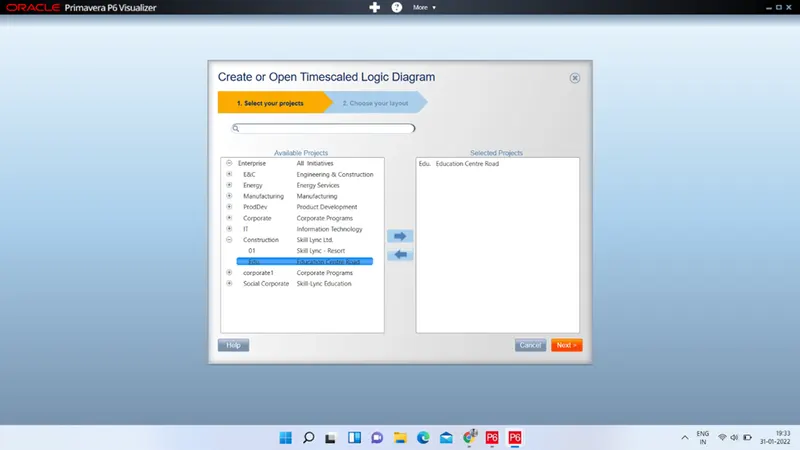
- Select your projects from the Available Projects list and add to the Selected Projects list. You can search this list. Click Next.
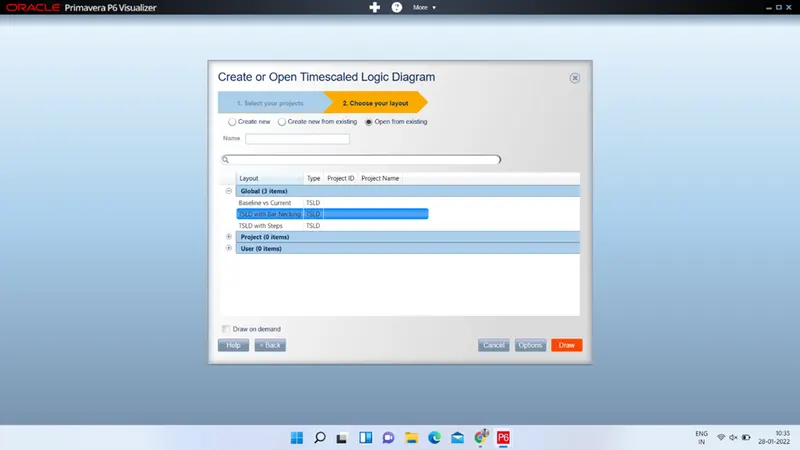
- Create a new layout or create a new layout from an existing layout. If you choose Create new, enter a name for the layout. If you choose Create new from existing, enter a name for the layout in the Name field and select an existing layout from the Layout list. We will select Open from existing and click draw.
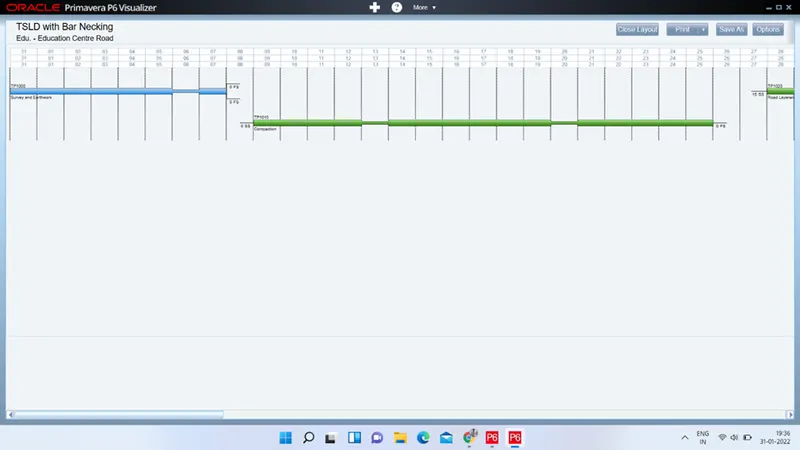
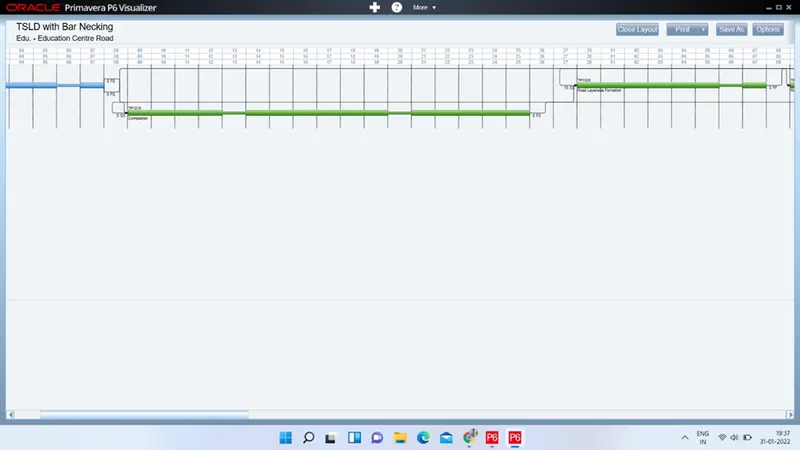
- Project will be opened in Visulaizer.
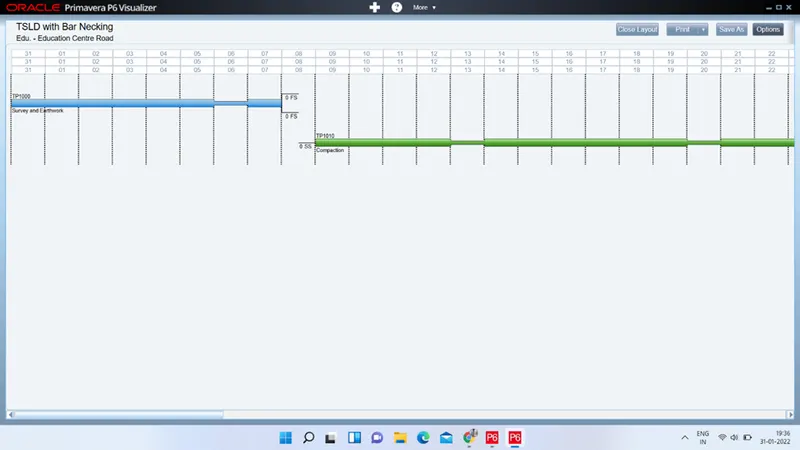
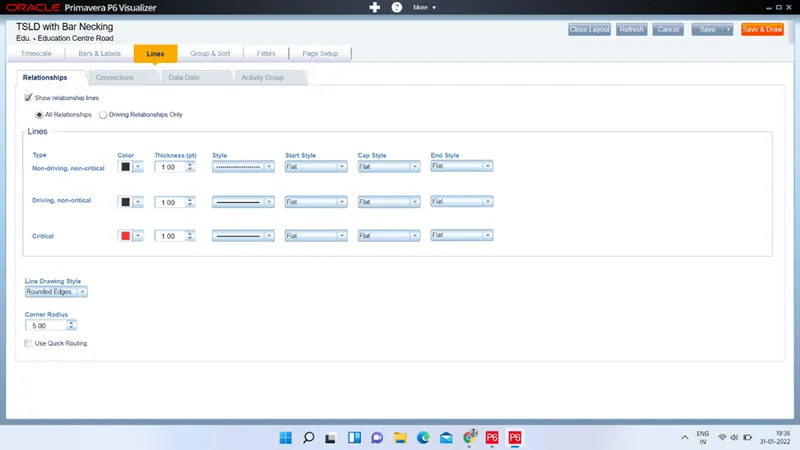
- Select options from top left corner of screen. Edit the details as per need and after editing all deatils click on save and Draw.
Thus our Project is completed now and we can change, preview, print the schedules, reports as per our need and use it further.