Project 1
PREPROCESSING OF INSTRUMENT PANEL (IP) OR DASHBOARD OF CAR USING ANSA (PROJECT - 1)
OBJECTIVE:
- Importing Instrument panel geometry into ANSA.
- Clean up the geometry until no topological error is found.
- Generate mid surface for the whole component including features.
- Mesh the component using manual mesh with given quality criteria.
- Improve the mesh flow and solve off elements.
QUALITY CRITERIA
|
S.No |
Quality Criteria |
Value |
|
1 |
Target/Average length |
4 |
|
2 |
Minimum Length |
2 |
|
3 |
Maximum Length |
6 |
|
4 |
Aspect |
3 |
|
5 |
Warpage |
15 |
|
6 |
Skewness |
45 |
|
7 |
Jacobian |
0.7 |
|
8 |
Minimum Quad Angle |
45 |
|
9 |
Maximum Quad Angle |
135 |
|
10 |
Minimum Tria Angle |
30 |
|
11 |
Maximum Tria Angle |
120 |
|
10 |
Tria Percentage |
15 |
ABSRTACT:
In this Project-1, ANSA pre-processor is used to generate mid surface using various options like casting, offset, middle etc.
Created 2D interpretation of the parent geometry. Extended mid surfaces in order to connect all the generated mid surfaces.
Mesh the component using spot with given quality criteria. Cleared off elements without any kinks or raised edges.
METHODOLOGY:
- Import CAD geometry into ANSA
- Do geometry check-up and clear all the errors
- Generate mid surface and assign different PIDs for parent geometry and mid surface
- Setup Quality criteria and mesh parameters
- Meshing and improvement of the mesh
INTRODUCTION:
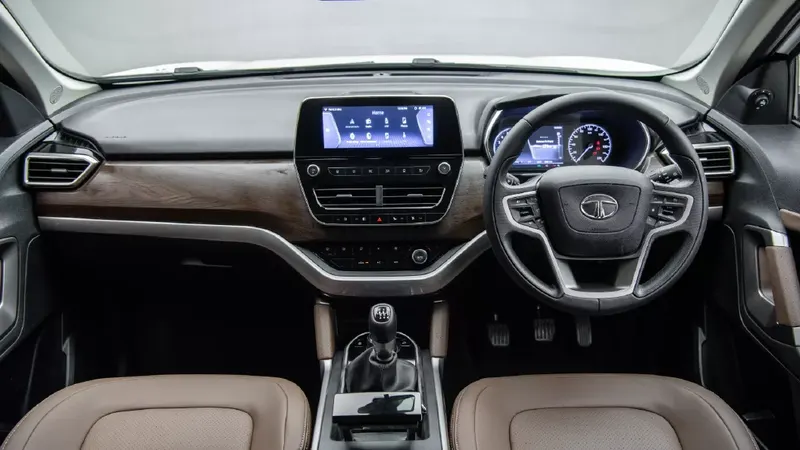
A dashboard (instrument panel (IP), or fascia) is a control panel usually located directly ahead of a vehicle's driver, displaying
instrumentation and controls for the vehicle's operation. These days car dashboards may include so many indicators like
speedometer, tachometer, odometer, fuel gauge, turn indicators, gearshift position indicator, seat belt warning light, enginemalfunction lights. Other features may include a gauge for alternator voltage, indicators for low fuel, low oil pressure, low tire
pressure and faults in the airbag (SRS) systems, lighting controls, safety systems, entertainment equipment, navigation systems
etc.
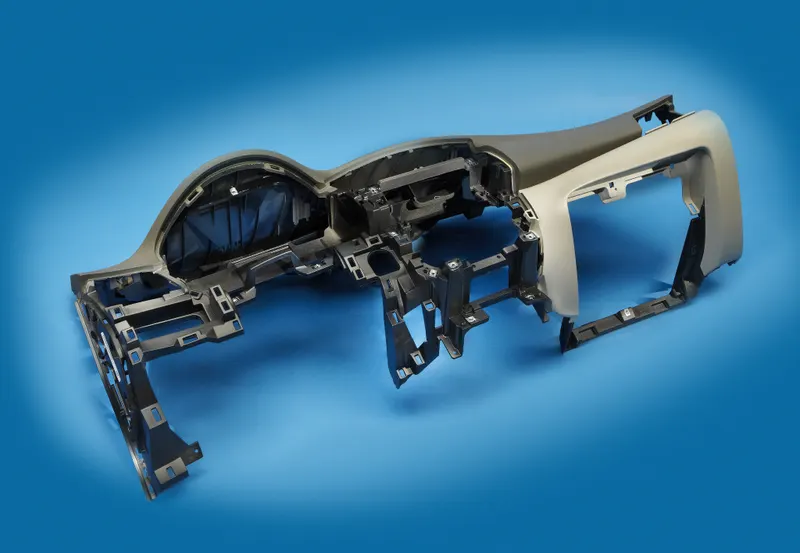
Dismantled dashboard
- Dashboard can be made from metal as the simplest and cheapest way. This could be the same base metal as the car,
which is steel or Aluminium. The more expensive luxury Cars are made of exotic wood with a highly polished finish.
Usually, top layer on old cars is PVC. More recently, dashboard coverings have been made of PVC blended with something
called ABS. ABS is an acronym for a block copolymer made of acrylonitrile, butadiene, and styrene.
PROCEDURE:
Step 1: Import the geometry into ANSA and do topo to stitch the surfaces. Assign PID for the whole geometry.
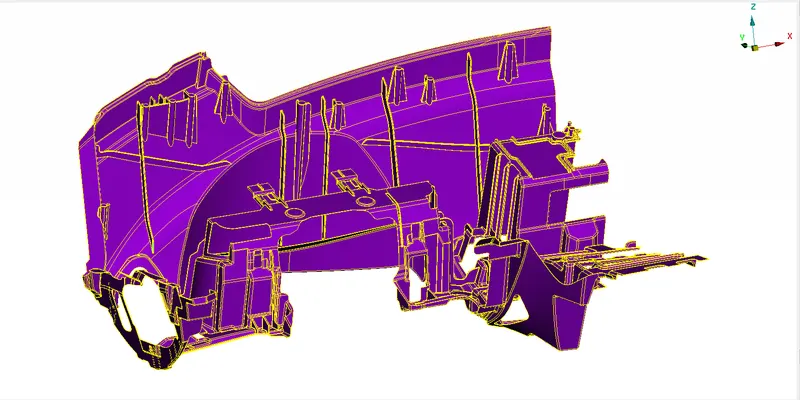
FIG 2:PID assigned for whole geometry
- Measure all the features so that when you assign PID’s, it will be easy to define different thicknesses for features like small
ribs, big ribs, dog houses.
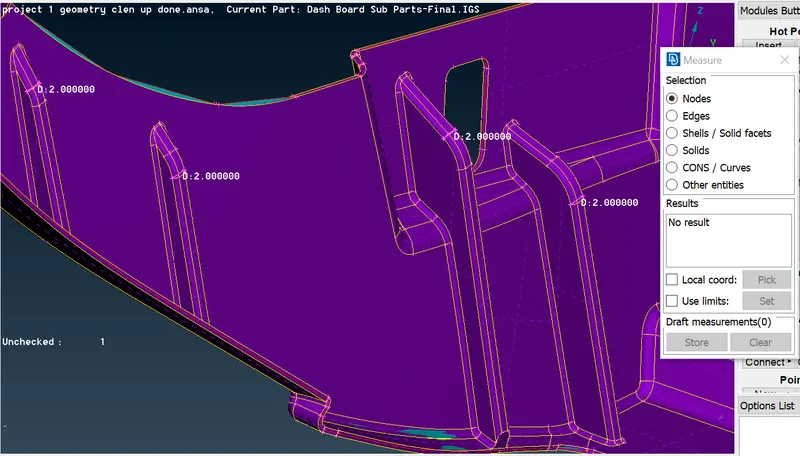
FIG 3:Measuring all features
Step 2: Clean the geometry using checks manager. Enable unchecked faces, collapsed cons, triple cons, needle faces,
overlapped faces, cracks, single cons. Clear all these issues until no error is found. One can use fix option in ANSA to clear all the
errors automatically. However, sometimes manual intervention is required for fixing some errors.
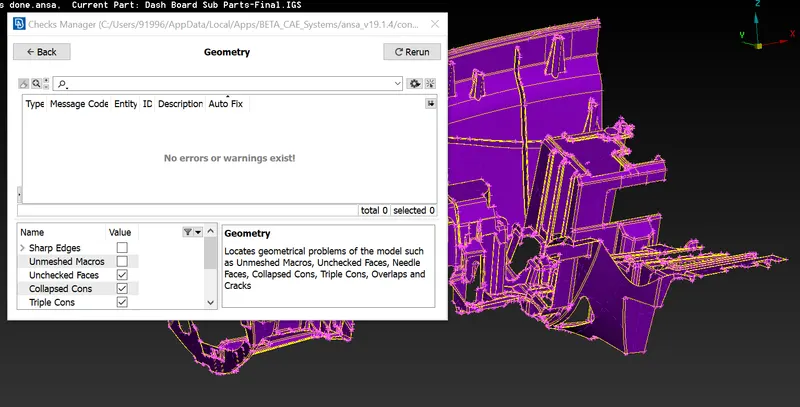
FIG 4:Checks Manager Dialog box
Step3:
MID Surface Generation for bigger area:
- Casting and skin options haven’t generated best results in mid surface generation. Therefore, I have done the mid surface
generation manually. - First generate mid surface for bigger part so that other small features can be extended on to it. Using offset option, pick
the bigger surface using feature area to generate mid surface.
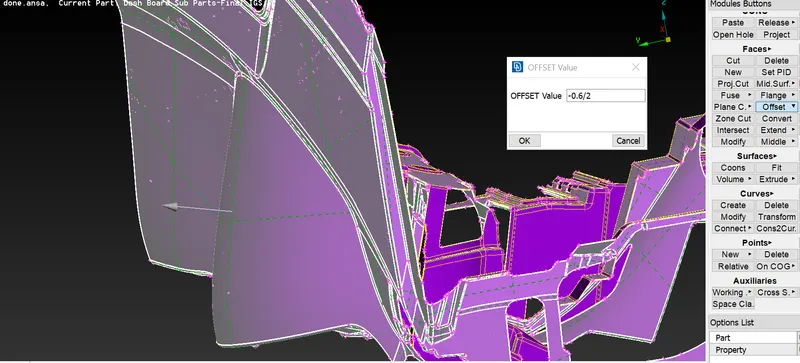
FIG 5: OffSetting big surface.
- Select the side which has less features so that the mid surface generated will be accurate. Isolate generated mid surface,
assign PID and thickness to it.
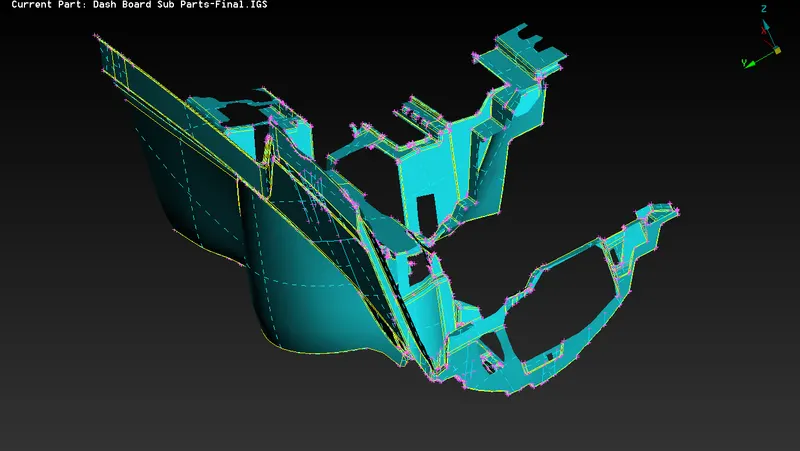
FIG 6:Generated Mid surface of big part
Step 4:
Mid Surface Generation for small Ribs:
- Use middle option and select both sides of the rib. Then a mid-surface will be formed. Like this generate mid surface for all
the ribs. Don’t forget to give separate PID and thickness for all the features. - Now extend the mid surface of the ribs on to the bigger mid surface generated in the earlier step. One can check the
thickness by giving transparency to the parent geometry and enabling draw shell as solid in presentation parameters.
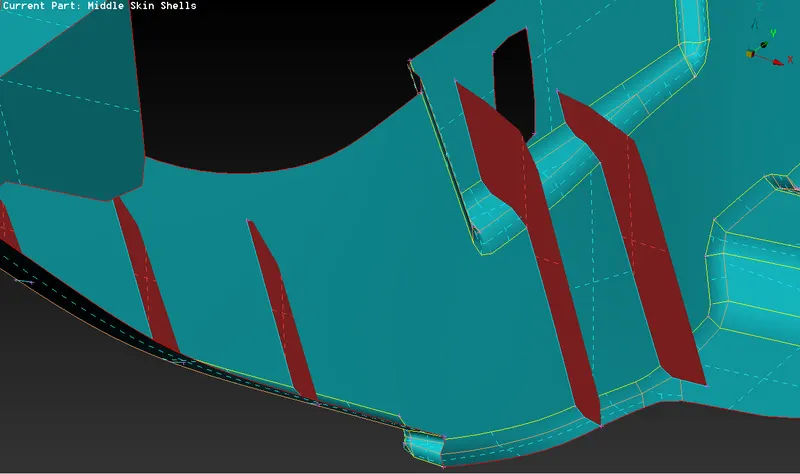
FIG6: Mid surfaces generated using middle option
Step 5:
Mid Surface Generation for long Ribs
- Mid surface for long ribs on the geometry can be generated using Faces à offset option. Measure the thickness and give
offset value in the desired direction. - Similarly extend the mid surface of the long ribs on to the bigger mid surface. Also check the thickness by giving
transparency to the parent geometry and enabling draw shell as solid in presentation parameters.
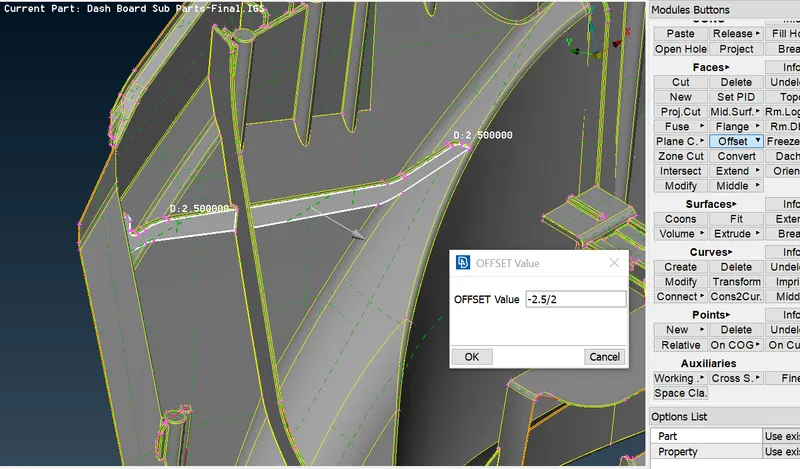
FIG 7: GENERATING MID SURFACE FOR RIBS
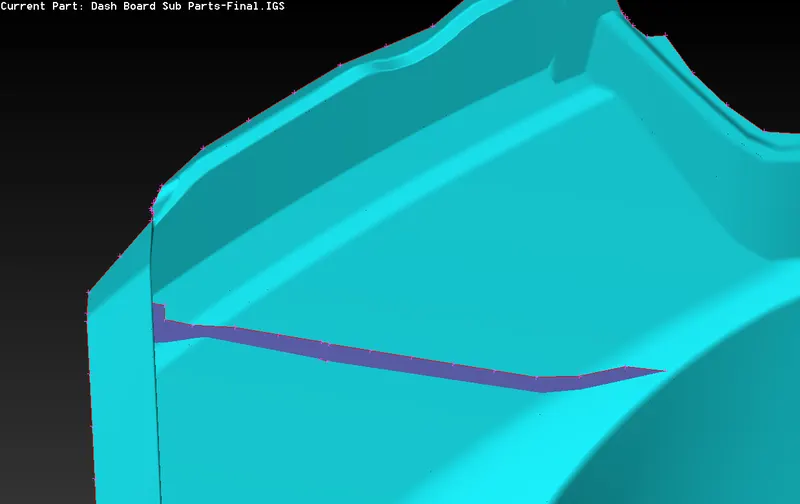
FIG 7: Mid generated for long rib
Step 6:
Mid Surface generation for dog houses
- Usually, the dog houses consist of cylindrical surfaces. For these cylindrical type surfaces, we can’t generate exact mid
surface and volume mesh is not preferred as these dog houses are more in this geometry. So, I have captured these
cylindrical surface as two intersecting rectangular ribs. - Using Cons2Curve option, I have connected the curve which is created on the cylindrical feature of parent geometry and
the rib using Faces à New à Fitted Surface option
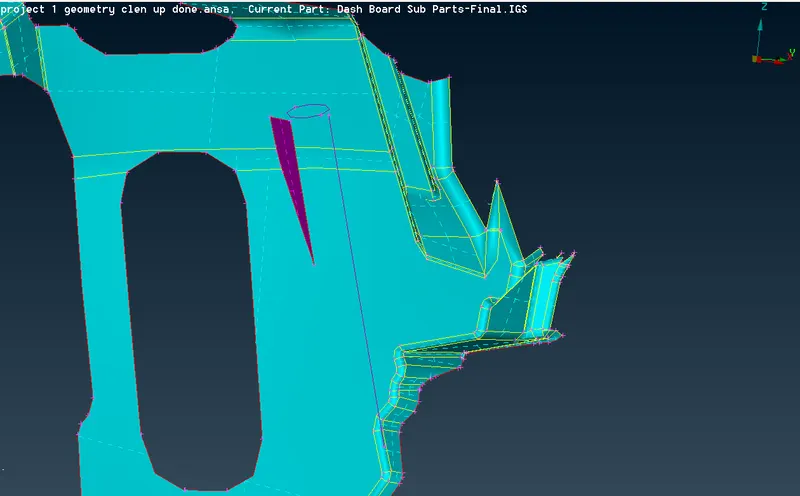
FIG 8: Using cons2curve option
- Select one side of rib and the curve to create rib for one side. Similarly create mid on the other side like cross symbol. This
‘+’ represents one single dog house. After creating surface on both sides extend all the required surfaces to the main mid
surface. Also use intersect option to form triple con in the middle.
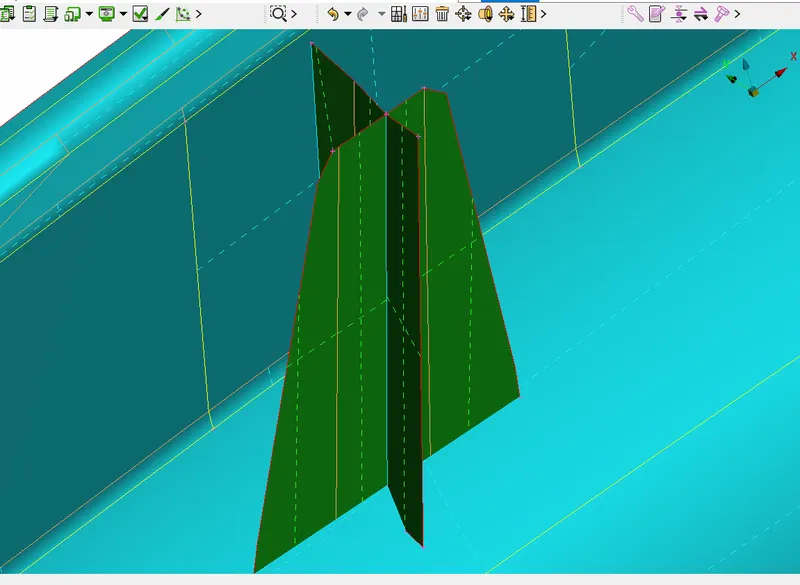
FIG 9: MID SURFACE FOR DOG HOUSE
- Now, to attain the same elevation as of parent geometry I have extended the mid surface of the dog houses on to the
surface of the parent geometry. Triple cons will be formed if u extend them perfectly.
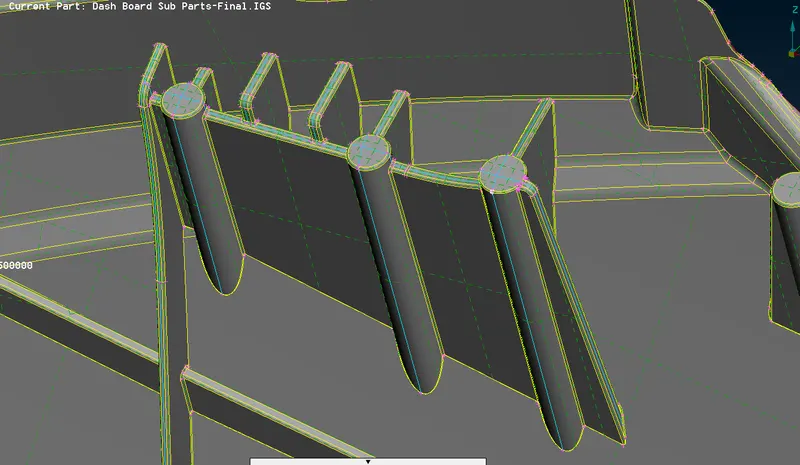
FIG 10: Dog house mid extended on to parent geometry
- Similarly, generate mid surface for all the dog houses and extend that on to the parent geometry to attain perfect shape
for the mid surface. After achieving the elevation release all cons and do topo again, so that mid surface will be releaved
from parent geometry.
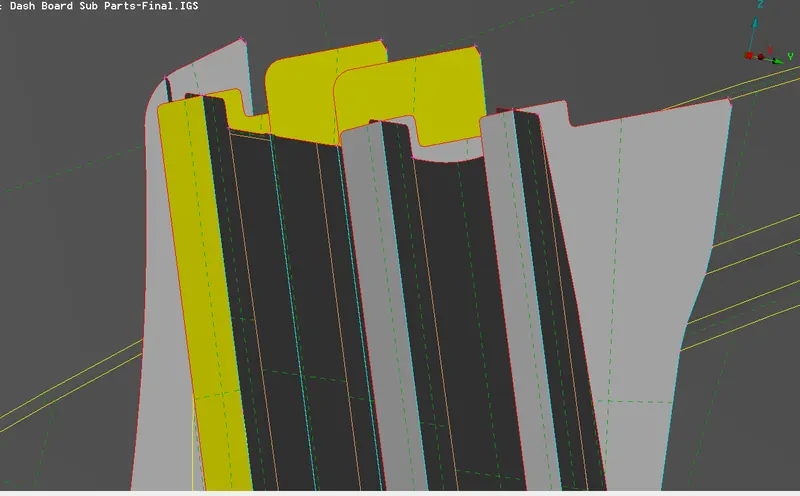
FIG 11: Elevation attained for mid surface
- First, generate mid surface for one dog house and check using transparency mode and enable draw shell
manner one can easily check whether the mid surface and thickness capturing is done perfectly or not.
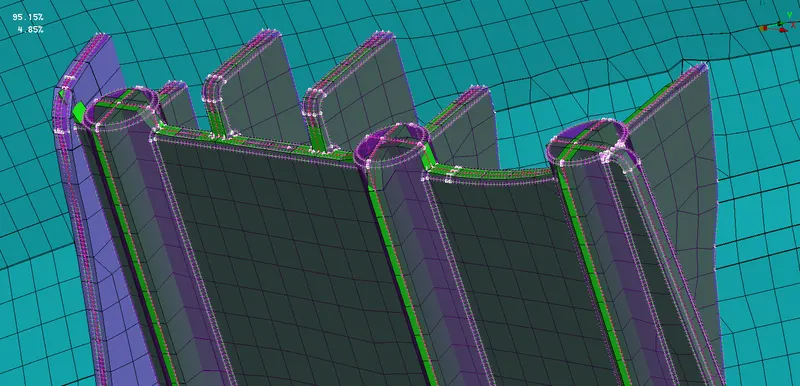
FIG 12: Transparency and shell as solid enabled
Step 6:
Mid Surface generated using casting
- For some features in the centre of instrument panel, I have generated mid using casting option.
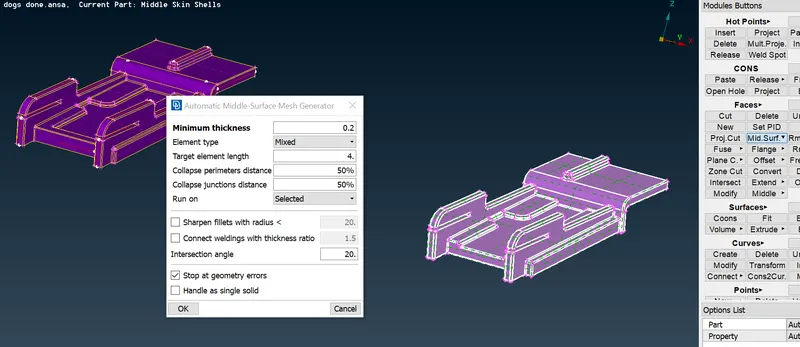
FIG 13: Casting done for some features
- Assign minimum thickness, target element length, and run on selected features. Casting always generates mesh along with
the mid surface.
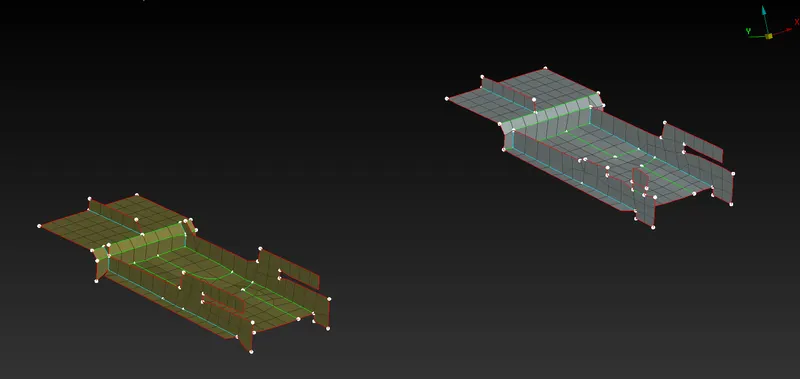
FIG 14: Generated FE using casting
- I have attached a picture of the complete mid surface generated below after connecting all the features together.
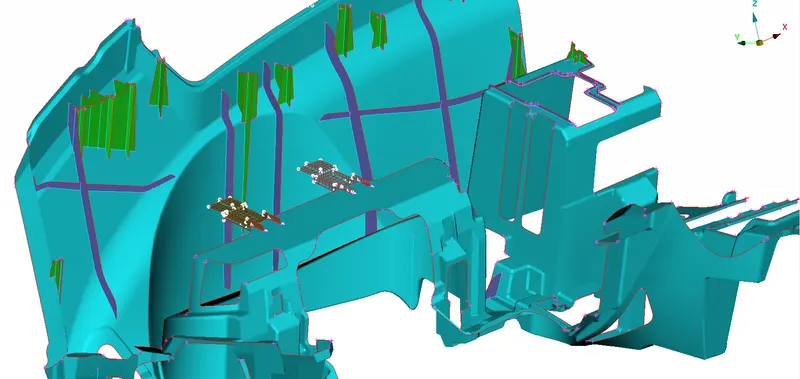
FIG 15: Mid surface generated for whole dashboard
Step 7:
Meshing and Improving mesh flow
- In this mid surface there are lot of double cons nearer to each other. Therefore, lot of topological clean up should be done
before starting mesh. - For this dash board, manual mesh is preferred as it has more features connected with each other. I have used spot mesh
option and meshed region by region manually. - There will be some off elements generated at some places where triple cons converge.
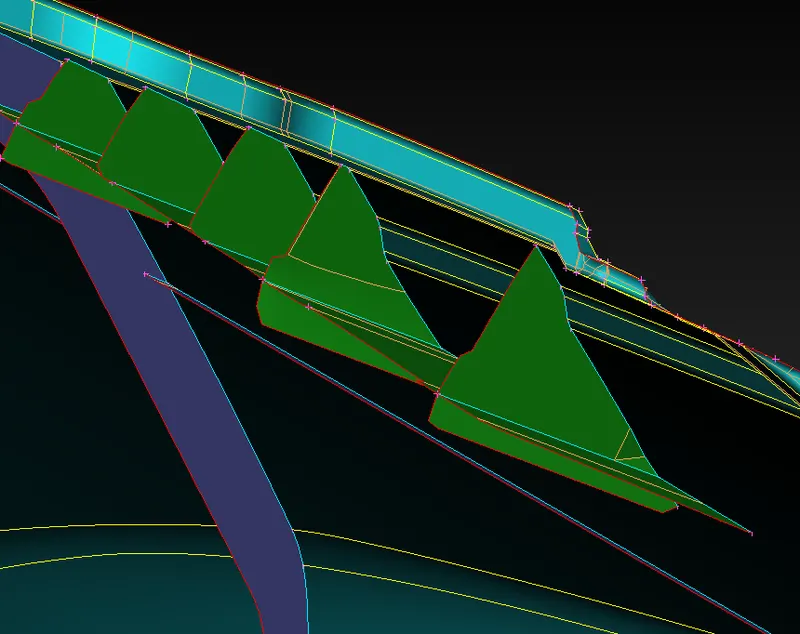
FIG 16: Triple cons converging
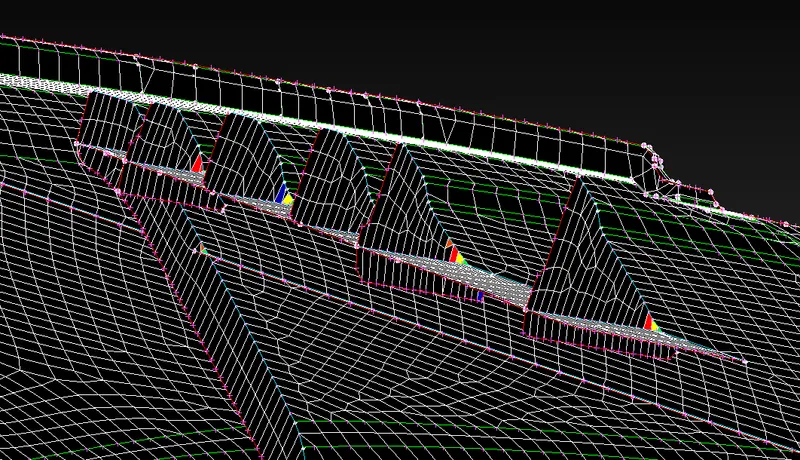
FIG 17 :Errors formed at converging regions
Reconstruct and Smooth
- I have used smooth option in order to clear some off elements at converging places.
- For better mesh flow reconstruct option can be used. I have removed opposite trias and trias at the edges using options
like swap, split and paste options.
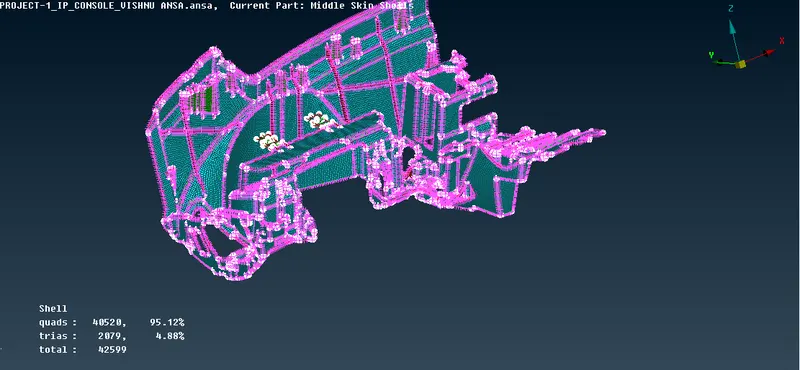
FINAL RESULT IMAGE:Meshed instrument panel with assigned thickness
Learning Outcomes:
- Able to do topological clean-up with no errors.
- Assigned separate PIDs for different surfaces.
- Able to generate mid surface for complex geometry with varying thicknesses.
- Aware of all the quality criterias and quality parameters during mesh generation.
- Understood about mesh generation and implemented mesh generation for complex geometry.
- Learned how to improve mesh flow and remove trias to achieve better mesh flow.
- Understood all the concepts regarding mid surface generation and meshing in ANSA.
Conclusion:
In this project, I have generated mid surfaces using different options available in ANSA. Able to defeature and do line
adujstments in some areas. Did topological clean up. Understood about transparency mode and the concepts related in
generating mid surface for different features. Able to achieve better mesh flow using smooth,reconstruct,swap,paste,move
options. Eliminated kinks and raised edges. Successfully generated mid surface and meshed whole Instrument panel usinh
ANSA.
PLEASE FIND THE DOCUMENT IN THE LINK BELOW
https://drive.google.com/file/d/1XOLt9lA5XUQOjLW7RTGwN1COaJiKYeqd/view?usp=sharing