Week 3 Challenge : CFD meshing on Turbocharger
Aim:
For the given model of a turbocharger, check for geometrical errors to make appropriate volumes. Create and assign PIDs accordingly. Create surface mesh and use that to create a volumetric mesh.
Objective:
- Perform surface mesh with the given target lengths as per PIDs.
- Blade stage-1 = 1 mm
- Blade stage-2 = 1 mm
- Impeller = 2 mm
- Shaft rotor = 1 mm
- Turbo casing = 5 mm
- Compressor casing = 5 mm
- Inlet casing cover = 5 mm
- Perform Volumetric mesh for the required volumes as shown in the videos.
- Write a detailed report on your surface meshing & Volume meshing process.
Turbocharger Model:
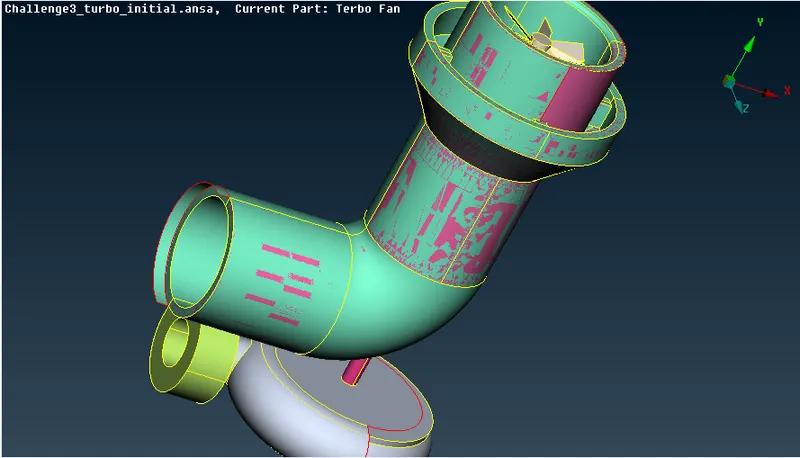
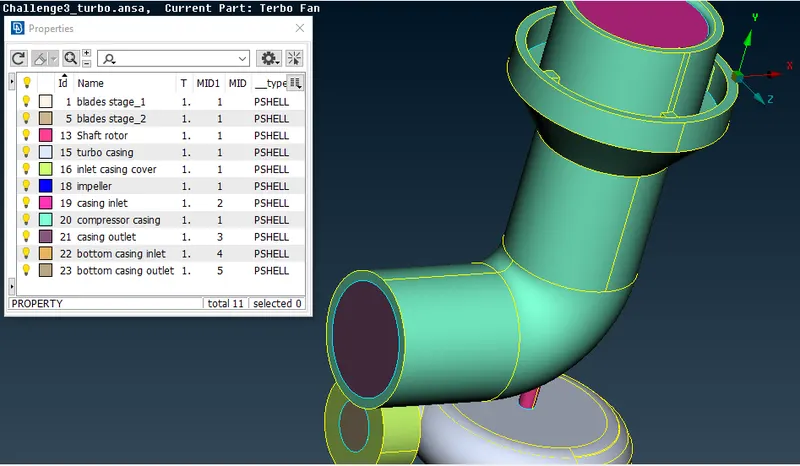
Fig 1. Initial model and final geometry cleaned model
Procedure:
1. Topo/ geometry clean-up:
- Upload the ANSA file using the open option under the file drop-down.
- Start with the topo clean by doing a geometry check to find single and triple cons in the geometry. select topo under faces and box select the entire model so that any missing cons can be detected and the geometry cleanup can be done more accurately.
- Delete the unnecessary overlapping surfaces by using the universal delete option.
- Start with filling the surface and clearing the single cons by creating a surface where ever required.
- Certain areas created by using the new option under faces don't satisfy the surface we require, therefore, certain hot points are projected so that small surfaces can be created and later can be joined and get the required geometry.
- Use intersects option to delete the surface which has no separate entity, therefore a separate entity is formed when using intersect and can be deleted easily.
- Once the single cons are solved, we can focus now on solving for triple cons which are present at the shaft region since we need to have a single volume which makes it easier to mesh in the later stage. Delete the overlapping surfaces to reduce them to double cons.
- After the unnecessary triple cons are removed, we can now start naming each part by assigning them an individual PID. After naming them, we can now move ahead with surface meshing.
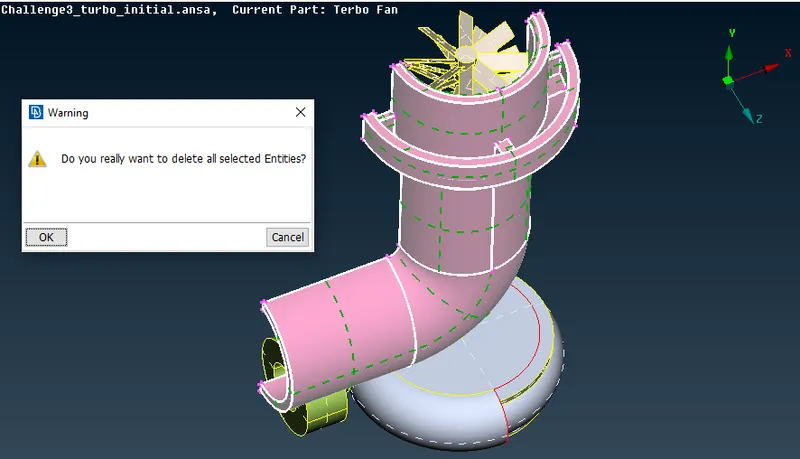
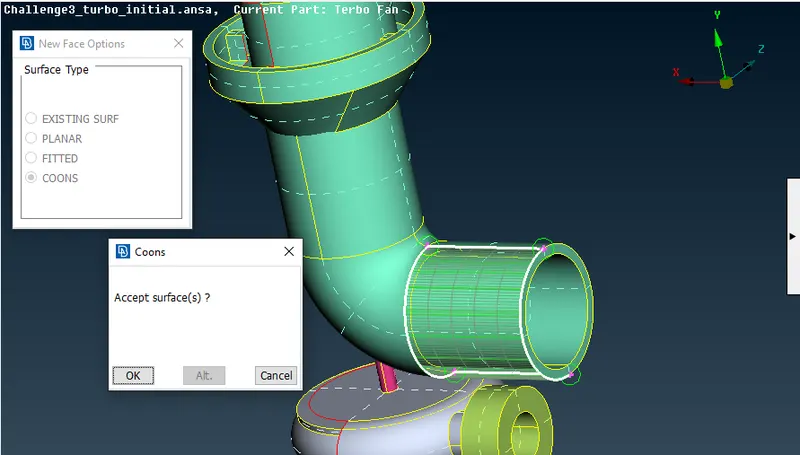
Fig 2. An overlapping surface that is to be deleted Fig 3. Creating new surfaces using COONS surface method
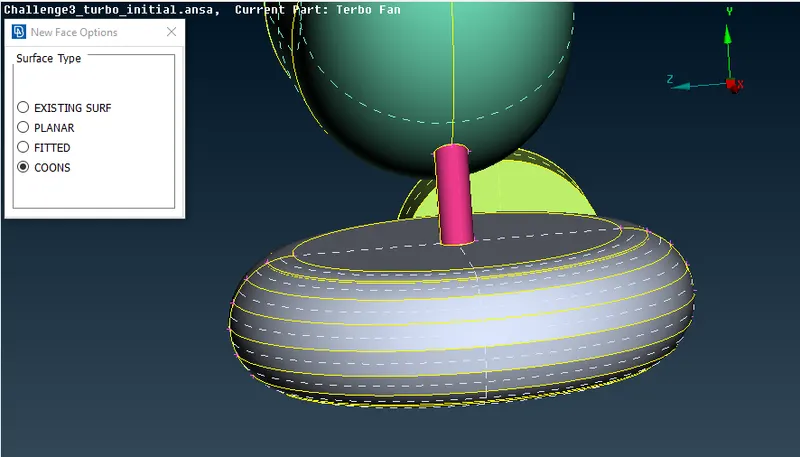
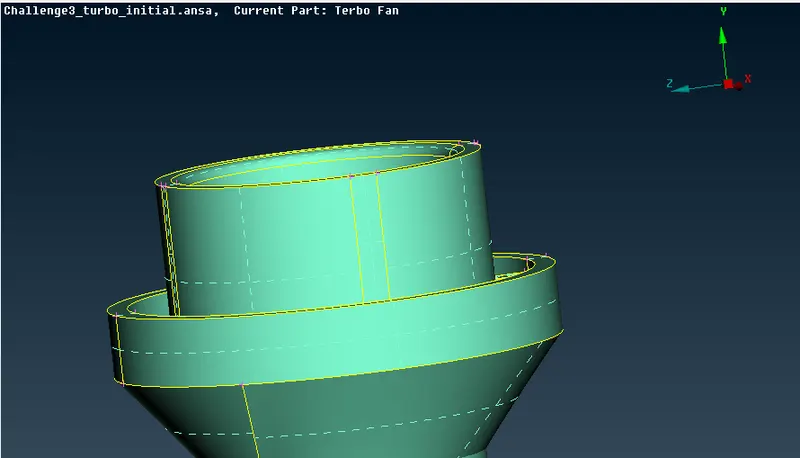
Fig 4. Creating certain surfaces using several hot points
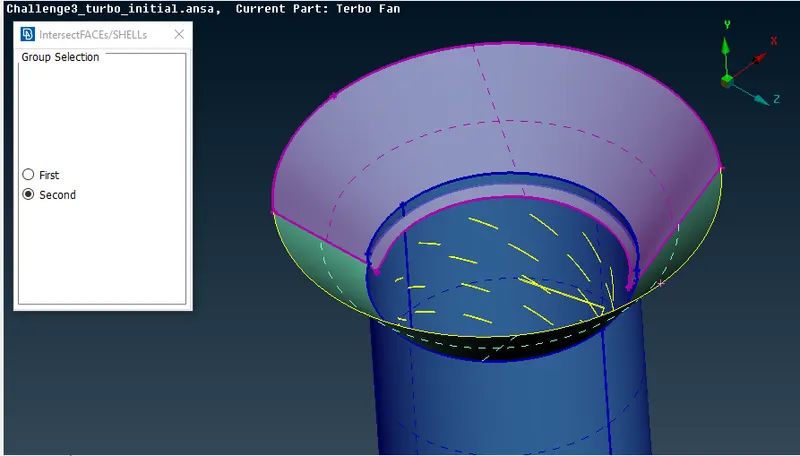
Fig 5. Using intersect method to remove extra surface
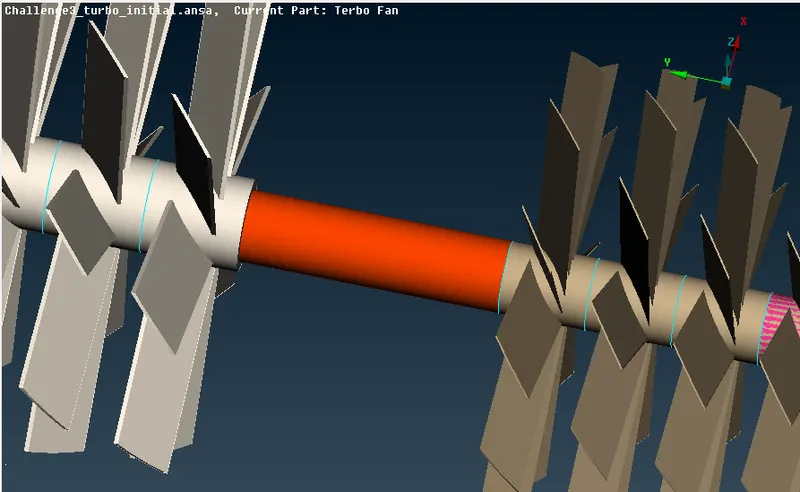
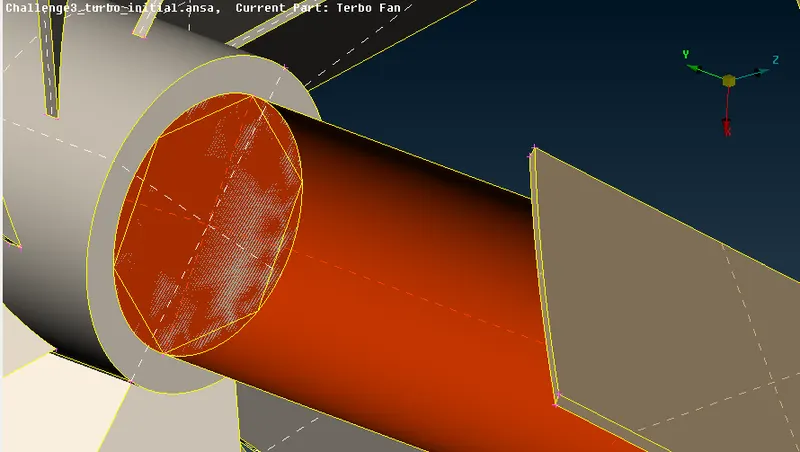
Fig 6. removing triple cons and overlapping surfaces
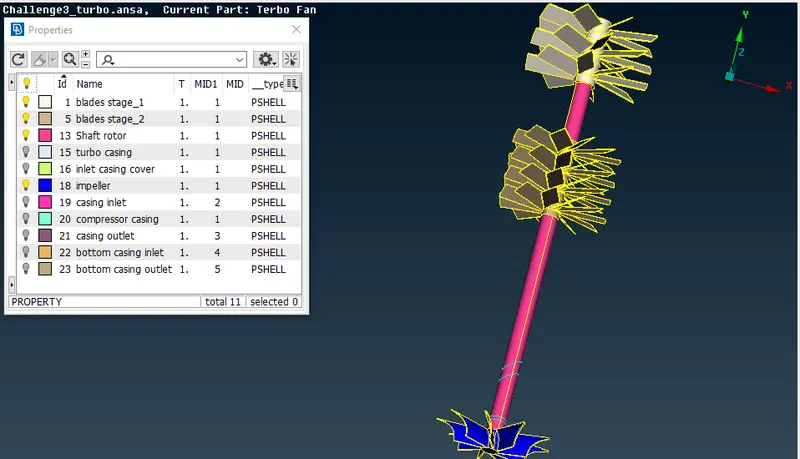
Fig 7. Components named accordingly using PID
2. Surface meshing:
- We need to mesh each component as per the given criteria in the question, therefore we need to mesh the component individually.
- Enter the quality and mesh parameters and length of the mesh accordingly for each component.
- while entering the mesh length, be aware of the change in mesh length between components with different mesh lengths, when they come in contact they tend to erase the other mesh, therefore while entering the perimeter and macros we need to give a range ranging from the bigger to smaller mesh length to avoid the mesh to get erased.
- After the mesh is generated, we can create a boundary of the varying mesh length and maintain a constant mesh length on the other side of the boundary.
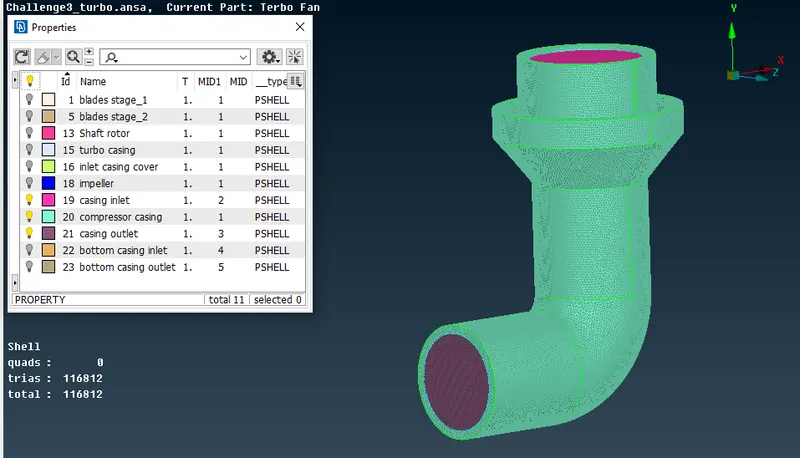
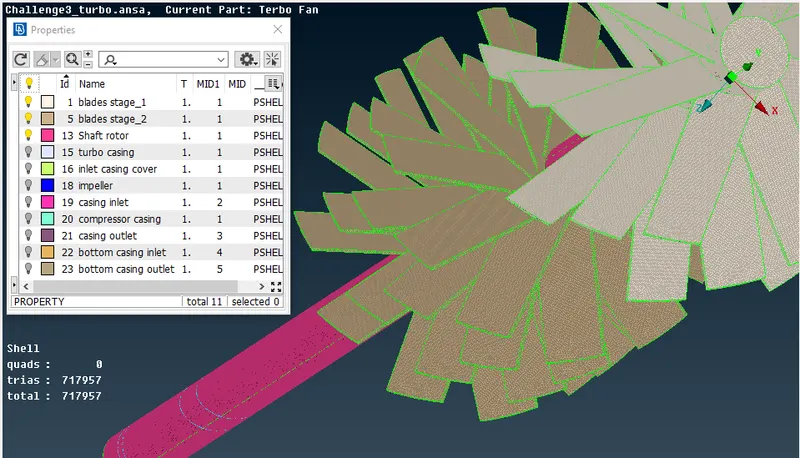
Fig 8. Surface meshing for each component individually
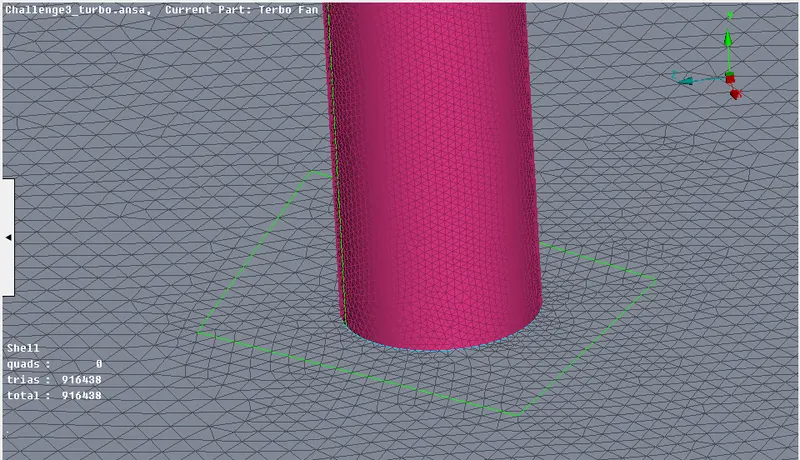
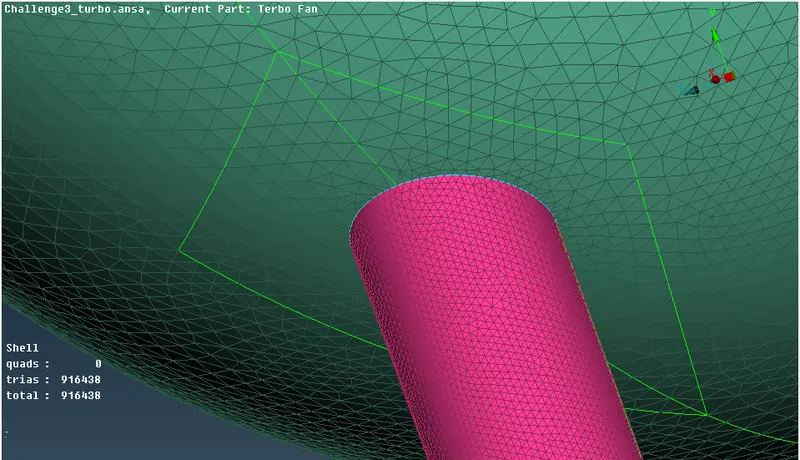
Fig 9. Creating separate regions for transition mesh
3. Volume meshing:
- After the surface meshing is done, we can now achieve volume meshing.
- Under volume meshing, choose to define and select the whole db in the pop-up window.
- ANSA identifies various volumes present in the geometry, we can delete the unwanted ones and keep the necessary volumes where the fluid can possibly flow in geometry.
- After deleting the outer thickness volume and only keeping the fluid volume region, we can mesh each volume using the tetra CFD option under the mesh.
- After each volume meshes, the volume mesh can be viewed for each component.
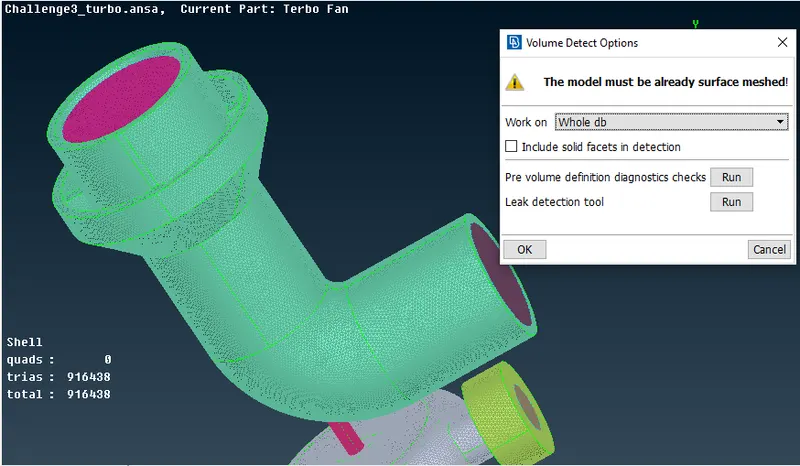
Fig 10. Identifying volume using the defined option
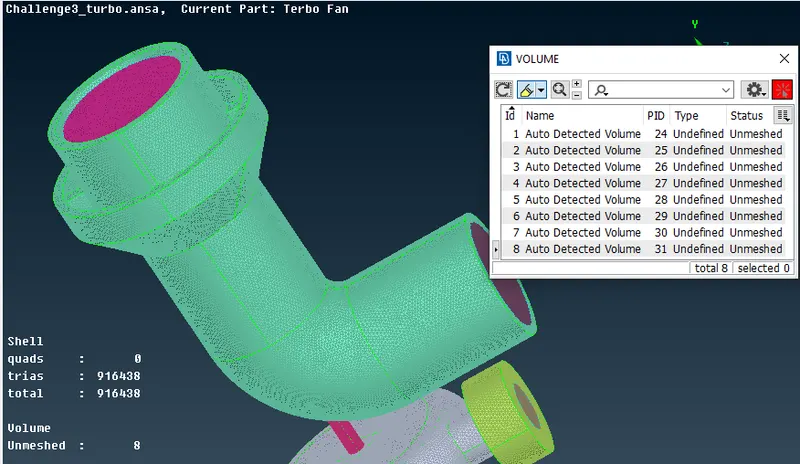
Fig 11. Detected volumes present in the geometry
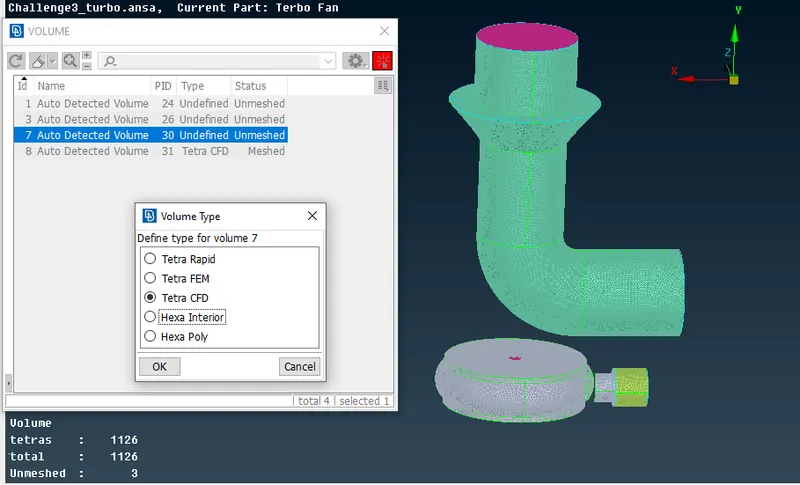
Fig 12. Creating Tetra CFD volume mesh for the fluid volume region
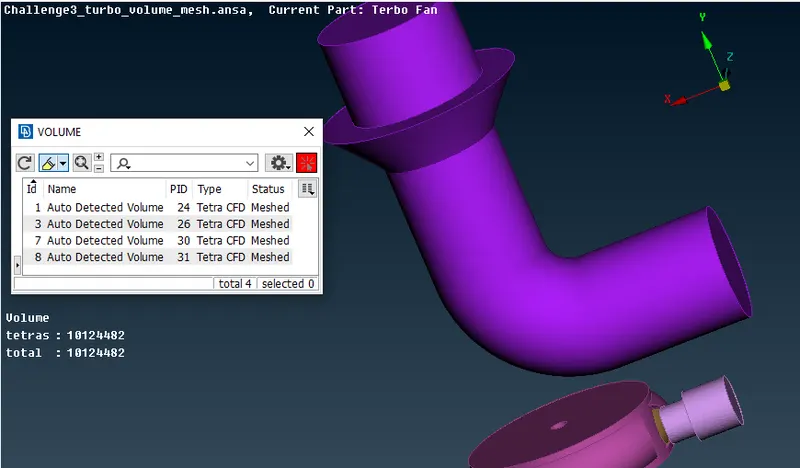
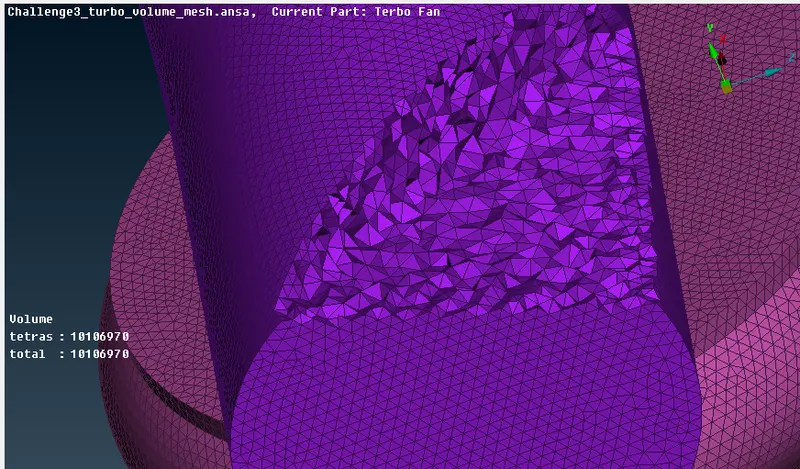
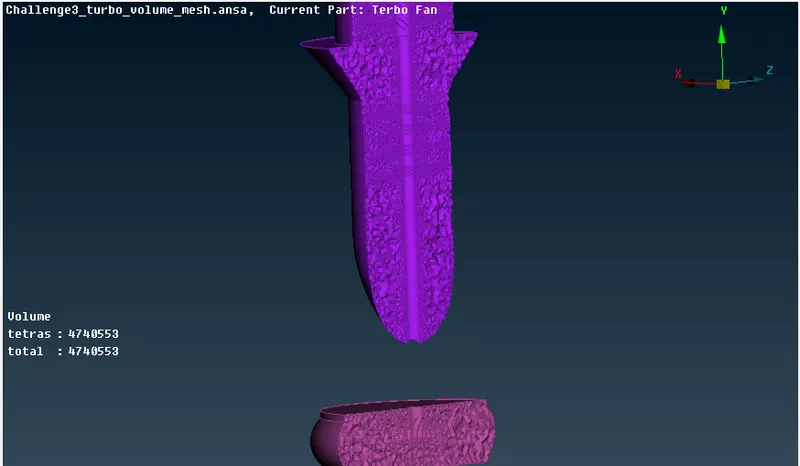
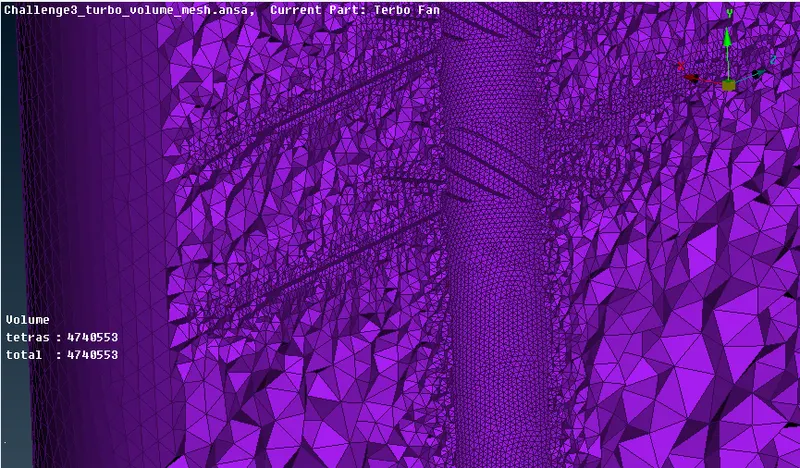
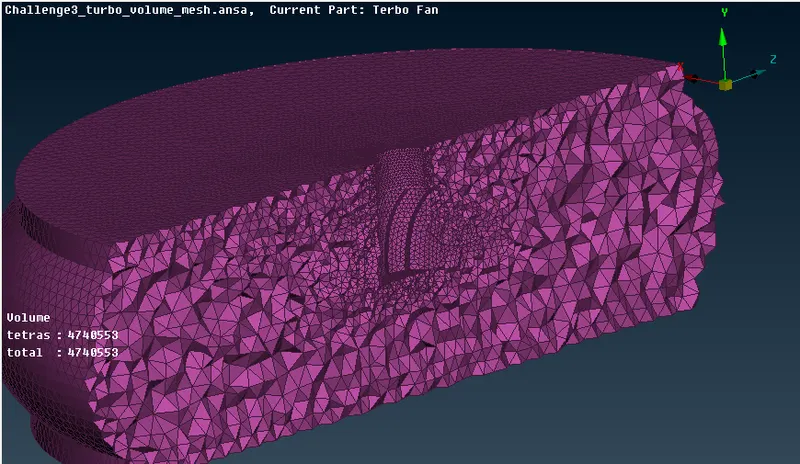
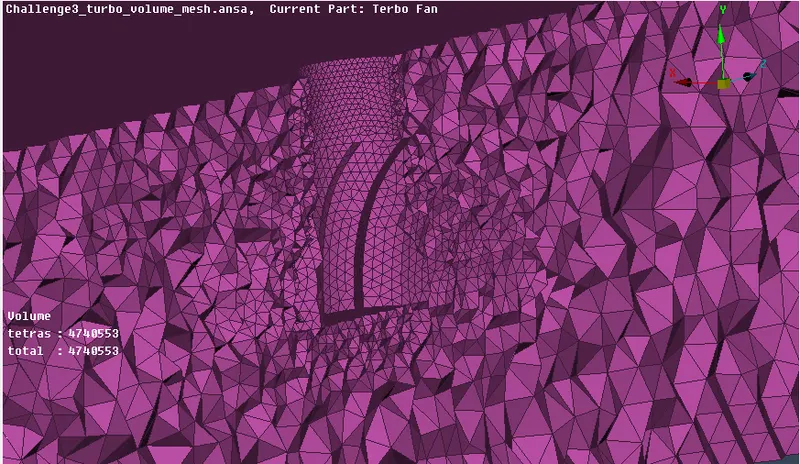
Fig 13. Volume mesh created for each volume and cut section to view the 3D mesh
Results:
- Completed geometry clean-up with all the inlets and outlets closed to create a closed volume:
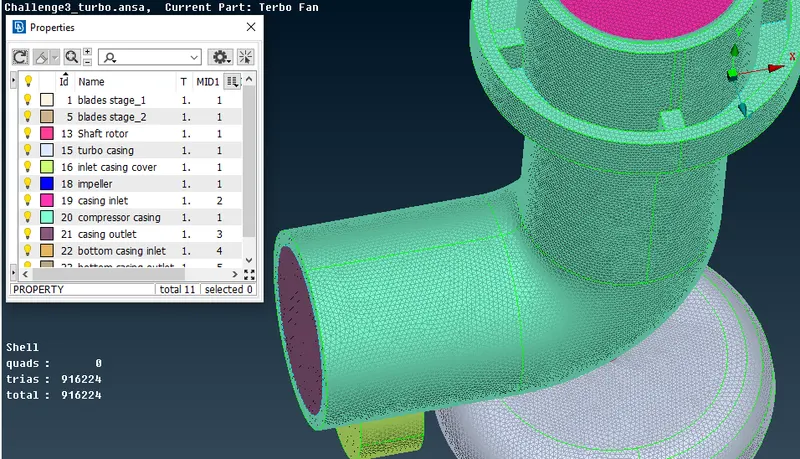
- Surface Meshing achieved with different mesh lengths as per the question:
- Volume mesh created for the fluid volume region along with cut sections to view the 3D mesh:
Conclusions:
- Achieved volumetric mesh of the turbocharger model.
- Different mesh length size tend to give errors at the contact regions of 2 different mesh length regions, therefore mesh ranges can be given to avoid erasing of mesh.
- Volumetric mesh can be achieved only after creating surface mesh successfully, or else the geometry can give fatal errors while volume meshing.
- Overlapped surfaces can be deleted using the universal delete option.
- Unnecessary single and triple cons can be removed and edited using different tools such as cons project, topo, release and fine tools while goemetry clean up.
- Successful volumetric mesh can be achieved only after correct geometric cleanup and surface mesh.