Usage of Collaborate tool in REVIT
1.ans.:) Aim:- Setting project base point and project shared coordinates for the project in a architectural model
Tools used:- REVIT, Architectural template, Manage tab, grids etc.
Procedure:
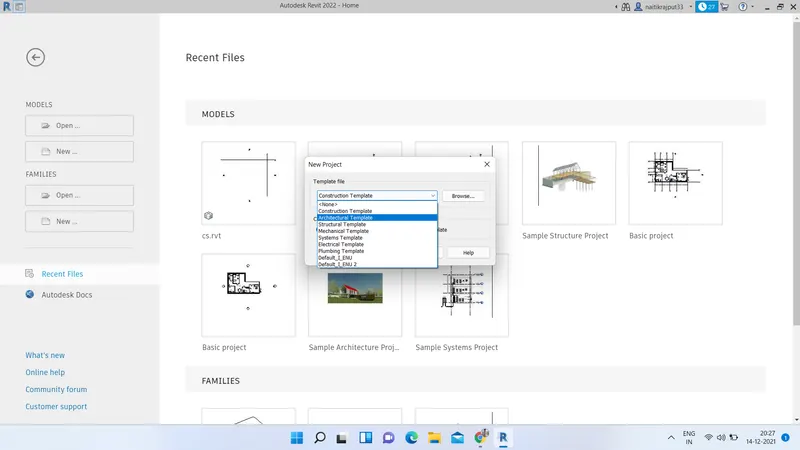
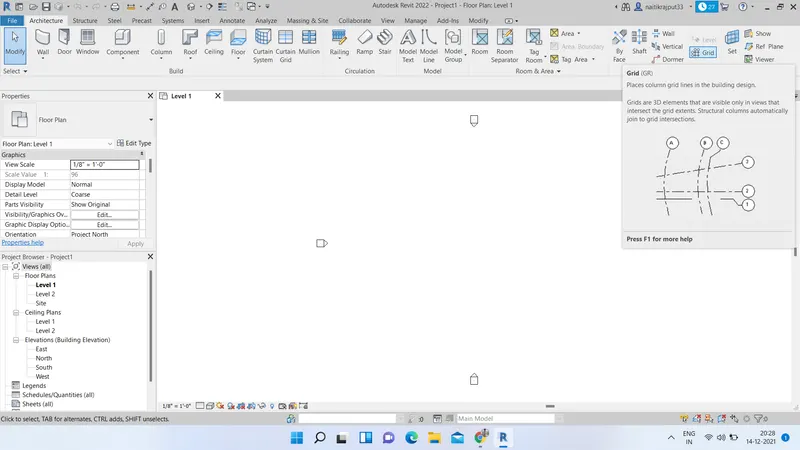
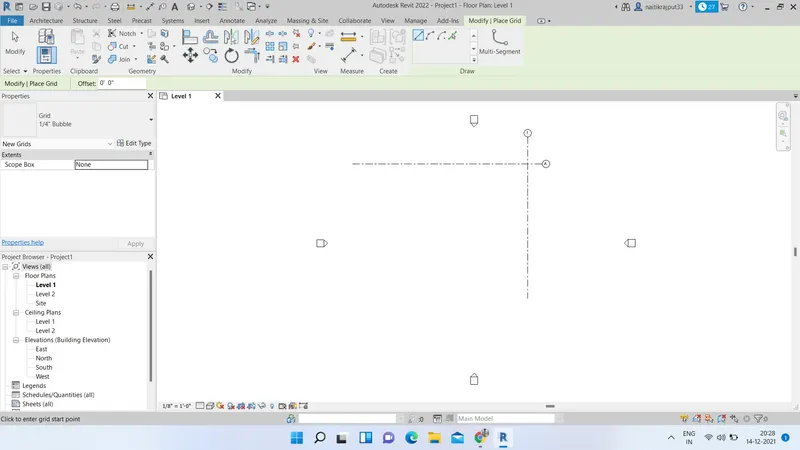
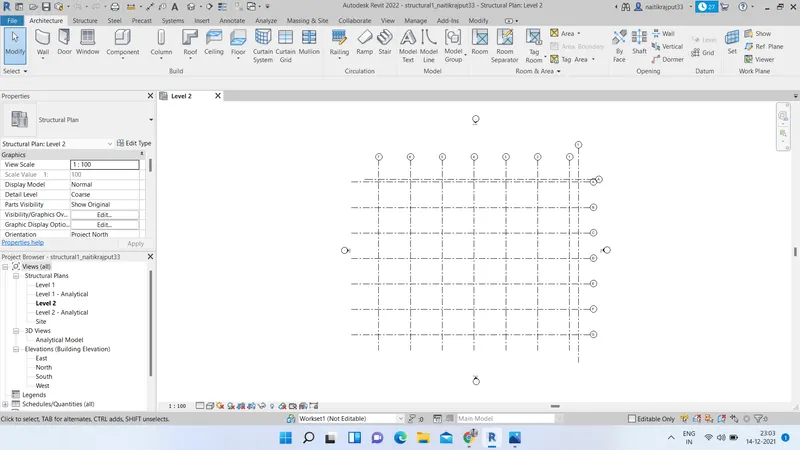
- Launch Revit and Open a new archiectural template using New option. From Architecture tab select grids option and draw horizontal and vertical grids and name it for a base point reference.
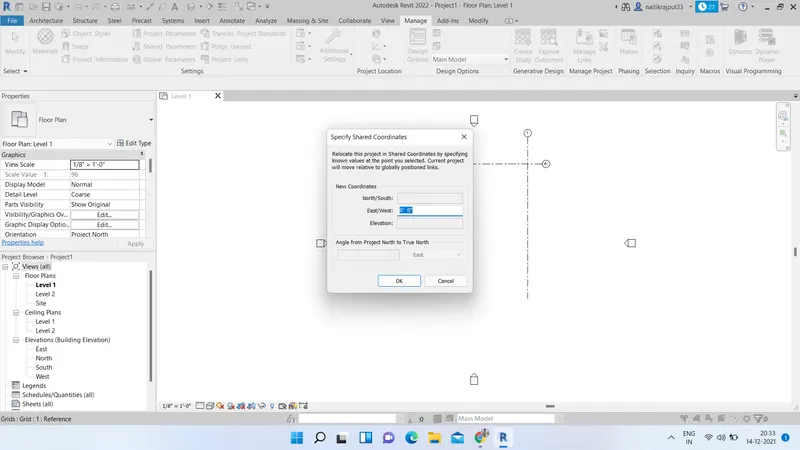
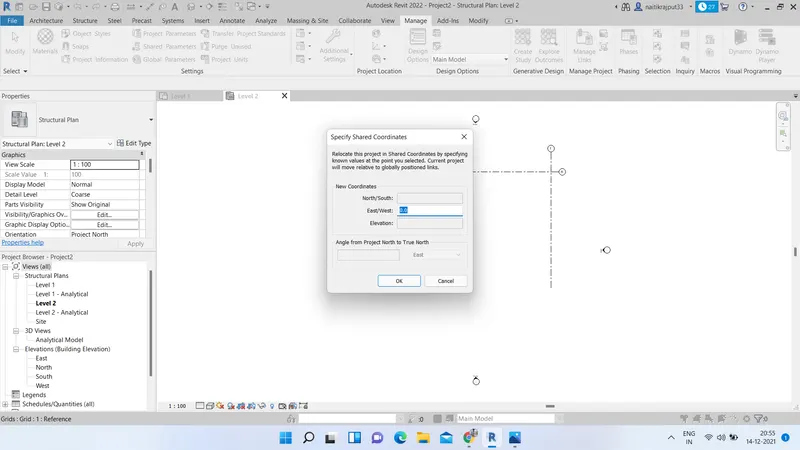
- Now go to manage tab. Select specify coordinates at a point from coordinates option.
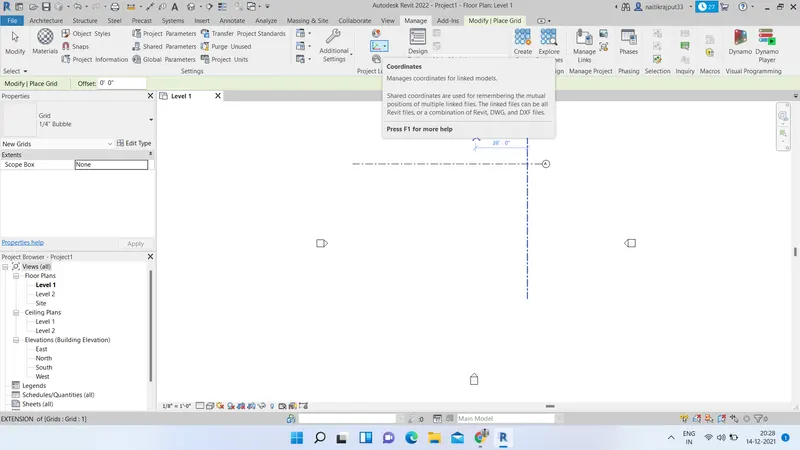
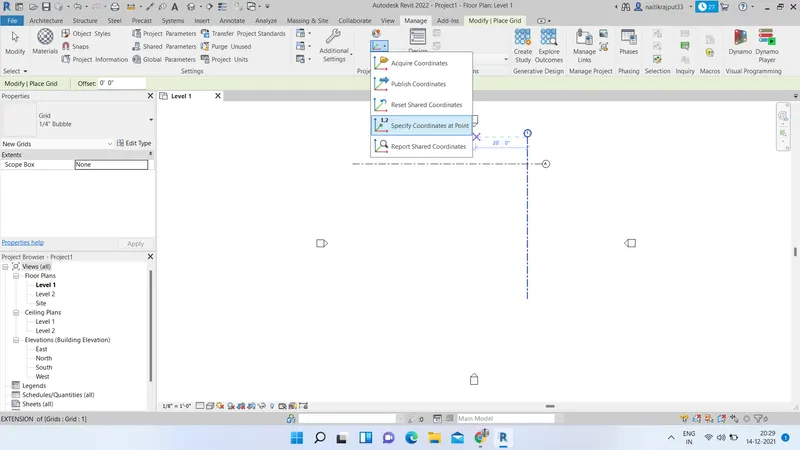
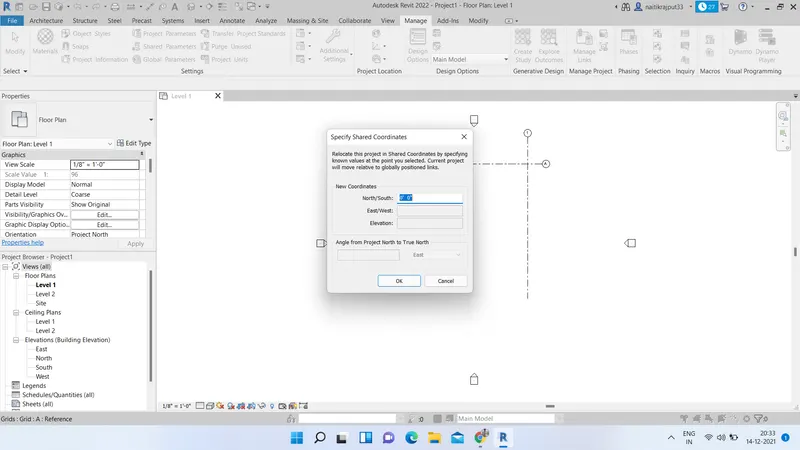
- Specify coordinates w.r.t. grid for north/south and click on OK button. Similarly repeat the steps and specify the same for east/west.
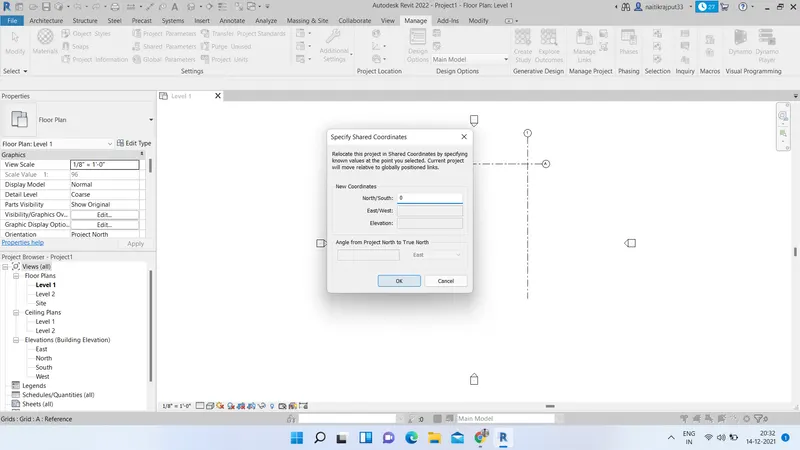
Result
Thus new shared coordinates are projected for the project. We can view them by using coordinates option and selecting grids.
2.ans.) Aim:- Using the manage tab setting of project parameters same as the architectural model in a new structural model.
Tools used:- REVIT, Architectural template, Manage tab, grids etc.
Procedure:
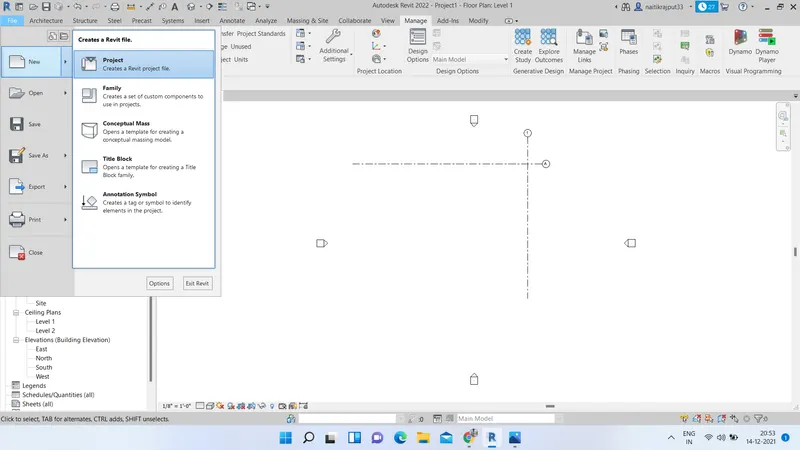
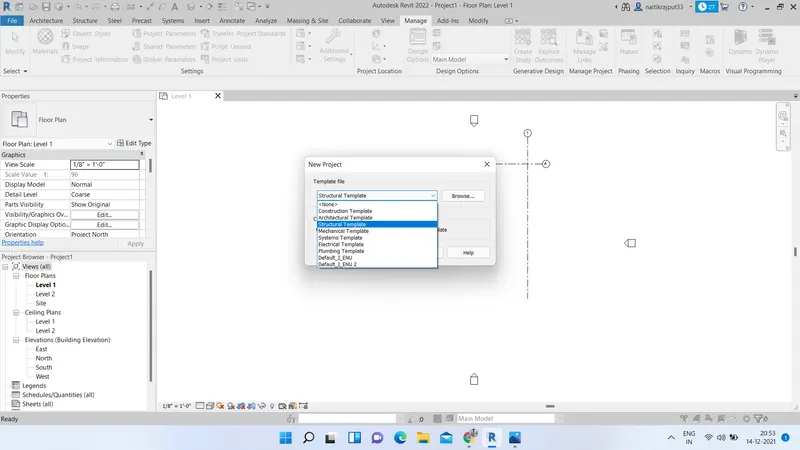
- Go to File-->New-->Project. Select structural Template under template dropdown and click OK.
- From structure tab select grids option and draw horizontal and vertical grids and name it for a base point reference.
- Now go to manage tab. Select specify coordinates at a point from coordinates option.
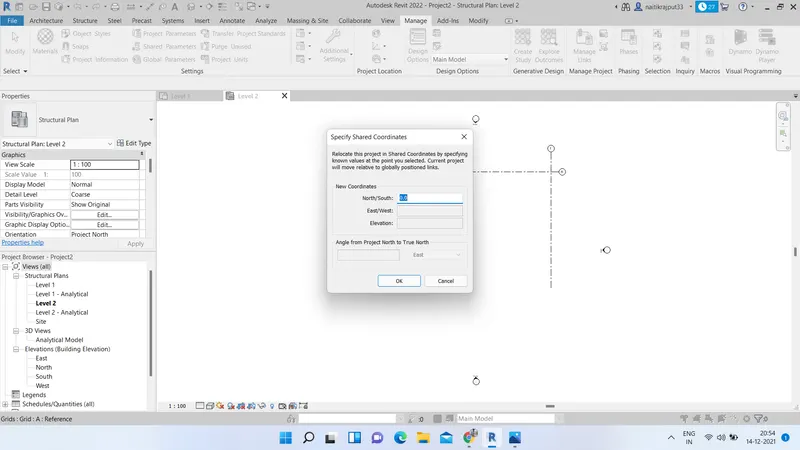
- Specify coordinates w.r.t. grid for north/south same as entered in previous architectural model and click on OK button. Similarly repeat the steps and specify the same for east/west.
Result
Thus new shared coordinates are projected for the project. We can view them by using coordinates option and selecting grids.
3.ans.:) Aim:- Using the tools under the Collaborate tab making the architectural model a central model.
Tools used:- Revit, Collaborate tab
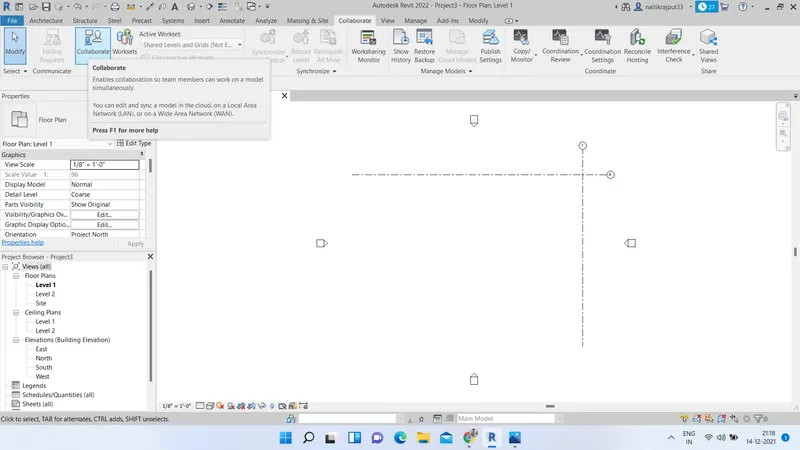
The central model stores the current ownership information for all elements in the project, and acts as the distribution point for all changes published to the file. A model can be made Central with help of collaborate tab present in Revit. Ww can link multiple Revit models together, allowing team members to work in context. Through worksharing, users on the same local area network (LAN) can work together in the same Revit model.
Procedure:
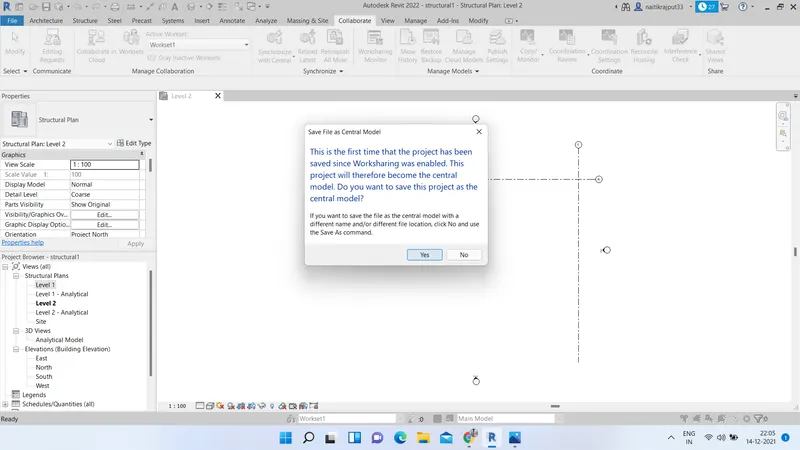
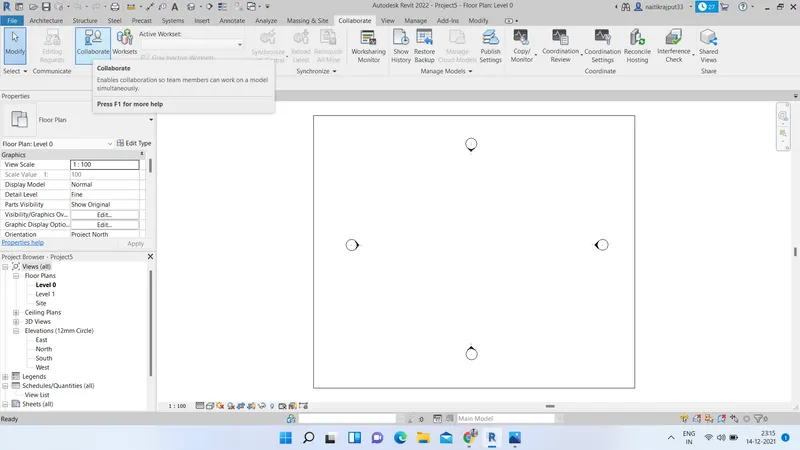
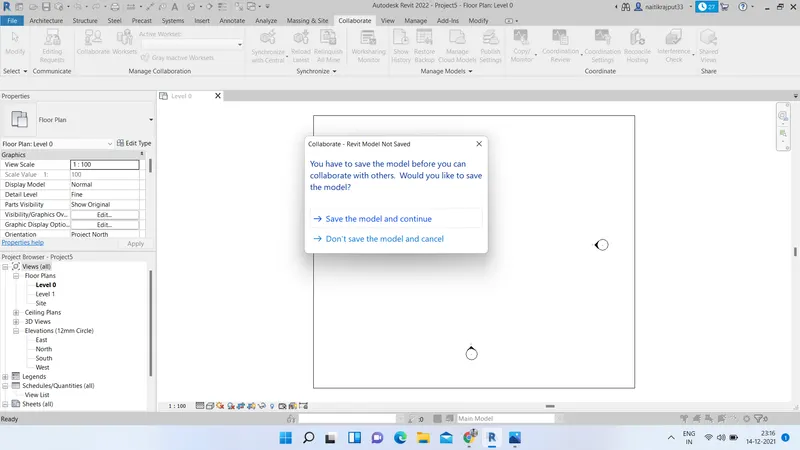
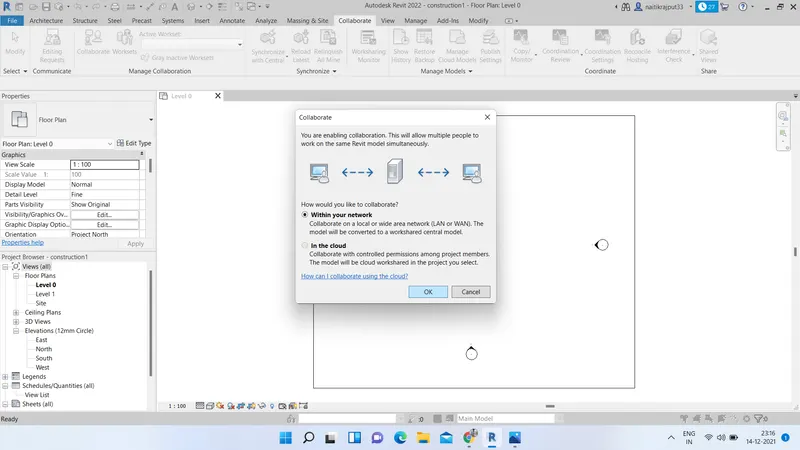
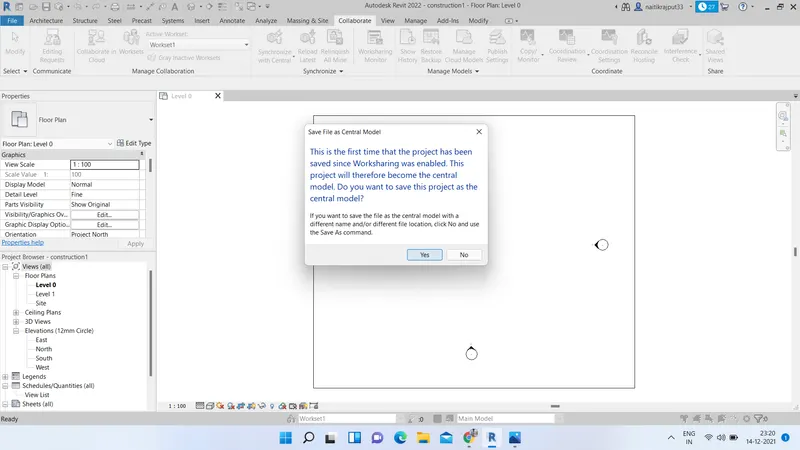
- Reopen the architectural model created at first. Go to Collaborate tab and select Collaborate option. Save the file if not saved already to continue.
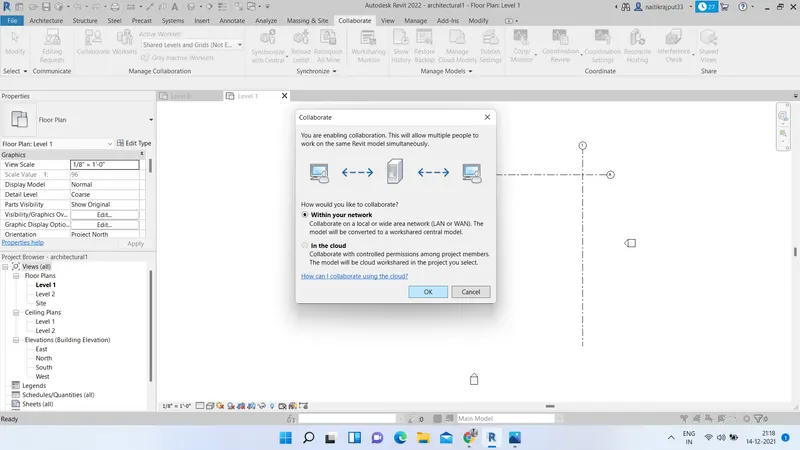
- Collaboration dialog box will appear. select within your network and click OK button.
Result:
Our model is now a Central model for further purposes.
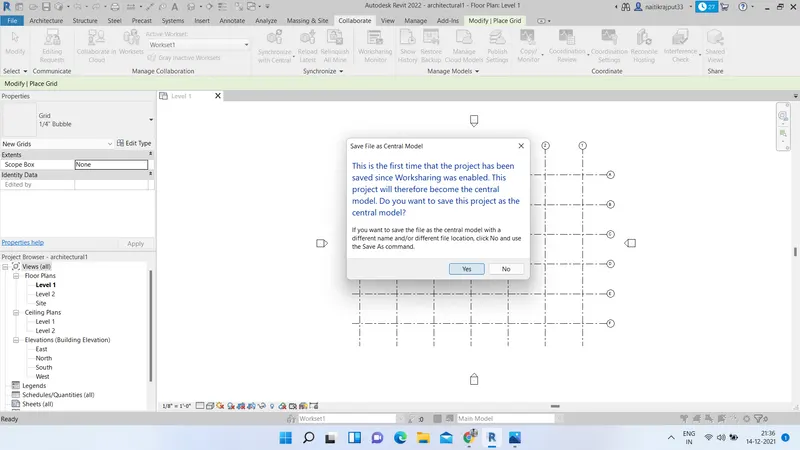
4.ans.) Aim:- Creating Longitudinal and Transverse pattern grids for the project.
Tools Used:- Revit, Architecture tab, Grids
Grids are annotation elements that help organize our design. Grid lines are added to a model to create a reference and framework for the design.
Procedure:
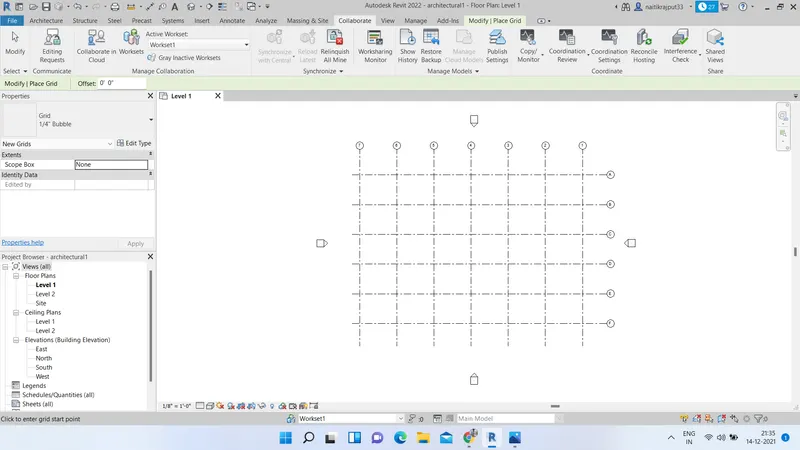
- In the Architectural model go to architecture tab. select grids option.
- Draw the desired transverse grids at desired spacings.
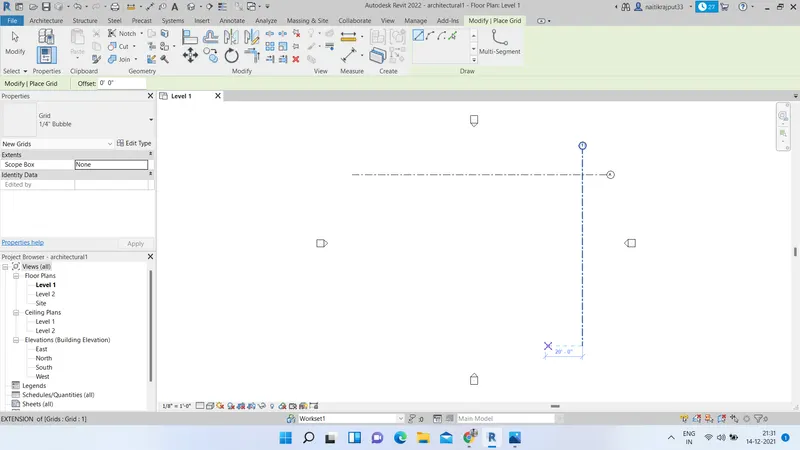
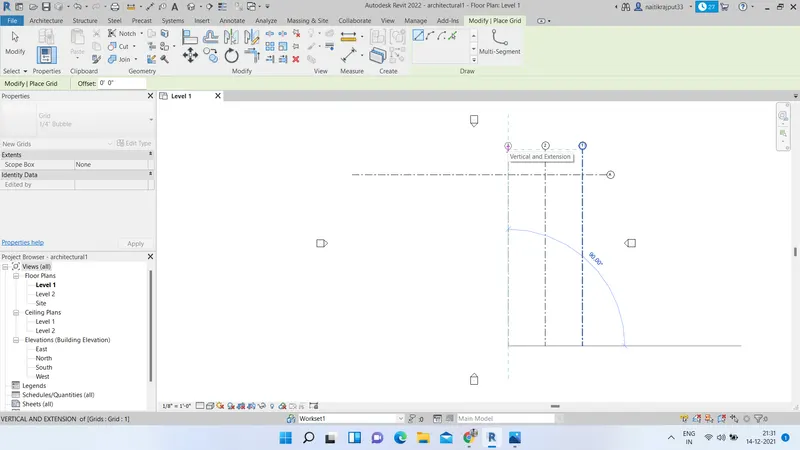
- Now, similarly draw longitudinal grids at desired spacings.
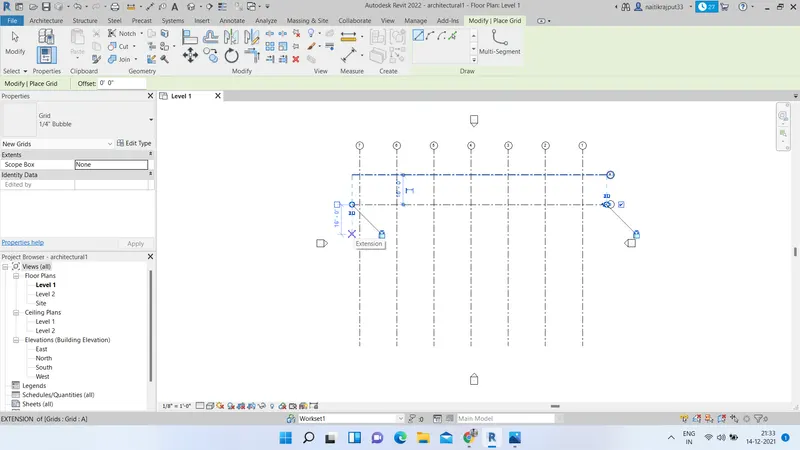
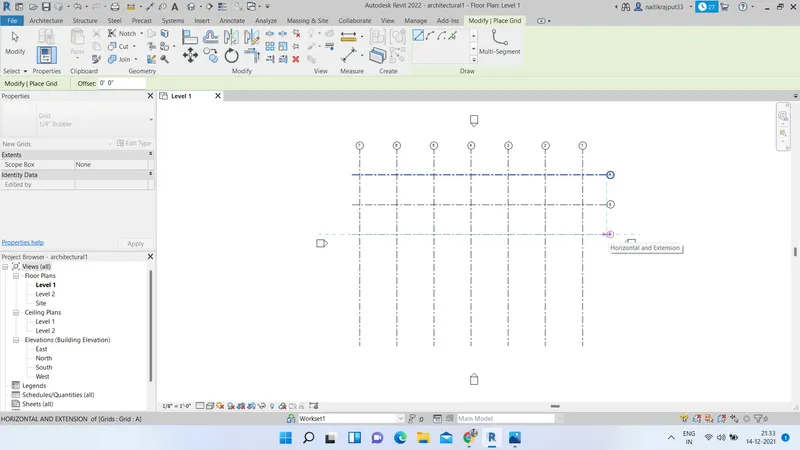
Results:
Desired latitude and longitudinal grids are framed for further use in project.
5.ans.:) Aim:- To Synchronize the changes from the local copy to the central file of the architectural model.
Tools used:- Revit, Collaborate tab
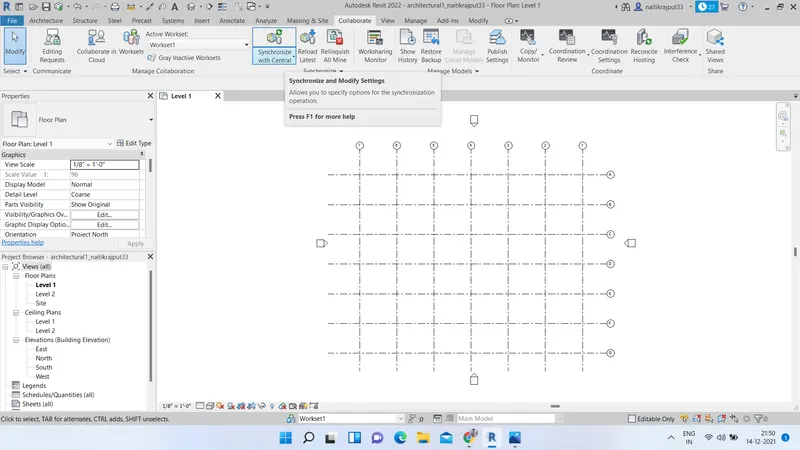
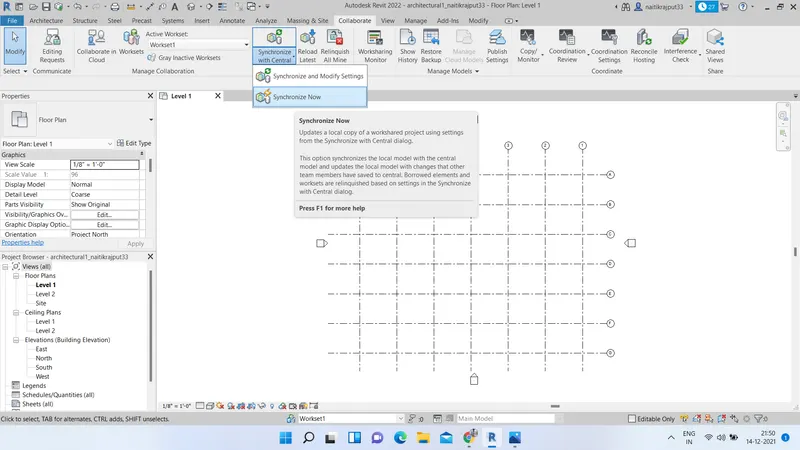
When working on a workshared project,the Synchronize with Central tool help to save our local changes to the central model.
- Go to Collaborate tab and Select Synchronize with Central button. From dropdown select Synchronize Now button.
Result:
Our changes in local model is now synchronised with Central model. All our changes made locally get reflected in central too.
6.ans.:) Aim:- Use of collaborate tools to save the Structural model as a central file.
Tools used:- Revit, Collaborate tab
The central model stores the current ownership information for all elements in the project, and acts as the distribution point for all changes published to the file. A model can be made Central with help of collaborate tab present in Revit. Ww can link multiple Revit models together, allowing team members to work in context. Through worksharing, users on the same local area network (LAN) can work together in the same Revit model.
Procedure:
- Reopen the structural model created at first. Go to Collaborate tab and select Collaborate option. Save the file if not saved already to continue.
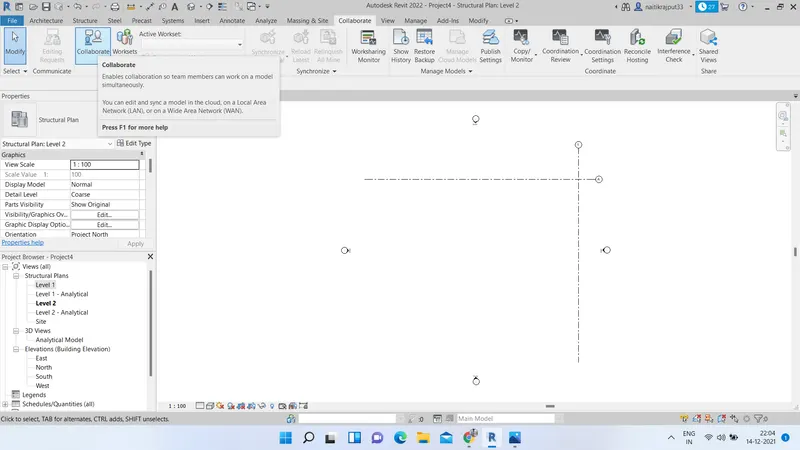
- Collaboration dialog box will appear. select within your network and click OK button.
Result:
Our model is now a Central model for further purposes.
7.ans.:) Aim:- Selecting the grids and levels from the architectural model, and using Copy Monitor try to copy the grids to the structural model.
Tools used:- Revit, Collaborate tab, Manage tab and other options
The Copy/Monitor tool is designed for use with elements of a building model to streamline coordination and collaboration on a project that involves multiple teams.The linking of each other's models using Revit's Copy/Monitor feature provides immediate visual feedback on what the other members are doing.
- Open the structural model and link architectural model using Manage tab-->Manage links and adding revit file.
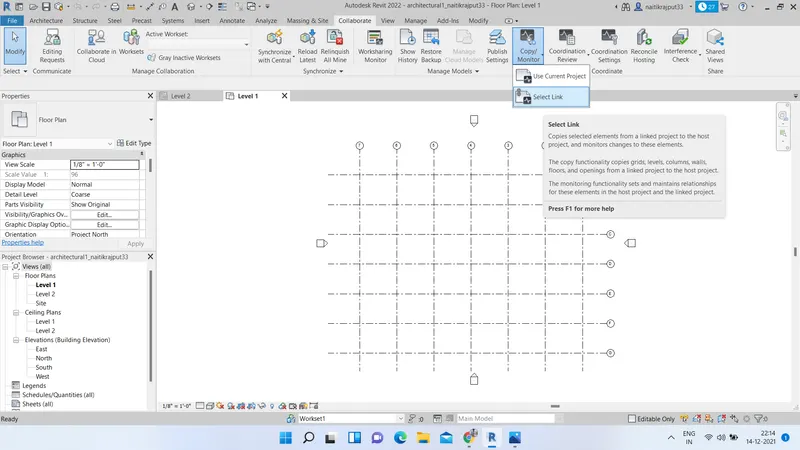
- Open the Architectural model and go to Copy/Monitor button under collaborate tab. Click on select link option from dropdown.
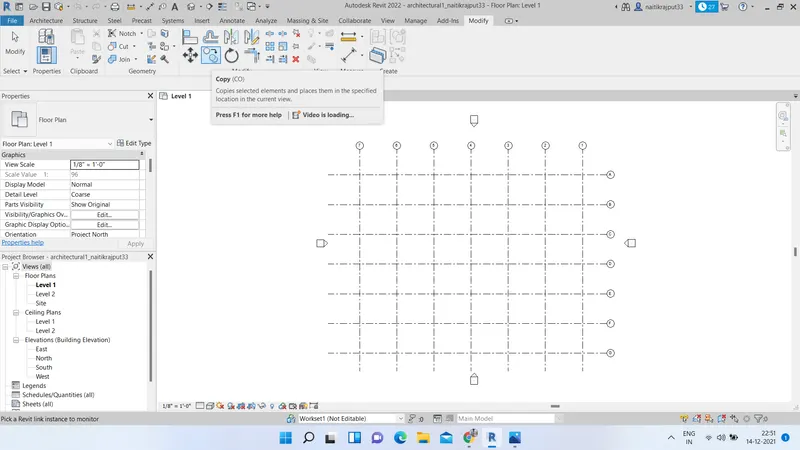
- Select copy from Modify tab and select the Grids and click on finish button.
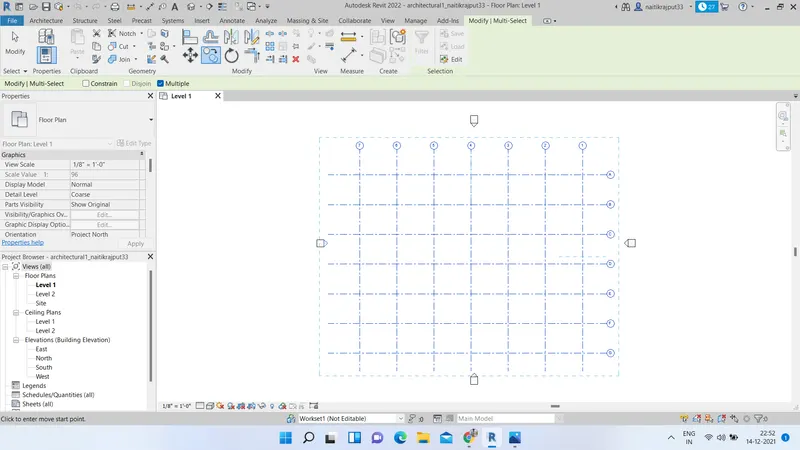
Now, Open the structural model. Grids will be copied from architectural model to that.
Result:
All the grids get copied from architectural model to structural model. But their coordinates are different, they need to be synchronised.
8.ans.:) Aim:- Linking both architectural and structural files in a single construction template and saving that as central model.
Tools used:- Revit, Manage tab, Collaborate tab
Linking models is primarily intended for linking separate buildings, such as those that compose a campus. We can link architectural models, structural models, and MEP models.
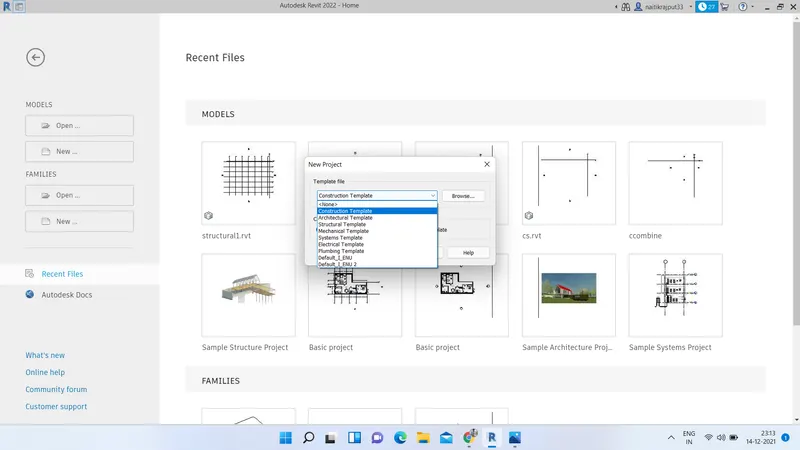
- Go to File-->>New-->>Project. Select Template as Construction Template and click Ok button. Now save it as Central file using Collaborate tab-->> Collaborate option. Save with desire name and make it a central file.
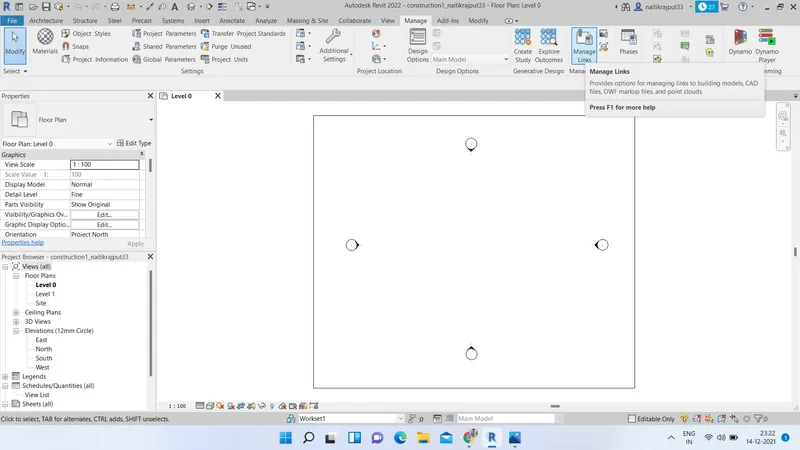
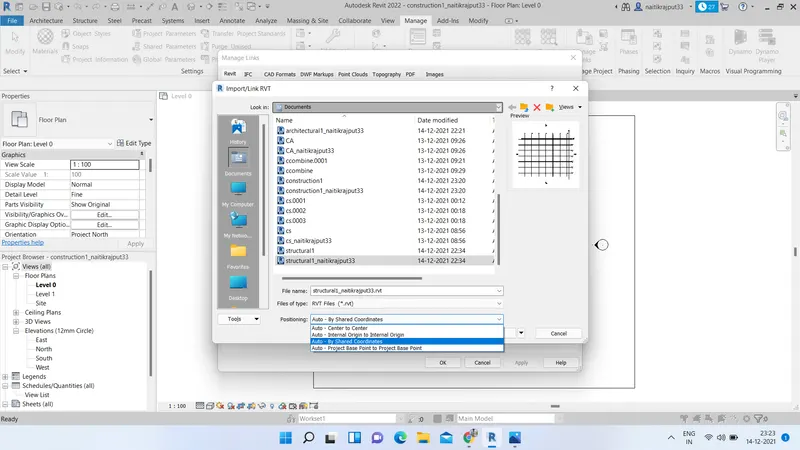
- Now go to manage tab. select manage links option.
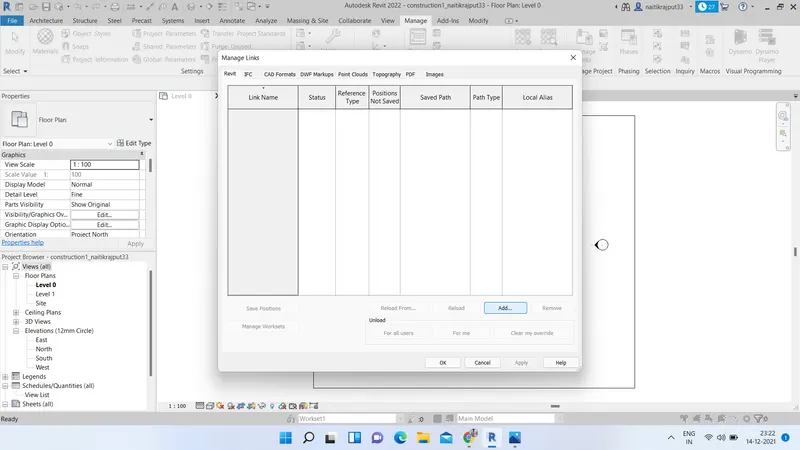
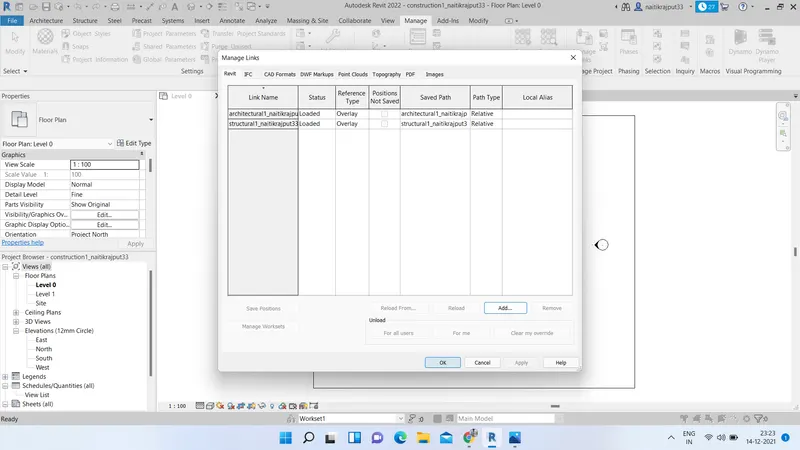
- Add both structural and architectural models to link into construction template. Use by shared cpoordinates option under positioning system. Click on Ok finally to Load.
Result:
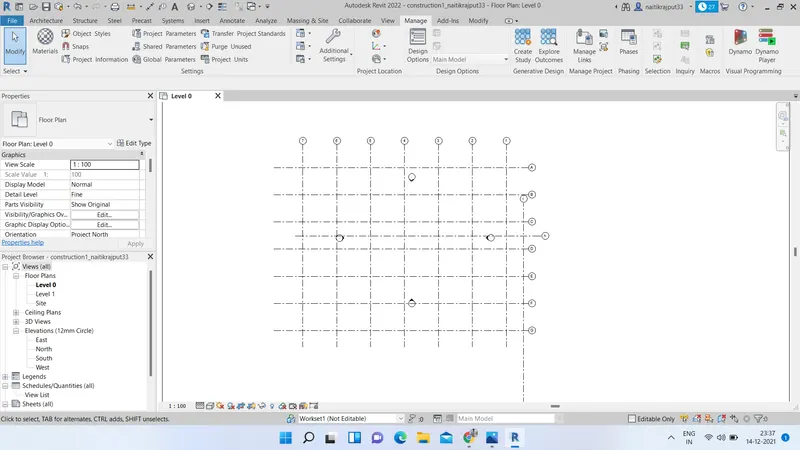
Both models are linked into construction template.
9.ans.) Aim:- To match the grids of Architectural and structural model linked in Construction Template.
Tools used:- Revit, Manage tab
We can see from result of previous question that grids are not matching. We need to match them for our further use in project.
- Go to manage tab. Select a Revit linked model.
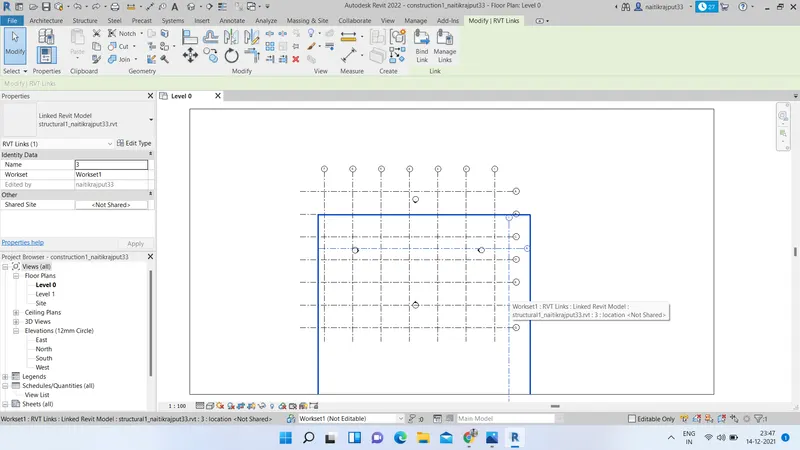
- Under modify Revit links tab select move option. Select the point to be moved and select the destination point. Click Ok.
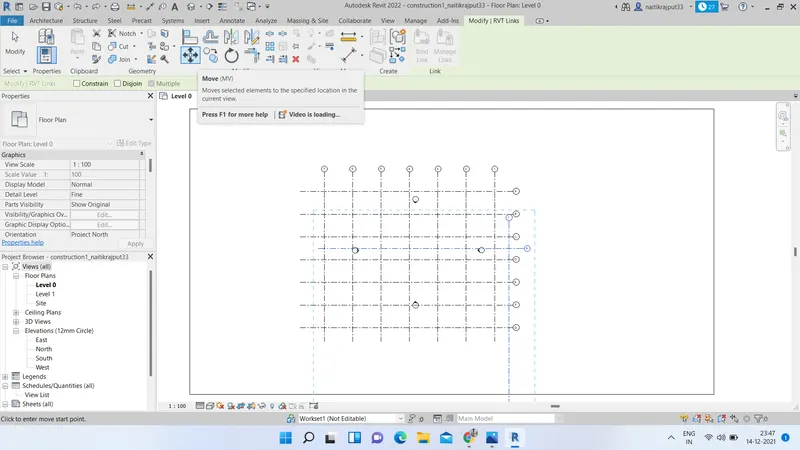
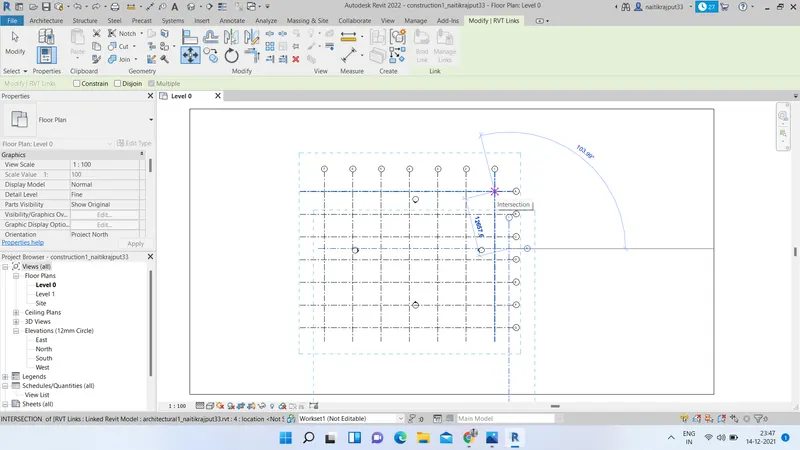
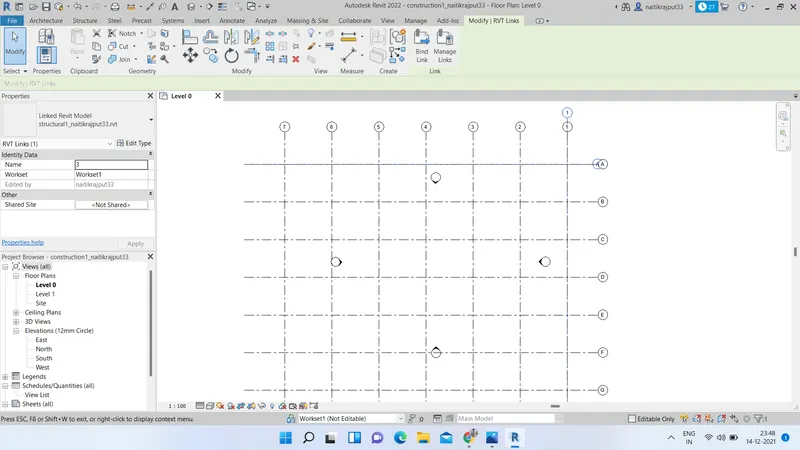
After this Grids are matched of both models.
Result:
Both architectural and structural grids are now matched in a combined file. We can save it for our next project.
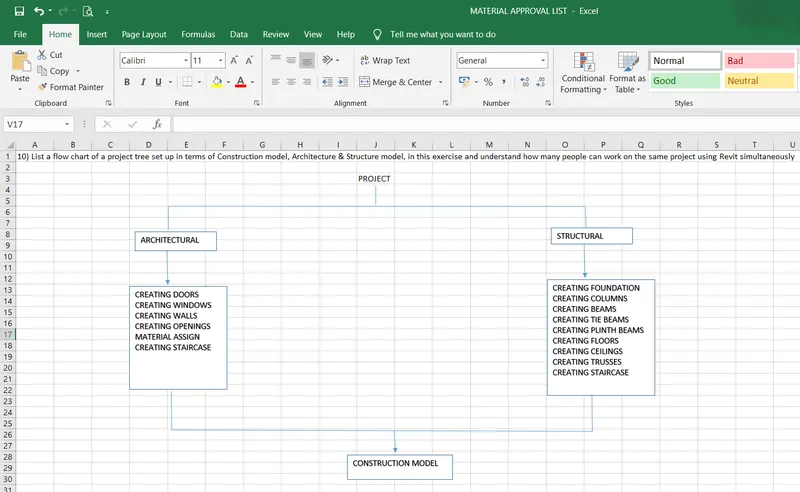
10.ans.) Aim:- Creating a flow chart of a project tree set up in terms of Construction model, Architecture & Structure model.
Tools used:- Ms Excel
We can infer that at a same time many people such as architects, structural engineer, planning person, Manager ,designer, Modeller etc. can work in Revit simulatneously. All the persons can design their own sector and manage workload during a project simultaneously.