Preparing Schedule & Cost Estimation for a building using REVIT
1.ans.:) Aim:- Using the shortcut keys to complete the tasks in Revit and listing them below.
Shortcut keys help provide an easier and quicker method of navigating and executing commands in the computer software. Shortcut keys are performed using the Alt key, Ctrl key, or Shift key in conjunction with another key.
We can add keyboard shortcuts in Revit by:
- Click View tab-->Windows panel-->User Interface drop-down-->Keyboard Shortcuts.
- In the Keyboard Shortcuts dialog, locate the desired Revit tool or command.
- Add a keyboard shortcut to a command:
- Select the desired command from the Assignments list.
- Press the desired key sequence.
- When the desired key sequence displays in the field, click Assign.Add a keyboard shortcut to a command.
- Select the desired command from the Assignments list.
The new key sequence displays in the Shortcuts column for the selected command.
Shortcuts used in Revit to do following tasks:-
- Using 3D model create a section box -----> BX
- To create similar doors and windows in a floor plan layout -----> BX
- To reduce the thickness of lines visible in plan views -----> CS
- To apply override settings to a floor in the model section view -----> EOD
- To increase the range of visibility in a plan view -----> VR
- To select the previously selected items -----> CTRL+<
- To add annotations to the model views -----> DI
- To bring the model elements in line -----> AL
- To rotate the model elements -----> RO
- To move an object to another location -----> MV
- To copy a model element -----> CO/CC
- To mirror an element about an axis ----->MM
- To create an array of model elements ----->AR
2.ans.:) Aim:- Using Revit and the project used from week 6 to 8 preparing a schedule for the Walls, Doors, Windows and Materials – Concrete/Wood.
Tools used:- Revit software, projects, View tab etc.
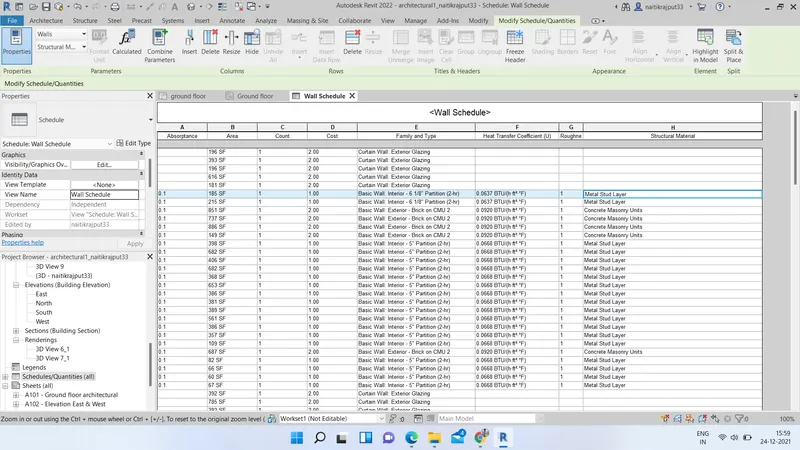
A schedule is a tabular display of information, extracted from the properties of the elements in a project. A schedule can list every instance of the type of element you are scheduling, or it can collapse multiple instances onto a single row, based on the schedule's grouping criteria. We can create a schedule at any point in the design process. As we make changes to the model that affect the schedule, it automatically updates to reflect those changes. We can add a schedule to a drawing sheet for further presentation.
For adding Schedules open the project created for previous project and follow the following steps:-
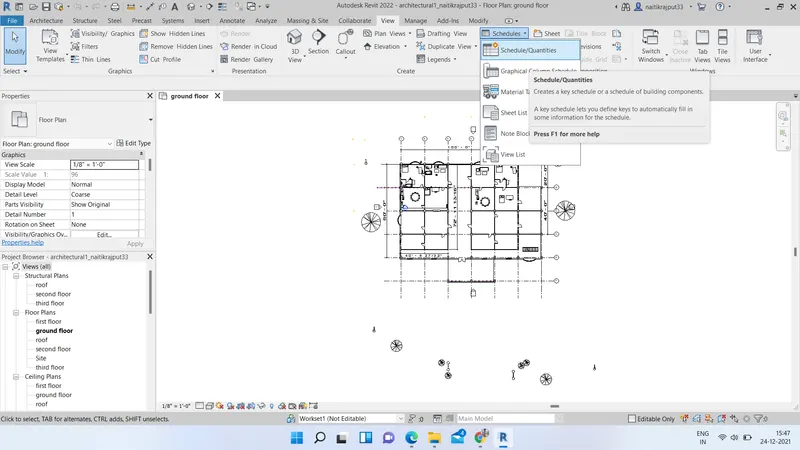
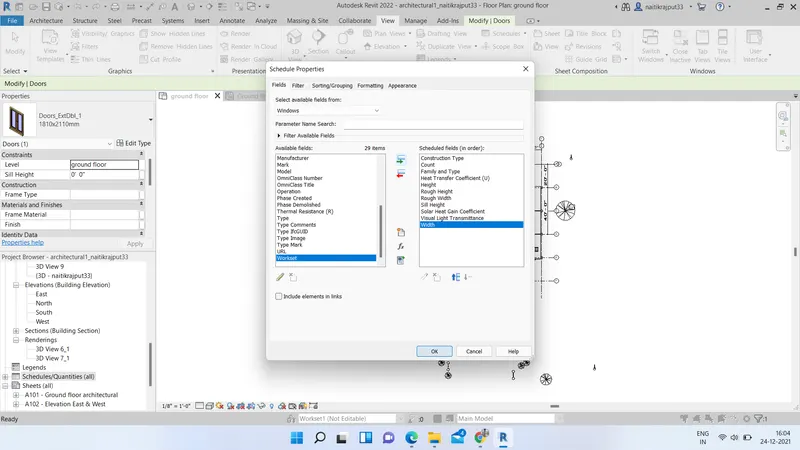
- Go to View tab and go to schedules option. Select Schedule/Quantities option from there.
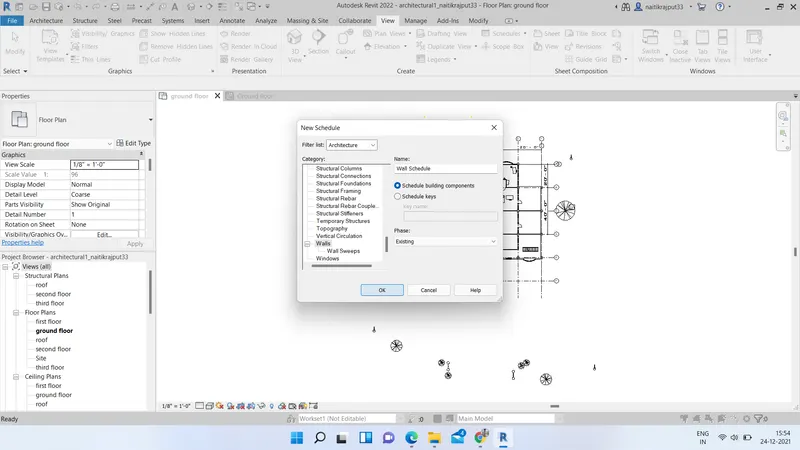
- Select the filter type as Architecture and category walls. Select phase and click on OK.
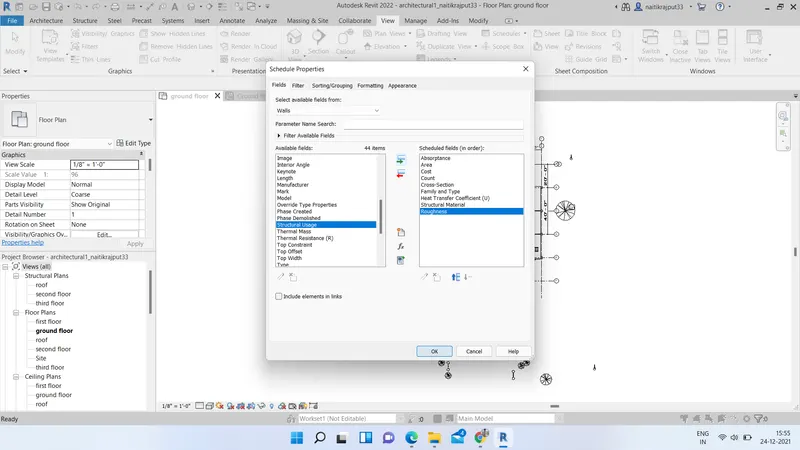
- Select the scheduled fields from the available fields and click on OK button. Wall schedule will be done.
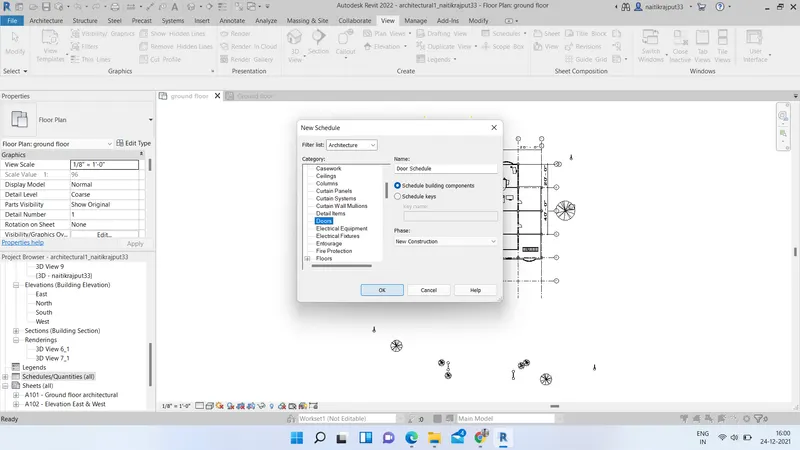
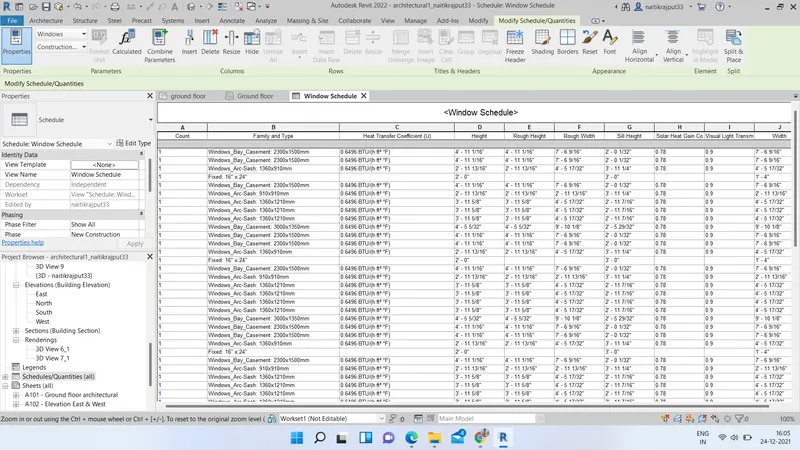
- Similarly prepare the schedule by selecting Doors, Windows and materials under architecture filter.
Results:-
Desired Scheduling of Walls,Windows,Doors etc. are done and are presented as below:
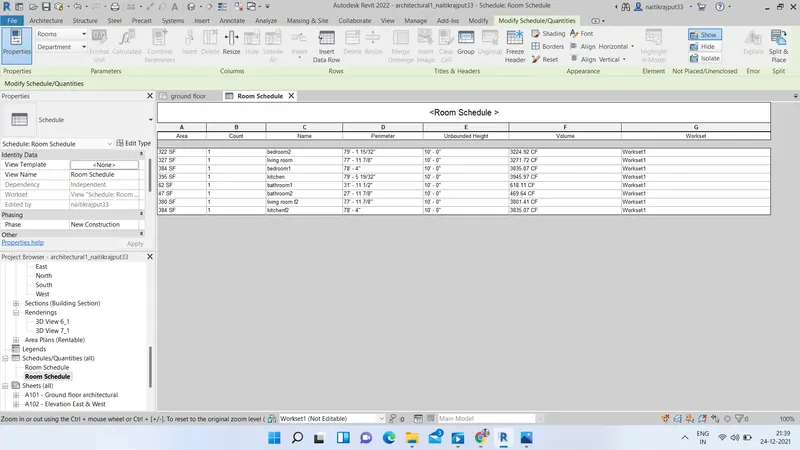
3.ans.:) Aim:- Using Revit Calculating area and volume of each room in the model with appropriate room tags and preparing Schedule of each Room.
Tools used:- Revit software, Architecture tab, View tab, Schedules options etc.
A schedule is a tabular display of information, extracted from the properties of the elements in a project. A schedule can list every instance of the type of element you are scheduling.
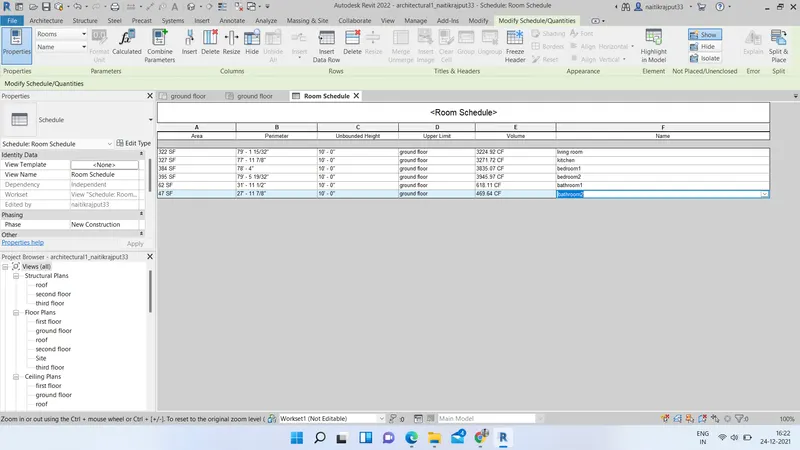
Open the project created and go to architecture tab. Using Room option create room and rename it using desired tag. Now, by selecting rooms we can see Area, volume etc. in property browser window or we can go to Area plan and create an area using defined room.
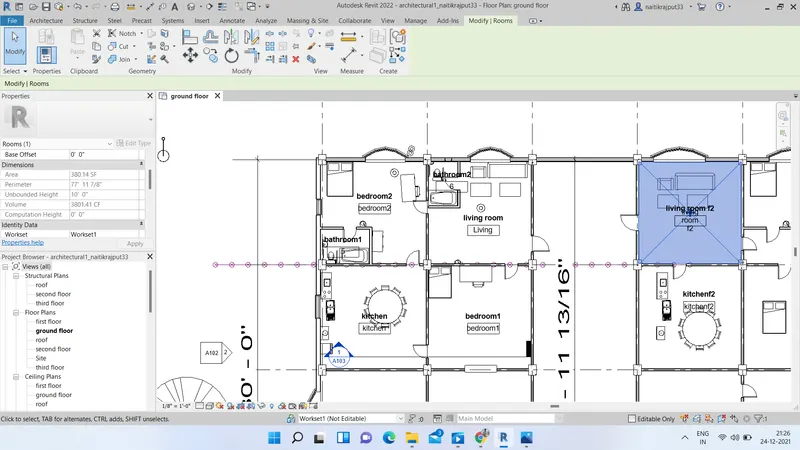
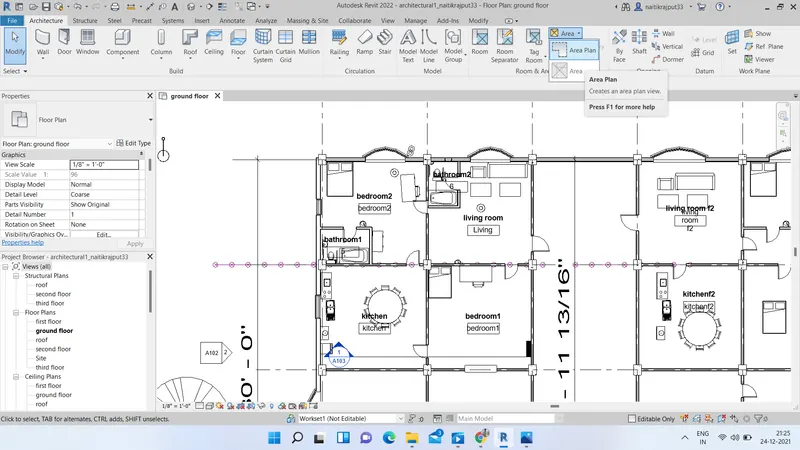
- Now to create schedule go to View tab and select schedules. Select Room category and select quantities to schedule under available quantities and select Ok.
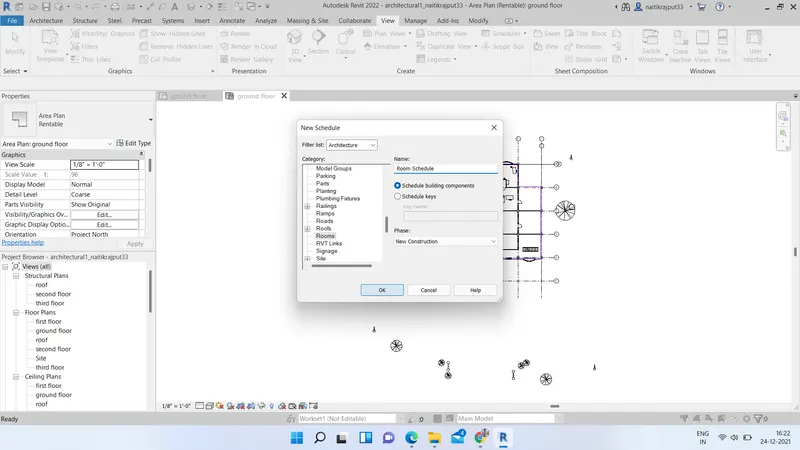
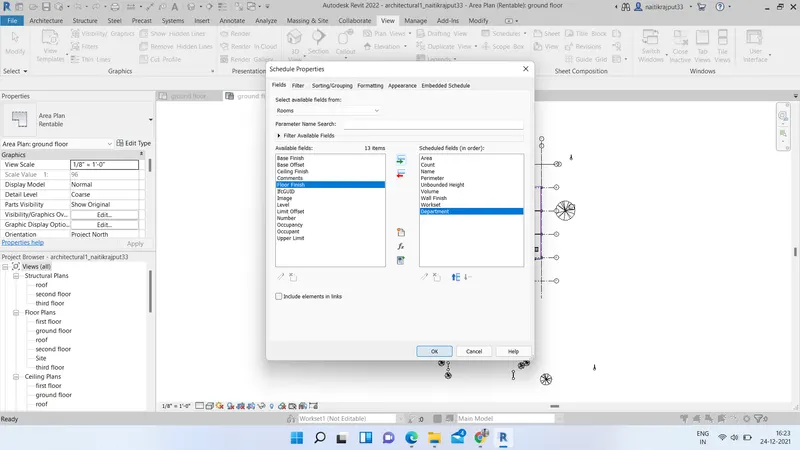
Results:-
Room is scheduled as per desire as seen below:-
4.ans:) Aim:- Using the same schedule and using the unit cost rate for materials available in the internet, preparing total cost of materials used in the project.
Tools used:- Revit software, View tab etc.
A schedule is a tabular display of information, extracted from the properties of the elements in a project. A schedule can list every instance of the type of element you are scheduling.
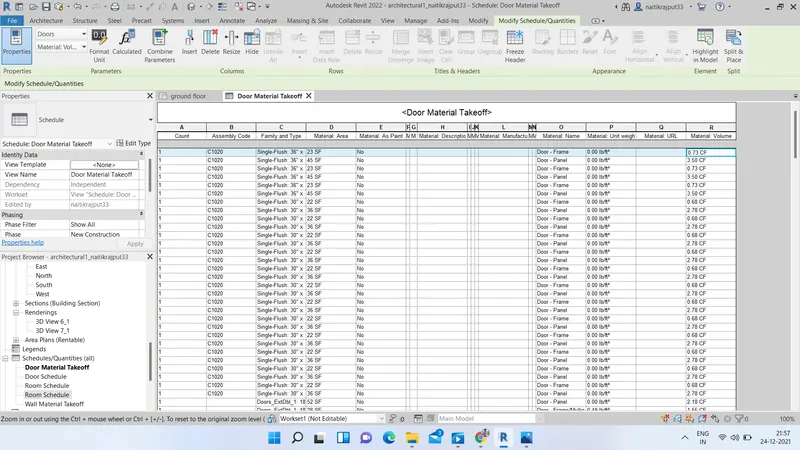
Open the project created and go to architecture tab. Now to create schedule go to View tab and select schedules. Select Material Takeoff from there. Select category say wall for schedulings and fields to be scheduled. Click OK finally.
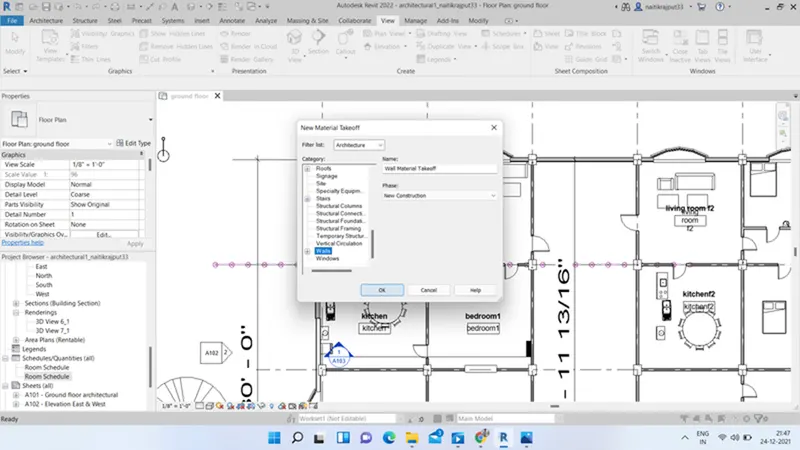
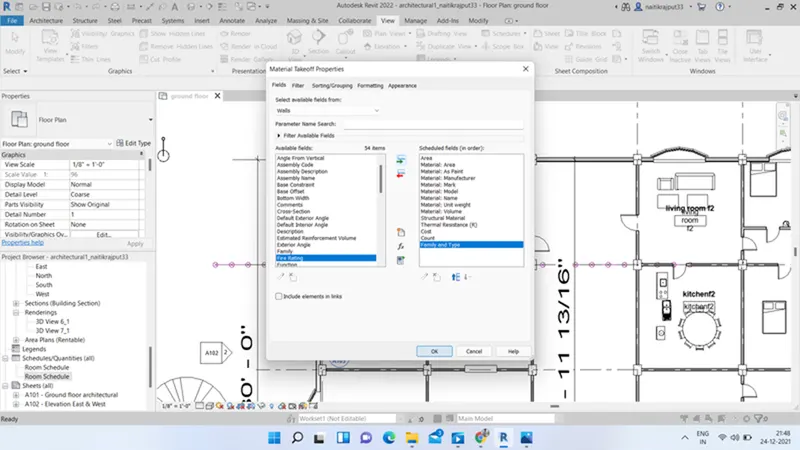
Similarly schedule for Door material takeoff and other material takeoffs as desired.
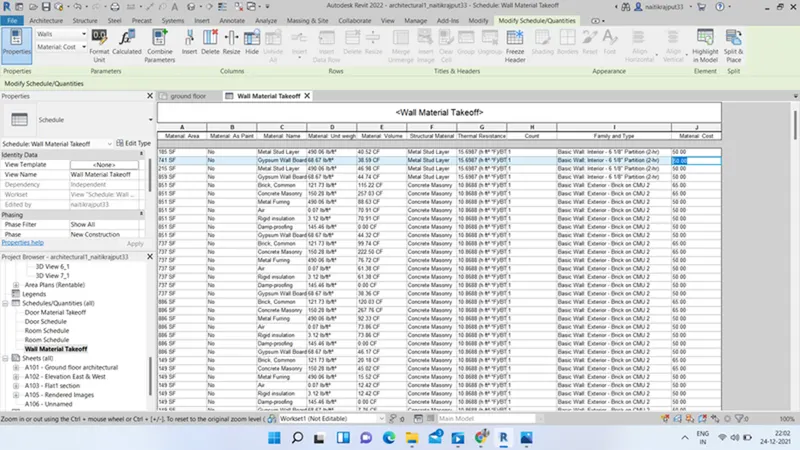
Now, we will calculate Total Cost of materials. In Schedule of Wall material Takeoff, enter a new field as Material:Cost. Enter the cost per unit material.
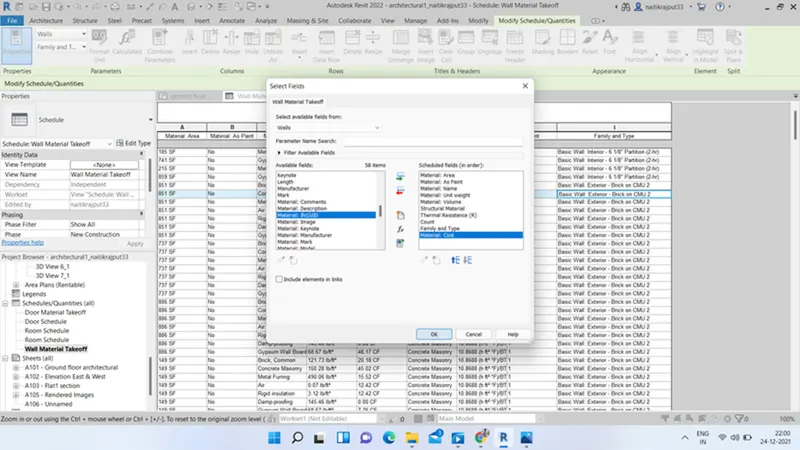
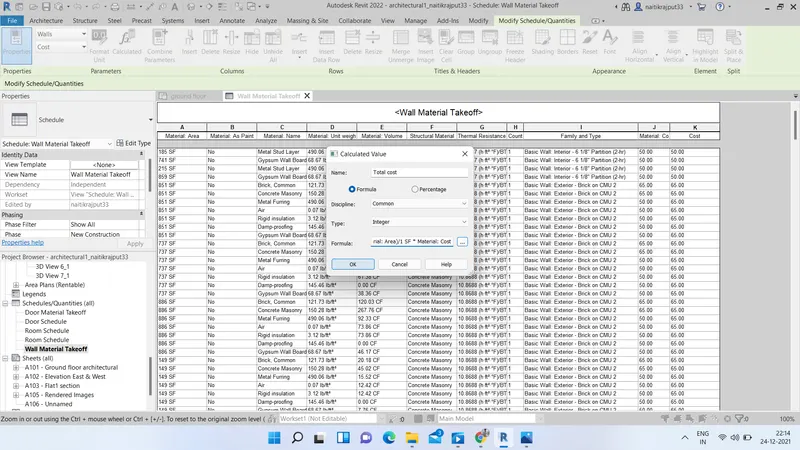
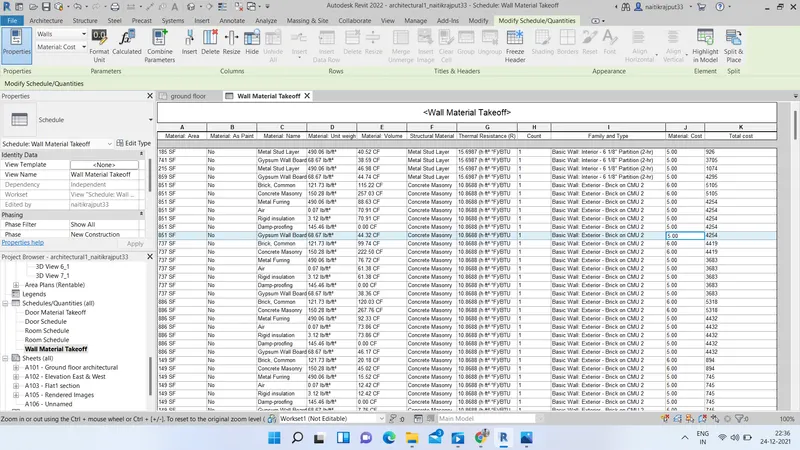
Now, Enter a new column and select Calculated.Give name as Total cost and define a function to calculate total cost of material. Click Ok finally and total cost of materials will be calculated.
Results:
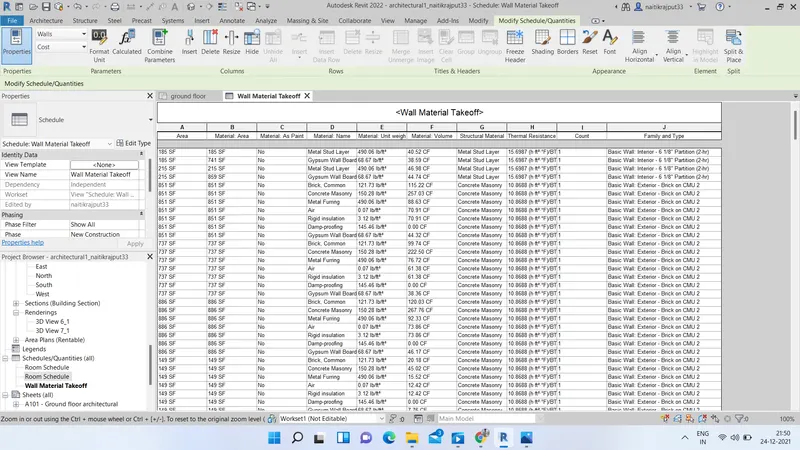
Schedules are added to project as listed below:-
5.ans.:-) Aim:- Using the concept of Visual Programming discussed in class, listing a flowchart for the following scenario
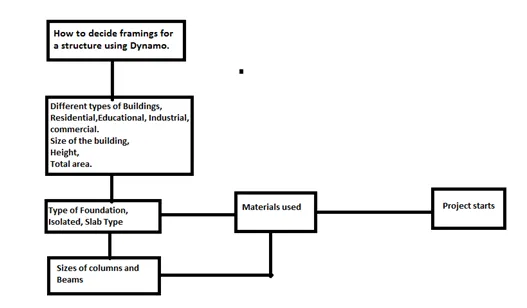
a. How to decide framings for a structure using Dynamo ?
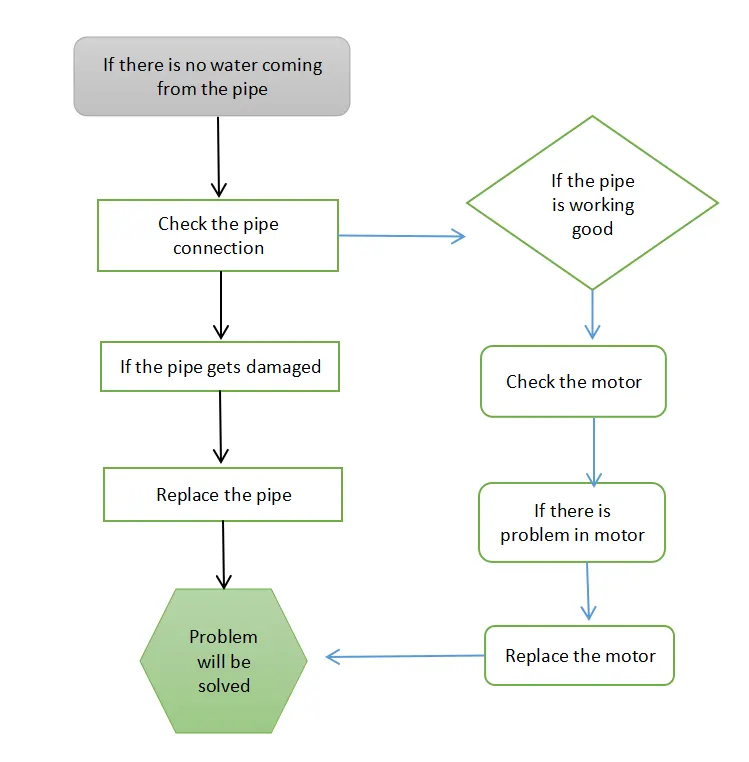
b. If there is no water coming from the pipes
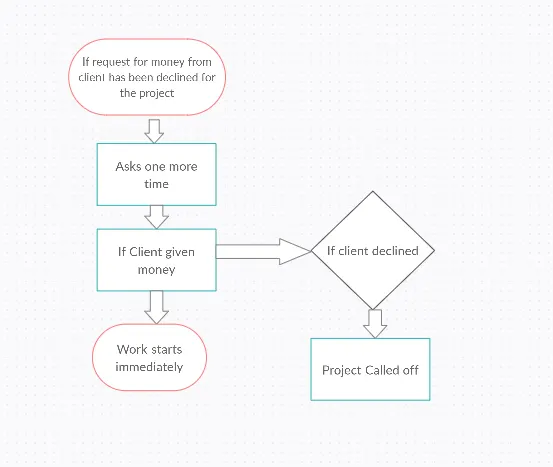
c. If request for money from client has been declined for the project
Dynamo is an open source visual programming language for Revit, written by designers and construction professionals. It is a programming language that allows us to type lines of code; while also creating an algorithm that consists of nodes.
Flowchart for:-
a. How to decide framings for a structure using Dynamo
b. If there is no water coming from the pipes
c. If request for money from client has been declined for the project
6.ans.:) Aim:- Listing the parameters associated with each model element.
Parameters associated with:-
Wall:- Type, Length, Width, Thickness, Height, Material, Cost,Area, Resistivity coefficient, Thermal Absorbtance
Floor:- Type, Length, Width, Thickness, Height, Material,Area, Cost, Resistivity coefficient, Thermal Absorbtance
Door:- Type, Length, Width, Thickness, Height, Material, Cost, Lintel height, Height of sill
Windows:- Type, Length, Width, Thickness, Height, Material, Area, Cost, Thermal Absorbtance, Lintel height, Height of sill
Table:- Type, Purpose, Height, width, Length, Cost
Building:- Type, Purpose, Number of floors, foundations type, Loads, Length, Width, Height, Material used, Location