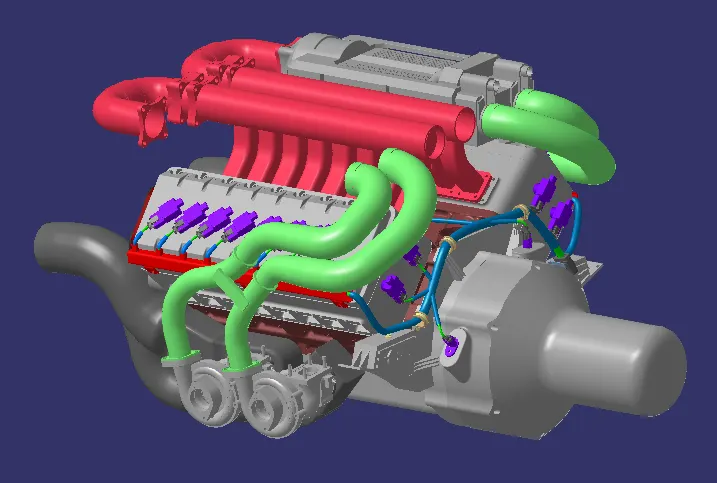
Project 1
AIM :
To Route the Wiring harness on Given Engine and Prepare flatten view drawing in CATIA V5. Application of all Packaging rules, Industry best practices shall be demonstrated in design. Apply Protection coverings as required.
WHAT IS WIRING HARNESS :
A wiring harness in an automobile is a group of wires or cables that are bound together by straps, clips, or other means, to transmit electrical power and signals throughout the vehicle. The harness is used to connect various electronic components and systems, such as the lights, engine, radio, and more. It acts as a central hub for the electrical system, making it easier to install, repair, and maintain the various components.
ENGINE HARNESS :
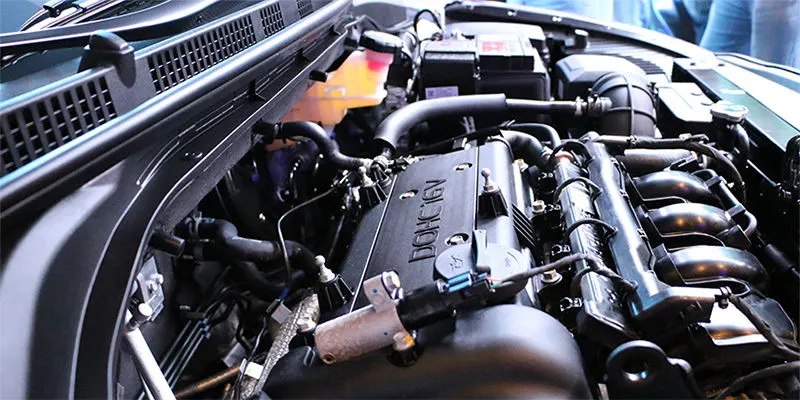
an engine harness in an automobile is a specific type of wiring harness that connects the various electrical components of the engine, such as the sensors, coils, and injectors, to the vehicle's main electrical system. It also typically includes connections for the battery, alternator, and starter motor. The engine harness routes through or around the engine compartment and is often protected by loom or conduit.
HOW HARNESS TOPOLOGY IS USED IN ENGINE WIRING HARNESS :
harness topology is the concept of divide or split the harness between different pieces to achieve the best manufacturability, serviceability and cost effective.
for example : In most of the OEM's , the engine segment is brought out of the outsource like TATA, Barath benz, bugati v16, cummins, hino etc.. Where as the engine manufacturer provides with the all the wiring harness for the engine like fuel injection sensor, engine speed sensor, coolant temperature sensor etc... And then the engine is brought to the vehicle manufacturer plant and assembled inside their vehicle system. The interconnection in the engine harness is used to connect the engine electrical components with the vehicle harness.
PROCEDURE TO CREATE AN ENGINE HARNESS WIRING :
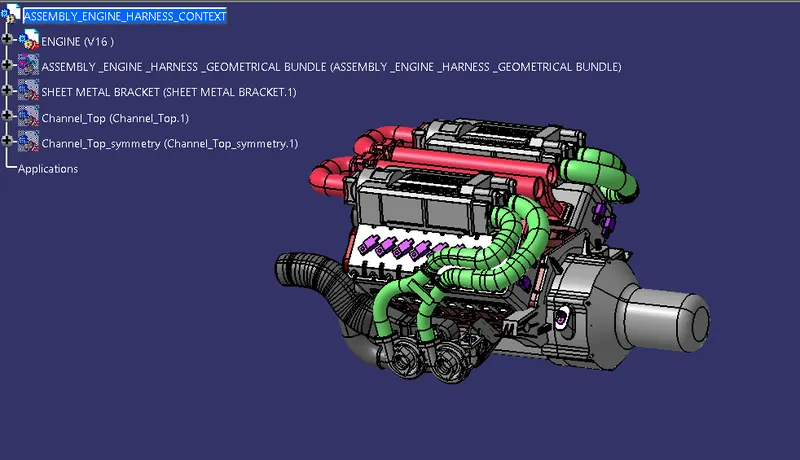
- create an engine harness context assembly
In this assembly feature, add the v16 engine model which has been provided as a step file.
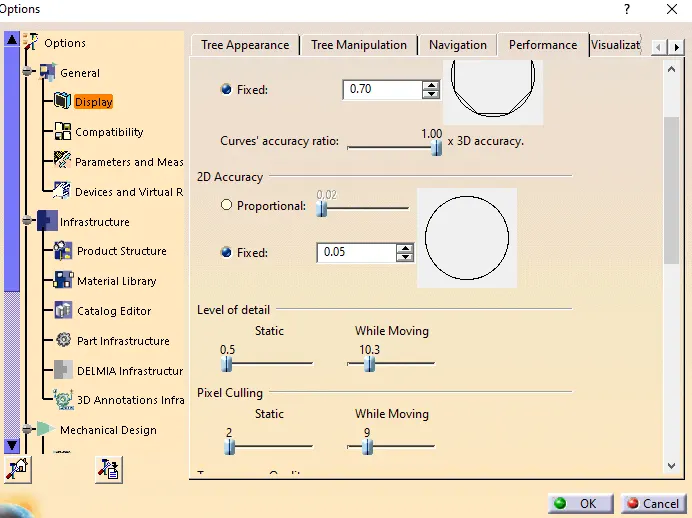
note : while working in large assembly segment, there should be some modification must be done display option before working.
- define the connectors
download the connectors for the google drive which has been provided and define all the connectors as electrical.
for defining the connector for mechanical parts to electrical, there are major 5 steps to follow (C-776438-4)
step 1 :
- creating mechanical properties of the connector in the catia v5 part design.
- create an axis system in the centre of the connector connection point and use the default oreintatation of the axis in all the connectors
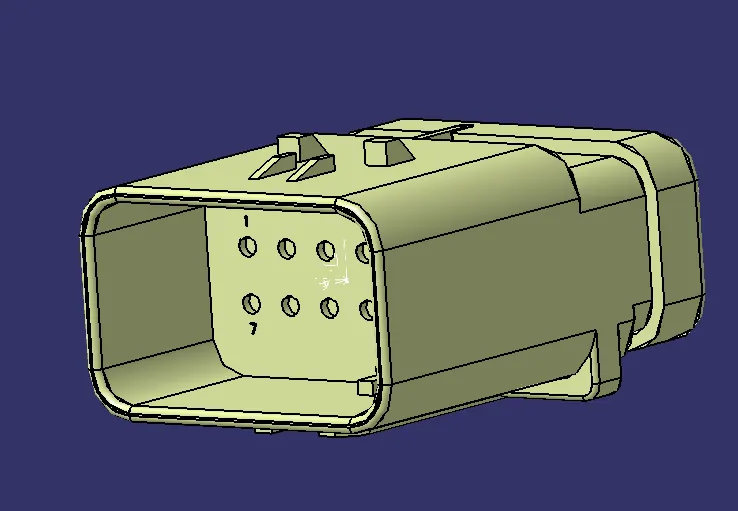
- and create the centre point for the bundle entry segment in the connector
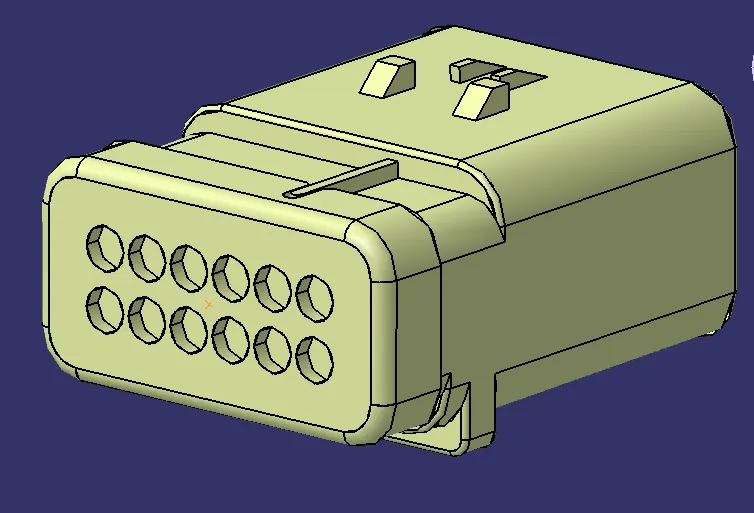
step 2 :
- then in electrical work bench define the part as the connector.
- and the define the no. of terminals in the connector. example :in this connector, there is no terminal no. mentioned is given the part no i.e C-776438-4 for that check the no. terminals in the connector connection point. refer the above image.
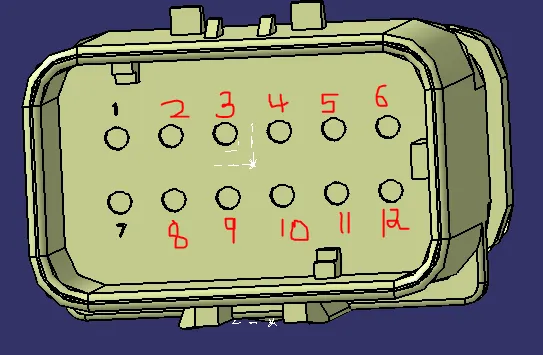
step 3 :
- after defining as the connector, make define of connector connection point.
- define the appropriate axis system, face to coincide and oreintation of the connector in connector connection point.
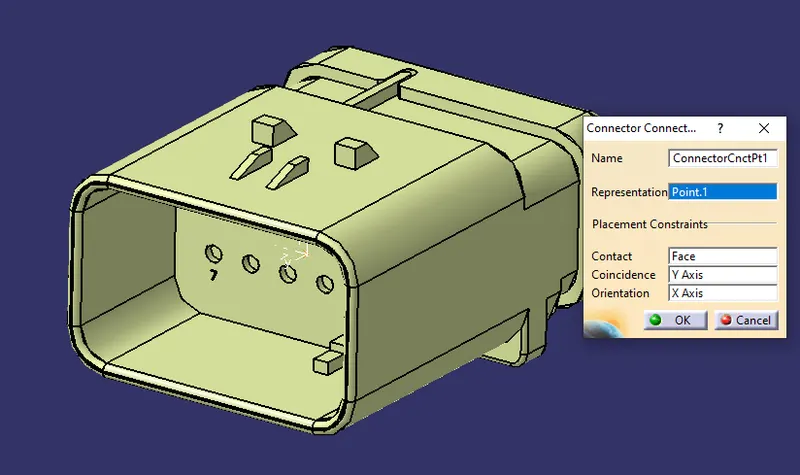
step 4 :
- after that define the bundle entry point for the connector.
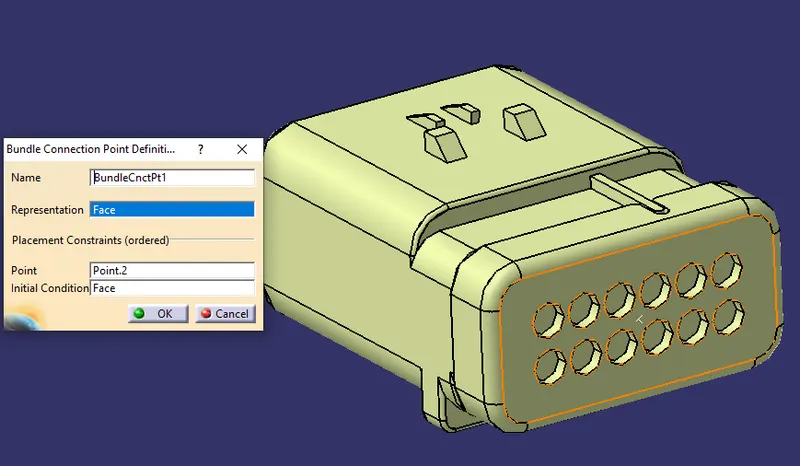
step 5 :
- if it is a female connector, it has a mounting definition which tends to mount on the external environment.
- to define the mounting clip, create the requied geometry axis for the cavity.
- and in electrical workbench, define the cavity point by giving the axis point and the orientation of the mounting clip.
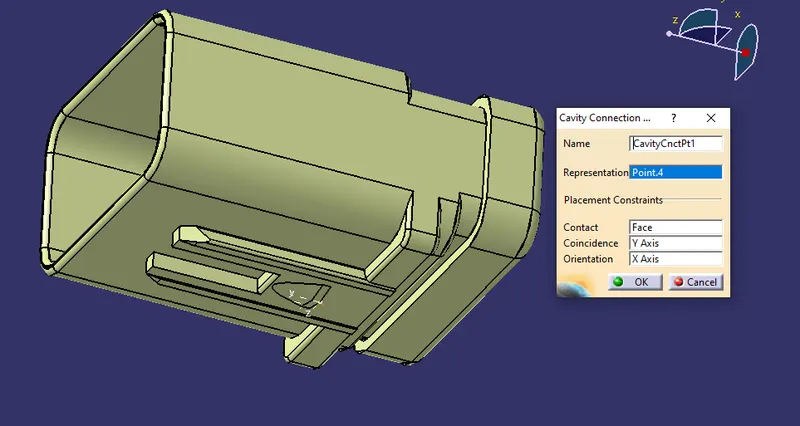
- similarly define it for all the 3 connectors. and save in the separate catague named as connectors
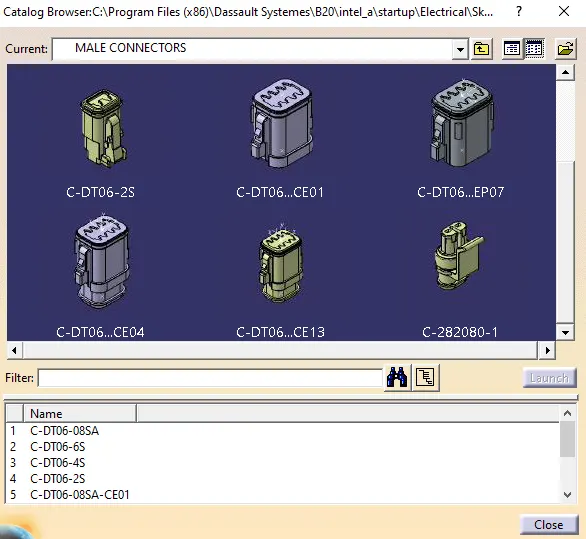
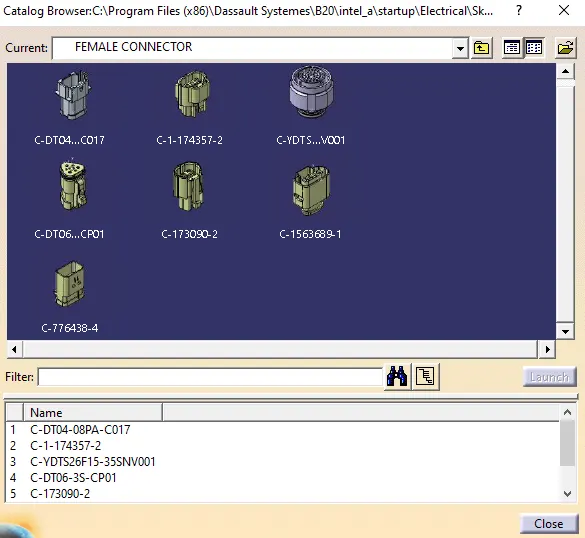
- position the connectors and connector support in the engine environment
positioning of the connectors and clips are done by using the smart move command in the assembly design as this engine is not electrically defined, it has been positioned with appropriate loaction in the engine.
there are total 23 electrical sensors used in this engine wiring harness project.
injector sensor - C-1563689 - 16 nos
camshaft positioning sensor - C-1563689 - 4 nos
transmission positioning sensor - C-1563689 - 1 nos
coolant temperature sensor - C-1563689 - 1 nos
engine speed sensor - C-173090-2 - 1 nos
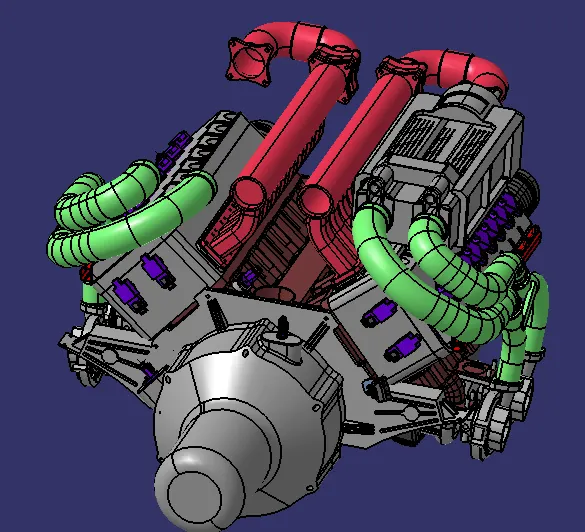
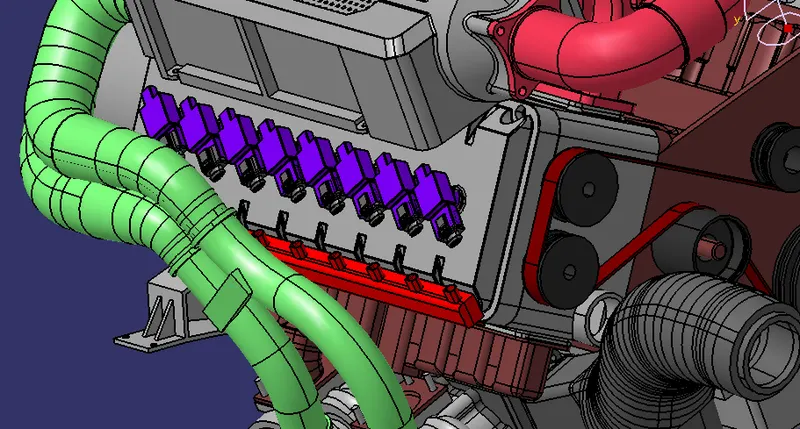
and for the interconnection connector, here using a 12 pole female connector (C-776438-4) and cavity clip (C-1924487-2) is provided to mount in the external environment.
for placing the interconnection connector, a sheet metal bracket is created and the connector is positioned in the sheet metal with the help of connector cavity.
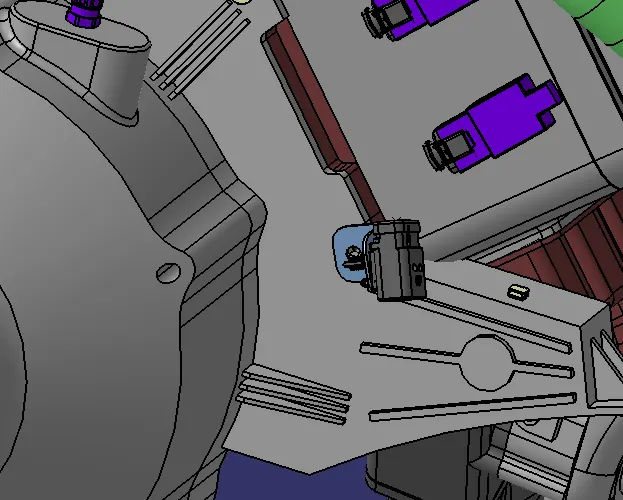
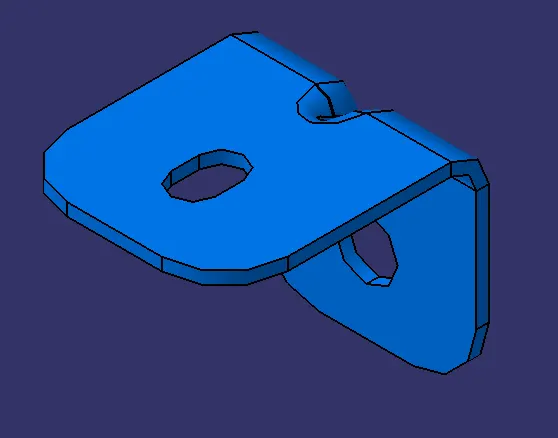
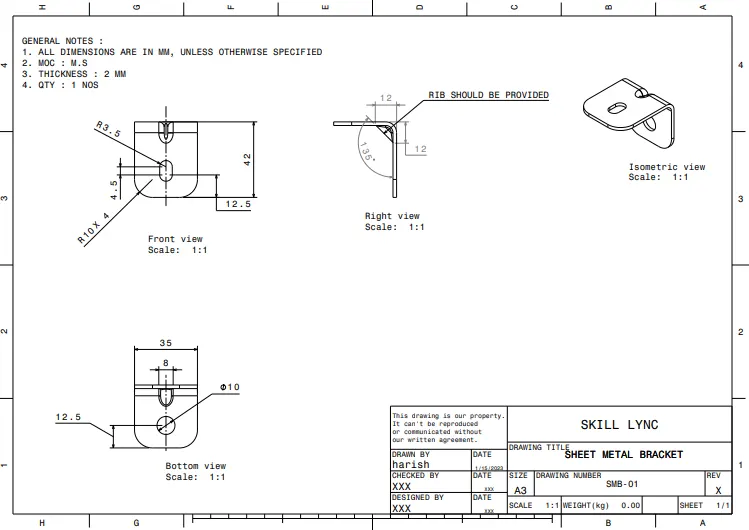
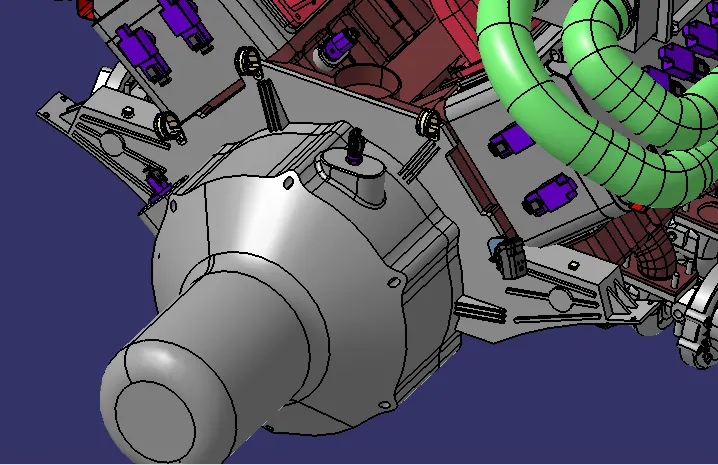
there must be some clamp for fixation of the bundle in the engine , hence P - clamps and the fur tree clip are used to route the wiring harness bundle in the engine with better manufaturablity and better packaging of the harness in the external environment.
if there is no mounting position provided for the clamp or clips, ask for the provision to the engine design team of clips and clamp mounting holes where required.
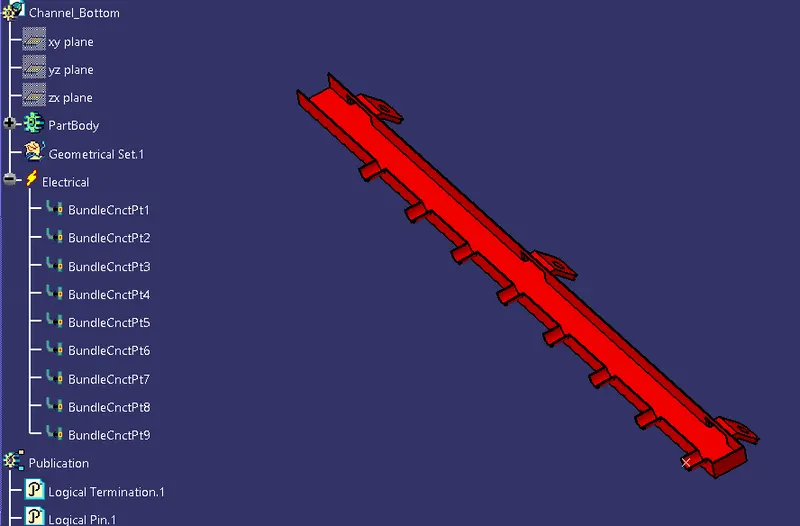
A plastic guiding channel, also known as a wire loom, is used in a wiring harness to protect and organize the wires. The channel provides a defined path for the wires to follow and keeps them separated from other components, reducing the risk of damage or interference. It also makes it easier to route the wires and install the harness in the vehicle or equipment. Additionally, plastic channel can be used to secure wiring and provide a clean look.
here it is used the injector segments in the both the sides of the engine where the bottom part is electrically define and the buddle connection point if provided at all the 8 points and one entry point.
the top part is just defined as the mechanical part , used for mating with bottom part.
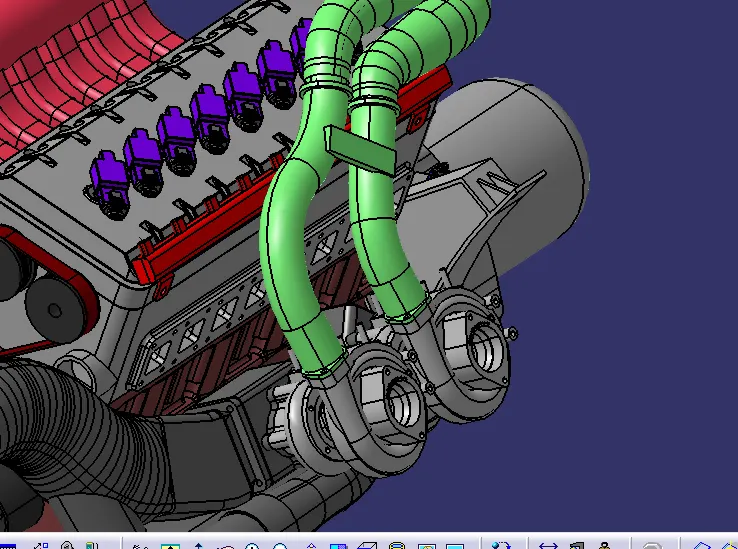
Some important packaging rules and best practices to be considered during wire harness routing and placing of the clips and clamps are as follows –
- Distance between two clamps on a straight branch should be minimum of 200mm.
- The minimum branch length should be 50mm.
- Minimum distance between clip and nearest branching point should be 25mm.
- The minimum distance between two straight connection points should be 200mm.
- The minimum distance between two breakout points should be 50mm.
- To limit the number of branches from a single branch point to 4.
- Avoid routing wiring harness near the exhaust manifold and its components and also from other unshielded heat sources. If re routing is not possible then maintain a minimum distance of 200mm.
- Try to avoid use of too many metal brackets on engine. Try to use the available threaded bosses on engine or demand for it.
- Enough clamps shall be provided to ensure positive clearance with surroundings and safety of wiring harness.
- P - Clamps, Fir tree clips and other clips can be added to the Geometric bundle as they are electrically defined and are part of the Wire harness routing and should be provided with the Wire bundle package.
- Enough slack should be provided to the wiring harness which help not to get damaged during the Engine rocking or starting condition.
- The wire harness routing should be done in such a way that it is easy in manufacturing and serviceability.
- The wire routing should be done keeping in mind the cost effectiveness of the bundle package.
- To avoid the harness routing and clipping in blind zones of the operator during the assembly and the service.
- To provide proper slack at end connectors so that there will be no tension on the wire bundle.
- To avoid sharp edges on the sheet metal parts and if it is not possible then provide protection parts to prevent damage of the wire bundle.
- To provide separate branch points for separate connectors to ensure Poka-Yoke.
- creating multi branchable segement for engine harness
the bundle dia is chosen according to the following
- connector current rating
- no of terminals in the connector
- wire is protective or non protective
- environmental temperature
minimum bend radius of the bundle must be 0.4 x bundle diameter.
Slack is provided in harness routing to allow for movement and flexibility in the system. There are a few reasons why this is important:
-
Movement: The engine and other components in a vehicle can vibrate and move slightly during operation, and the harness needs to be able to accommodate this movement without becoming damaged or causing issues with the connections.
-
Thermal expansion: Wires expand and contract with changes in temperature, and the harness needs to have enough slack to accommodate this expansion without becoming damaged or causing issues with the connections.
-
Serviceability: Providing slack in the harness allows for easier access to components and systems for maintenance and repair.
-
Tolerance: Providing slack in the harness allows for a certain tolerance, in case of any misalignment or movement during the manufacturing process, so that the harness will not be stretched or damaged.
-
Installation: By providing slack in harness, it can be easily routed and installed in the vehicle or equipment, and also it makes it easier to remove and re-install the harness for service or maintenance.
It is important to keep the slack to a minimum, however, to reduce the risk of the harness becoming tangled or damaged. A balance must be struck between providing enough slack for flexibility and movement and keeping the harness compact and organized
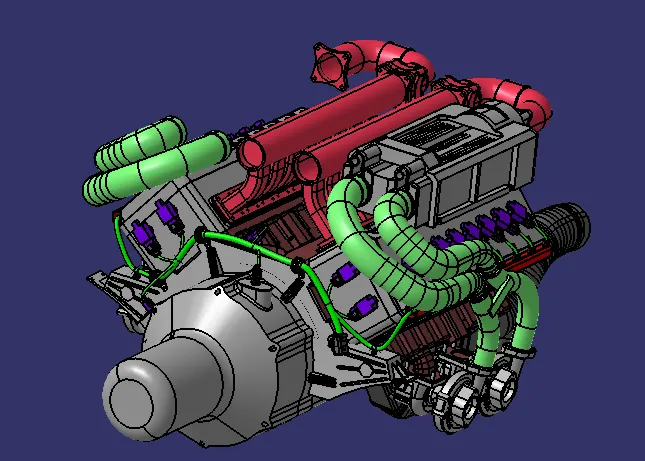
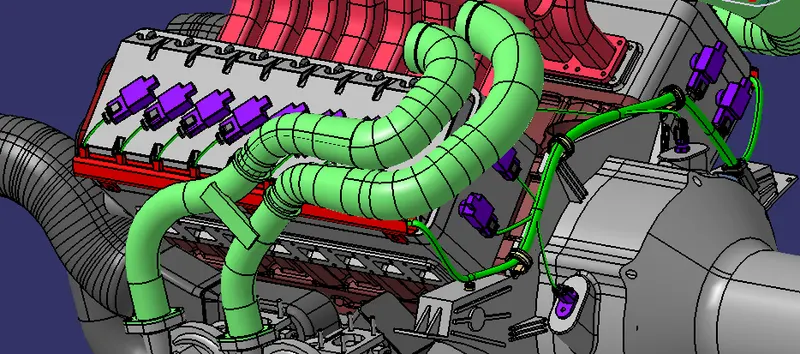
- adding some protective coverings to the engine harness bundle
slit- COT tubes, cotton tapes are added on the wiring harness bundle as shown below.
Use of Corrugated tubes
- They are of two types Slit and Non-slit Cot tubes
- Corrugated flexible tubes also known as COT tubes / convoluted conduits have a wide range of applications in automotive industries.
- Corrugated tubes are made from plastic and they are flexible.
Plastic materials used and its temperature resistance are as follows,
- Polypropylene (PP) for (-) 20 to 100 degree Celsius
- Heat Resistant (HR) for (-) 20 to 135 degree Celsius
- Flame Retardant (FR) for (-) 20 to 135 degree Celsius (flame retardant)
- Polyamide/nylon (PA) for (-) 20 to 180 degree Celsius
Use of breaded tubes (Nylon woven loom) and Silica sleeves –
In case of corrugated tube is not suitable for the very high temperature zones (specially in exhaust area), use of breathed tubes and silica sleeves can be done.
Beaded Tube- is an expandable sleeving braided from 8 mil(0.2mm) flame resistant polyphenylene sulfide (PPS) monofilament fiber, extremely lightweight, resistant to high temperature (up to 285 degree Celsius) and virtually impervious to solvents.
Silica Sleeve – it is braided into a strong and flexible sleeve from silica yarns. The thick 560mil (1.5mm) walls of this sleeving provide enhanced thermal protection up to 1800-degree Fahrenheit (982 degree Celsius)
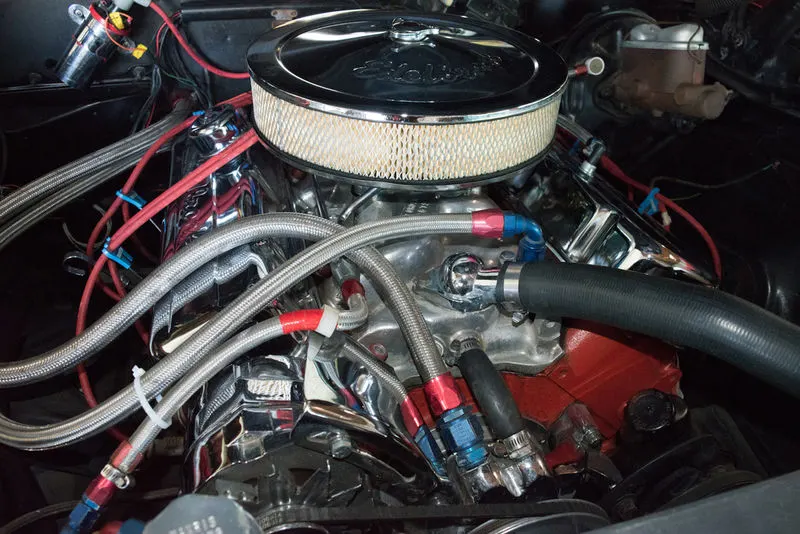
In this engine harness project, silica sleeves are used to protect the wiring harness at high temperature upto 982 degree celcius. There must be minium of 20 - 25 mm clearance from the connector ends. where blue coloured layer is the protective covering.
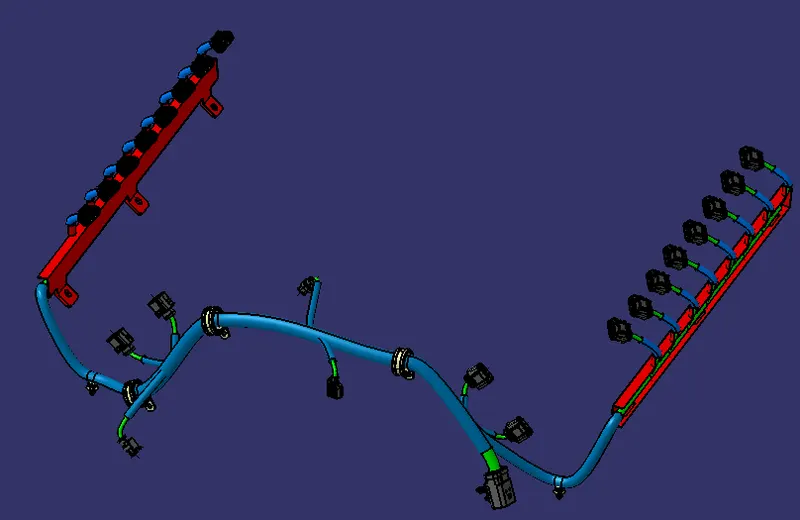
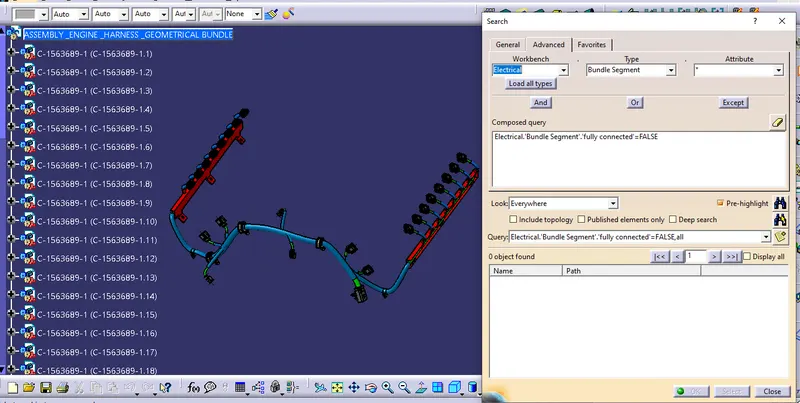
- bundle continuity check
PROCEDURE TO CREATE AN ENGINE HARNESS WIRING FLATTEN :
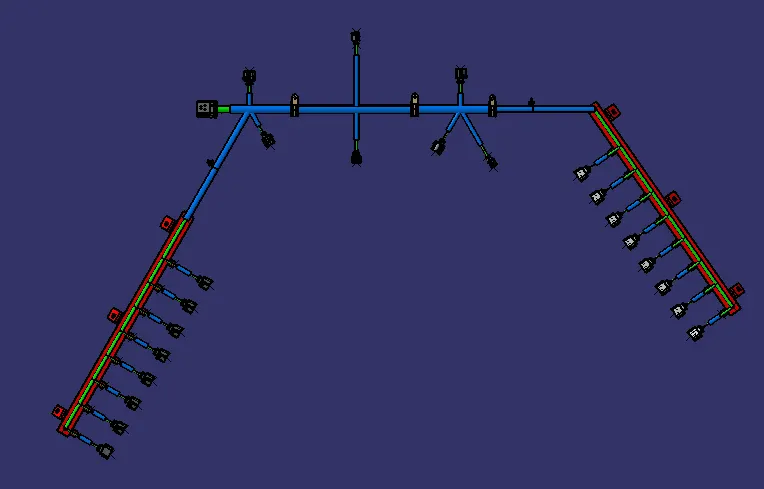
- create a new product file and name it as engine harness wiring flatten.
- define harness flatten paramters as required and click okay.
- then extract the electrical geometrical bundle product file.
- after extracting the product file, flatten the wiring harness using flatten command
- and set to xy plane as default and click all the bundle connections, click okay.
- now the engine harness wiring flatten is created
- aligned the flatten object as required.
PROCEDURE TO CREATE AN ENGINE HARNESS WIRING FLATTEN DRAWING :
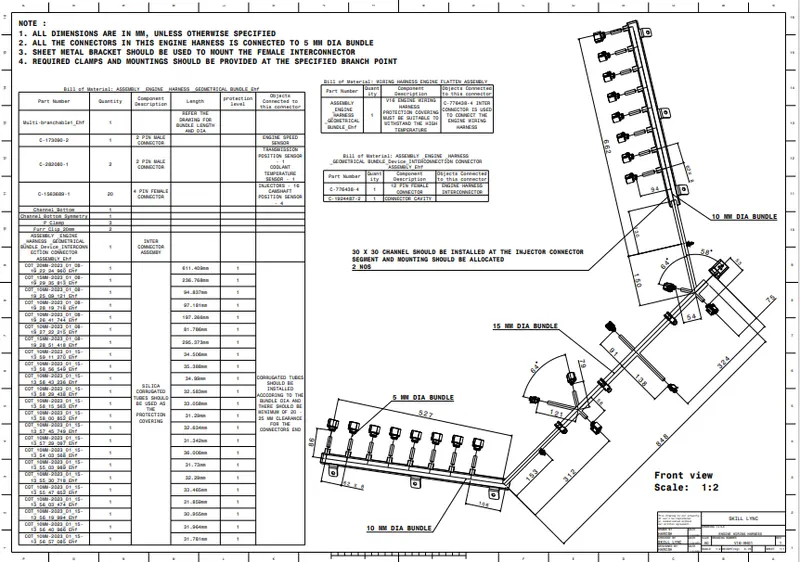
- make sure flatten parameters are set as requied in the drawing
- the bundle must be in single line
- the protecting covering must be in double line
- connectors and supports must be in 3d object
- and after placing it in the drawing sheet, make sure that in properties the wire frame properties is selected.
- then assign the required dimensions and bill of material table in the drawing sheet.
CONCLUSION :
Thus in this project successfully routed the wiring harness for the V16 Engine assembly and the flatten-view drawing was prepared in CATIA V5. Various packaging rules and constraints were considered while routing the harness. After finalizing the wire routing, we can request the corresponding Engine design team to provide additional holes for the mounting of Fir tree clips.