Final Project: Electric Rickshaw modelling
To Create a detailed MATLAB model of an Electric Rickshaw (three-wheel passenger vehicle).
Objectives:
- Rear wheels are driven by PM brushed-type motor
- Assume the efficiency points of the motor controller and motor
- Make an excel sheet of all input and assumed data
- Results: For any three standard driving cycles show energy consumption, and temperature rise of the motor and controller.
Ans.
E-Riskshaw is 3-Wheeler (3W) electrical vehicle that can be used as a passenger as well as a cargo vehicle. This means that it has the potential to replace conventional fuel-based auto rickshaws.
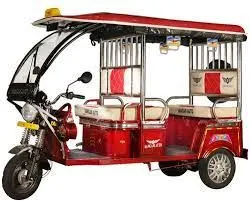
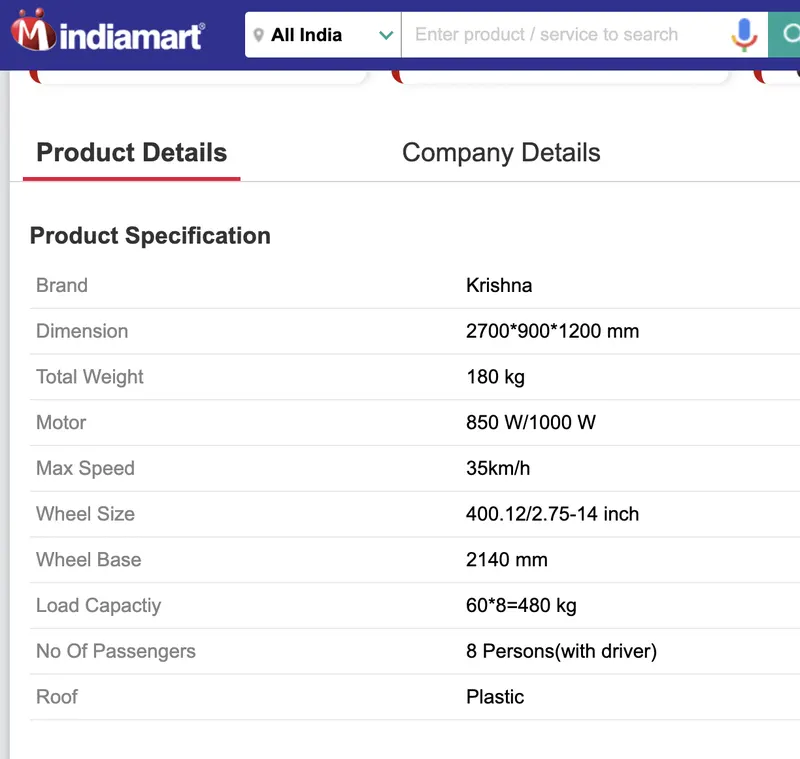
There is a number of limitations that comes with an E-rikshaw that it has a maximum load limitation, which impacts speed and the SoH of the battery as well. The speed is also a concern regarding this vehicle, this vehicle has an average velocity of 30 to 35 kmph as the maximum speed.
Here is an example of the tech-specs of an E-Rickshaw.
Block Diagram:
The block diagram shown below can be referred for simulation of the model of the E-Rickshaw.
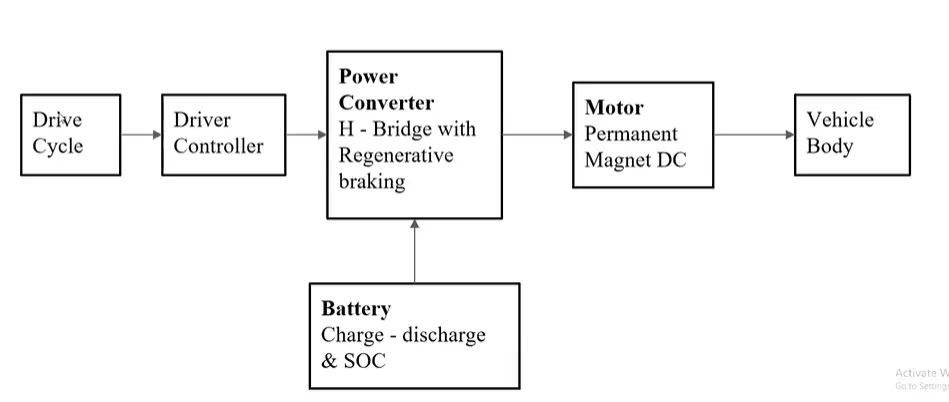
The battery, drive cycle, controller, DC motor, vehicle body, and transmission system are the primary building blocks of the planned Electric Rickshaw. A drive cycle is the input data here, simulating how a person would actually operate a vehicle. The developed vehicle is made to deliver the output of how it responds to the drive cycle using the FTP75 and WOT drive cycles. The primary goals are to measure the driver's speed, estimate the motor and controller's temperature, calculate the vehicle's state of charge (SOC), and measure the distance traveled. Distance is estimated using speed and time parameters for each of the three Drive cycles, and there is a SOC block that will estimate the level of charge of a battery.
The Model is shown below:
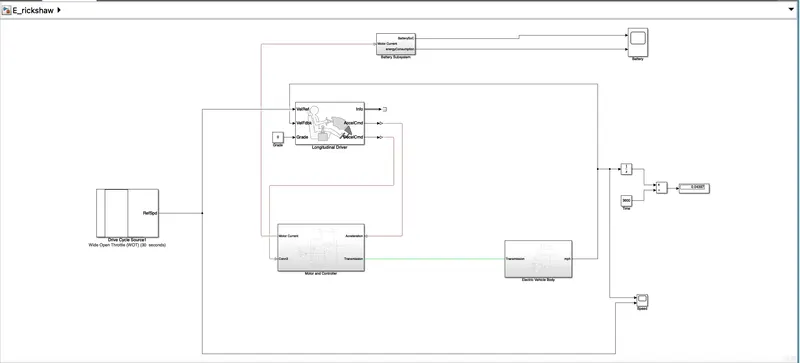
In order to drive the motor at first, current travels from the battery through the DC-DC power converter. The controller will regulate the necessary voltage. The Controller will run the motor at the desired rpm while adhering to the referenced drive cycle. The gearbox of a vehicle then transmits the motor power to the wheels. and the controller will compare and adjust the vehicle speed based on the speed.
1. Drive Cycle:
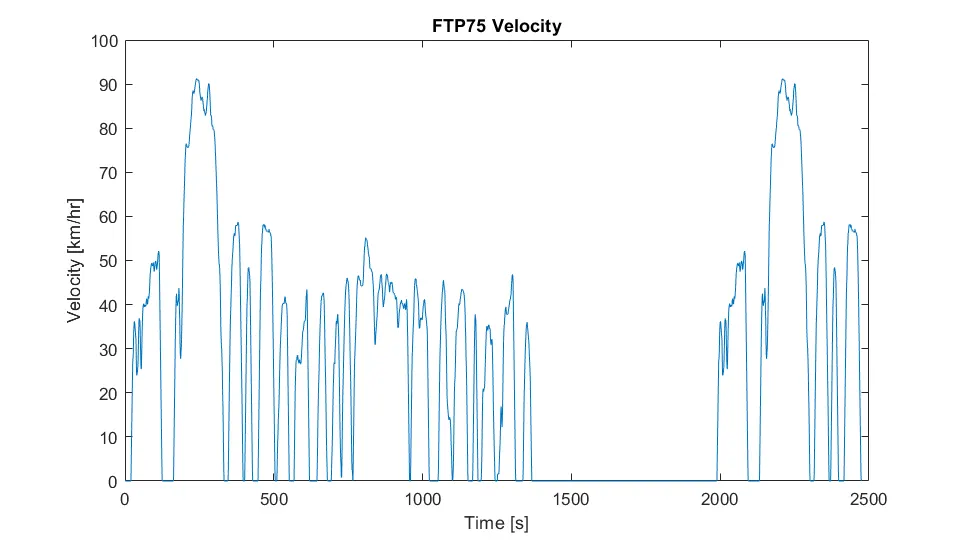
A drive cycle is pre-saved driver behavioral data with either universal or can be customized according to the needs of the user. Here 2 drive cycles are used that are WOT and FTP75 which are available on MATLAB Simulink.
WOT (Wide-Open Throttle):
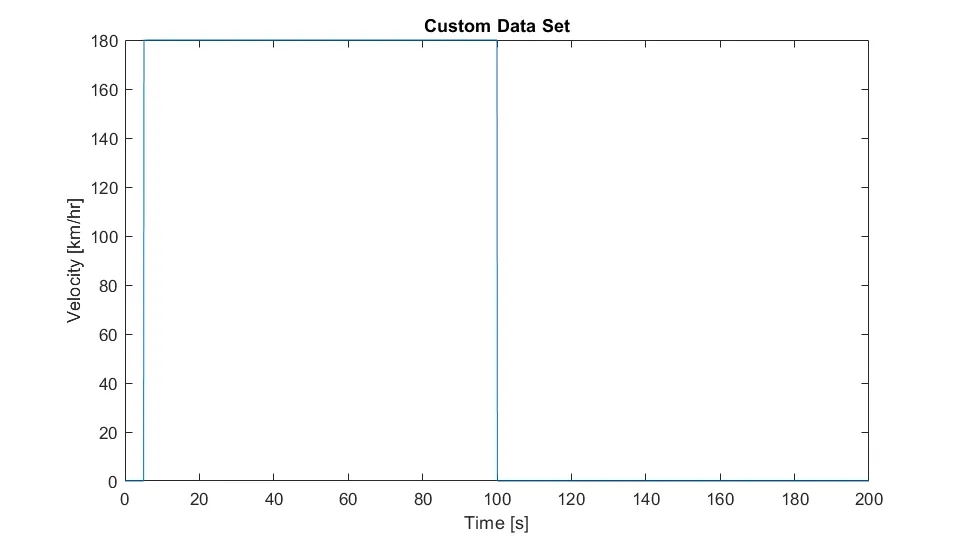
FTP75:
2. Driver Controller:
On the basis of two sets of data, the longitudinal driver block is utilized to send a controller normalized acceleration and deceleration signals. The reference velocity is represented by the first data set and the feedback velocity by the second. Below is a diagram of the longitudinal driver block:
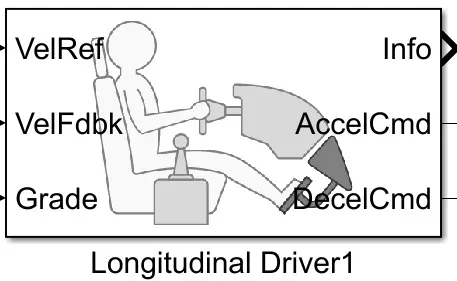
The longitudinal driver block has the following ports:
- VelRef - reference velocity and it is the velocity data provided from a drive cycle source.
- VelFdbk - feedback velocity and it is the velocity data provided from the vehicle body's velocity port that outputs the velocity data.
- Grade - This port provides a grade or inclination angle for the surface on which the vehicle is traveling in degrees.
- Info - This port is for the bus signals which consist of block calculations e.g. acceleration/deceleration command, the difference between reference, and vehicle speed.
- AccelCmd - This port provides the acceleration command to a controlled voltage source.
- DecelCmd - This port provides the deceleration command to another controlled voltage source.
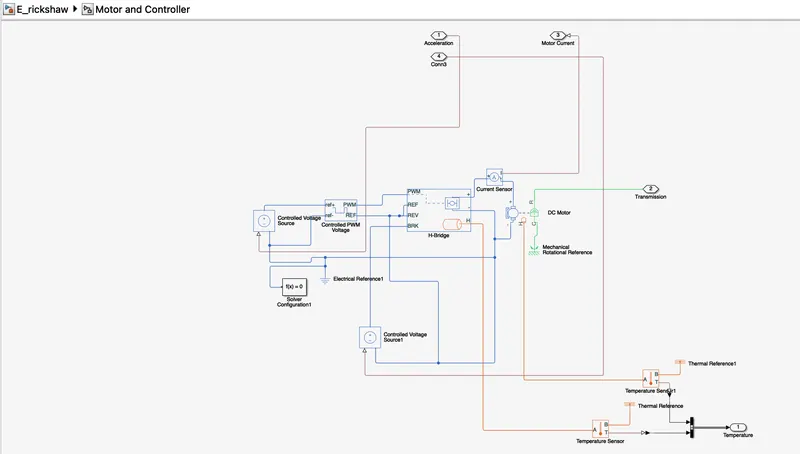
3. Motor and Controller (SubSystem):
3.1. The Motor
The brushless DC motor (BLDC) or the induction motor determines the power and performance of electric cars. Induction motors and DC brushless motors are used to replace direct current (DC) power sources. Also mentioned earlier for EVs, lithium-ion batteries also take the place of lead-acid batteries. Because the needs and applications of both components—brushless DC motors and induction—determine their future.
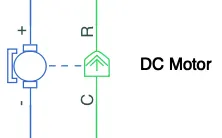
The block has two sides, the mechanical side on the right and the electrical side on the left, as we can see. There are 2 ports on the mechanical side: C and R. The C stands for the casing, while the R stands for the rotor's spin, which generates torque. For applying voltages, the electrical side has a positive and a negative terminal. A positive torque will occur from the C port to the R port if a positive voltage is applied to the DC motor block from the positive to the negative terminal. By altering the sign of the back emf or the torque constant, the direction of the torque generated by the DC motor can be adjusted. Because it will be stationary, the C port of the mechanical side needs to be attached to a mechanical rotational reference as shown below.
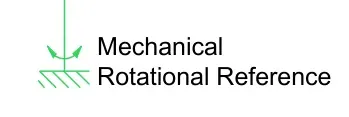
The open connection of the basic gear from the vehicle body block will be connected to the R port. The positive terminal of a power converter, which in my case will be an "H bridge," is connected to the positive terminal on the electrical side.
3.2. Power Converter:
The power converter is required to transfer power from one component to another in the proper form and amount. In the case of electric vehicles (EVs), a power converter is required to supply the DC voltage from the battery of the EV to the DC motor in order for it to function properly under the necessary conditions. I used an H-Bridge motor drive as my power converter, as was previously indicated. The H-bridge block is shown below,
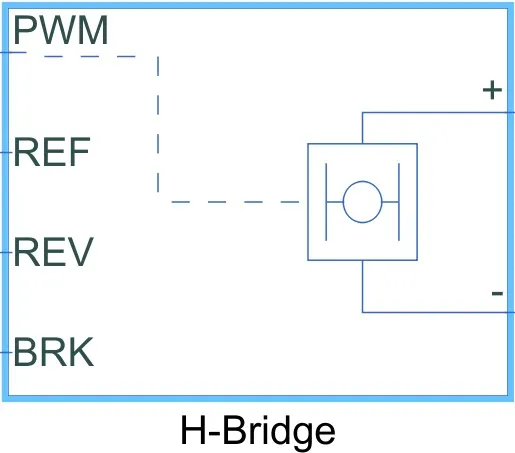
The left side of the H Bridge is used to control voltage signals, while the right side has terminals that supply the controlled voltage to the DC motor. The H-Bridge block's left side ports are as follows:
- PWM: The post is used for Pulse Width Modulation of the Voltage to the H-bridge.
- REF: REF stands for Reference.
- REV: REV stands for Reverse and controls the voltage for the reverse action of the vehicle.
- BRK: BRk stands for Braking and hence controls the voltage for braking of the vehicle.
3.3. Controlled PWM Voltage:
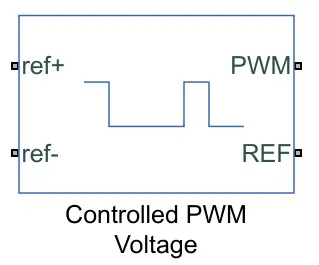
In order to supply a regulated pulse width modulated voltage to the H-Bridge block, I have next employed a "Controlled PWM Voltage" block. PWM and REF ports on the block, which feed into the identical ports on the H-Bridge block, will be used to output the PWM voltage. In the case of a low pulse, the output voltage is set to 0V, while in the case of a high pulse, the output voltage will be equal to the output voltage amplitude, which was set to 320V in the H-Bridge block. The duty cycle, which is the ratio of the time the switch is ON to the time it takes to complete one cycle, determines the voltage pulses that are produced by this block (which is the time for which the switch is ON and OFF). The regulated PWM voltage block's input determines the duty cycle.
the formula for the duty cycle is as follows:
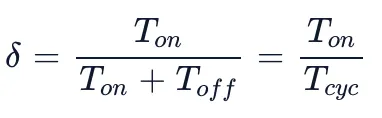
where
δ is Duty cycle
Ton is ON time
Toff is OFF time
Tcyc is Time taken for 1 Cycle
The Controlled PWM voltage block is shown below,
3.4. Controlled Voltage Source:
Because they need a controlled voltage source to supply the voltages to make the voltage pulses that must be sent into the H-Bridge, the input ports of the controlled PWM voltage block are still unconnected. I have the regulated voltage source block for this. This block is advantageous because it will supply the required voltage, which is strong enough to keep the output voltage constant regardless of the current flowing through it. The controlled voltage block is as shown below,
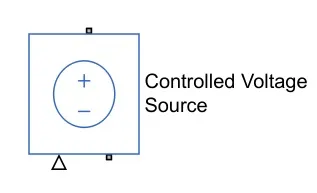
This model has 2 controlled voltage sources. One block is to provide the voltage for the acceleration of the vehicle and the other is to provide the voltage for the deceleration of the vehicle.
3.5. Electrical Reference:
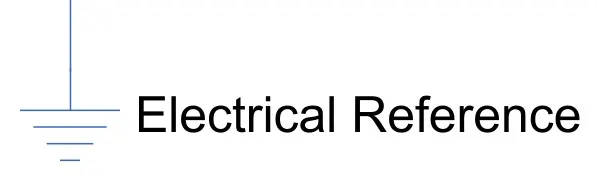
A grounding effect is produced for electrical circuits using the electrical reference block. There must be at least one electrical reference block in each model that has electrical or electronic components. Below is a diagram of the electrical reference block:
3.6. Solver Configuration
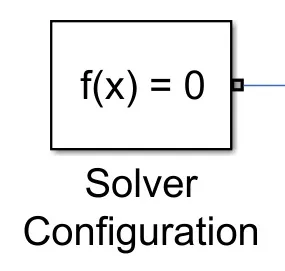
The solver configuration block is used to solve any necessary equations in a model and in my case, I have used them in the connection to the 'REV' port of the H-Bridge block. The solver configuration block is shown below:
Below shown is the sub-section of the model in which these above-defined components are used:
3.7. Vehicle Body:
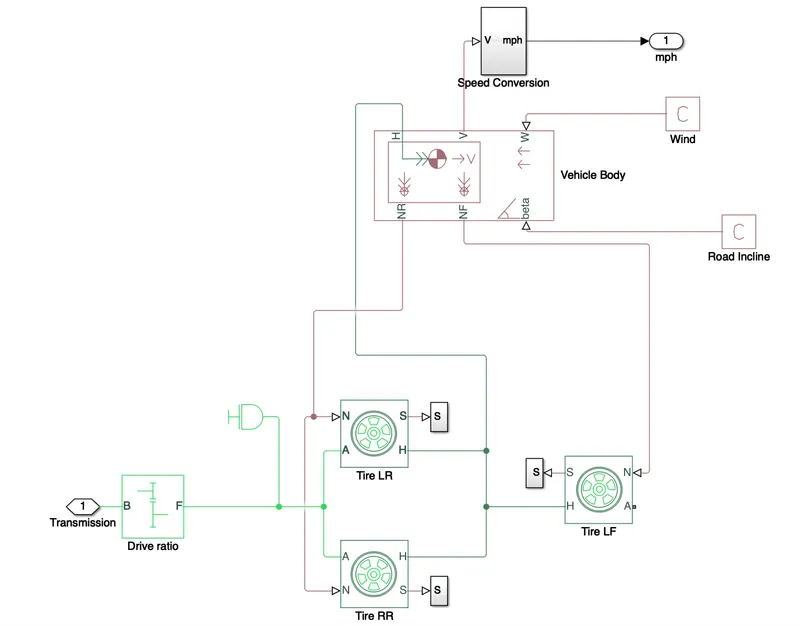
The vehicle body is 6 port blocks,
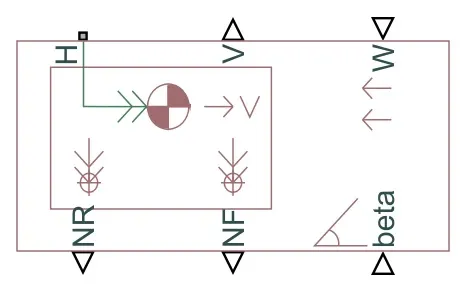
Each port has a specific role in the functioning of this block
- H: Is named 'H' as it acts as Hub for the wheels to connect it with the main vehicle body
- V: This physical signal output port, which stands for "Velocity," is utilized to output the vehicle's speed or velocity.
- W: By providing a speed for it, this physical signal input port enables us to simulate a "headwind" operating on the vehicle.
- NR: This physical signal output port simulates the normal forces acting on the rear wheels.
- NF: This physical signal output port simulates the normal forces acting on the front wheels.
- beta: The vehicle can be modeled on an inclination angle to produce the effect of a hill climbing force thanks to this physical signal input port.
Wind (W) and Slope (beta):
As was already indicated, using the "W" and "beta" ports of the velocity block, we may simulate the impacts of wind resistance and road incline, respectively. In order to simulate the effects of wind and road inclination on the motion of the car, I used a "PS - Constant" block in my model. I have a steady signal of 5 m/s for the wind effect, and this functions as a headwind, which is the opposite of the direction of motion. I have consistently signaled 0 for the road incline.
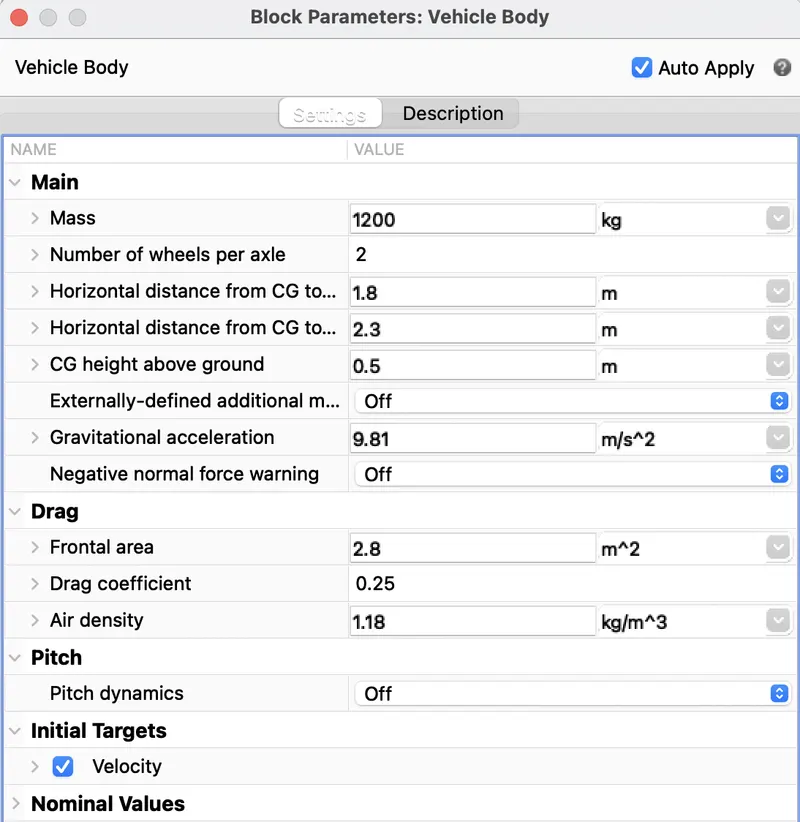
3.8. Tires:
The "magic formula" tires are the ones utilized in this electric vehicle model. There are a variety of tire blocks that may be used to mimic a vehicle, but I've chosen to utilize the ones that use the magic formula since they let us simulate the longitudinal behavior of car tires on highways. Additionally, they enable us to mimic additional effects like tire inertia and stiffness, which improves the accuracy of situations encountered in the actual world.
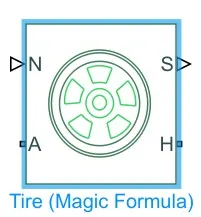
The magic formula tire has 4 ports
- N: The physical signal input port for the normal force acting on the tyre and being regarded as positive in the downward direction is this port, which stands for "Normal."
- A: This port, which stands for "Axle," is the mechanical port that controls the wheel axle's rotation.
- S: This port, which stands for "Slip," is the physical signal output port that relays information about tyre slip.
- H: The mechanical translational conserving port for the wheel hub via which the tire-generated push is applied to the vehicle body is denoted by the letter "Hub."
Shown below is block parameter for Tire block:
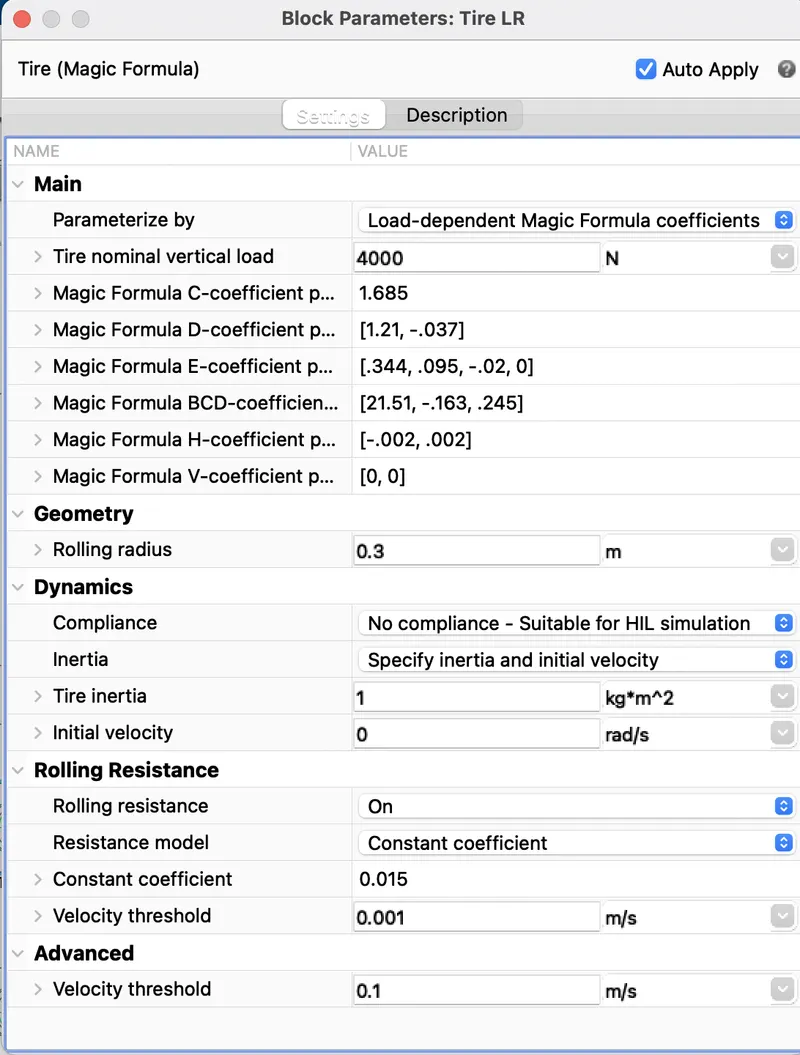
3.9. Gear:
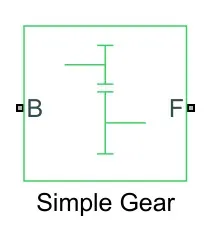
A gearbox known as a "Simple Gear" is a final drive ratio that limits the coupled driveline axes of the base gear and the follower gear.
B: The input of DC motor R is coupled to output B, base gear. A rotating mechanical conserving port is what it is.
F: The rear axle is coupled to the F follower gear's output. A rotating mechanical conserving port is also present.
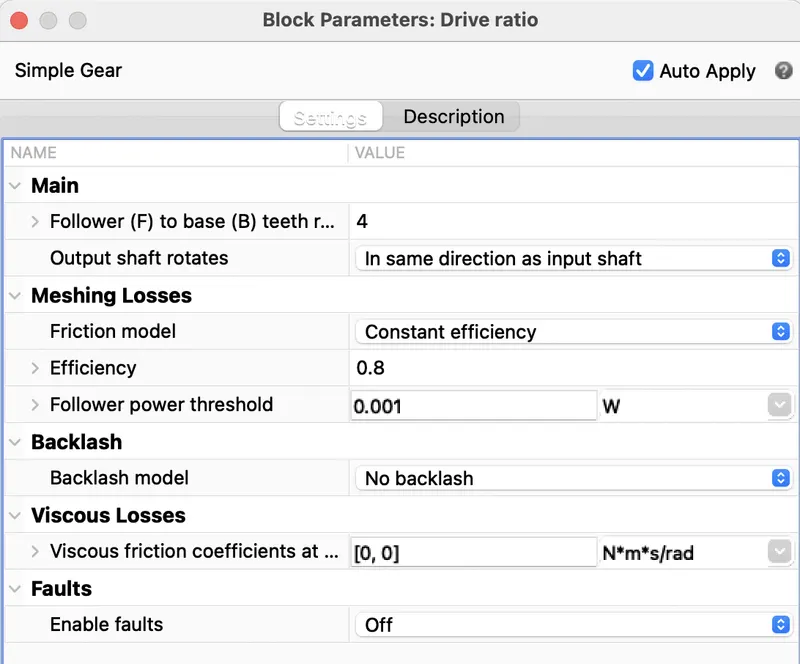
Shown below is block parameter for Drive ratio/Simple Gear Block:
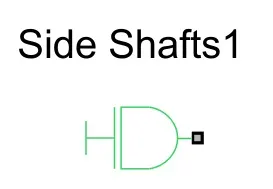
3.10. Side Shafts:
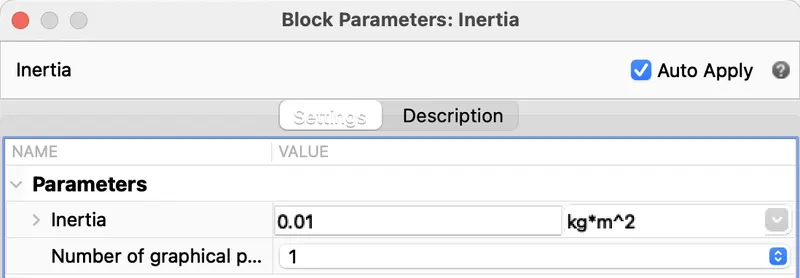
To give the straightforward gear block the ideal mechanical rotational inertia, an inertia block has been added to the workspace. The positive orientation of the block is from the port to the reference point, which in this case would be the basic gear, and this block has just one mechanical rotational conserving port. When inertia is accelerated in a positive direction, the torque produced by it acts in that direction.
Shown below is block parameter for Side shaft:
4. Vehicle Body Subsystem:
4.1. SoC Calculation Subsystem
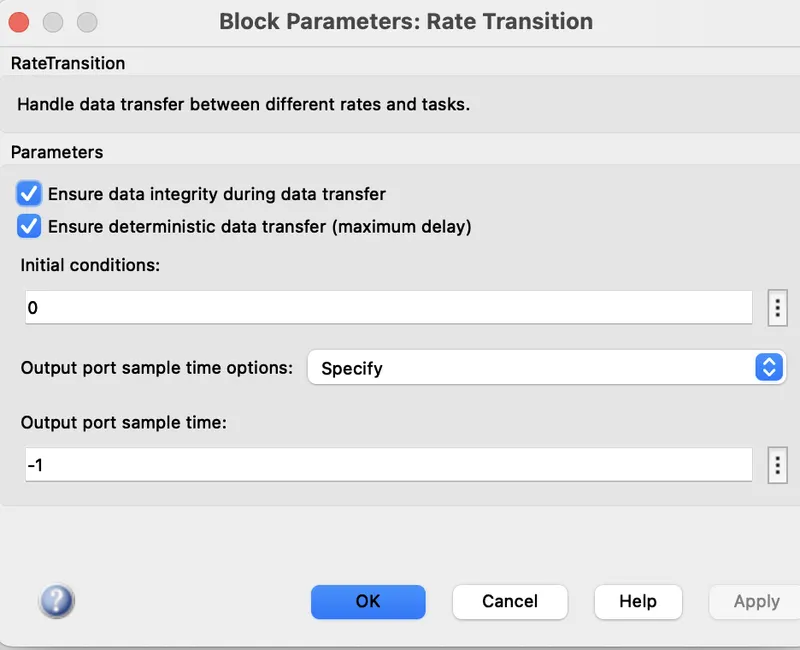
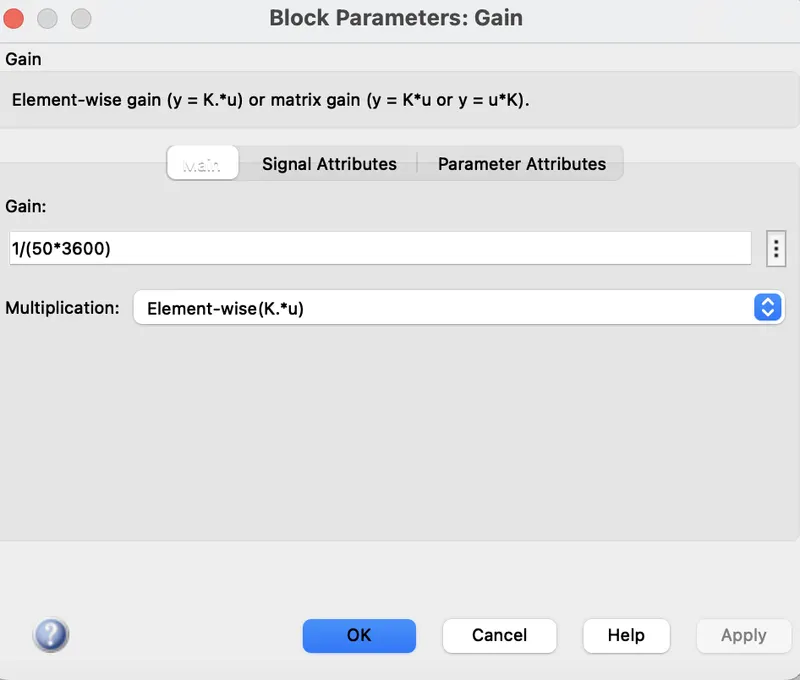
An intricate subsystem made of different building blocks was developed to gauge the battery's state of charge. The 'Rate Transition' block, which is the first block, manages data transfer between various rates and tasks. The signal from the rate transition block is then multiplied or divided using a "Gain" block. In this instance, the gain block will split the current signal by the battery's ampere rating, which has been assumed to be 80Ah times 3600. (seconds in an hour).
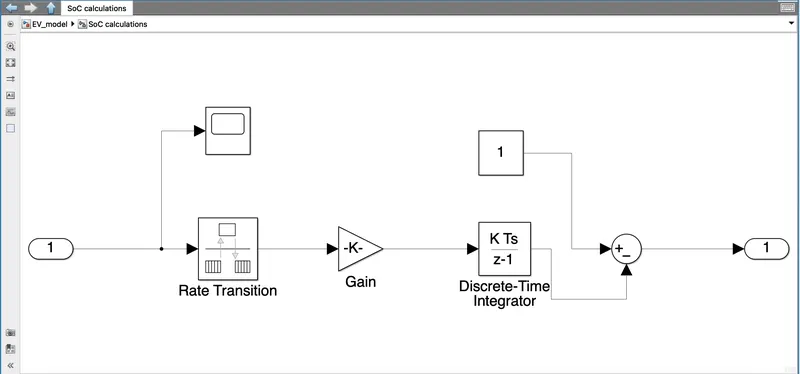
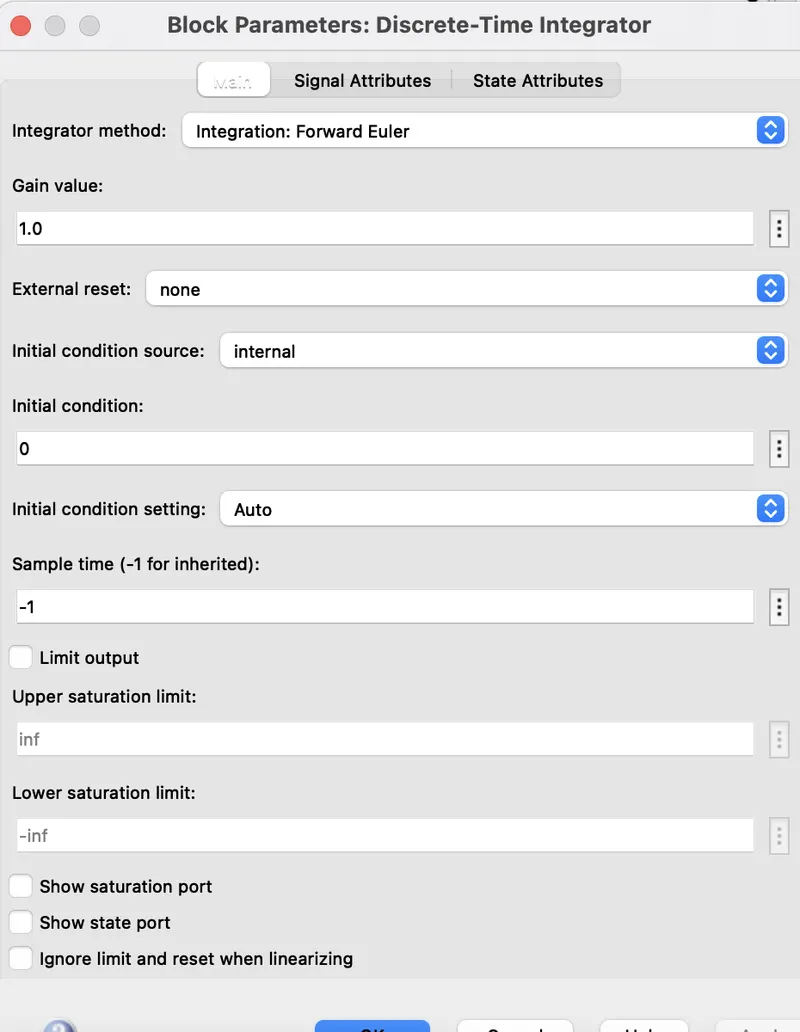
To discretely integrate the current signal with regard to time, a "Discrete - Time Integrator" block is utilised. The battery's initial SOC is represented by a constant block. In order to simulate a situation where the battery is always completely charged, I changed the constant block to have a value of 1, which stands for 100%. After that, operations like addition and subtraction are carried out using a "sum" block. The constant block indicating 100% charge will be deducted from the signal from the "discrete time integrator" block.
Shown below are the block parameters of this subsystem:
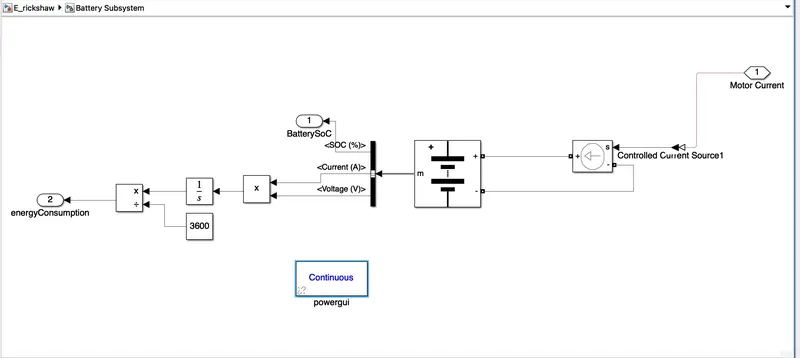
5. Battery:
FTP75:
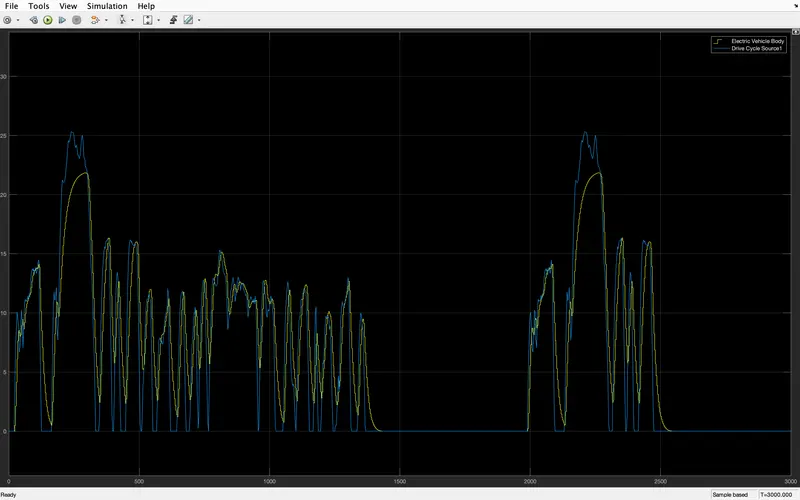
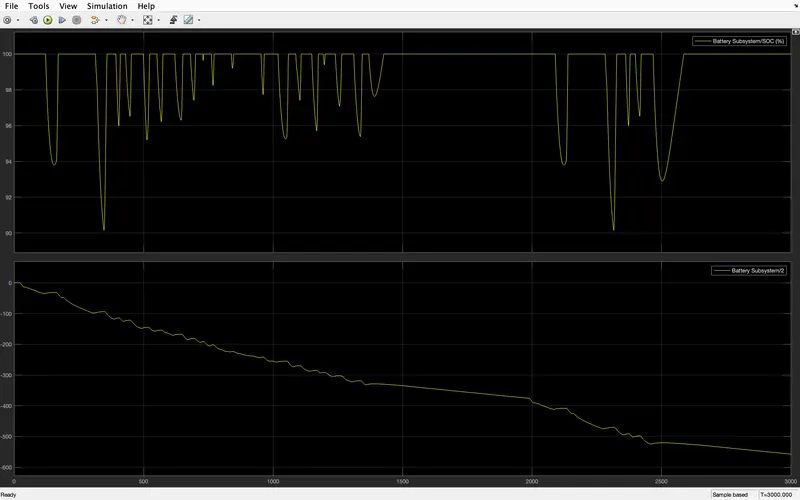
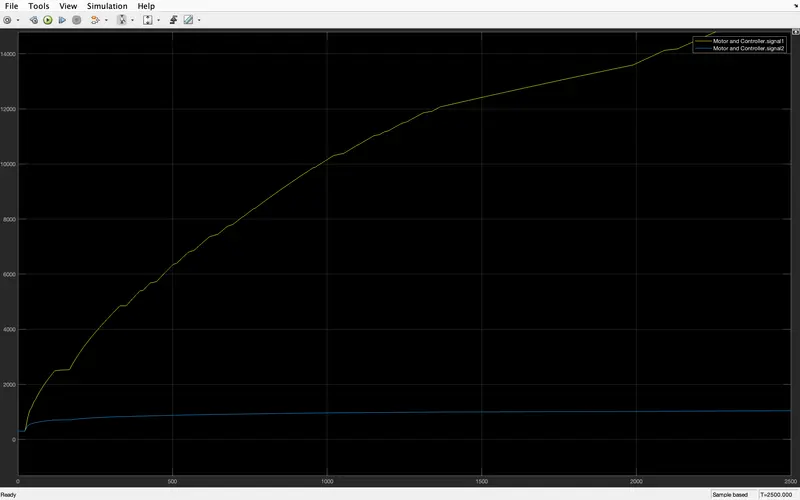
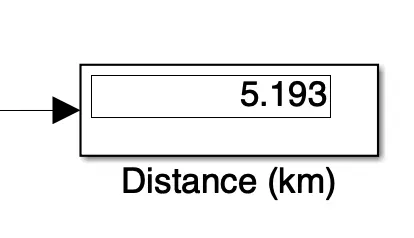
- Distance Travelled = 5.193km
- SoC ranges from 100 to 90%
- The temperature of Motor ≈ 1000K
WOT:
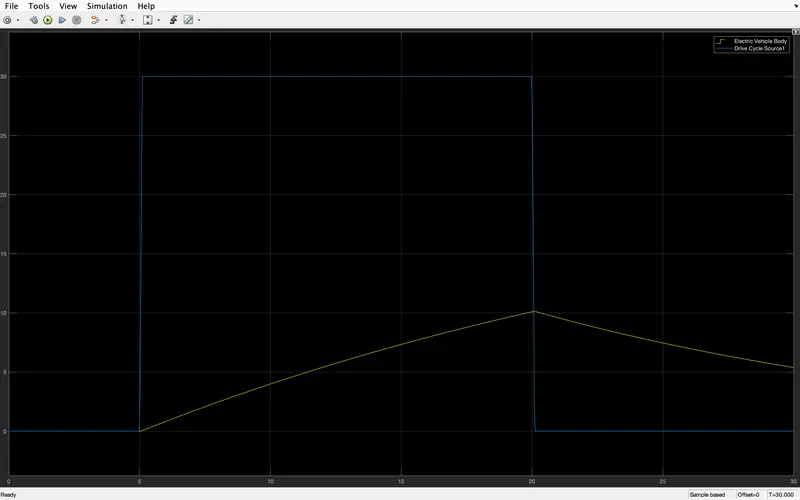
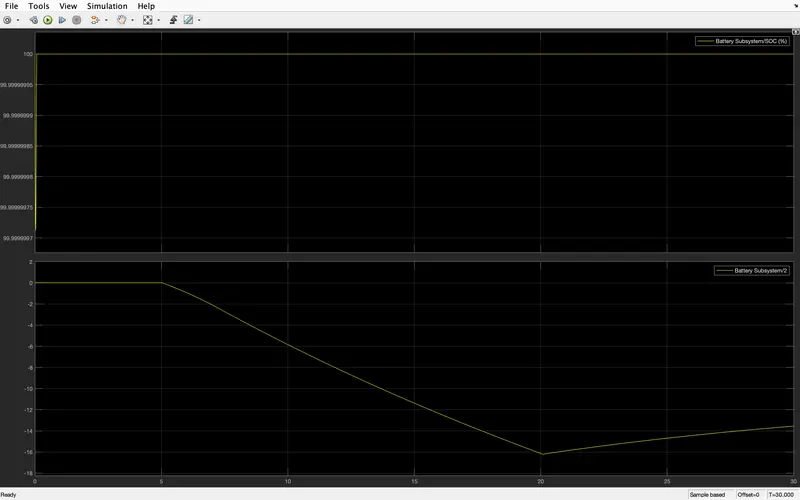
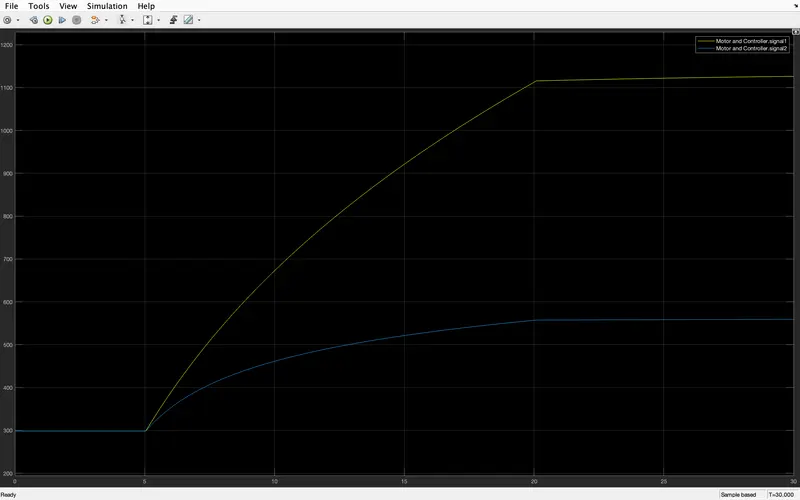
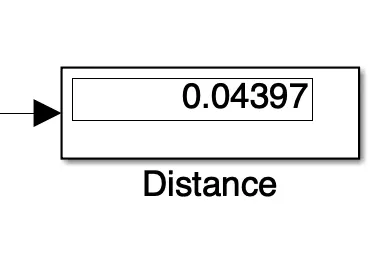
- Distance Travelled = 0.0439
- SoC ranges from 100 to 99%
- The temperature of Motor ≈ 550K