Centrifugal pump design and analysis
Aim: To model a centrifugal pump and perform a Parametric Simulation at different outlet velocities to obtain relationship between Pressure Ratio and mass flow rate.
Theory:
A Centrifugal pump is a mechanical device designed to move a fluid by means of transfer of rotational energy of one or more driven rotors called impellers to kinetic energy which makes the fluid flow.
Fluid is sucked in through the eye of the Pump by the rotating impellers. Thus fluid enters the pump axially. Then the rotating impellers cast out the fluid by action of centrifugal force along its circumference through impeller's vane tips. This increases the fluid's velocity and pressure and also direct it to the outlet. The casing is designed to constrict the fluid from the inlet and direct it onto impeller and slow and control fluid before discharge.
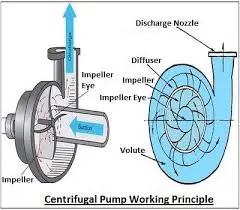
Types of Centrifugal Pumps:
Based on type of flow:
1)Axial Flow
2)Radial Flow
3)Mixed Flow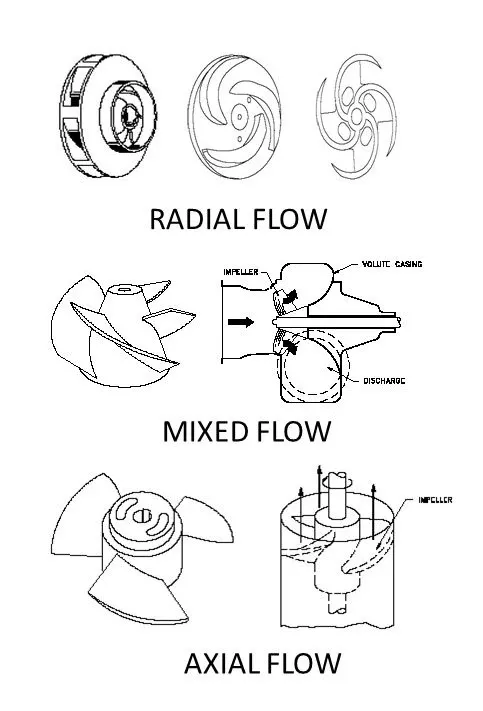
Based on number of Stages:
1)Single Stage
2) MultiStage
Based on closure of impeller:
1) Open
2) Semi-Open
3) Closed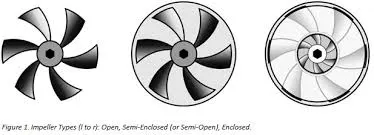
Based on type of impeller:
1)Forward Swept
2)Radial Exit
3)Backswept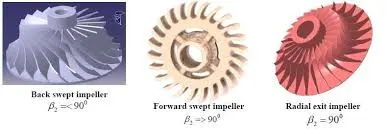
Based on type of casing:
1)Volute
2)Diffuser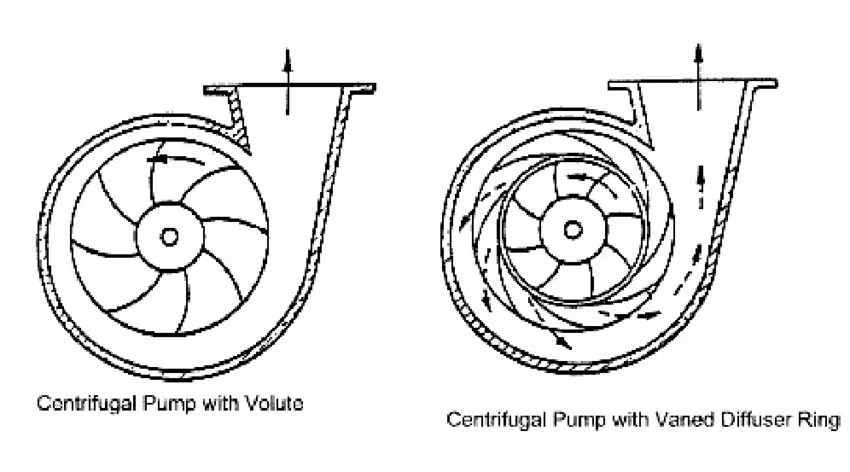
Head of Pump:
A pump does not create pressure, it only creates flow. The gauge pressure is a measurement of the resistance to flow.
In fluids the term head is used to measure the kinetic energy which a pump creates. Head is a measurement of the height of the liquid column the pump could create from the kinetic energy the pump gives to the liquid.
Different Types of Pump Head
Total Static Head - Total head when the pump is not running
Total Dynamic Head (Total System Head) - Total head when the pump is running
Static Suction Head - Head on the suction side, with pump off, if the head is higher than the pump impeller
Static Suction Lift - Head on the suction side, with pump off, if the head is lower than the pump impeller
Static Discharge Head - Head on discharge side of pump with the pump off
Dynamic Suction Head/Lift - Head on suction side of pump with pump on
Dynamic Discharge Head - Head on discharge side of pump with pump on
The head of a pump can be expressed in metric units as:
h = (p2 - p1) / (ρ g) + v^2 / (2 g)
where
h = total head developed (m)
p2 = pressure at outlet (N/m2)
p1 = pressure at inlet (N/m2)
ρ = density (kg/m3)
g = acceleration of gravity (9.81) m/s2
v2 = velocity at the outlet (m/s)
Pump Efficiency
Pump efficiency, η (%) is a measure of the efficiency with which the pump transfers useful work to the fluid.
η = Pout / Pin
where
η = efficiency (%)
Pin = power input
Pout = power output
We will be modelling a Open type impeller with Mixed Flow vanes and Volute Casing.
Methodology:
First we will model the impeller and shaft.
Shaft diameter = 30 mm = 0.03 m
Impeller Vane Peripheral Diameter=150mm= 0.15 m
Number of Blades=5
We used helix command to create a Helix profile that will be followed to extrude the Blades.We can see that blades have backswept. Circular pattern is used to pattern the blade for 5 times.The shape of blades is enhanced using Cut Revolve to make it more fluiddynamic and less restriction for fluid entry.
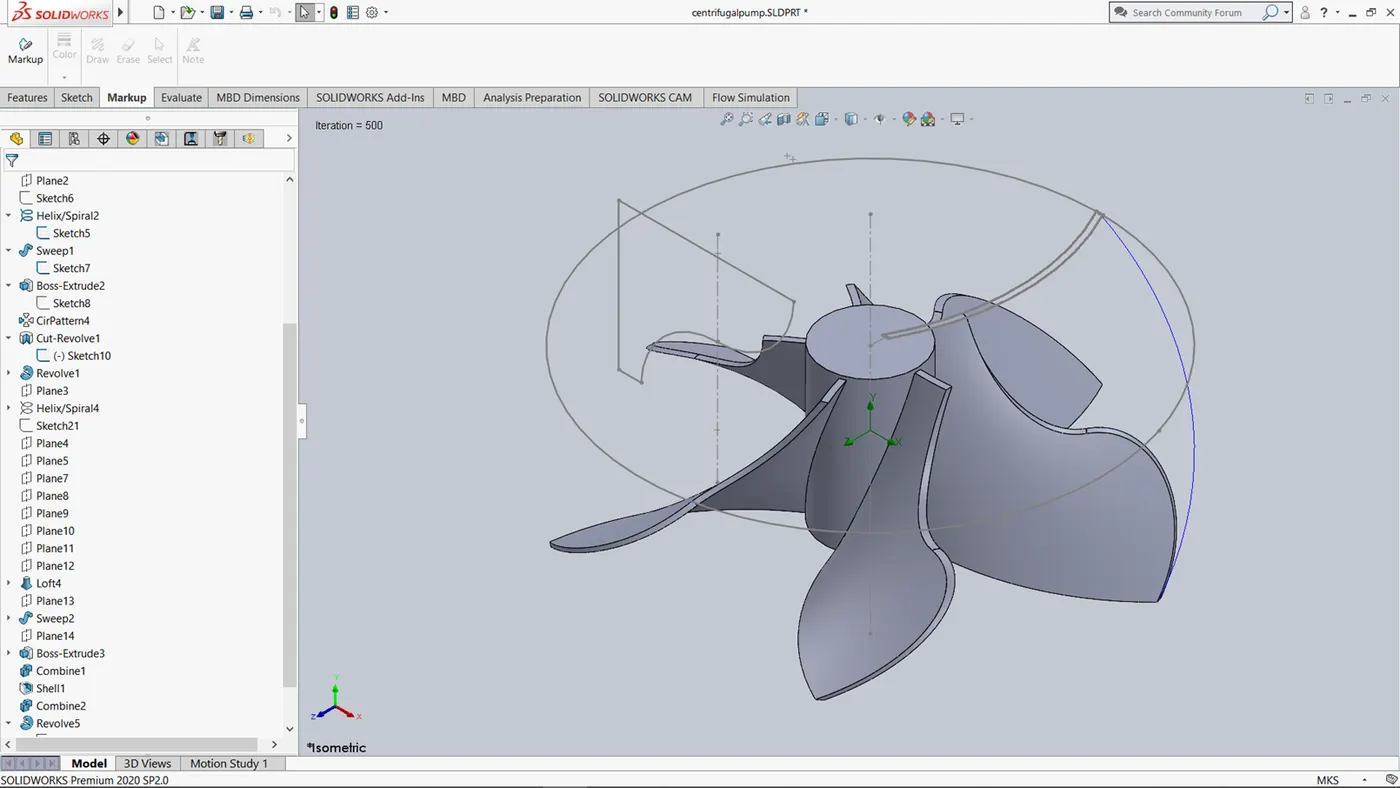
Once the impeller is done, we will start modelling the casing part. An envelope for the impeller is first created to form central part of the casing.Clearance of 2 mm is provided here.
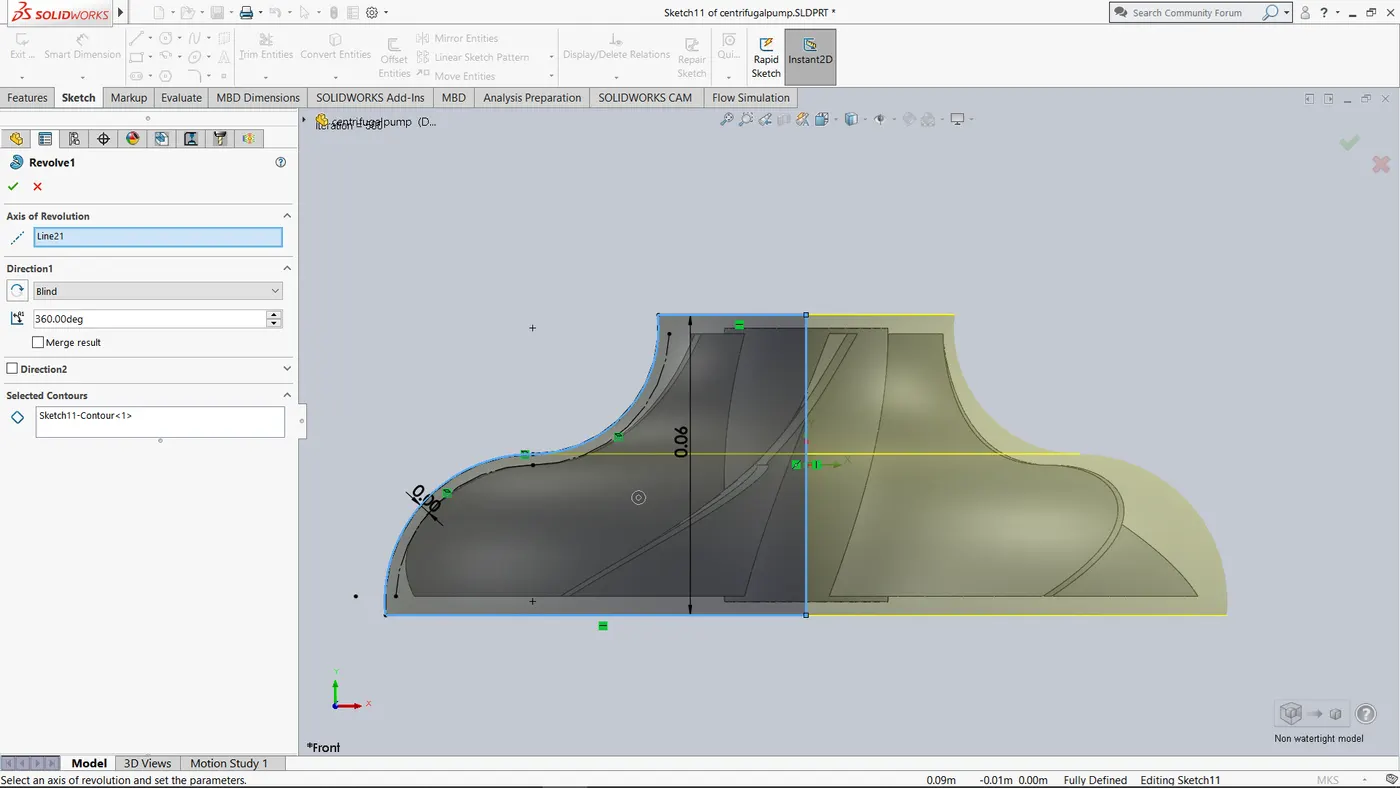
Then we will create a Spiral to form the Volute of the casing.
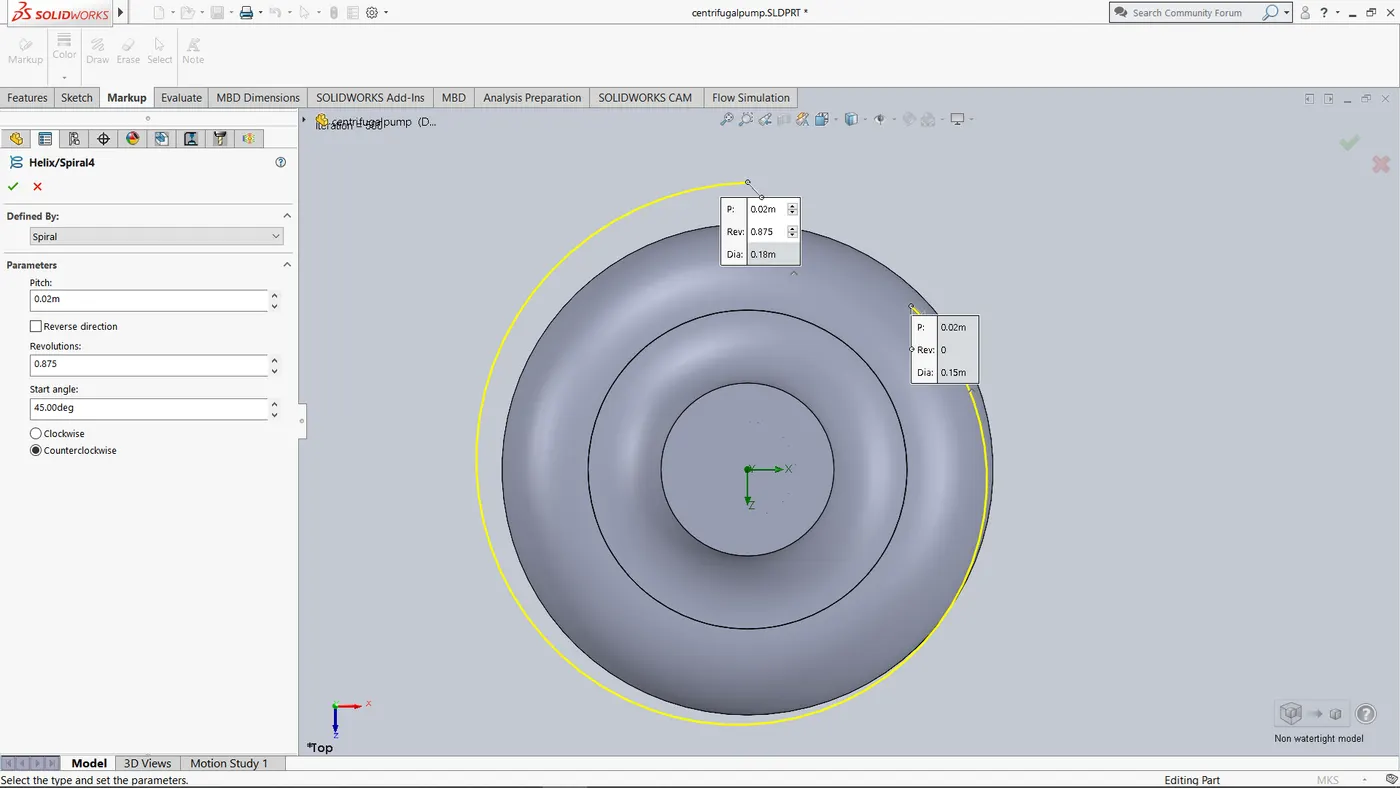
Then using the loft command a profile of increasing diameter is create to form the Volute which will serve as outlet for the casing.
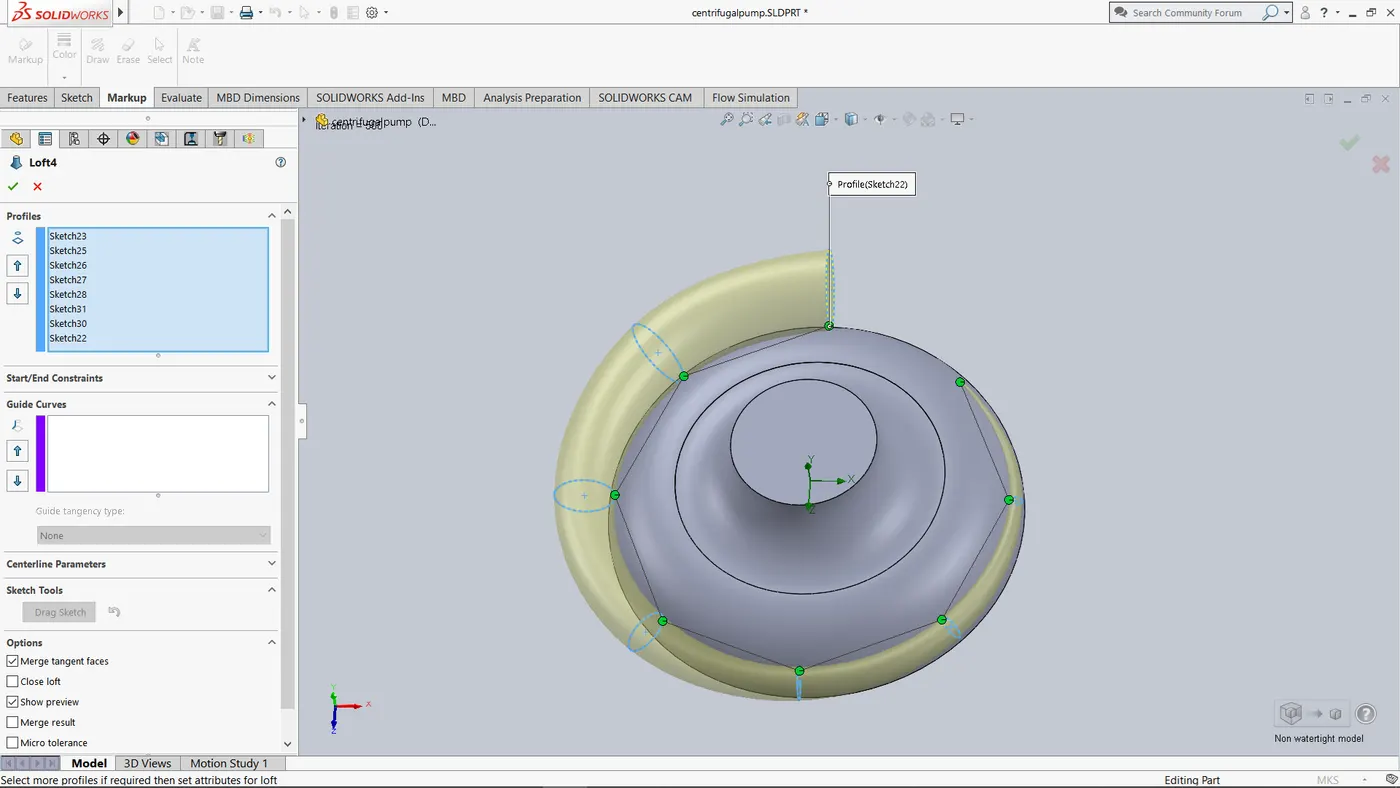
We will further extend the Volute by a Sweep of diameter 30mm.
Similarly we will create Inlet Pipe of 55mm diameter by using Extrude feature.
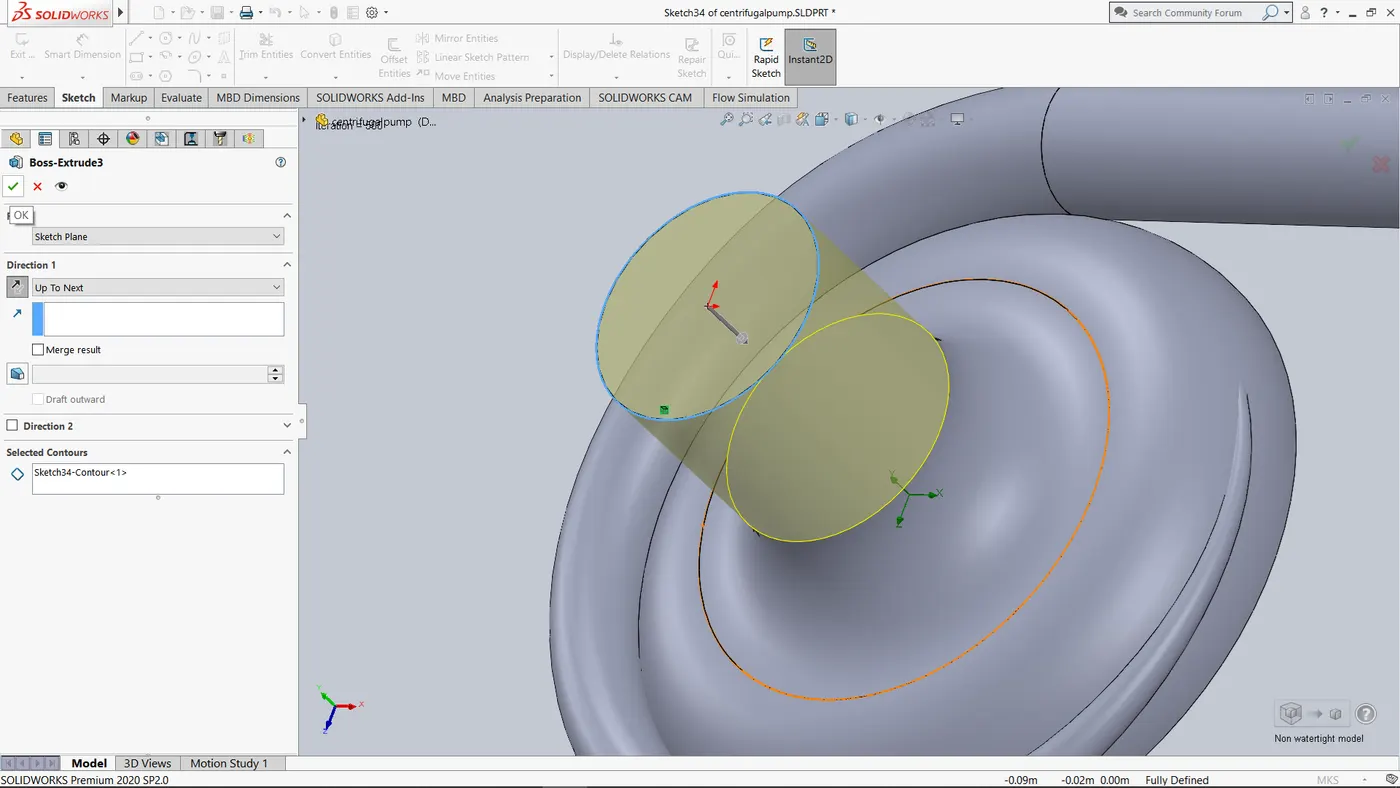
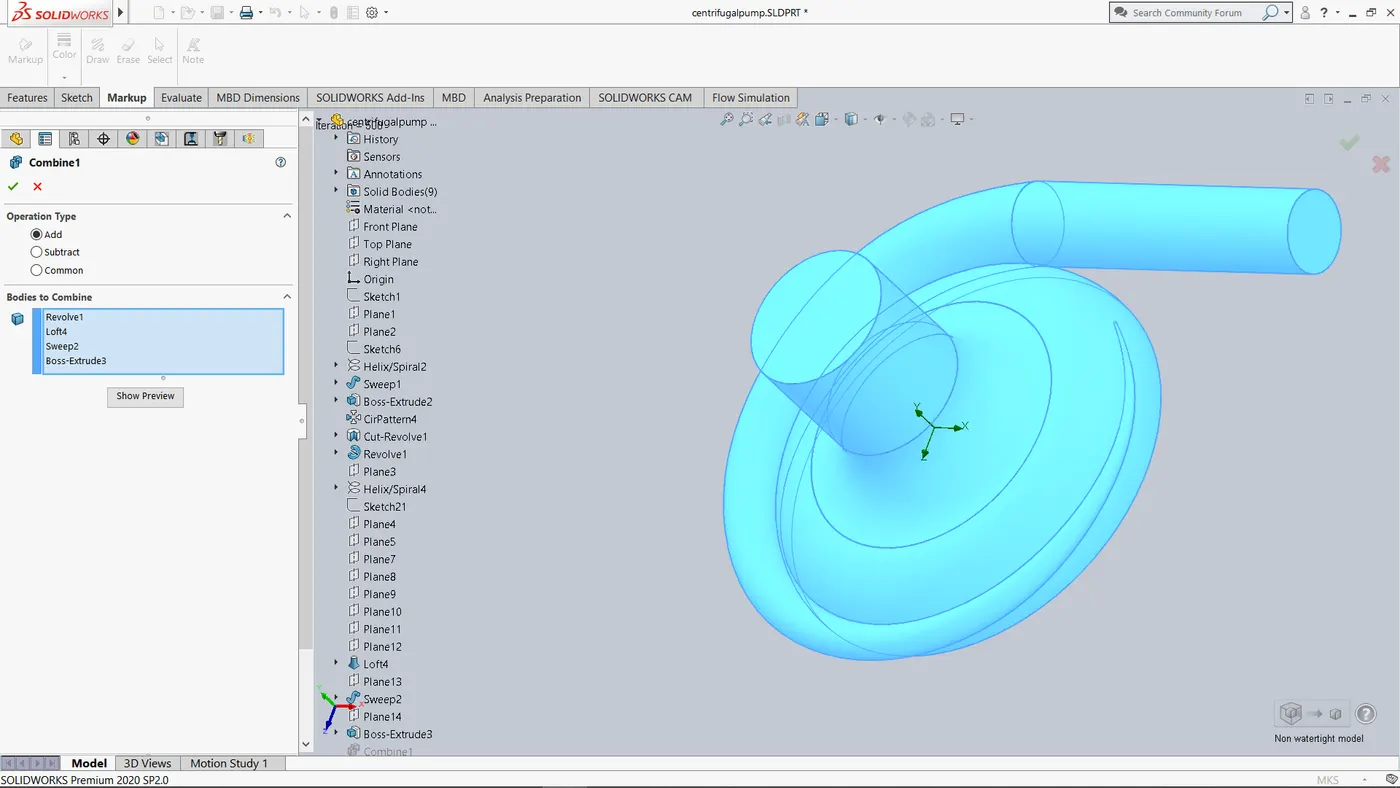
We will then combine Casing features to form a continuous casing.
Then using the Shell Command we will create a shell from Inlet Face to Outlet Face outward with thickness of 2mm.
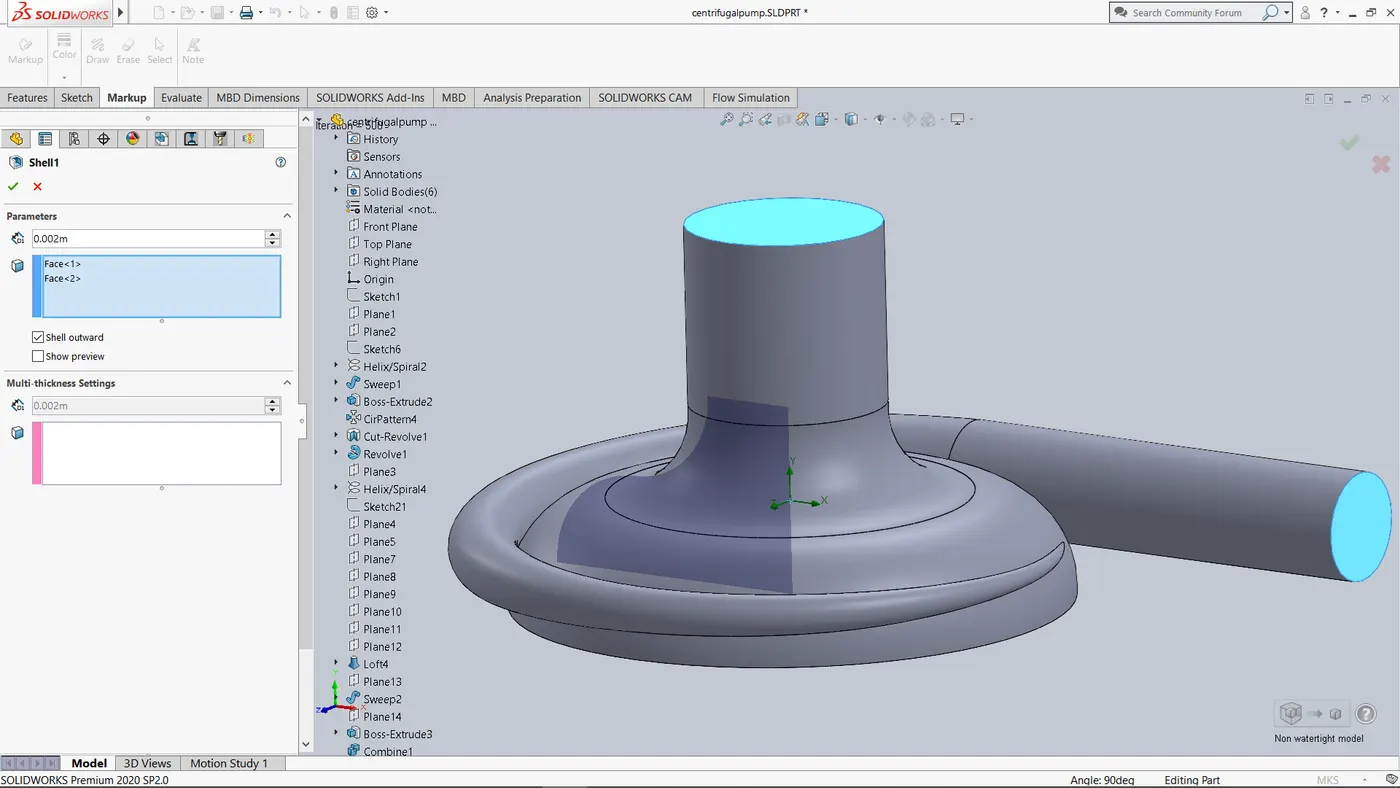
Thus Casing dimensions
Inlet Diameter = 55 mm = 0.055m
Outlet Diameter = 30 mm = 0.03 m
Thickness =2mm = 0.002m
Now we will create a Volume which will be used to simulate rotating fluid due to action of rotors.Volume must be such that it completely covers all rotating parts.
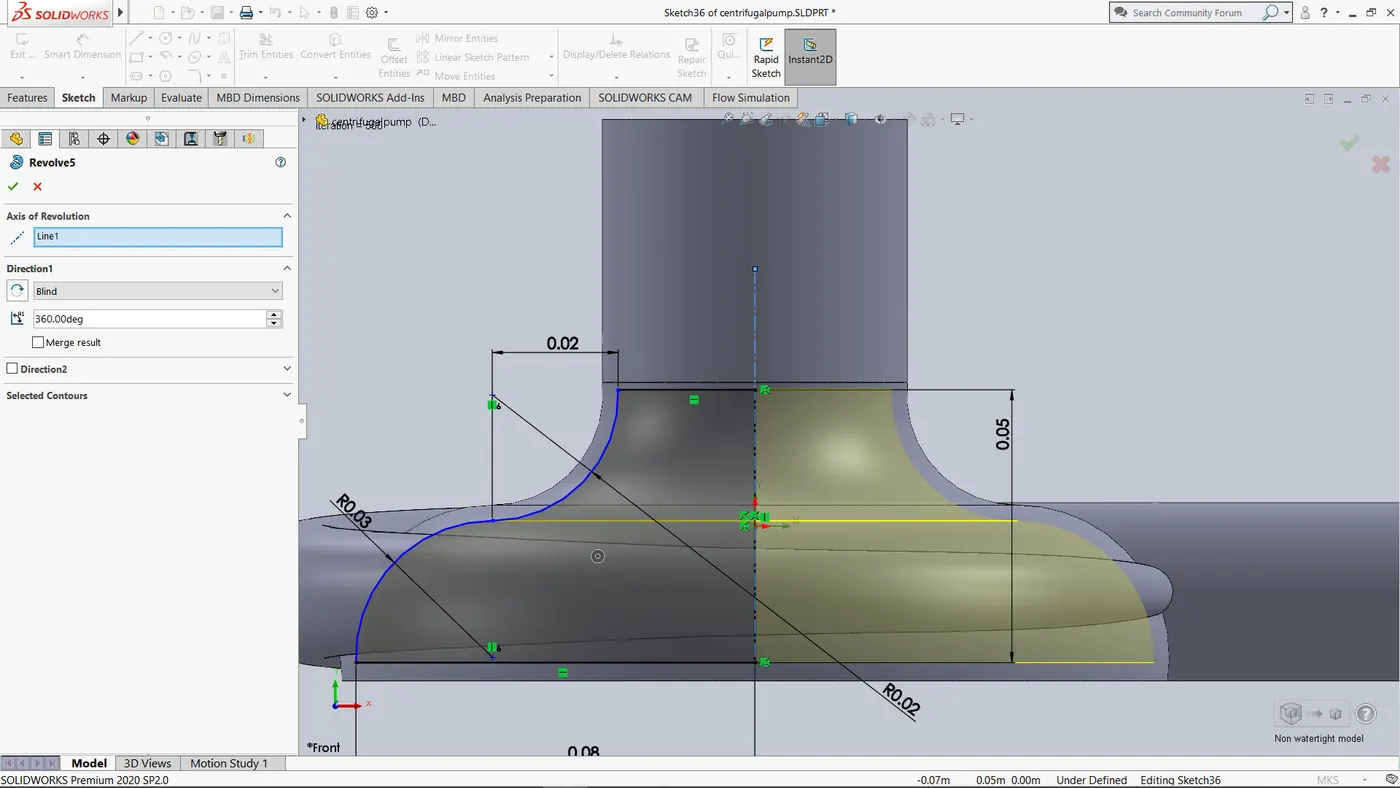
Now model is ready for flow simulation.
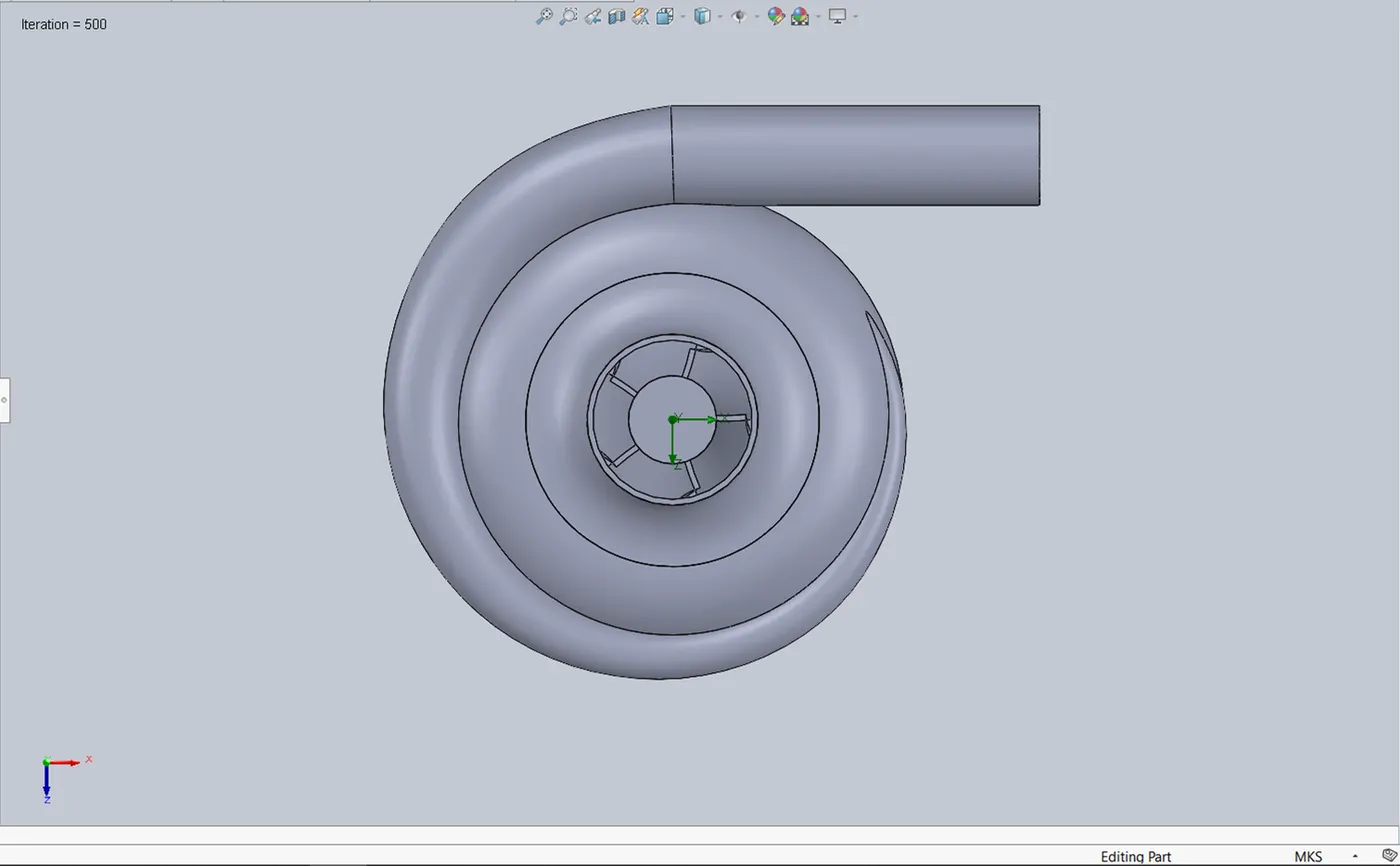
We will now Create lids to form a closed geometry for Internal Flow Simulation. 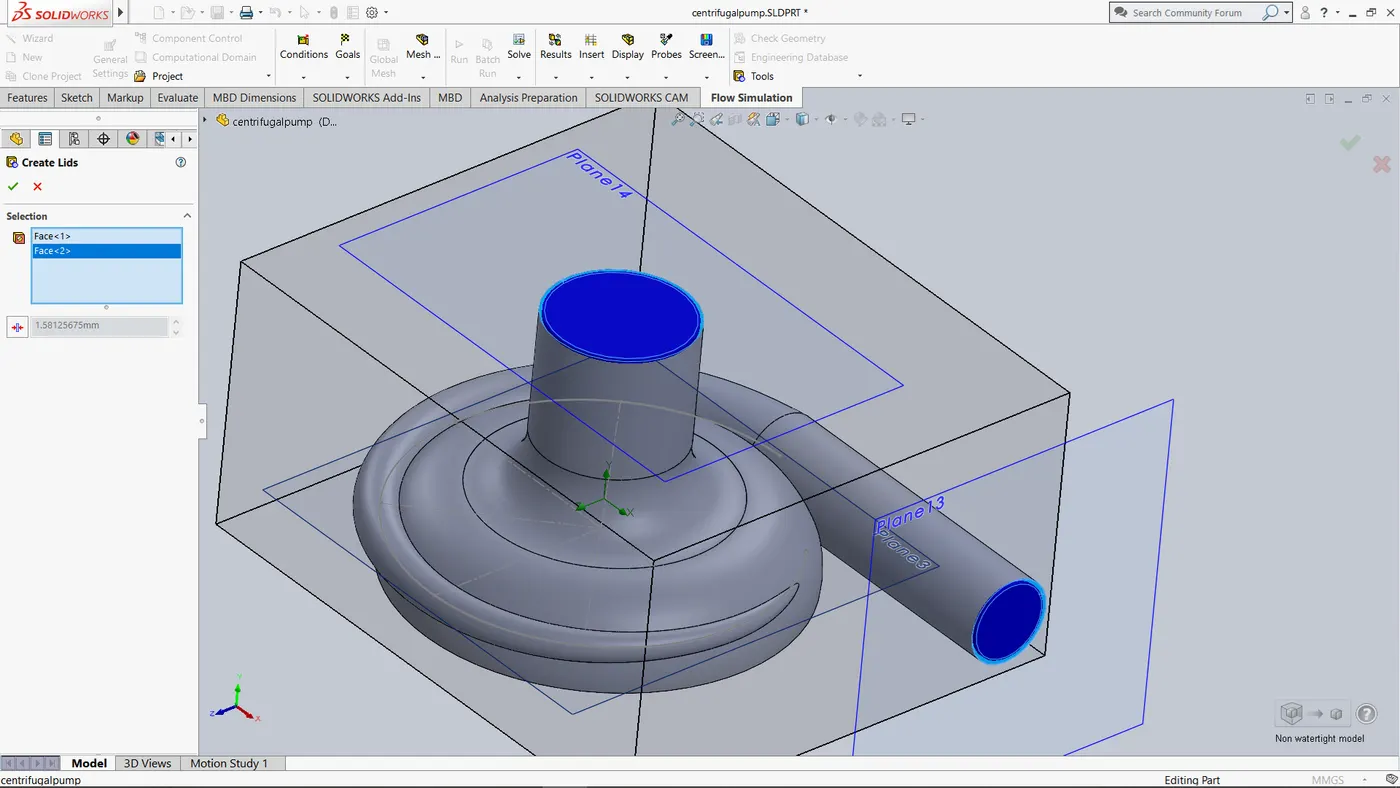
Then using Flow Simulation Wizard we will setup a Internal Flow Simulation.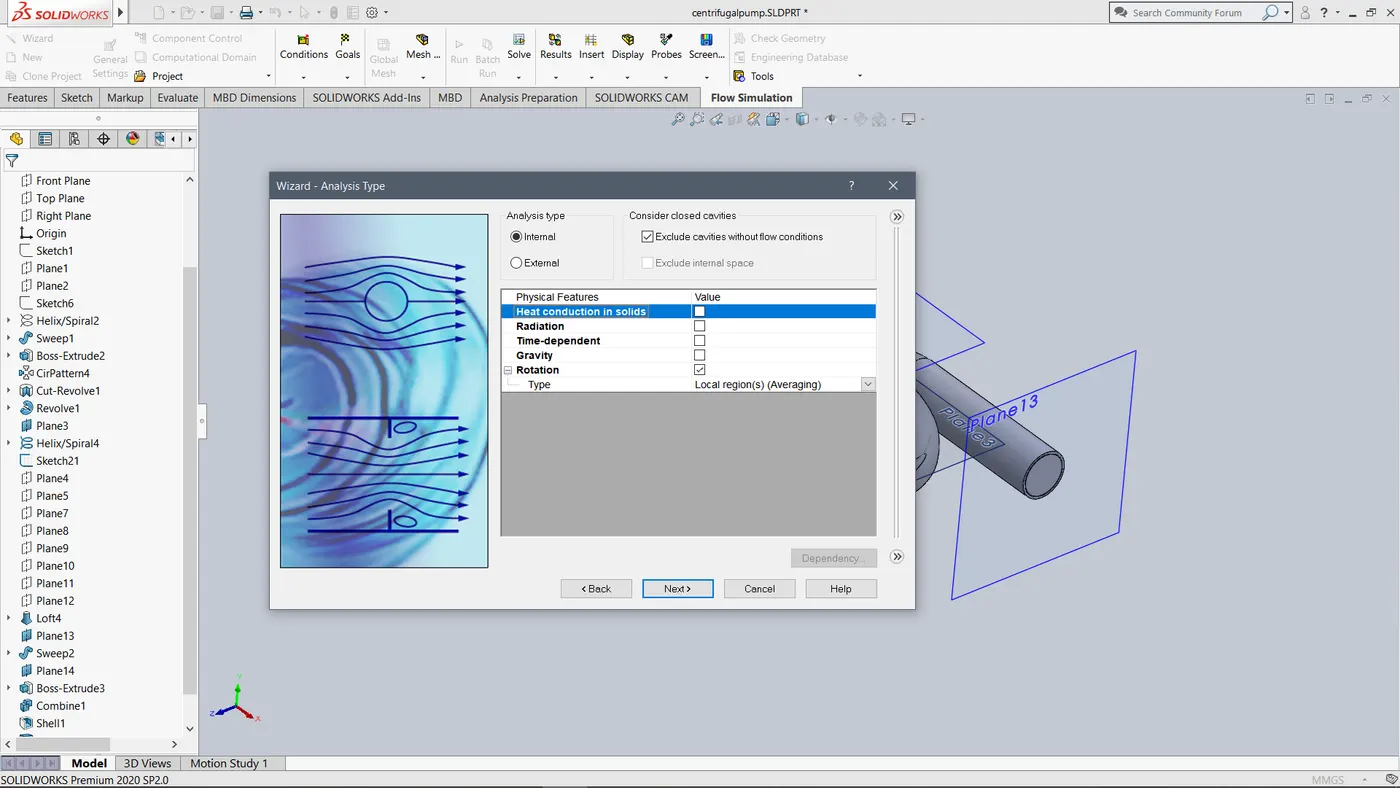
We will select SI units and Water as working fluid.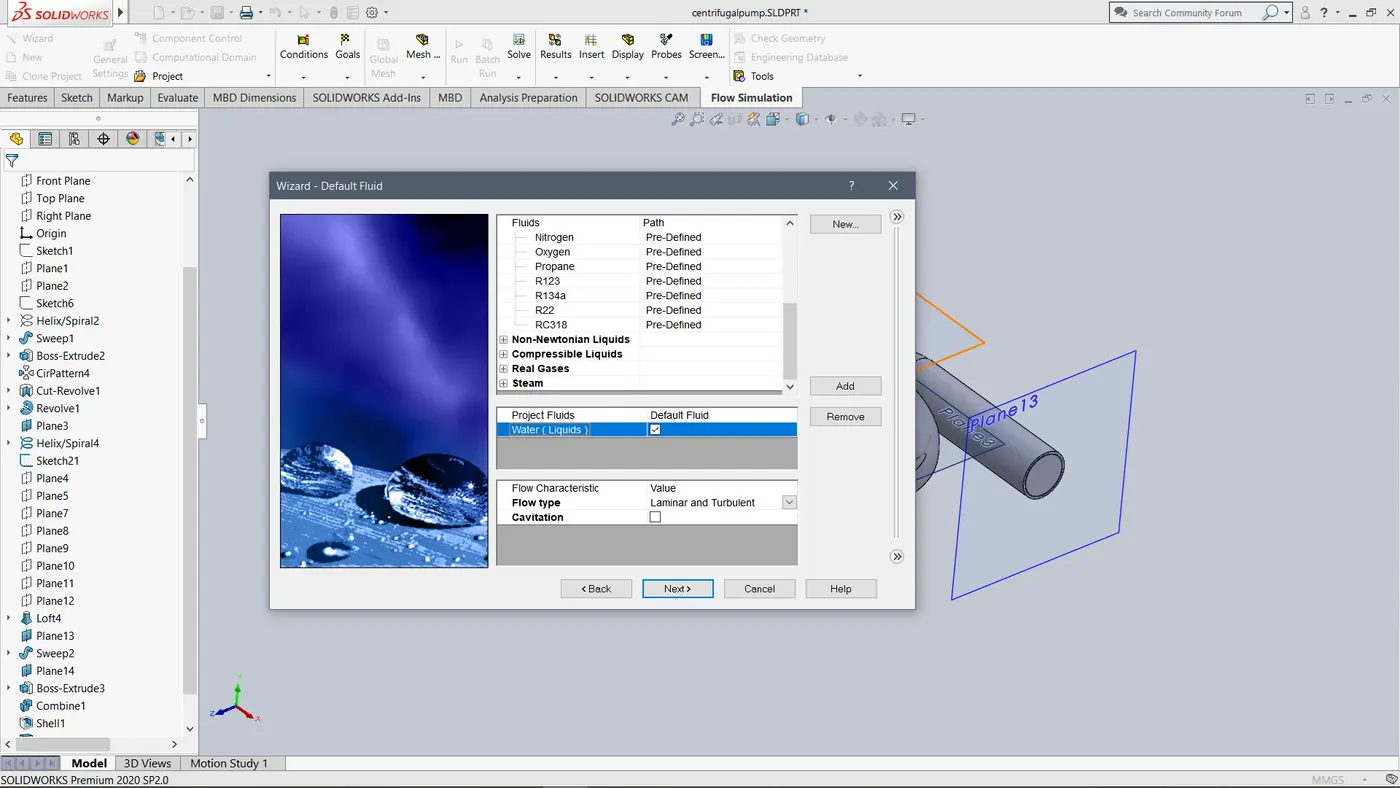
Once a new project is created.By right clicking on Input Data, Under Component Control we will deselect the Volume created to simulate rotating fluid to be ignored from Computations. 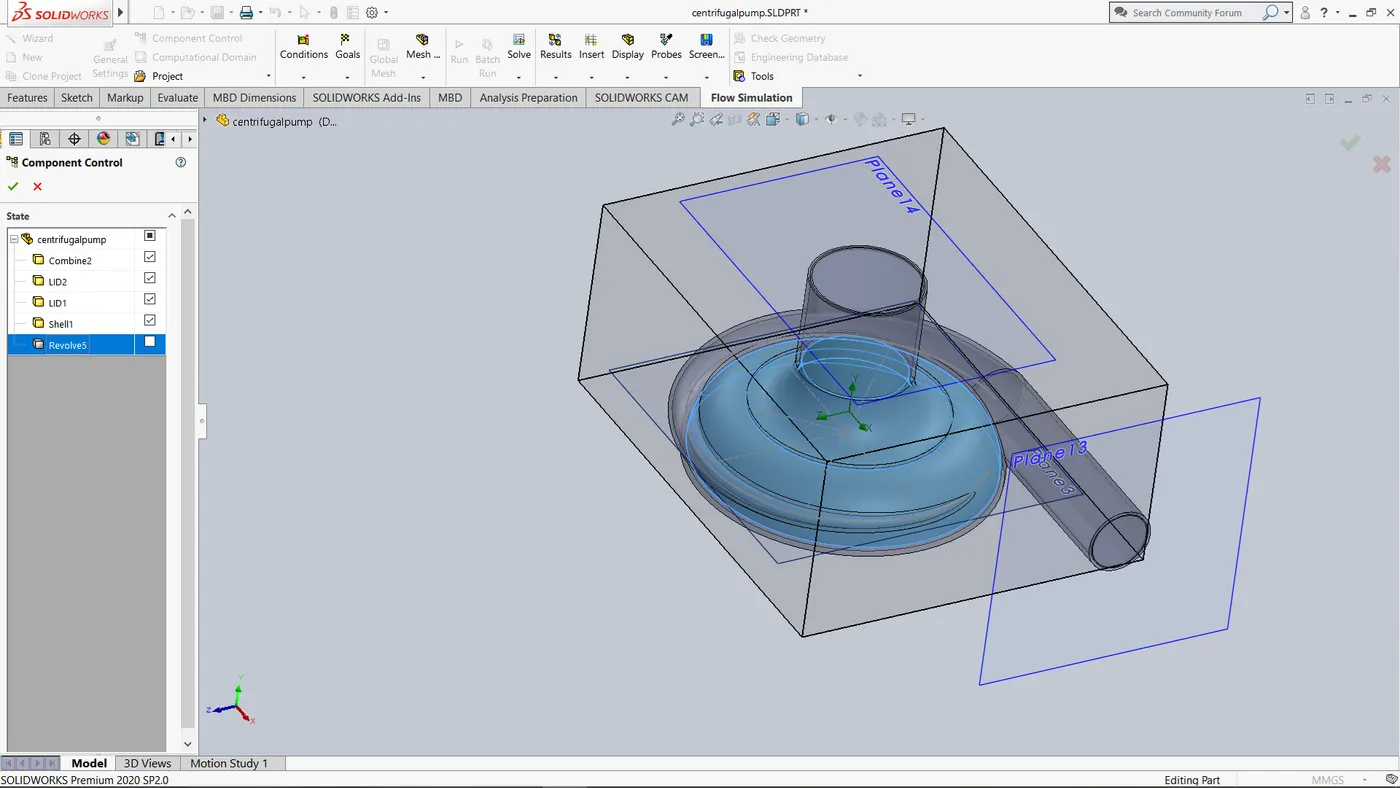
Then we will insert a Rotating region by selecting the Volume by name Reveolve5 and with angular velocity of -1000 rad/s , negative sign to reverse the direction specific to the casing.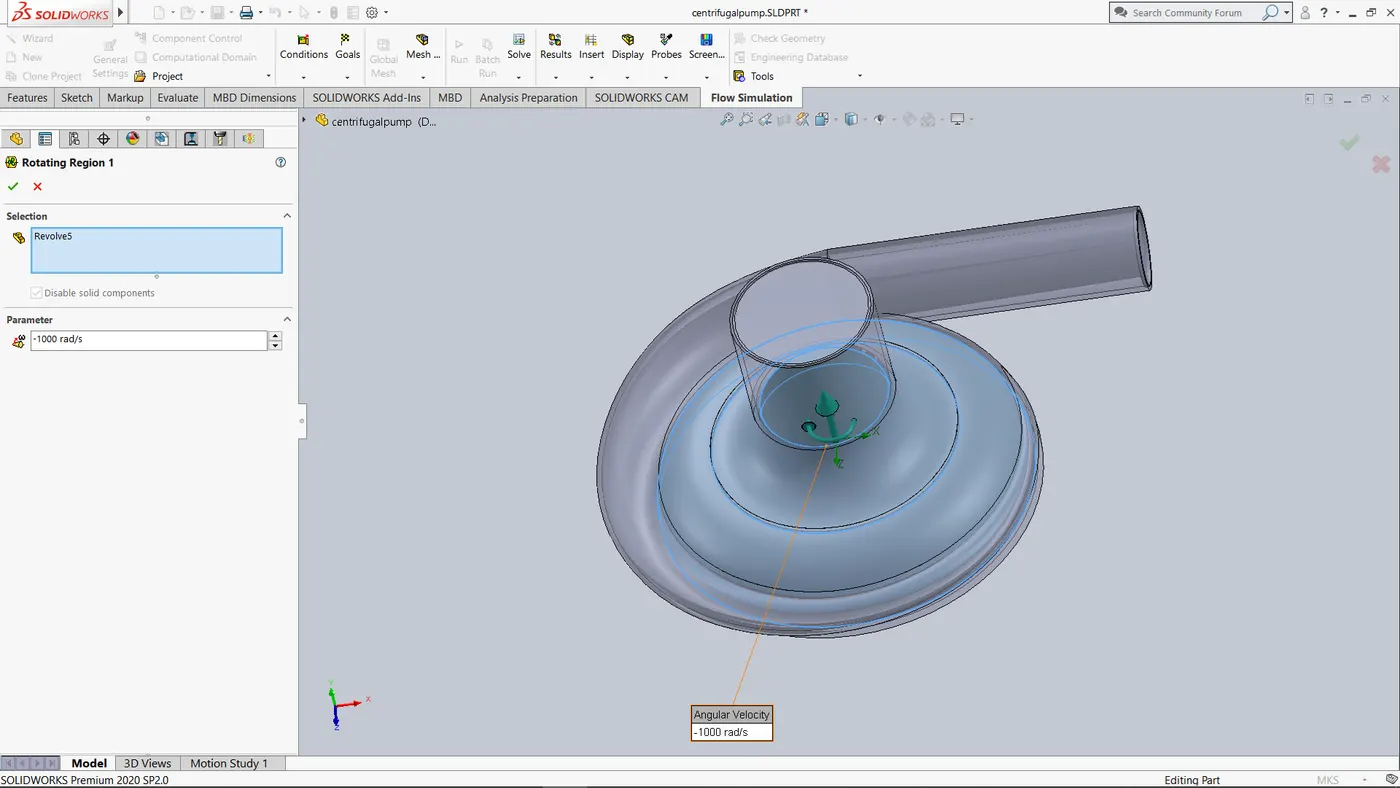
Then we will provide Boundary conditions:
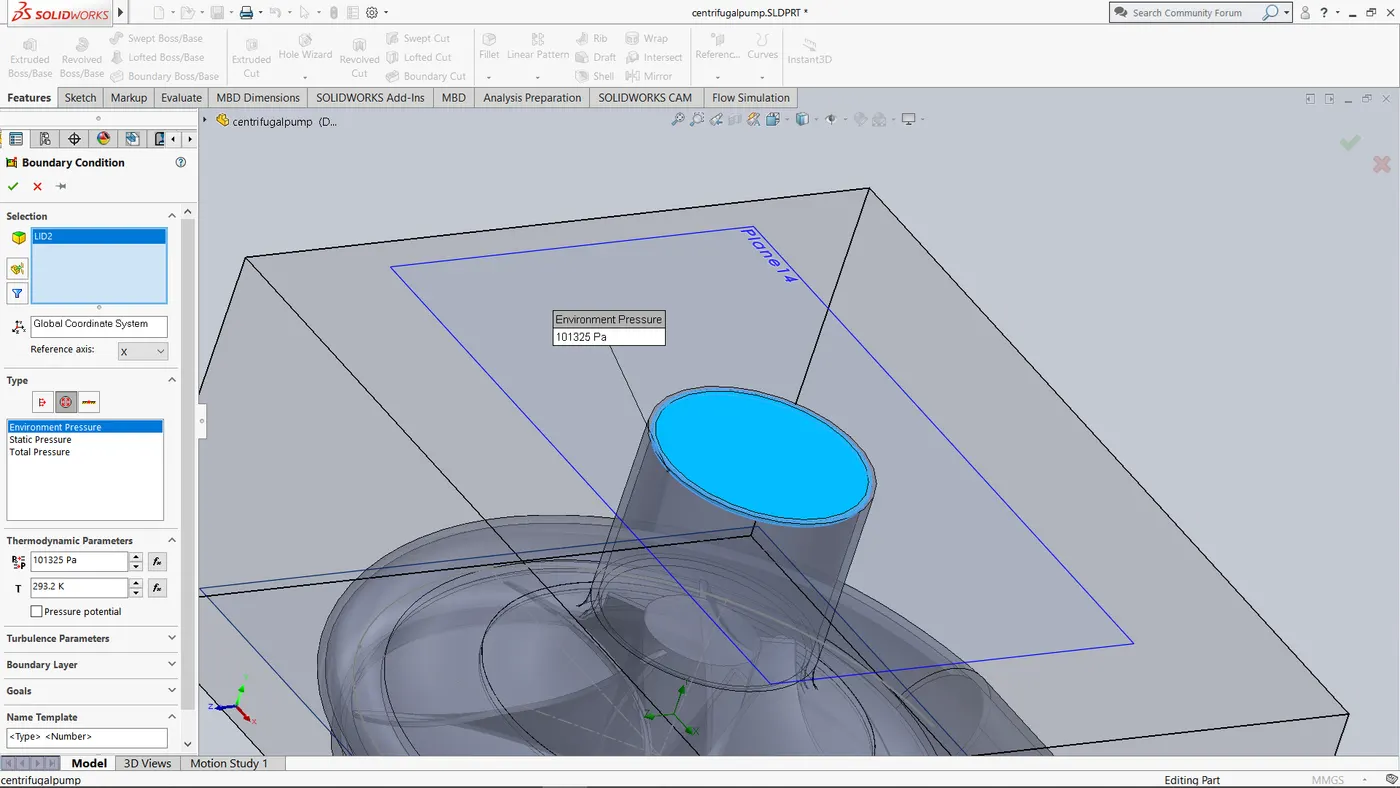
Outlet Velocity of 10m/s at Outlet Face and Environment pressure of 101325 Pa at Inlet Face.
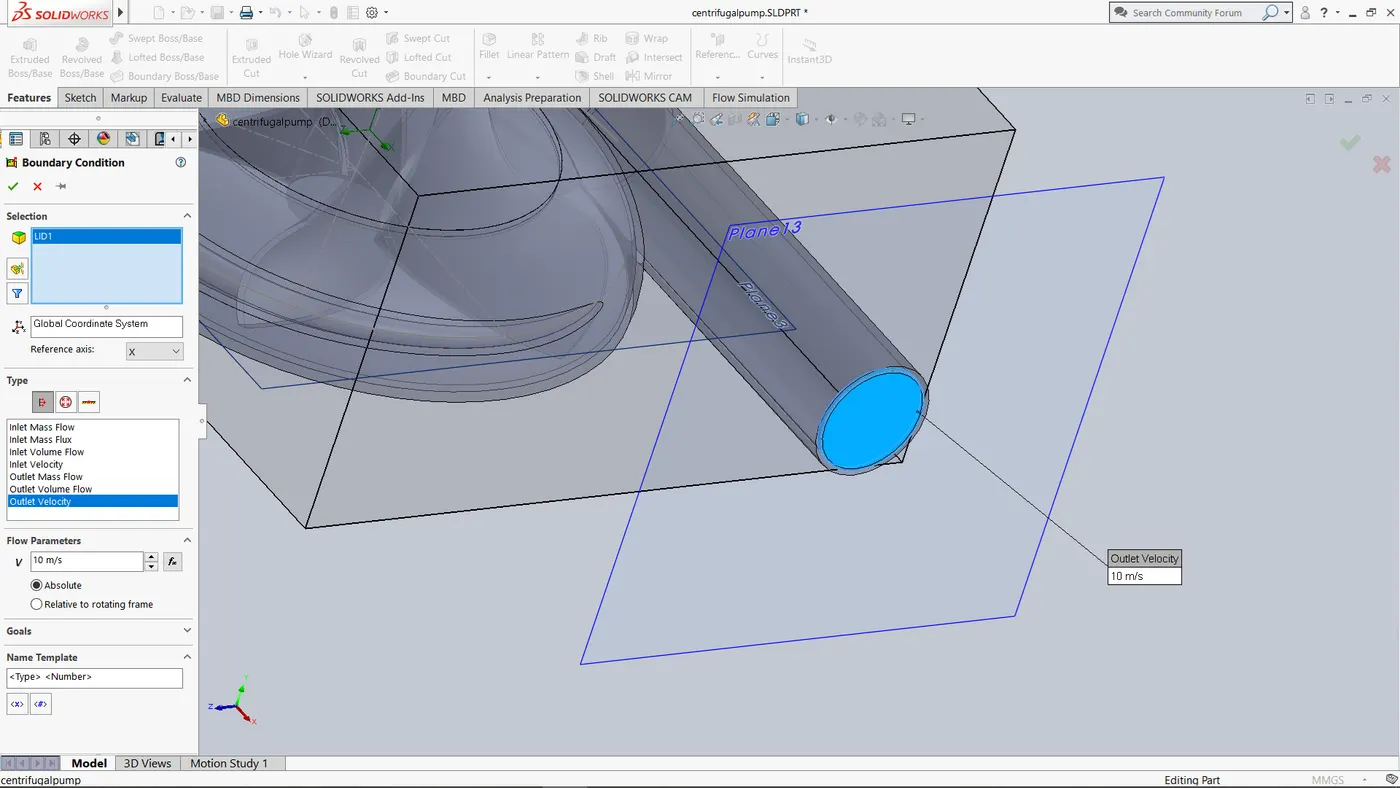
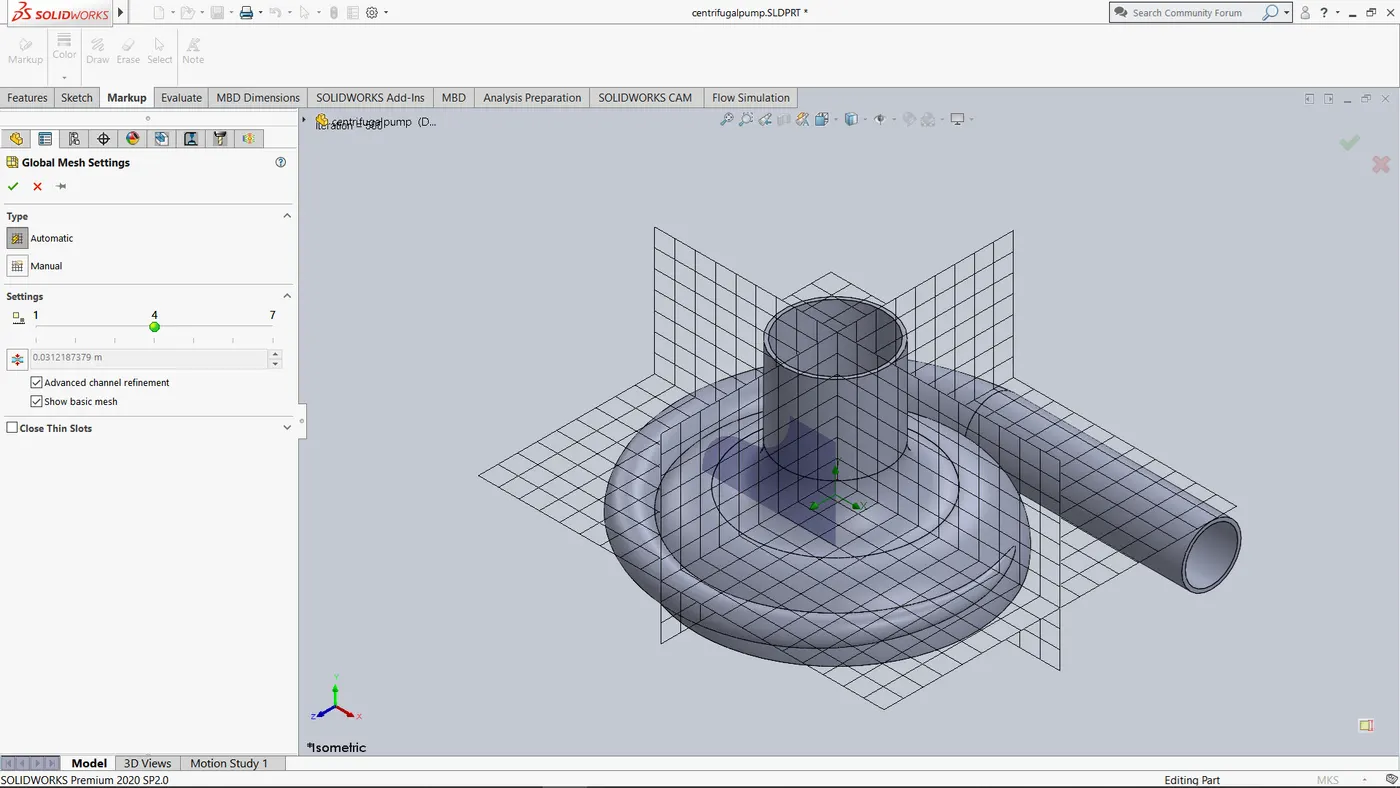
Then Set the Autometic Mesh to 4 and enable Advance Channel Refinement.
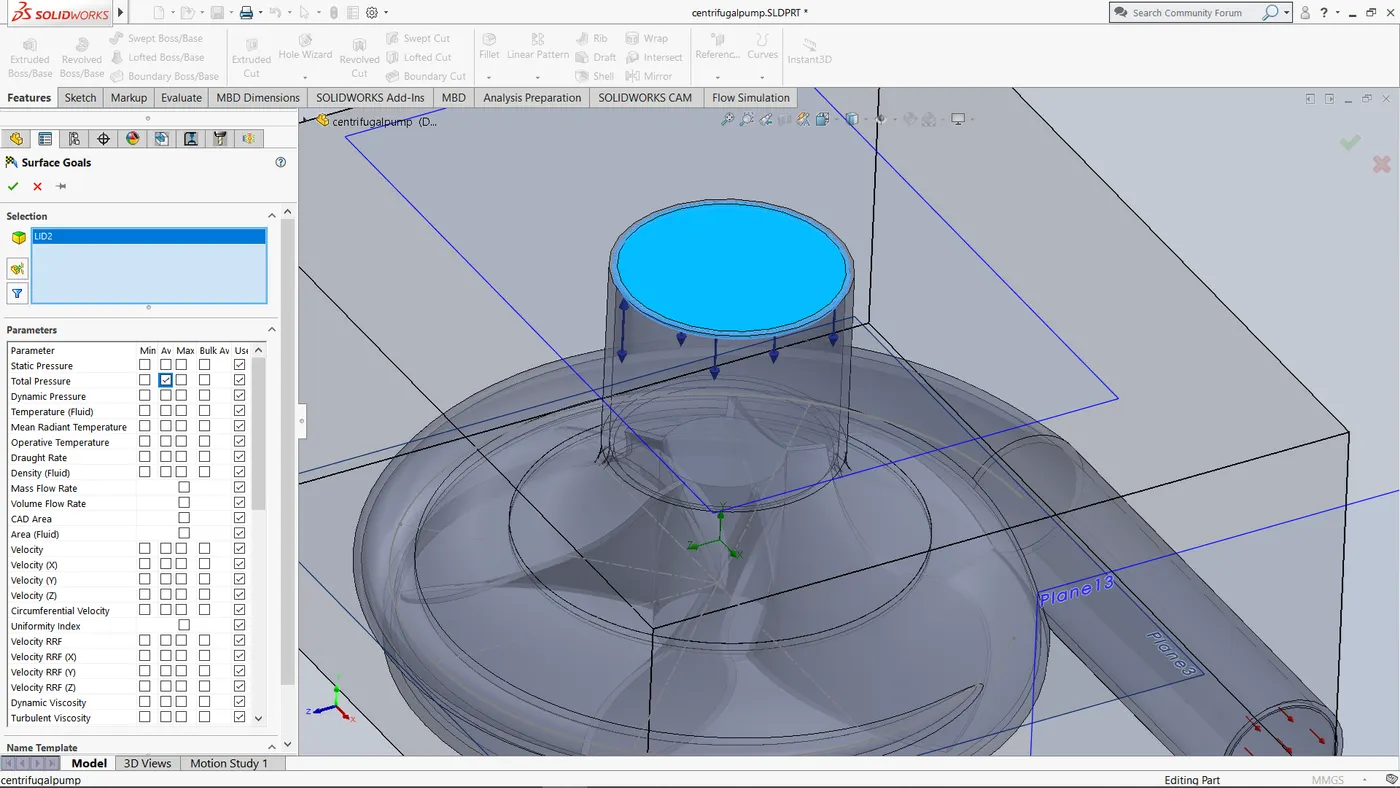
We will Insert Surface Goals:
Mass Flow rate at Outlet Face.(SG Mass flow rate 2)
Average Pressures at Inlet( SG Average Total Pressure 3) and Outlet Face(SG Average Total Pressure 1).
Then under results we will create Cut Plots for Velocity, Pressure , Flow Trajectories for Velocity and Goal Plots for Mass Flow Rate, Inlet and Outlet Pressures.
Under Input Data we will modify Calculation Control Options to run the simulation for 500 Iterations.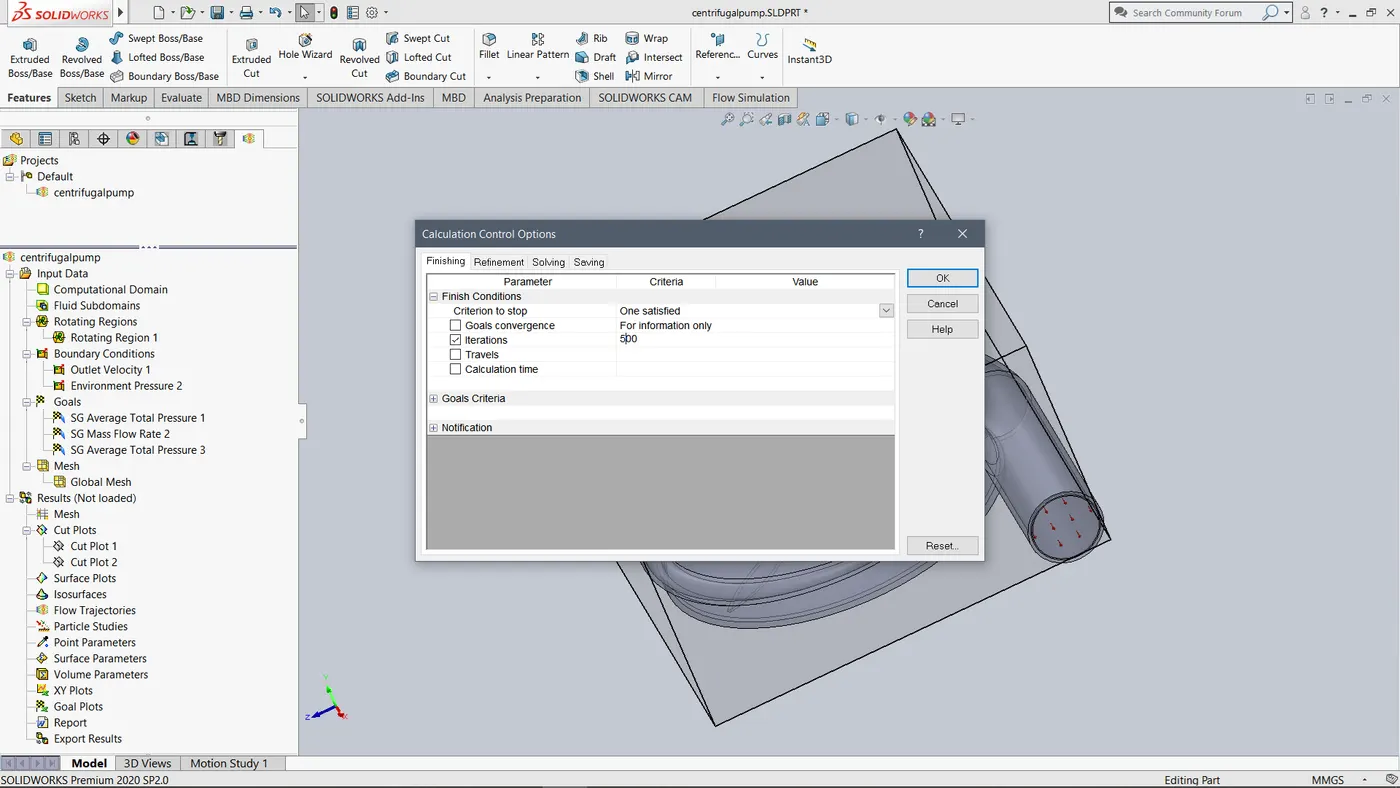
We will Run the baseline simulation.
Then we will create a Parametric Study for different Outlet Velocities from 10m/s to 20m/s with 6 steps.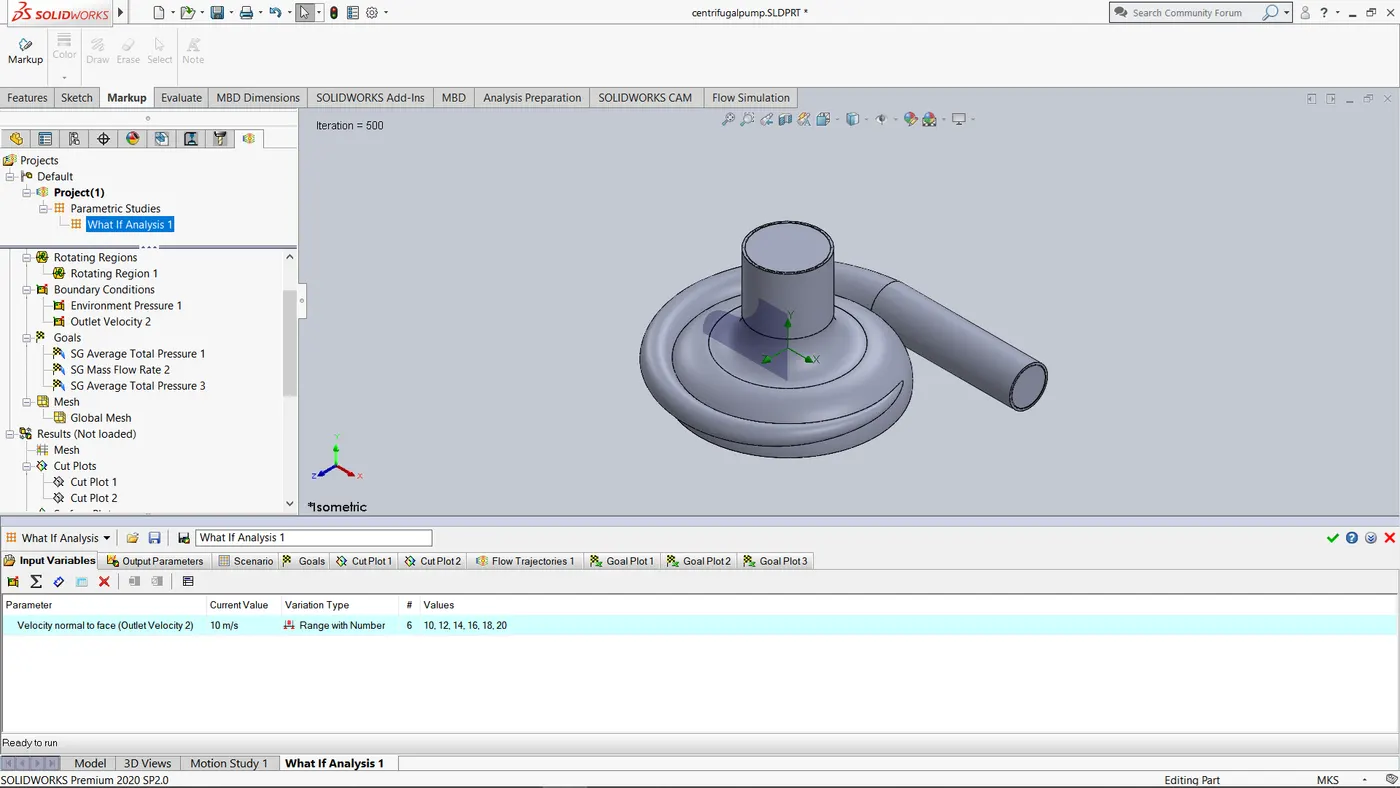
We will select all Output Parameters and Run the Simulation.
Once the Parametric study is completed we will study the Results.
Results and Observations:
Baseline Simulation: Outlet velocity =10m/s
Cut Plots:
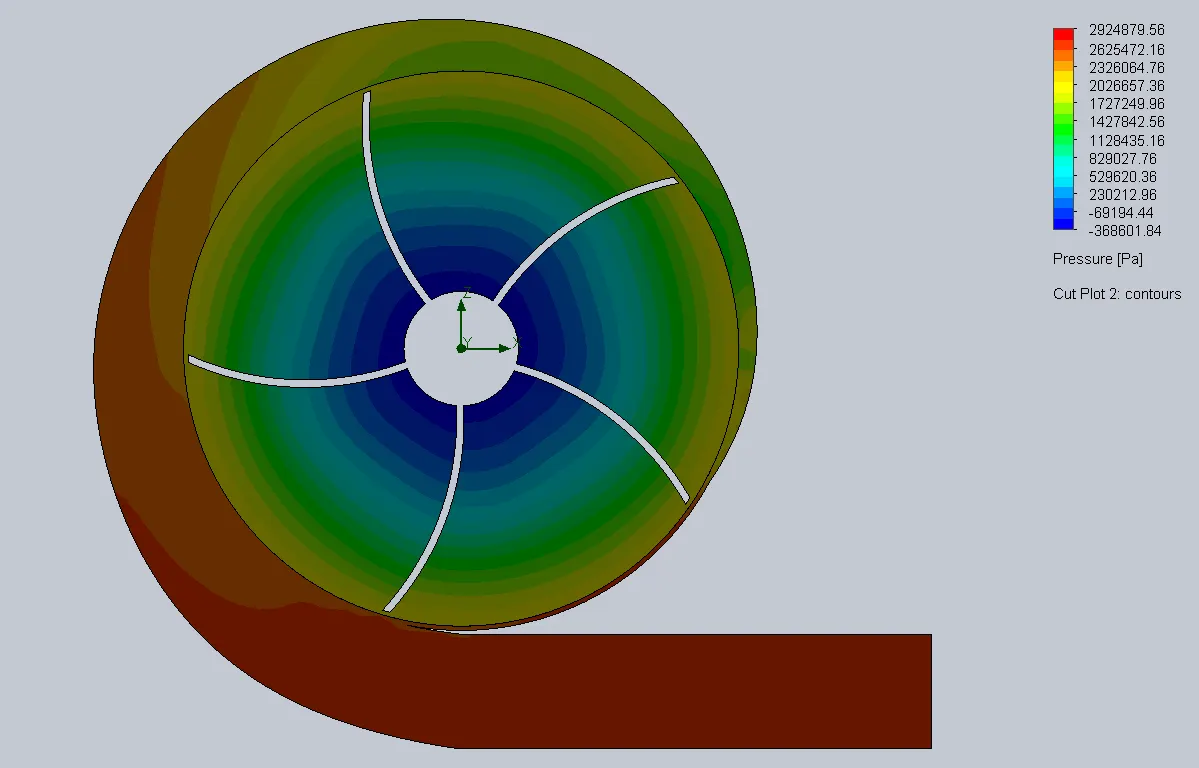
Pressure Plot
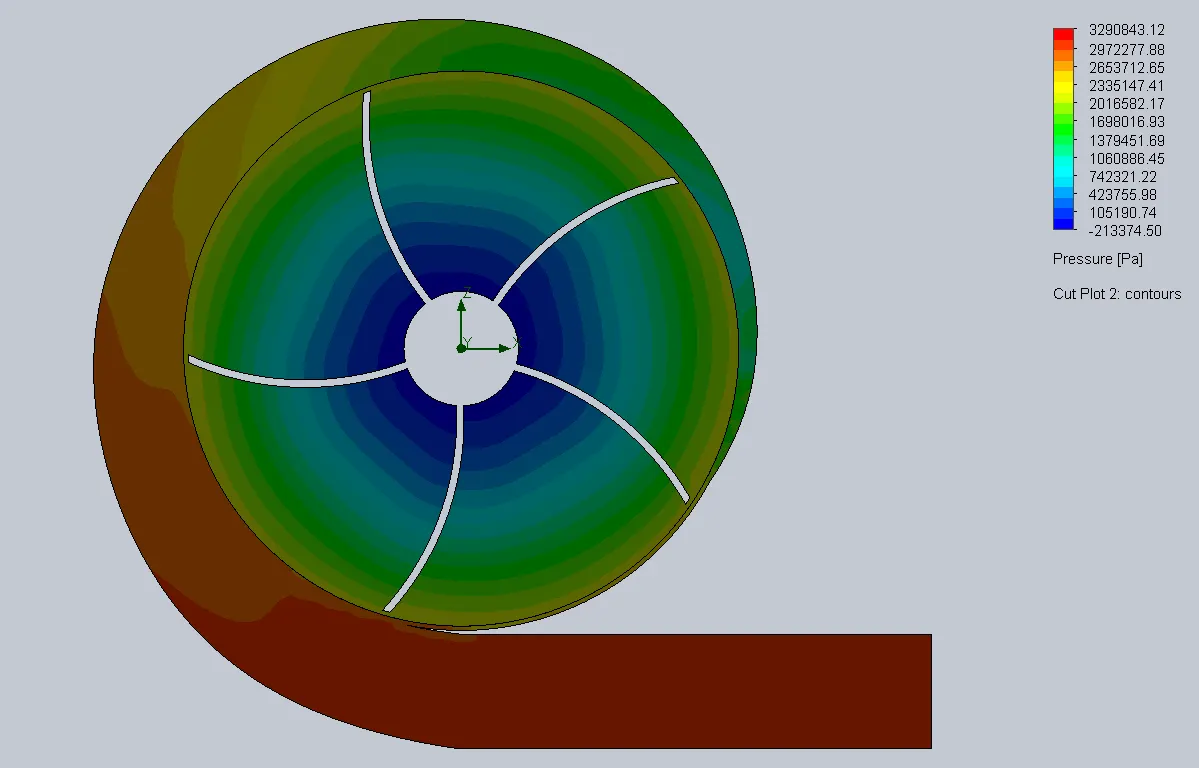
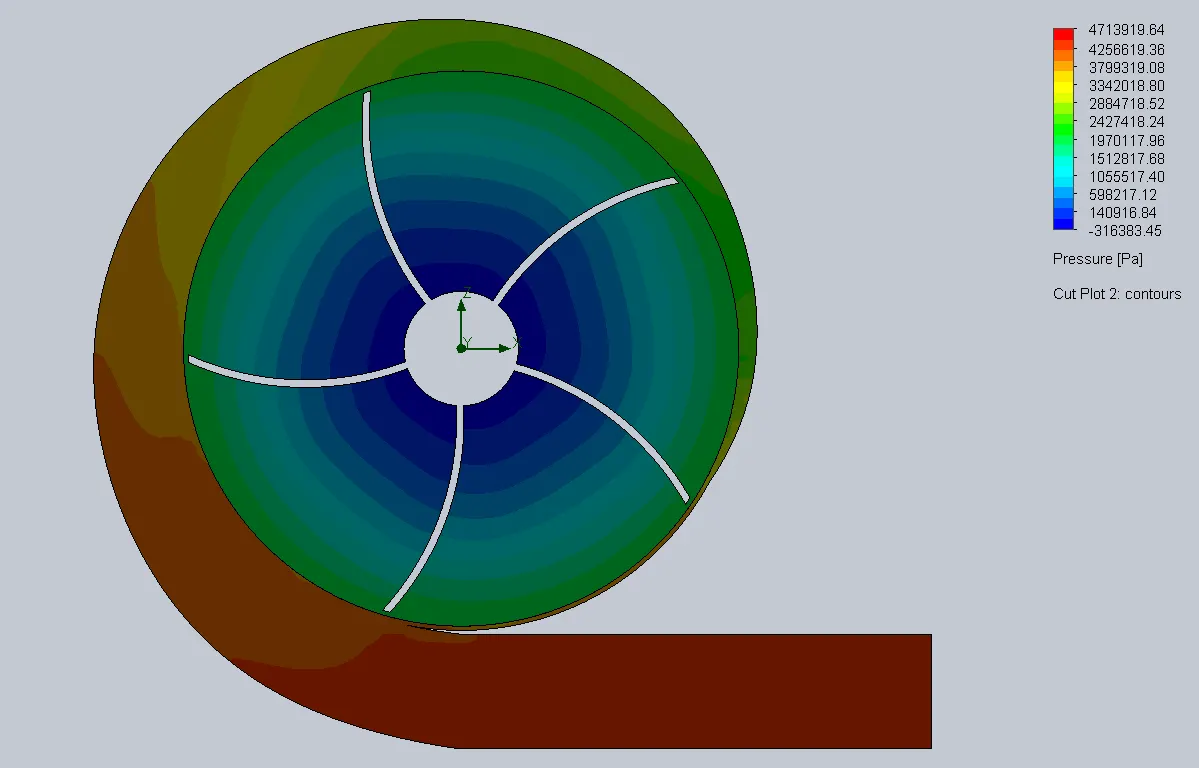
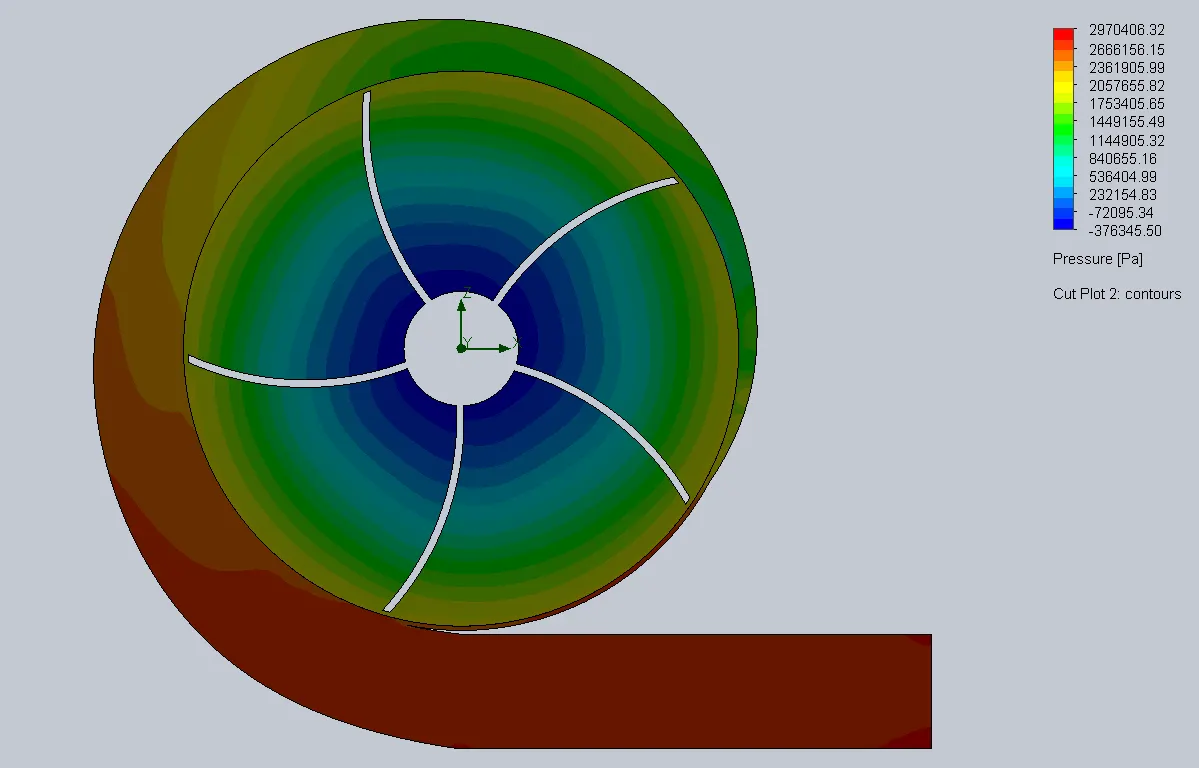
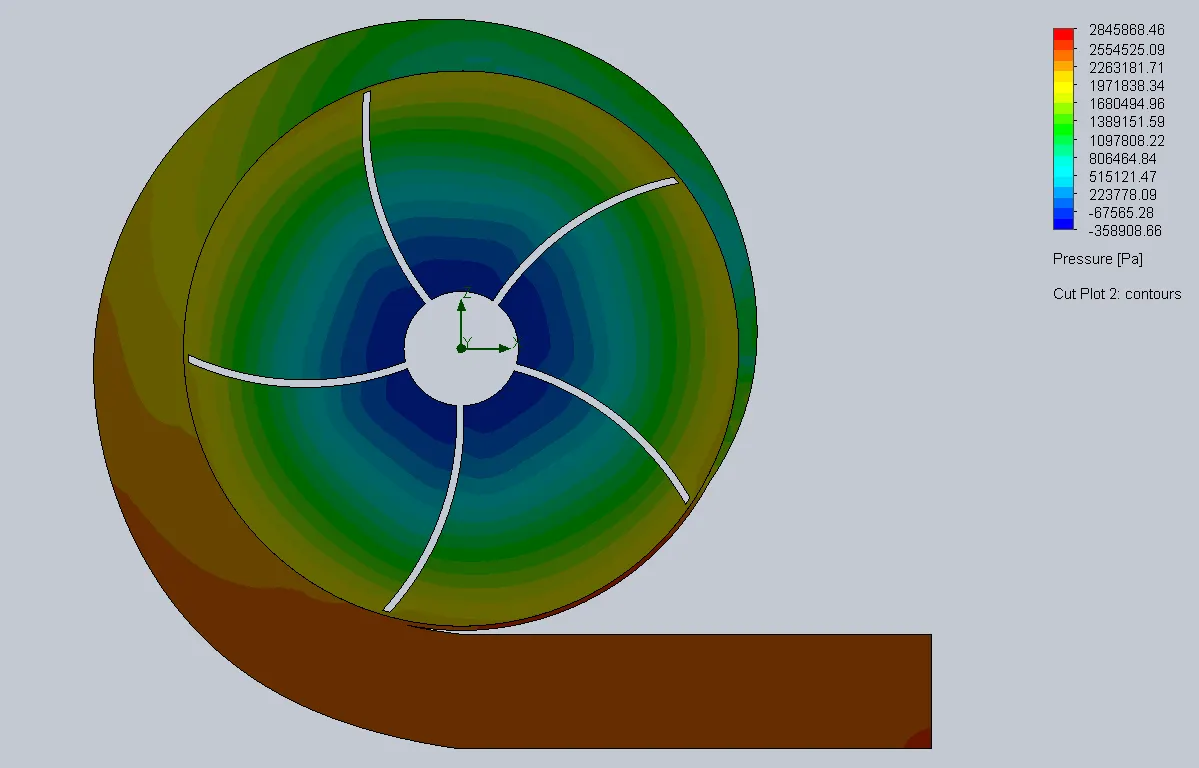
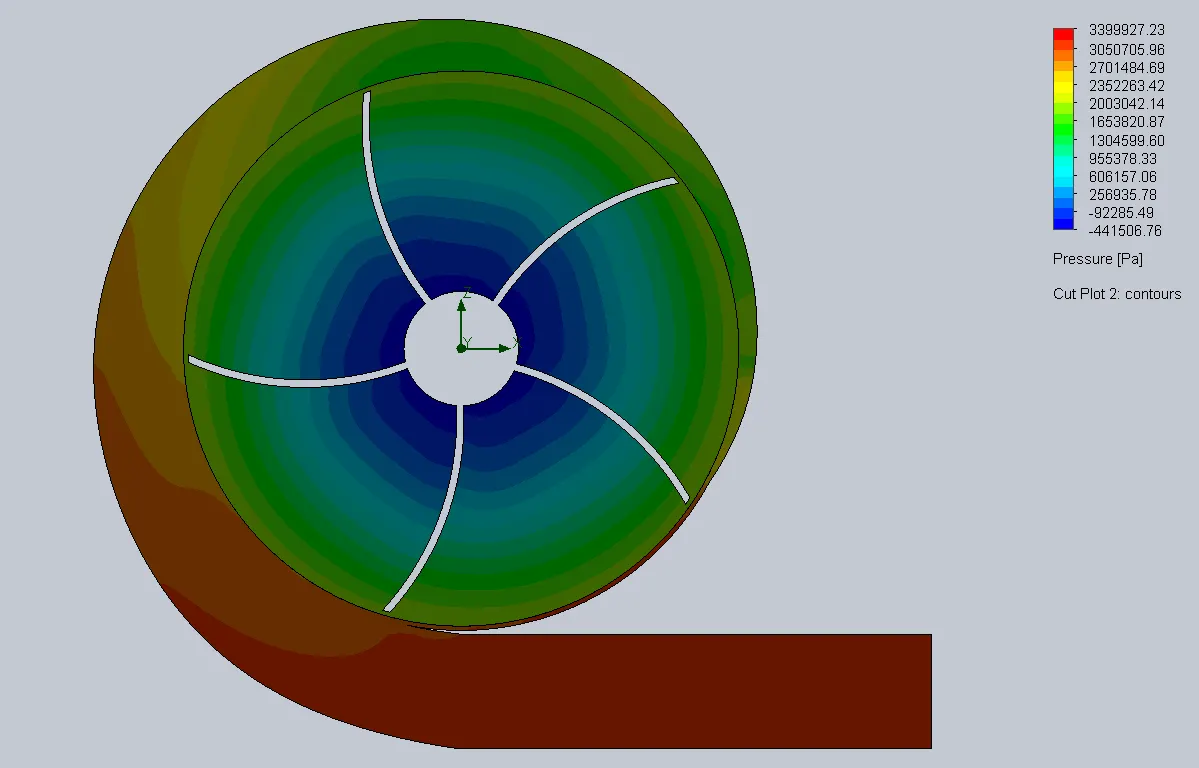
As we can see Water is sucked in at Atmospheric Pressure at the eye of pump and its Pressure goes on increasing as it approaches the Outlet.
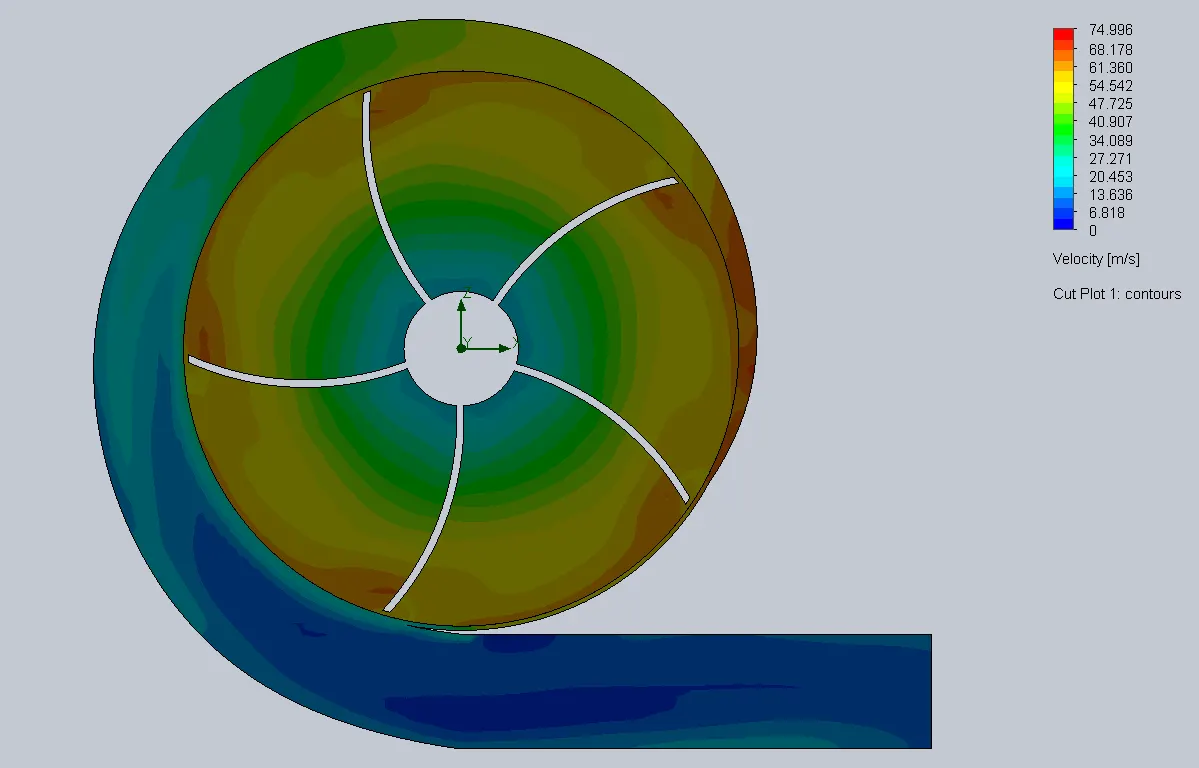
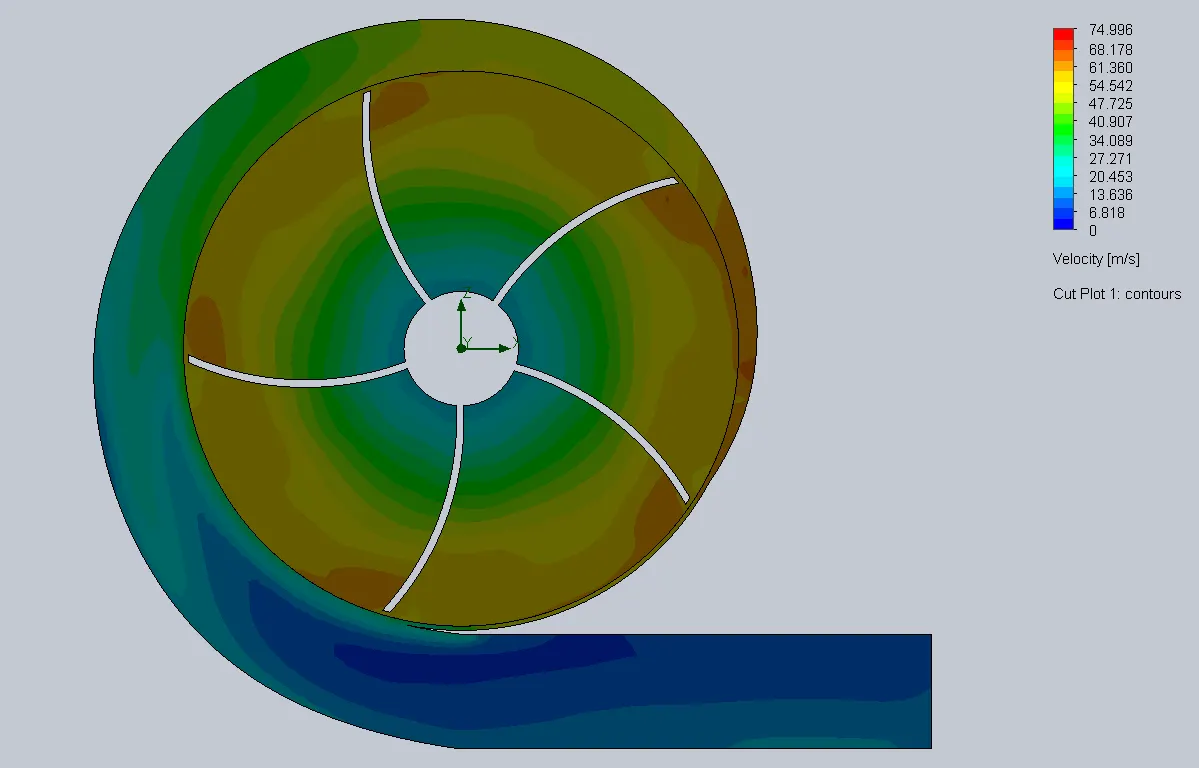
Velocity Plot
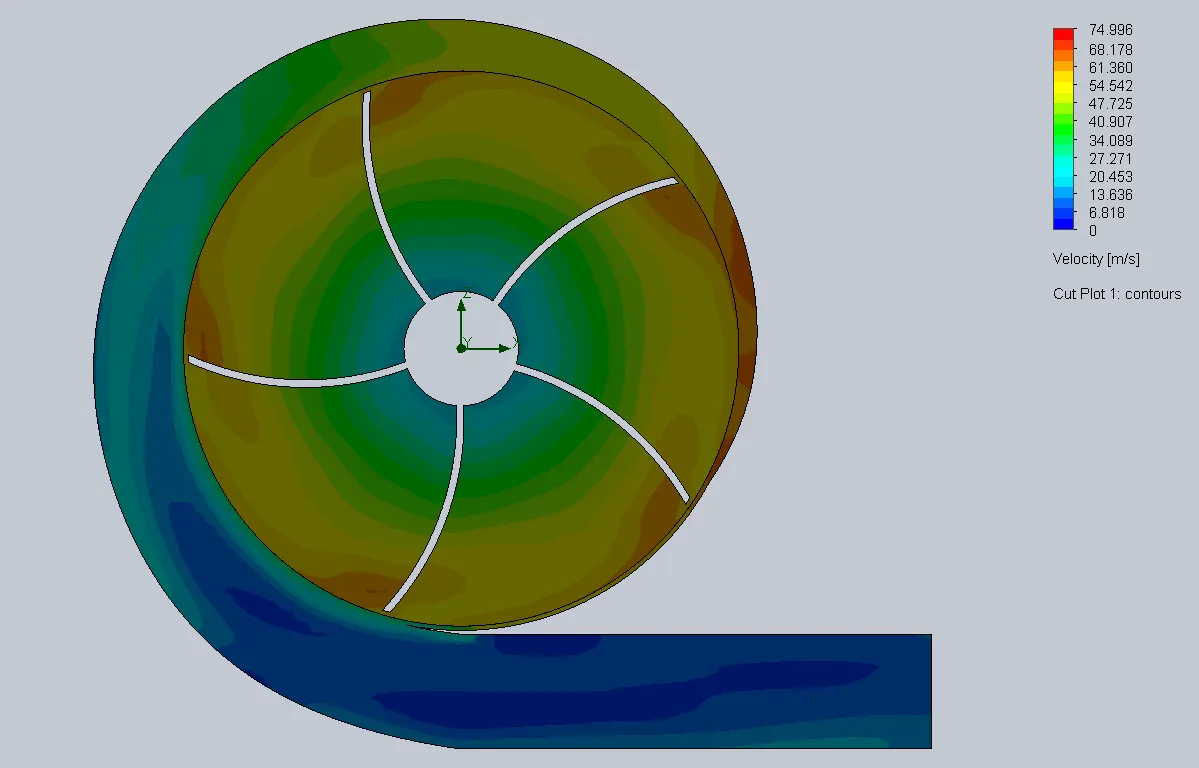
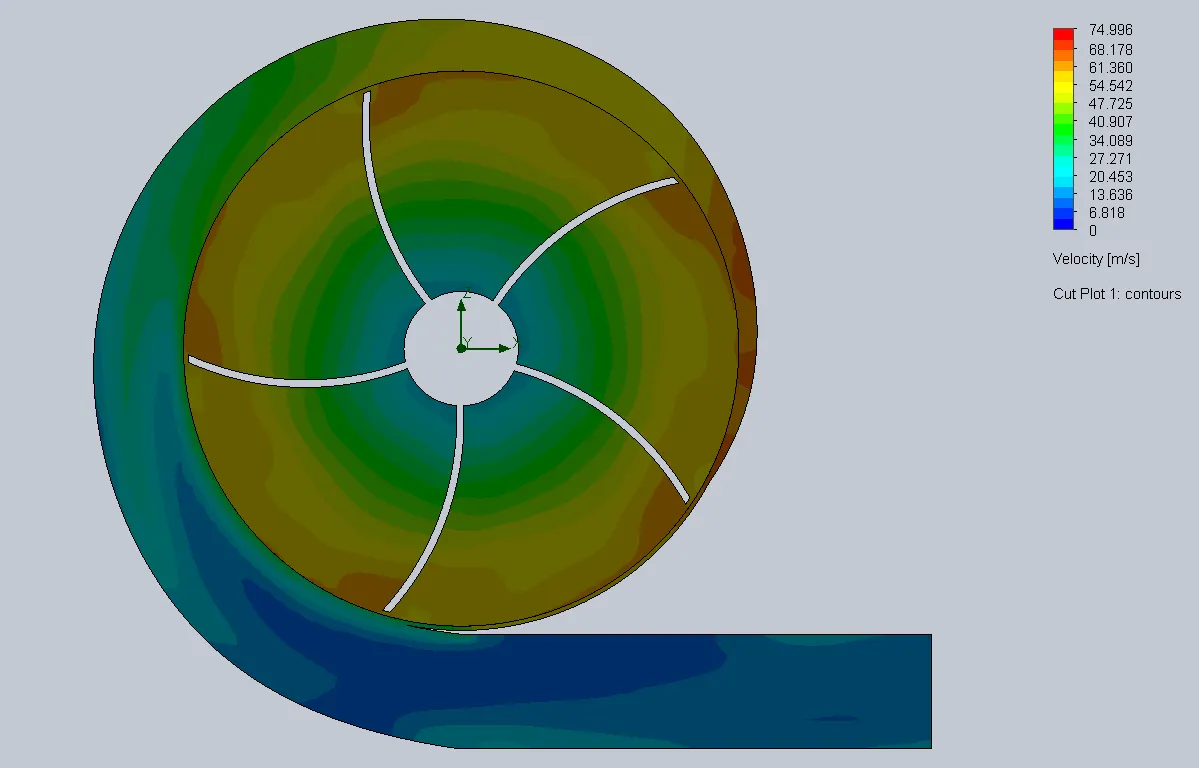
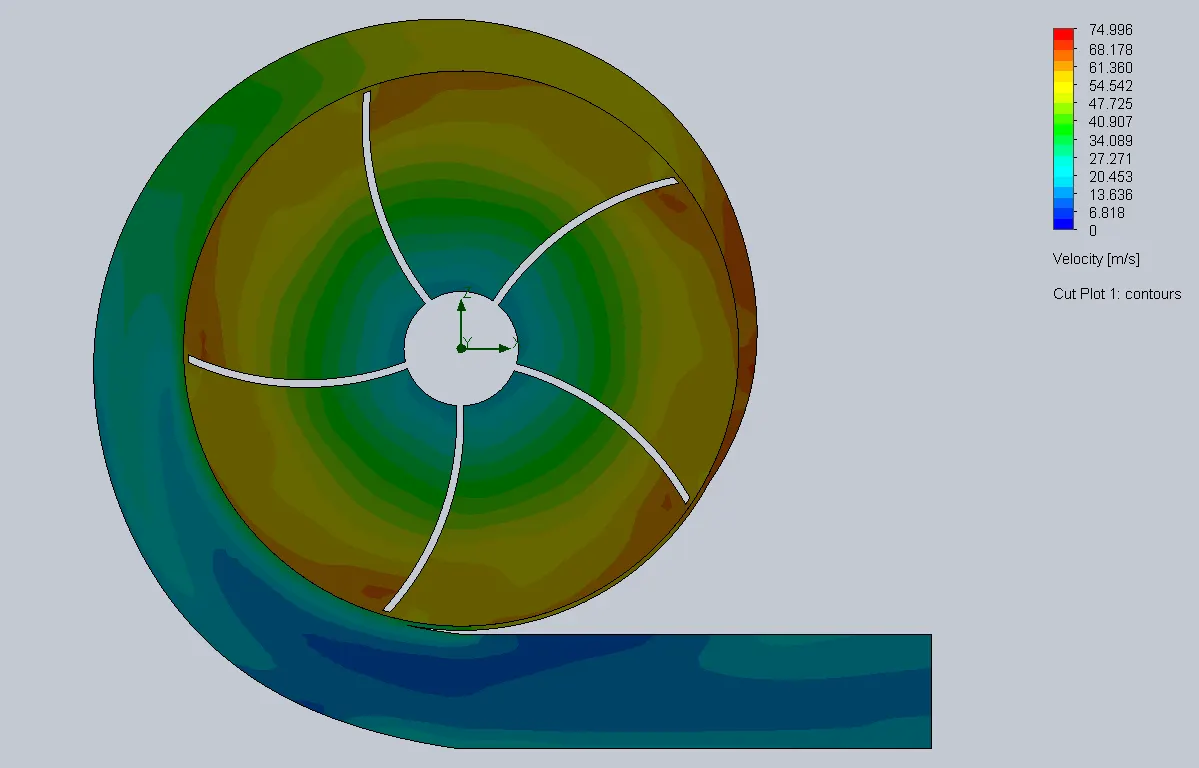
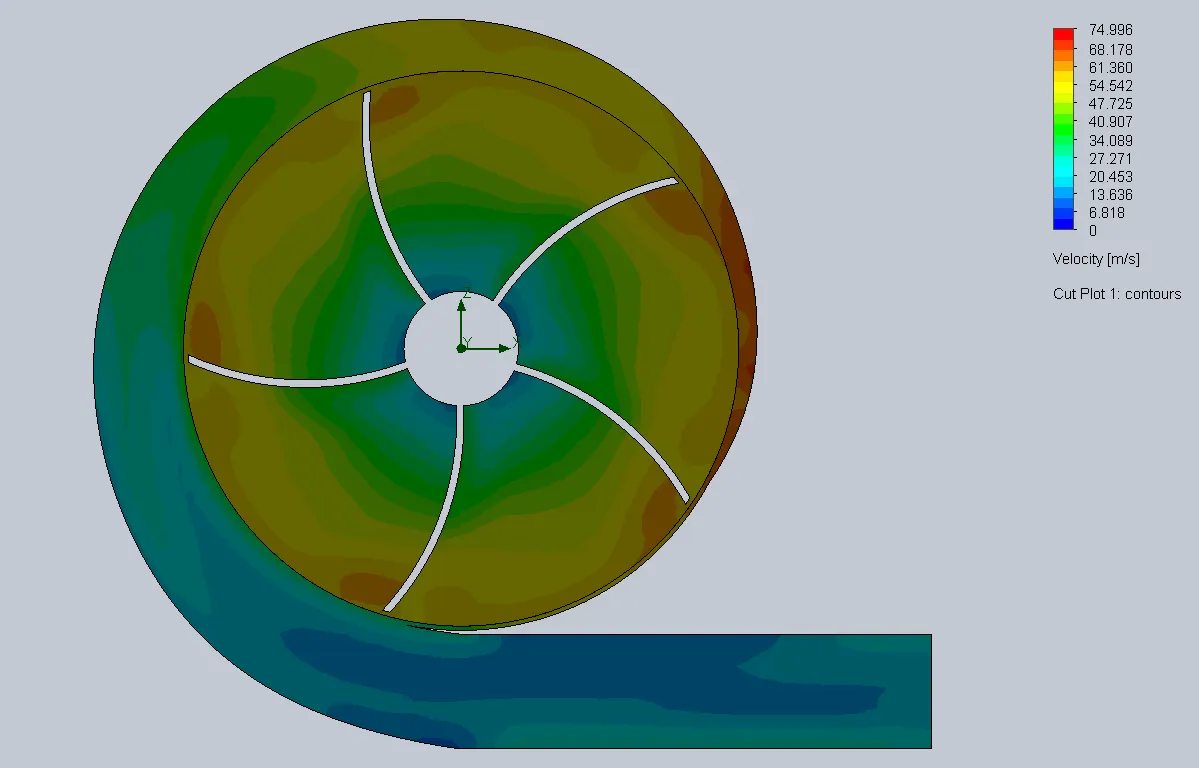
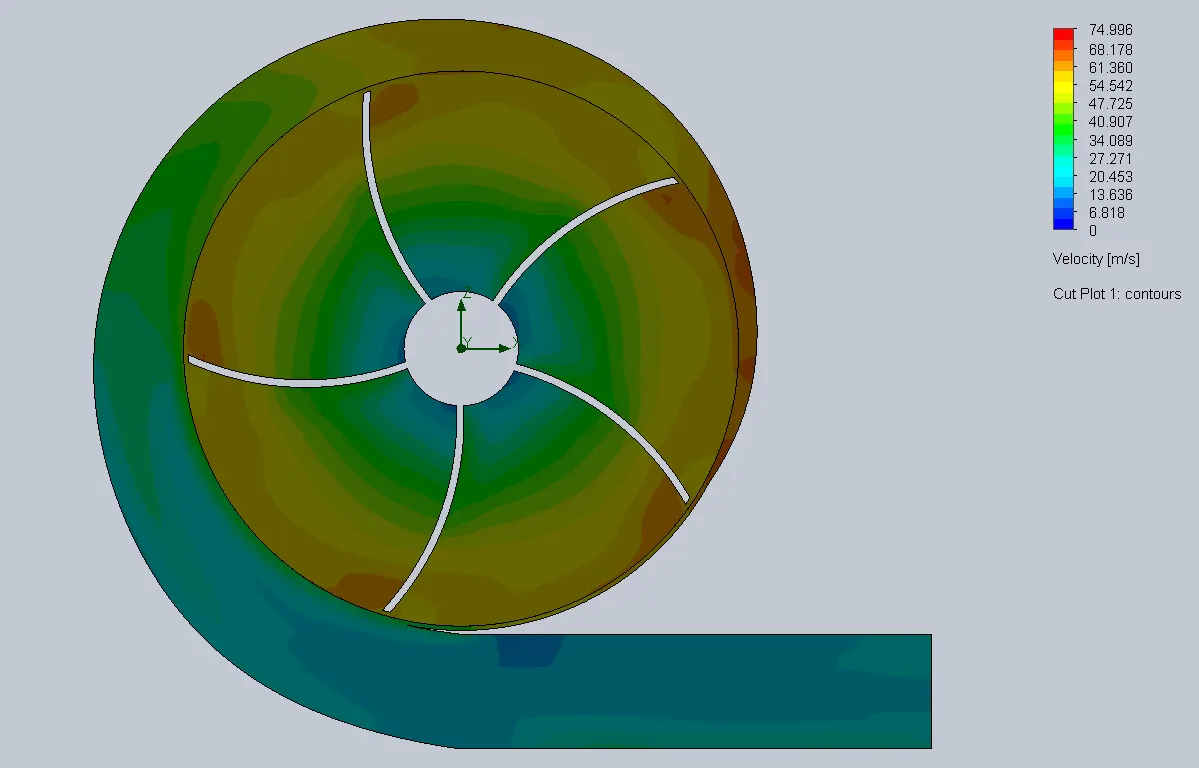
Water is sucked in at the eye of pump and its velocity goes on increasing along the periphery of the impellers and ir made stable again before moving out if Outlet.
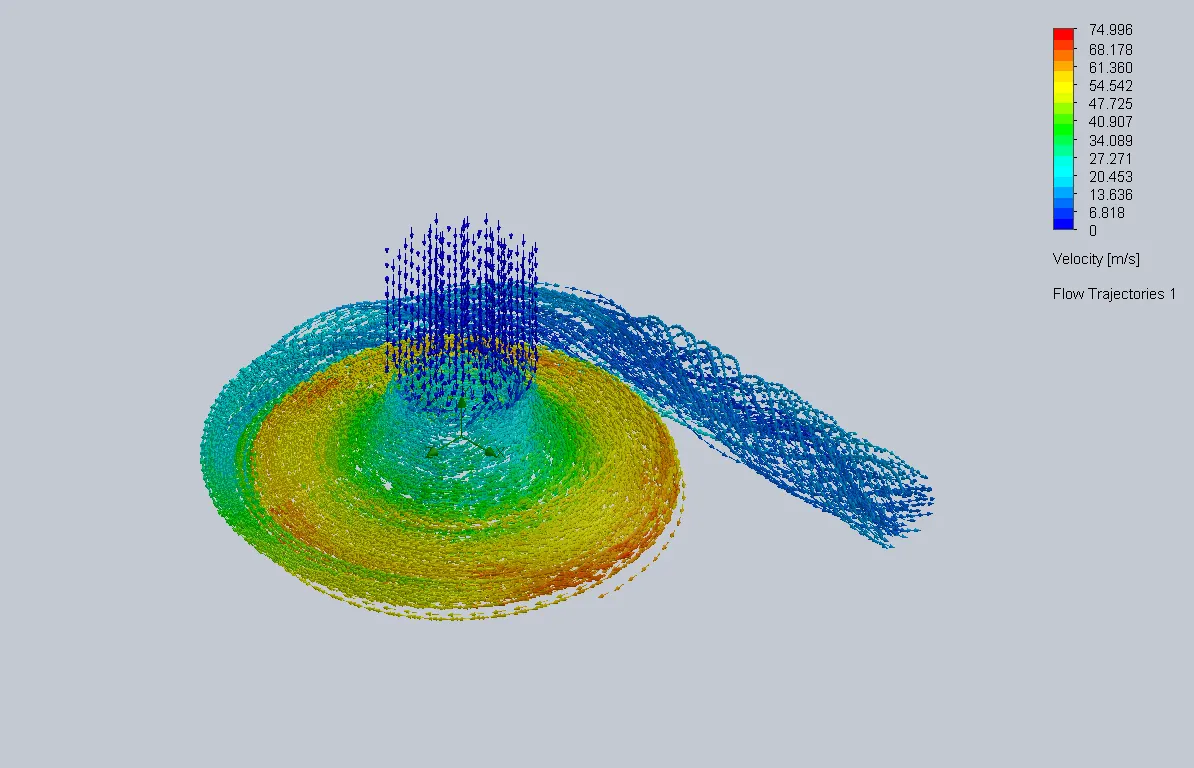
Flow Trajectories
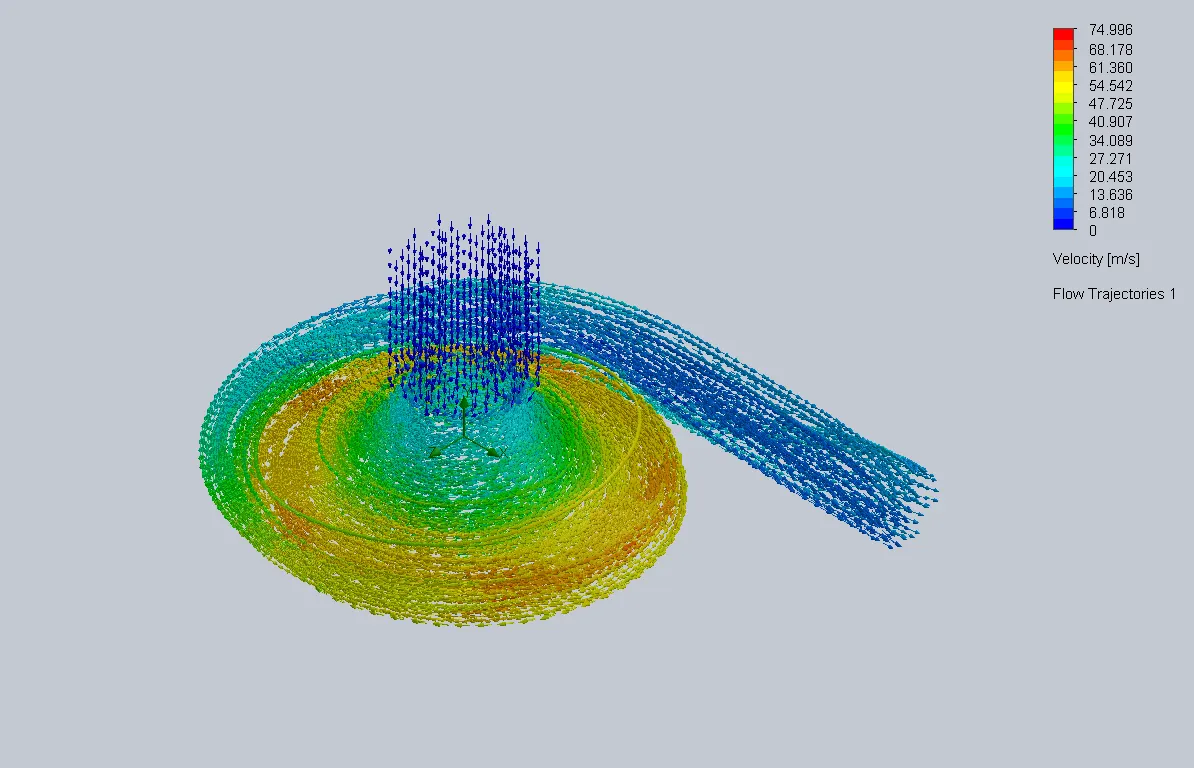
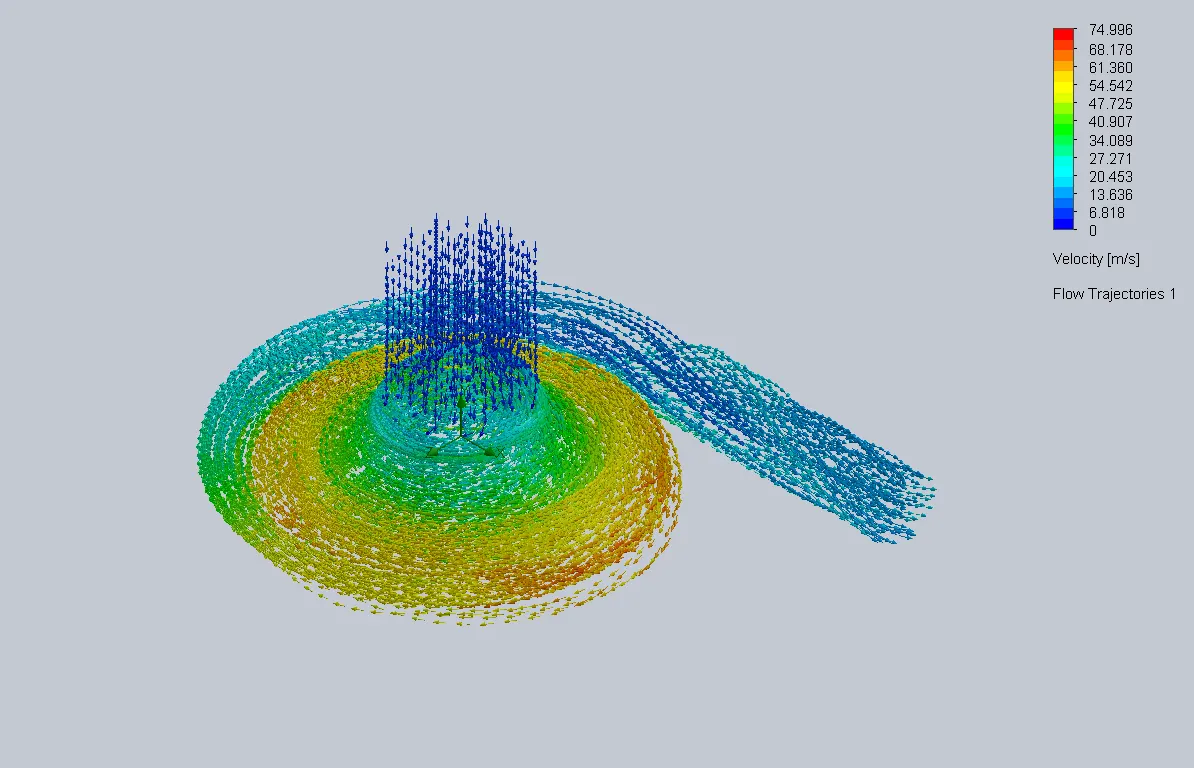
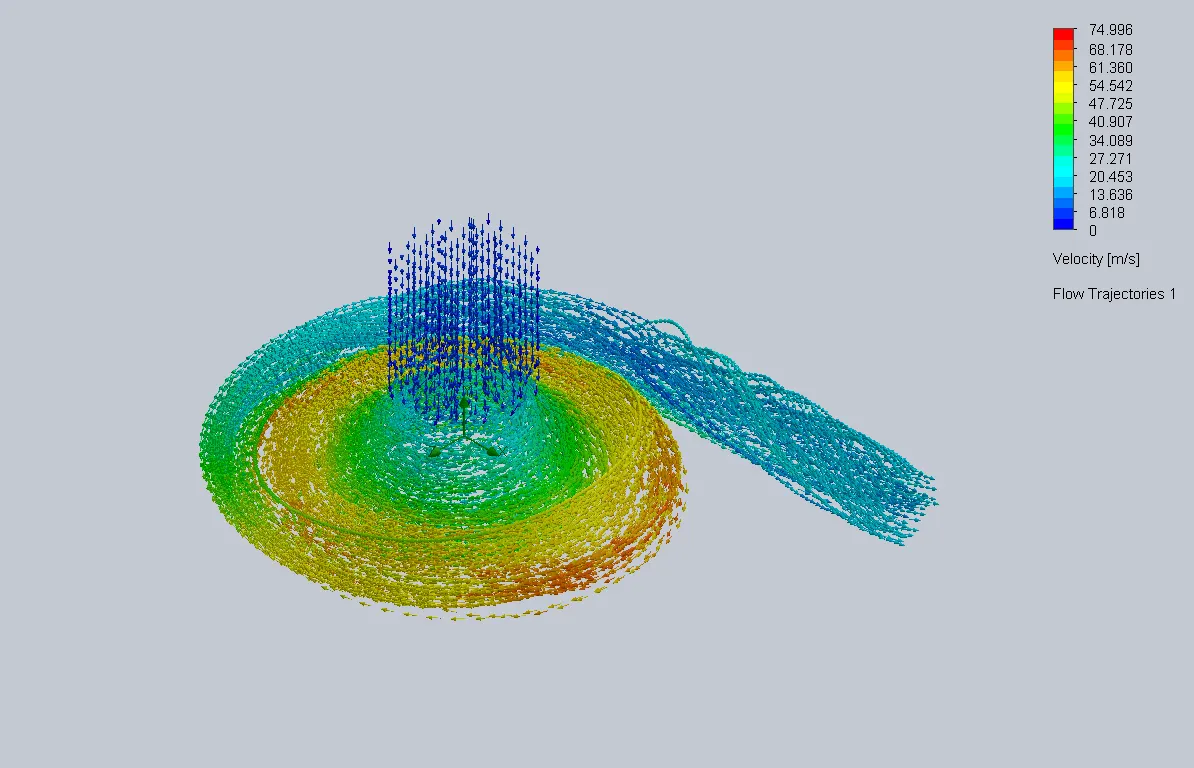
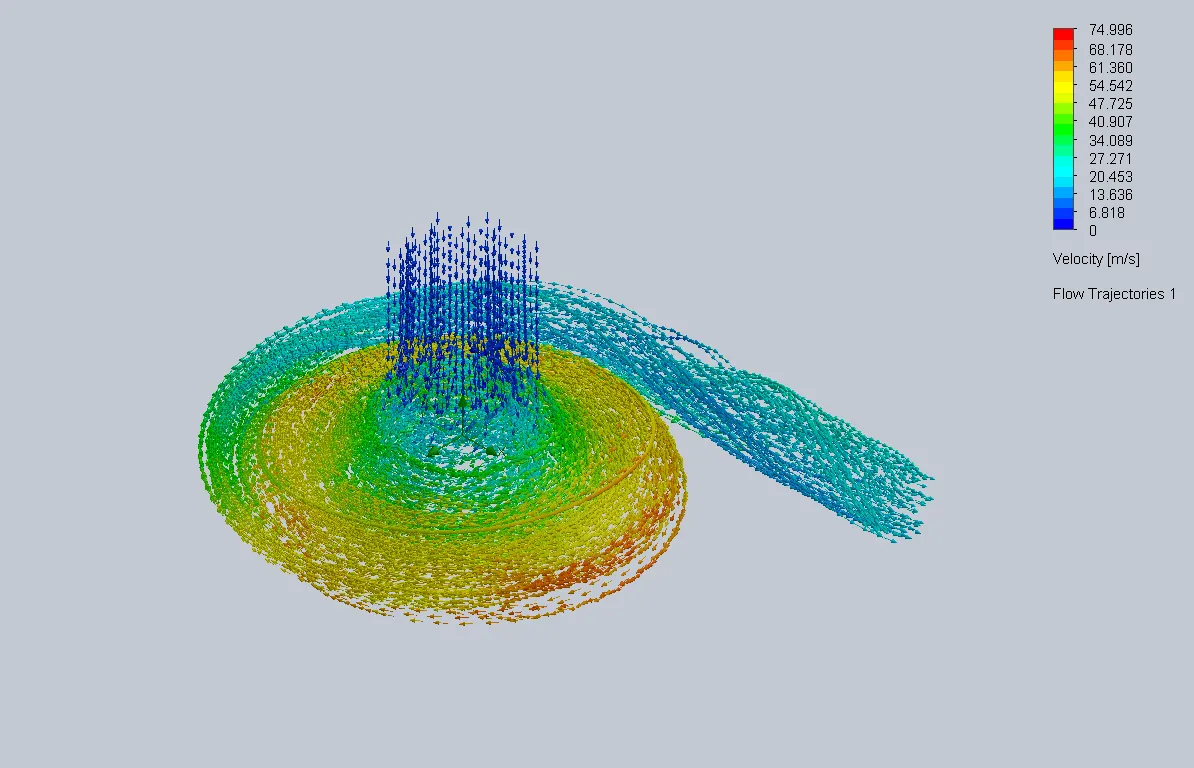
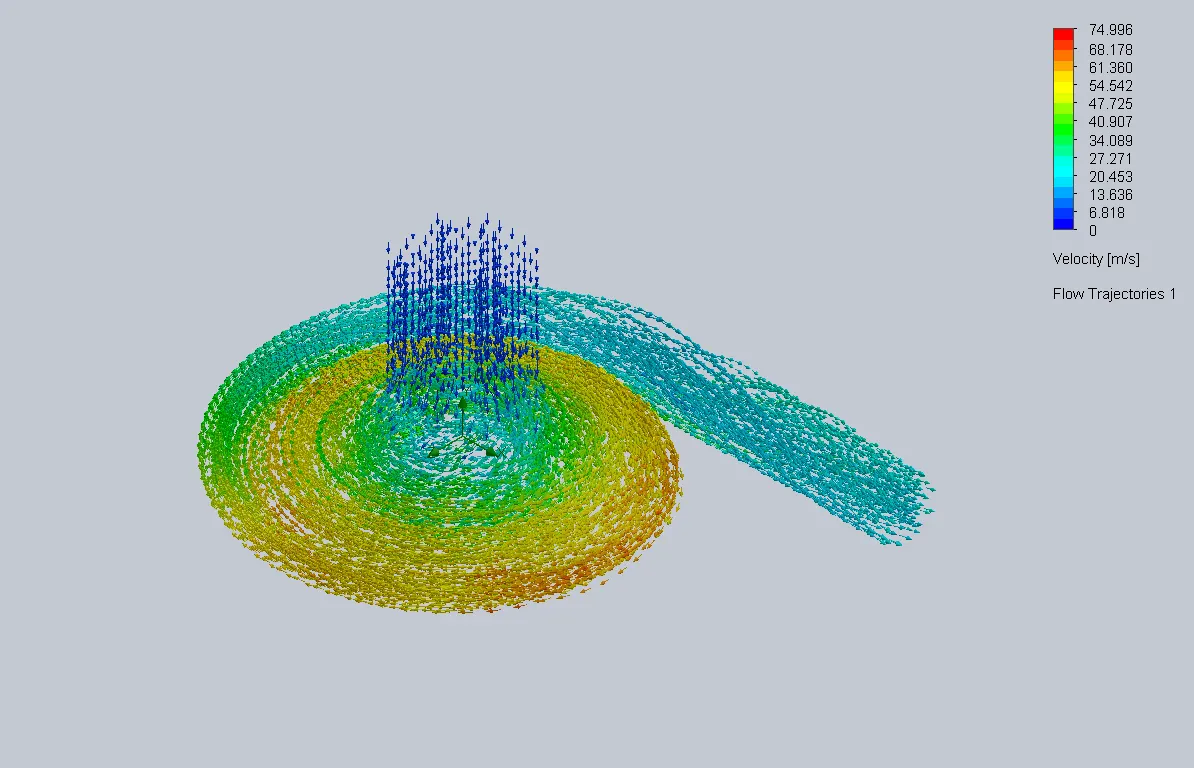
Flow Trajectories of Velocity show us how Water flow takes place from Inlet at eye of Pump to outlet. We can see rotational motion of fluid with increasing velocity from center to periphery and again stable velocity at Outlet.
Goal Plots:
Averaged Values of Mass Flow Rates and Pressure are:
| Averaged Inlet Pressure Pa |
Averaged Outlet Pressure Pa |
Averaged Mass Flow Rate kg/s |
| 101325 | 3007878.55 | -7.0105 |
Mass Flow Rate is negative as Fluid is leaving the system.
Parametric Study:
1) Outlet Velocity=10m/s
Cut Plots:
Pressure Plot
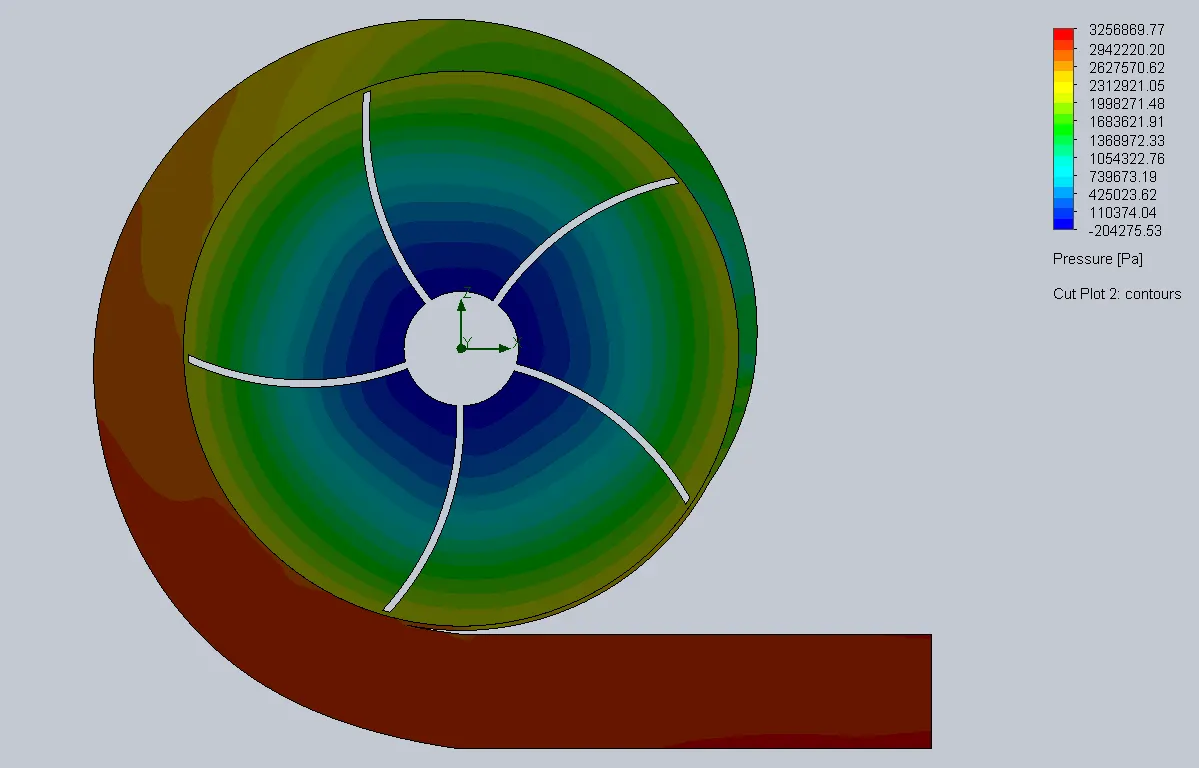
Velocity Plot
Flow Trajectories
2) Outlet Velocity=12m/s
Cut Plots:
Pressure Plot
Velocity Plot
Flow Trajectories
3) Outlet Velocity=14m/s
Cut Plots:
Pressure Plot
Velocity Plot
Flow Trajectories
4) Outlet Velocity=16m/s
Cut Plots:
Pressure Plot
Velocity Plot
Flow Trajectories
5) Outlet Velocity=18m/s
Cut Plots:
Pressure Plot
Velocity Plot
Flow Trajectories
6) Outlet Velocity=20m/s
Cut Plots:
Pressure Plot
Velocity Plot
Flow Trajectories
Goal Plots:
All averaged values are as follows:
| Goal (Value) | Design Point 1 | Design Point 2 | Design Point 3 | Design Point 4 | Design Point 5 | Design Point 6 |
| Velocity normal to face (Outlet Velocity 2) [m/s] | 10 | 12 | 14 | 16 | 18 | 20 |
| SG Average Total Pressure 1 [Pa] Outlet | 3136515.704 | 2750022.96 | 4375943.062 | 2929327.362 | 2663226.023 | 3311490.319 |
| SG Mass Flow Rate 2 [kg/s] | -7.010557544 | -8.412779654 | -9.815833441 | -11.21789654 | -12.62022673 | -14.02302874 |
| SG Average Total Pressure 3 [Pa] Inlet | 101325 | 101325 | 101325 | 101325 | 101325 | 101325 |
| Pressure Ratio (Outlet Pressure /Inlet Pressure ) | 30.95500325 | 27.14061643 | 43.18720022 | 28.9102133 | 26.28399727 | 32.68186843 |
Plot of Mass Flow Rate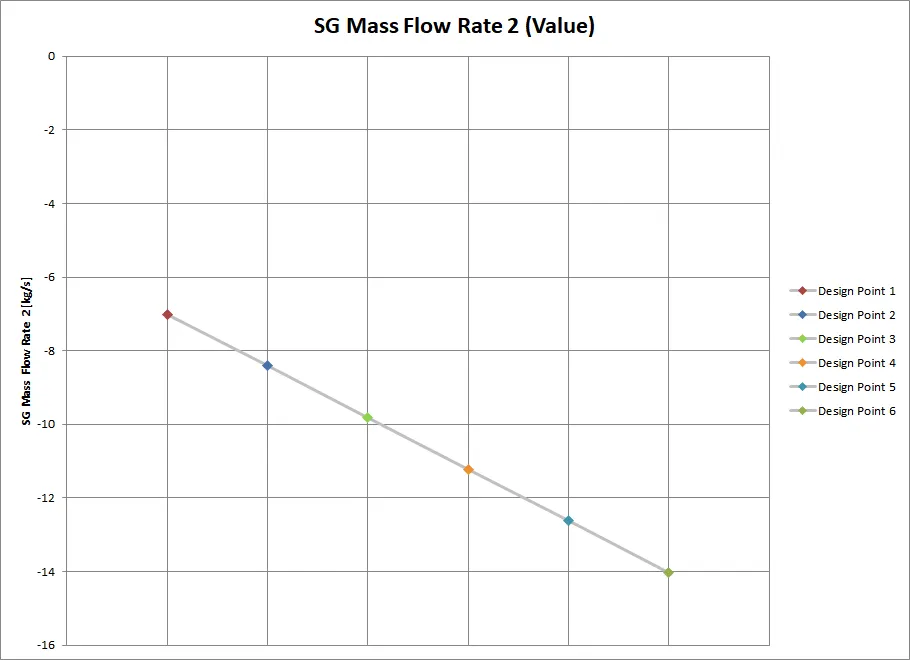
It is evident that as Velocity at Outlet increase the mass flow rate increases. Also the Outlet Pressure changes with change in Velocity. But this change is not uniform. Pressure values at output are changing randomly. However inlet Pressure is constant i.e Atmospheric Pressure.
Plot of Pressure Ratio vs Mass Flow Rate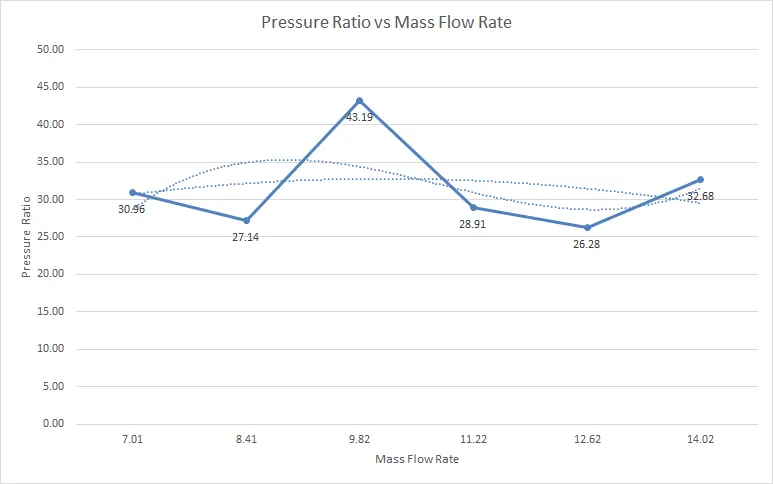
The graph shows the variation of Pressure Ratio with respect to Mass Flow Rate . It is hard to predict the trend of this graph as variation is not uniform. But this graph tell us how the Pump will perform at different Pressure ratios i.e Pressure heads and what will be the mass flow rate. We can try to plot a trendline by using Polynomial regression of degree 2 or 3 which can help us predict the performance for intermediate values.
Conclusion :
As outlet velocity of pump increase the mass flow rate increases proportionally. The Performance Diagram of Pressure Ratio vs Mass Flow Rate can help us understand Performance of Pump for different Pressures.
References:
wikipedia.org
www.ijmetmr.com
engineeringtoolbox.com
- Krushnalohar20can you send the cad file of centrifugal pump