Week 8 - Challenge 6 - Core & Cavity Design
Core and Cavity Design for Switch Bezel - Plastic Component Mold
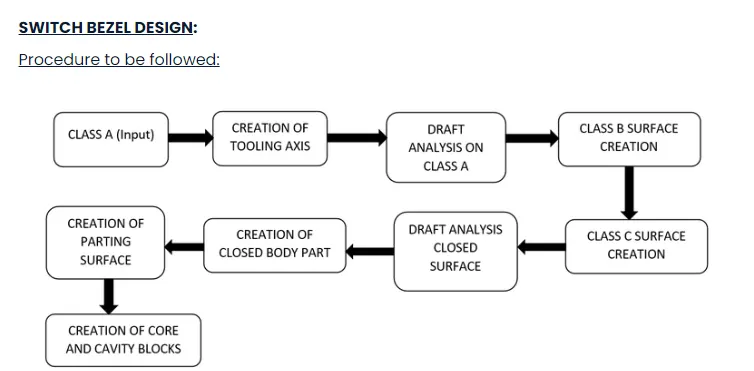
This report demonstrates the design of Core and Cavity Bloacks for an Automotive Plastic Component – Door Switch Bezel using industry principles such as Parting Surface and Parting Line definition, Draft angles, Draft Analysis, Determining and implementing of Tooling Axis, Class A, Class B, Class C surfaces and maintaining the Thickness of the part at 2.5mm. The Molds are designed using Surface Design and Solid Design techniques in CAD package CATIA V5.
PARTING SURFACE :
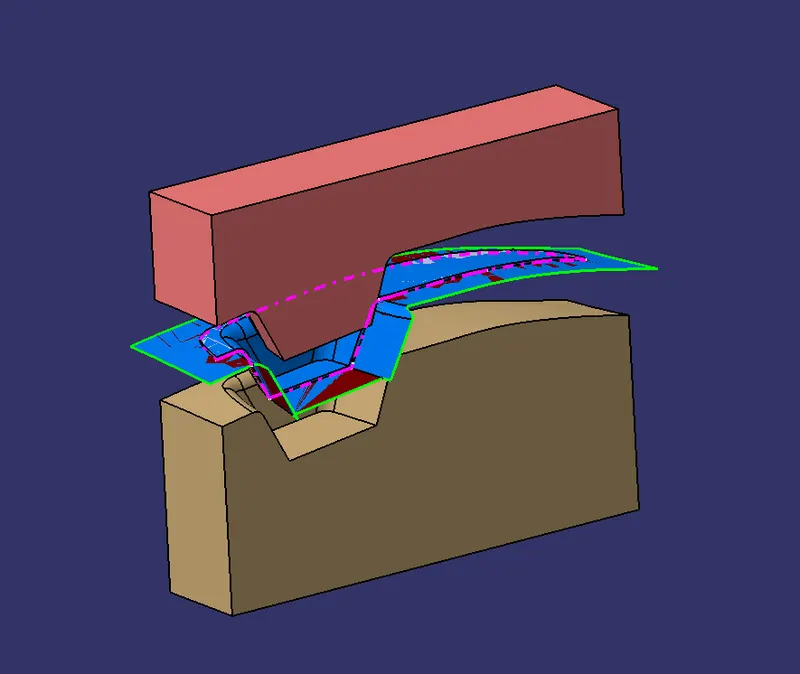
Generally,injection mold has two major components : the movable halve and the fixed halve , during the injecction molding process, these two halves are pressed tightly from a sealed hollow to avoid the melt flow leakage and maintain certain holding pressure, the pressed surface are called parting surface , usually parting surface are the biggest projection outline of the part.
Parting Surface Design Principles :
Parting bsurface design directly affects the product quality , ease of construction and opearation of the injection mold , the mold design is one of the key facctors to success.
Principles to follow to design Parting surface :
- Design the injection mold simple as possible .Avoid or reduce side parting as much as possible to reduce complexity of the mold making.
- Ease of de-molding as far as possible, for instance the plastic parts should stay in fixed halve of injection mold and should ejected by ejection system avoid , side de-molding action,
- Ensure the dimension accuracy of the molded parts ,Try to make the parts similar dimension accuarcy reqirements in same mold to reduce manufacturing and assembly errors .
- Ensure apperance reqirement of molded parts,finish or mismatch usually occurs on parting surface , so the parting surface should not be designed on high quality requiremnent surfaces.
- Ensure adequate venting.If possible parting surface should be place at the end of the mold flow.This is going to be advantage of fillng and venting.
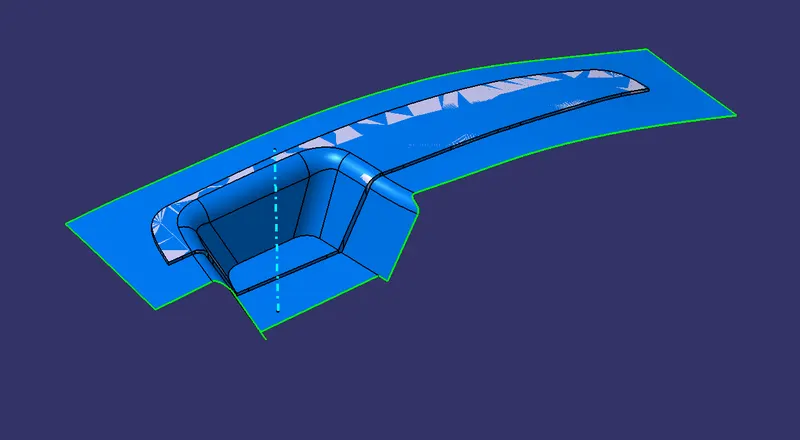
PARTING LINE :
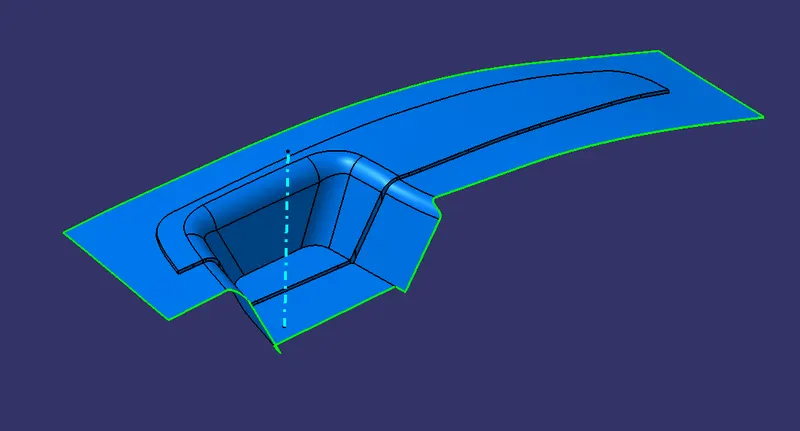
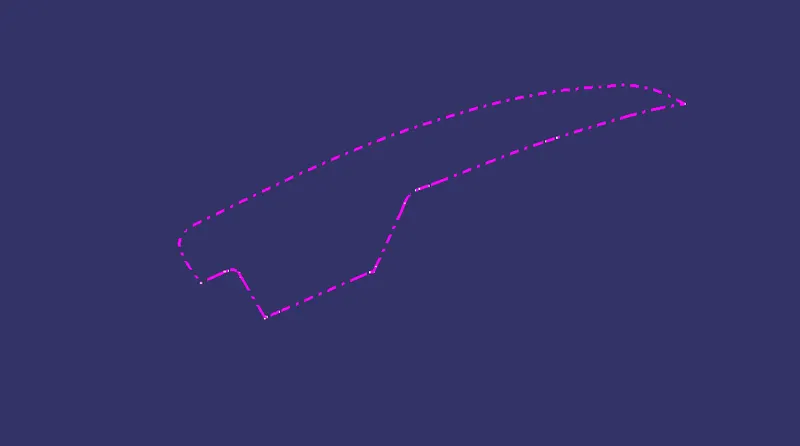
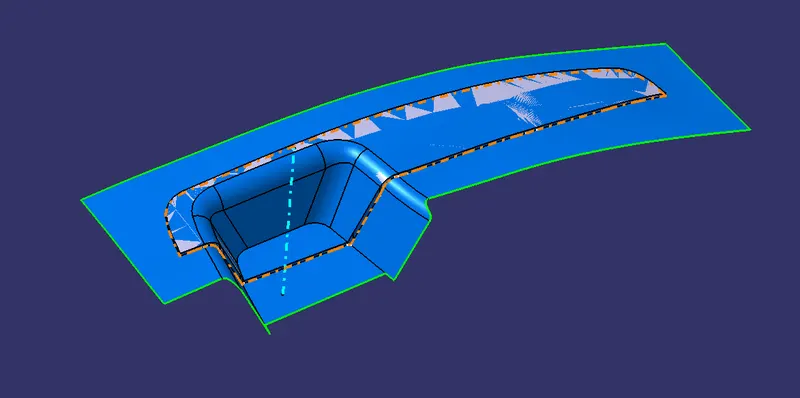
- Part lines are where the two halves of the mold meet.
- This generally creates a physical line on a part that is both visible and noticeable to the touch. These lines, however, can be hidden or minimized when placed along edges of the part. When designing a part, always keep in mind its part lines.
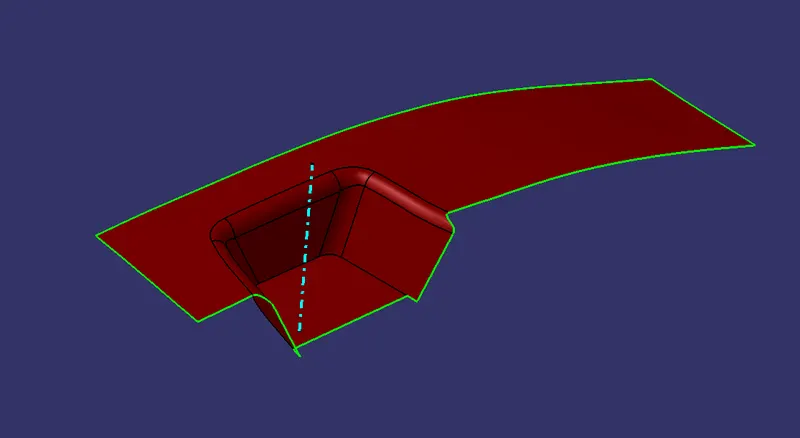
Class- A Surface:
- In automotive design, a class A surface is any of a set of freeform surfaces of high efficiency and quality.
- It is the visible aesthetic surface of any automotive component.
- Class A surface refers to those surfaces which are visible and abide to the physical meaning, in a product.
- This classification is primarily used in the automotive and increasingly in consumer goods industry.
- It is a requirement where aesthetics has a significant contribution.
- For this reason, the exterior of automobiles is deemed Class-A.
Class- B Surface:
- Class B surfaces are Engineering Surfaces which are invisible to the eyes or often on the back side of the Class A surfaces.
- It is mainly the thickness of the component or Class A.
- These surfaces need to be designed as per the Class A surface i.e., the continuity, thickness of the component, functionality etc should be maintained.
- These surfaces include the main engineering features such as Screw bosses, Ribs, Snaps, Stiffeners and fixations.
- B surfaces also do not contain any aesthetic styling content and textures since it is not visible to eyes.
Class- C Surface:
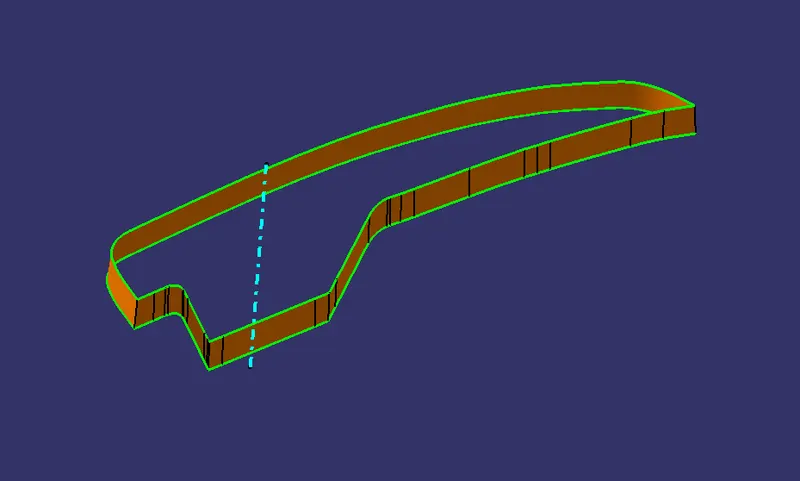
- Class C surfaces are connectors between Class A and B surfaces.
- This surface connects both A and B surfaces along the Tooling Axis.
- It contains the draft as per the design.
- It is basically the thickened surface between both A and B surface.
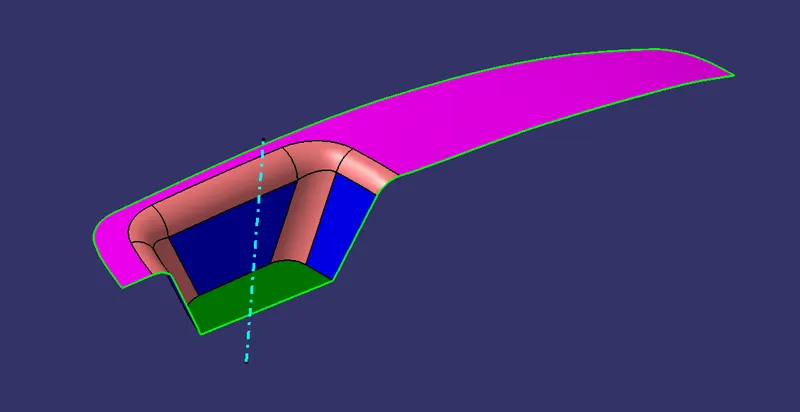
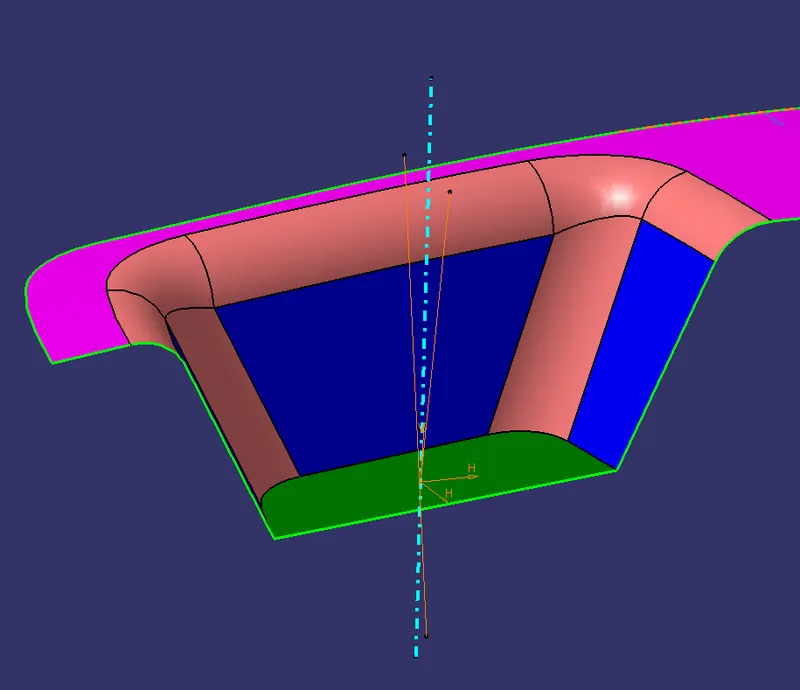
- Below Figure 5 shows class A,B and C surfaces: Blue surface is Class A, Purple surface is Class B and Red surfaces are Class C surfaces.
Procedure for creating the tooling axis
Tooling axis represents the opening and closing of the mold core and cavity during the manufacturing of the components.
- check the suitable direction for the tooling axis with the x, y and z directions.
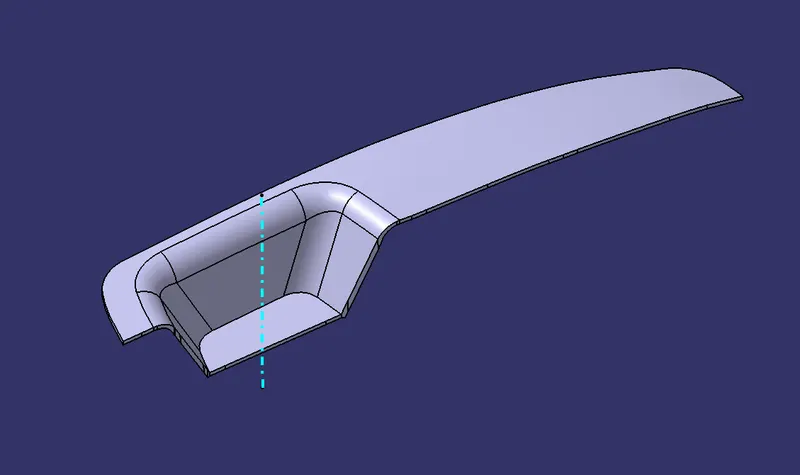
- Using the given class-A surface, extract the base surface of the pocket and create a midpoint on the extracted surface.
- create an axis system with respect to the point created.
- By looking the A-surface, we can say the best tooling direction can be made along the z axis.
- Hence, we need to check whether all the faces of the walls clearing the tooling direction. For that,
- create a positioned sketch on the y-z plane and using the project 3D element, project the wall faces on the y-z plane.
- Then create 2 lines and make it coincide with respective projected faces. And then with the lines created, a bisecting line can be made.
DESING RULES OF CREATING CORE AND CAVITY :
To create a plastic part there are two major components core and cavity. The core has the impression and the cavity have the depression.
Design rules:-
- The proper draft should be given to the part so that the part can be ejected from the core and cavity.
- Minimum 3 degree draft should be given to the Class C surface. If the part has 0 degree draft then there will be friction occurs in the core and cavity.
- The side core should be avoided because the manufacturing cost of the component increases.
- The parting line is the line that split the mold into two halves the core and the cavity. So the parting line should be always in the Class B surface so that we can not see the parting line.
- Avoid sharp corners as the cost to manufacture the sharp corner is very high.
- The thickness of the part should always have uniform thickness throughout the part.
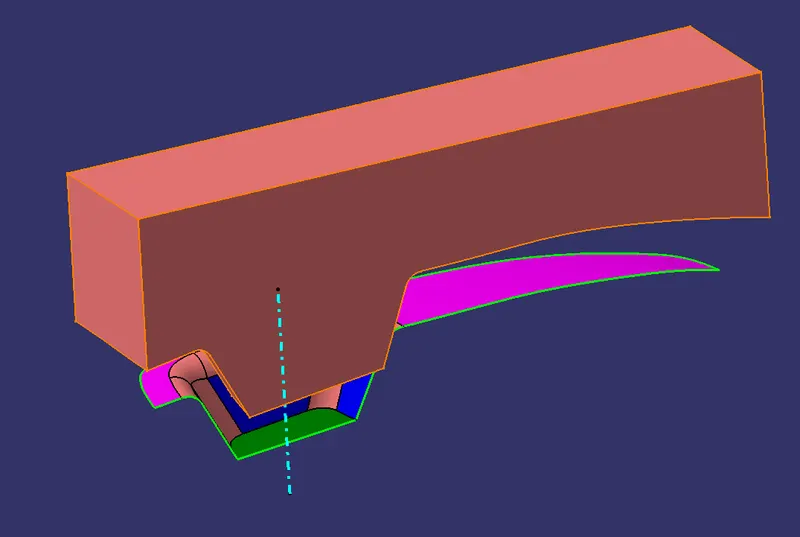
FIG: CORE BLOCK
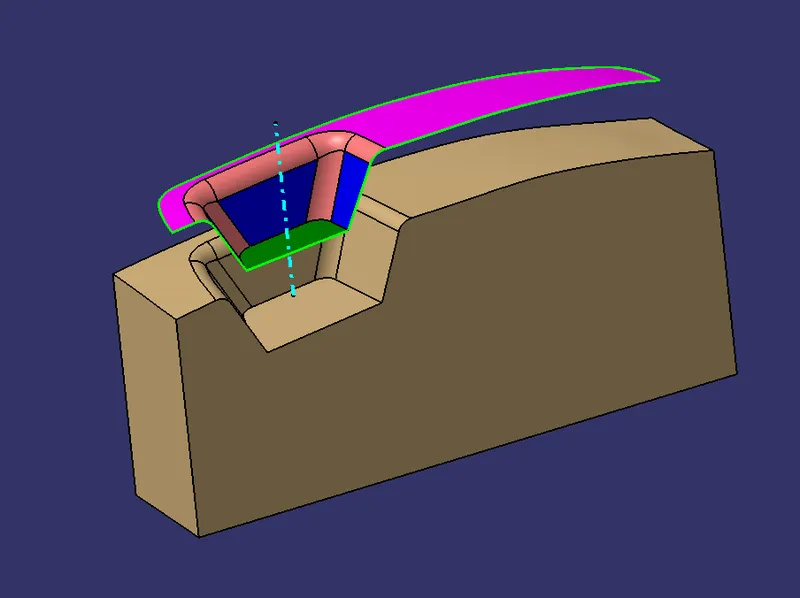
FIG: CAVITY BLOCK
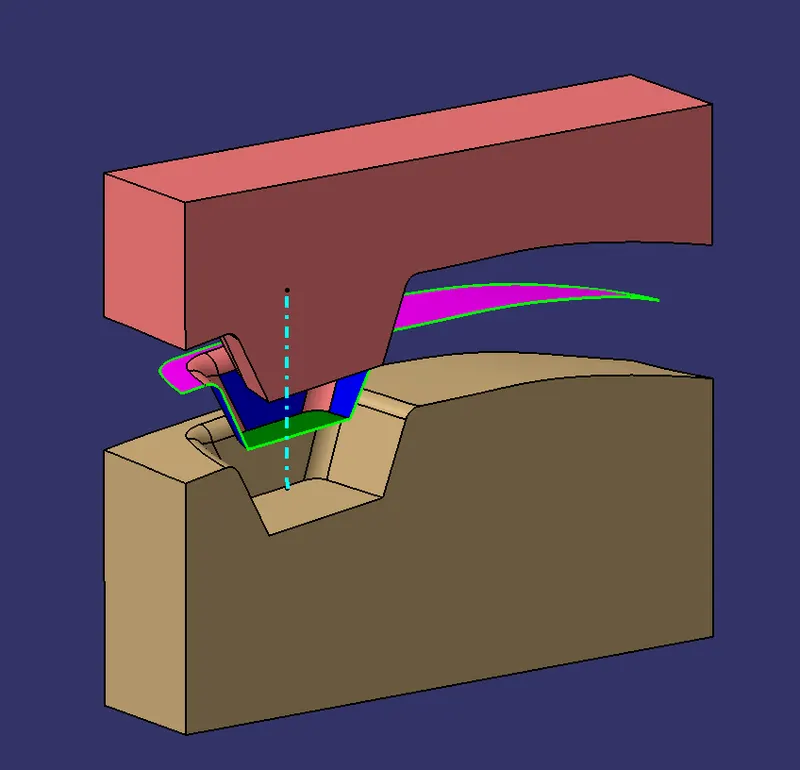
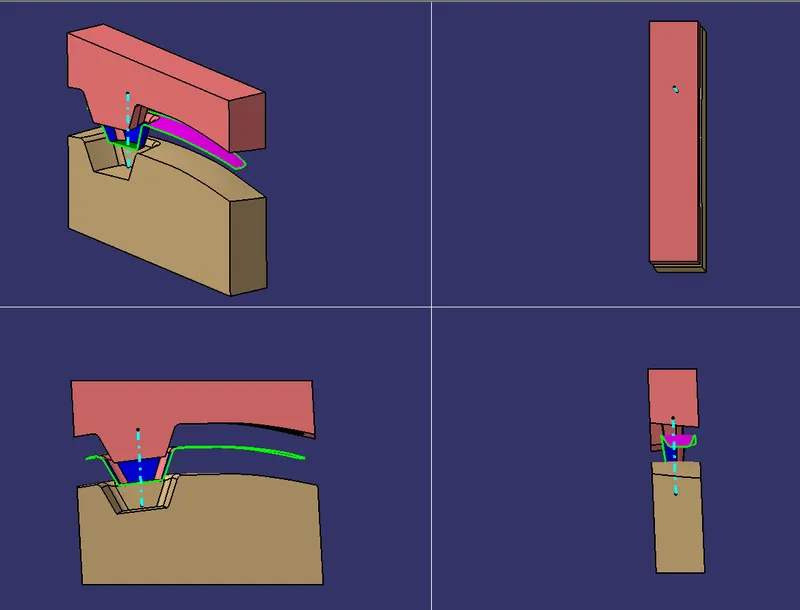
FIG: CORE AND CAVITY
Draft Analysis:
- Draft is a taper applied to the faces of the part that prevent them from being parallel to the motion of the mold opening. This keeps the part from being damaged due to the scraping as the part is ejected out of the mold.
- The Draft Analysis allows the user to easily analyses the proper draft angle and manufacturability of the designed component.
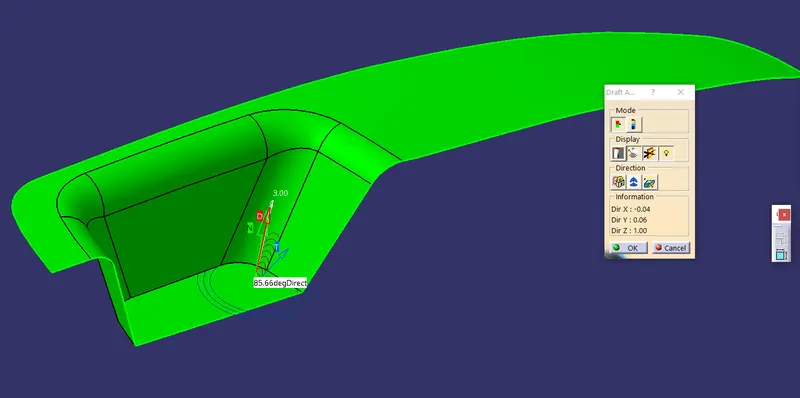
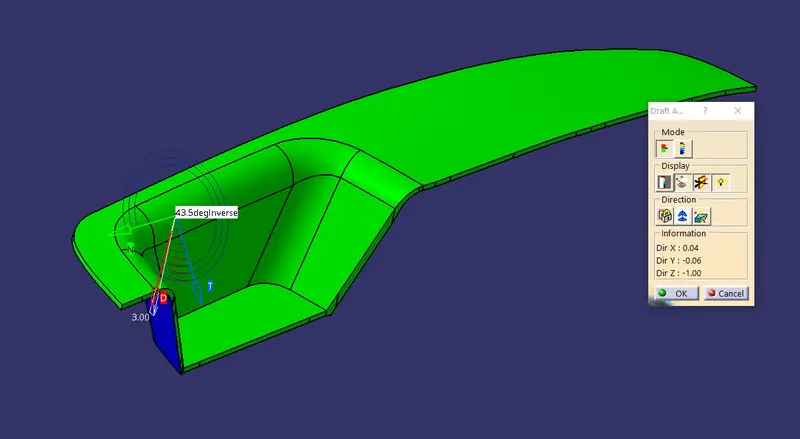
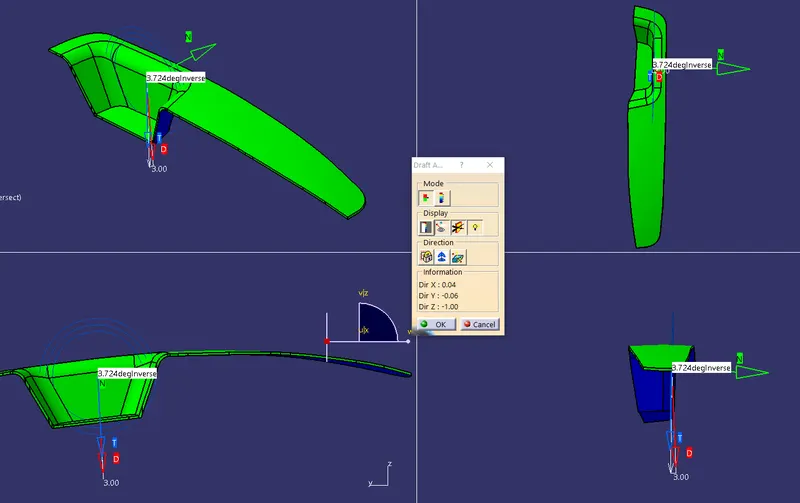
- Draft analysis is done after determining the tooling axis, draft analysis is used to check whether the minimum draft (3 degrees) is maintained or not.
Procedure for performing the draft analysis are as follows
- Change the view mode of the component to be in customized parameter mode and then select the shading mode as materials.
- Then open the featured draft analysis tool from the insert menu.
- Then click on use the compass to define the current drafting direction and then drag and align the compass on the Tooling axis.
- Then lock the draft direction and perform draft analysis by clicking on the component.
- The green colour shows the positive daft tooling direction and the given surface passes the draft analysis.
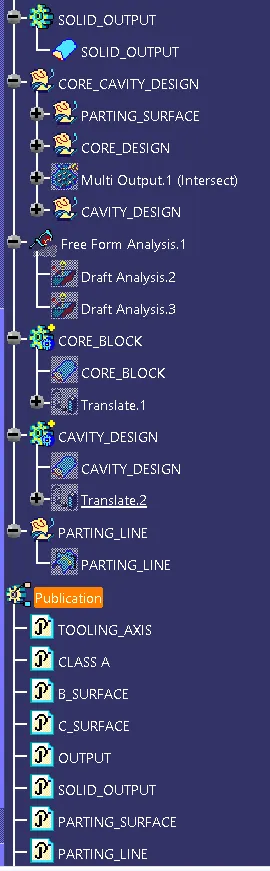
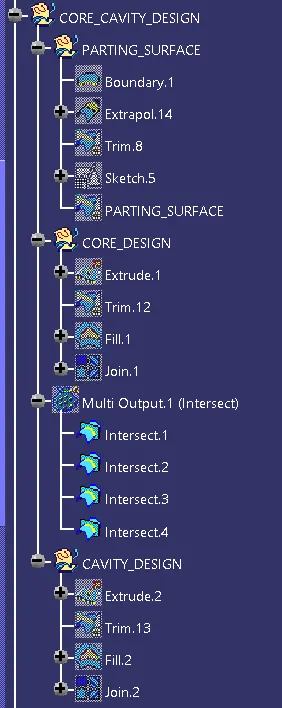
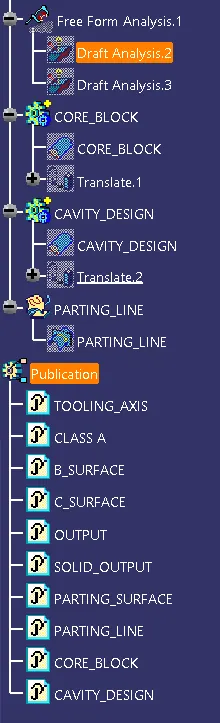
The expanded Tree Structure for the geometrical sets, part body and the publications
Conclusion:
The Design of Core and Cavity for the Mold of Automotive Plastic Component – Door Switch Bezel is completed using concepts of Parting Surface, Parting Line, Draft angle, Draft Analysis for Class A and Final enclosed surface, Tooling Axis creation and implementation, Class B and Class C creation and conversion to a solid part maintaining the part thickness at 2.5mm.