Crash Box Simulation
Objective:
To perform a crash test simulation of a crash box.
Tool: Ls-Dyna
Introduction:
In this exercise, we are going to simulate a crash test for a crash box for which mesh is given. A crash box is a highly energy-absorbing structure that crashes on the application of loads and reduces the impact on other components nearby. A full-fledged crash box is a highly sophisticated design but in this case, we will go with a rectangular channel which can be thought of as the most simple crash box.
In this case, the crash box is made to crash into a rigid wall with an initial velocity of 50 Kmph. The material for the crash box is steel. And the simulation is run for two cases: First with the crash box having a thickness of 1.2mm and second, with a thickness of 1.5mm.
Unit system: gm-mm-ms
Deliverables:
- Input .k file and output files (d3plot, glstat, sleout, rcforc)
- Animation of the final simulation
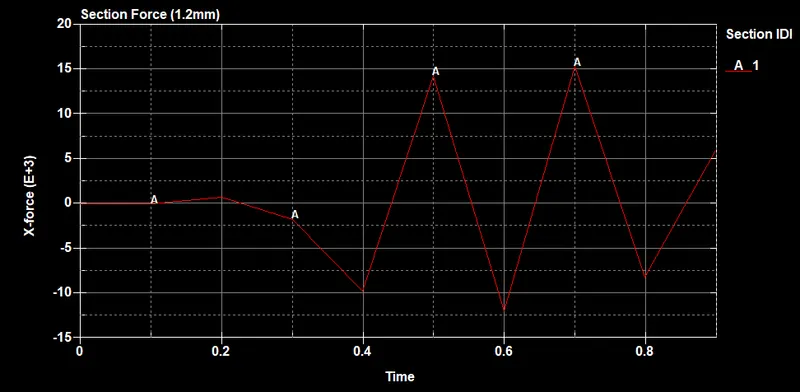
- Cross-sectional force generated in the middle of the crash box (along its length)
- Acceleration plot of a node in the middle of the crash box (along its length)
- Maximum directional stress and strain along the length of the crash box (X strain, Y strain, etc)
- Plot of all energies (total, internal, kinetic, hourglass, sliding)
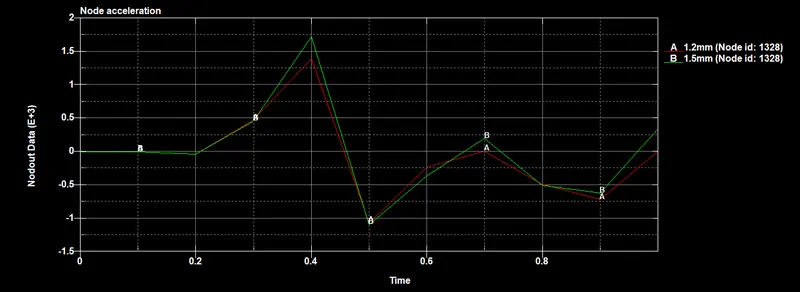
- Compare the accelerations and stress/strain plots of 1.2/1.5mm crash boxes.
Procedure:
The image below shows the meshed model of the crash box.
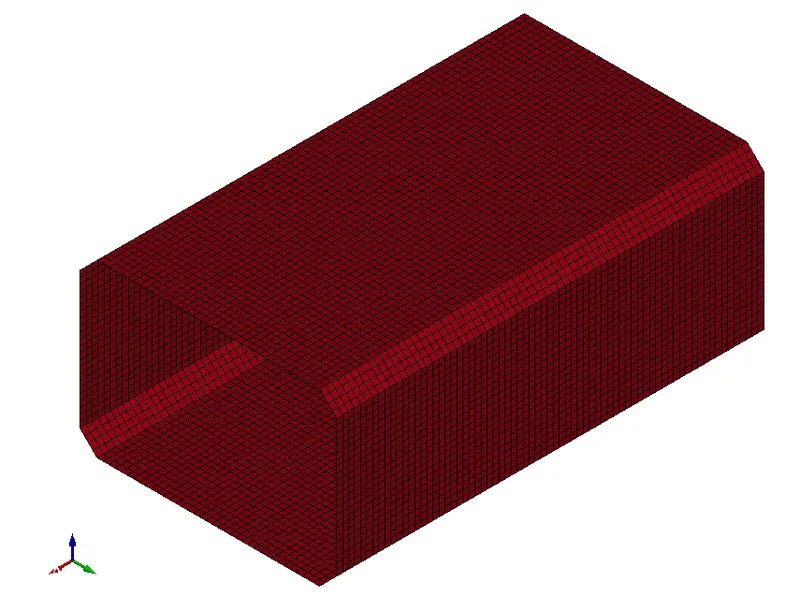
Next, some cards/Keywords to define and control the simulation are created as follows:
First, the *PART keyword is used to define the parts in the model. This keyword requires a material keyword to define the material properties of the part and a section keyword to define the element formulations for the part model.
*MAT
This keyword is used to define the material properties of the part. LS-DYNA provides multiple types of material laws. Here, *MAT_PIECEWISE_LINEAR_PLASTICITY (024) is used for the crash box. The material parameters used are as shown in the images below,
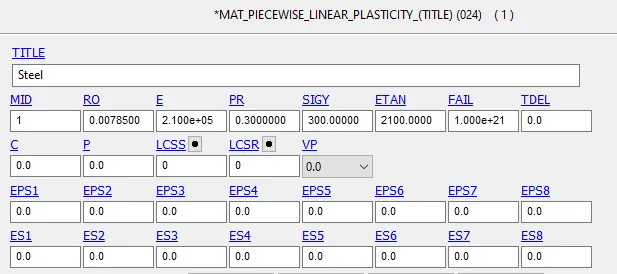
*SECTION
This keyword is used to define the element formulation method used by LS-DYNA. The crash box is modeled using the shell elements, therefore, the *SECTION_SHELL keyword is used.
And the thickness is set to 1.2mm and for the second case, it is changed to 1.5mm.
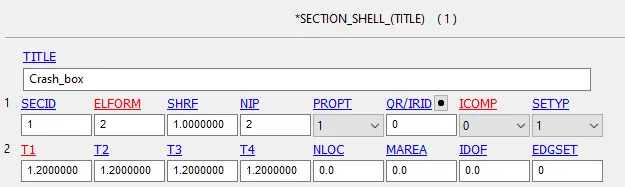
*PART
This keyword is used to define the individual parts. Under parameters, material ID and section ID are configured.
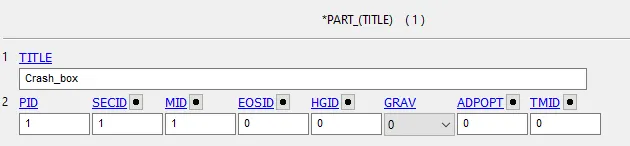
*Rigidwall
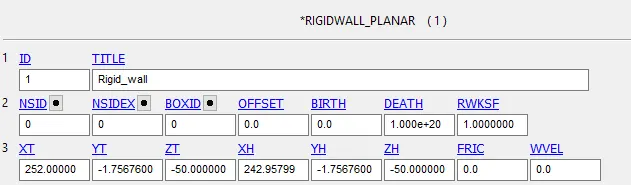
This keyword is used to create a rigid wall. There are multiple types of rigid walls that can be created in Ls-Dyna. For this case, the *RIGIDWALL_PLANAR keyword is used to create an infinite rigid wall in front of the crash box. The keyword is configured such that there is a gap of 2mm between the rigid wall and the crash box.
*INITIAL_VELOCITY
This keyword is used to assign some initial velocity to the selected nodes. *INITIAL_VELOCITY_NODE is created by going to Create Entity>Initial>Velocity. All the nodes of the crash box are selected using area selection and an initial velocity of 13.89mm/ms is configured in the x-axis and is kept zero in all other directions.

*CONTACT_AUTOMATIC_SINGLE_SURFACE
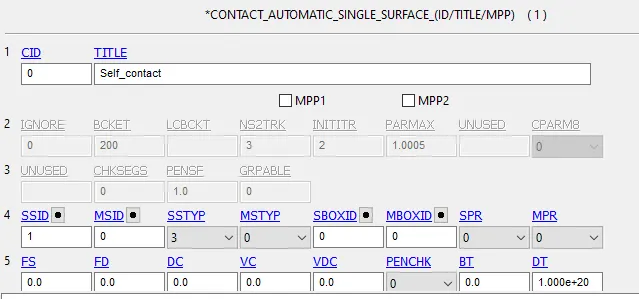
This keyword is created to model the self contact behaviour of the crash box, which is possible if the crash box gets deformed. For Slave ID (SSID), crash box part ID is entered. SSTYP is configured to 3, so that LS-DYNA considers the part ID. All other parameters are kept as default. As it is a self contact, we don't need to define a master surface.
*HOURGLASS
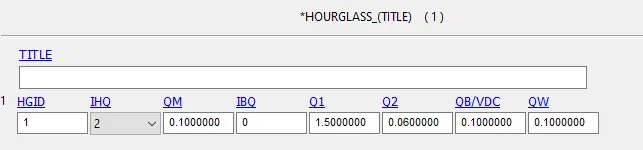
This keyword is created to define the Hourglass control type.
*CONTROL_ENERGY
This keyword allows controlling whether the energy is computed or not.
HGEN: Hourglass energy
RGEN: Stonewall energy dissipation
SLNTEN: Sliding interface energy dissipation
RYLEN: Rayleigh energy dissipation (damping energy)
IRGEN: Initial reference geometry energy
1 means it is not computed and 2 means it is computed and included in the energy balance.

*CONTROL_TERMINATION
This keyword is used to control the simulation and define the simulation time. For our purpose, the simulation time (ENDTIM) is configured to 1ms. All other parameters are kept as default.

*DATABASE
This keyword is used to configure the type of output that needs to be recorded from the simulations. Following keywords are created:
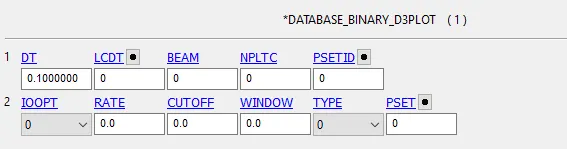
*DATABASE_BINARY_D3PLOT is used to create the animation file of the simulation. DT defines the time step to record the results and is configured to 0.1ms.
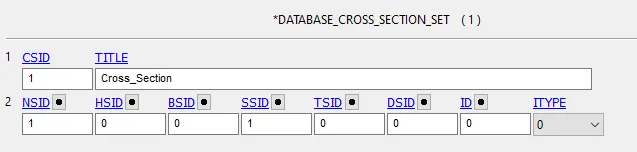
*DATABASE_CROSS_SECTION_SET
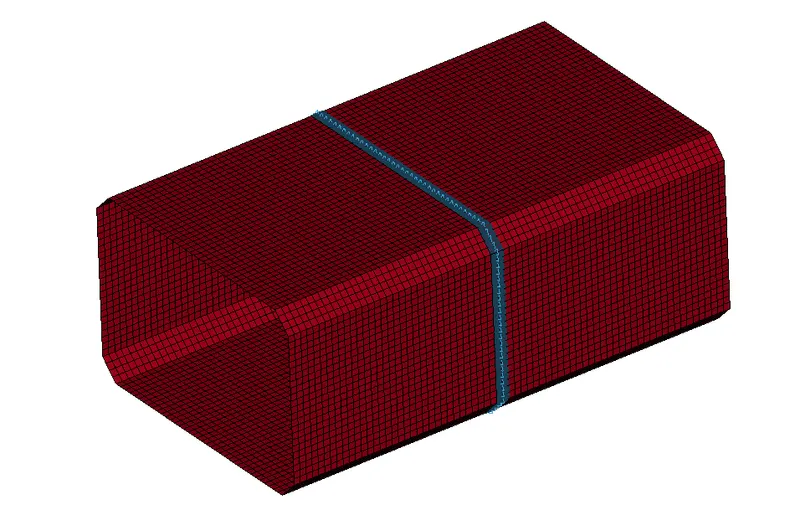
This keyword is used to record the data for the cross-section created. For this, a set of shell elements and a set of node elements are created in the middle of the crash box (along its length). Node set id and shell set id are configured in the keyword parameters and all other parameters are kept as default.
The image below shows the cross-section created.
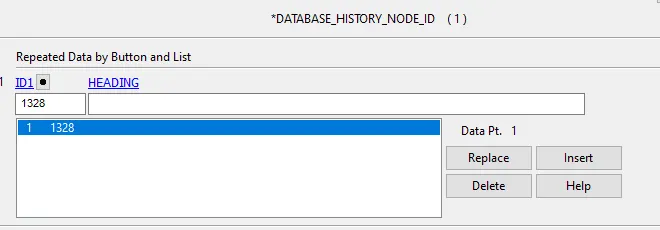
*DATABASE_HISTORY_NODE_ID
This keyword is used to record the history/data for the nodes. We are using this keyword to record the acceleration of a node (node id: 1328) in the middle of the crash box.
ASCII_option
This keyword instructs the Ls-Dyna to output the data that is requested for our visualization. The database keyword used above would make the Ls-Dyna record that particular data but will not be included in the output file.
Following output requests are enabled:
GLSTAT: to include the global history data from the simulation.
NODOUT: to include the data for the configured nodes.
SECFORC: to include the data for the cross-sections created.
SLEOUT: to include the data for the contact interface configured.
The time step to record the results is configured to 0.1ms for all.
Results:
Von-mises stress contour for 1.2mm model:
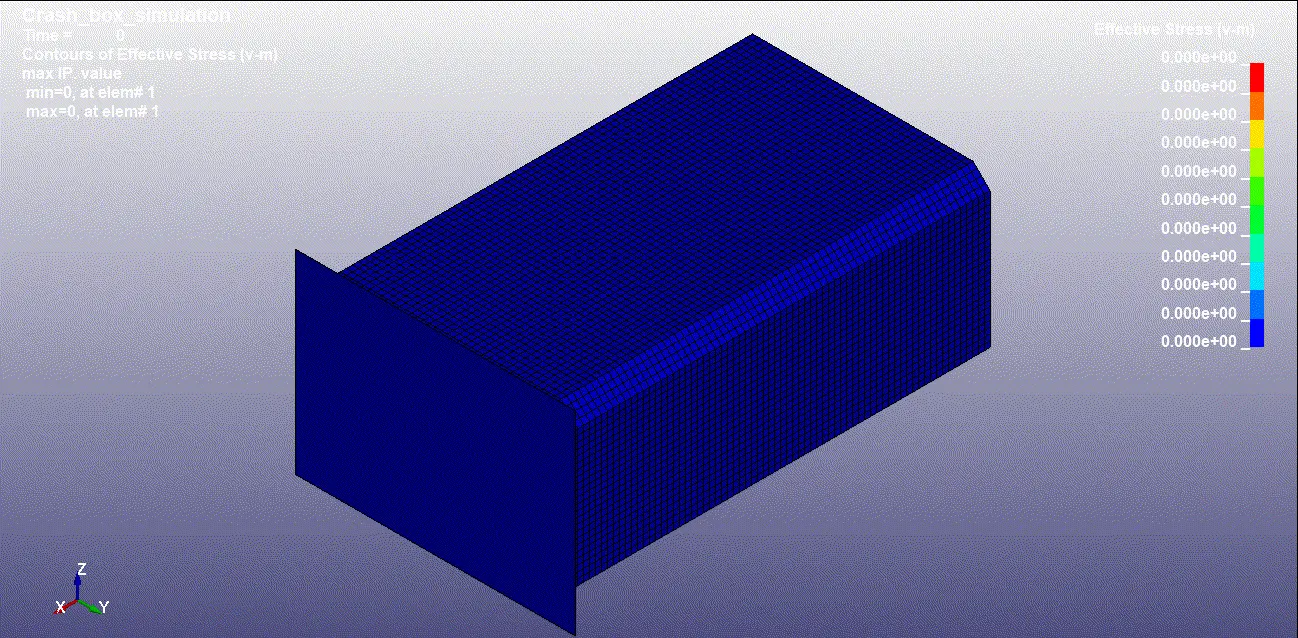
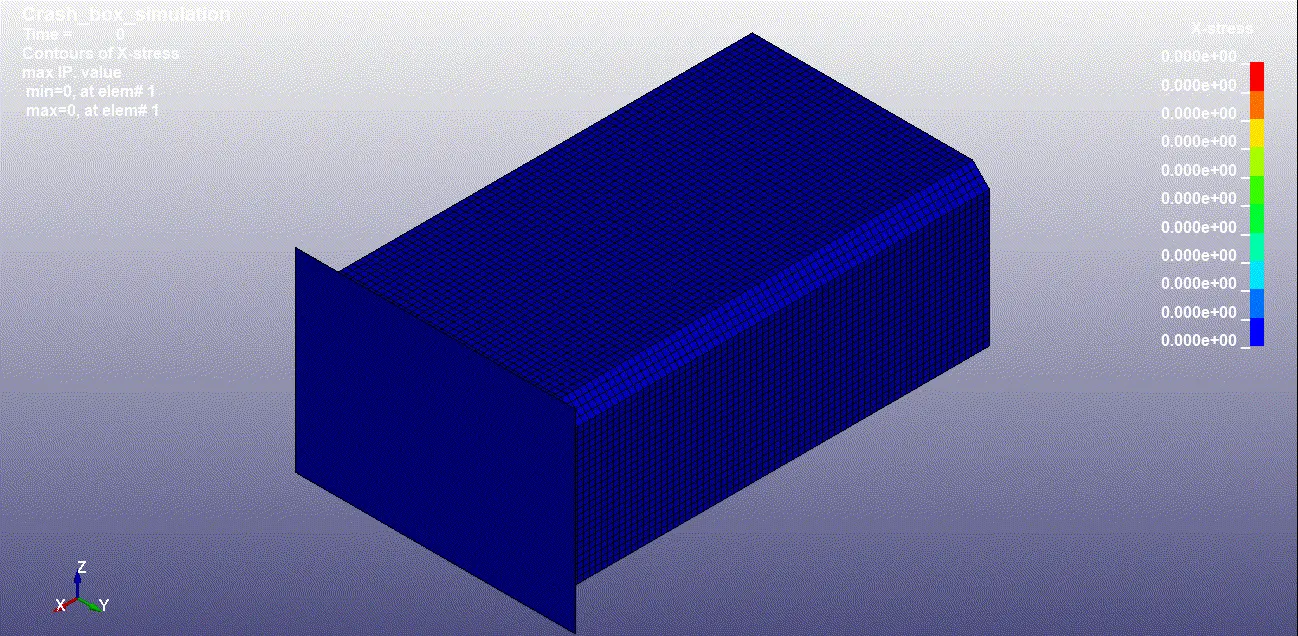
Stress along the x-axis (along the length) for 1.2mm model:
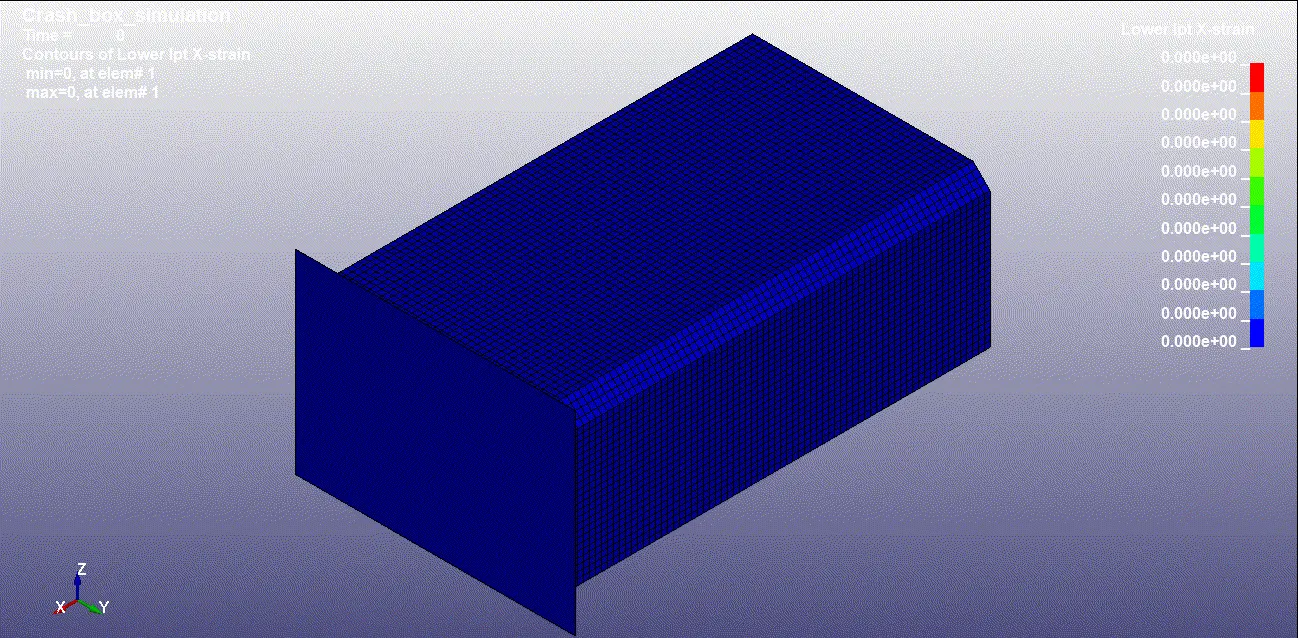
Strain along the x-axis (along the length) for 1.2mm model:
Von-mises stress contour for 1.5mm model:
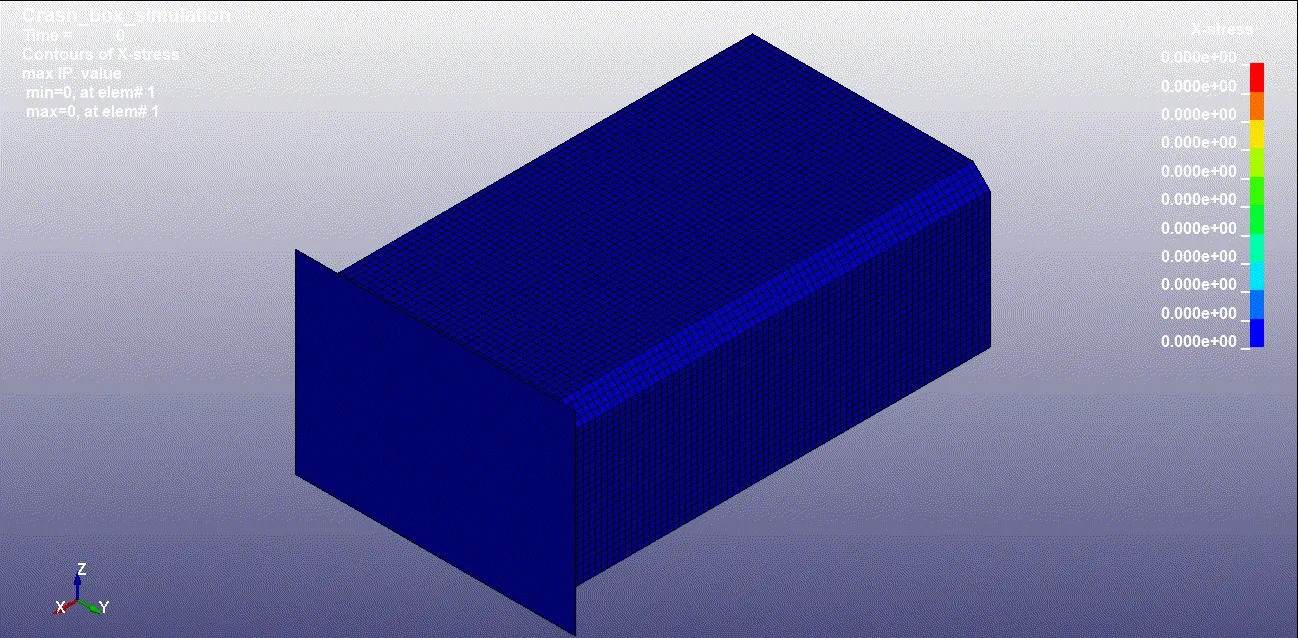
Stress along the x-axis (along the length) for 1.5mm model:
Strain along the x-axis (along the length) for 1.5mm model:
We can observe that in both cases the crash box bounces back after crashing with the rigid wall and there is no strain.
Section force plot for 1.2mm model:
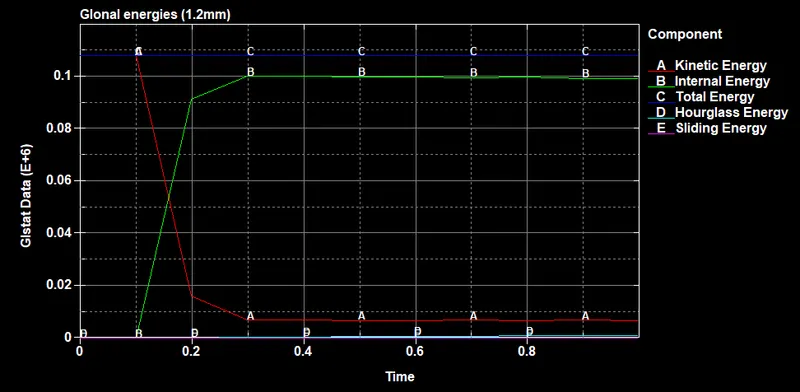
Global energies plot for 1.2mm model:
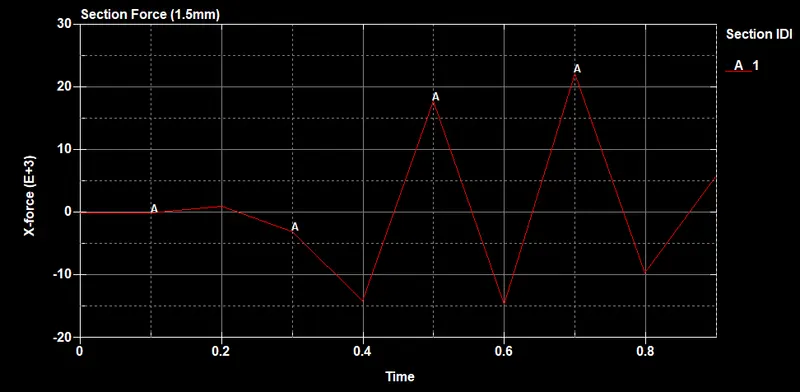
Section force plot for 1.5mm model:
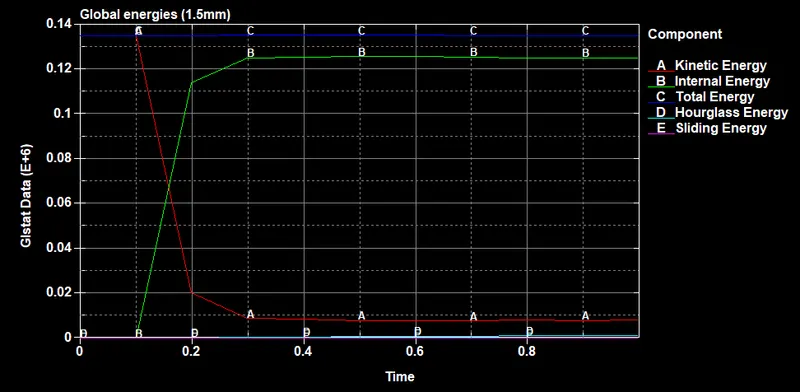
Global energies plot for 1.5mm model:
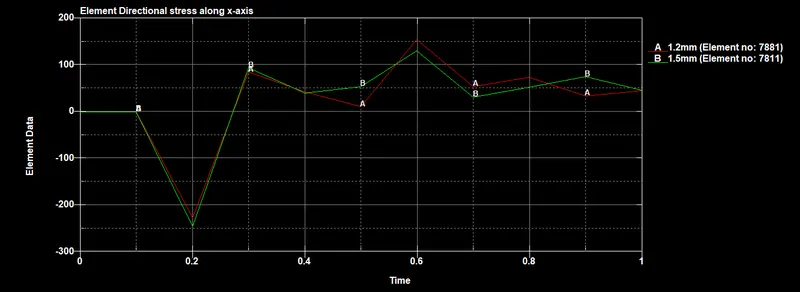
Directional stress plot:
Node acceleration plot:
Observation:
From the global energies plot, we can observe that @0.1ms the crash box crashes into the wall and its internal energy starts to rise and kinetic energy starts to decrease, as expected. The hourglass energy and sliding energy are almost zero for the complete simulation period. And, the total energy remains constant which is desirable. Therefore, energy error is insignificant and all the results are acceptable.
The reason that the crash box didn't deform is that there was no inertial mass behind it and therefore, it just bounces back after the impact. For a car, when the front crumple zone crashes, it gets deformed because of the huge inertial mass of the car behind it. By deforming it absorbs most of the energy and therefore keeps the occupants safe.
Conclusion:
All the keywords/cards were configured from scratch for the simulation and the crash simulation was performed succesfully.