Week 4-1D Element Creation Challenge
1D ELEMENT GENERATION IN HYPER MESH
INTRODUCTION
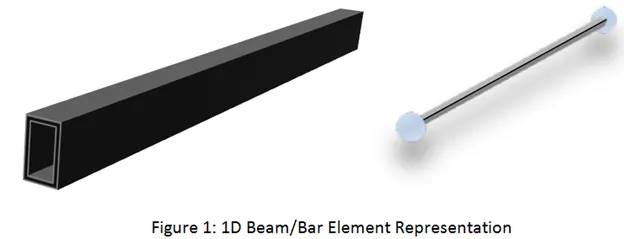
Whether they are straight or curved, all line elements are classified as 1D elements since they have translational and rotational displacement functions. The bending behaviour of a member can be accurately predicted using 1D elements, which are frequently used to describe line members. When a member is divided into several segments for 1D element meshing, the overall result is unaffected, but the results can be visualized more smoothly and effectively with more segments.
OBJECTIVES
Mesh the Given component with the Size of 5 Units. Create 1D elements on the following component with the given cross-section and DOF
- Rod element:- Translational DOF should be Constrained with the RBE2 link
Cross-Section: BOX- Dimension a= 12 mm
Dimension b=10 mm
Thickness t= 0.75 mm
a. Beam element: - All DOF should be constrained with the RBE3 link
Cross-Section: I Section- Dimension a= 8 mm
Dimension b= 10 mm
Dimension c= 8.5 mm
Thickness t1= 0.75 mm
Thickness t2= .6 mm
Thickness t3= .6 mm
b. Bar element: - Constrain only x and y DOFs with RBE3 link
Cross-section: X section- Dimension DIM1= 5 mm
Thickness DIM2= 1.2 mm
Dimension DIM3= 10 mm
Thickness DIM4= 1.2mm
d. & e. Apply the mass of magnitude 10 with the RBE2 link
f. Join the two components with spring elements
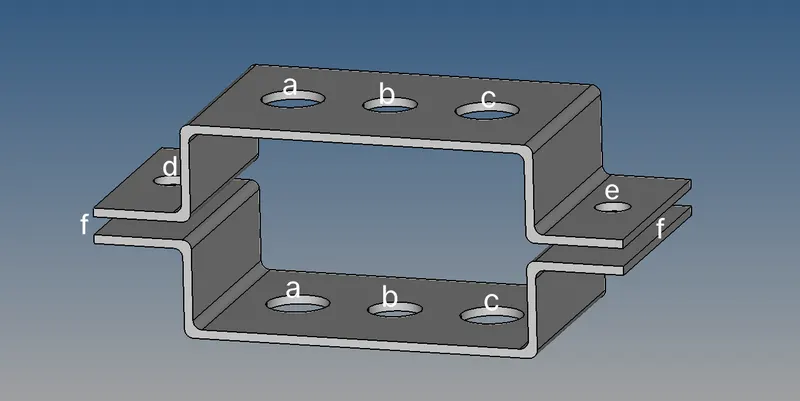
Figure-2 Representation of given model
PROCEDURE
The method of 1D element generation is divided into a number of phases which are as follows:
- First, we import the model with the IGES extension by using the import geometry option. After that, we need to analyse the geometry and start extracting mid-surface by using the mid-surface option Geom panel of the tools bar. Once the mid is generated we ought to mesh it with 5 units as average size using automesh option in the 2D panel.
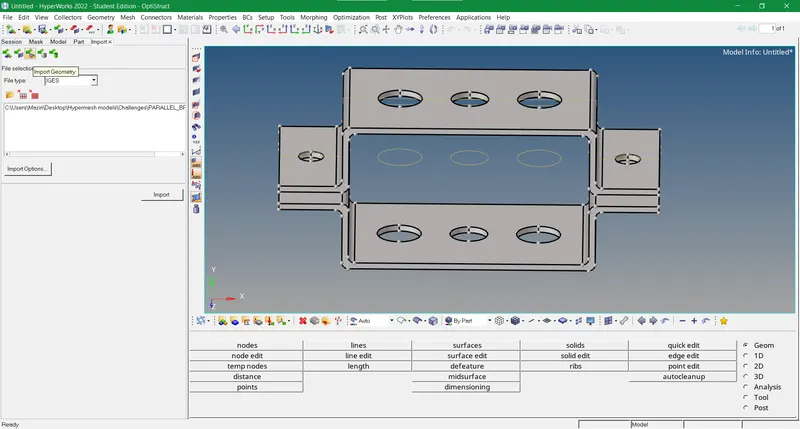
Figure 3 – Import CAD model into the hypermesh
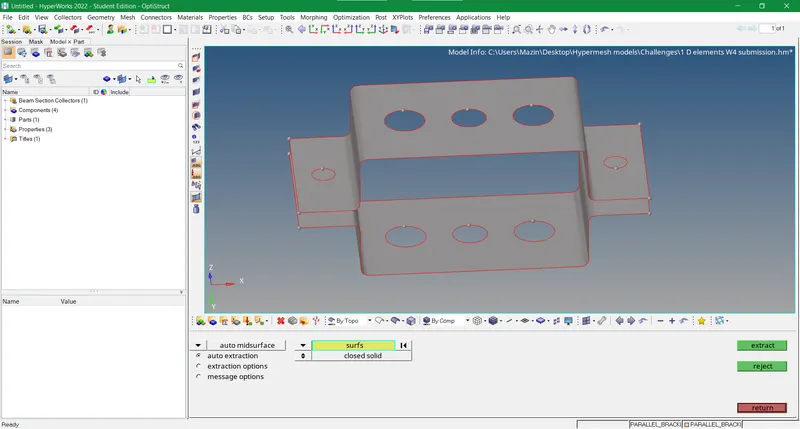
Figure-4 Mid-surface generated
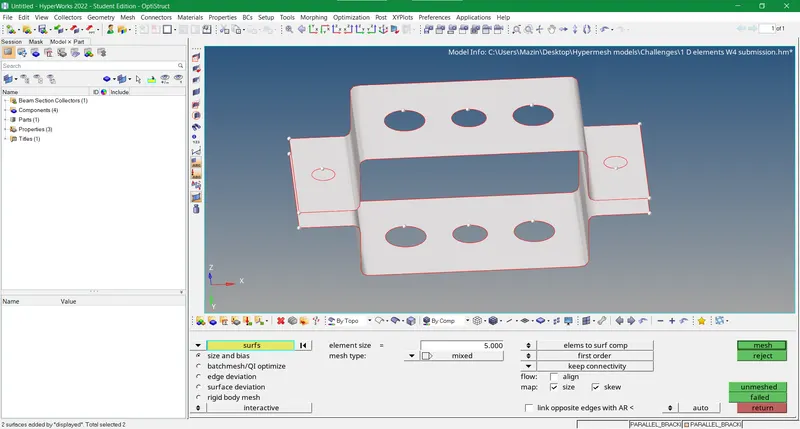
Figure 5 Auto meshed the mid-surface developed
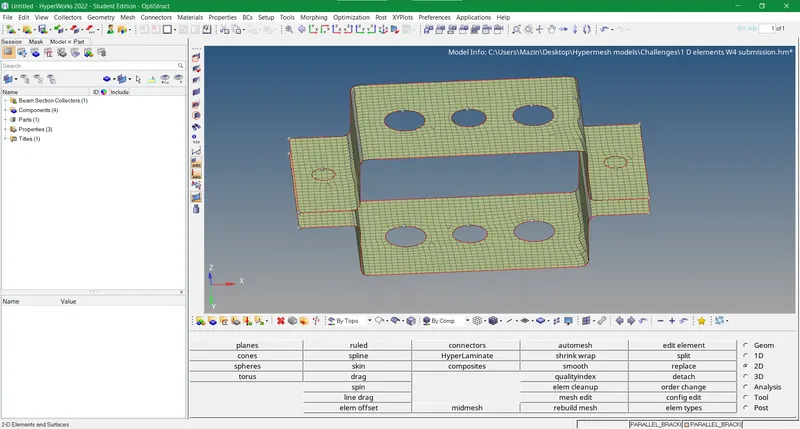
Figure-6 Mesh quality improved with rebuild mesh option which is optional in this case
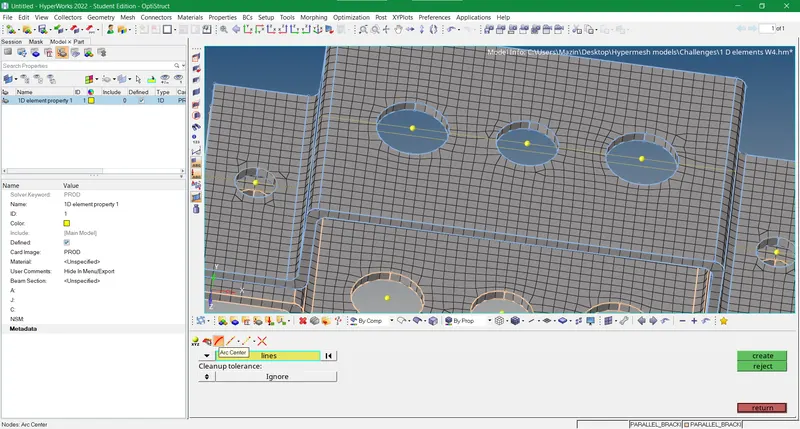
Figure-7 Node creation at the centre of the holes.
- Furthermore, post meshing we initiate by creating rigid body elements to provide connections between the component and the 1D element. Before that, we need to create centre nodes for all the holes designated by a b c d e and f in the prescribed model. There are numerous methods to do so but we choose the nodes sub-panel from the Geom panel and selected the arc centre option with the lines selection tool. Moving forward we move to the 1D panel and select the Rigids sub-panel for the holes of Rod element(a). As per allotted data about DOF, we create RBE2 in the holes of the Rod element by choosing all dependent nodes that constitute the circumference of the hole and the independent node which is the centre node. Likewise, we create RBE3 for bar element (b) in the RBE3 sub-panel of the 1D panel and RBE2 for beam element with the given data of DOFs.
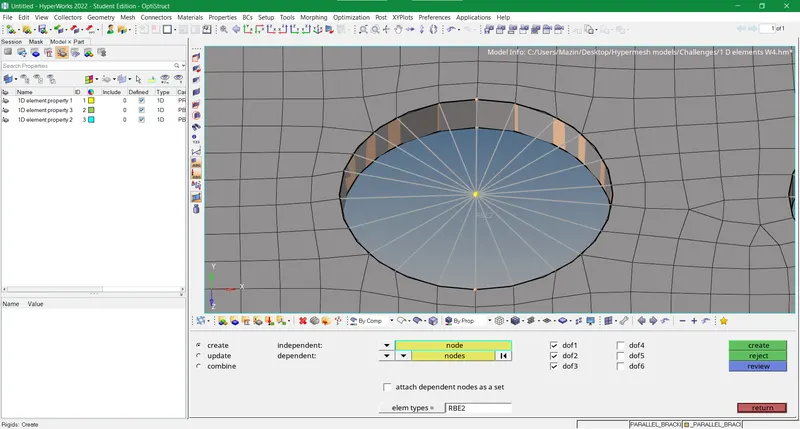
Figure-8 RBE2 established for rod element holes
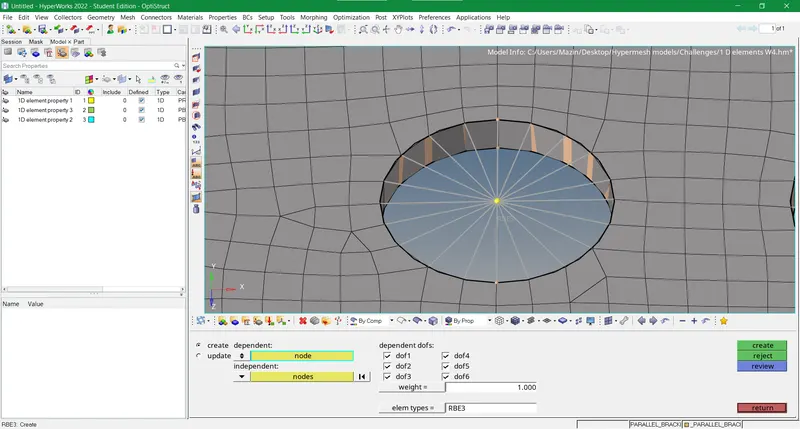
Figure-9 RBE3 established for beam element holes
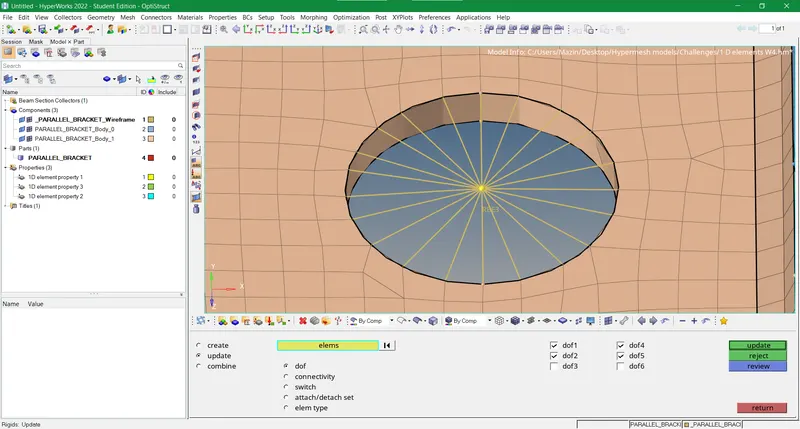
Figure- 10 RBE2 established for bar element holes
- Nevertheless, we create a cross-section for all three elements with the provided data by following the path from the main panel as 1D>HYPERBEAM>Standard section. The standard section type and section library is portrayed in the figures below with respect to the given data. Also, cross-section dimensions for all three elements are altered according to the provided data.

Figure 11-Rod cross section creation
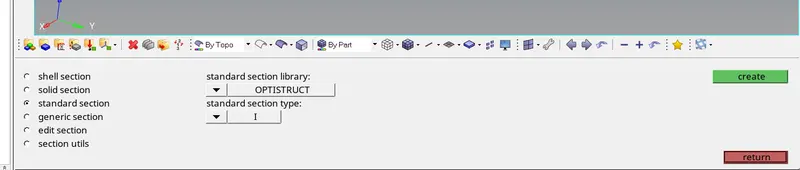
Figure 12-Beam cross-section formation

Figure-13 Bar cross-section formation
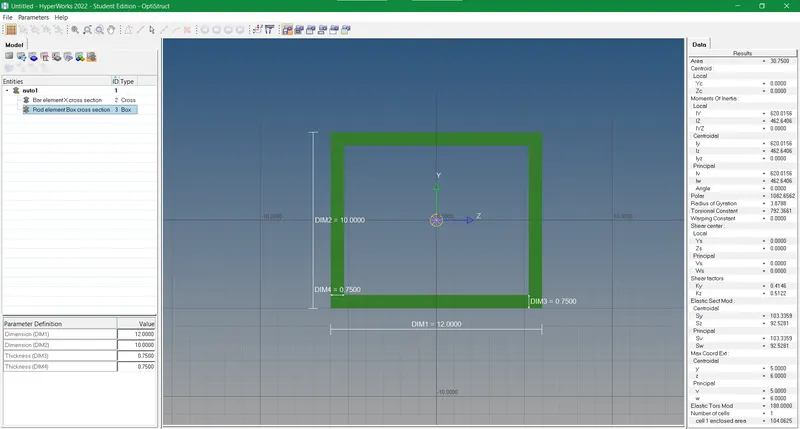
Figure 14 Rod cross section (Box type)
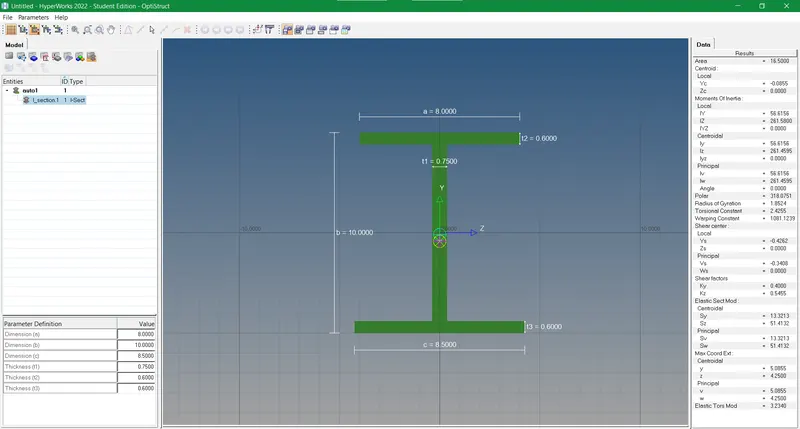
Figure-15 Beam cross section (I type)
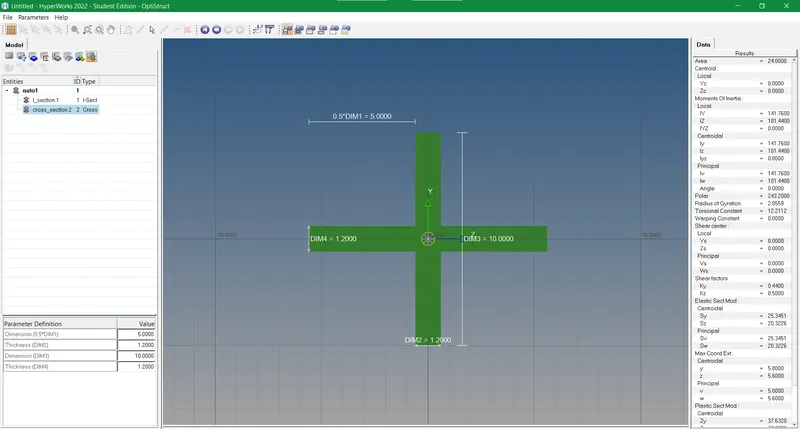
Figure-16 Bar cross section(X type)
- Without further ado, we create properties for all three elements with their specific card image and beam section that we created earlier i.e. cross-section in the figures below.
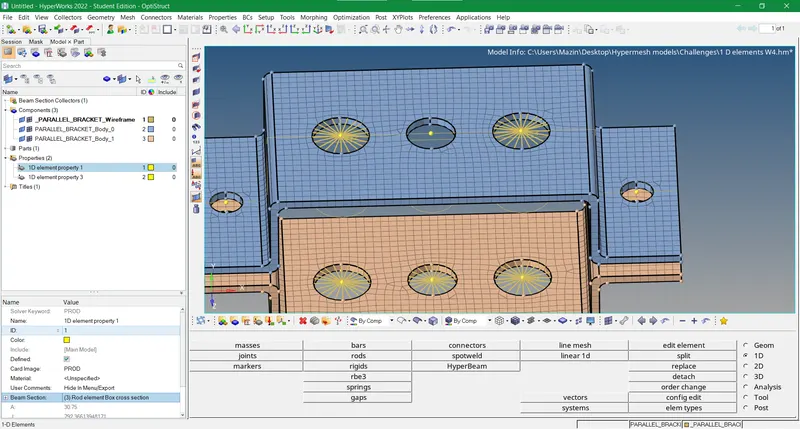
Figure-17 Rod element property created
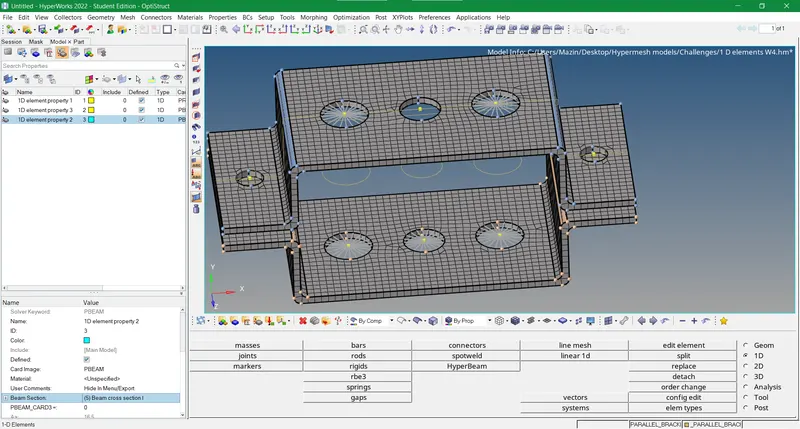
Figure-18 Beam element property created
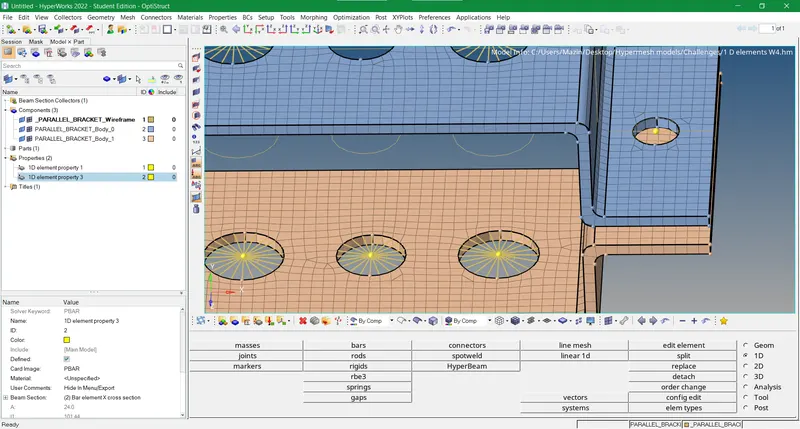
Figure-19 Bar element property created
- Since the properties and cross sections are assigned we start creating all the 3 elements by establishing a connection with their respective rigid body elements from one bracket body to another. It is done by following the required path as 1D>Rods for rod element and 1D>Bars for both beam and bar elements as shown below in the figure. For all three elements, we choose a specialized element type and property earlier created. After selecting two nodes of each bracket for all a b and c holes we get all three 1D elements.

Figure- 20 Beam element created
- Henceforth we move to the last part by creating RBE2s at holes designated by d e and f with all DOFs constrained. We provide connection to each of them by spring elements which are created by going to the 1D panel and selecting the springs sub-panel.
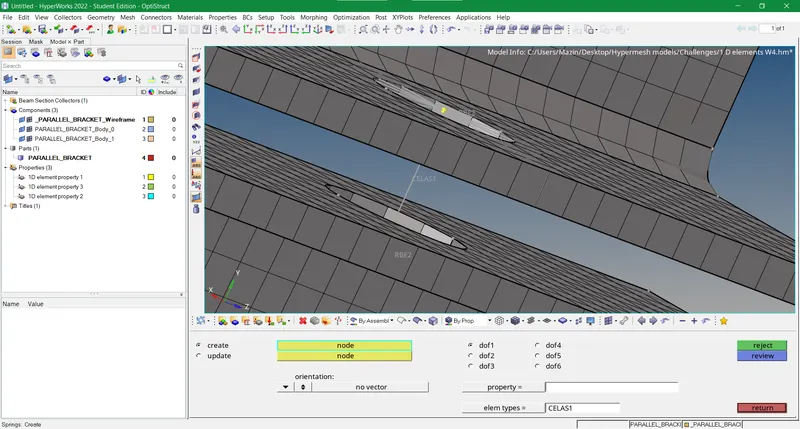
Figure-21 Spring connection formed
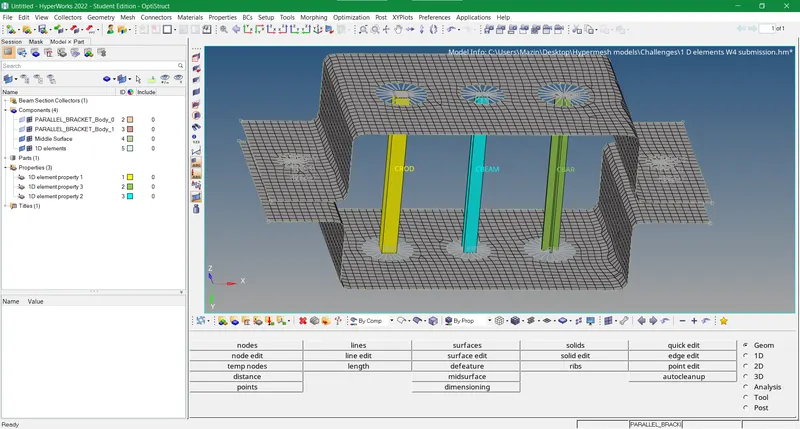
Figure-22 Final image of the model
RESULTS
- The outcome of this assignment is that we developed a good experience in 1D element connections between desired numbers of entities.
- The representation and designation of each 1D element are known after working on this task.
- The cross sections designations and particular properties of each 1D element are learned via this model.
- We got a good idea of rigid body elements that define the motion of DOFs for each element interconnected with them.