Week 12:Project-1-Meshing of Door Inner Panel Challenge
AIM:
To perform FE modelling of an Automotive Side Door inner panel trim component by considering the given element Quality criteria.
Figure 1 - Automotive Side door inner panel
NOTE:
In this challenge, there will be some off elements found in the chamfer region which cant be removed. It is acceptable as it is been found due to the presence of triple cons on the chamfered surface. Due to those triple cons there will be some quality criteria failure which can be accpetable and those quality fails can be neglected.
GIVEN DATA:
The given data are the inputs to work. Here the given data are,
- CAD model.
- Quality criteria.
- CAD MODEL: Here the given cad model is Automotive Side Door inner panel trim (Plastics)
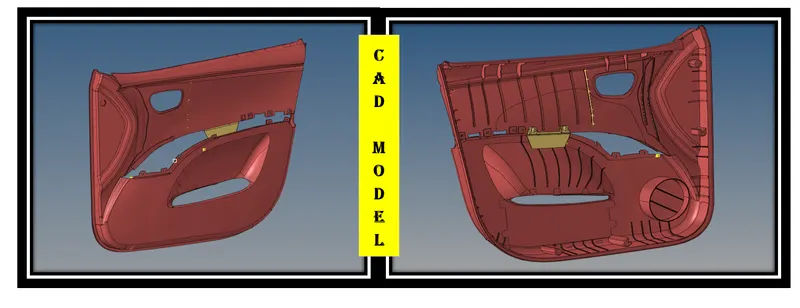
Figure 2. CAD model - Given data.
- QUALITY CRITERIA : Every product which is been produced will go through the set of quality check. If the quality check fails other steps like boundry condition & apllying loads will not be feasible, So for this reason the element quality check is performed. To identify the quality failure the quality criteria will be entered as an input data. The given quality criteria are shown in the below table. The elements should be maintained within the below given value. If the given quality value is not maintained there will be a failing in qulaity.
| S.NO | QUALITY CRITERIA | VALUE |
| 1. | Target/Avg length | 4 |
| 2. | Min. length | 2 |
| 3. | Max. length | 6 |
| 4. | Aspect ratio | 5 |
| 5. | Warpage | 15 |
| 6. | Skewness | 45 |
| 7. | Taper | 0.5 |
| 8. | Min. quad angle | 45 |
| 9. | Max. quad angle | 135 |
| 10. | Min. Tria angle | 20 |
| 11. | Max. Tria angle | 120 |
| 12. | Tria percentage | 10 |
Table 1 : Quality criteria.
METHODOLOGY:
- Import CAD geometry.
- Geometry cleanup.
- Mid surface / Skin generation.
- Shell or solid meshing.
- Element quality check.
- Mesh improvement.
- Apply load & Boundry condition.
- Export input file.
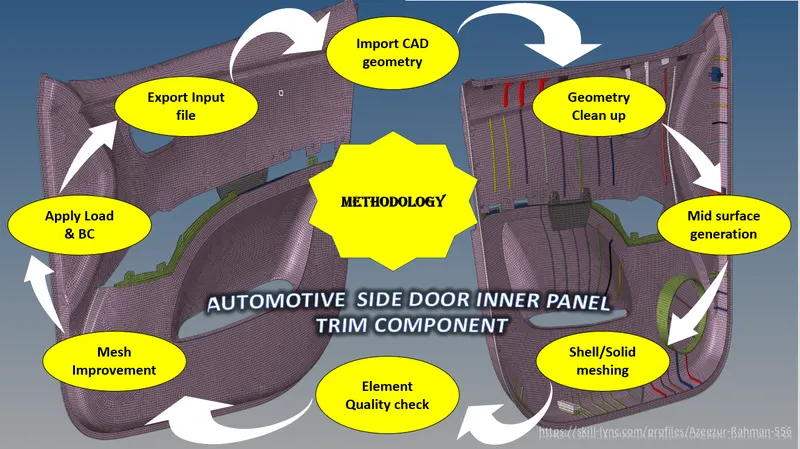
Figure 3. Methodology.
1. Import CAD geometry:
- Input the given cad model. Here the given cad model is Automotive side door inner panel - Trim component.
- Also enter the input values - The given quality criteria value.
Figure 4. Input CAD geometry.
2. Geometry cleanup:
- To generate FEM we clean up the geometry.
- Surface patch up, creating new surfaces, eleminating of triple cons in unwanted area, converting single cons to double cons in necessary area are comes under geometry cleanup phase.
3. Mid surface generation:
- This will be done once after the geometry cleanup & extraction of mid surface is an important step in CAE which has to be followed.
- Mid is the neutral pahse which is been generated from the CAD which is imported or given to us.
- The conversion of 3D cad to 2D cad is happening in mid surface generation.
- The mid surface is generated to reduce the complexity as by simplifying the cad model we get more accurate simulation results in shorter time.
- Once mid surface is extracted feed in the properties of materials & assign thickness for particular model.
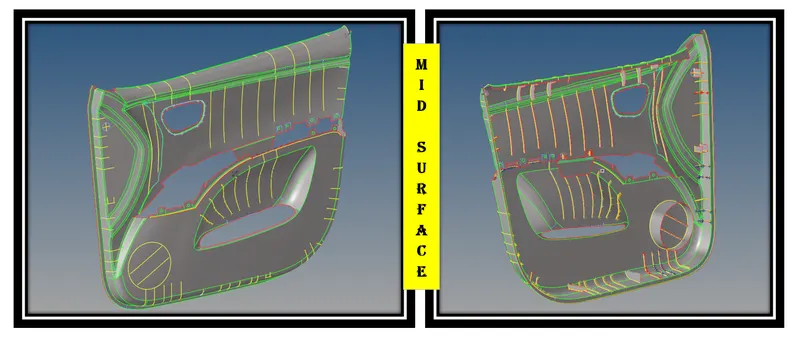
Figure 5. Mid surface of given CAD geometry.
4. Shell or solid meshing:
- Shell meshing is achieved after skin extraction but we do not mid surface all components based on requirements we should also be doing volumetric mesh.
- For casting & molding products we generally go with solid meshing.
- In this project, I have used a Batch mesh for meshing the given model eventhough it is a plastic component.
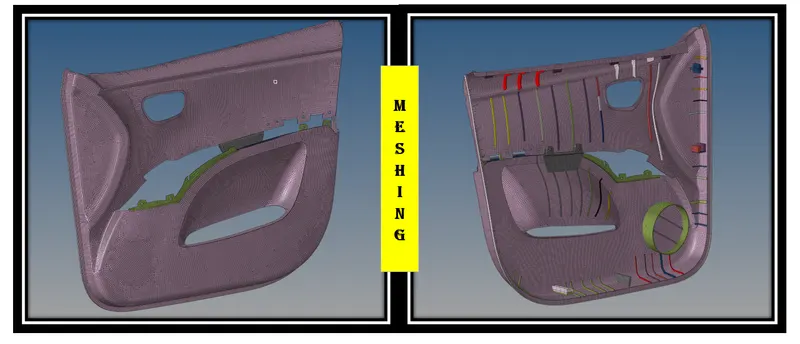
Figure 6. Generation of mesh for given CAD geometry.
- Assign Property, material & Thickness -
- Since it is a plastic part there will be a varrying thickness. For parts having varying thickness the average thickness can be given or multiple thickness can be given for a part by assigning seperate PID to the same parts.
- In this challenge, I have gone by taking average thickness for the ribs having varrying thickness.
-
-
- Avg thickness = (Max. thickness + Min. thickness) / 2
-
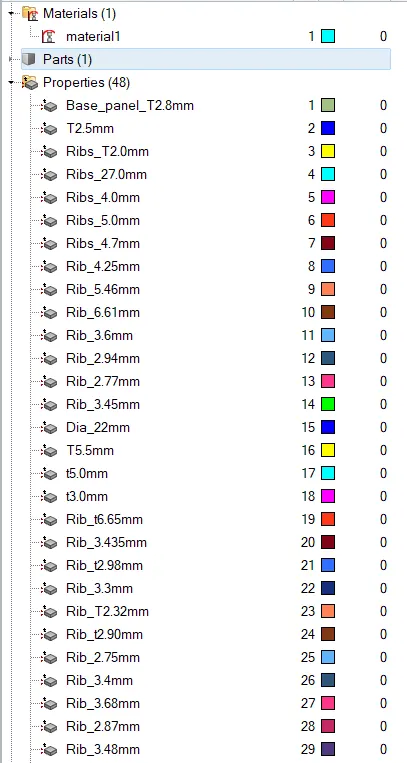
Figure 7. Assign Property, material & thickness
5. Element quality check:
- Every product which is been produced will go through the set of quality check. If quality check fails other steps like B/C & applying loads will not be feasible, So element quality check will be performed.
- The given quality criteria values been enterd in quality crieteria settings under prefernces. These colours are customizable and can be seen while meshing if the elements are beign failed. These failed elements should be corrected and the elements should matches the quality criteria.
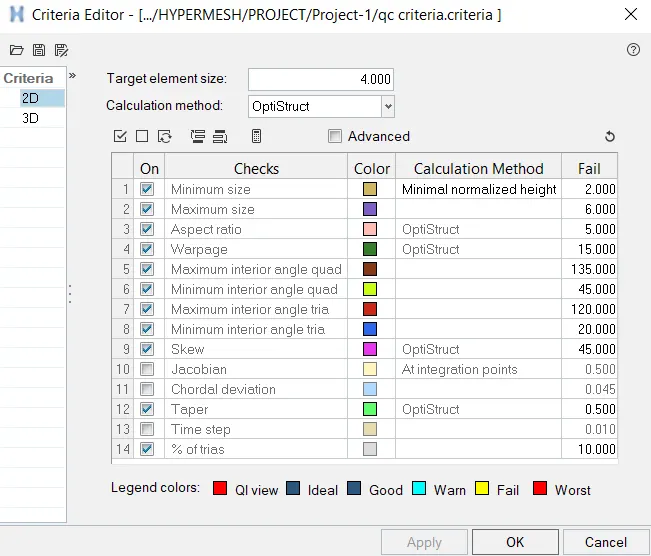
Figure 8. Quality checks.
6. Mesh Improvement:
- In this phase, the quality of FEM will be improved.
- After quality check any improvements that is been addressed that will be done in mesh improvement stage.
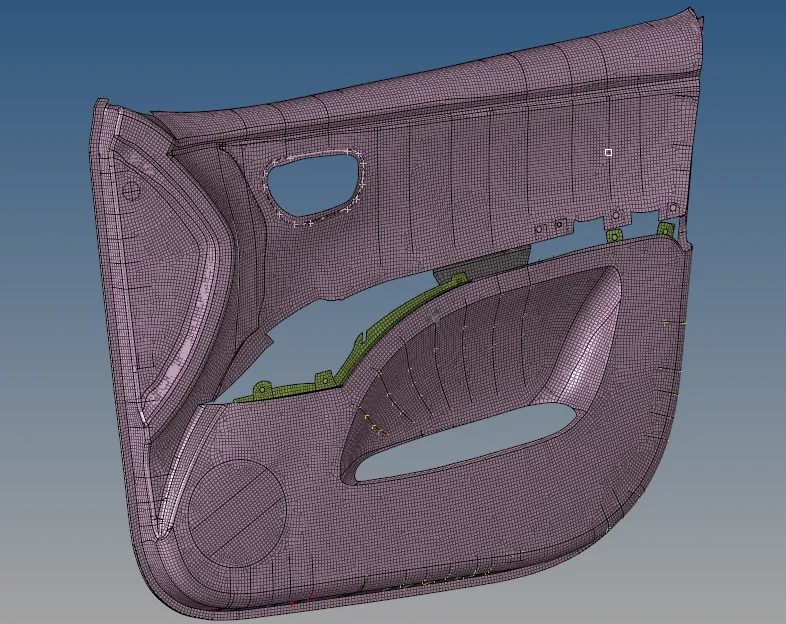
Figure 9. Mesh improvement
7. Apply load & BC: Loads & boundry conditions will be applied on this phase.
8. Export input file:
- Have to choose which software will read the file. As different solvers follow seperate algorithms & process.
- Decks: NASTRAN - NVH, PAM CRASH - Safety, LS DYNA - safety, ABAQUS - durability.
2D detailed element representation - It should be activated after finishing challenge. Since it is a shell elements, After activating 2D detailed element representation the meshed shell elements will convert to solid, by considering the thickness assigned on Property card. This is a final stage in this challenge which has to done before submiting.
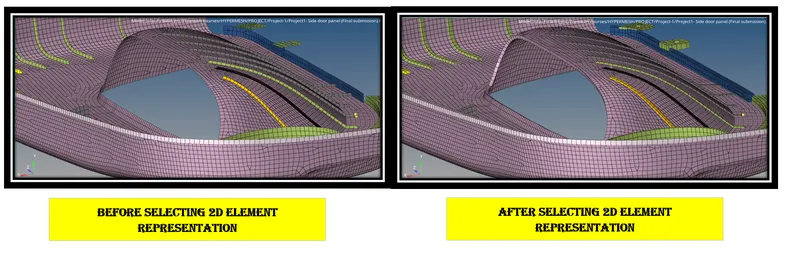
Figure 10. Details of elements
CHECKS:
The checks for,
- Comparison
- Normal
- Free edges
- Duplicate elements has been done successfully
LEARNING OUTCOMES :
At the end of this challenge, I can able to
- Easily perform FE Model building for any complex automotive trim components with a good mesh flow.
- Work on HYPERMESH with a flow.
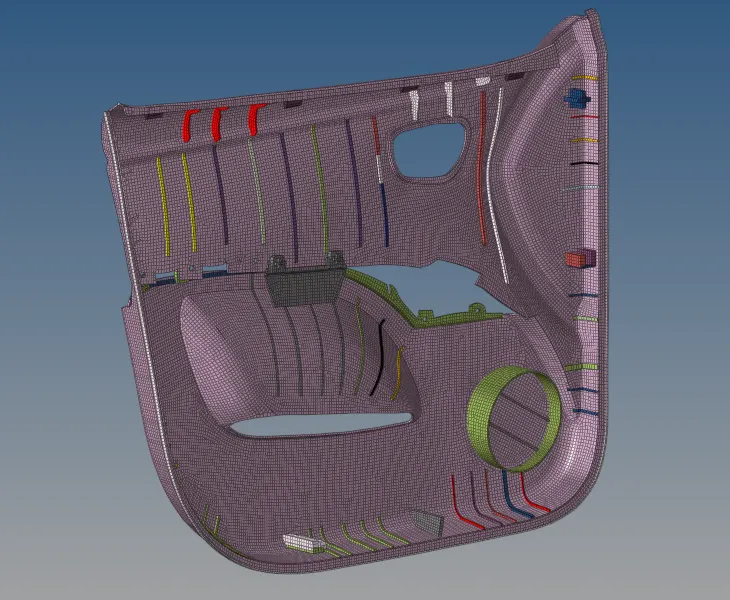
Figure 11. Side door inner panel (meshed component)
CONCLUSION :
Hence, the geometrical errors and 2D mesh, with the given element Quality criteria has been performed successfuly for a given Automotive side door inner panel-Trim component. As per methodology, From import cad, geometry clean up to mesh improvement phases have been performed successfuly. The Applying load & Boundry condition phases will be performed on upcoming challenges.