Photo Realistic Rendering
MODELLING OF AMERICAN CHOPPER IN SOLIDWORKS
SOLIDWORKS INTRODUCTION:
Mechatronics, the combination of robotics, electronics, computer, and control systems, has resulted in a variety of amazing products from smart phones to self-driving cars. In order to create those products, they need to be digitally modeled and developed. SOLIDWORKS, a solid modeling computer-aided design and computer-aided engineering program, is one of the most popular software options for Mechatronics engineers. Solid Works is computer-aided design software owned by Dassault Systèmes. It uses the principle of parametric design and generates three kinds of interconnected files: the part, the assembly, and the drawing. Therefore, any modification to one of these three files will be reflected in the other two.
Solid works helps you perform 2D and 3D modeling, and this CAD software is known for its ease-of-use and intuitiveness.
Solid Works software enables you to:
- design very precise 3D objects
- develop products
- double-check your file's design
- maintain a library of your 3D files
- create 2D drawings
- create images and animations of your 3D objects
- estimate the manufacturing cost of your 3D objects
Softwares required: SOLID WORKS, Photo view 360
SOLIDWORKS 2016 System Requirements
Operating System
Supported Systems:
- Windows 10, 64-Bit
- Windows 8.1, 64-Bit
- Windows 8.0, 64-Bit
- Windows 7 SP1, 64-Bit
- Windows 7 SP1, 32-Bit
RAM
- 64 bit: 8 GB (min), or more – recommended for large assembly work and Simulation and also graphic card 1 GB (min).
Though these recommendations are a good starting point for spacing out a SOLIDWORKS machine, it is always a good idea to conduct your own hardware/software tests before purchasing any workstation, computer hardware, or video card for Solid Works.
Objective:
The main objective is
- To create all individual parts which are required for the solid modeling of American chopper
- Next is how to assemble all the parts of the American chopper
- Finally using photorealistic model and render it using Photoview 360 along with the application of Decals, lights and camera.
Design Process The design process usually involves the following steps:
- Identify the model requirements.
- Conceptualize the model based on the identified needs.
- Develop the model based on the concepts.
- Analyze the model.
- Prototype the model.
- Construct the model.
- Edit the model, if needed.
DESIGN PLAN/ DESIGN PROCEDURE:
FEATURES OF SOLIDWORKS:
Sketch: A collection of lines and other 2D objects on a plane or face that forms the basis for a feature such as a base or a boss. Sketching is done using sketch entities such as splines, lines, rectangle, circles etc. The sketch is the basis for most 3D models. Creating a model usually begins with a sketch. From the sketch, you can create features. You can combine one or more features to make a part. Then, you can combine and mate the appropriate parts to create an assembly. From the parts or assemblies, you can then create drawings. A sketch is a 2D profile or cross section. To create a 2D sketch, you use a plane or a planar face. In addition to 2D sketches, you can also create 3D sketches that include a Z axis, as well as the X and Y axes. There are various ways of creating a sketch.
Loft: Loft creates a feature by making transitions between profiles. A loft can be a base, boss, cut, or surface.
You create a loft using two or more profiles. Only the first, last, or first and last profiles can be points. All sketch entities, including guide curves and profiles, can be contained in a single 3D sketch.
Extrude Boss: Extruded Boss/Base feature, this is one of the most common and universal features used within the 3D modeling world. This is a handy feature for creating 3D solid models within SolidWorks.
Using the modeled 2D sketch created, you are ready to turn the 2D sketch element into a 3D solid feature. The Extruded Boss/Base feature can be found on the features tab in the Command Manager.
Extrude cut: Extruded Cut is a handy feature to aid in material removal of a 3D model using 2D sketches. Using the Extruded Boss/Base model created in the Extruded Boss/Base, we will modify the 3D block to include a circle feature by removing material. The Extruded Cut feature can be found on the features tab in the Command Manager
Dome: A dome is a curved formation or structure. It is shaped like half of a sphere. Imagine cutting an orange in half, and placing it cut-side-down on a table. This is the shape of a dome, although most domes in nature are not perfectly rounded. elliptical dome is for cylindrical or conical models. An elliptical dome's shape is a half ellipsoid, with a height equal to one of the ellipsoid radii.
Fillet: Fillet/Round creates a rounded internal or external face on the part. You can fillet all edges of a face, selected sets of faces, selected edges, or edge loops by specifying distance.
Chamfer: A chamfer is the sloped or angled edges or corners of a part design. It is an antonym of the fillet. Instead of having a curved shape, a chamfer is straight and has a sharp angle. Chamfering is done mentioning either with distance distance or angle distance.
Split: Split feature is to create multiple parts from an existing part. You can create separate part files, and form an assembly from the new parts. You can split one or more solid or surface bodies. To split a surface, the Trimming Surface must extend past the boundaries of the surface to split.
Patterns: this feature is used to pattern the entities in any specified direction. There are different types and ways there can be used based on our requirement.
- Curve Driven Patterns
The Curve Driven Pattern tool allows you to create patterns along a planar or 3D curve. To define the pattern, you can use any sketch segment, or the edge of a face (solid or surface), that lies along the plane. You can base your pattern on an open curve, or on a closed curve, such as a circle.
- Linear Patterns
Use linear patterns to create multiple instances of one or more features that you can space uniformly along one or two linear paths.
- Circular Patterns
Use circular patterns to create multiple instances of one or more features that you can space uniformly around an axis.
- Sketch Driven Patterns
Using sketch points within a sketch, you can specify a feature pattern. The seed feature propagates throughout the pattern to each point in the sketch. You can use sketch driven patterns for holes or other feature instances.
- Table Driven Patterns
Using X-Y coordinates, you can specify a feature pattern. Hole patterns using X-Y coordinates are a common application for table driven patterns. However, you can use other seed features, such as a boss, with table driven patterns. You can also save and load the X-Y coordinates of a feature pattern, and apply them to a new part.
Blocks: You can make, save, edit, and insert blocks for drawing items and sketch entities that you use often, such as standard notes, title blocks, label positions, and so on. You can attach blocks to geometry or to drawing views, and you can insert them into sheet formats.
Mirror: The ability to mirror can be found in part and assembly files, and allows you to mirror sketch entities, features, faces, bodies, and components. Mirroring is done when you want to get the same design wrt to a line or plane. Mirroring is best way to reduce time and avoid errors. Mirroring sketch entities can be done wrt to a line while mirroring features is done wrt plane. You can also mirror the components while in assembly wrt a reference plane.
Projected curve: it is a tool you are going to use to form 3D curves from two 2D curves from two different planes. But the two sketches should be orthogonal or perpendicular. They are 2 types based on usage we can use either sketch on face and sketch on sketch.
Reference geometry: Reference Geometry includes reference planes, axes, coordinate systems, and points. Make sure they are fully defined while created. While creating reference plane these are the various ways you can define it.
- Offset Distance
- Coincident with 3 vertices
- Coincident with a line and a vertex
- Angle
- Parallel
- Tangent and Parallel
- Tangent and Perpendicular
- Mid Plane
- Perpendicular at a Point
- Create a plane parallel to the screen
Appearances: An appearance defines the visual properties of a model, including color and texture. Appearances do not affect physical properties, which are defined by materials.
Mates: mates create a geometric relationship between the assembly components so that they are defined. As we define mates we define the allowable directions of linear and rotational motion of the components. We can also restrict and allow the motion within the assembly based on our convenience.
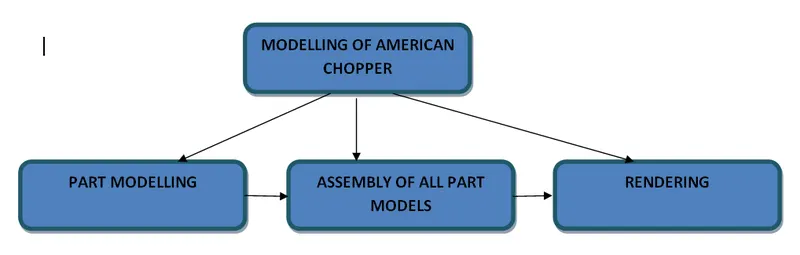
American Chopper consists of different part and all are assembly onto a fixed part model and final rendering is done.
The following are the parts of Model
- Kickstand
- Chain
- Fenders
- Engine
- Chassis
- Wheels
- Front fork
- Oil tank
- Gas tank
KICKSTAND:
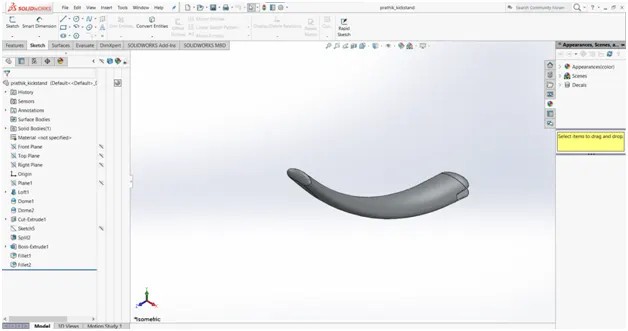
A kickstand is a part on a motorcycle that allows the bike to be kept upright without leaning against another object or the aid of a person. A kickstand is usually a piece of metal that flips down from the frame and makes contact with the ground. It is generally located in the middle of the bike or towards the rear.
Features used to create kickstand
- Sketch
- Loft
- Extrude boss
- Extrude cut
- Dome
- Fillet
- Split
CHAIN
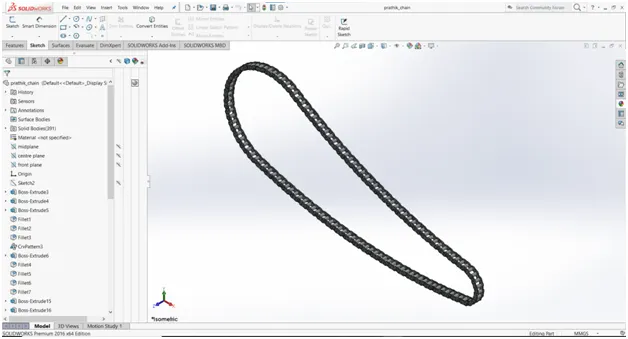
Chain drive is a way of transmitting mechanical power from one place to another. It is often used to convey power to the wheels of a vehicle, particularly bicycles and motorcycles. It is also used in a wide variety of machines besides vehicles. It consists of endless series of chain link known as roller chain which meshed with toothed sprocket gear. This type of power transmission mainly used in motor cycle.
Advantages of chain drive
- No slip and creep during the power transmission, it ensure the perfect velocity ratio. The output side rotate at precise speed.
- High transmission efficiency than friction drive.
- They can be operated under adverse thermal and atmospheric conditions.
- It can operate under wet conditions.
- It can use in both short and long distance power transmission.
Disadvantages of chain drive
- There may be velocity fluctuation and under excessively stretched chain conditions.
- Conventional chain drive suffers vibrations due to chordal effect.
- The chain drive need careful maintenance, lubrication and slack
- If there is no frequent proper lubrication the chain wear out faster than belts and ropes.
Features used to create chain:
- Sketch
- Trim
- Blocks
- Extrude
- Patterns
- Fillets
- Appearances
Trim entities is also used. There are 2 types of trim entities.
- Power trim: used to trim the unwanted part of entity
- Extend entities: used to extend the line or entities upto next point.
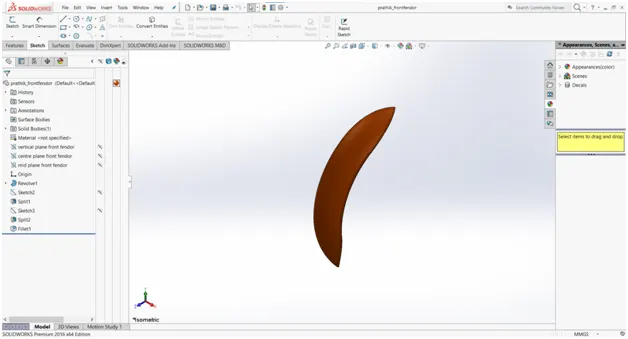
FENDORS:
Mounting a quality set of bicycle fenders, also known as mudguards, to your bike will have a number of benefits. For most, reducing the amount of water, mud, and grime that sprays up into your face, all over your bike and your backside is enough to warrant their use.
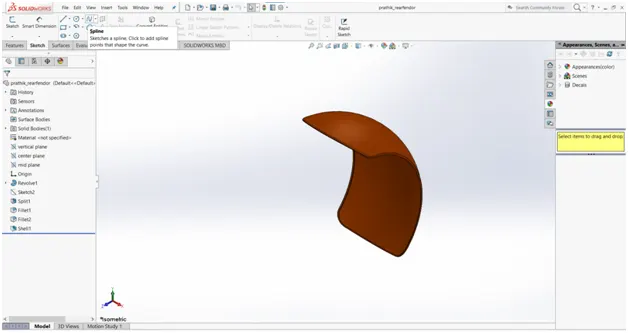
Features used to create fendor
- Sketch
- Offset entites
- Trim entities
- Revolve
- Dynamic mirror
- Split
- Appearances
Rear Fendor:
Front Fendor:
Oil tank:
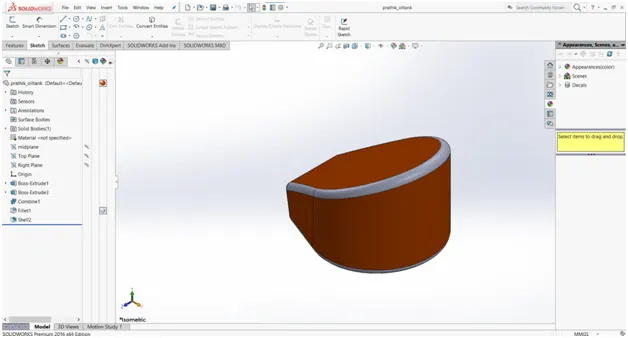
Oil tanks store fuel oil for heating systems on commercial and residential properties. They can be above-ground or underground, Oil tanks are durable enough to last for years in a variety of different weather conditions. Tank leaks don't happen often, but a variety of factors could affect the lifespan and durability of the tank, including the location, the climate, the material of the tank and its age. Nearby vegetation can also affect a tank's lifespan.
Features:
- Sketch
- Boss extrude
- Combine
- Fillet
- Shell
Pedal:
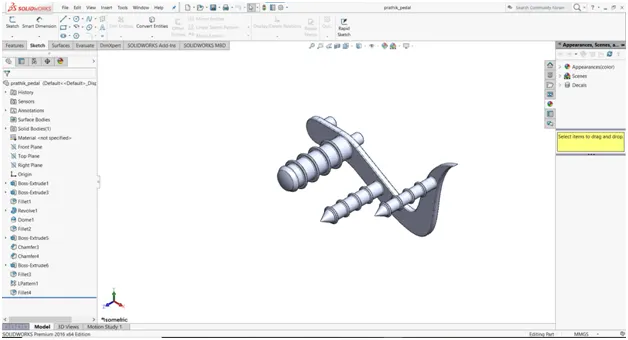
The pedals in bike are used for keeping our foot on it.
Features
- Sketch
- Extrude
- Fillet
- Linear pattern
- Dome chamfer
Front wheel
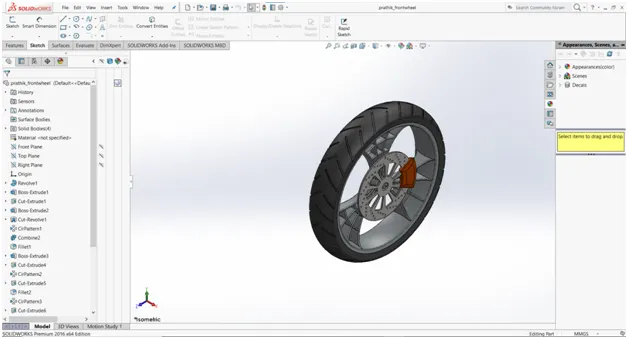
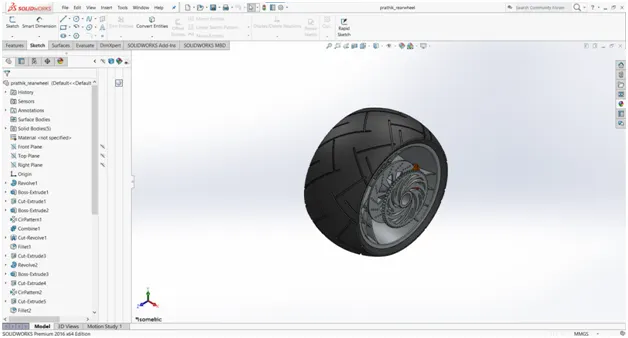
Motorcycle wheels are made to cope with radial and axial forces. They also provide a way of mounting other critical components such as the brakes, final drive and suspension. Wheels, and anything directly connected to them, are considered to be unsprung mass. Traditionally motorcycles used wire-spoked wheels with inner tubes and pneumatic tyres. The advantages of the cast wheels versus spoked are several, and include the use of tubeless tires for higher speed and better retention of inflation; better runout tolerance and the elimination of spoke maintenance; better rigidity and thus better handling; weight reduction due to smaller hub size; and better handling of side loads for motorcycles with sidecar rigs. Now a days we are using tubeless tyres to avoid puncture situations and they are best in those cases and also have better lifespan than conventional tyres but they are expensive when compared.
Features
- Sketch
- Revolve
- Trim
- Boss extrude
- Revolve cut
- Linear pattern
- Chamfer
- Cut extrude
- Circular pattern
Rear Wheel:
Front fork:
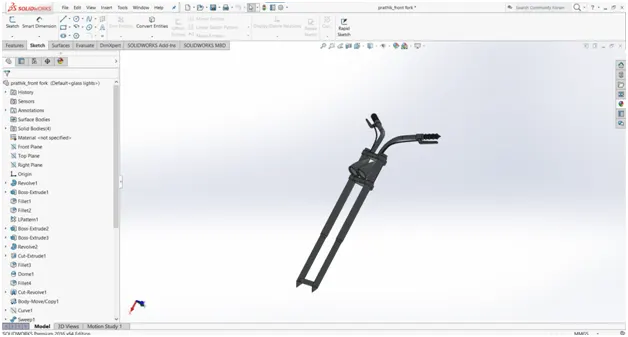
A motorcycle fork connects a motorcycle's front wheel and axle to its frame, typically via a yoke, also known as a triple clamp, which consists of an upper yoke joined to a lower yoke via a steering stem, a shaft that runs through the steering head, creating the steering axis. Most forks incorporate the front suspension and front brake, and allow the front wheel to rotate about the steering axis so that the bike may be steered.
Features
- Sketch
- Extrude
- Trim
- Revolve
- Split
- Copy bodies
- Dome
- Mirror
- Combine
- Projected curve
- Sweep
Engine:
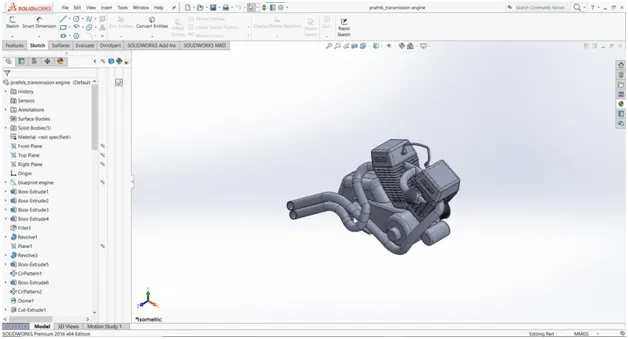
A motorcycle engine is an engine that powers a motorcycle. Motorcycle engines are typically two-stroke or four-stroke internal combustion engines, , but strict emission laws have led to far fewer two-strokes. Almost all production motorcycles have gasoline internal combustion engines.Motorcycle engines are generally classified by one of three characteristics: the number of cylinders they possess, the capacity of their combustion chambers or the number of strokes
Features
- Sketch
- Trim
- Revolve
- Boss extrude
- Extrude cut
- Offset
- Dome
- Fillet
- Projected curve
- Composite curve
- Sweep
- Mirror
- Circular pattern
- Split
Transmission Belt:
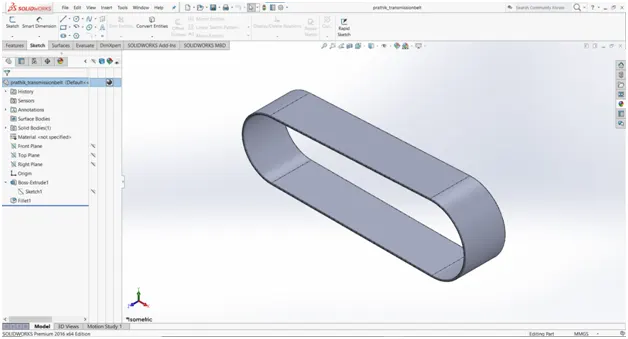
The principle remains the same as the chain drive, instead, this uses two pulleys.
- One on the output shaft of the engine and the other on the wheel.
- A belt connects both the pulleys and it snugly fits on the grooves of the pulleys.
- The belt is made up of reinforced rubber with a strong synthetic material making the belt durable.
Features used:
- Sketch
- Boss extrude
- Fillet
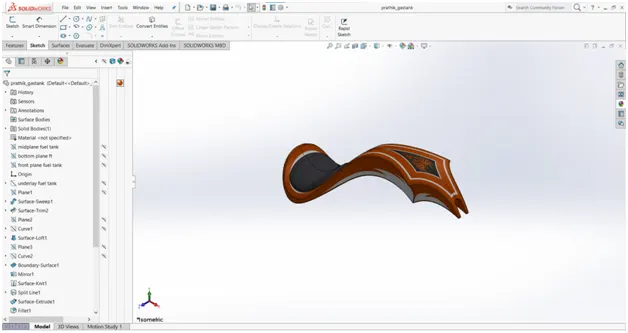
Gas tank:
A fuel tank (also called a petrol tank or gas tank) is a safe container for flammable fluids. Though any storage tank for fuel may be so called, the term is typically applied to part of an engine system in which the fuel is stored and propelled (fuel pump) or released (pressurized gas) into an engine. Plastic (high-density polyethylene HDPE) as a fuel tank material of construction, while functionally viable in the short term, has a long term potential to become saturated as fuels such as diesel and gasoline permeate the HDPE material.
Features
- Sketch
- Trim
- Projected curve
- Sweep surface
- Loft surface
- Fill surface
- Surface knit
- Sweep cut
- Fillet
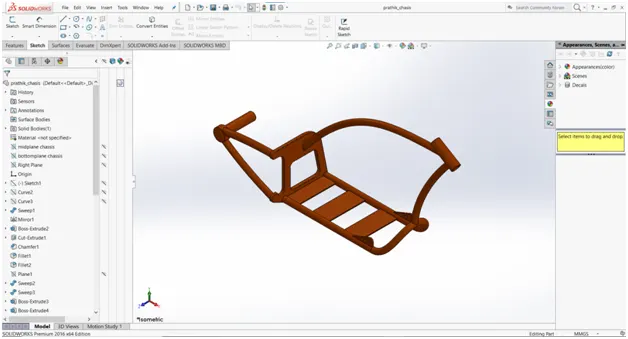
CHASSIS: A motorcycle’s chassis or frame forms its skeleton. All the components of a motorcycle, like the suspension, wheels, fuel tank, seats, handlebars etc, are attached to this base structure which lends a motorcycle its strength and ability to handle well.
Features
- Sketch
- Projected curves
- Surface loft
- Extrude boss
- Extrude cut
ASSEMBLY OF CHOPPER:
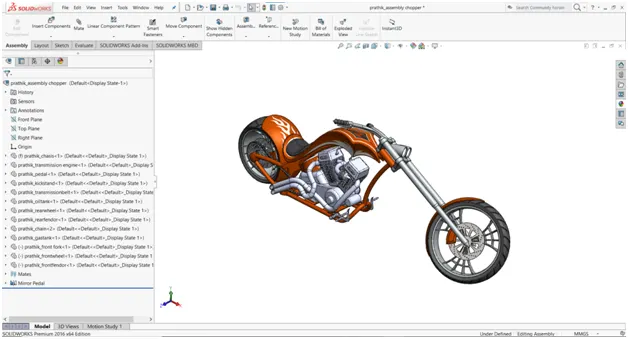
After all the components are created. Now the next step is to assemble all the parts to get American chopper.
- The first step is to insert the chassis since all the parts are mounted on it and make sure you fix the chassis.
- Next step is to insert the parts one by one by give mates so that they are in respective positions and you may fix them or make them to rotate for some particular angle.
Features :
- Inserting parts
- Mates
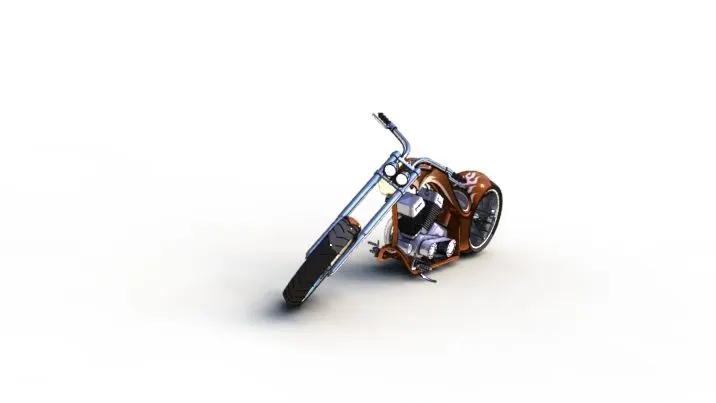
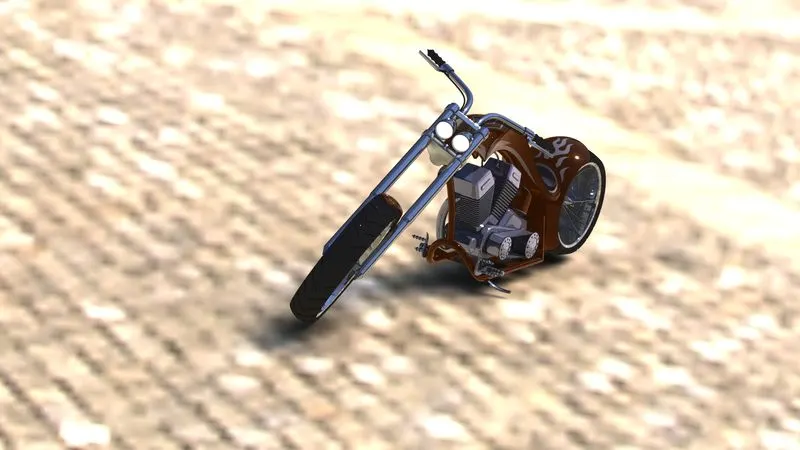
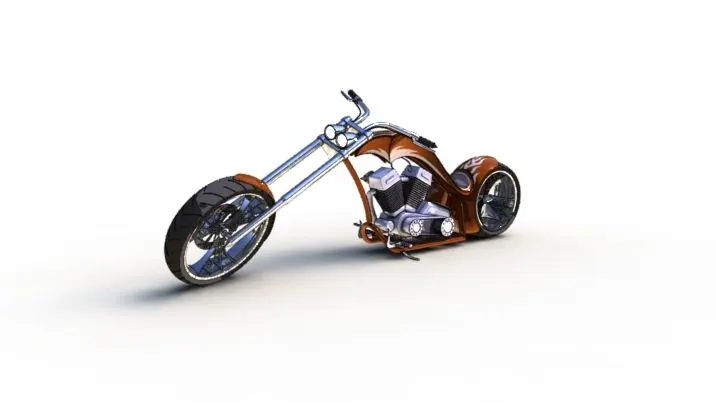
RENDERING
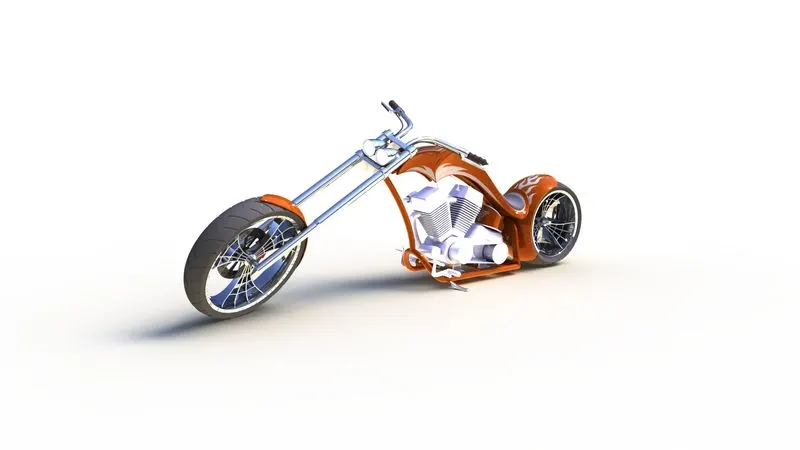
Rendering or image synthesis is the process of generating a photorealistic or non-photorealistic image from a 2D or 3D model by means of a computer program.
Rendering in solidworks is done in 2 ways
- Photoview 360
- Solidworks visualize
Photoview 360:
PhotoView 360 enables technical users to create sophisticated, high-quality renderings of their design directly within SOLIDWORKS. It gives users the ability to demonstrate and interact with CAD models in 3D, providing perspectives and angels that would be unavailble in 2D. Users can apply appearances, background scenes, decals and more, right from the 3D CAD model. It provides a highly interactive environment for viewing designs as well as for creating photo-realistic renderings that can be used to showcase our designs.
SOLIDWORKS Visualize:
SOLIDWORKS Visualize is a standalone software package designed to take 3D CAD data and transform it into photorealistic images and animations that are ready for print and web in minutes. The intuitive interface allows even non-technical users to develop rich, lifelike visual content with ease.
Conclusion:
The part modelling and assembly of the American Chopper was learnt.