Design of backdoor
1. Introduction
Back door or tail gate simply refers to the back of the car that can open and close.it covering the rear of the vehicle. It provides access to a cargo area (trunk/boot). A tailgate hinged at the roof is a predominant characteristic of hatchbacks, estates/station wagons and lift backs. The door or opening of boot area or back door may be hinged at the top side or bottom. In most cars, usually this process will be done manually. One has to get down the car to open and close the tail-gate with the car key. Nowadays, automobile manufacturers providing Advanced features like the automated tail-gate. An automatic tail-gate in the car will do the process of shutting and opening the tail-gate electronically.
Some vehicles have the trunk in front of the passenger compartment, e.g. rear-engined cars like Volkswagen Beetle and Porsche 911, or electric vehicles like Ford F-150 Lightning. This is known as a frunk, a portmanteau of the word’s “front” and “trunk”. The alternative term froot (a combination of "front" and "boot") is also occasionally used.
There are also vehicles with both front and rear trunks, either with low profile rear drivetrains, e.g. Volkswagen Type 3 or Tesla Model S, or with a mid-engine, e.g. Porsche 914 and Boxster, Toyota MR2 and Fiat X1/9.
Types of back door car in India
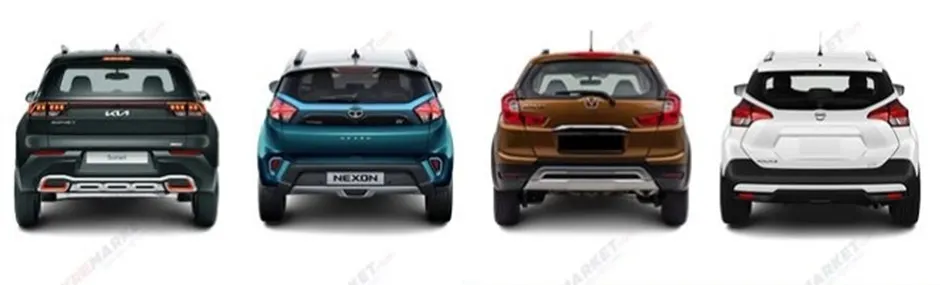
Froot type door car
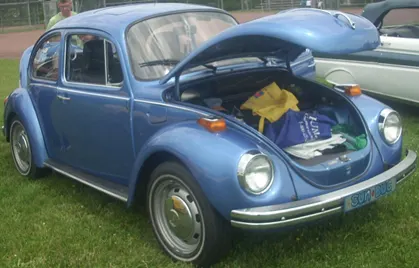
2. Types of back door
2.1 Based on opening position
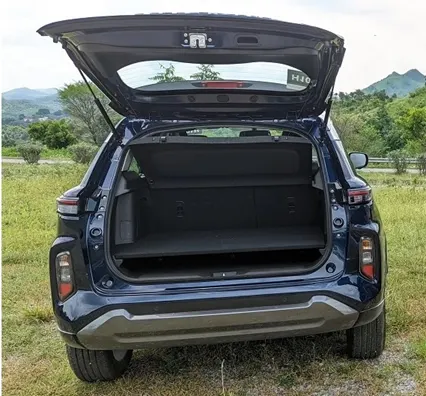
2.1.1 Top Mounted
This type of back doors is used in a station wagon, pickup truck and some of the sport utility vehicles.
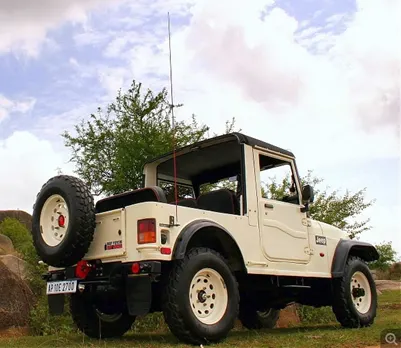
2.1.2 Side Mounted
Side-mounted doors are used in the van type MPVs, SUVs, pickup truck vehicles. These side-mounted doors or barn doors are a lot easier compared to top-mounted doors.
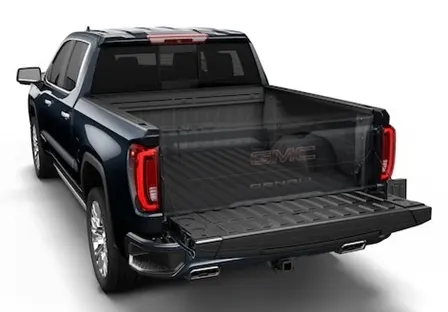
2.1.3 Bottom/ Split
This bottom type or split type backdoor system are used in the car type such as estate type car, pickup trucks and some luxury SUVs. The bottom split is also used as a support or even as a table for the tour going people.
2.2 Based on working mechanism
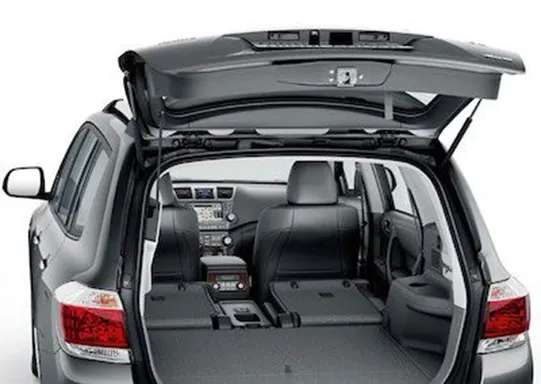
2.2.1 Gas Stay
Gas stay types backdoor/liftgate/tailgate is an ideal and most commonly used tailgate mechanism from lower segment car to luxury car segment. The ideal components of tailgate consist of a hinge, door, gas stay and some rubber beadings for sealing of door.
2.2.2 Power Lifted
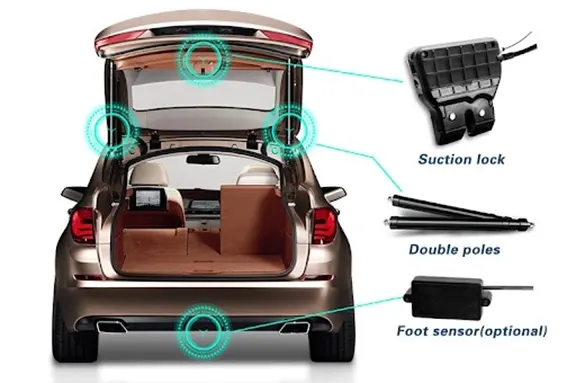
Power trunk lid system is another sophisticated way of trunk/liftgate opening mechanism which is to automatically open and close of the trunk/liftgate and release of the latch by the touch of a button. The following image shows the component as used in the powered trunk/back door lift system.
3. Manufacturing of Back Door
3.1 Material Selection
The material selection plays a major role in determine the overall weight of the back door. The materials generally used are Steel and Aluminium. The Density of Steel is higher than Aluminium thus it results in adding more weight of the door. Basically, the material is used based on the budget of the car, because the cost of steel very cheap than Aluminium. If aluminium is used in higher end models like Benz, Audi, Porshe and BMW we can find aluminium is used instead of steel resulting in reduced weight and increased performance of the vehicle.
Another Factor to make a note is using Casted Aluminium instead of deep drawn Steel components and adding reinforcements to it is the space of the luggage commodity gets increased by a certain amount because the draft angle for Casted aluminium is much lesser (3 degree) than the deep drawn Steel inner panel (7-9 degree). Thus, it reduces the space between the inner and outer panel resulting in much larger cabin space than the deep drawn steel inner panel.
An intensive research and development are going on for alternate materials, manufacturing processes and stamping tools for sheet-metal components with the main objectives of cutting down the weight and unit cost of the vehicle. Simultaneously, the steel content of the car is falling with the use of aluminium and new materials, such as plastics. Aluminium may provide the most sought-after solution to reduce the weight of the vehicles. A reduction of 30% in weight is achievable if the same strength, stiffness, and stability of the component are to be realised by substituting steel with aluminium. Possibility of significant reduction in die cost will be another advantage with aluminium. However, problems related to strength, serviceability, manufacturability, and above all the cost, require effective solutions before the acceptance of aluminium as a substitute to steel for body panels.
3.2 Sheet Metal Operations
3.2.1 Stamping
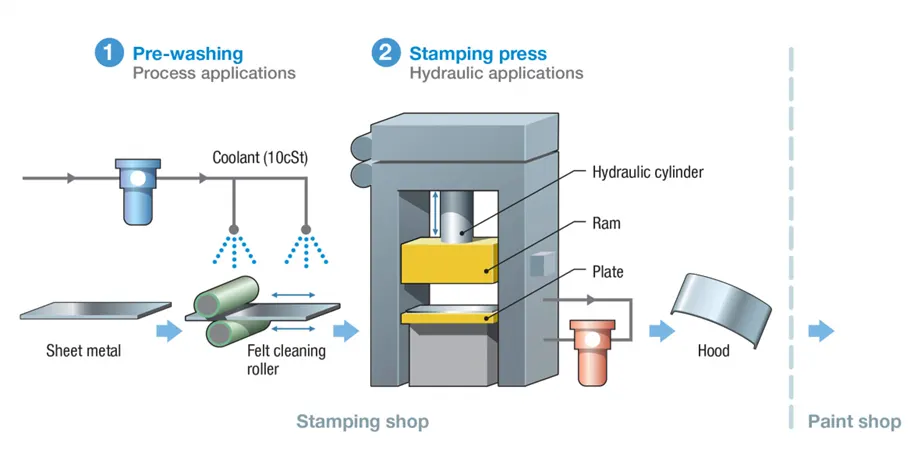
Stamping processes to be used for a panel depend on its design. However, normally the processes used extensively are blanking, drawing, piercing, notching trimming, hemming etc. Blanking prepares the initial approximate form of the part in flat sheet. Drawing is generally the first operation to attain depth related form. Piercing, notching, hemming, are product design related operations. Trimming generally removes the extra material on the periphery of the panel provided for blank holding during draw operation.
3.2.2 Blanking
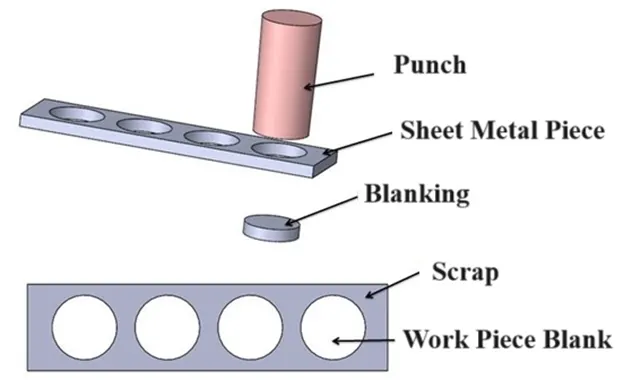
Blanking is a cutting operation of a flat metal sheet and the article punched out is known as blank. Blank is the required product of the operation and the metal left behind is considered as a waste.
3.2.3 Punching
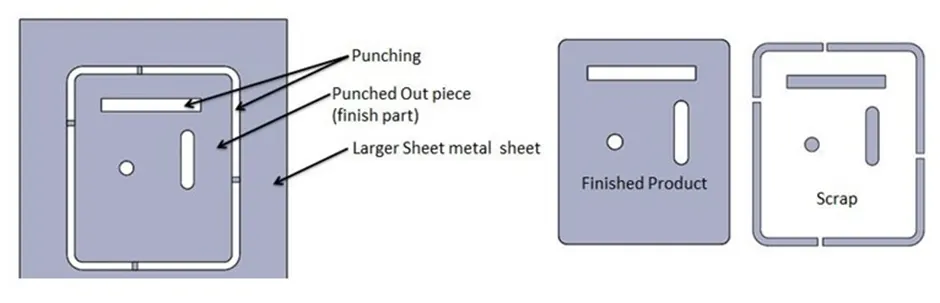
Punching is an operation that involves punching holes or other more complex shapes to remove material from metal sheets. It is similar to blanking only the main difference is that, the hole is the required product and the material punched out from the hole is considered as a waste.
3.2.4 Embossing
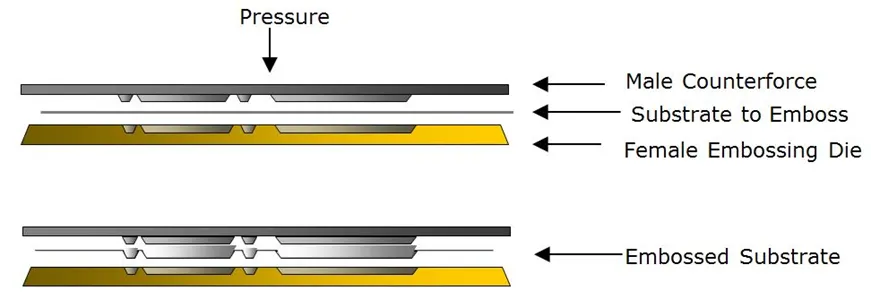
Embossing is a metal forming process for producing raised or sunken designs or relief in sheet materials by means of matched male and female roller dies, theoretically with no change in metal thickness or by-passing sheet or a strip of metal between rolls of the desired pattern. Metal sheet is drawn through the male and female roller dies producing a pattern or design on the metal sheet. Depending on the roller dies used, different patterns can be produced on the metal sheet.
3.2.5 Hemming
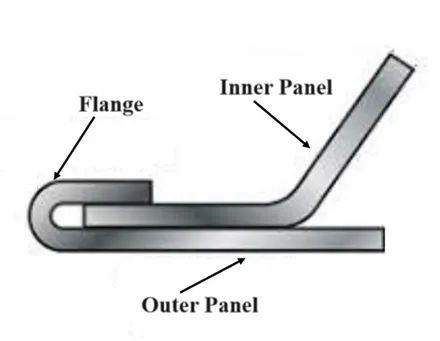
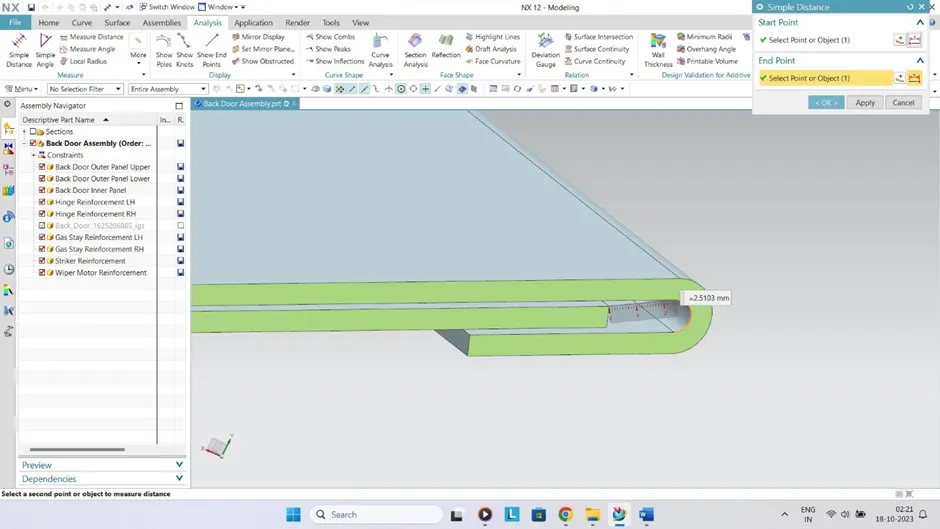
Hemming is a forming operation in which the edges of the sheet are folded or folded over another part in order to achieve a tight fit. Normally hemming operations are used to connect parts together, to improve the appearance of a part and to reinforce part edges.
In car part production, hemming is used in assembly as a secondary operation after deep drawing, trimming and flanging operations to join two sheet metal parts (outer and inner) together.
4. Design consideration for Back Door
4.1 Visibility Criteria
Federal motor vehicle safety standard (FMVSS) No. 111, “Rear Visibility,” currently requires that vehicles be equipped with rearview mirrors to provide drivers with a view of objects that are to their side or to their side and rear.
4.2 Striker Position
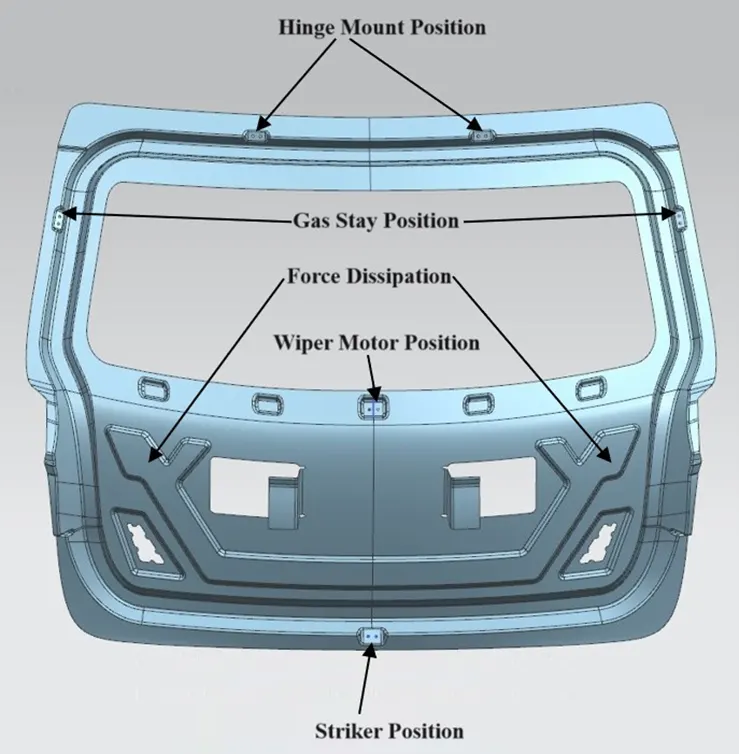
The position of the hinge should be perpendicular to the latch when the latch and striker meets. for that, a circle is drawn from the centre of hinge axis to find the path of the striker. and positioned it perpendicular to the path. As in the skin data the striker position is not specified so it is determine on its own.
4.3 Gas Stay Position
Gas Stay is a device used for supporting the back door in its open position. Gas stay requires no manpower and is engaged into support position automatically as the back door opens. One end of the Gas Stay is fixed on the backdoor and the other end on the Body Side or on the Back door stationary area. As in the skin data the Gas Stay position is not specified so it is determine on its own.
4.4 Force Dissipation
The major criteria in designing the back door or any BIW part is the force dissipation during an impact or a collision. Studies are done to dissipate the force on the sides and avoiding it reach the inner cabin of the car so that possible damage of impact inside the car is reduced. The V or Y embosses are created on the inner panel so that the force gets transmitted on to the sides instead reaching it on the cabin. This is one of the main criteria in back door design.
4. Inputs for Designing of Back Door
- Outer Panel Thickness = 0.75mm
- Inner Panel Thickness = 0.75mm
- Reinforcement = 1.5mm
- Hemming Clearance for Glue = 0.2mm
- Clearance between Inner and Outer Panel = 2mm
- Parts provided for working = Back Door Skin
5. Components of Back Door Assembly
- We have to check if there are any surface irregularities in the skin data, if irregularities are there, then repair it by using bridge curve or curve on surface and through curve mesh and sew it.
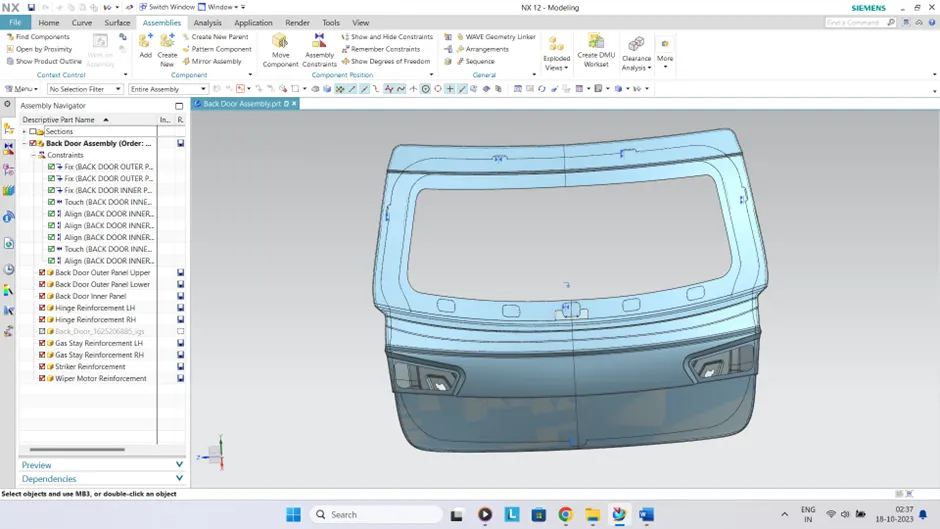
- Assembly command was used to start the Back Door.
- Using Add component command back door modified skin was inserted in assembly.
- Using Create New component command all the component’s part files are generated in assembly.
- As the location of Hinge, Gas Stay, Wiper Motor, Striker is not provided they are drawn on assumptions.
5.1 Back Door Inner Panel
The inner door panel is a component which is used for strengthening the door assembly and it is one of the most important components on which all accessories are mounted like hinges, gas stay, striker and wiper motor etc.
The mastic points are defined on the back door inner panel where the back door can easily deform. They help the backdoor outer panel to come back to its original shape after it gets deformed. Mastic sealants are elastic compound that believe like the rubber.
Mastics sealants are used for joining of outer panel and inner panel. It increases the strength of back door and good NVH (Noise, Vibration and Harness). So accurate clearance should be given for mastic sealant. Embossing is provided at all the reinforcement area to compensate for weakness and improve strength.
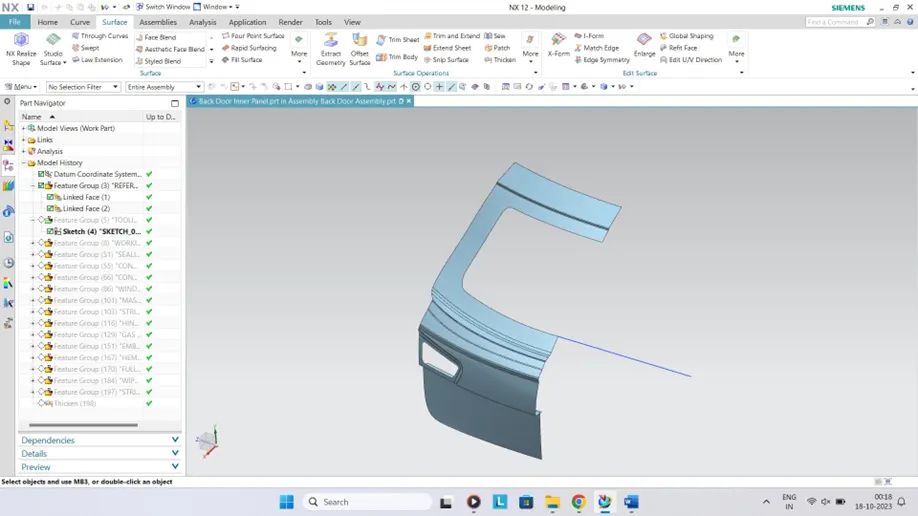
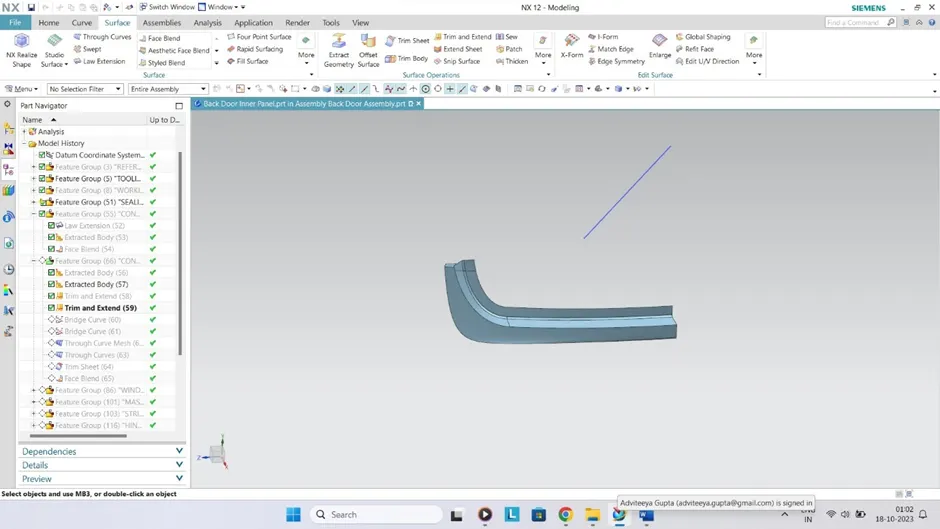
- Using Wave Geometry Linker command, the Inner panel skin was achieved.
- Tooling Axis was made which will be used later for other commands for giving direction.
- Using Offset Command sealing flanges were made.
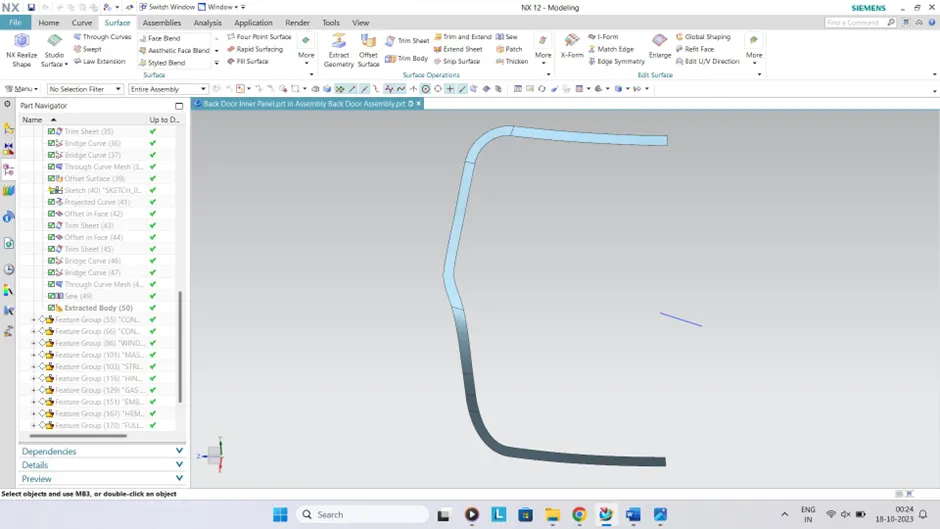
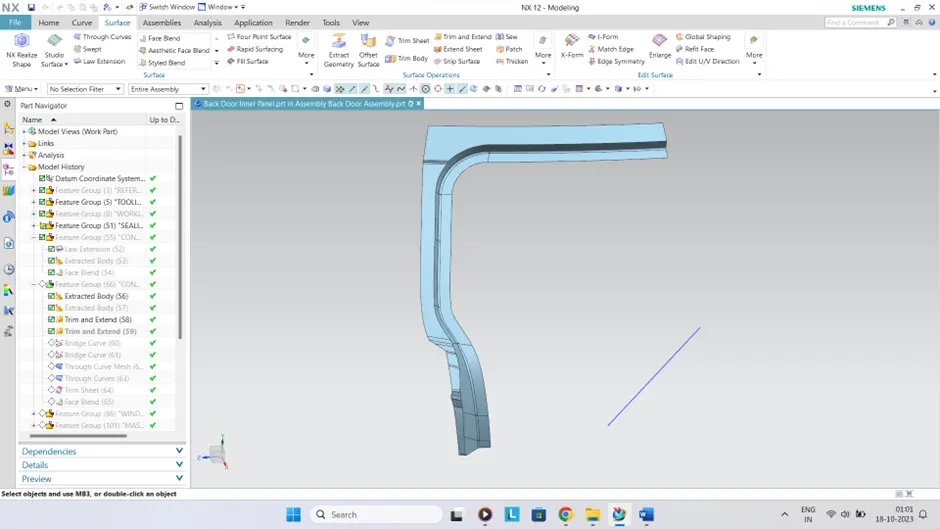
- Using Through Curves the flanges were given the surface and by using sew all surfaces were joined.
- By using Edge Blend all the surfaces were made smooth.
- By using Emboss command for projected curve for the sketch emboss was made in tooling direction.
- Cutouts are made for emboss using Project Curve and Trim Sheet command.
- For Hinge reinforcement the mount is made using Emboss command.
- For Gas Stay reinforcement the mount is made using Emboss command.
- Sheet is completed using sew command.
- Now for making Striker Mount Law Extension command was used to make outer boundary.
- Base of Striker Mount was manufactured by using Law Extension command.
- Using Trim and Extend command both the surfaces are join together.
- Wiper Motor Reinforcement are made on inner panel.
- Draft Analysis is performed for 70 and using tooling axis as the direction on the inner panel to check the panel.
- Finally Thicken command is used to thicken for 0.75mm and completing the Inner Panel.
Tooling Axis
Sealing Flange 1
Connecting Flange 1
Connecting Flange 2
Wind Shield
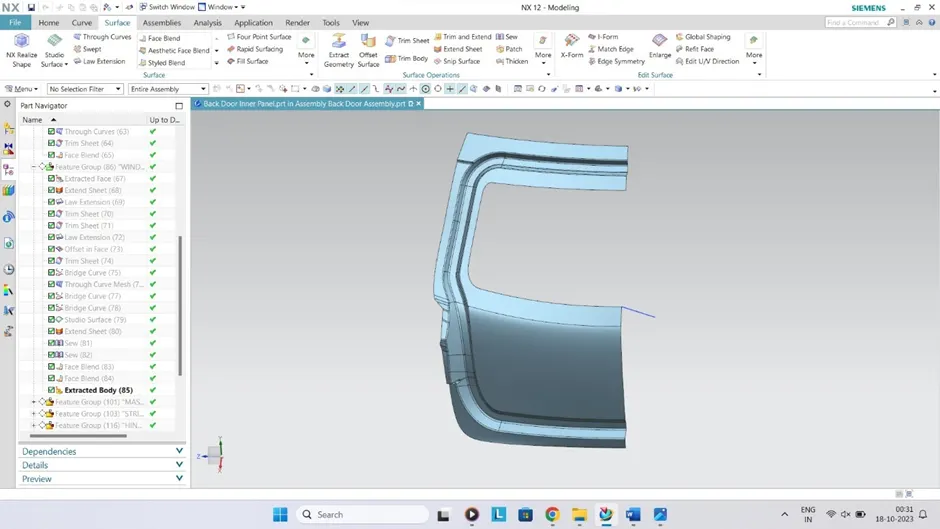
Mastics
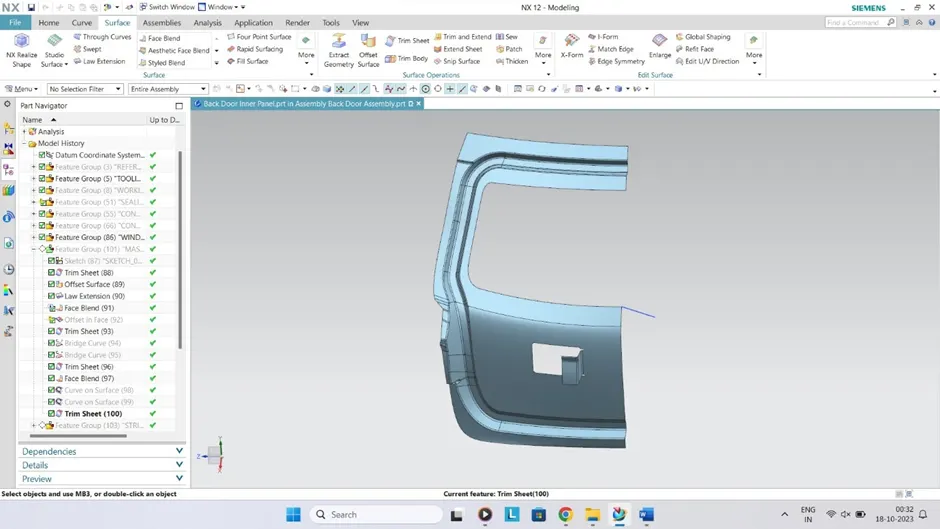
Hinge and Gas Stay Mount
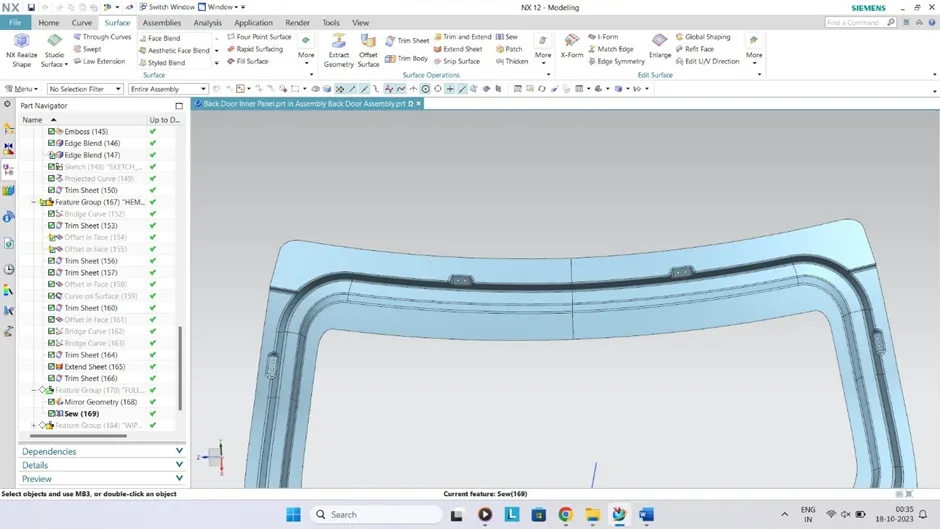
Emboss and Cutouts
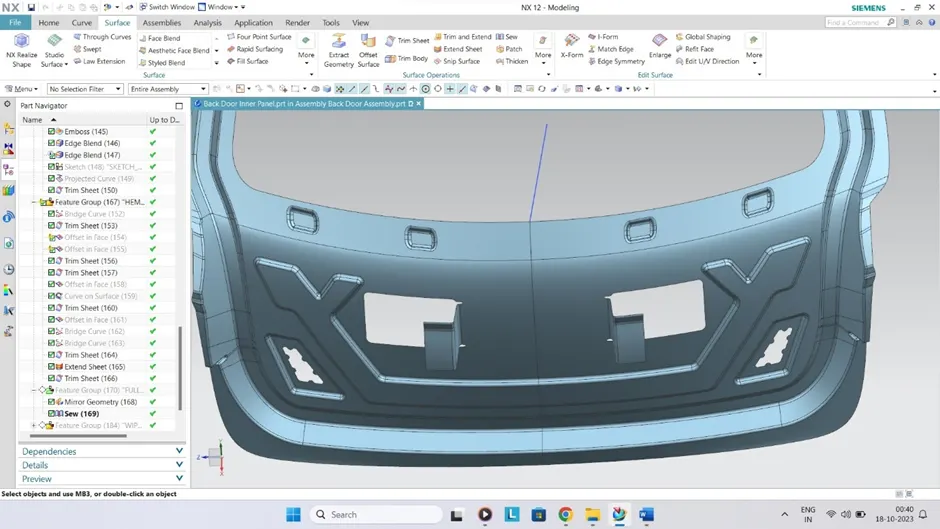
Wiper Mount
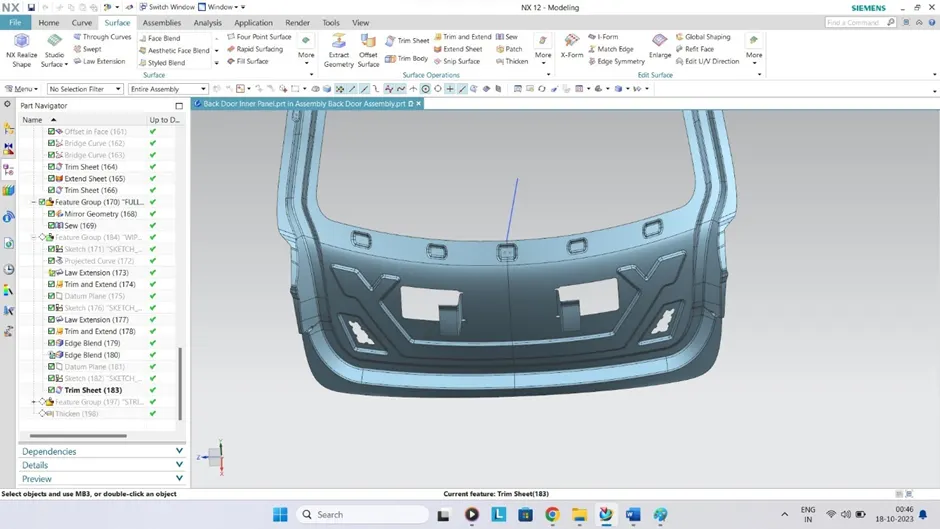
Striker Mount
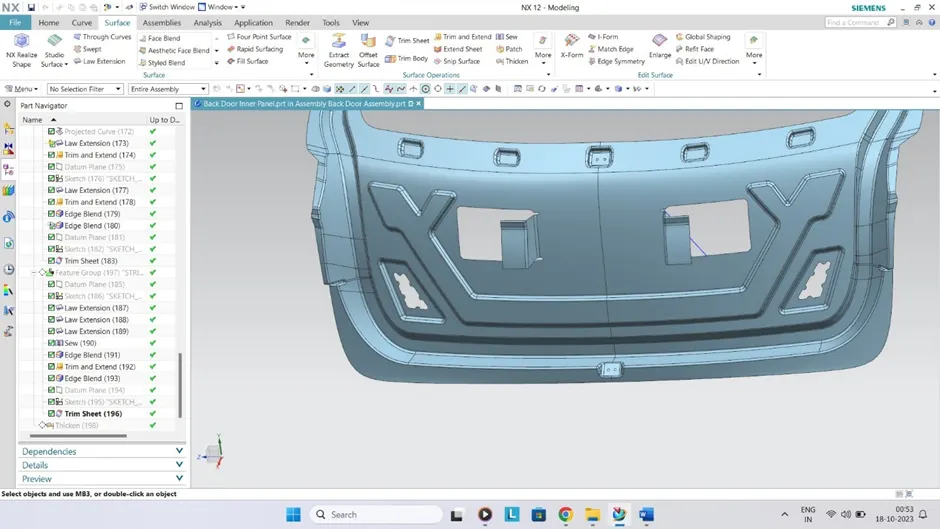
Draft Analysis
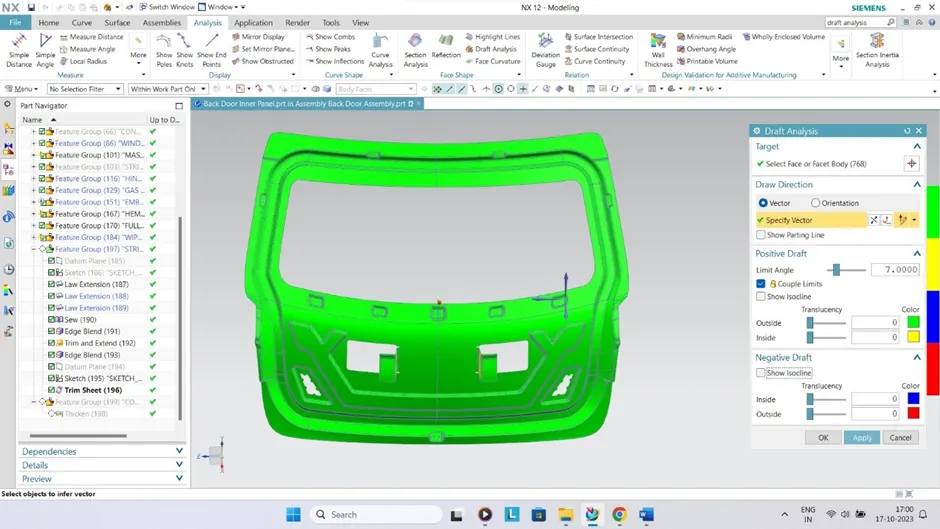
Inner Panel Thicken
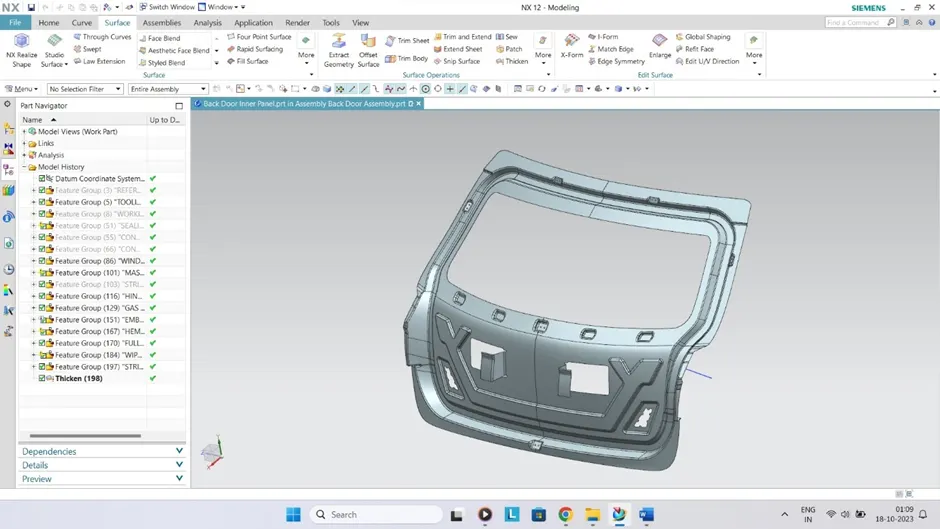
Inner Panel Front View
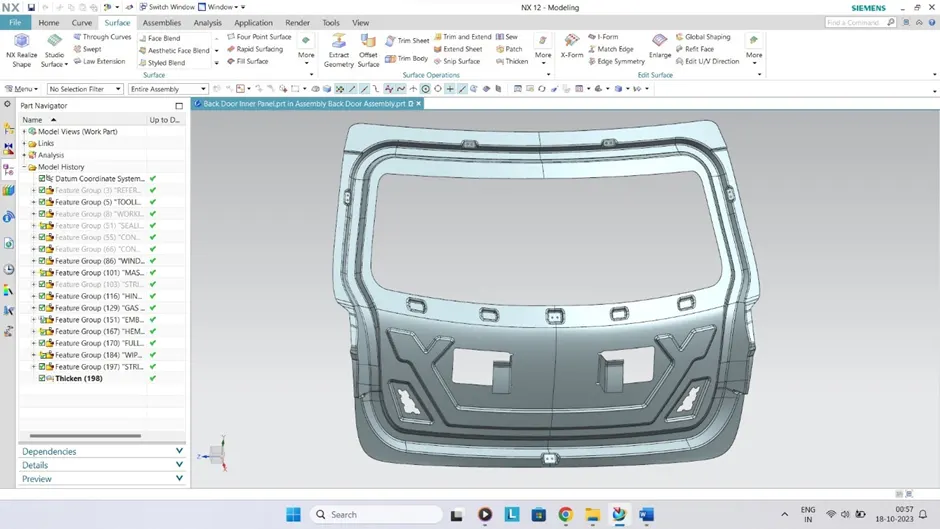
Inner Panel Back View
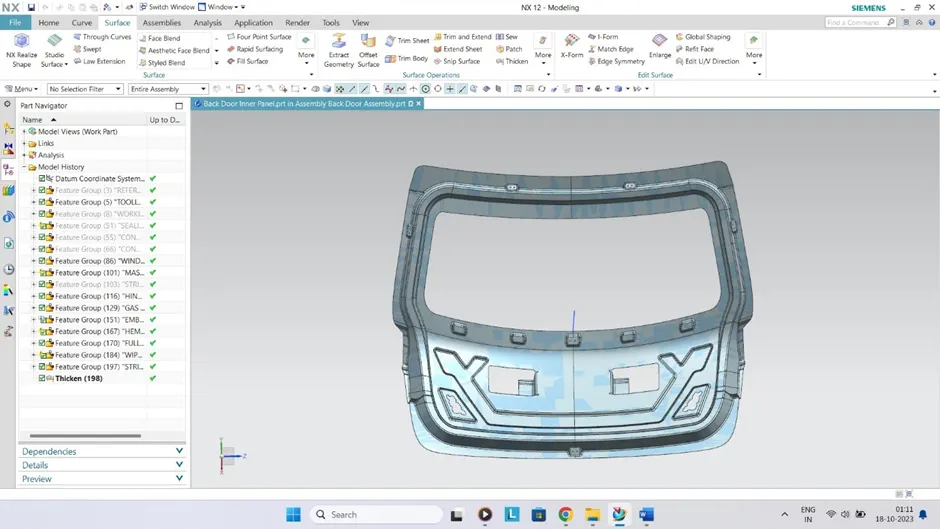
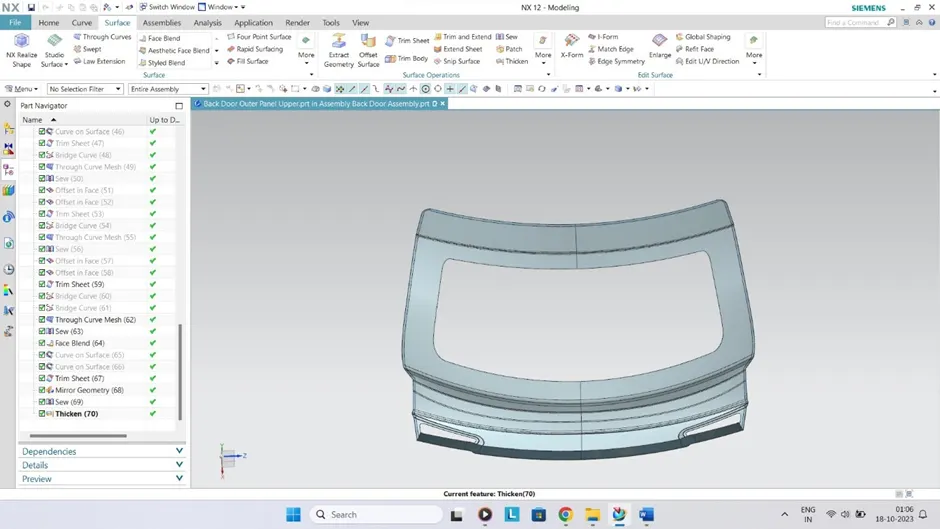
5.2 Back Door Outer Panel Upper
The outer panel of the back door is similar to the other BIW components where it is the aesthetic part of vehicle. The coating provided is of multi stage which has the property of scratch resistance, rust prevention and smooth and attractive finishes. The outer panel also has the provisions for the tail. Lamp, rear fog lamp and also has the provision for license plate mountings. Most of the hatchback cars have the provision for wiper motor.
- Using Wave Geometry Linker command, the Back Door Outer Panel Upper skin was achieved.
- Offset surface was used to achieve next surface for hemming.
- Law extension was used to achieve the next perpendicular surface.
- Using Three Face Blend the three surfaces were joined together into single surface.
- Hem relief was given on the edges by using Curve on Surface and Trim Sheet command.
- Using Mirror Geometry, the surface was complete in whole.
- Sheet is completed using sew command.
- The Thicken command was used to thicken the component for 0.75mm.
Back Door Upper Back View
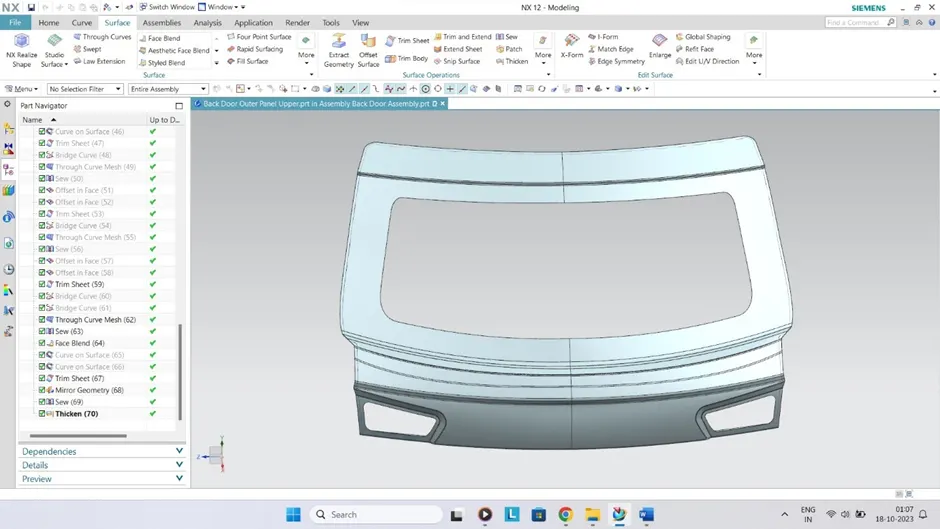
Back Door Upper Back View
5.3 Back Door Outer Panel Lower
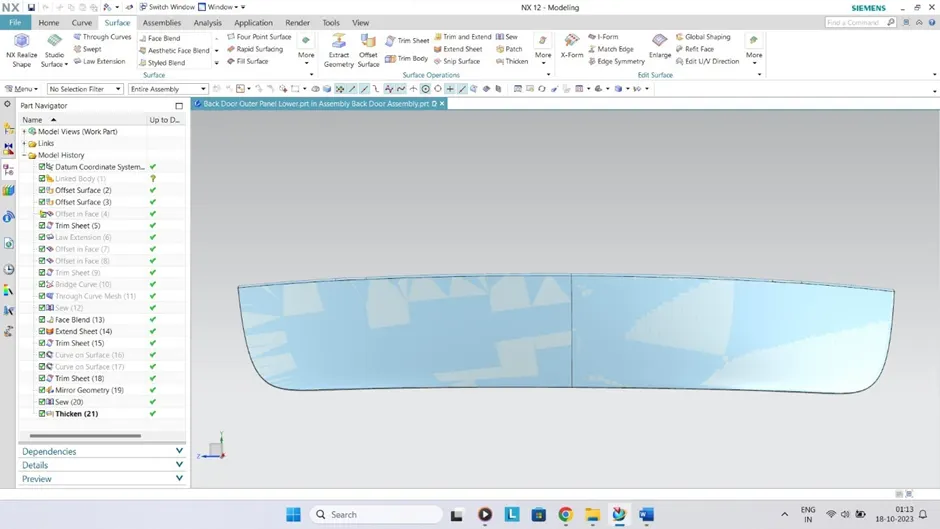
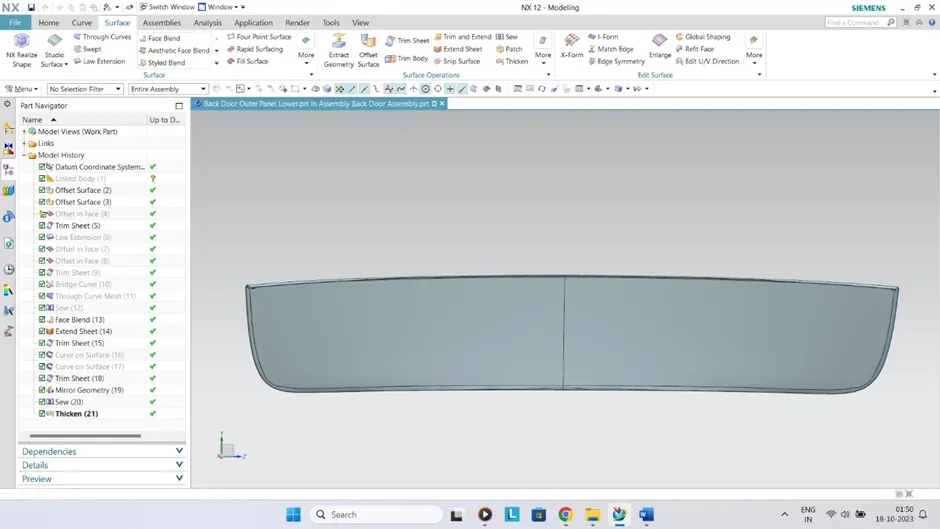
The outer panel of the back door is similar to the other BIW components where it is the aesthetic part of vehicle. The coating provided is of multi stage which has the property of scratch resistance, rust prevention and smooth and attractive finishes. The outer panel also has the provisions for the tail. Lamp, rear fog lamp and also has the provision for license plate mountings. Most of the hatchback cars have the provision for wiper motor.
- Using Wave Geometry Linker command, the Back Door Outer Panel Lower skin was achieved.
- Law extension was used to achieve the next perpendicular surface.
- Using Three Face Blend the three surfaces were joined together into single surface.
- Hem relief was given on the edges by using Curve on Surface and Trim Sheet command.
- Using Mirror Geometry, the surface was complete in whole.
- Sheet is completed using sew command.
- The Thicken command was used to thicken the component for 0.75mm.
Back Door Lower Front View
Back Door Lower Back View
5.4 Hinge Reinforcement LH
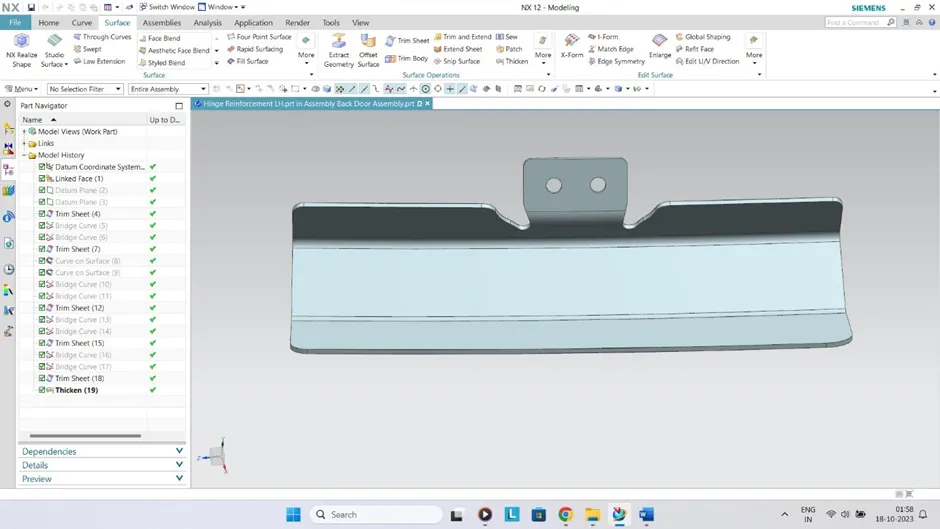
Hinges enable the opening and closing of the back door. One end of the hinge is fixed on the backdoor and the other end on the Roof, on both sides. Hinges can be placed outside or inside the backdoor. The hinge reinforcements are added to compensate for the weak region due to the acting load over it.
- Using Wave Geometry Linker command, the Hinge Reinforcement LH skin was achieved.
- By using Datum Plane and Trim Sheet command required length of the reinforcement is achieved.
- Stress concentration on edges was reduces by using Curve on Surface, Bridge Curve and Trim Sheet command.
- The Thicken command was used to thicken the component for 1.5mm.
Hinge Reinforcement LH
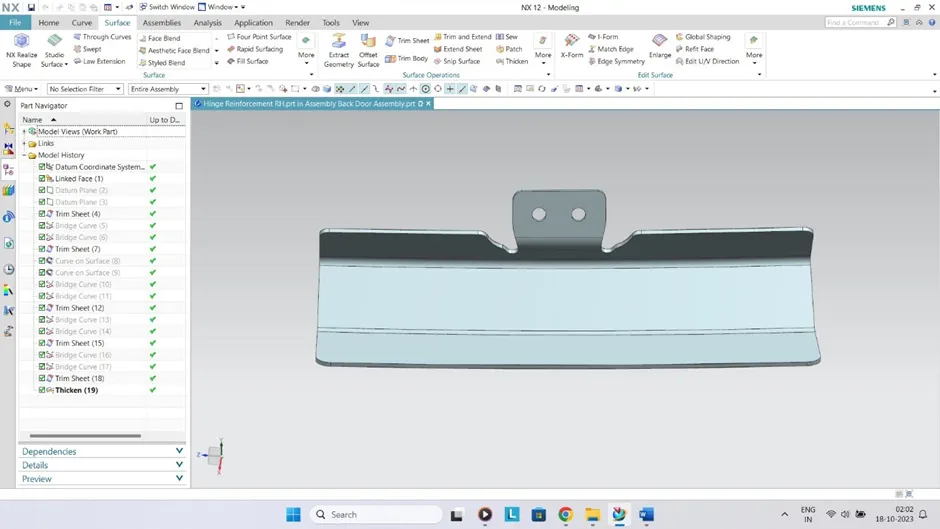
5.5 Hinge Reinforcement RH
Hinges enable the opening and closing of the back door. One end of the hinge is fixed on the backdoor and the other end on the Roof, on both sides. Hinges can be placed outside or inside the backdoor. The hinge reinforcements are added to compensate for the weak region due to the acting load over it.
- Using Wave Geometry Linker command, the Hinge Reinforcement RH skin was achieved.
- By using Datum Plane and Trim Sheet command required length of the reinforcement is achieved.
- Stress concentration on edges was reduces by using Curve on Surface, Bridge Curve and Trim Sheet command.
- The Thicken command was used to thicken the component for 1.5mm.
Hinge Reinforcement RH
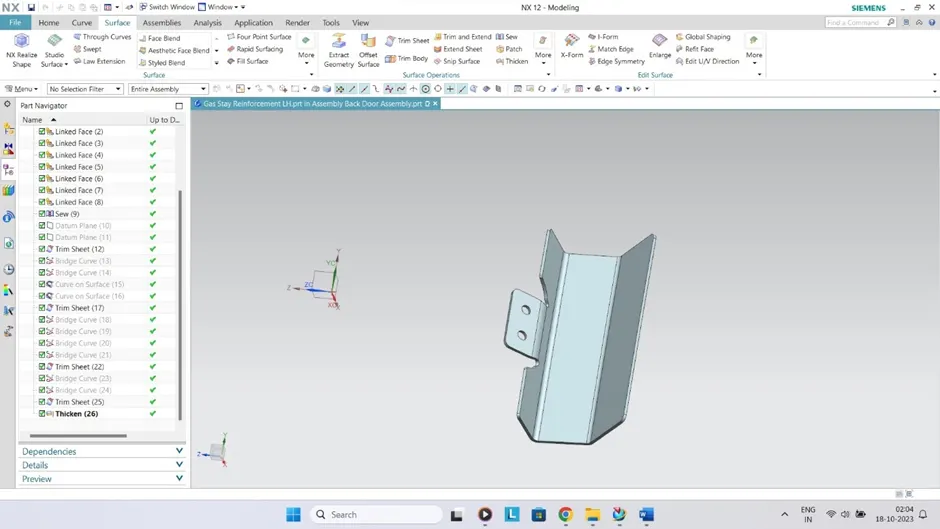
5.6 Gas Stay Reinforcement LH
Gas Stay is a device used for supporting the back door in its open position. Gas stay requires no manpower and is engaged into support position automatically as the back door opens. One end of the Gas Stay is fixed on the backdoor and the other end on the Body Side or on the Back door stationary area
- Using Wave Geometry Linker command, the Gas Stay Reinforcement LH skin was achieved.
- By using Datum Plane and Trim Sheet command required length of the reinforcement is achieved.
- Stress concentration on edges was reduces by using Curve on Surface, Bridge Curve and Trim Sheet command.
- The Thicken command was used to thicken the component for 1.5mm.
Gas Stay Reinforcement LH
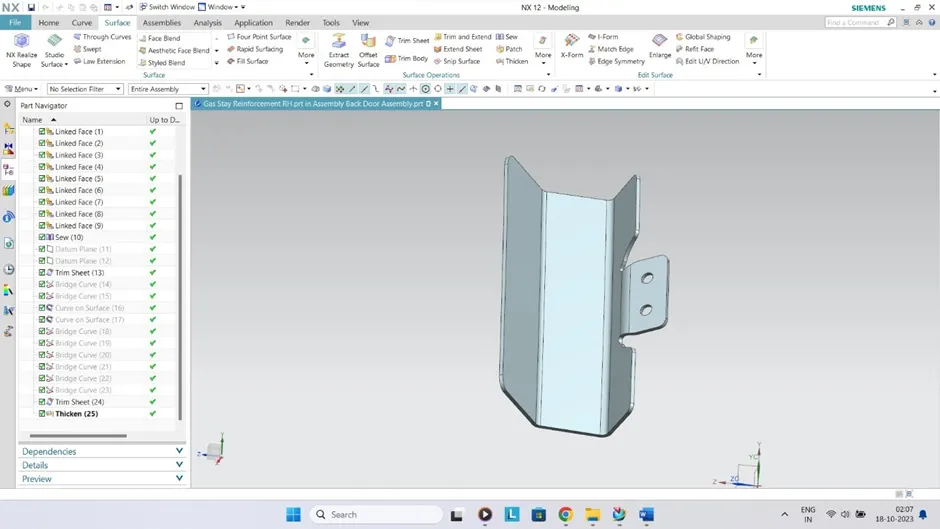
5.7 Gas Stay Reinforcement RH
Gas Stay is a device used for supporting the back door in its open position. Gas stay requires no manpower and is engaged into support position automatically as the back door opens. One end of the Gas Stay is fixed on the backdoor and the other end on the Body Side or on the Back door stationary area
- Using Wave Geometry Linker command, the Gas Stay Reinforcement RH skin was achieved.
- By using Datum Plane and Trim Sheet command required length of the reinforcement is achieved.
- Stress concentration on edges was reduces by using Curve on Surface, Bridge Curve and Trim Sheet command.
- The Thicken command was used to thicken the component for 1.5mm.
Gas Stay Reinforcement RH
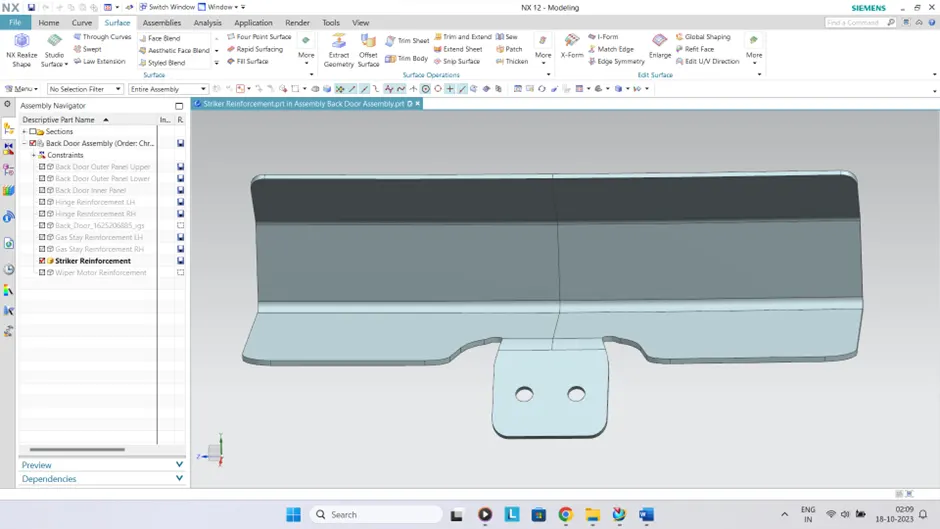
5.8 Striker Reinforcement
Striker is used for locking the Back Door with the car. Due to regular opening, closing, and over slamming of the backdoor, there is stress developed in the Latch and Striker area. To compensate for the same, reinforcements are added in this area.
- Using Wave Geometry Linker command, the Striker Reinforcement skin was achieved.
- By using Datum Plane and Trim Sheet command required length of the reinforcement is achieved.
- Stress concentration on edges was reduces by using Curve on Surface, Bridge Curve and Trim Sheet command.
- The Thicken command was used to thicken the component for 1.5mm.
Striker Reinforcement
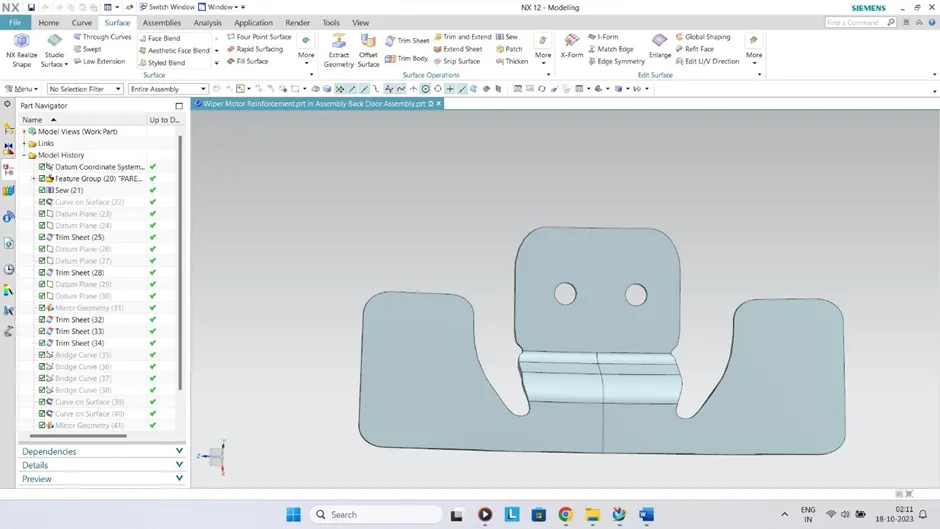
5.9 Wiper Motor Reinforcement
Wiper motor reinforcement is created to mount the wiper motor assembly.
- Using Wave Geometry Linker command, the Wiper Motor Reinforcement skin was achieved.
- By using Datum Plane and Trim Sheet command required length of the reinforcement is achieved.
- Stress concentration on edges was reduces by using Curve on Surface, Bridge Curve and Trim Sheet command.
- The Thicken command was used to thicken the component for 1.5mm.
Wiper Motor Reinforcement
Hemming distance
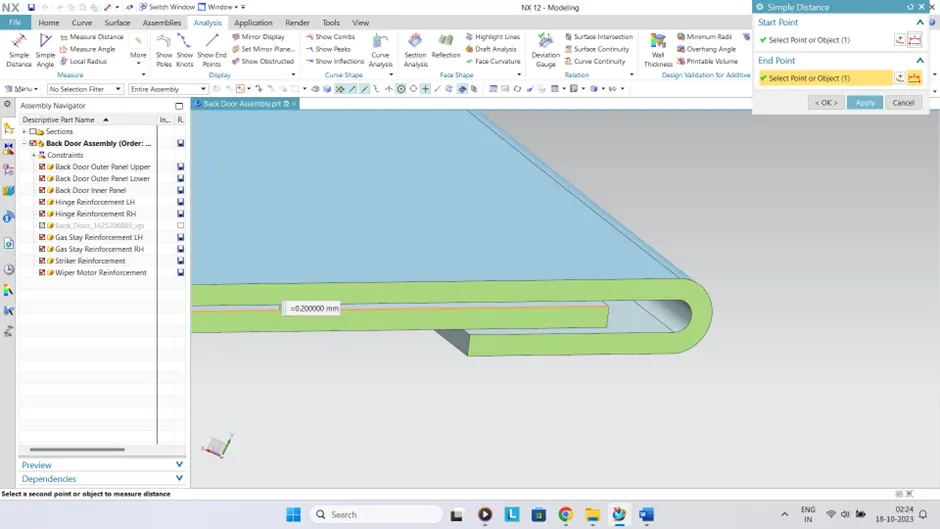
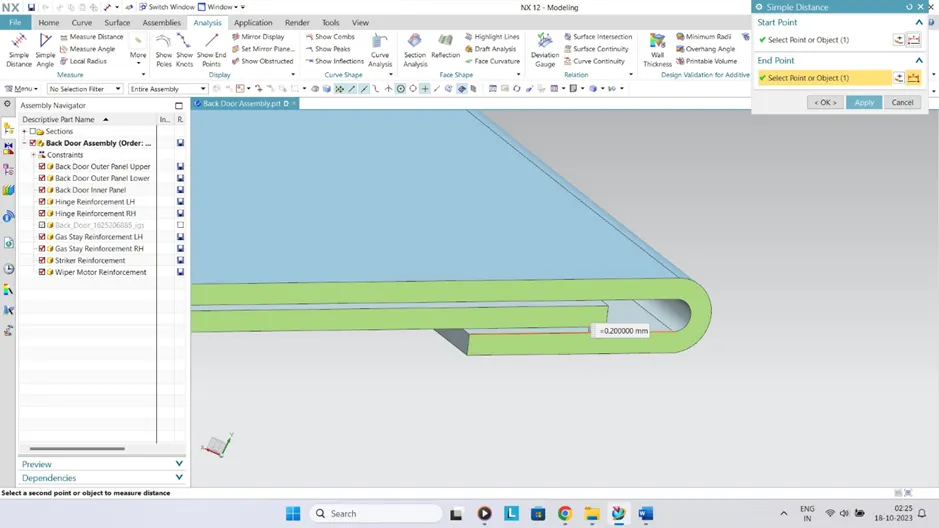
Back Door Assembly Constraints
6. References
- https://en.wikipedia.org/wiki/Trunk_(car)
- https://www.tyremarket.com/tyremantra/wp-content/uploads/2022/05/Top-10-SUVs-With-Highest-Boot-Space-In-India-e1653304845907.jpeg
- https://en.wikipedia.org/wiki/File:Volkswagen_Type_1_(Auto_classique_St._Lazare_'10).jpg
- https://akm-img-a-in.tosshub.com/indiatoday/images/bodyeditor/202209/Maruti_Suzuki_Grand_Vitara_mil-x997.jpg?_vDUmOgK3uVUBLoyMv7nGlEgUFzzRQ1I?size=750:*
- https://www.team-bhp.com/forum/attachments/4x4-vehicles/65622d1692893190t-mm540-hyderabad-j-9.jpg
- https://gmauthority.com/blog/wp-content/uploads/2018/07/2019-GMC-Sierra-1500-MultiPro-Tailgate-Primary-Gate-Access.jpg
- https://www.gilaniengineering.com.au/wp-content/uploads/2021/04/Automatic-Power-Tailgate-Lift-Kit-and-Electric-Automatic-Boot-Opener-1.webp
- https://www.pall.co.in/en/industrial-manufacturing/automotive/stamping.html
- https://gmauthority.com/blog/wp-content/uploads/2018/07/2019-GMC-Sierra-1500-MultiPro-Tailgate-Primary-Gate-Access.jpg
- https://vivadifferences.com/difference-between-coining-and-embossing-sheet-metal-operations
- https://u-emboss.com/wp-content/uploads/2015/06/Basic-Embossing.jpg
- https://www.autoform.com/en/glossary/hemming/#:~:text=Hemming is a forming operation,and to reinforce part edges
- https://www.dsource.in/sites/default/files/course/sheet-metal/sheet-metal-joinery/hemming-and-seaming/images/66_joinery_hemming_seaming.jpg
Note: The file size is more than 20mb so I am sharing google drive link for assesment of challenge
https://drive.google.com/file/d/1Urf1xQVSyQ1jKr2osH6wpSyZTZnUkHtR/view?usp=sharing