To calculate dead and live load for industrial steel structures and to apply them using TSD
| To calculate dead and live load for industrial steel structures and to apply them using TSD |
|---|
Aim: To calculate dead and live load for industrial steel structures and to apply them using TSD
Introduction:
- Load Calculation
- Load Application
- Valdation
- Here After valdation of the geometry of model, promary and combunation loads to be defined
- Load cases to be created under the LOAD tab. The follwoing primary load cases to be defined
- Self Weight- Pre defined in the software
- Slab Self Weight- Slab self weight defined when we model the slab, Slab self weight To be transfer to the supporting Beam
- Finished
- Services
- Brick Wall
- Imposed Load
- Wind Load
- Seismic Load
- Crane Load
- Load combinations to be generated under the LOAD tab and to be checked with the codal provision
* Before Providing Load application We need to creat the Wall Panel , Roof panel and Slab *
Step -1 Take Challenge -3 Model for creating Wall ,roof panel and Slab
- Open Tekla Software from My disktop
- Go to the file menu
- Open --> Recenr document--> STEEL BUILDING.tsmd File
- Then Select FRAME G 2D
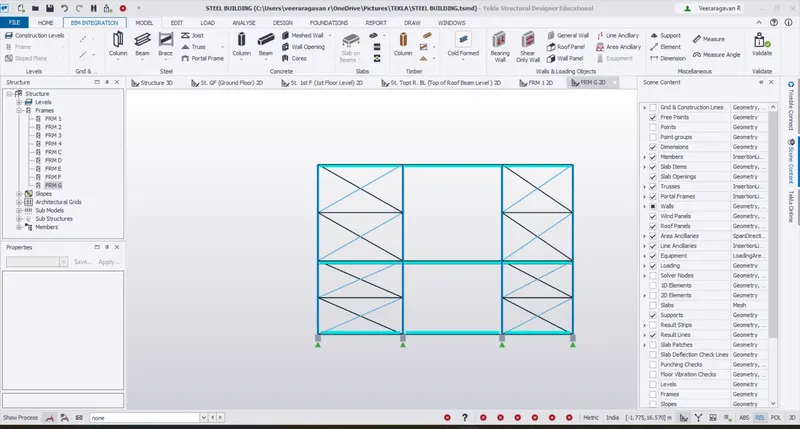
- And then i Changed the Column colours for Showing the different elements
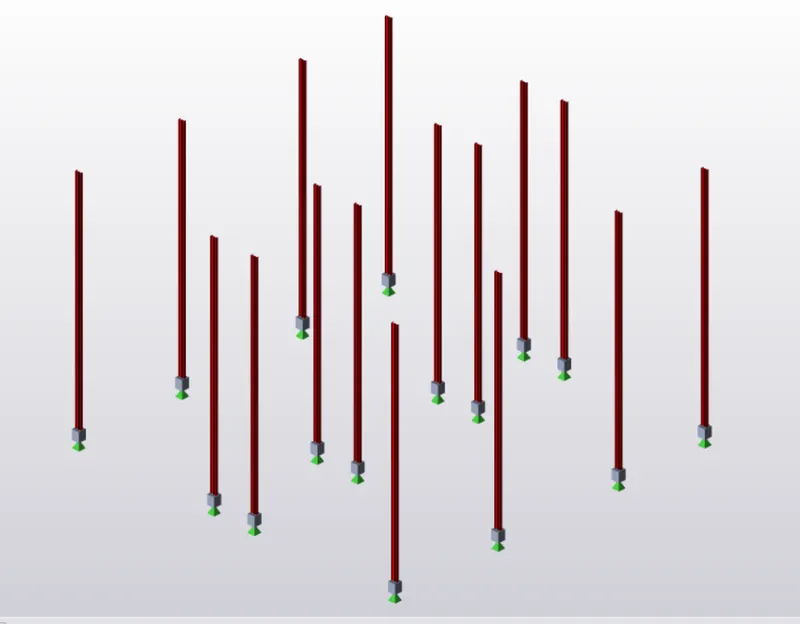
- And also i choosen the colour of Wall panel, Roof panels, and etc..
- Shown in the below diagrame ia result of changed Column colour
Step-2: Model the Wall Panel:
- Now select the WALL Panel from Under the Model tab is called Walls and Loading objects here
- Select Wall Panel
- Pick the point-1,2,3,4
- Press Escape
- Similarly all the wall Panel are created by show in the figure
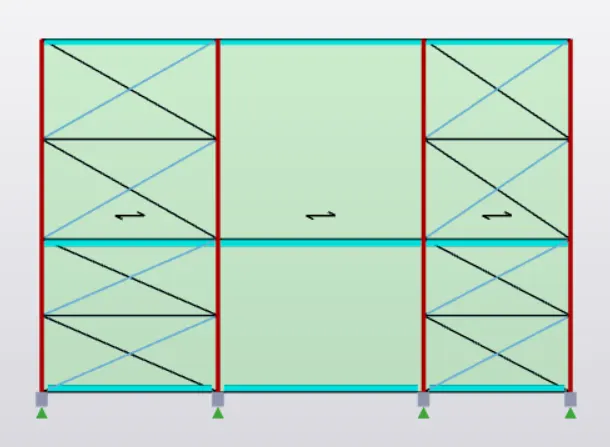
- Now Need to validate for if Errors are appear or not
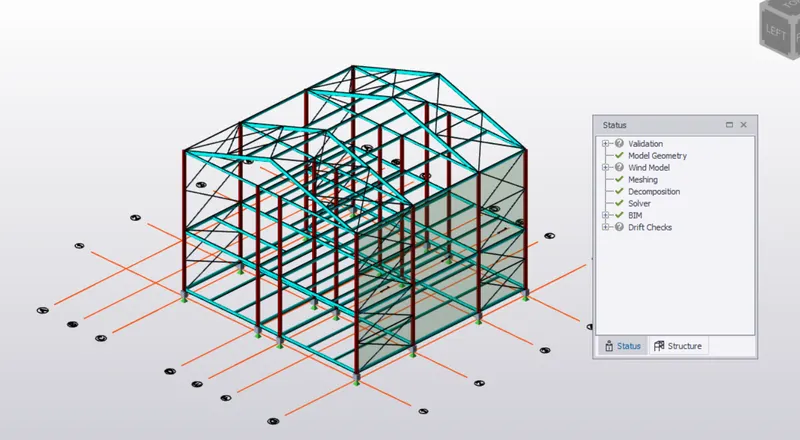
- No Error
- And Copy the Wall panel for the other side
- Select --> Pick the refernece point--> Pick The New Position
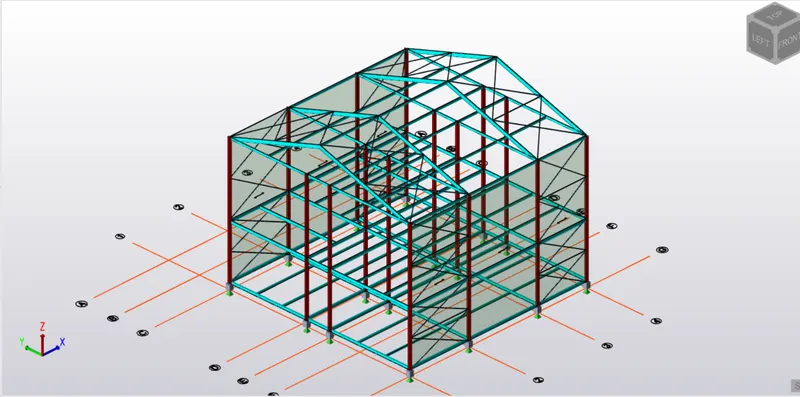
Step-3: Model the Roof Panel:
- Above the Similar Procedure are Following to be modeling the Roof panel
- As shown in the below diagram and also validated The Roof panel
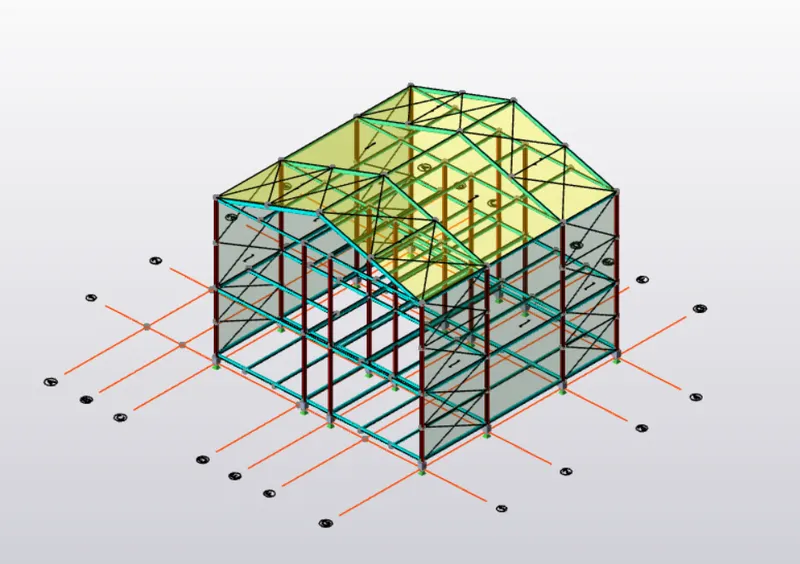
Step-4: Model the slab:
i. Ground Floor Slab 1:
- Go to the Manage property
- Select the New-->Slab-->General slab
- Change the Name as S1
- Now to provide the Slab type as: Slab on Beam
- Deck Type: Reinforced Concrete
- Decomposition: One-way slab
- Overall Depth: 200mm
- Grade : M25
- And aslo to provided the Rib type: type 2
- And Bar type, Bar size, Bar sapcing also as given below value
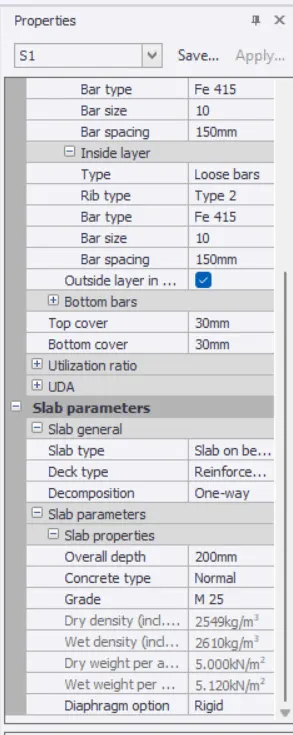
- Now Model the Slab
- Slec the Slab option under the Model tab
- Select property as S1
- Then Rotation angle is :90
- Select Bay
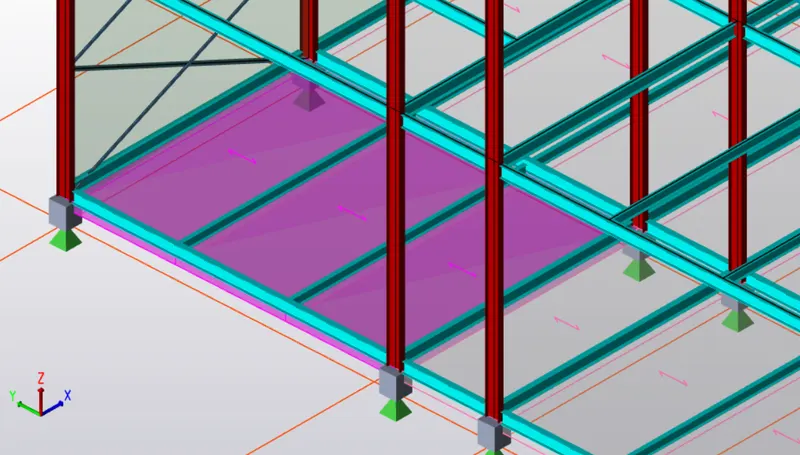
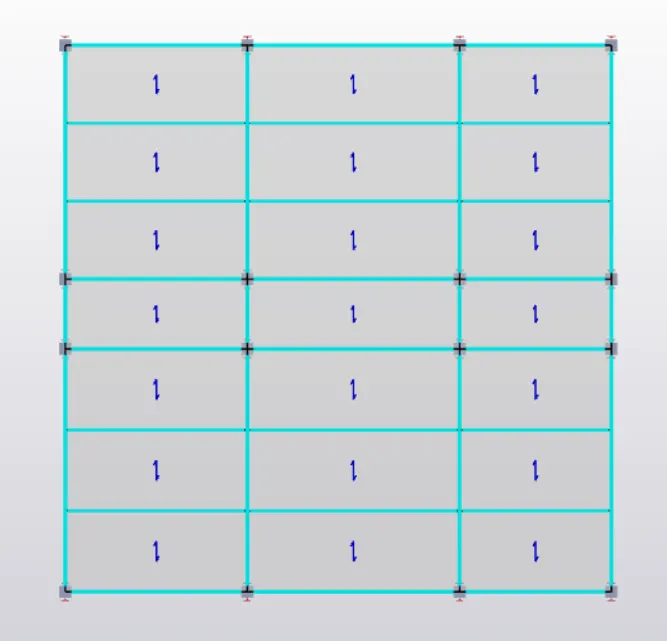
ii.First Floor Slab :
- Similarly Created Firsyt floor Slab
- Property's:
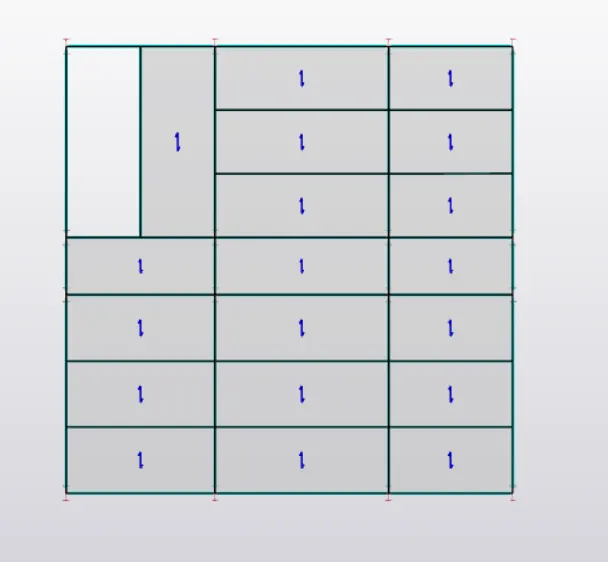
ii.Roof Flat Slab :
- Go to the Manage property
- Select the New-->Slab-->General slab
- Change the Name as S2
- Now to provide the Slab type as: Slab on Beam
- Deck Type: Reinforced Concrete
- Decomposition:Two-way slab
- Overall Depth: 200mm
- Grade : M25
- And aslo to provided the Rib type: type 2
- And Bar type, Bar size, Bar sapcing also as given below value
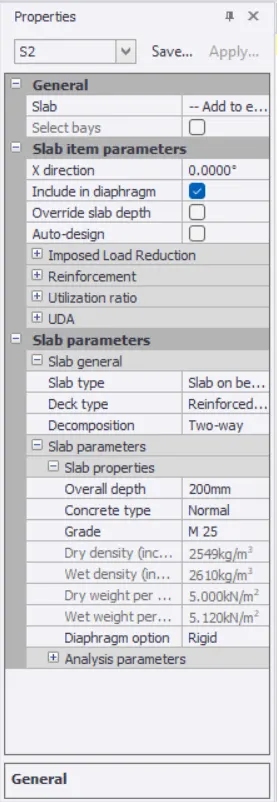
- Now Model the Slab
- Slec the Slab option under the Model tab
- Select property as S2
- Select Bay
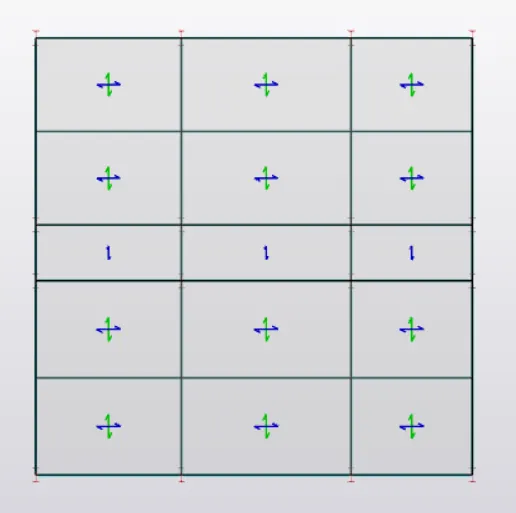
Validate the Model:
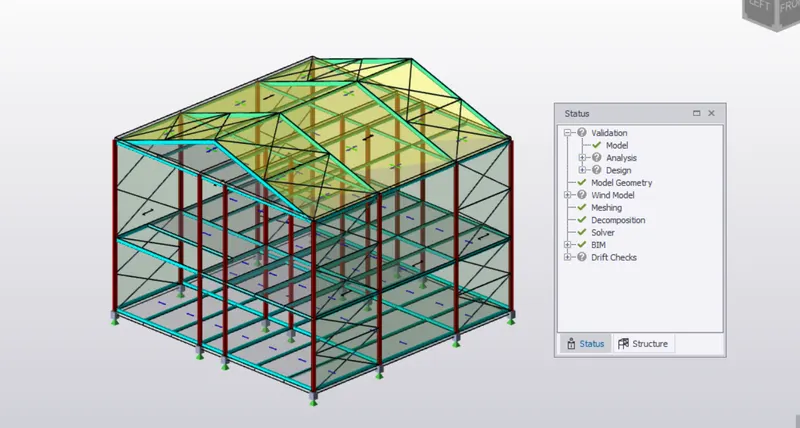
Hence Finished the Model of Wall panel and roof panels and Slab
**************************************************************************************************************************************
Now Chllenge- 4
Question-1
Aim: To Calculate dead load in design report based on IS code and apply dead load on the model
Given:
- Finishes of 50mm
- Slab as per design
- Brickwall 150mm thickness
- Roofing load based on purlin size
- Ceiling loading 0f 0.3KN per sq m
Procedure:
Step-1: To set the Predefined Loads
- Select to the Home
- Under the Load tab There are Various option called Loadcases, Combination Load Group, And Wind Wizard
- First Start with the Loadcases
- Click Loadcases
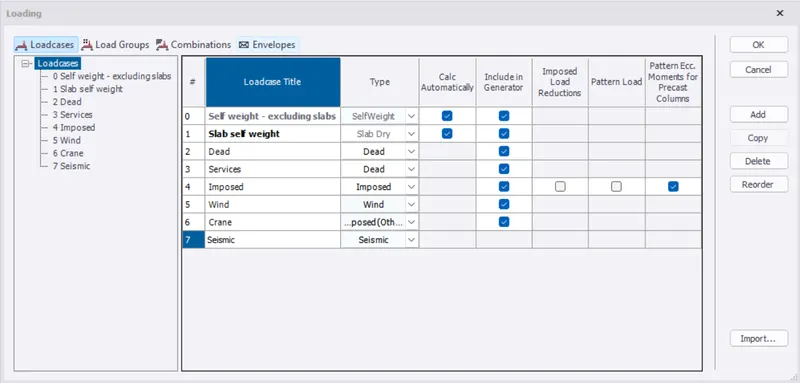
- Predefined Loadcases dialouge box are appear on dispaly with
- Slab self weight , Dead Load, Service Load, Imposed Load
- Now go to Add the Load cases
- Click Add
- Under the type Select the Wind, Seismic and crane Load As Imposed load(other)
- Press OK
- Now Generate the Load Combinations
- Click the Generate option
- Slect the Dlete all Previously generated combination -> Next
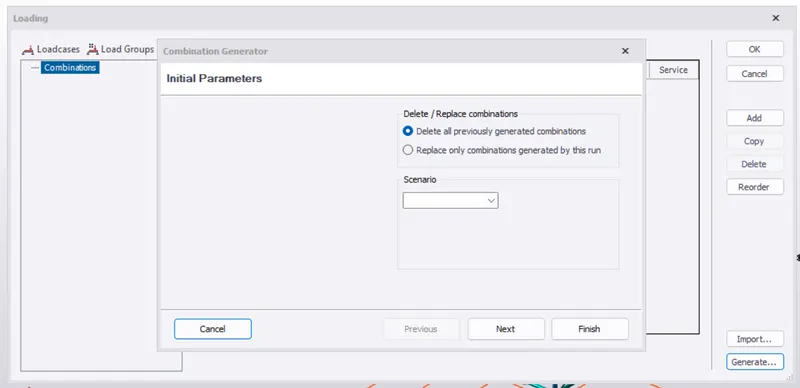
- Press Next
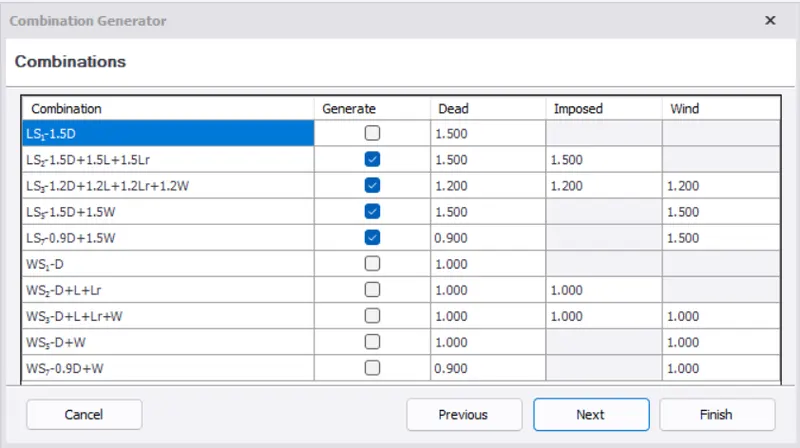
- Press Next
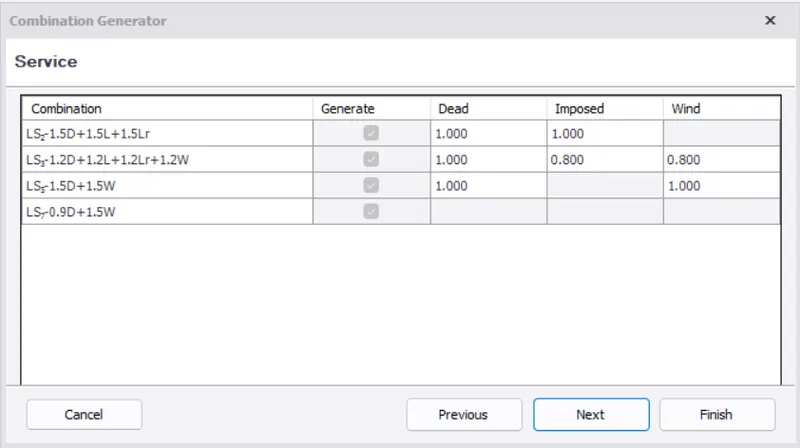
- Press Next
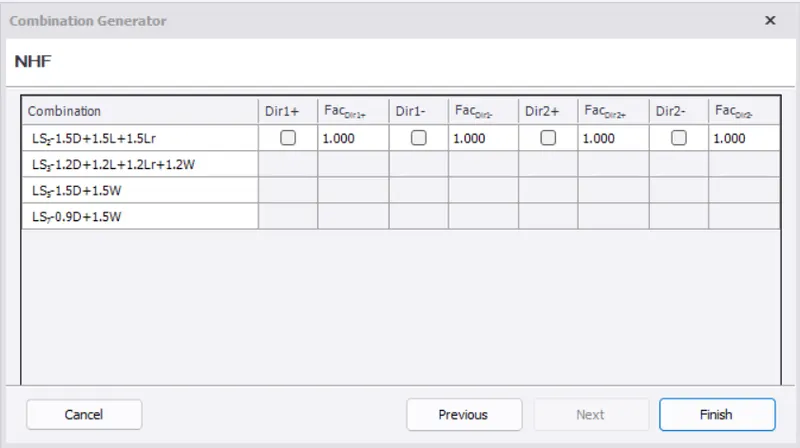
- Click Finish
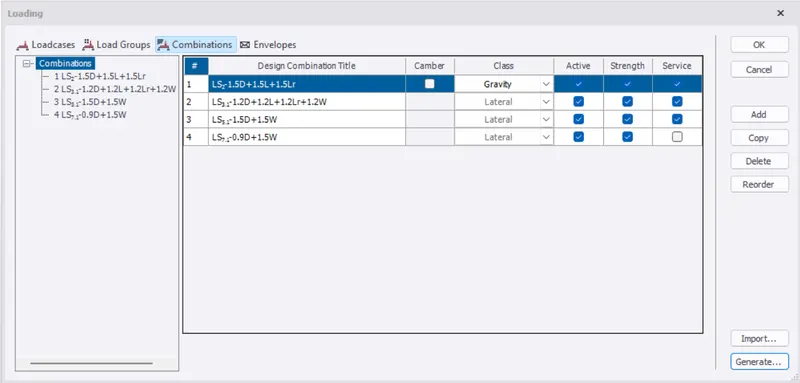
- Now Press OK to be finished Load combination
Load Calculation:
Step-2: To calculate the Dead Load
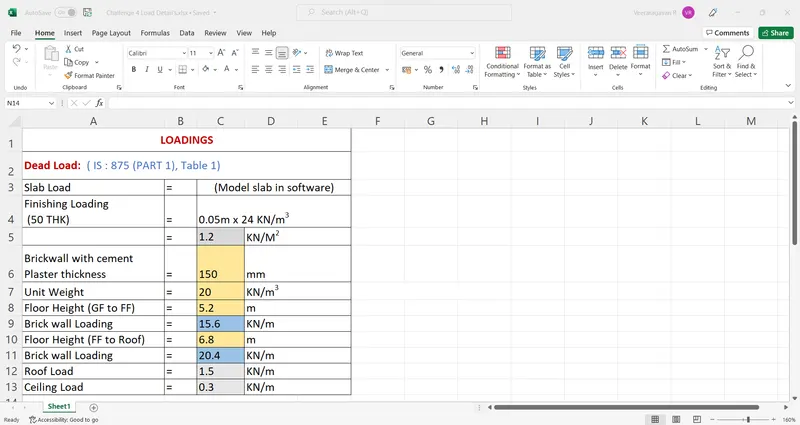
Excel Worksheet for Dead Load Calculation:
- I took all Value of Unit Weight of Bricks and unit weight of Concrete from the Code book (IS-875 (PART 1), Table 1)
- And Here i Calculate the Brick Wall loading by using Formula for= C7*C6*C8/1000= 15.6 KN/m
- Similarly calculated First Floor to Roof =20.5 KN/m
To Apllying Dead Load:
Step-3 : To applying Slab and Roof Panel Load:
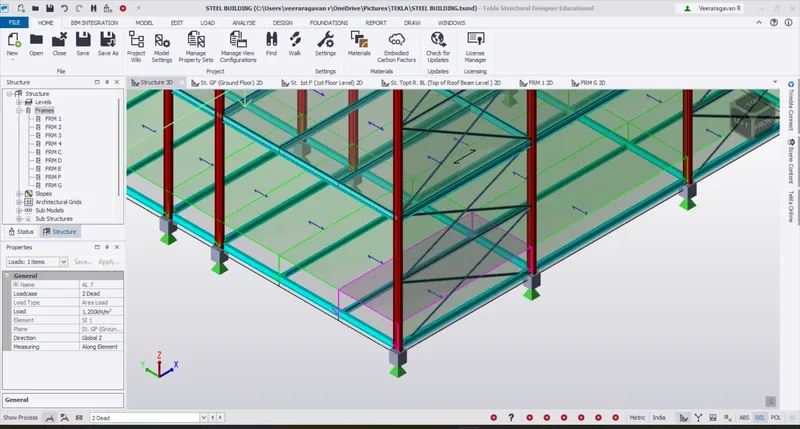
i. Ground Floor Slab:
- First Go to Under the Loadcases there is option called : None
- Then select to drag down Select : 2 Dead Load

- Under the Deal Load, Select the Area Load for Applying Finishing Load
- Finishing Load is: 1.2 KN/m2
- Under the Area Load We need to select the Load type is: Area Load
- Direction: Global z
- Measuring: Along Elements
- Load : 1.2 KN/m2
- Now Pick Area Item the colour of the Slab is changing
- Validate The Slab model:
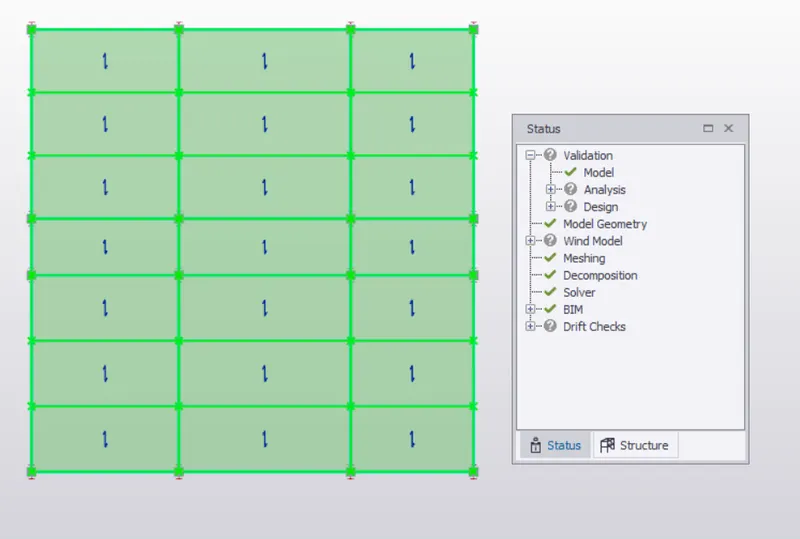
ii. First Floor Slab:
- First Go to Under the Loadcases there is option called : None
- Then select to drag down Select : 2 Dead Load
- Under the Deal Load, Select the Area Load for Applying Finishing Load
- Finishing Load is: 1.2 KN/m2
- Under the Area Load We need to select the Load type is: Area Load
- Direction: Global z
- Measuring: Along Elements
- Load : 1.2 KN/m2
- Now Pick Area Item the colour of the Slab is changing
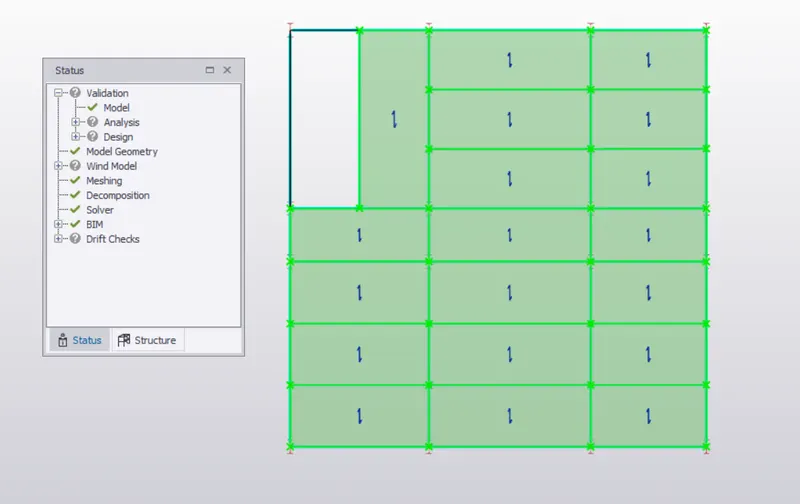
iii. Roof Flat Slab:
- First Go to Under the Loadcases there is option called : None
- Then select to drag down Select : 2 Dead Load
- Under the Deal Load, Select the Area Load for Applying Finishing Load
- Finishing Load is: 1.2 KN/m2
- Under the Area Load We need to select the Load type is: Area Load
- Direction: Global z
- Measuring: Along Elements
- Load : 1.2 KN/m2
- Now Pick Area Item the colour of the Slab is changing
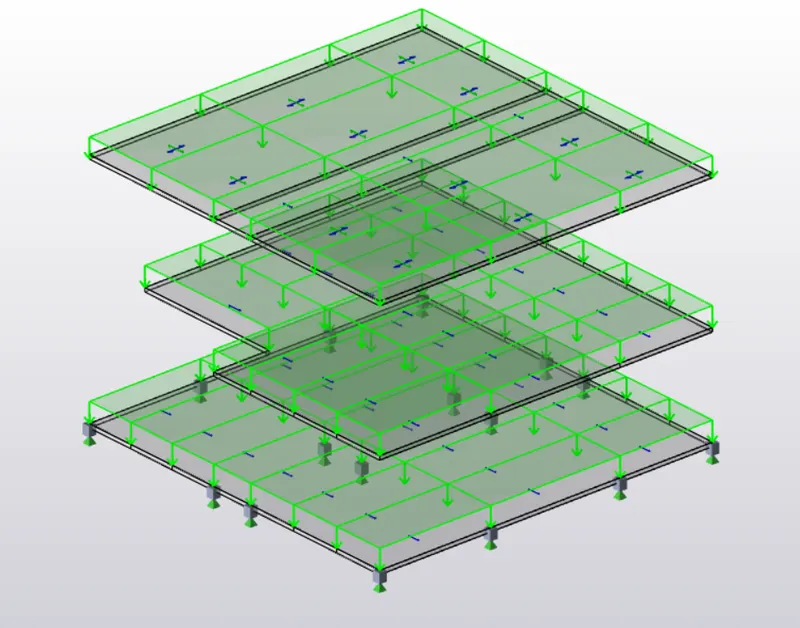
Step-4 : To Apllying Wall Load:
i. Ground Floor Wall:
- First Go to Under the Loadcases there is option called : None
- Then select to drag down Select : 2 Dead Load
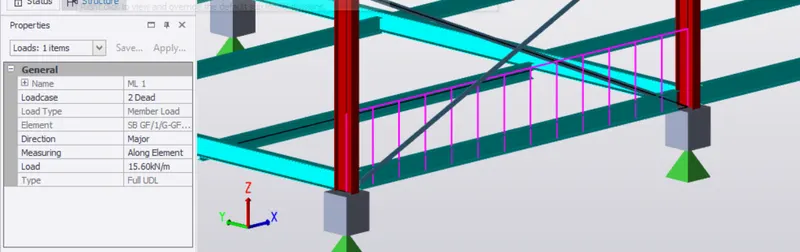
- Under the Load Tab, Select the Full UDL Load As member load
- Wall Load is: 15.6 KN/m
- Under the Area Load We need to select the Load type is: Member Load
- Member Load : Full UDL
- Direction: Global z
- Measuring: Along Elements
- Load : 15.6 KN/m2N
- First we Apply the loading for Outer wall perimeters
- Select the Full UDL
- Pick Load Position
- Properties of Wall load:
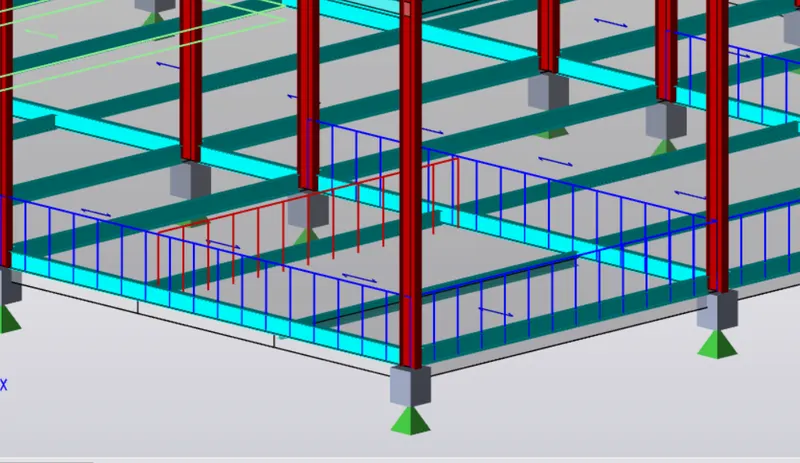
- Finish the Perimeters Load
- Now Take Line Load To draw the Wall for wherever Requierd in the Drawing
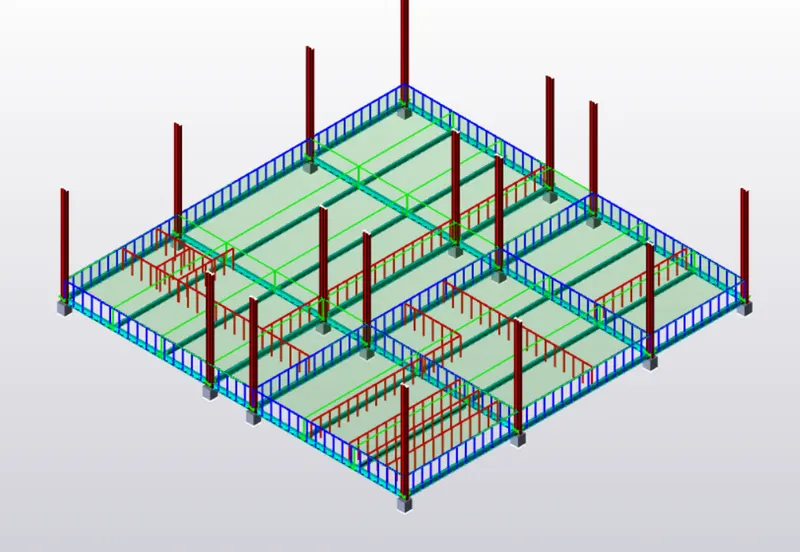
Validate :
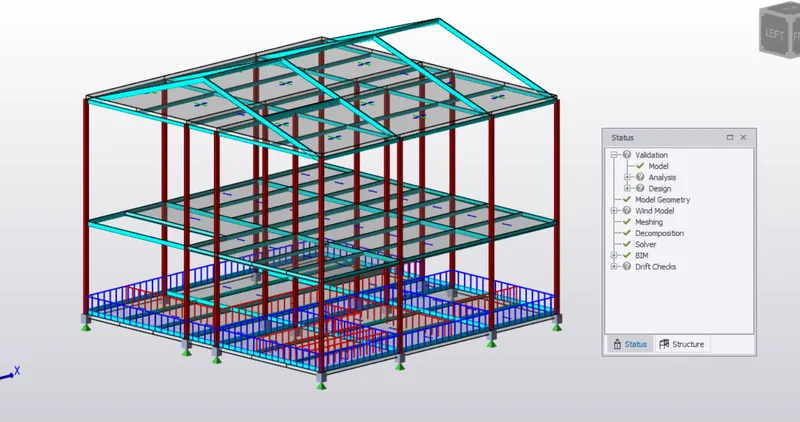
- Hence No Error
Similarly Applying for 1st Floor Wall loading also
ii. First Floor Wall:
- First Go to Under the Loadcases there is option called : None
- Then select to drag down Select : 2 Dead Load
- Under the Deal Load, Select the Full UDL Load As Member load
- Wall Load is: 20.4 KN/m
- Under the Area Load We need to select the Load type is: Member Load
- Member Load : Full UDL
- Direction: Global z
- Measuring: Along Elements
- Load : 20.4 KN/m2N
- First we Apply the loading for Outer wall perimeters
- Select the Full UDL
- Pick Load Position
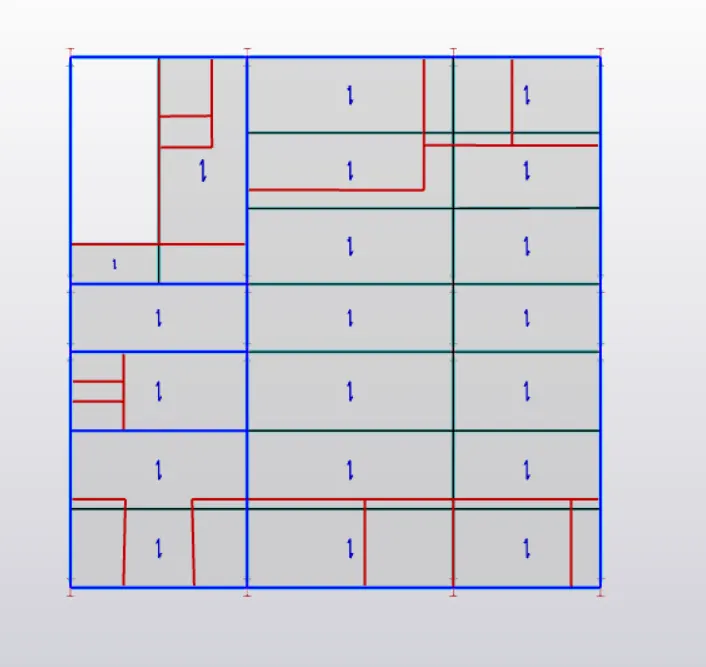
- Finish the Perimeters Load
- Now Take Line Load To draw the Wall for wherever Requierd in the Drawing
Validate:
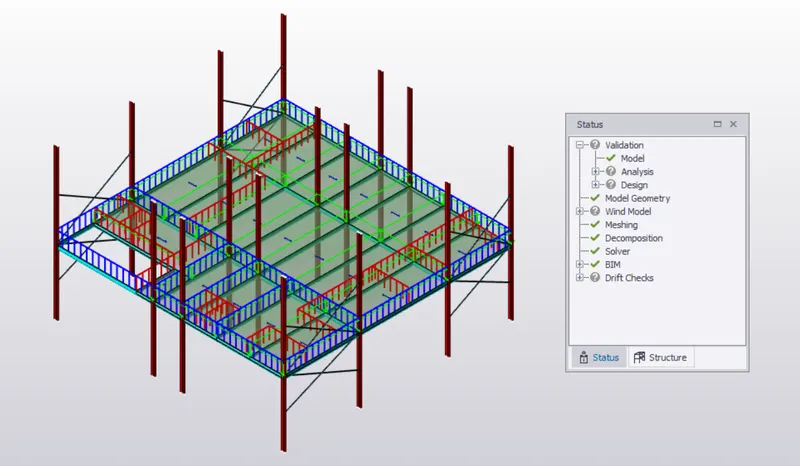
- Hence No Error
iii. Roof Panel Load:
- First Go to Under the Loadcases there is option called : None
- Then select to drag down Select : 2 Dead Load
- Under the Load Tab, Select the Area Load for Applying Member Load
- Roof Load is: 1.5 KN/m2
- Under the Area Load We need to select the Load type is: Area Load
- Direction: Global z
- Measuring: Along Elements
- Load : 1.5 KN/m2
- Now Pick Area Item the colour of the Slab is changing
Validate :
Result:
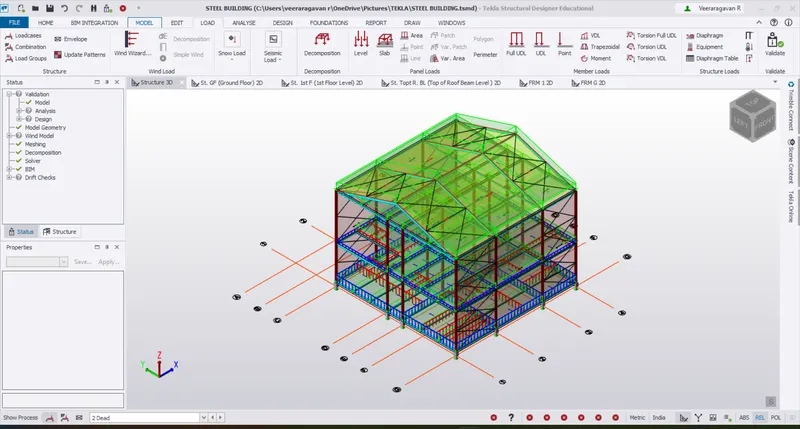
**************************************************************************************************************************************
Question-2
Aim: To Calculate live load in design report based on IS code and apply live load on the model
Given:
- Assume the loading based on IS 875
- Roof loading
- Consider equipment loading as 5KN per sq m
Procedure:
Load Calculation:
Step-1: To calculate the Live Load
Excel Worksheet for Dead Load Calculation:
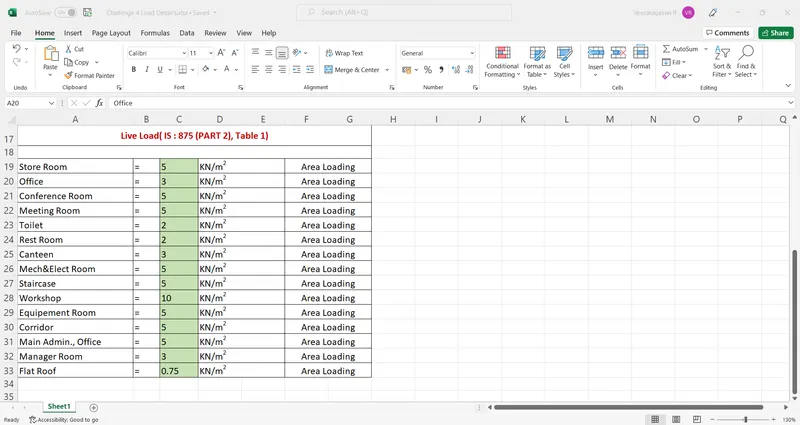
- I took all Value of Live Load from the Code book (IS-875 (PART 1), Table 1)
- Following Below Rooms Of Live Load to be Applied for our Model
To Apllying Live Load:
Step-2: To Applying the Live Load
i. ground Floor
- Select COnstruction Level of Grond Floor
- First Go to Under the Loadcases there is option called : None
- Then select to drag down Select : 4 Imposed

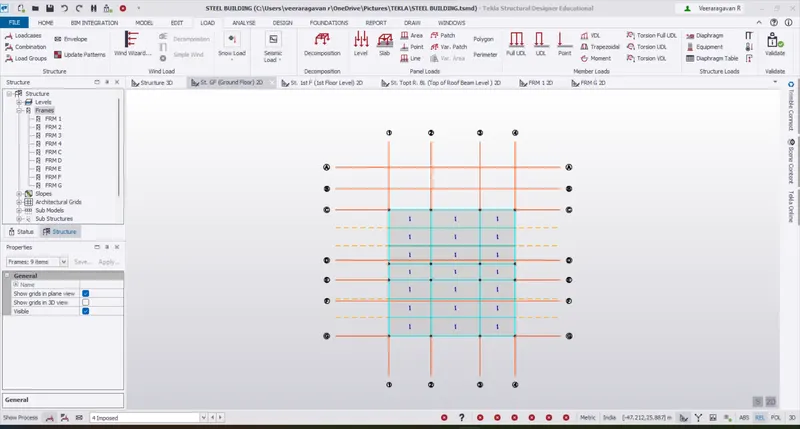
- Then We need to Refer the Room Name and their Live Load from (IS-875 (PART 1), Table 1)
- Under the Load Tab, Select the Area Load for Applying Live Load
- Initial One by One Floor Imposed load to be applied
- Live Load is:2 KN/m2
- Under the Area Load We need to select the Load type is: Area Load
- Direction: Global z
- Measuring: Along Elements
- Load : 2 KN/m2
- Now Pick Area Item the colour of the Floor is changing
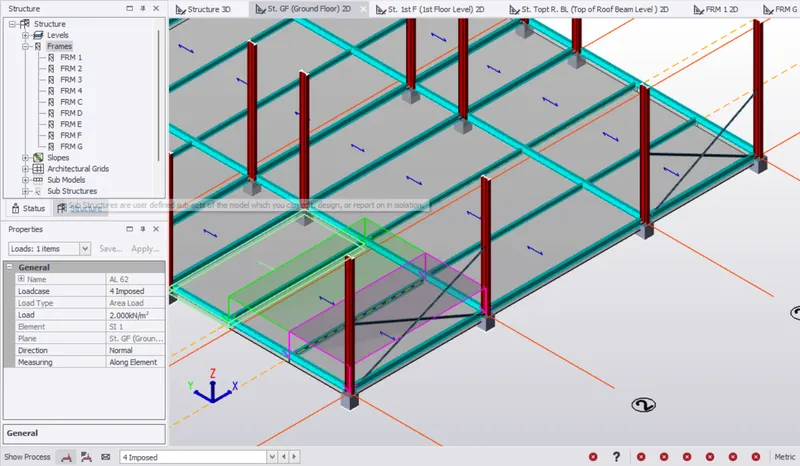
- Now select the Area Load for applying Office Room
- Live Load is:5 KN/m2
- Under the Area Load We need to select the Load type is: Area Load
- Direction: Global z
- Measuring: Along Elements
- Load : 5 KN/m2
- Now Pick Area Item the colour of the Floor is changing
Validate:
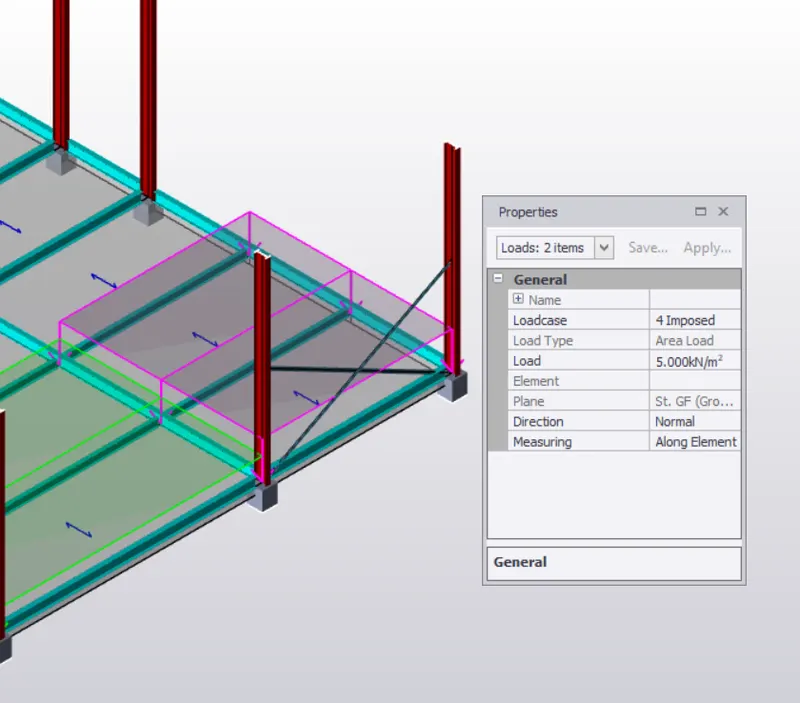
Here Similarly all rooms live load to be applied
Store Room,Conference Room, Meeting Room, Mech& Elect Room, Staricase, Equipment Room, Corridor, Main Admin., Office = 5KN/m2
Office Room, Canteen, Manager Room = 3 KN/m2
Toilet, Rest Room, = 3 KN/m2
Workshop = 10 KN/m2
Flat Roof = 0.7 KN/m2
Similarly all the Load are appied
Validate 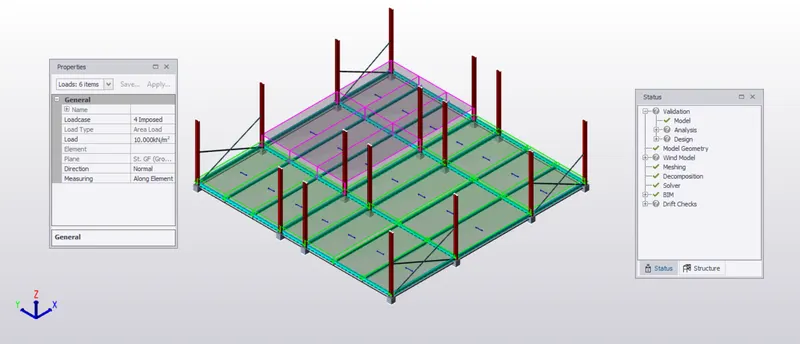
ii. First Floor:
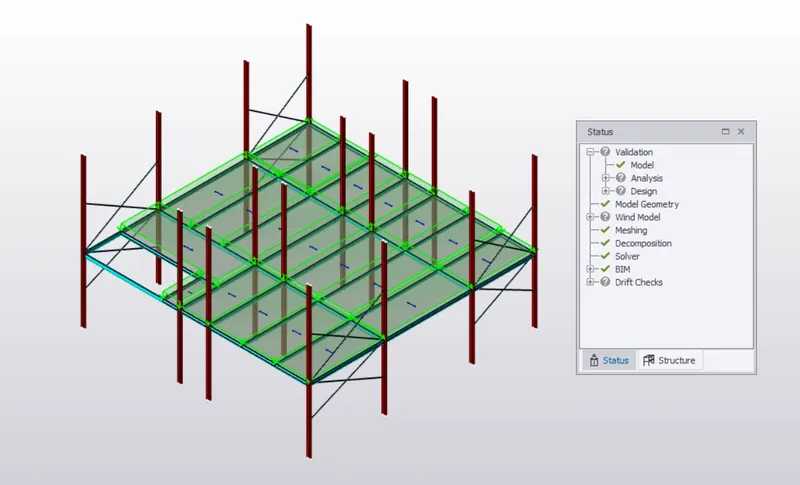
iii. Flat Roof:
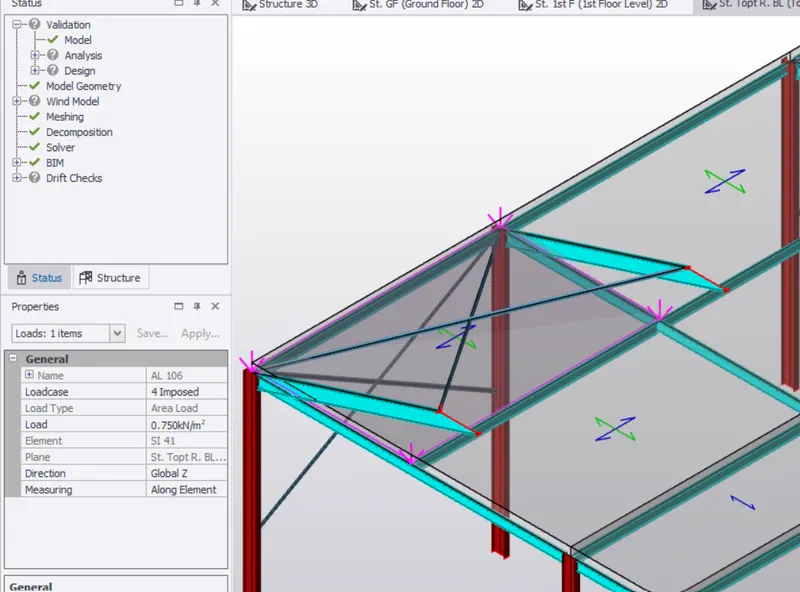
- Here Roof Flat Floor Are Access Not Povided so we take the Live Load: 0.75 KN/m2 From the (IS-875 (PART 1), Table 1)
- Above the same procedure to be used aplly for live load of Flat Roof
- Under the Load Tab, Select the Area Load for Applying Live Load
- Then select to drag down Select : 4 Imposed
- Live Load is:0.7 5N/m2
- Under the Area Load We need to select the Load type is: Area Load
- Direction: Global z
- Measuring: Along Elements
- Load : 0.75 KN/m2
- Now Pick Area Item the colour of the Floo r is changing
Properties :
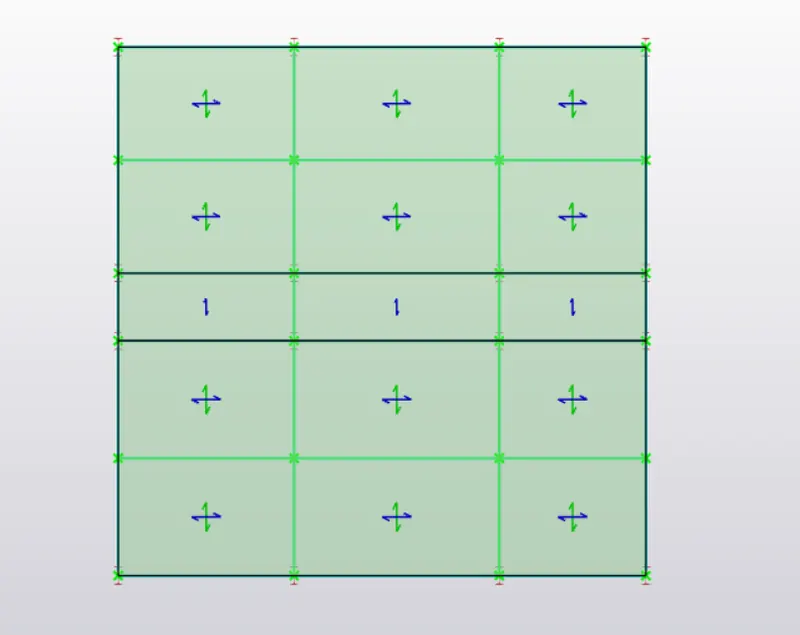
Validate:
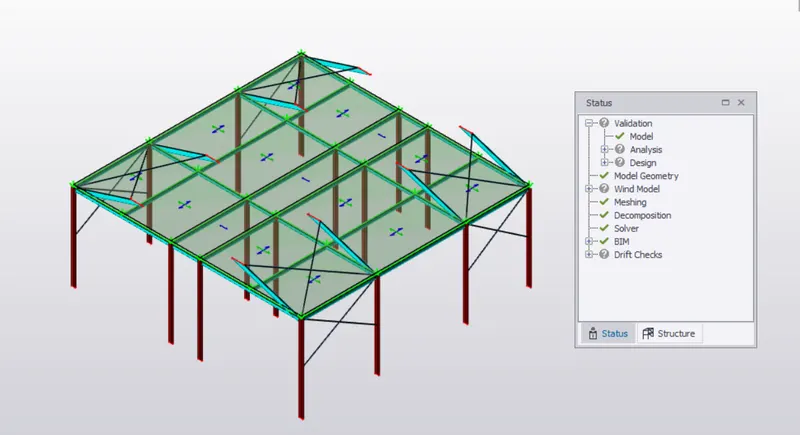
iv. Rafter Load:
- Access Not Provided Except Fro Mantenance
- Under the Load Tab, Select the Area Load for Applying Live Load
- Then select to drag down Select : 4 Imposed
- Live Load is:0.75N/m2
- Under the Area Load We need to select the Load type is: Area Load
- Direction: Global z
- Measuring: Along Elements
- Load : 0.75 KN/m2
- Now Pick Area Item the colour of the Floor is changing
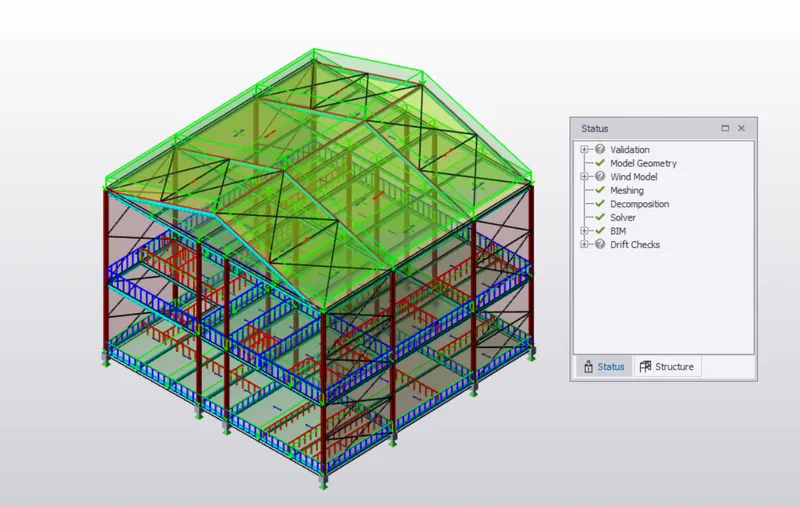
RESULT:
**************************************************************************************************************************************
Question-3
Aim: To Generate a calculation for 5T crane loading based on following inputs
Procedure:
Load Calculation:
Given:
- Centre to Centre of wheel = 10m
- Weight of crab = 40 KN
- Number of wheels = 4
- Wheel base = 2m
- Crane Capacity = 50 KN
- Weight of trolley = 10 KN
- Minimum Hook Approach = 1m
Maximum Point Load on crane =Crane capacity + Weight of the Trolly
= 50+10
= 6o KN
UDL = Self weight of crane/Distance between rails
= 2.89 KN/m
Moment at A:
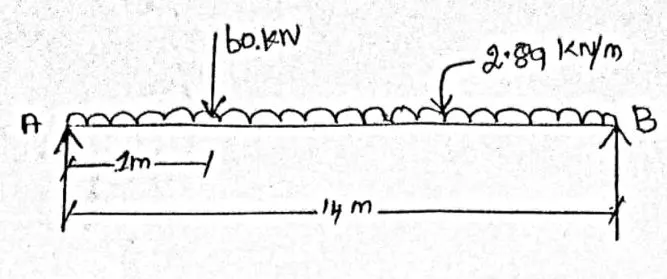
∑Ma=0
= 60x1-RBx14 + 2.89x14x14/2=0
4 RB = 60+283.22
RB = 24.52KN
∑Fy = 0
RA+RB-60-2.89x14 =0
RA = 60+2.89x14-RB
RB = 75.94 KN
Now Let Assume Self weight of Gantry Girder = 1.2 kn/m
Self weight of rail section = 0.3 KN/M
Total Self weight = 1.5 KN/m
Factor Load = 1.5x1.5
= 2.25 KN/m
Now Load on Each Wheel = 75.94/2 KN
= 37.97 KN
Factor Load = 1.5x37.97 =56.955 KN
= 57 KN
Moment at C: 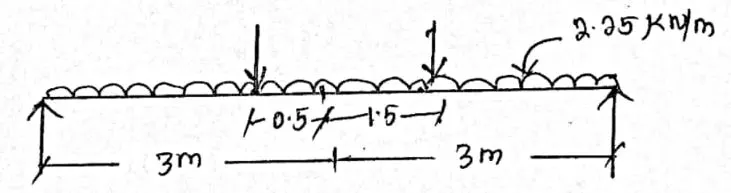
∑Mc = 0
RDx6 = 2.25x6x6/2 + 57x4.5 + 57x2.5
RD = 439.5 KN/6
= 73.25 KN
∑Iy = 0
RC + RD-57-57-2.25X6
RC + RD = 127.5 KN
RC = 127.5-73.25
= 57.25 KN
Moment On Front Wheel
RD = 2.25x1.5x1.5/2
= 2.53 KN
Moment On Front Wheel
RC = 2.25x2.5x2.5/2
= 7.0 KN
Maximum Shear Force: 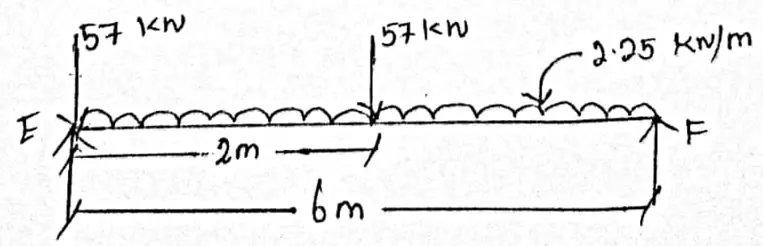
∑Mf = 0
REx6-57x6-57x4-2.25x6x6/2 = 0
RE = 101.75 KN
Impact Load:
10% Of Wheel Load = 0.1x101.75
= 10.175 KN
V = wl/2 = 1.5x6/2
= 4.5 KN
Maximum Shear force = 4.5 + 10.175 + 101.75
= 116.425 KN
Lateral Load Analysis = 5% of Total Weight
= 5/10 x 60
= 3 KN
RESULT:
- calculation of 5T crane loading is Done
**************************************************************************************************************************************