Suspension Subsystem Preprocessing using ANSA
AIM: The aim of this project was to carry out geometry cleanup, meshing, and connections for the given suspension subsystem using ANSA.
PROCEDURE:
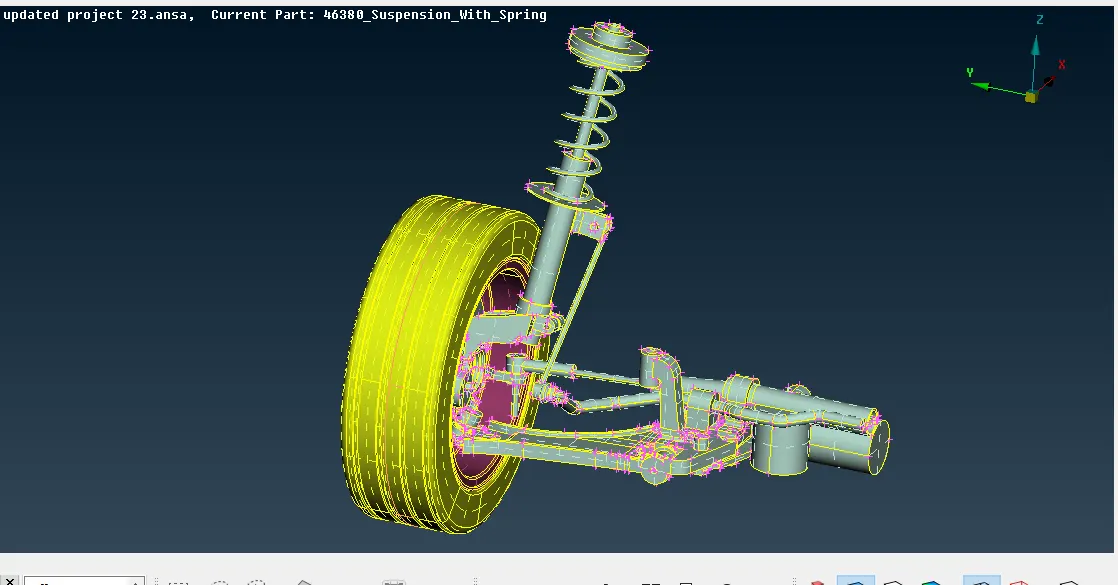
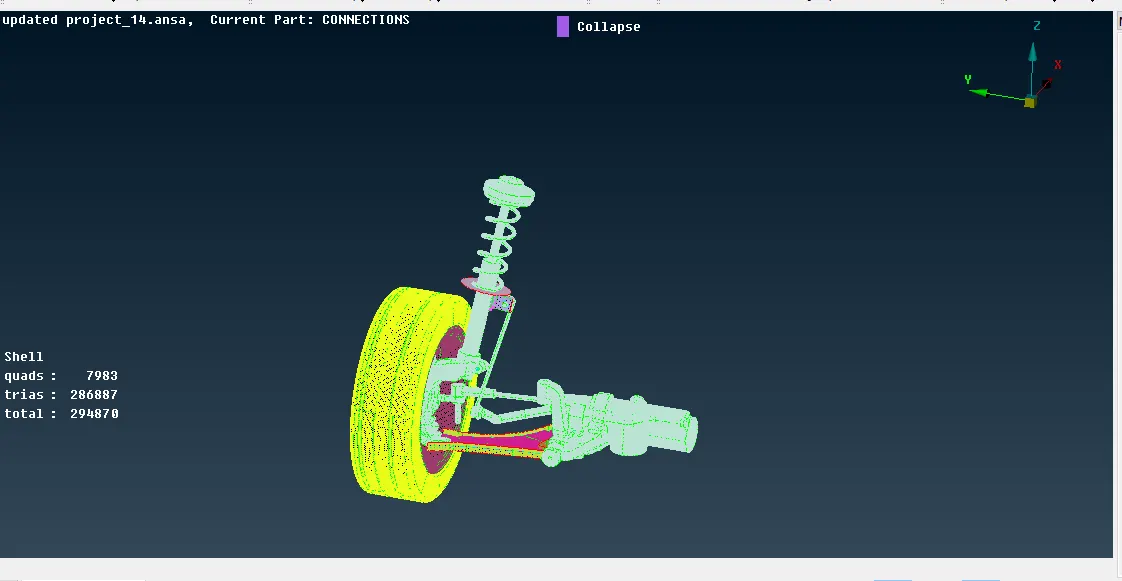
- The model given was that of suspension subsystem and consisted of the tyre, rim, upright, wheel hub, steering rack, and various other components.
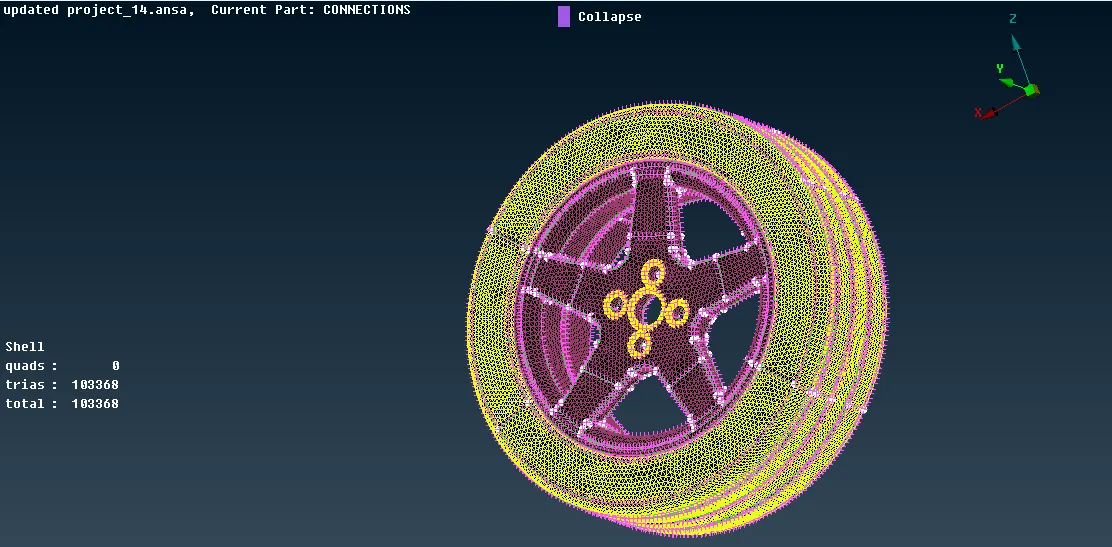
- Tyre and rim had different element criteria from the remaining components, hence they were meshed first. Since it was not possible to extract mid surface for them, they were meshed using tetra elements.
- Before meshing, the tire and rim model were checked for geometry errors using Checks-Geometry. If any errors were present, they were removed using auto or manual fix methods. Once the geometry was clean and error-free, meshing was carried out on it.
- Under Mesh Parameters, the element was set as Ortho tria and avg, max, min length was specified. Meshing was first carried out on curved surfaces, or fillets using ortho tria elements. Ortho tria elements have a uniform convergence and produce smooth surfaces whereas tria elements generate distorted curved surfaces. Hence Ortho tria elements were used since they could capture these surfaces effectively. The mesh was then refined using Reconstruct-Macro Area and the meshed surface was selected. Once the curved surfaces were meshed, flat surfaces were meshed using tria elements.
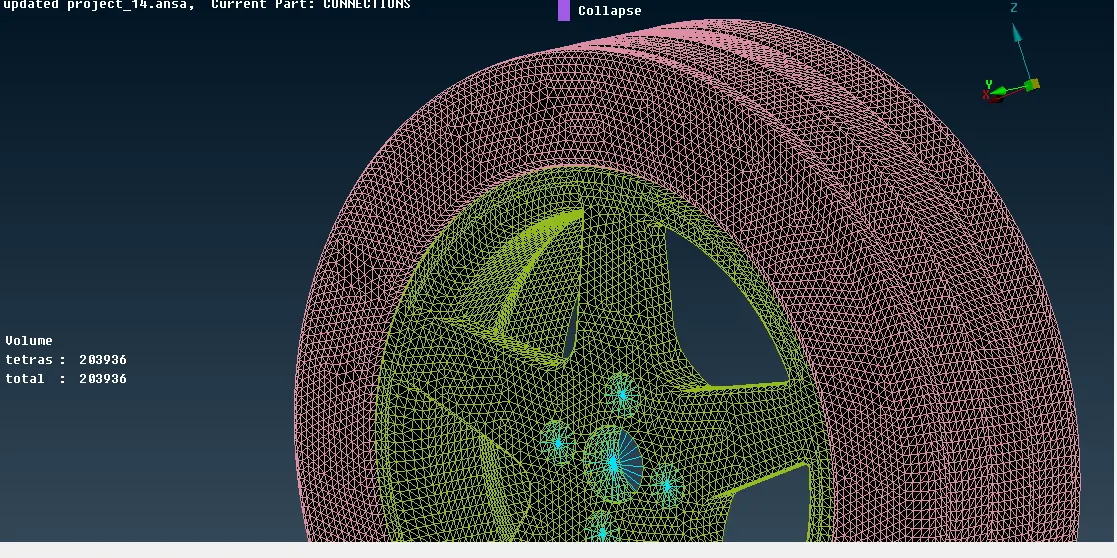
- Once the geometry was meshed, volume had to be defined in order to generate a solid mesh. In order to define a volume, Volume Mesh Deck was opened and Volumes-Define-Manual option was selected and geometry was selected. Then a volume was generated for the selected geometry along and a new property card was created (PSOLID). The volume was also visible under Volumes-List. Since ortho tria and tria elements were used to create the surface mesh, the Unstructured Mesh tab was used to generate a solid mesh. To generate a solid mesh, Tetra FEM was used and the geometry was selected and the entire volume was highlighted and meshing was carried out on the model. The solid mesh was then checked for Tetra Collapse in the hidden mode.
- If any collapsed elements were present, they were fixed using Grids-Move- Free under the Mesh deck. The element was then moved along an axis and the error was resolved. The element's local coordinate system was displayed by right-clicking on its node.
- After tire and rim, the remaining components were meshed with their respective quality criteria.
- Once the solid mesh was over, shell meshing on components with a thickness less than 5 mm had to be carried out. The components to be mid surfaced were fixed checked for geometry errors and correct orientation. In order to orient it uniformly, Topo- Faces-Orient-Visible was used. The mid surface was then generated using Faces-Offset and the distance was entered based on parent geometry thickness. The ribs were connected to the surface by using Topo-Faces-Extend and the edge to be extended and the face to be extended to were selected. In order to generate a smooth flow, cuts were made and the area was divided into smaller blocks. First, the difficult areas were best used Mesh-Mesh Generation-Spot/Best/Map and the generated mesh was refined using Reconstruct/Smooth option. Tria and rotating quads were eliminated using the Split command.
- Once the surface was meshed, thickness was assigned to the component using Macros-Set PID.
- Once the entire subsystem was meshed, connections had to be assigned. Connections had to be assigned for holes that had to be rigidised and for surfaces that had to be weld together.
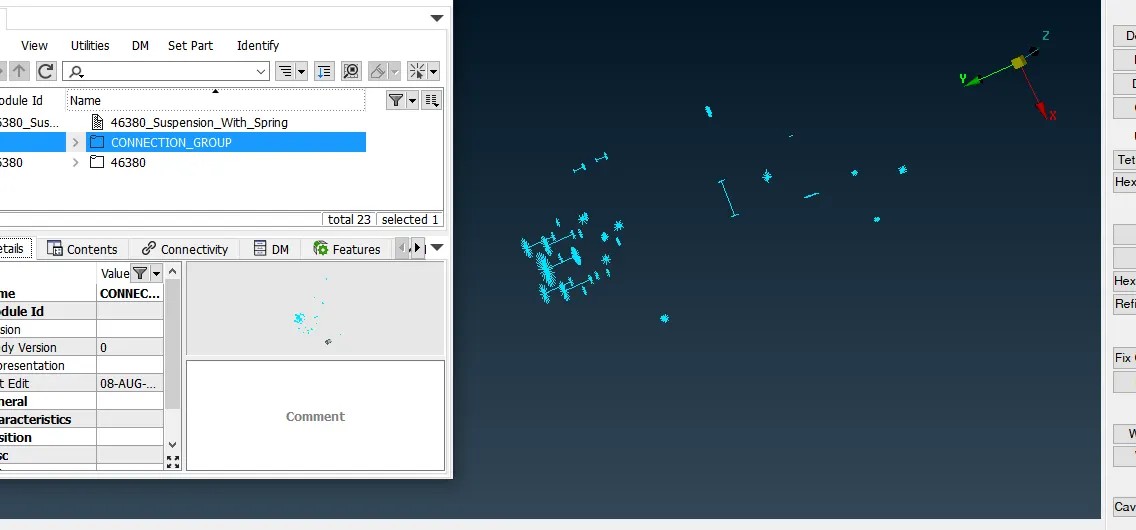
- Connections were specified under the Nastran deck. To rigidise a bolt hole, ELEMENTS-RBE2-Many nodes was selected and the hole nodes were selected. A new part was created for the connection, and it was moved into a new group. The connection part under the Model tab was then set as current, so all new connections would be added into the same part.
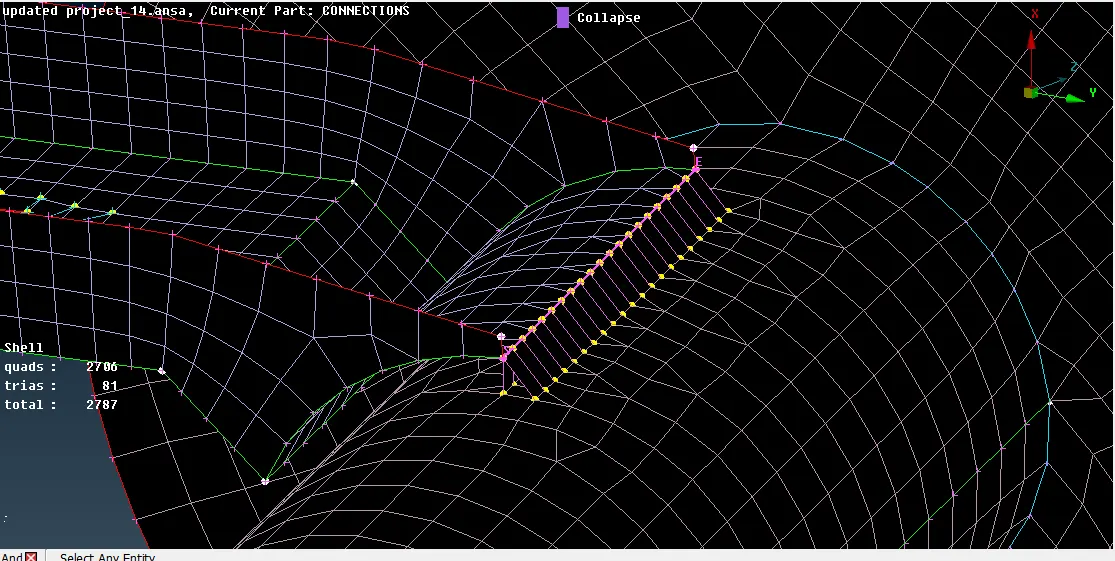
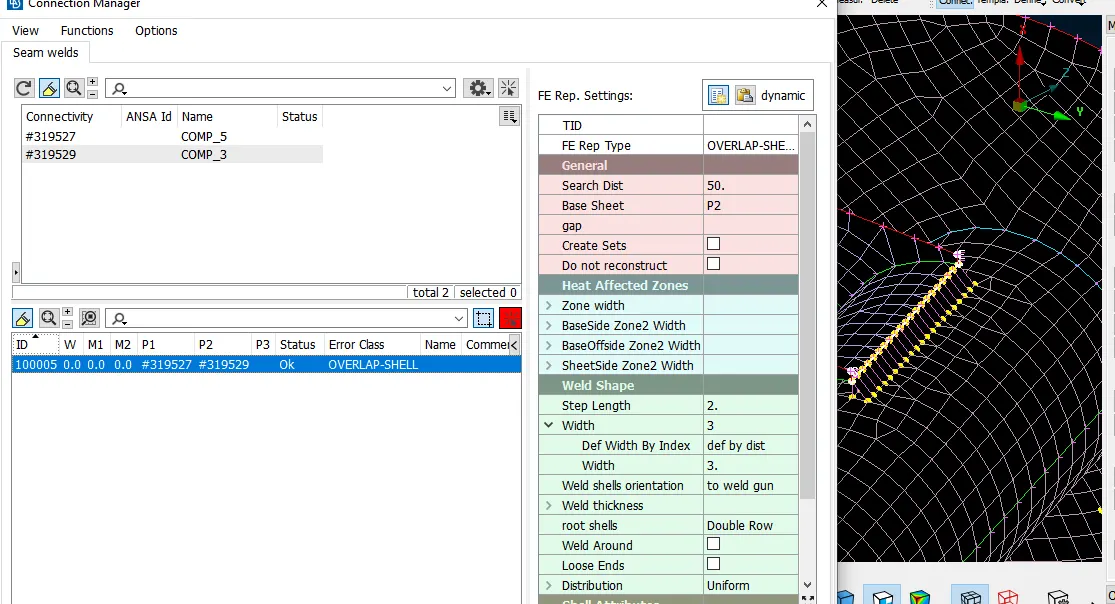
- To create an overlap weld, the con was converted to a curve using Topo-Curves-Cons2Curv. Convert option was used to convert the curve to a seam line. Using the connection manager, the seam line was selected, and both connecting parts were defined under P1 and P2 using the ctrl+f1 key. Overlap shell element was used to define the weld, and the search distance, base sheet, step length values were entered and a new PID was created for the weld. Once the values were entered, the weld was then realized.
INITIAL MODEL:
FINAL MODEL:
TYRE AND RIM:
SHELL MESH-
SOLID MESH AND CONNECTIONS DEFINED:
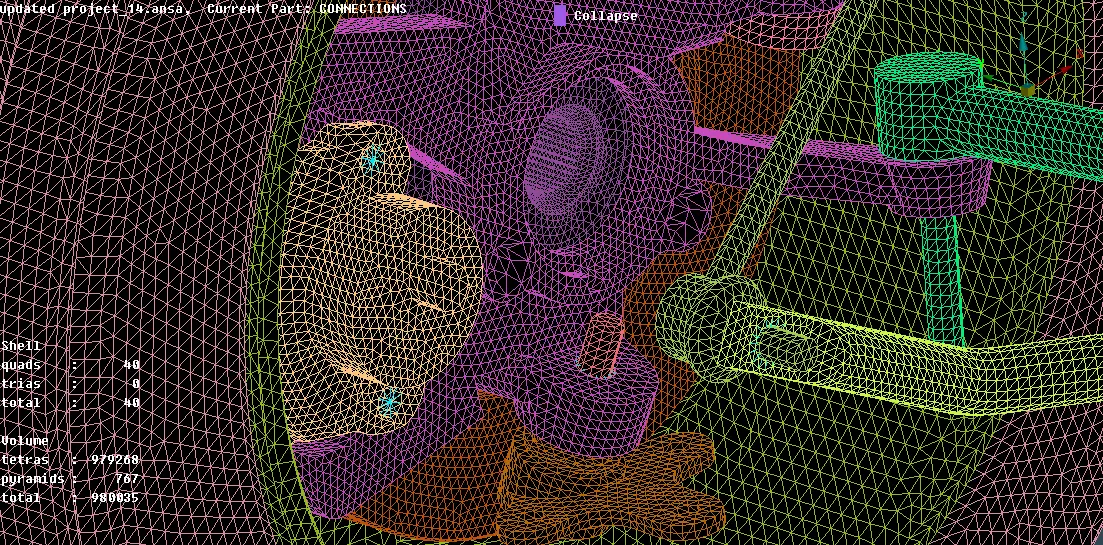
UPRIGHT, WHEEL HUB AND CALIPER:
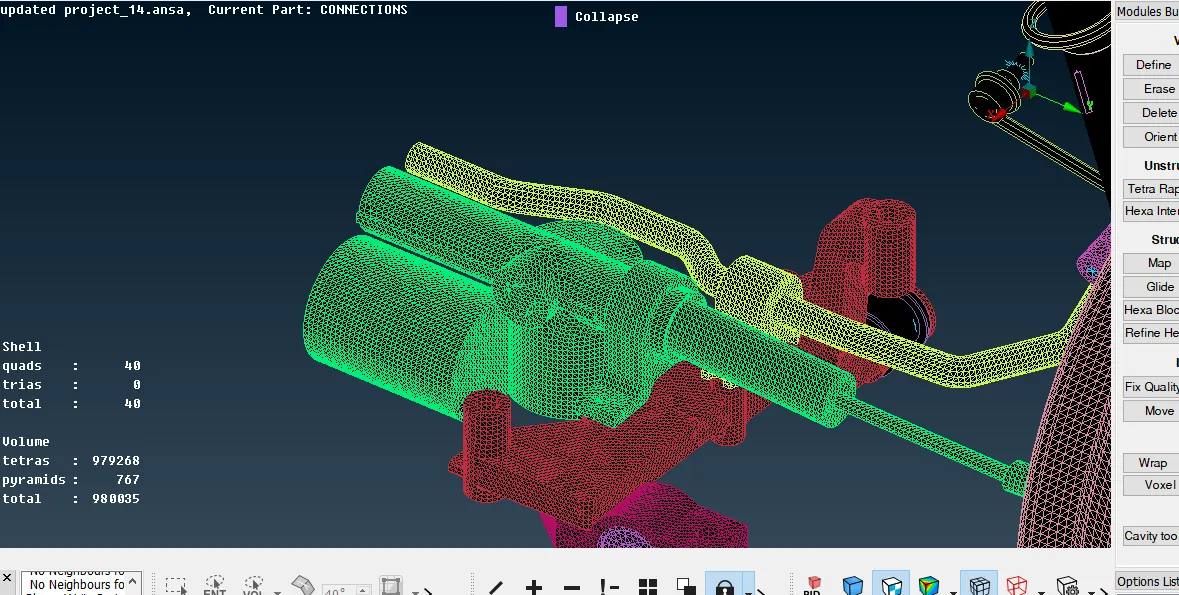
STEERING RACK:
BREAK DISK:
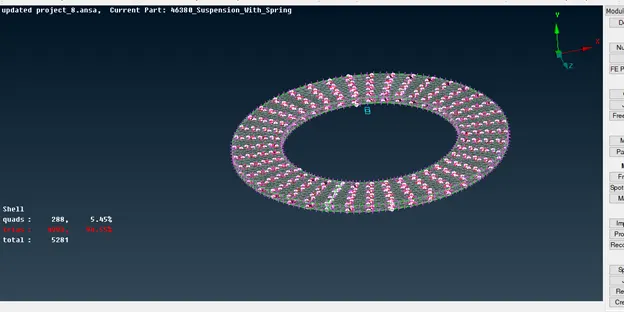
Due to irregularities in the break disk venting holes, all features were deleted except for four connecting surfaces.
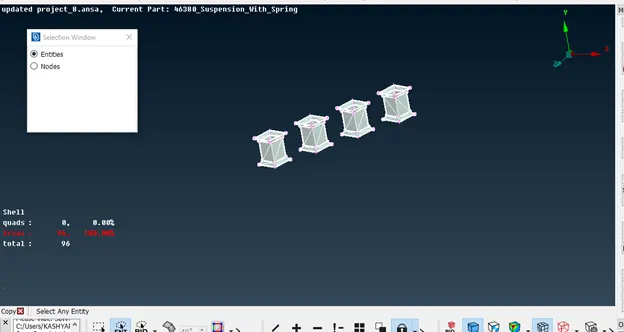
The four were meshed effectively and were replicated throughout the model using the Transform function.
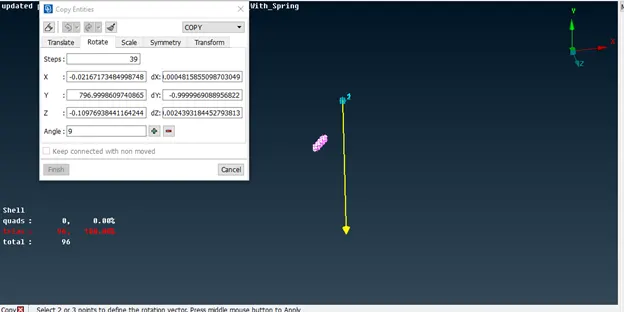
2 points were created at the centre using two circle at some vertical distance from each other with the help of Topo-Points-On COG. These points were then used to create the axis of rotation for creating the necessary pattern.
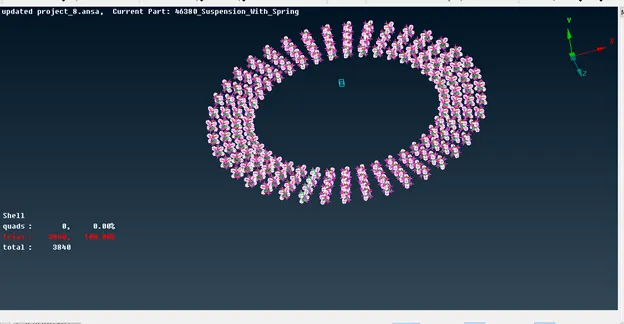
Clean meshed vents were regenerated and Topo was carried out to connect it with the surface.
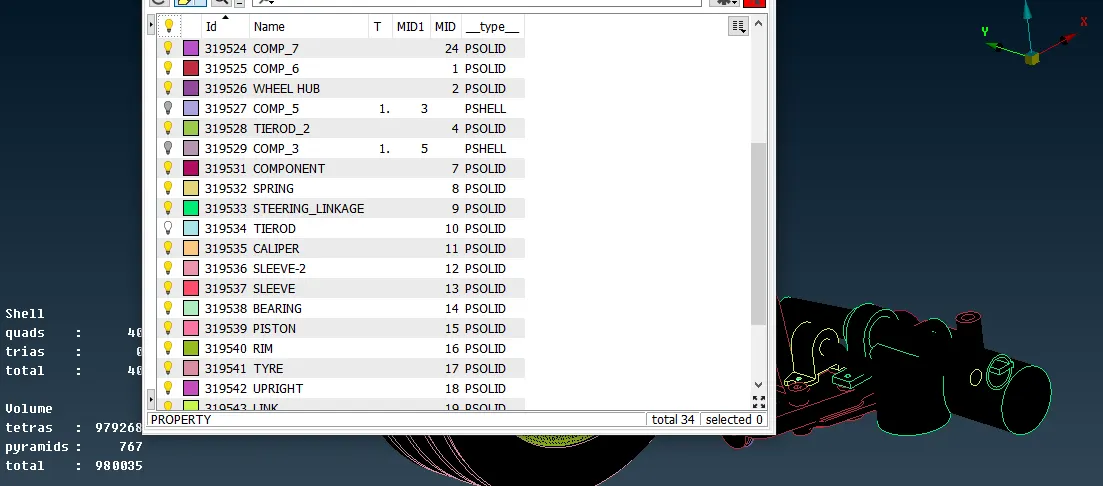
PID CARD CREATED FOR SOLID MESH:
TYPE SPECIFIED AS PSOLID-
OVERLAP WELD JOINT CREATED USING CONNECTION MANAGER:
CONNECTION MANAGER WINDOW FOR WELD JOINT:
HOLE RIGIDISED USING RBE2 ELEMENTS UNDER NASTRAN DECK:
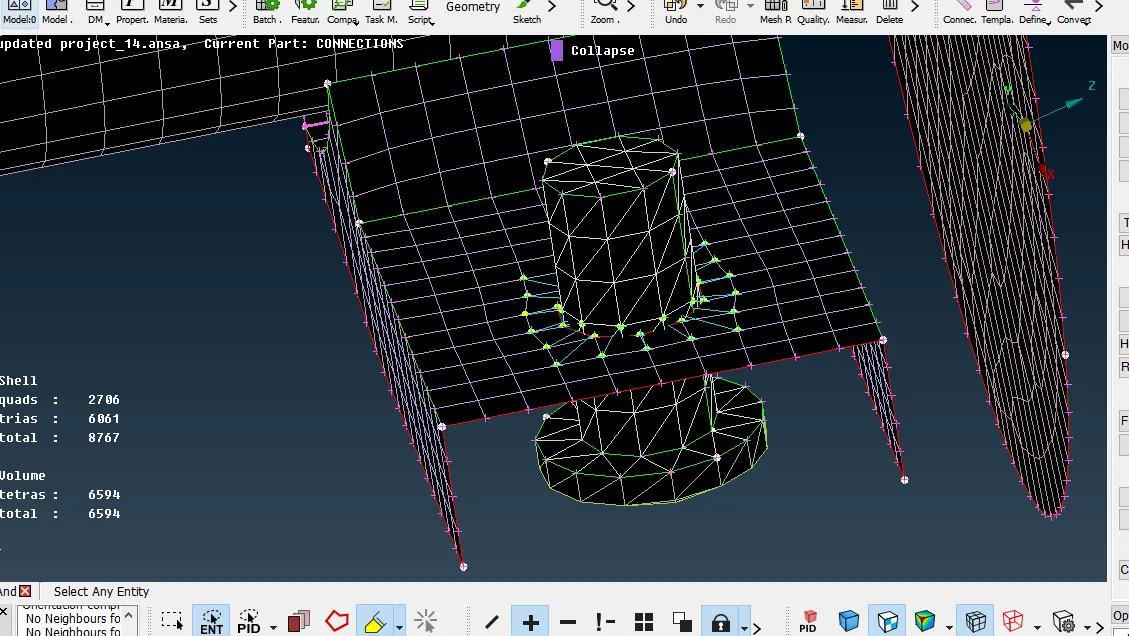
First slave nodes were selected, following which a master node was created. The connection was then assigned to a part created under the Model tab.
CONNECTION GROUP:
LEARNING OUTCOMES:
Through this challenge
1. I understood how to identify the components of a subsystem and create a plan for mid surface generation and meshing, and that the middle surface has to be generated only for components having a thickness less than 5 mm.
2. I understood how to create a smooth mesh flow by diving large areas into smaller areas and avoid the generation of trias and rotating quads.
3. I learned that ortho tria elements are recommended over tria elements in capturing curved surfaces and fillets and tria elements are useful in meshing flat surfaces and reduce solid mesh generation time.
4. I understood the Tetra FEM algorithm and that Volume- Unstructured Mesh its application is limited to tria and ortho tria elements.
5. I understood how to resolve the Tetra collapse error.
6. I learned how to define connections for bolted surfaces and how to give a connection for two rows of elements.
7. I learned how to define a weld connection and assign a PID to the connection under the connection manager.
CONCLUSION: Through this challenge, I was able to understand how to initiate mid surface generation and meshing for a subsystem model and how to identify which components need solid mesh and which require only the shell mesh. I was able to create connections for overlapping metal surfaces by defining an Overlap shell and for bolted surfaces using RBE2 elements. I understood how to reduce the solid mesh generation time by effectively using Ortho tria and tria elements.