Hood design-Week 2
AIM:
Design hood with the given data.
OBJECTIVE:
Designing of BIW of bonnet that satisfies the manufacturing requirements, functional requirements and NCAP standards.
THEORY:
What is Hood or Bonnet?
The bonnet system consists of a bonnet, striker, opening system, latch, and a pedestrian safety system. The main functions for the bonnet are to protect the under-bonnet system and work for pedestrian safety. The system should allow inspection of the engine and service of the under-bonnet systems such as filling fluids. Together with the latch system and opening system, the bonnet should fulfill ergonomics demands concerning opening and closing forces and opening geometry. It should be robust enough not to be damaged by normal daily use of the car.
Hood consists of components like:
- Outer panel
- Inner panel
- Hinge assembly
- Striker Assembly
- Reinforcement
How a complete bonnet is built?
The bonnet constitutes a design element next to the front fenders, front lights, bumper and the plenum cover. The complete bonnet consists of an inner and an outer bonnet joined together by hemming and adhesives. Rubber based glue is used in the flange joint as anti-flutter glue between outer and inner bonnet and on points of the inner bonnet. Today, another pattern is used to fulfil the requirements from pedestrian safety. Front reinforcement (lock striker reinforcement) and hinge reinforcements (steel) are clinched to the inner bonnet. Spot welding is used in part assembly of front reinforcement. The greatest potential areas for weight reduction are material changes and redesign of the inner bonnet. The most important requirement to be consider is that the bonnet should reduce the pedestrian head injury criterion (HIC) value.
Design and manufacturing consideration for Car Hood:
- Hood head zone for lock striker:
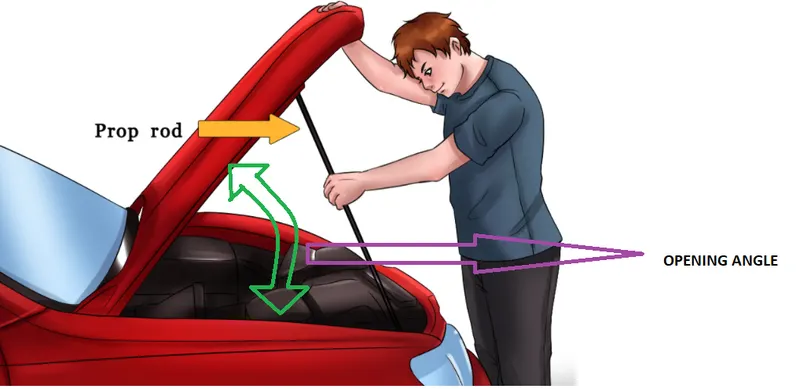
The basic requirement while designing hood is the opening angle. This depends on the region like what kind of people are using (based on the height).
- Holding mechanism:
The support for the hood can be given in two ways:
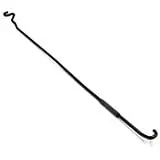
1. Support Rod
2. Gas Stay
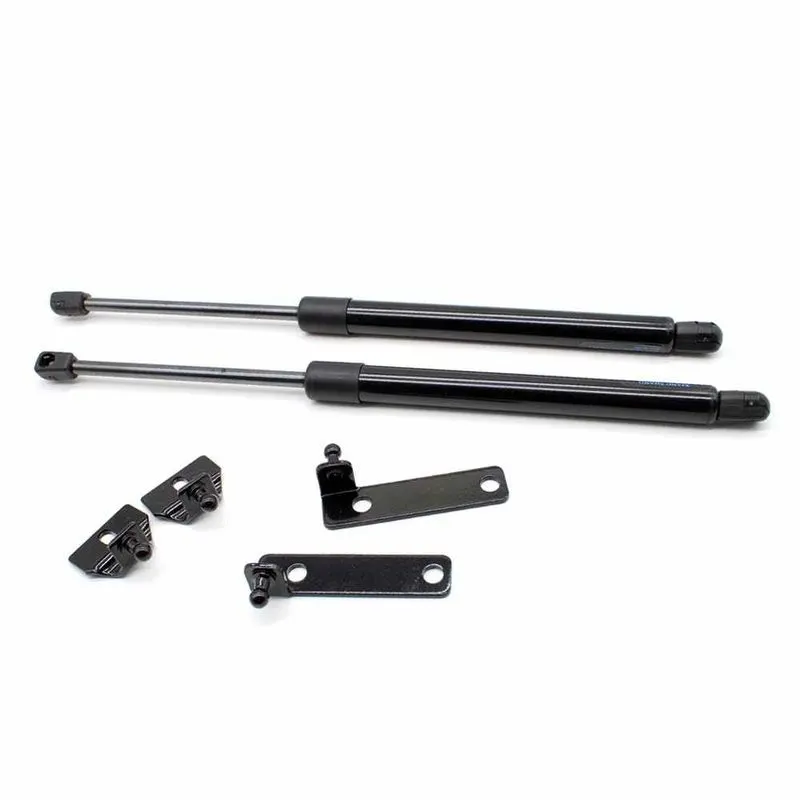
In both case as a designer you need to know about the opening angle and closing angle, where it should be mounted etc. For support rod we give some bends or shape to give strength to the rod. The minimum curvature of the support rod should be 35mm. In case of gas stay the human effort is less.
To fix gas stay we need to consider the center of gravity of the part. Ball stud is used to fix gas stay. Since gas stay is an additional commodity brackets will be implemented for reinforcement.
- Reinforcement:
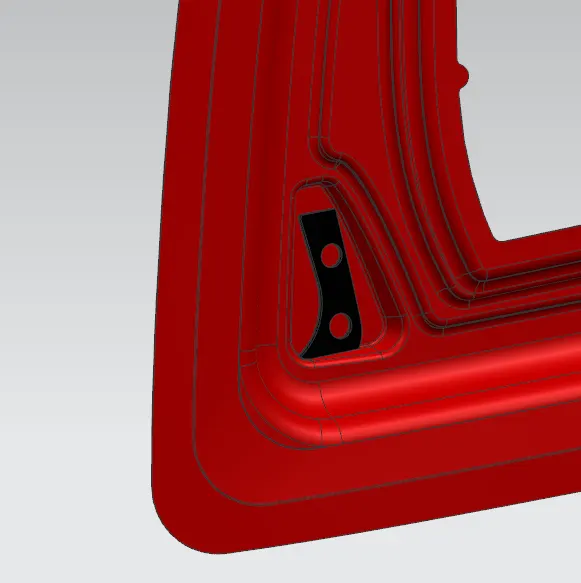
Due to loss of material we need to add additional material to strengthen. Those structures are called reinforcement. Here we use latch reinforcement and hinge reinforcement.
- Noise, Vibration and Harshness:
NVH value is very important for a pleasant driving feeling. If the vehicle has a very poor NVH then the customers will be dissatisfied. For getting good NHV we have different methods for the hood we give stiffener pad and mastic sealant.
1. Stiffener pad: It’s like a sponge that we keep between the inner and outer panel.
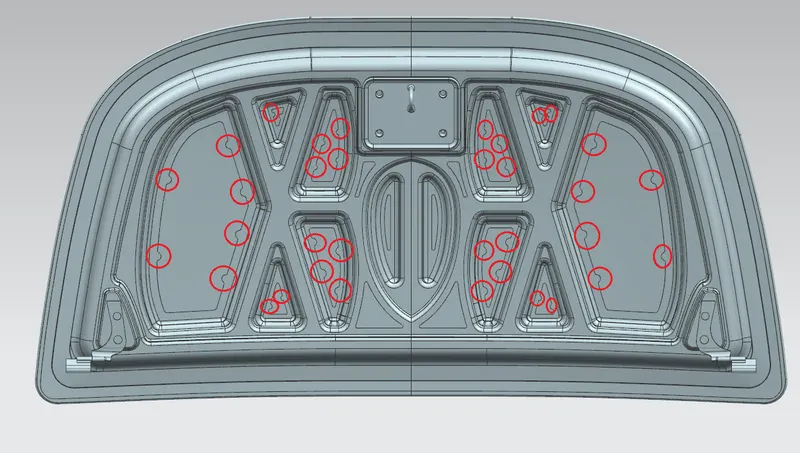
2. Mastic sealant: It’s a sealant that glues together the inner and outer panel for eliminating vibrations. Position the mastic as it covers most of the hood. It has a diameter of 80mm.
- Pedestrian Safety:
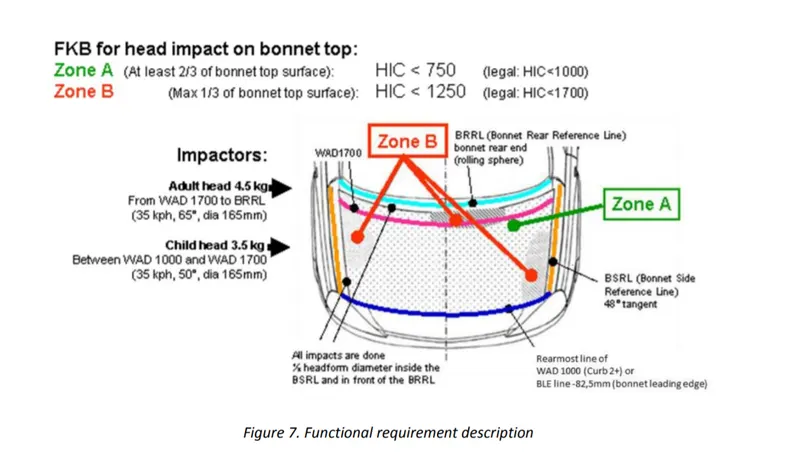
Head Injury Criteria (HIC): HIC shows the potential risk of pedestrians getting injured following a collision with vehicle. The value depends on the design of the bonnet, type of material chosen, type of impact and structure. The distance on which the head impacts on the vehicle from ground is called Wrap around distance (WAD). Distance from ground to the head impact zone over the outer surface of vehicle. During crash analysis, based on WAD, there are two test areas: child head impact and adult head impact.
PROCEDURE:
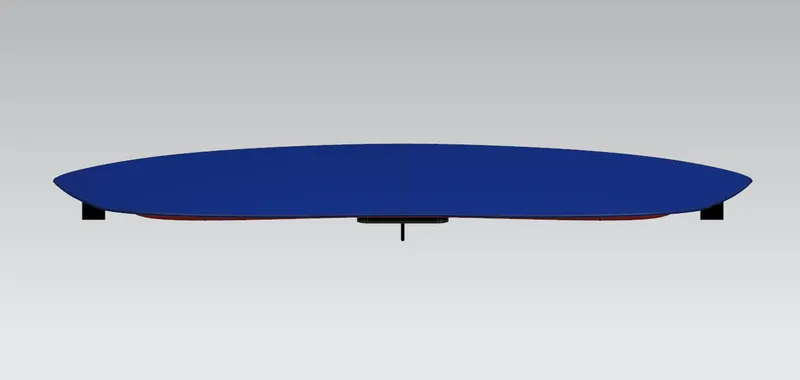
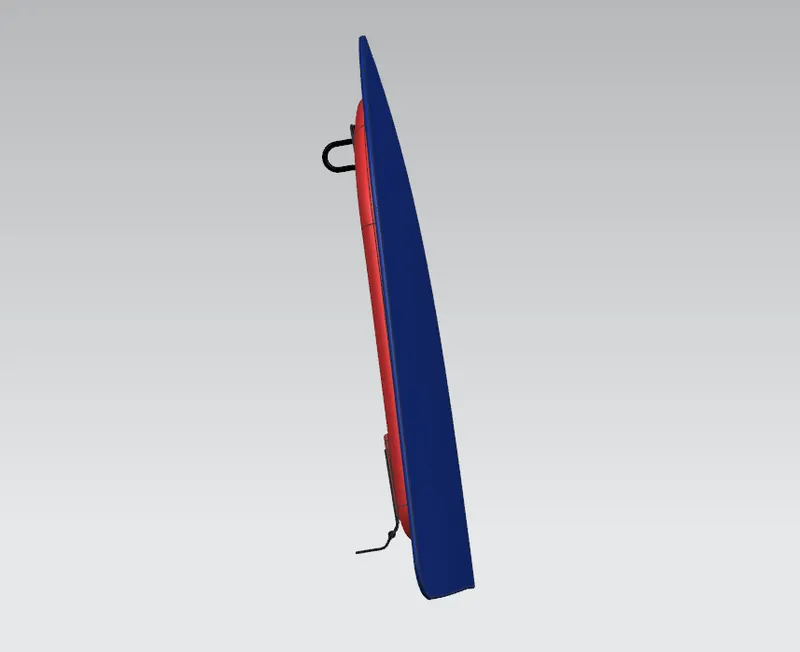
For this project I got the class A surface from the design team. I developed the class A surface into a complete model with the help of master section and basic engineering design principles.
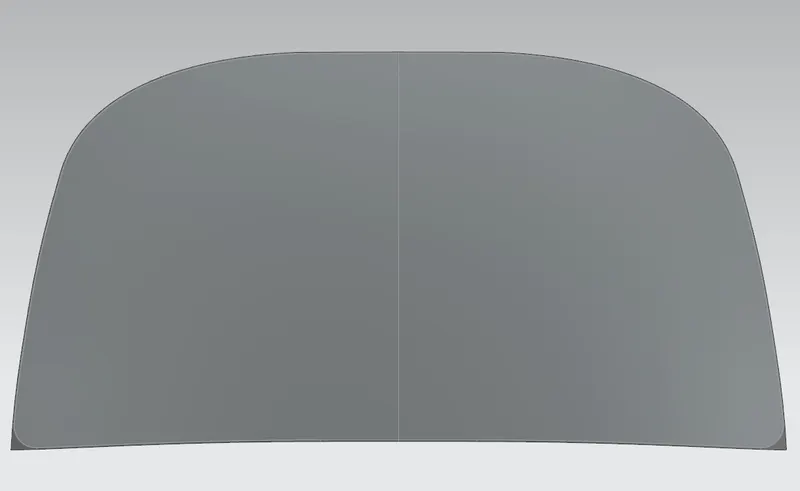
FIG: Class A surface
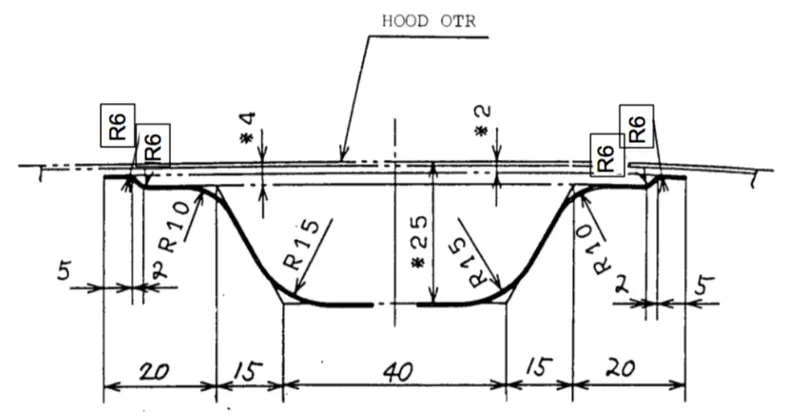
FIG: Master Section
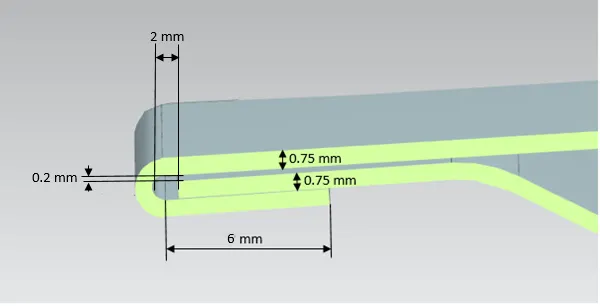
FIG: Hemming data
How to draw Latch trajectory?
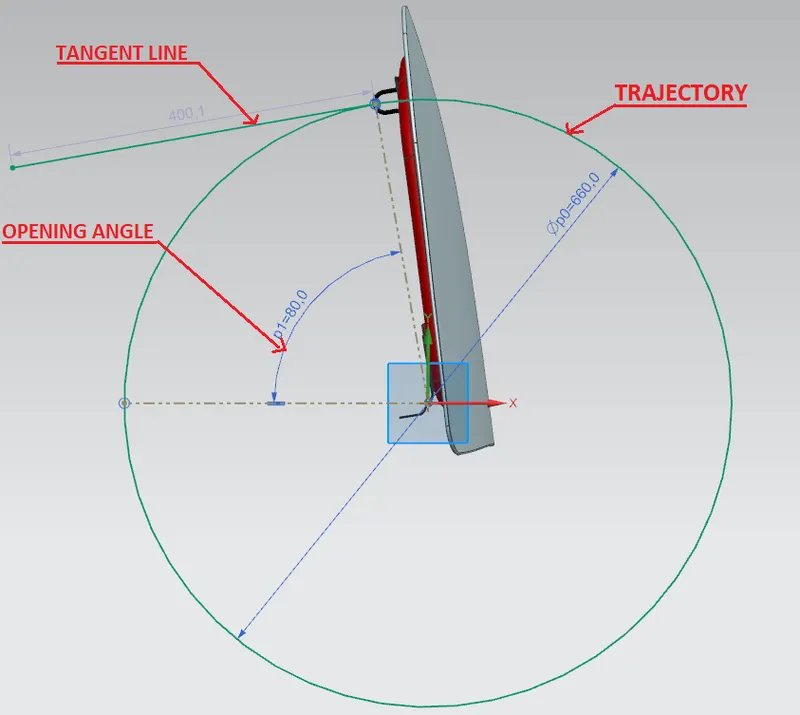
Latch trajectory is used to position the striker and find a suitable opening angle.
Step 1: For that first create the hinge axis.
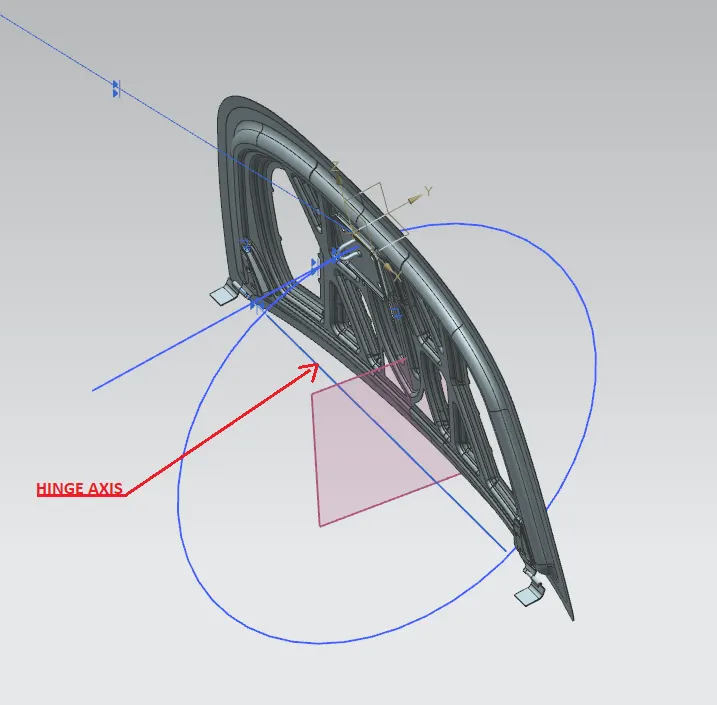
Step 2: Create a circle with the center as hinge axis. After that create a tangent line to the circle the point of tangency is connected to the center to control the opening angle.
Step 3: Create a line that is normal to the striker surface, which is at the center of the U clamp.
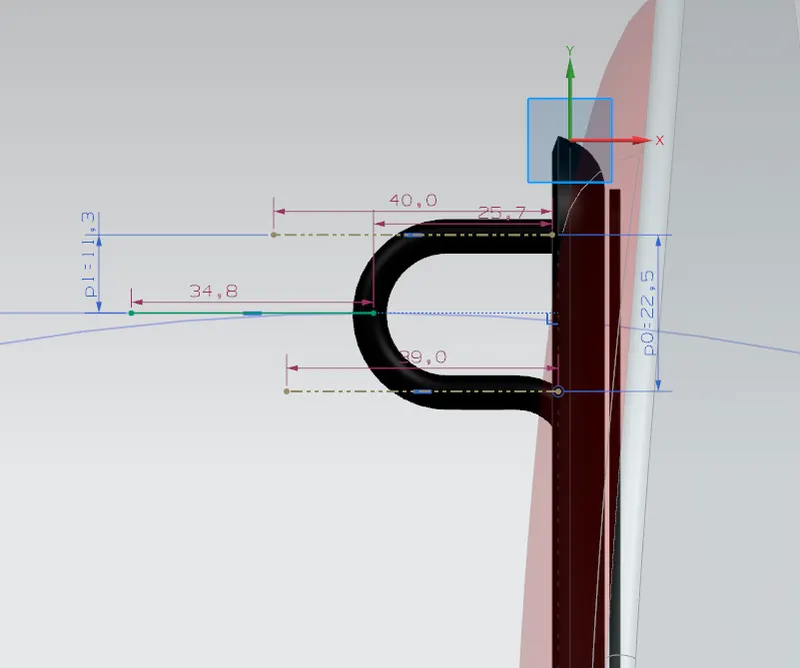
Step 4: Constrain the hinge axis with X-axis. The normal line with the tangent line. Now we will be able to change the position of the striker by changing the opening angle.
What is Emboss?
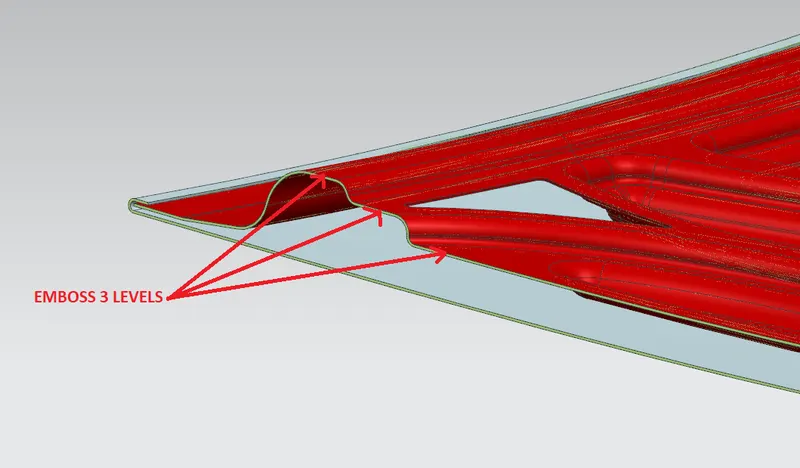
Sheet metal embossing is a stamping process for producing raised or sunken designs or relief in sheet metal. This process can be made using matched male and female roller dies, or bypassing a sheet or a strip of metal between rolls of the desired pattern.
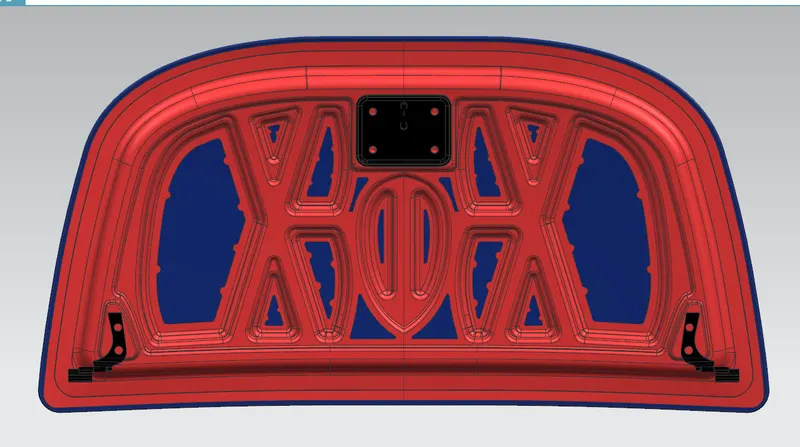
For Inner Panel I’ve created 3 levels of emboss as shown in the figure.
Manufacturing Process:
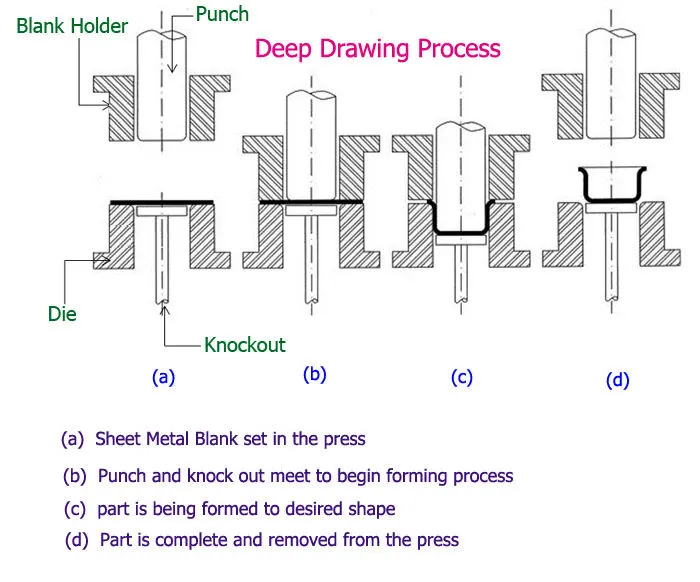
Deep drawing:
This deep-drawn process is extremely popular amongst manufacturing companies for its high precision capabilities at large volumes. It involves the use of blanks that are manufactured into your specific toolset whilst offering maximum efficiency and cost-effectiveness as a result of the innovative process.
Deep drawing is especially beneficial when producing high volumes, since unit cost decreases considerably as unit count increases. When considering the functionality of the end product, deep drawing poses still more advantages. Specifically, the technique is ideal for products that require significant strength and minimal weight.
Hemming:
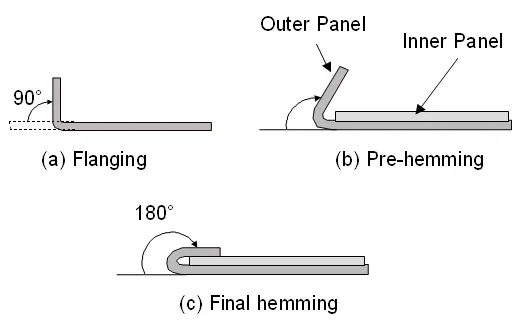
Hemming is a sheet metal forming process in which sheets are joined by bending it usually to 180°. Automotive body panels and automotive parts such as deck-lids, trunk-lids, doors, hoods and tailgates are formed by hemming process.
Hems are commonly used to re-enforce, hide imperfections and provide a generally safer edge to handle. When a design calls for a safe, even edge the added cost of material and processing of a hem is often preferable to other edge treating processes.
RESULT:
CONCLUSION:
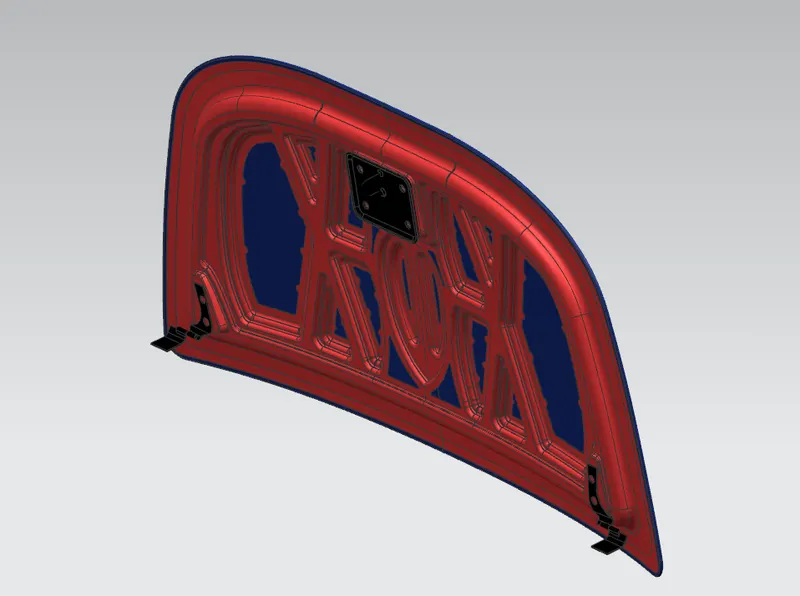
The inner panel and outer panel was designed from the Class A surface given according to the design and safety standards. Learned about latch and striker positions. Necessary reinforcements were developed for the inner panel.