Creation of Multiple viewports, Scaling the drawing and setting in Template in AutoCad
1. AIM :
To create the layout of the plan and section A of the challenge 7, using the template Tutorial-mArch.dwt. Use the Mv command to create the viewport. Use ATTTEDIT to edit the information in the title block. Use A11 for the layout aand take a plot.
INTRODUCTION :
There are two types of viewports in AutoCAD Model space viewport and layout space viewport. Viewports are areas that display different views of your drawing or model.
PROCEDURE :
- Open plan and section drawings from challenge 7
- Select layout at the bottom
- Right click on template and open "march template file"
- Rename the layout to "PLAN and SECTION"
- Right click on the layout and click on page setup manager
- Click on modify and change the name, papersize, plotscale etc as shown below
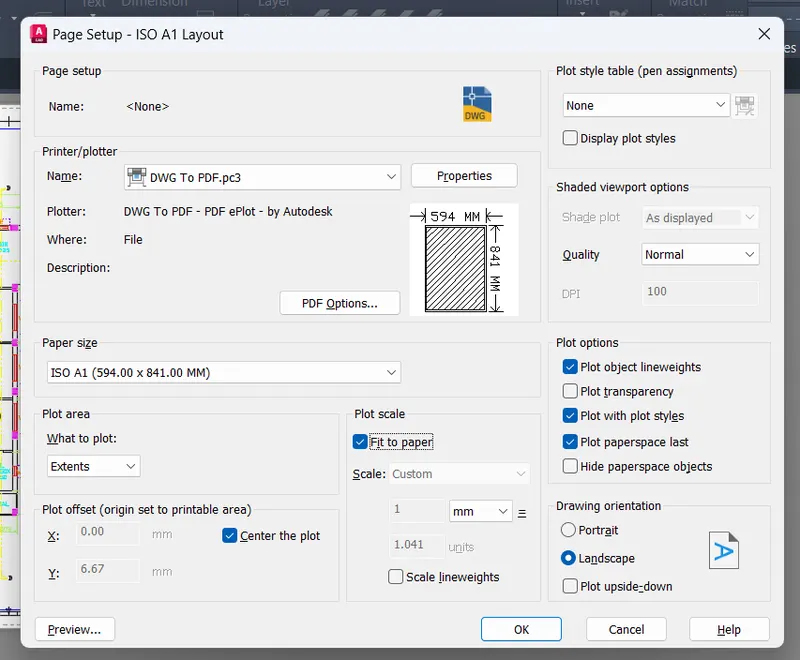
- Now draw two rectangles of size 400 x 445 and 375 x 445.
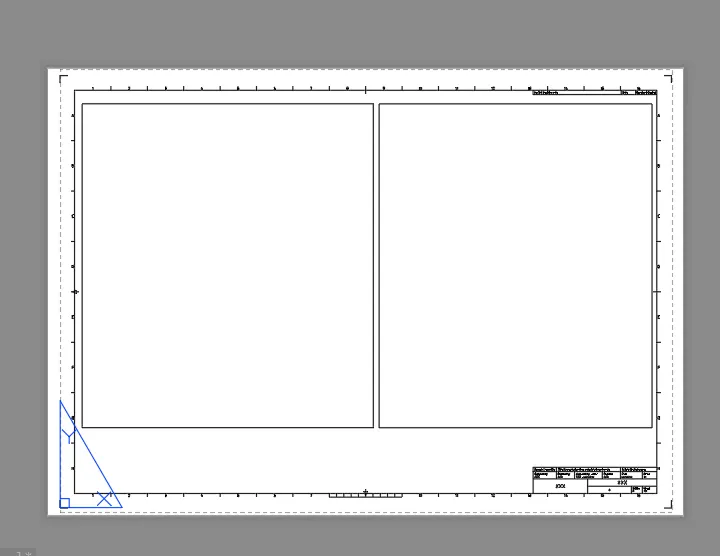
- Enter "MV" (MVIEW) in the command
- Specify the corner points of rectangle
- Repeat it for another rectangle
- Enter "MS" (MSPACE) in the command
- Select and adjust the view and set scale 1:50 in each view
- Enter "PS" in command and enter
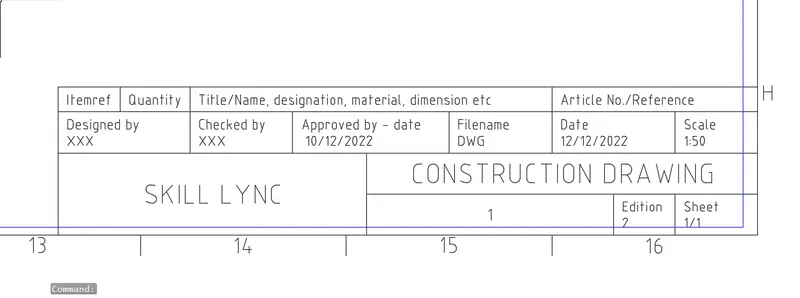
- Enter command "ATTEDIT" and Select the block to be edited
- Using "dimlinear" mark the dimensions of rectangle
- Now export the current layout to "PDF" format and save it.
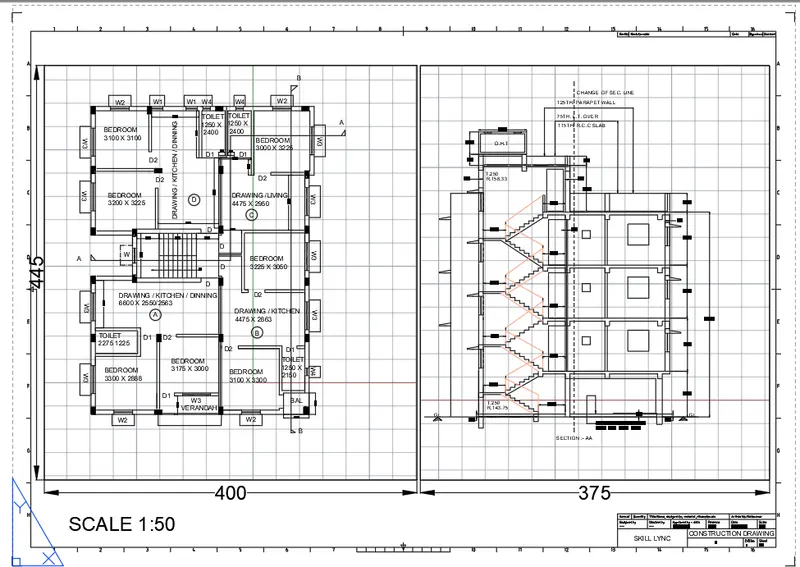
Result :
The layout of the plan and section A of the project in challenge 7 is as below
2. AIM :
To create the layout of the kitchen drawn in challenge 9 and use A4 size page for the layout and take a plot.
INTRODUCTION :
- Layout viewports are objects tt you can scale to display the view of your drawing on a layout tab for ublishing and production.
- Model viewports split the drawng space into one or more rectangular areas called model space viewports.
PROCEDURE :
- To create the viewport, initially take the 9th week challenge that is already created.
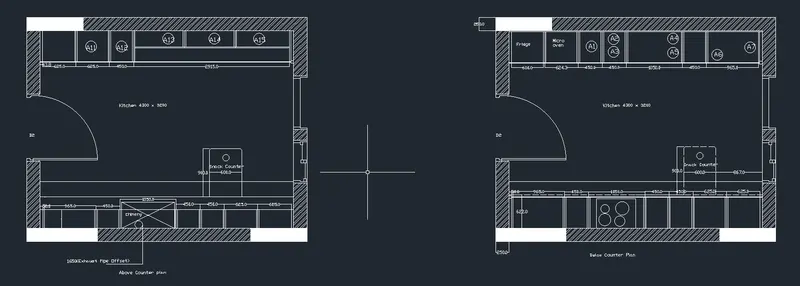
- Now, in the command prompt type V to create the model view of the plan.
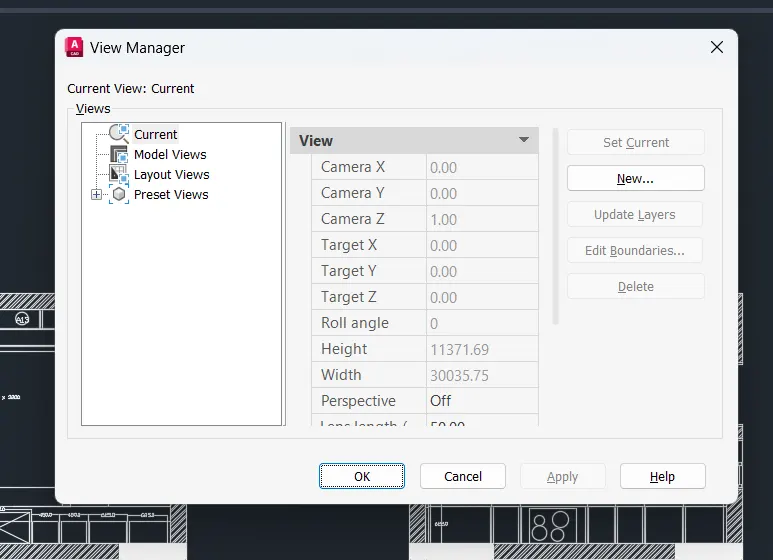
- Then provide the view name and choose the boundary option.
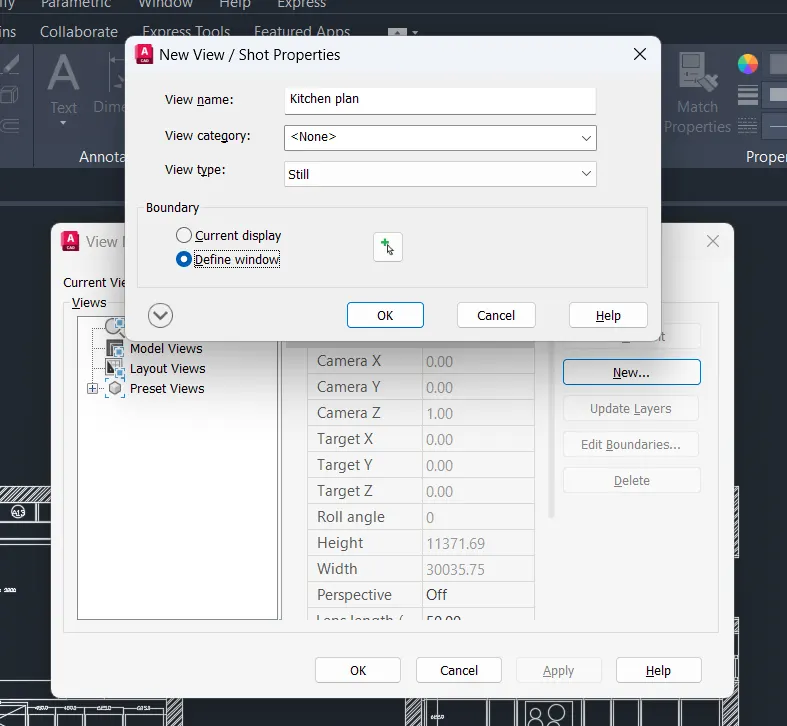
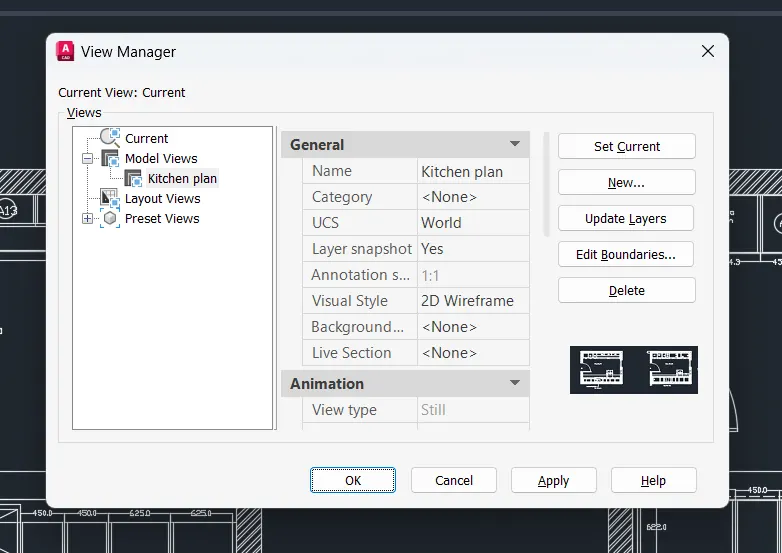
- Now, click ok then apply and again ok.
- Hence, the model view is created.
- Now, go to layout option in the window.
- Now, type page setup in the command prompt and page setup manager dialogue box opens.
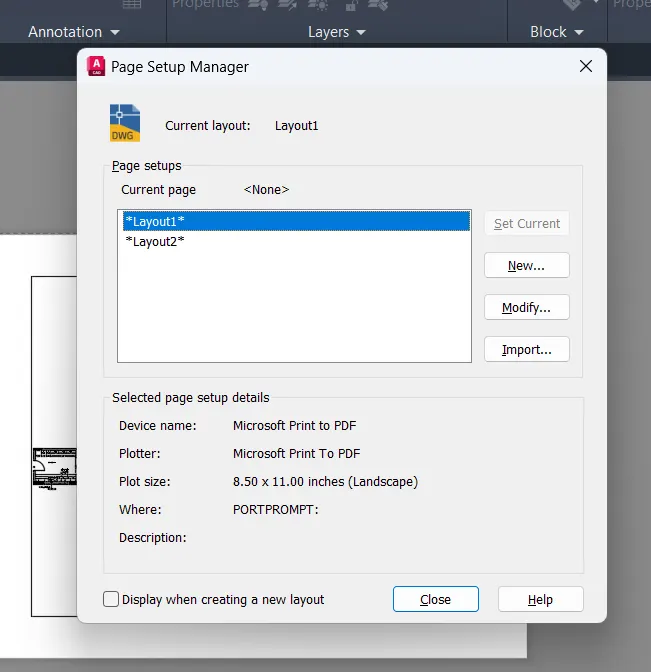
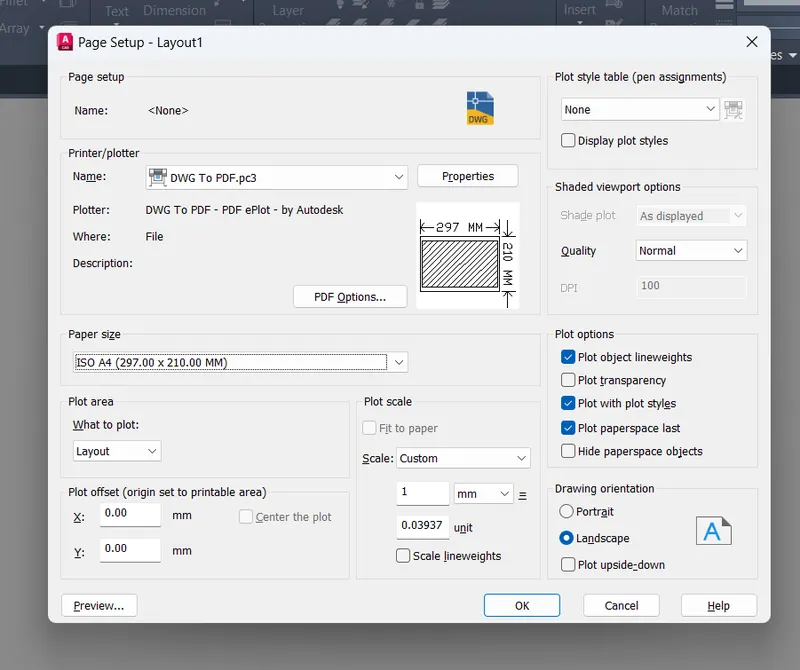
- Then modify the settings- provide the size of the paper(A4), then provide the plot area as layout and then cick ok.
- Now, type MV to create multiple viewports and create viewports as necessary.
- Then provide the views as given in the question.
- Then type ms in command prompt to zoom in and out the views in the viewport and PS command to return back to paper space where zooming in and out is not possible.
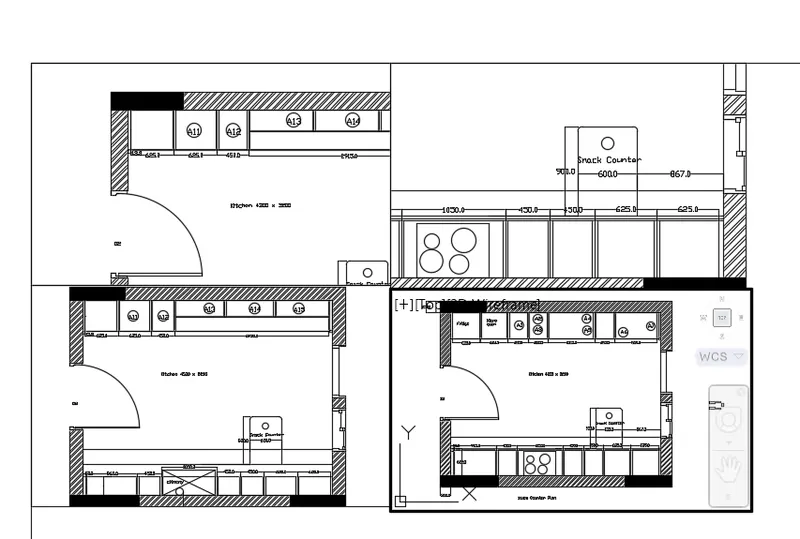
Result :
The layout of the kitchen drawn in challenge 9 is as given below
3. AIM :
To create the layout of the section created in challenge 9 and to take the plot.
INTRODUCTION :
- There are different model space viewports configurations like single, two vertical, two:horizontal etc.
- These configurations can be saved and restored by name with the VPORTS command or pulling down the viewport configuration from the ribbon.
- When using multiple viewports, the one that is highlighted with a blue rectangle is called the current viewport, the remaining viewports will be displayed grey as for not used.
PROCEDURE :
- To create the viewport, initially take the 9th week challenge that is already created and in that take the industrial section.
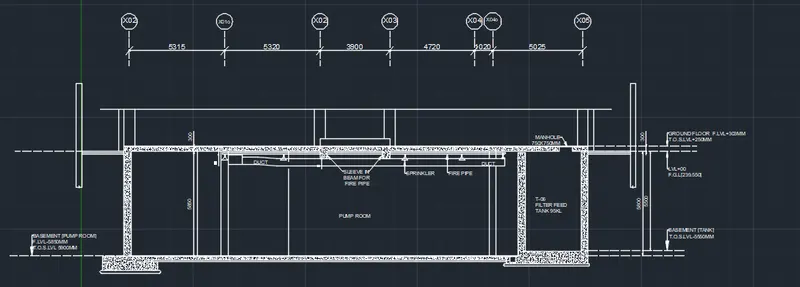
- Now, in the command prompt type V to create the model view of the section.
- Then provide the view name and choose the boundary option.
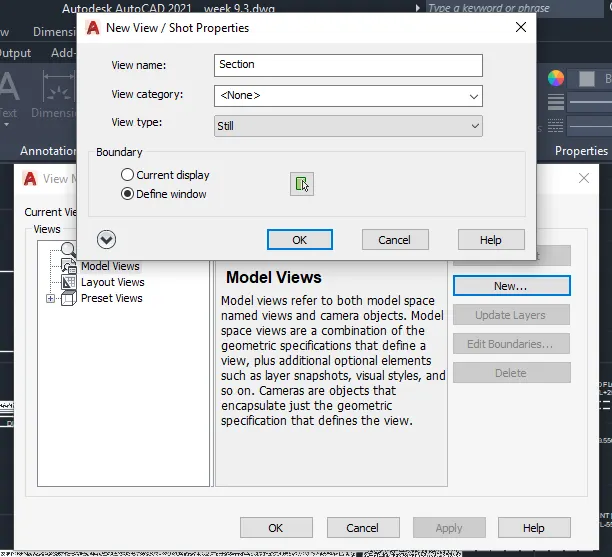
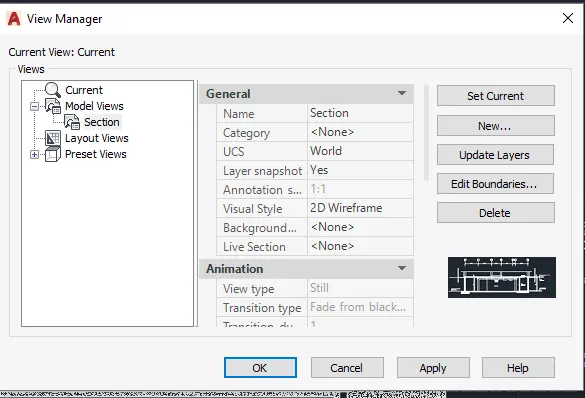
- Now, click ok then apply and again ok.
- Hence, the model view is created.
- Now, go to layout option and select new and type the name of the layout as Section
- Now, type page setup in the command prompt and page setup manager dialogue box opens.
- Now, type MV to create multiple viewports and create viewports as necessary.
- Then provide the views as given in the question.
- Then type ms in command prompt to zoom in and out the views in the viewport and PS command to return back to paper space where zooming in and out is not possible.
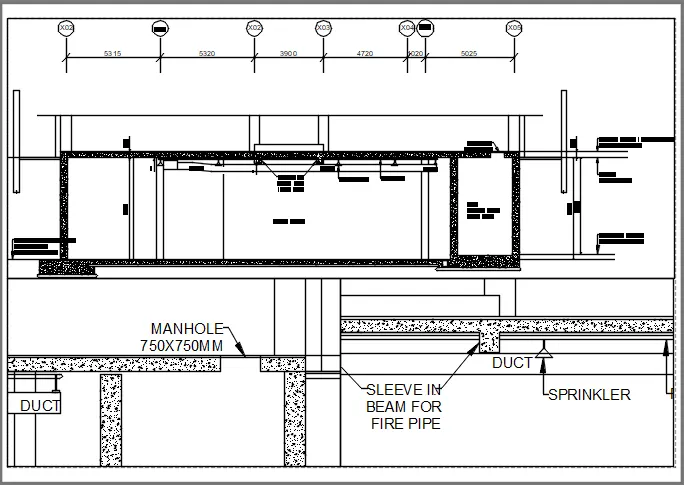
Result :
The layout of the section created in challenge 9 industrial section is given below