Experimental Study of A Non-premixed Combustion Model Using CFD Software ANSYS
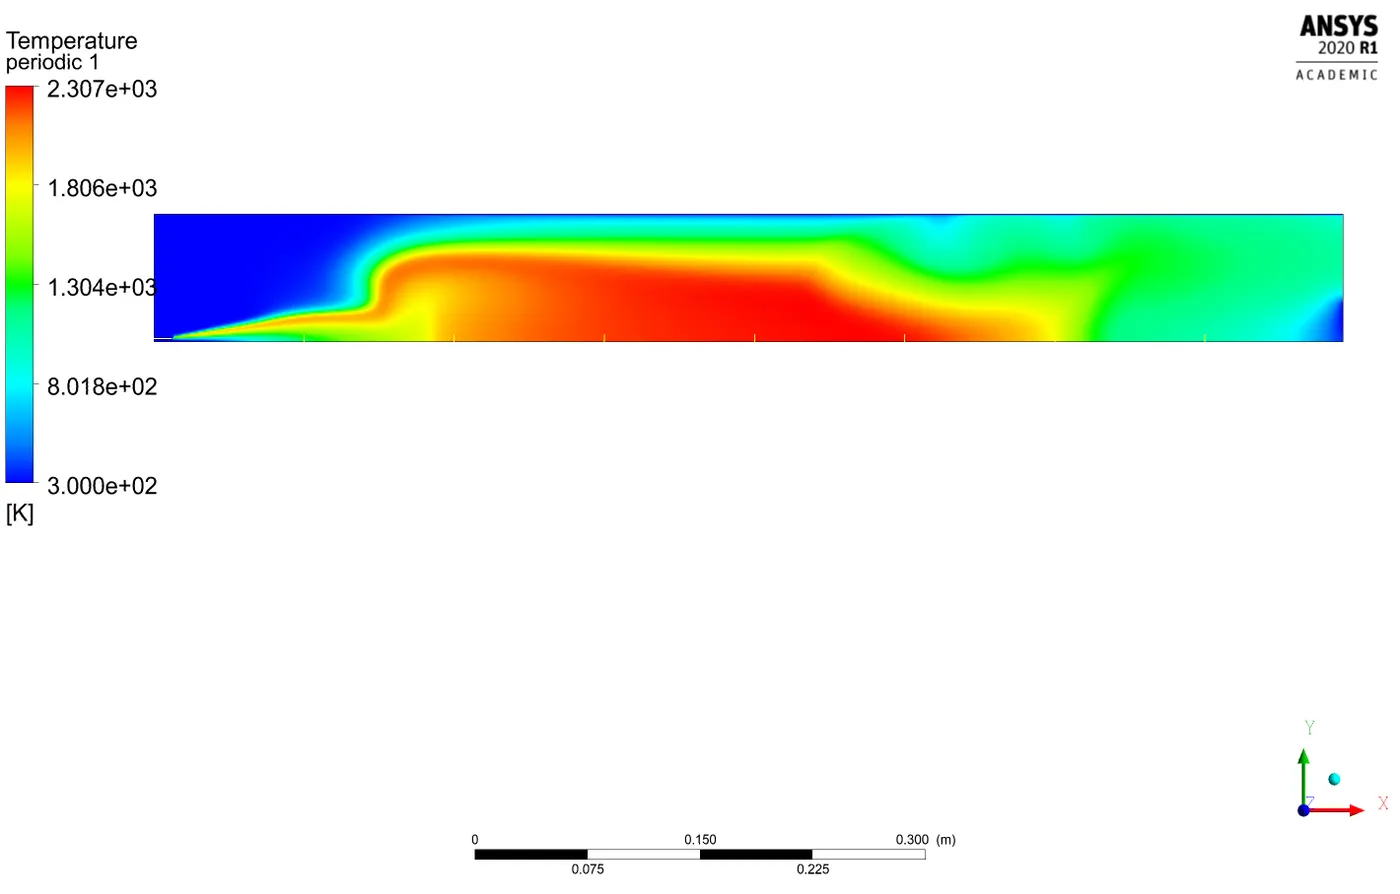
Abstract:- The objective of the experiment is to perform a non-premixed combustion simulation on a hypothetical combustor model. A combustion reaction is when a substance reacts with oxygen and releases a huge amount of energy in the form of light and heat. The first required reactant in combustion is fuel. Many of these fuels, called combustibles, are organic. Organic materials contain carbon, hydrogen, and oxygen. Our choice of fuel for the experiment is Methane (CH4). The second required reactant in combustion is an oxidant. Oxygen (O₂) is the universal oxidant and required for all combustion. Combustion will not occur without both of these reactants. The combustion of organic materials creates a number of products. The first product of organic combustion is carbon dioxide. The second product of organic combustion is water, typically released as water vapor. The third product of organic combustion is energy, released as heat or heat and light. Because there are other molecules present in most fuels, the combustion process is not entirely clear. This means it produces small amounts of other materials such as `N_2, O_2, No` & soot. Through this experimental study, we will be plotting the variation of mass fraction of all the product species at different locations of the combustor along with the temperature contour. The experiment has been divided into two parts:`
Part I
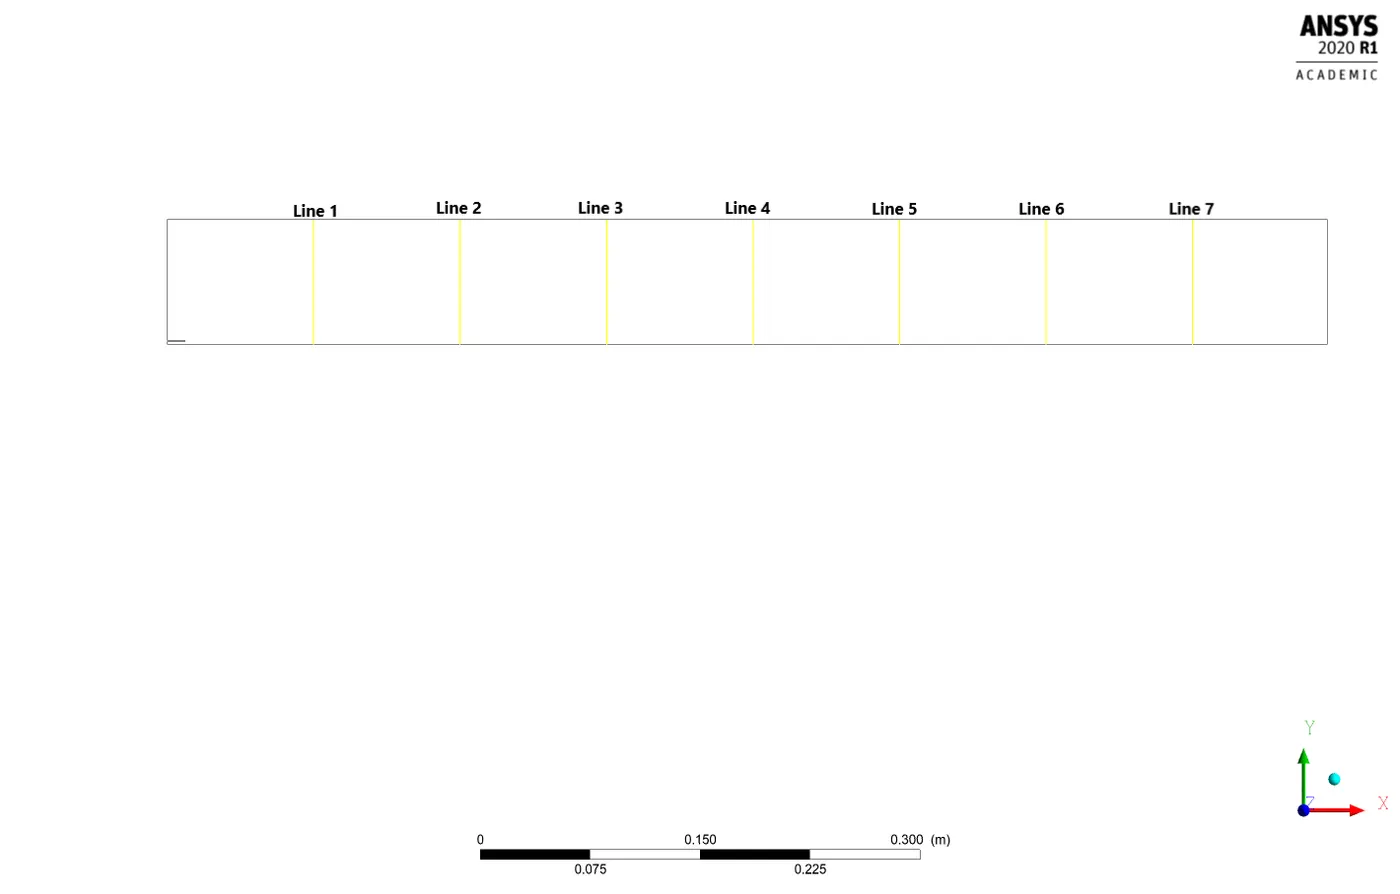
Perform a combustion simulation on the 3D combustor model and plot the variation of the mass fraction of the different species’ in the simulation using line probes at different locations of the combustor & also need to plot for CO2, H2O, CH4, N2, O2, NOx emissions & Soot formation.
Part II
From part 1 we observed that the harmful products Nox and soot are getting formed at the outlet of the combustor. Such formation has harmful effects on the environment and humans. The stringent government norms also demand the least formation of Nox and soot and to satisfy those requirements, you need to check the effect of adding the water in the fuel.
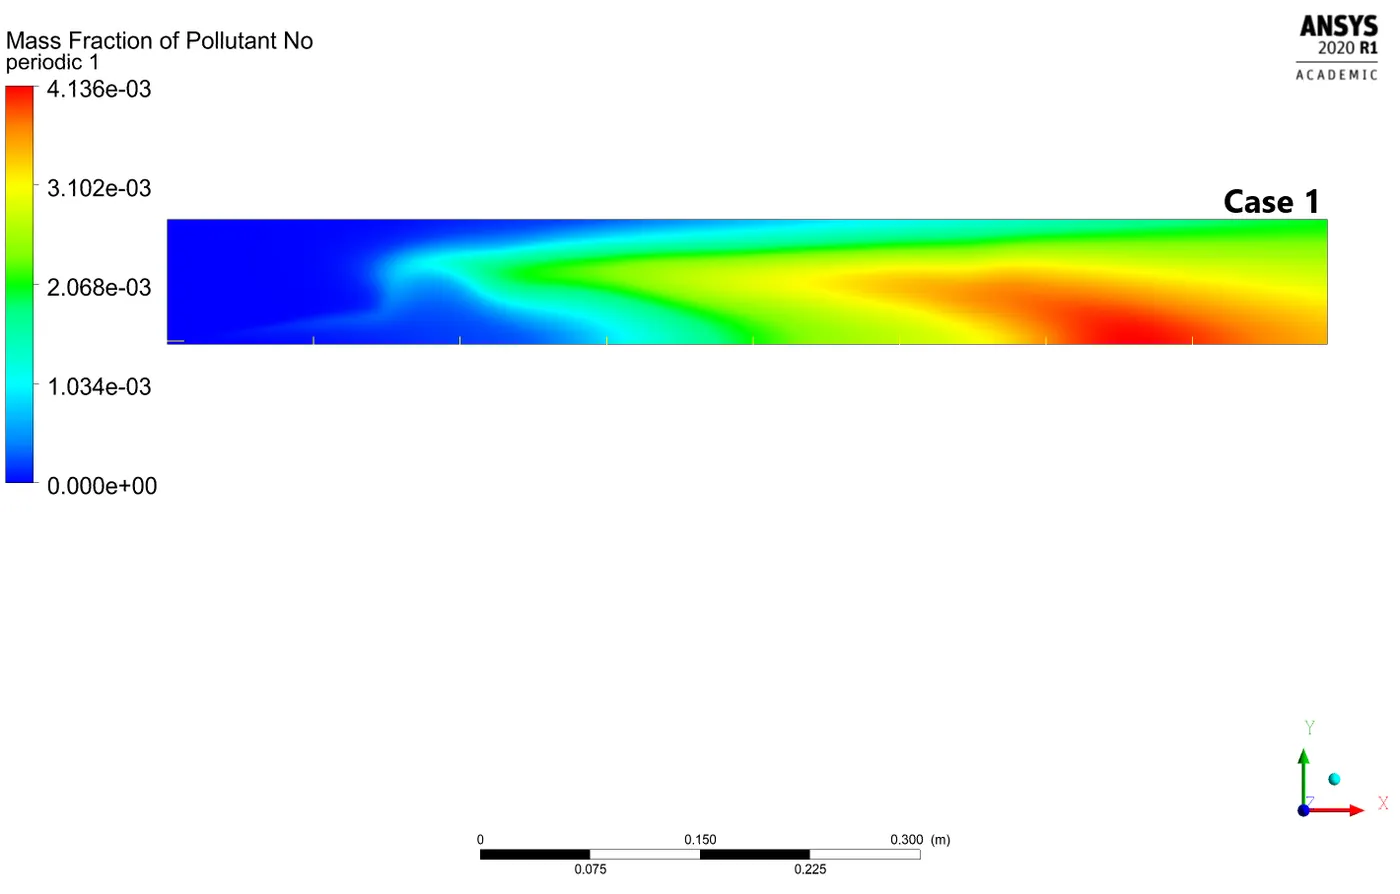
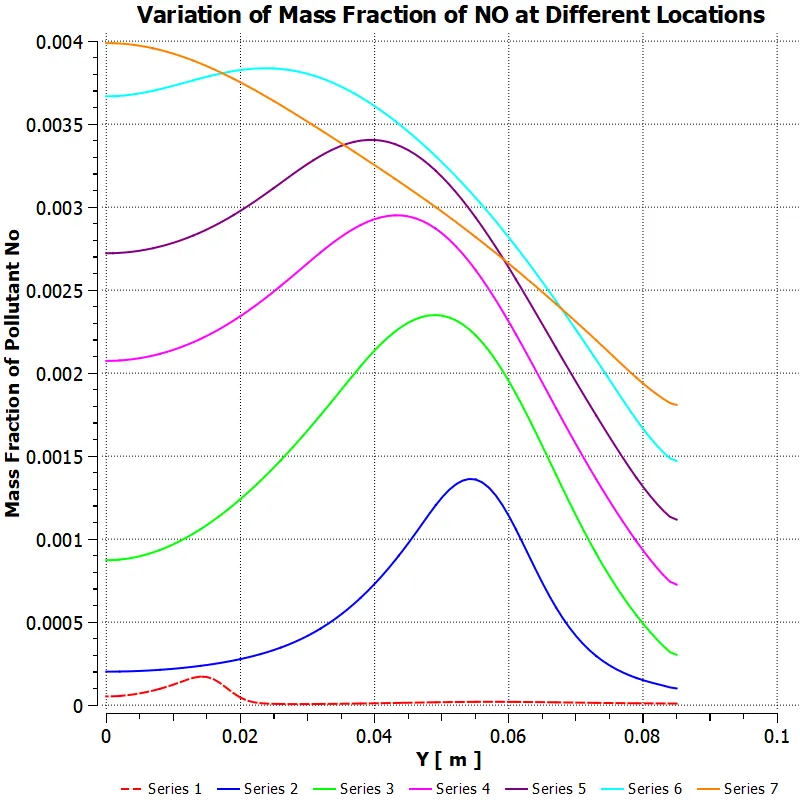
In this part, we add the water content in the fuel from 5% to 30% by mole and observe the effect of it on the results.
Geometry_______________________________________________________________________
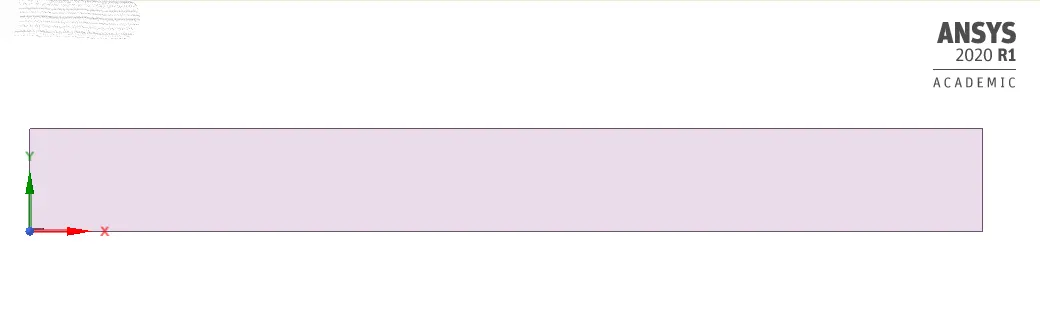
We start by importing the 3D pre-modeled geometry of the combustor to Spaceclaim, where we will be editing our geometry according to our simulation requirements. Our geometry is made up of 3 solid cylinders, going ahead with this model would require huge computational power & the overall mesh count will also exceed the student license limitations. Hence, we extract a 2D model out of the geometry to accommodate our needs. We used the "split Body" feature from space claim to extract the 2D model. The steps involved are shown below.
Split Cylinder 1 (largest) into half
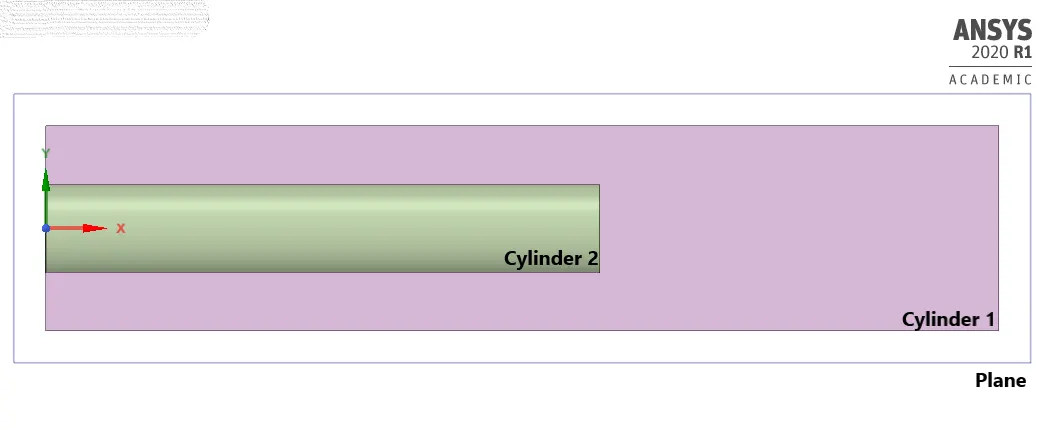
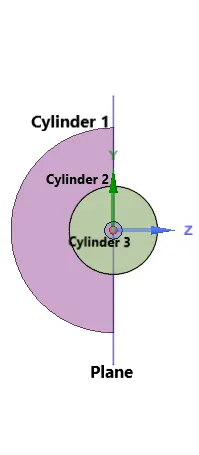
Split Cylinder 2 into half
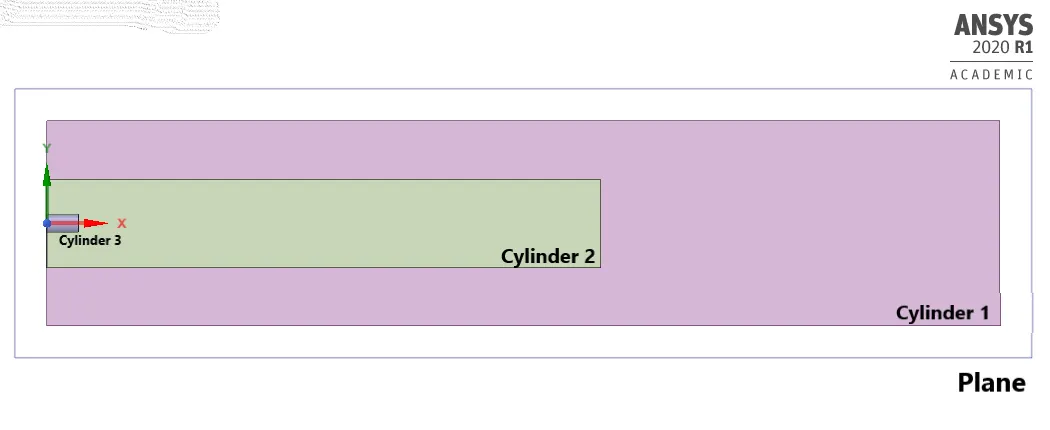
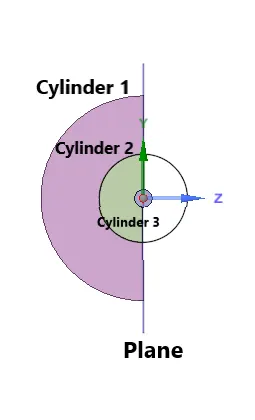
Split Cylinder 3 (smallest) into half
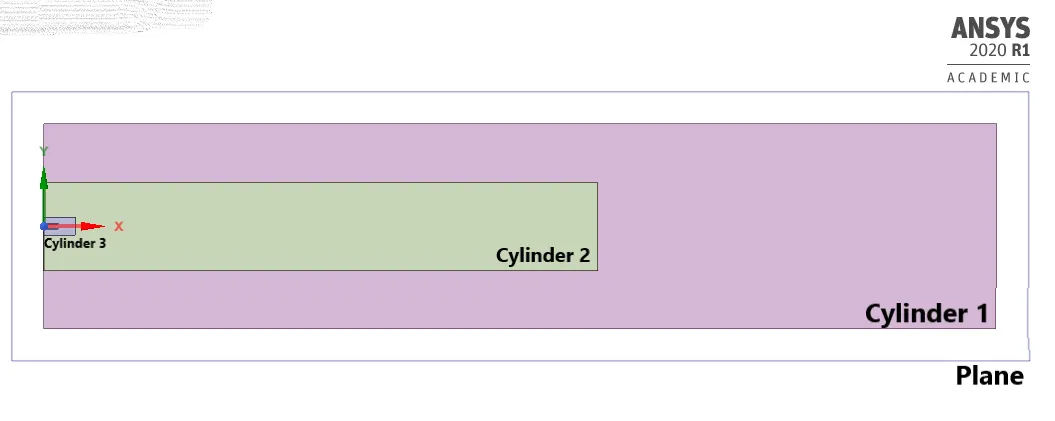
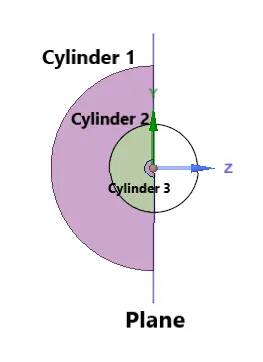
Split Geometry into half by creating a 2nd plane along Z-axis
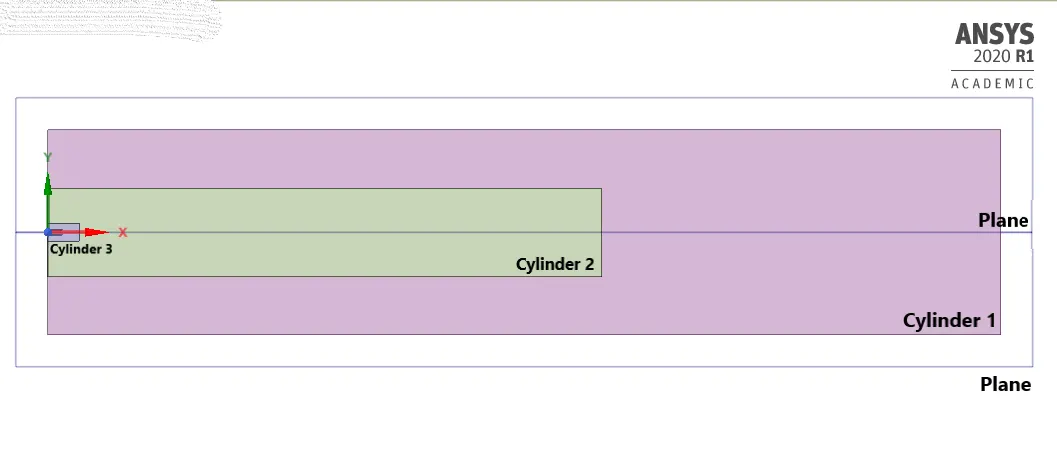
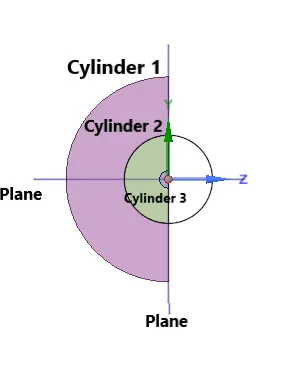
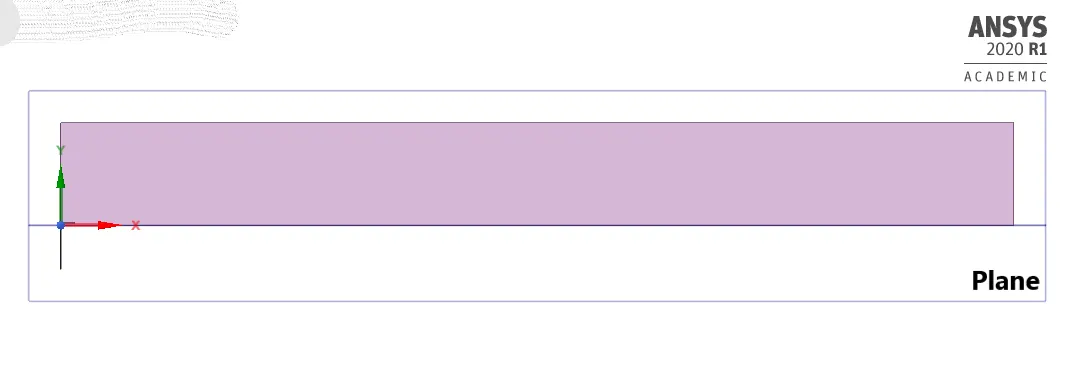
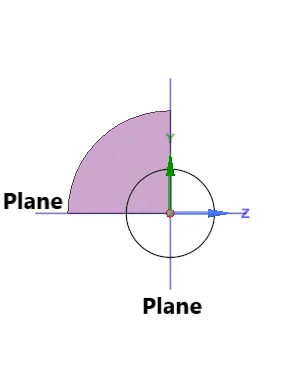
Final 2D Geometry Extracted
Meshing Module_______________________________________________________________
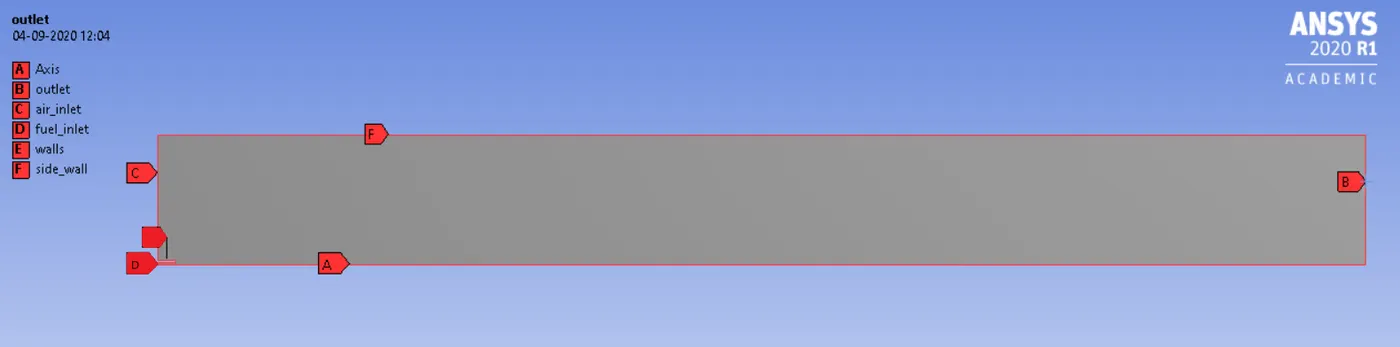
The process of discretizing our domain of interest i.e. the geometry into smaller pieces is called mesh generation. Ansys Fluent uses a technique called the "bounding box" method to generate a body-fitted mesh. This is done by creating the smallest size hypothetical box possible that can be used to fit the entire geometry into it. In the meshing module interface, we start by assigning names to our geometry. For our geometry, we have 2 inlets (air & fuel), 1 outlet, walls & an axis. The next part of the meshing module involves meshing strategies, we used a fine mesh of an element size of 1mm equally distributed throughout the domain. In addition, inside "sizing" we turned capture proximity = yes with 5 layers of embedding near the gap as shown in the below images.


Setting Up The Flow Physics_______________________________________________________
In Ansys Fluent after creating the mesh & assigning the boundaries, the next stage of the process is to set up the simulation parameters. This step involves specifying certain properties to capture the physics of the problem perfectly, such as materials used, simulation time parameters, solver parameters, initial & boundary conditions to solve the Navier Stokes equation which are PDEs, defining body forces, type of fluid flow & species involved.
We start by setting up the Domain, here we will be using a pressure-based steady-state solver with absolute velocity formation also enable 2D space as Axisymmetric. The next parameter that we need to set up is the Flow Physics, here we will be navigating to the viscous feature & use the standard K-epsilon (k-ε) turbulence model with standard wall function in which the magnitudes of two turbulence quantities, the turbulence kinetic energy ‘k’ and its dissipation rate ‘ϵ’, is calculated from transport equations solved simultaneously with those governing equations for capturing better flow physics. Along with the standard PDEs & turbulence equations we will also be solving the Energy equation to capture the temperature variation field.
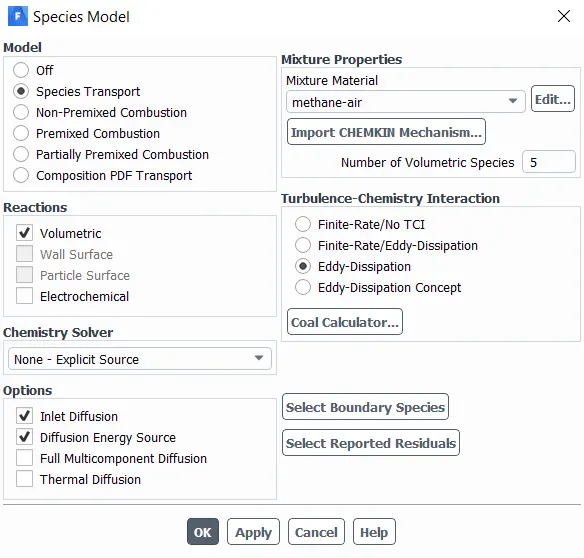
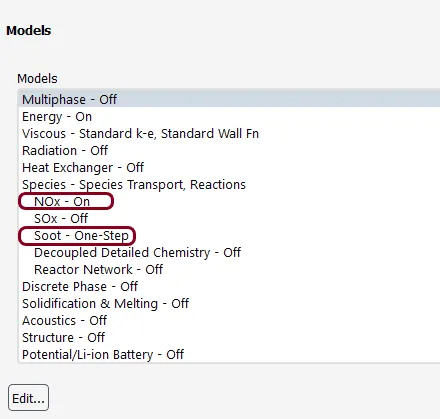
Next, we use the Species Model feature, where we will be setting up the parameters required for the calculation of species transport & combustion. We used a species transport model, this model enables us to calculate multi-species transport. We also enable Eddy-dissipation for turbulence -chemistry reaction to take place. Since we are not using an ignition source the Eddy-dissipation along with the k-ε turbulence model predicts the combustion process. In addition, we also use a NOx & Soot model with CH4 as our fuel & O2 as an oxidant.
Finally, We then navigate to the Boundary zone, these are user-defined parameters where we assign the boundary condition. For the air-inlet, we assigned a velocity magnitude of 0.5 m/s & for the fuel-inlet we assigned a velocity magnitude of 80 m/s. Outlet, wall & axis boundary conditions are kept as default values.
Results & Observations__________________________________________________________
[Part 1]
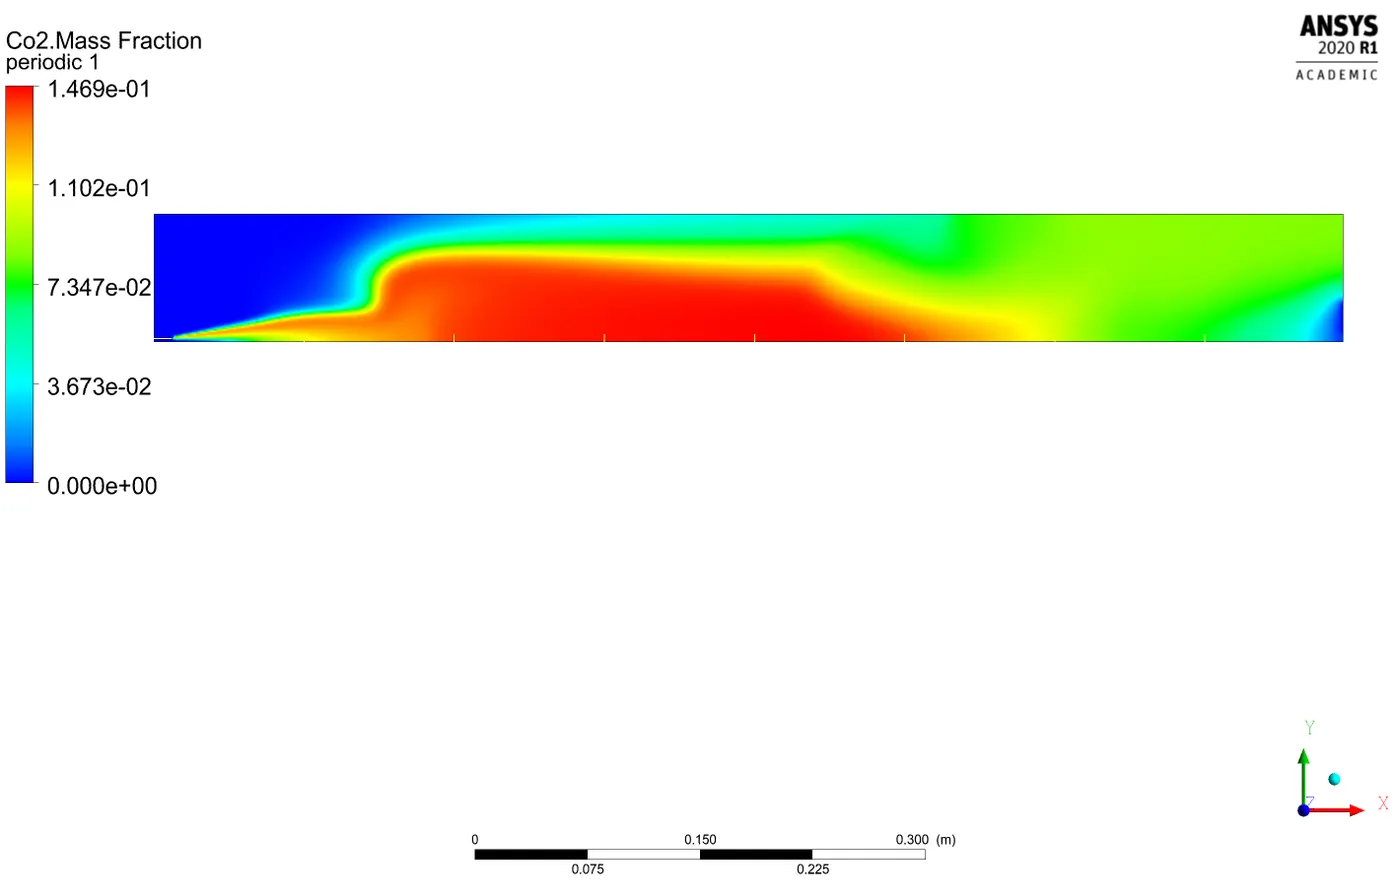
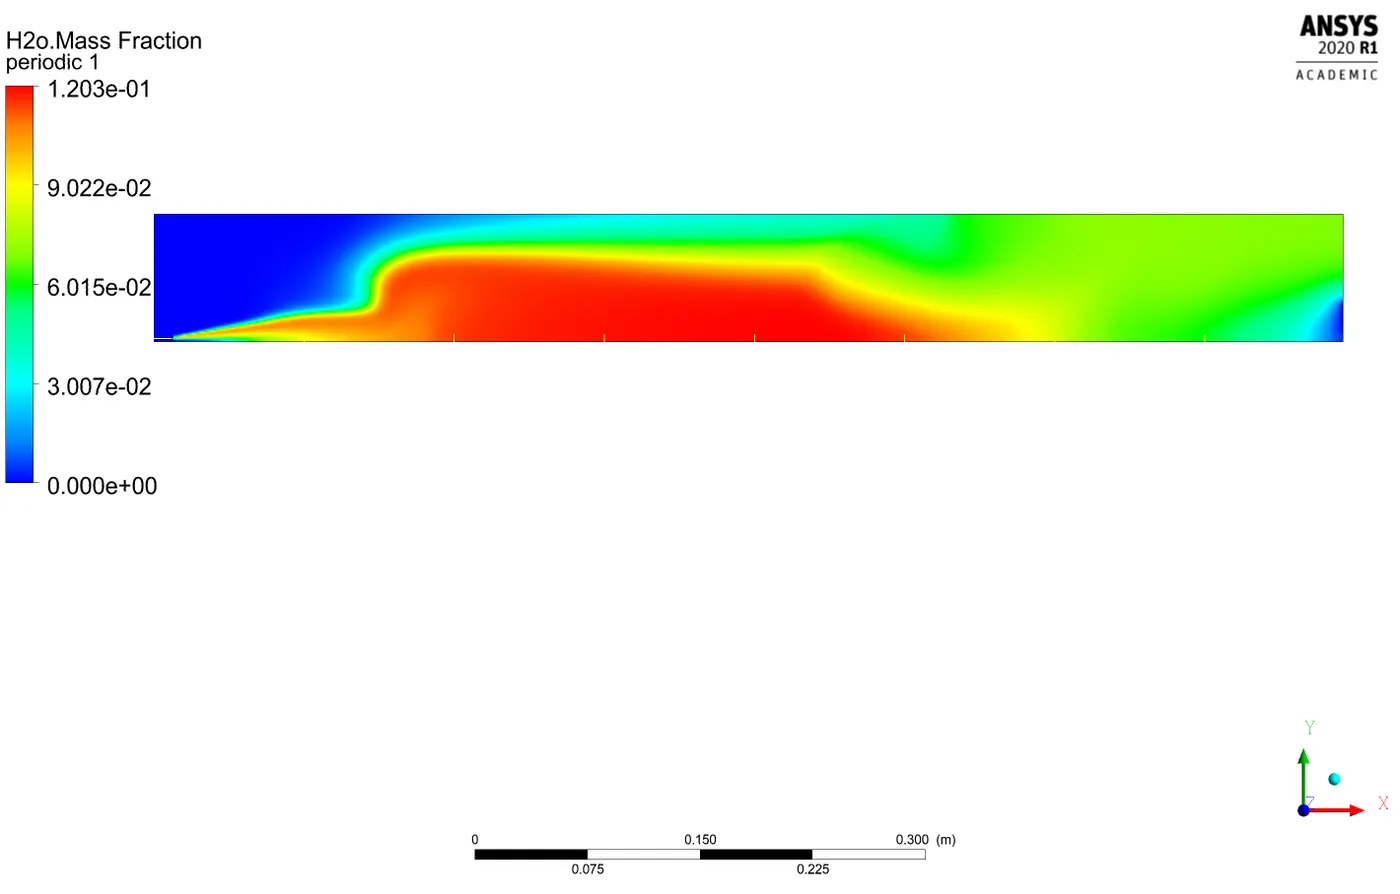
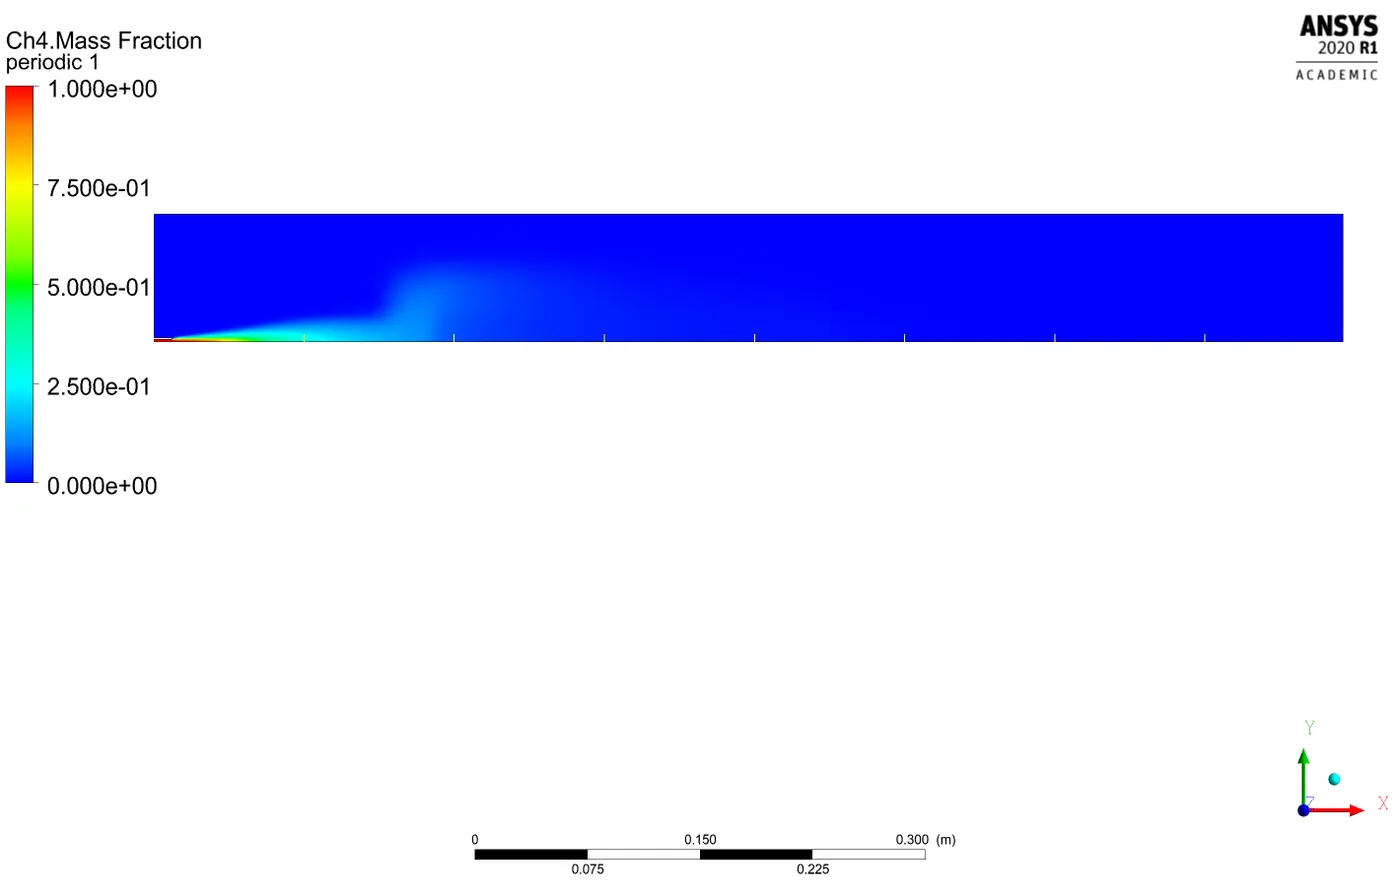
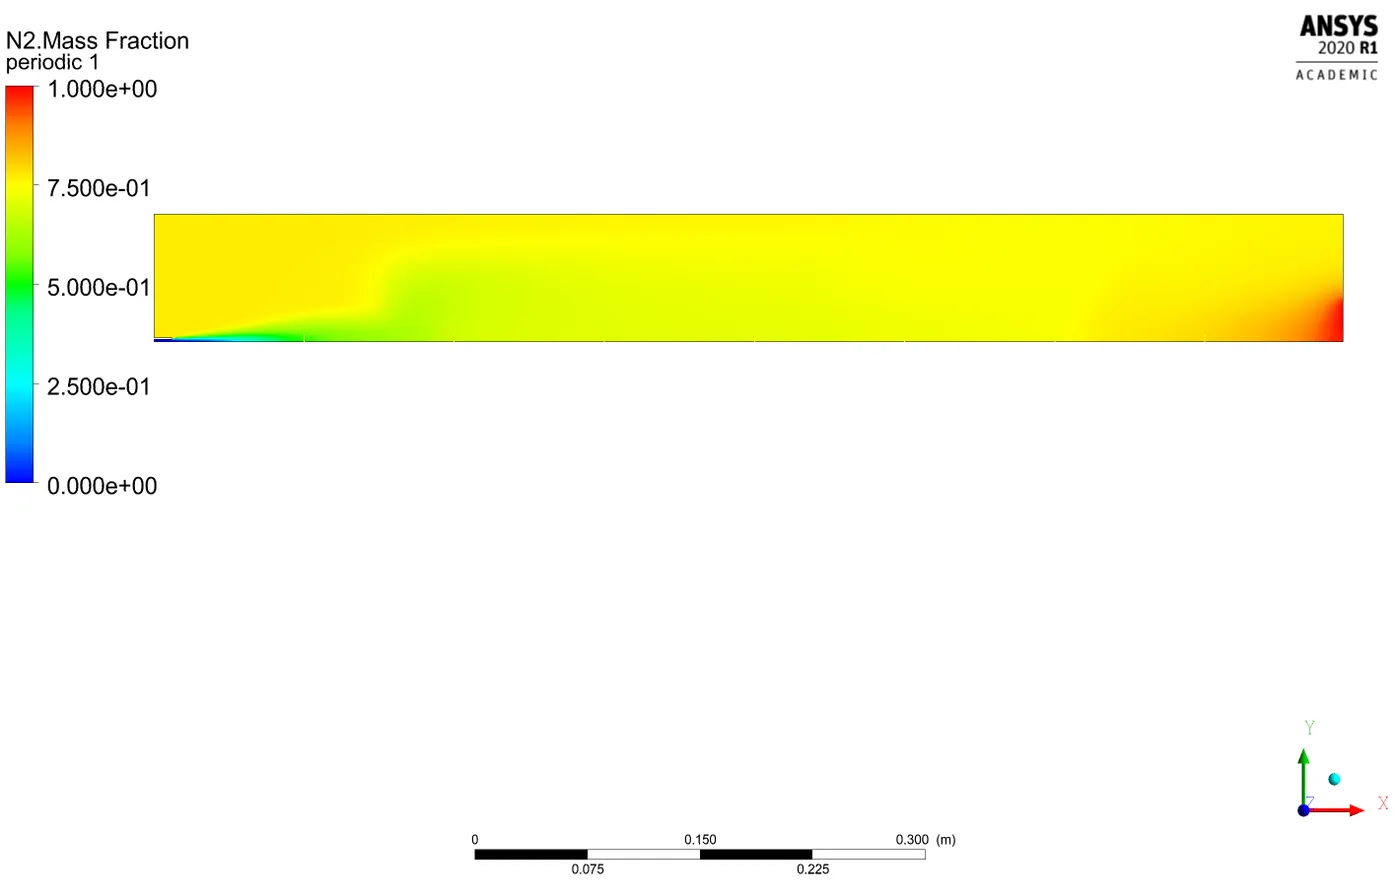
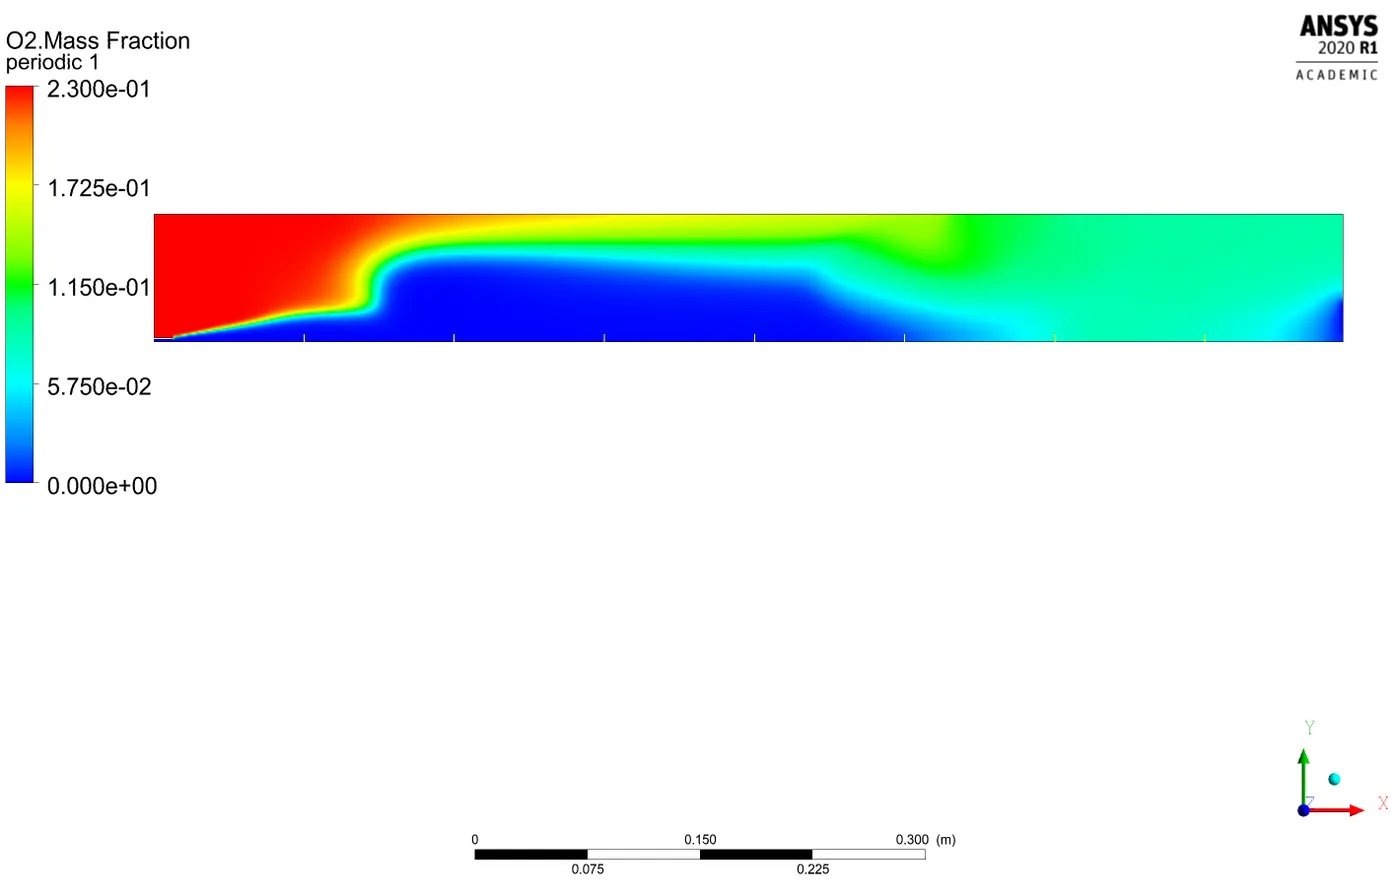
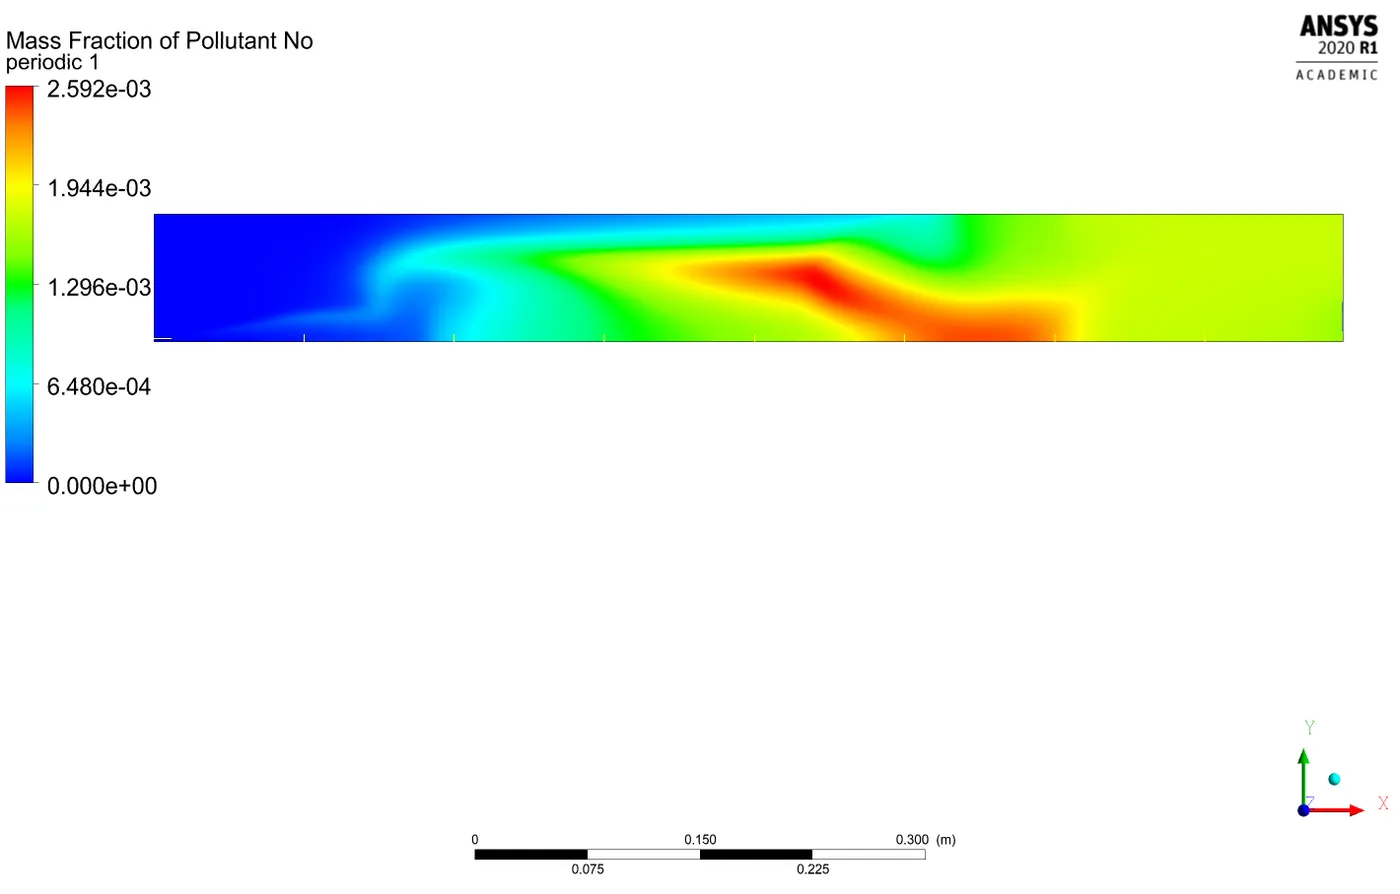
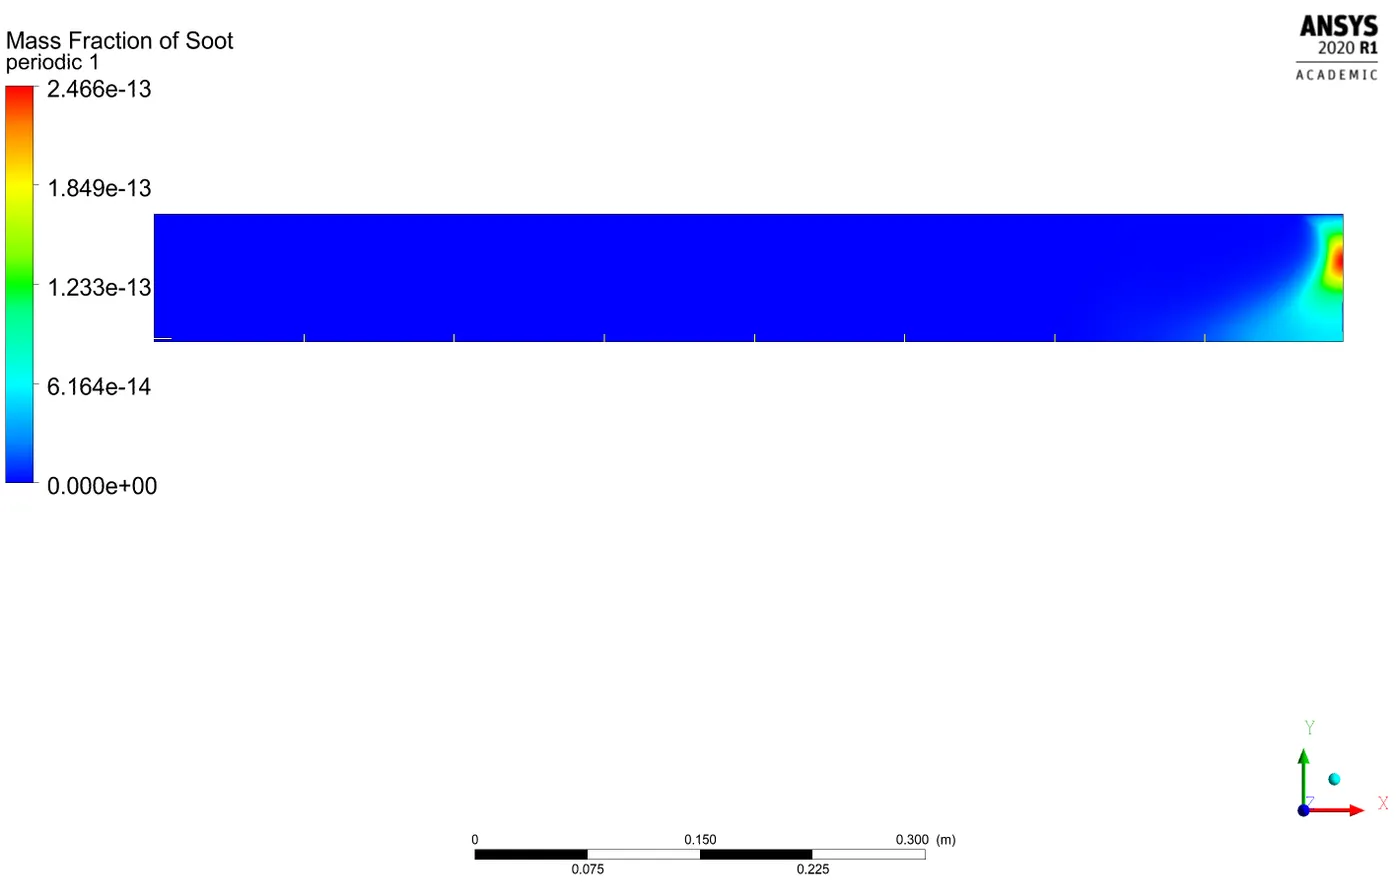
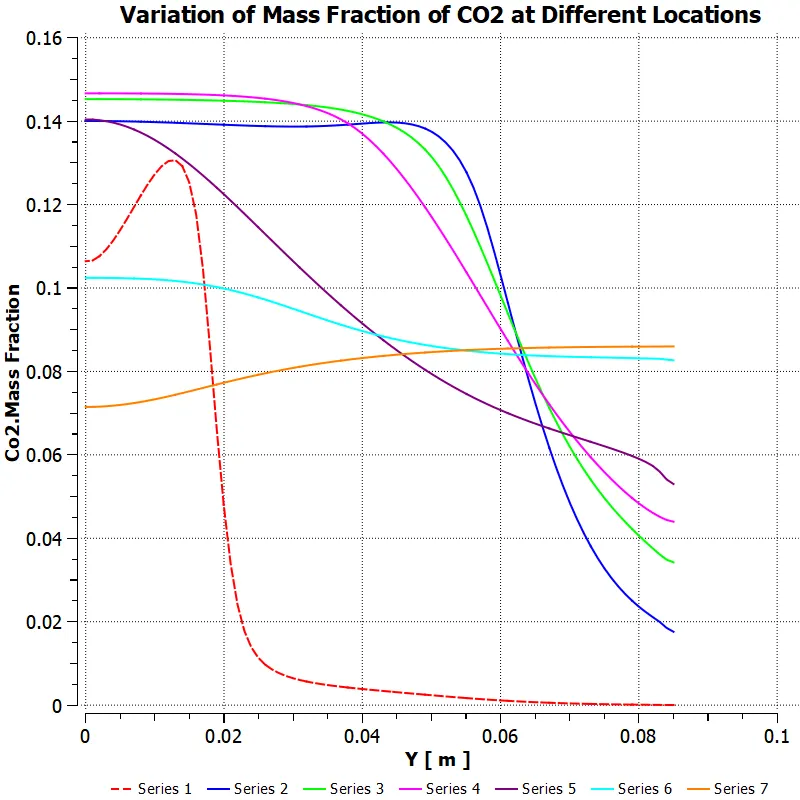
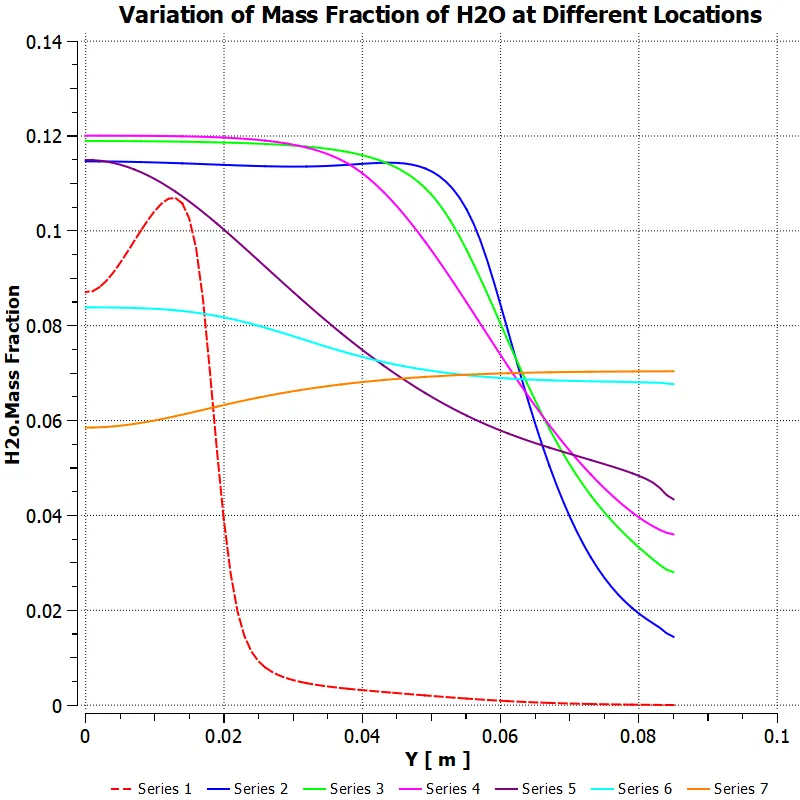
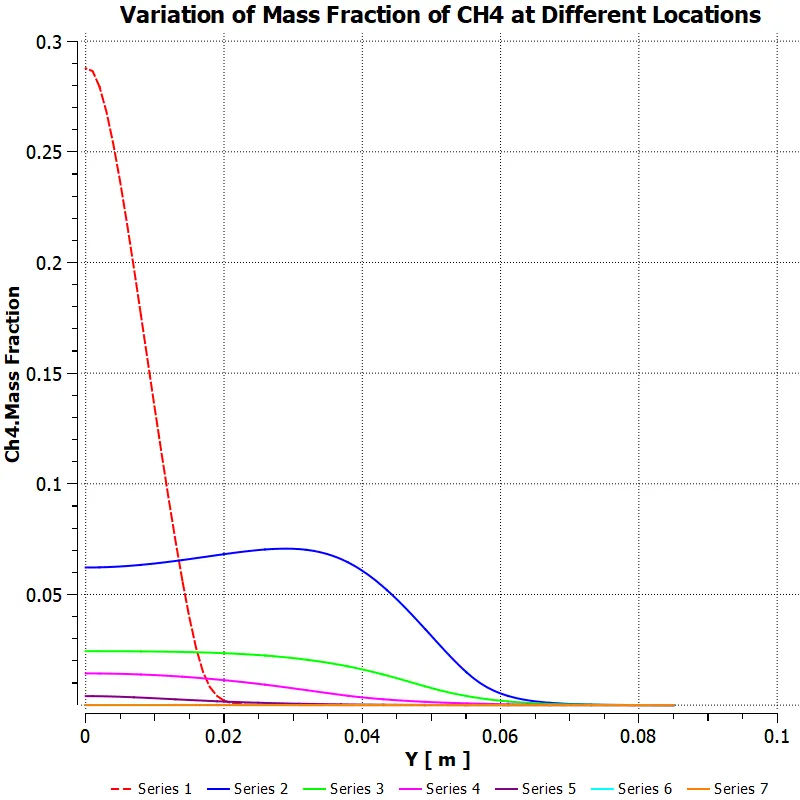
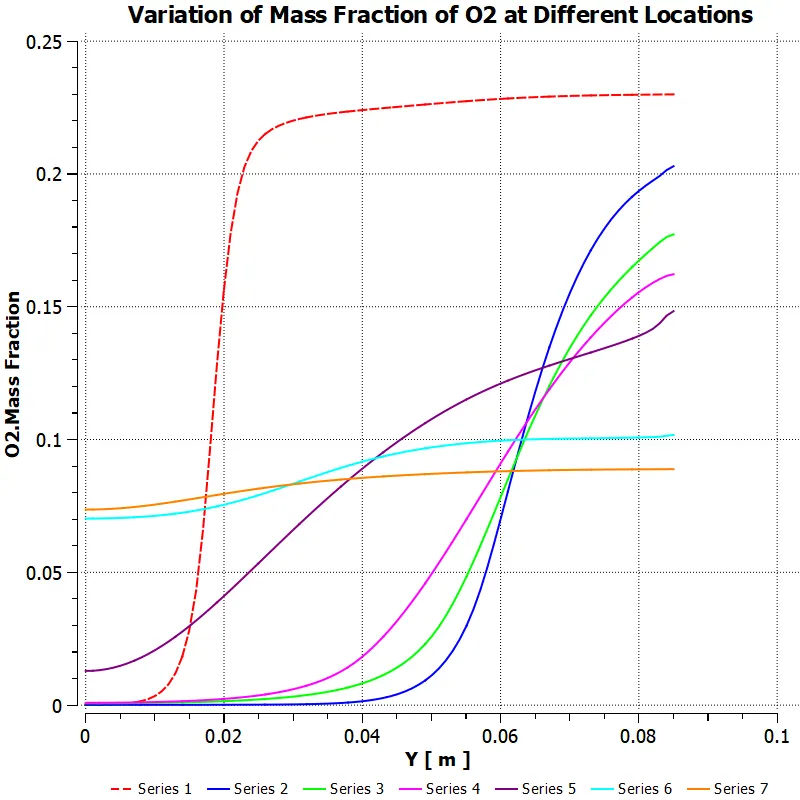
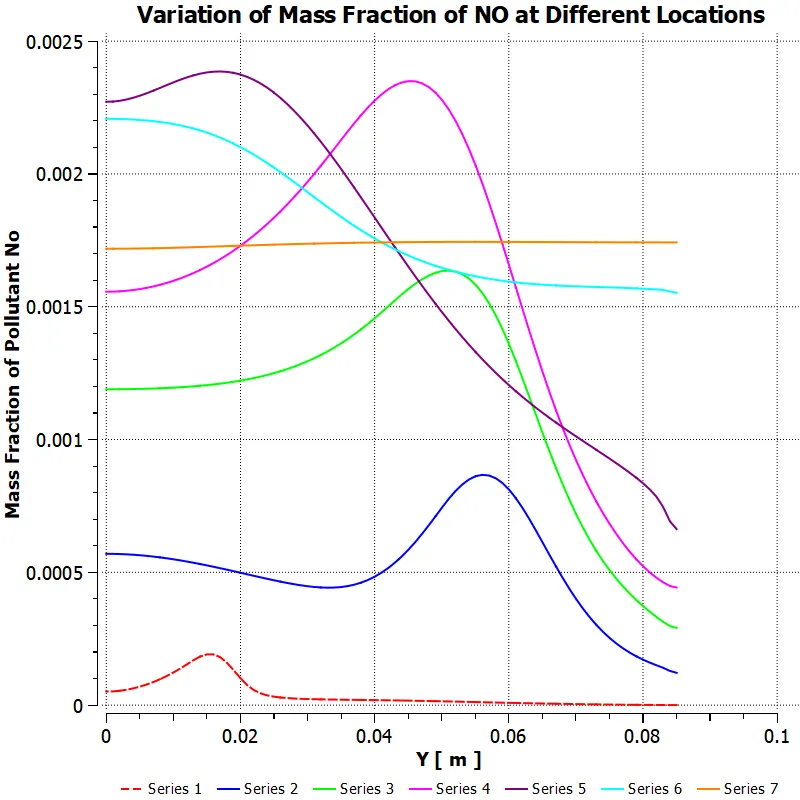
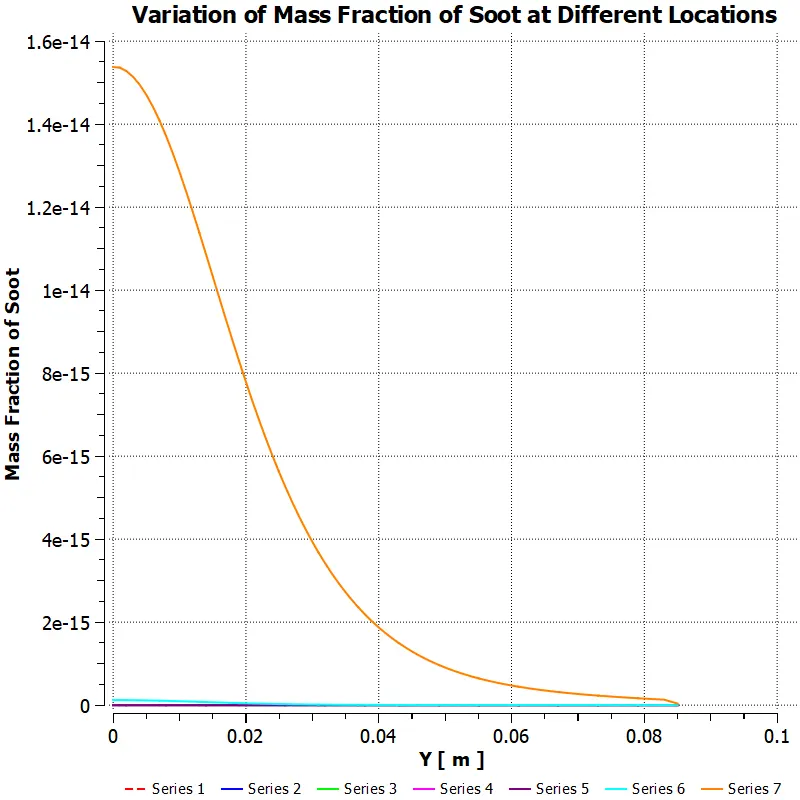
--------------------------------------------------------------------------------------------------------------------------------------------------------------------------------------------------------
[Part 2]
A. Temperature Contour
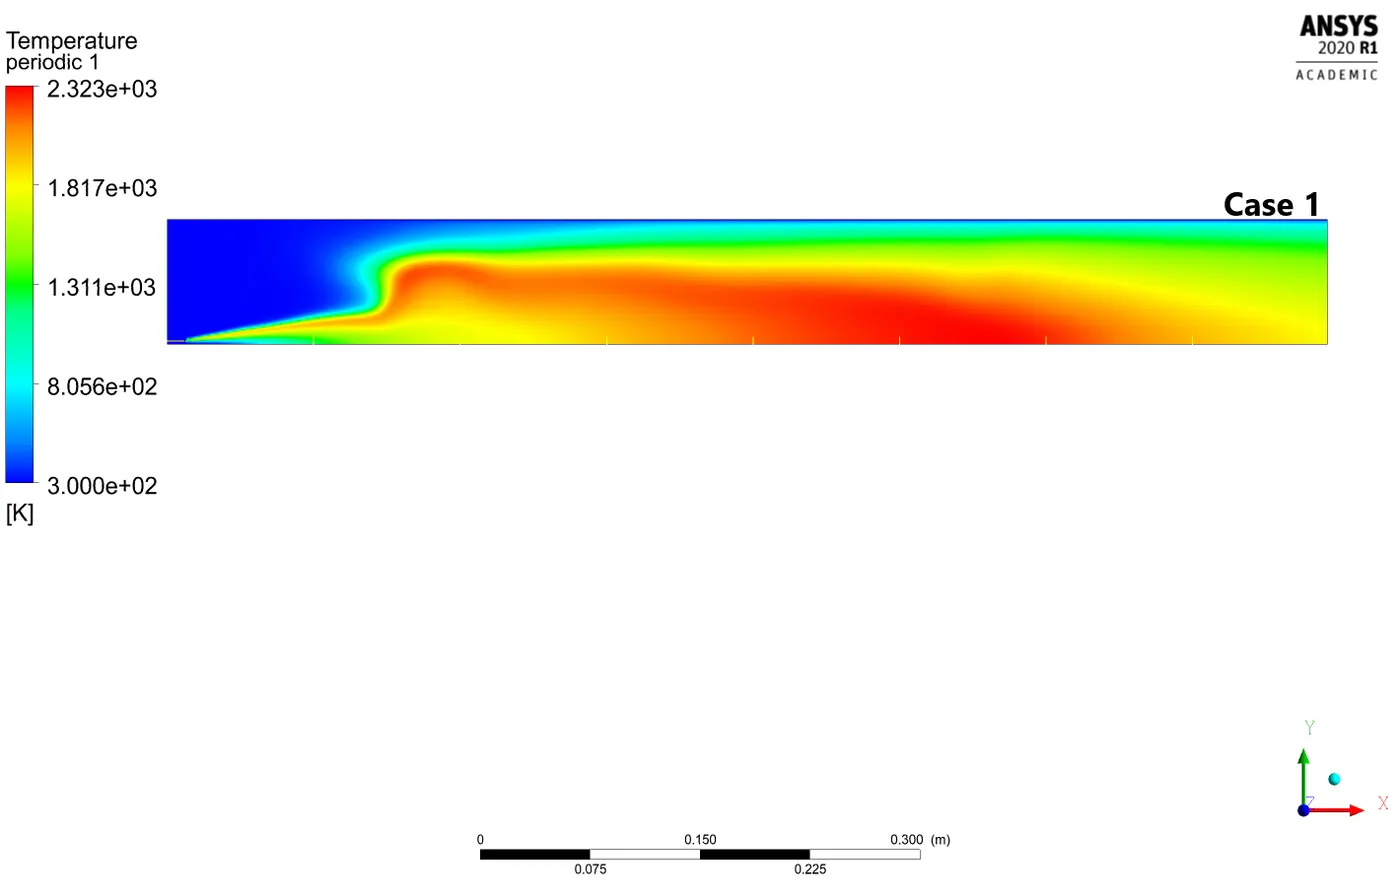
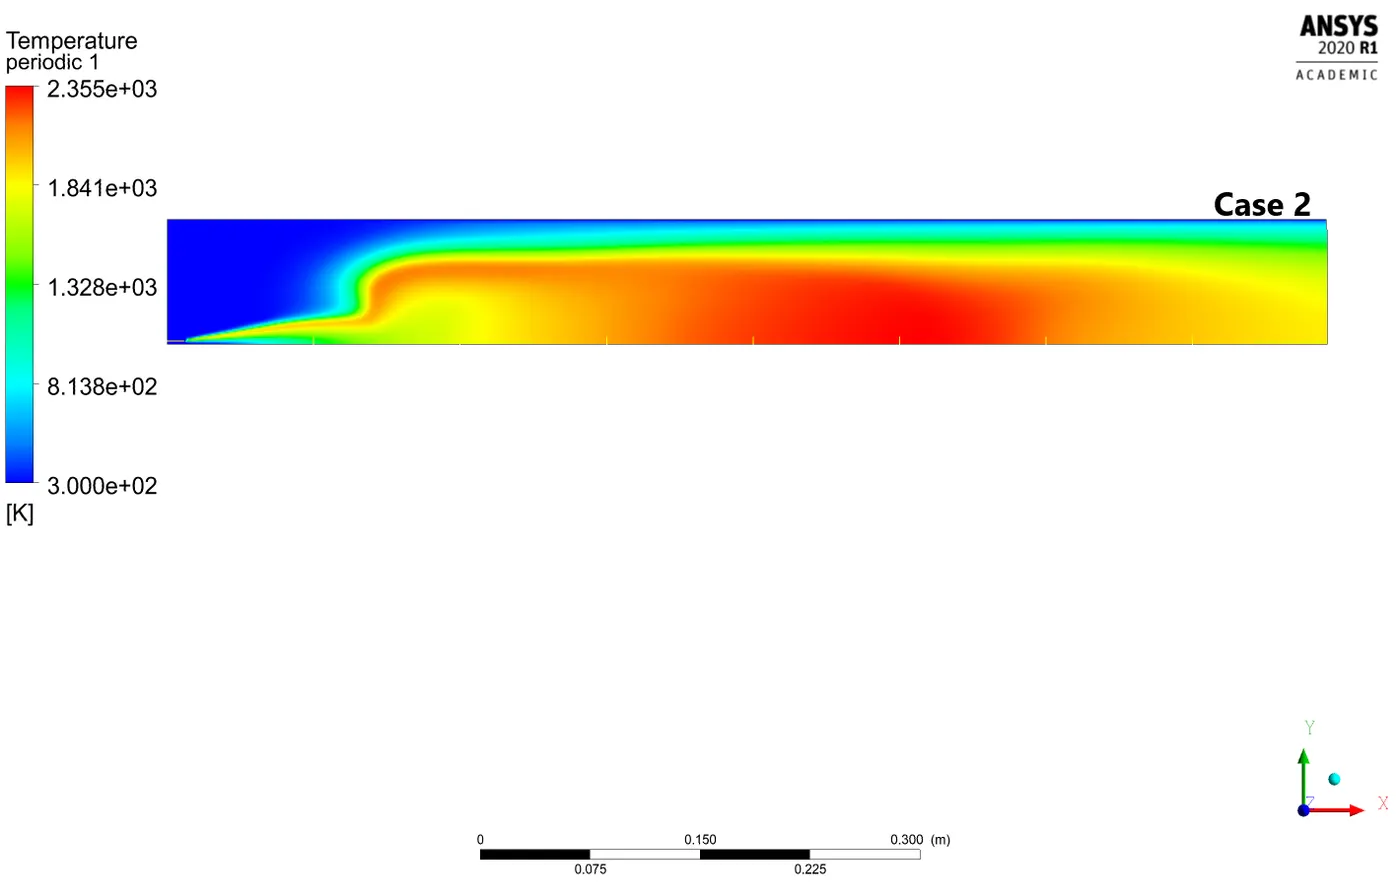
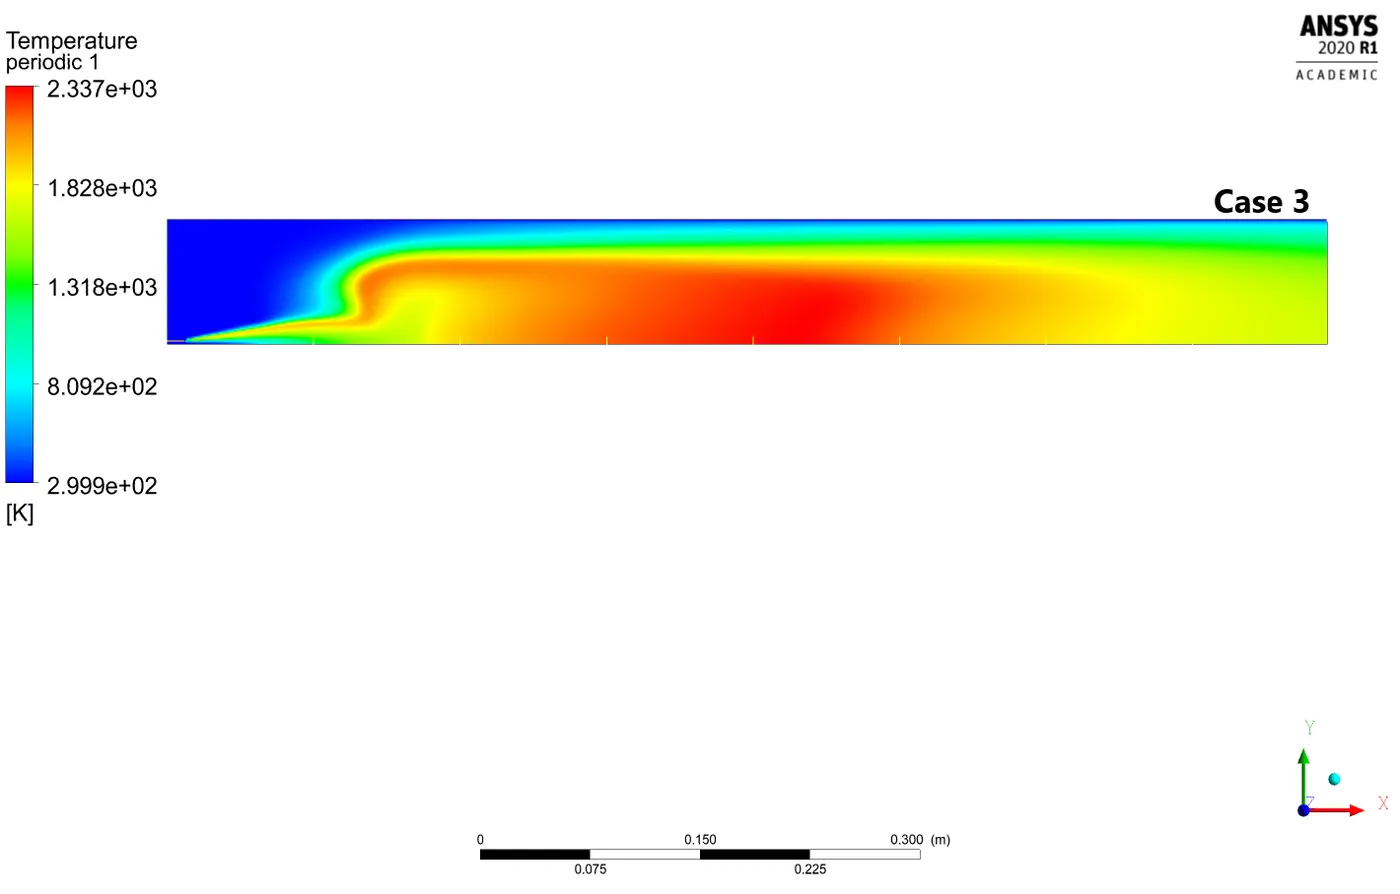
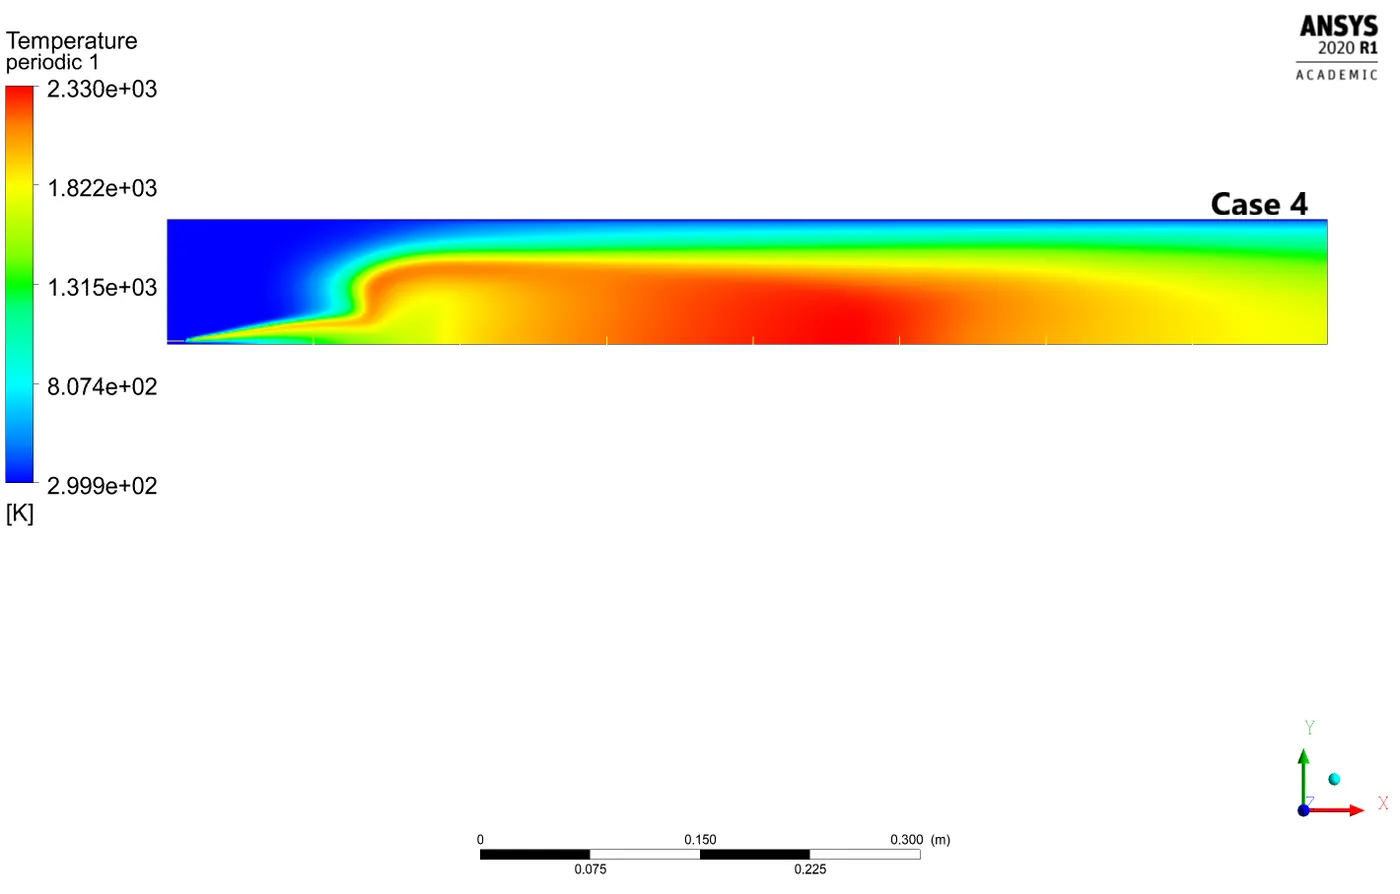
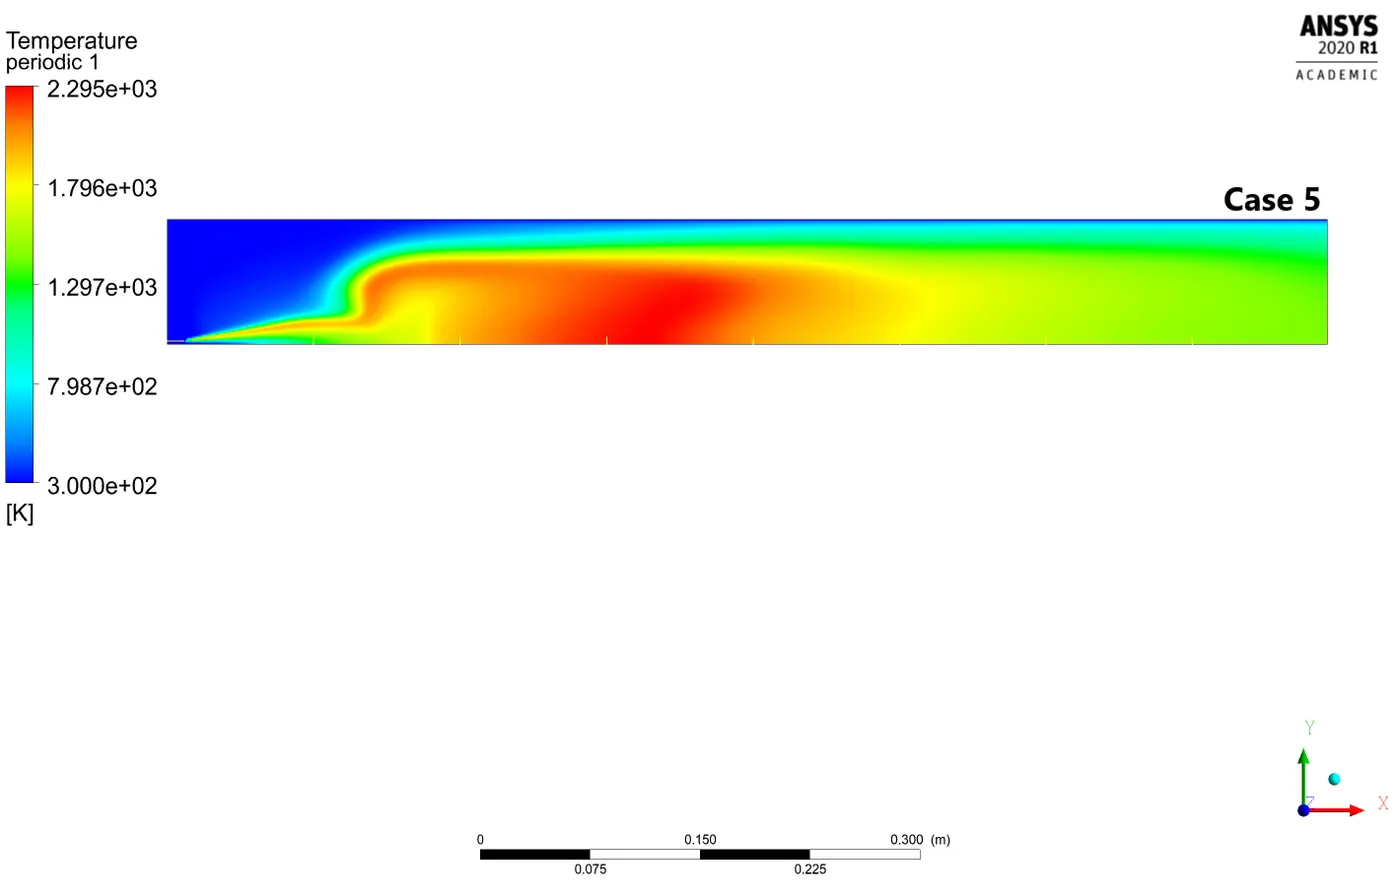
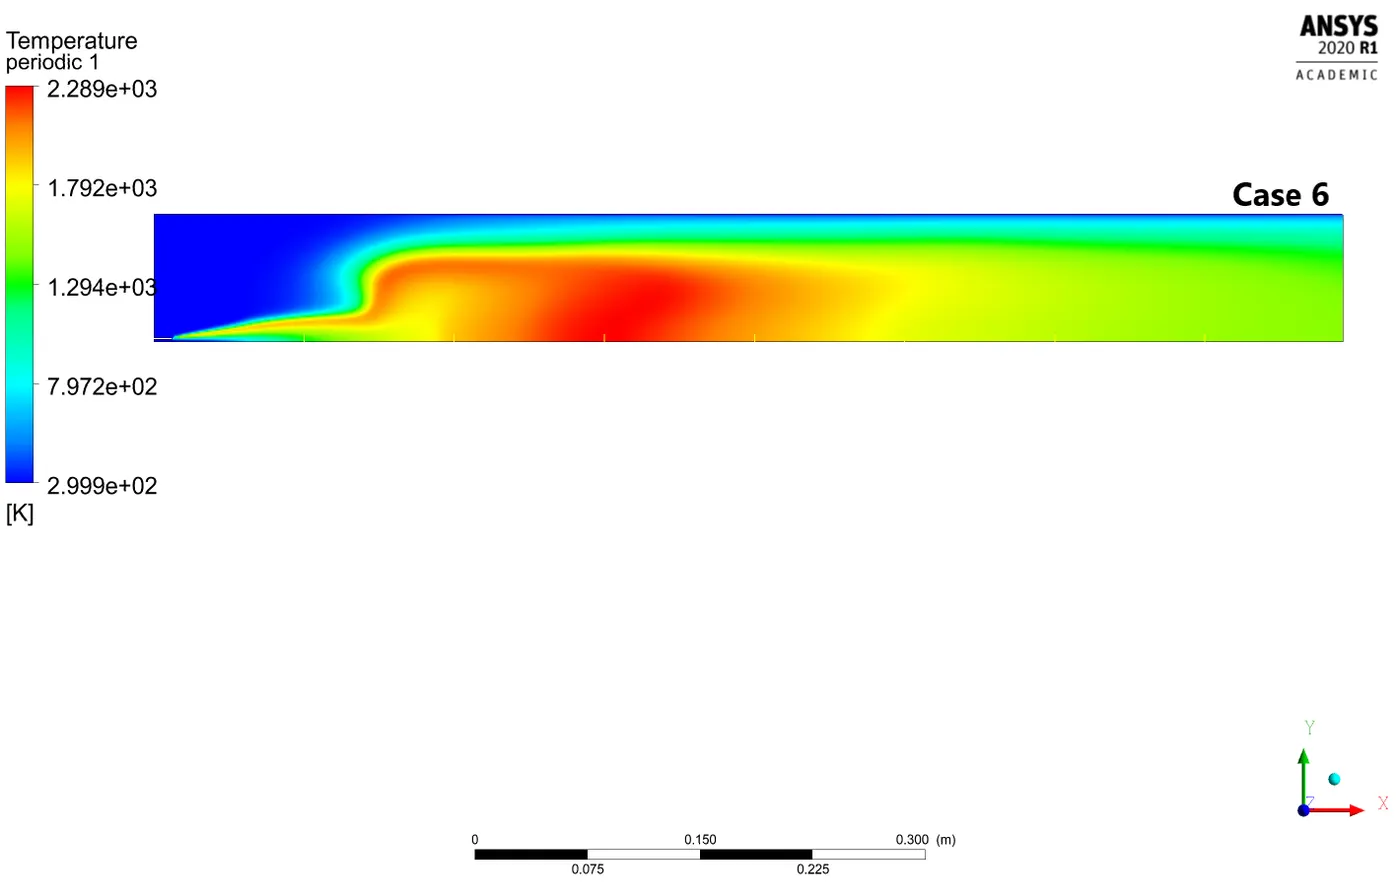
B. NO Emission Contour
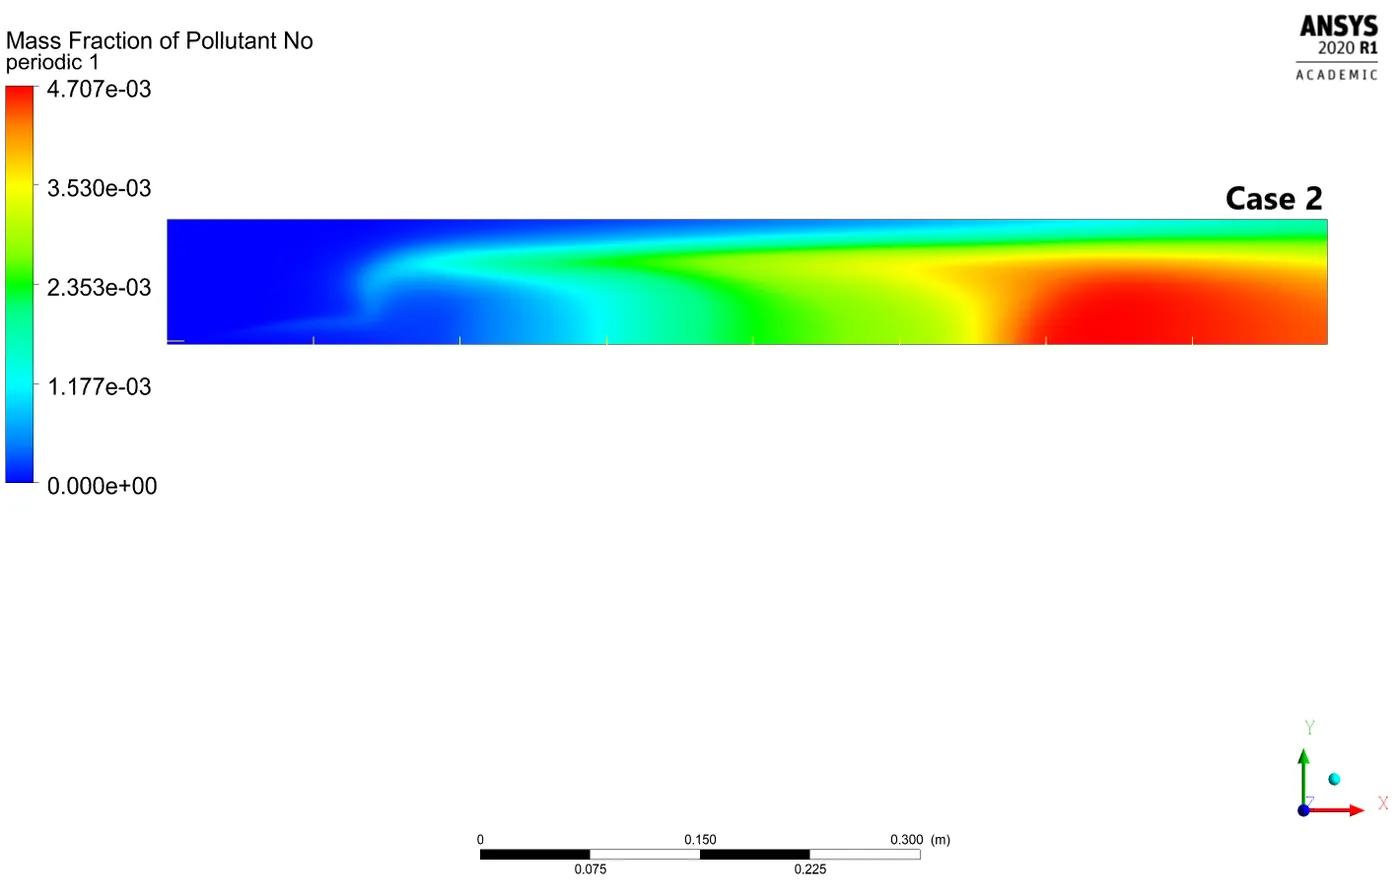
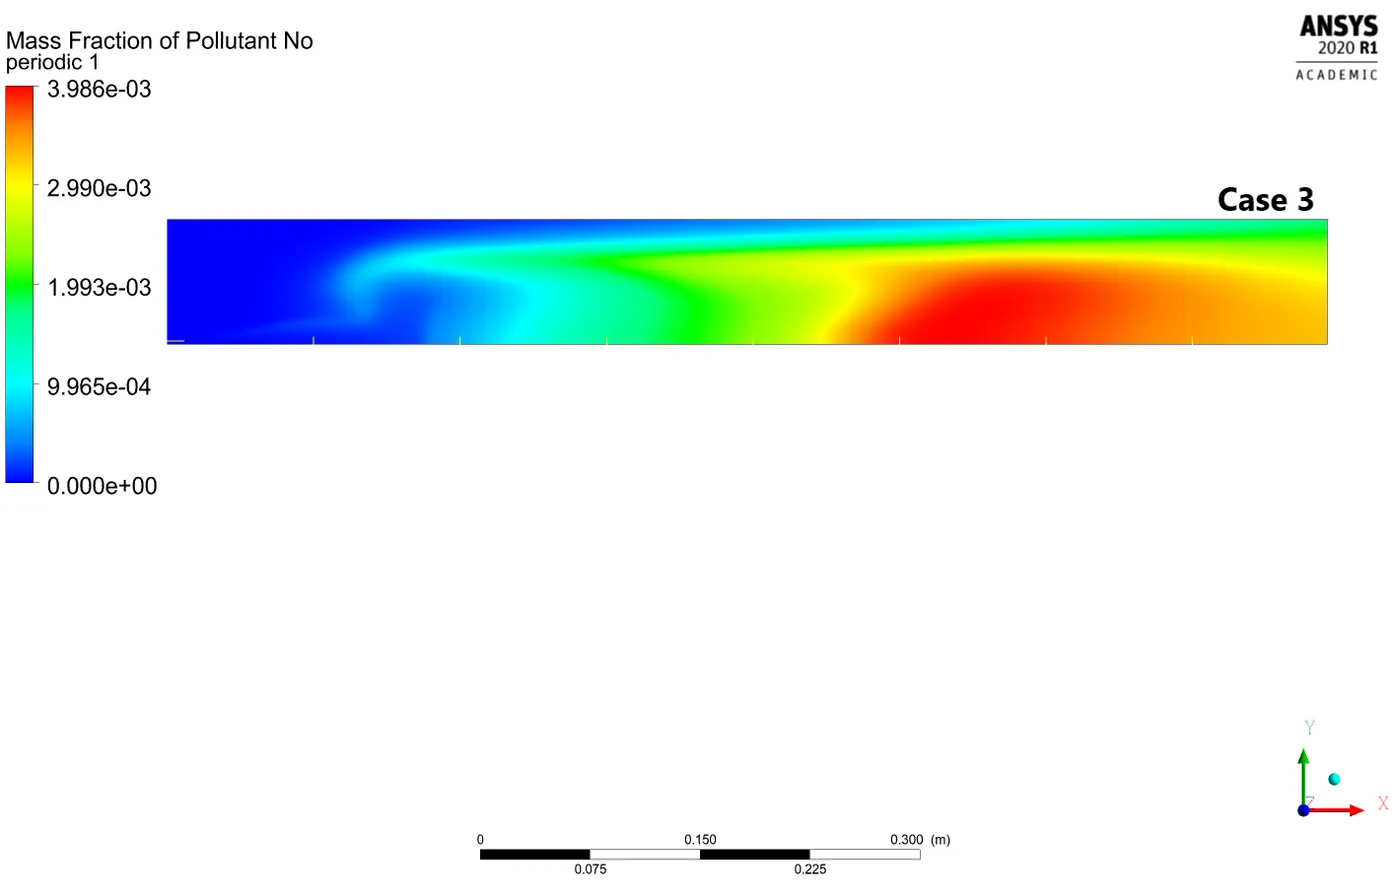
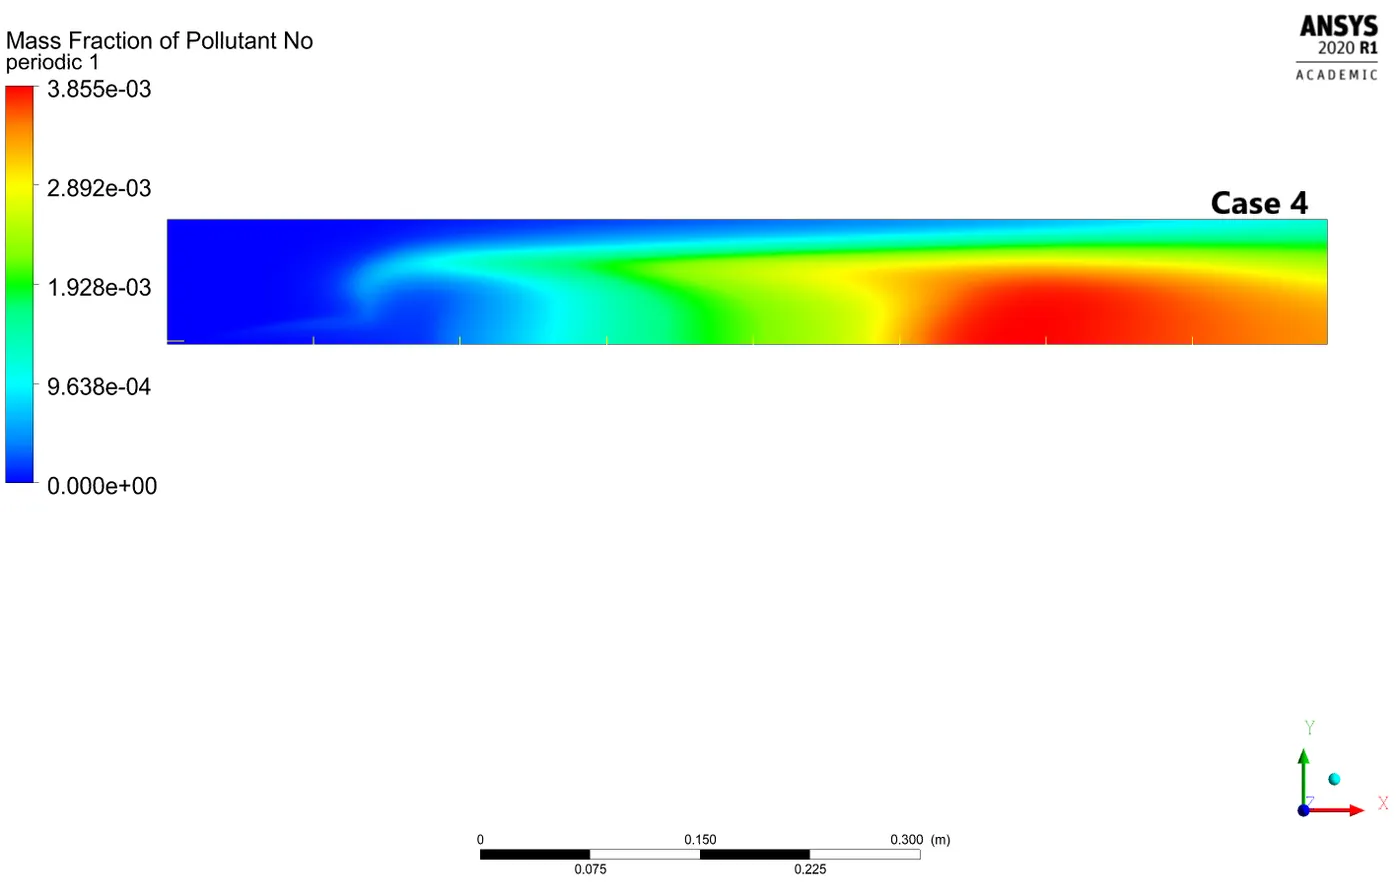
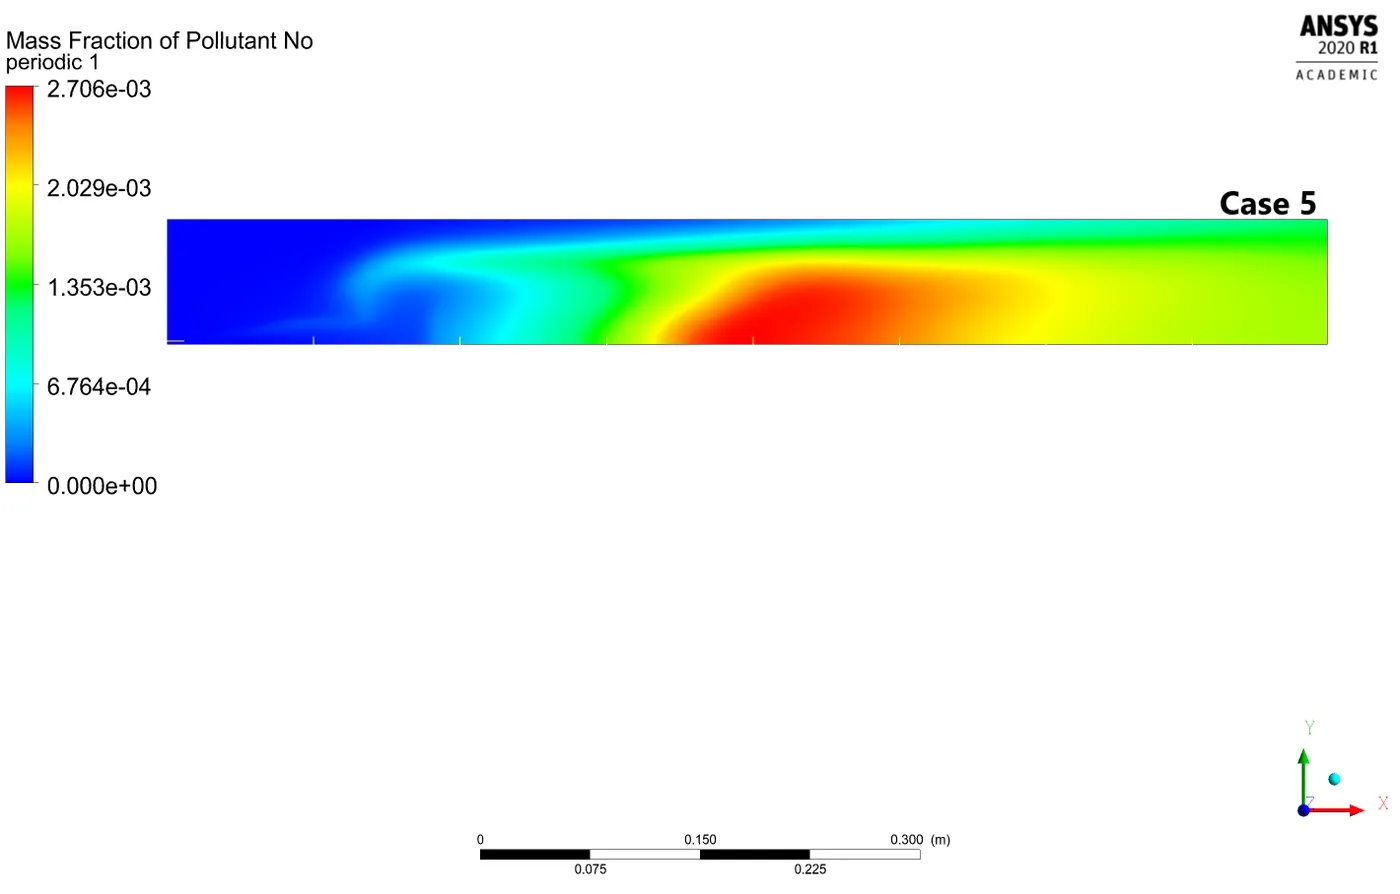
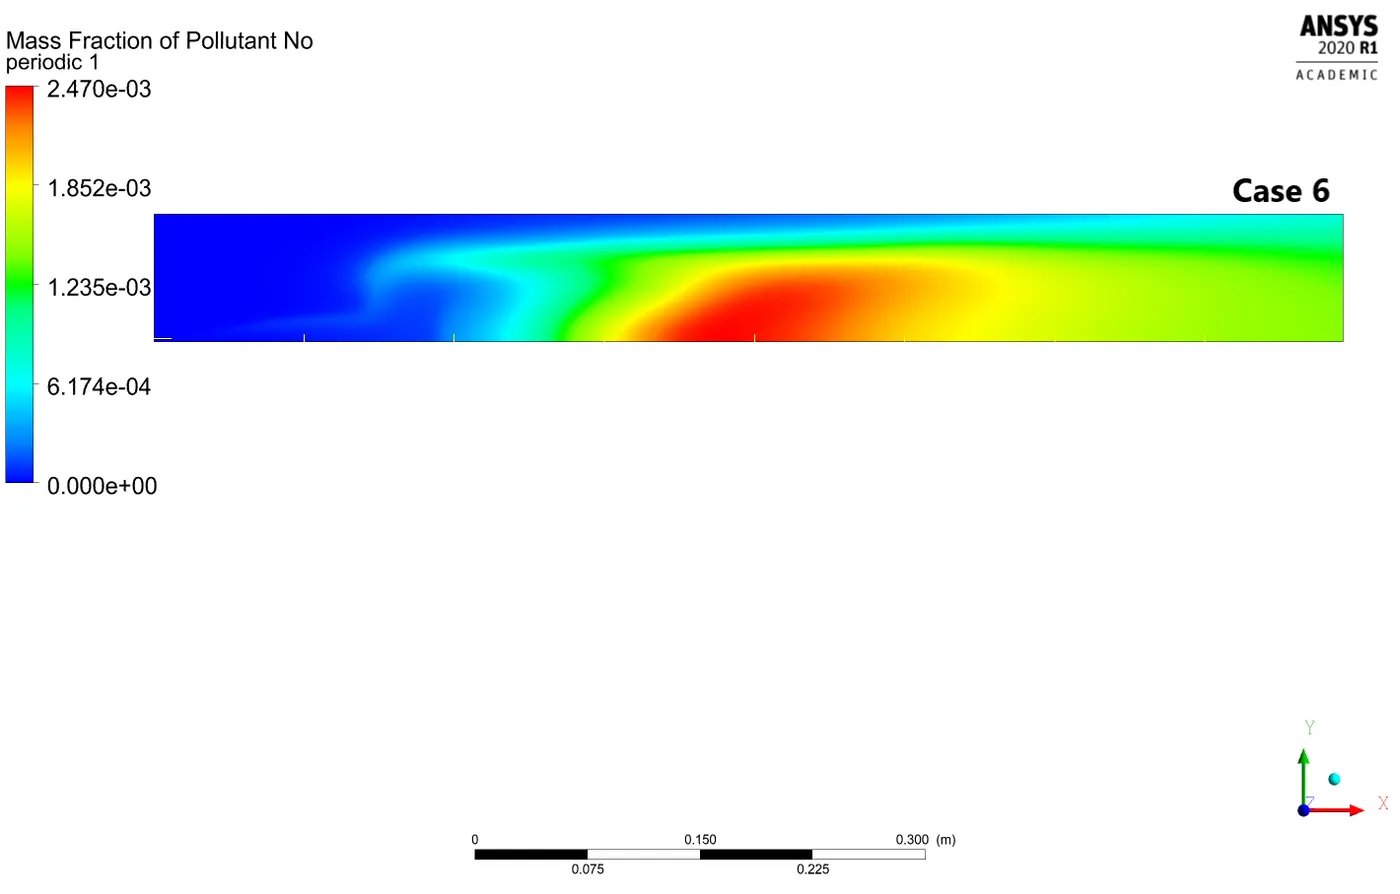
C. Soot Emission Contour
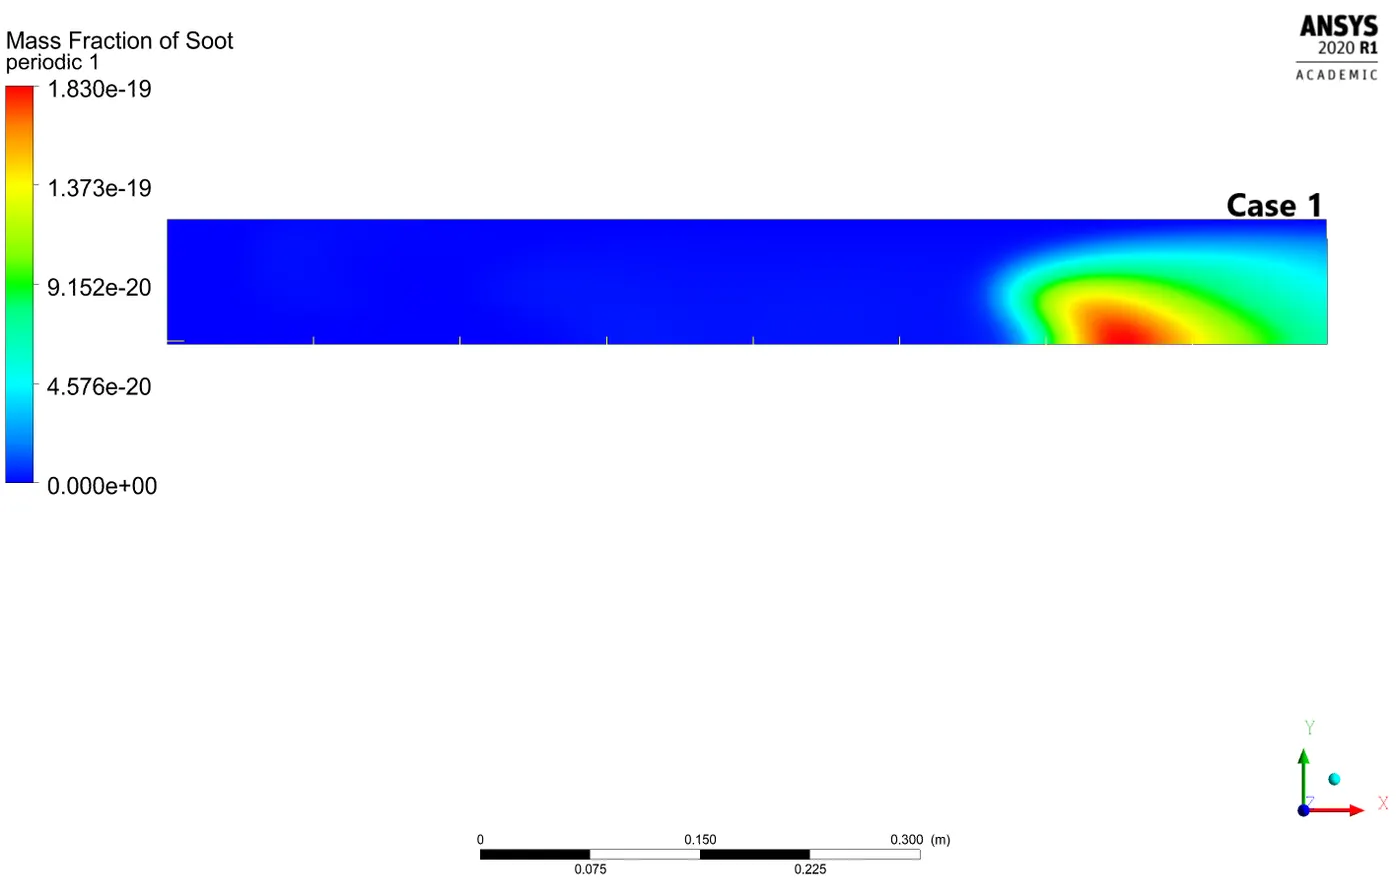
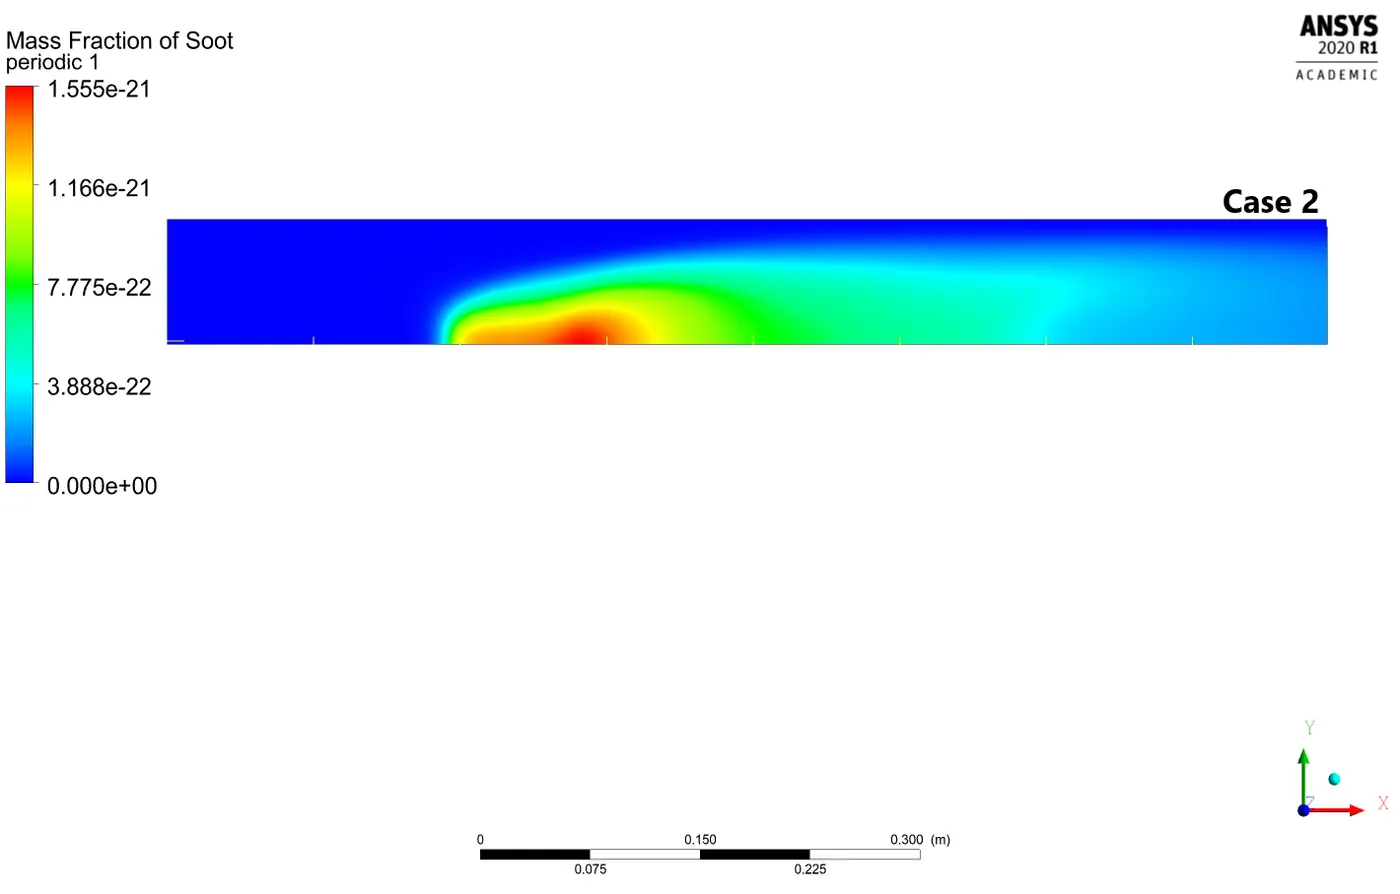
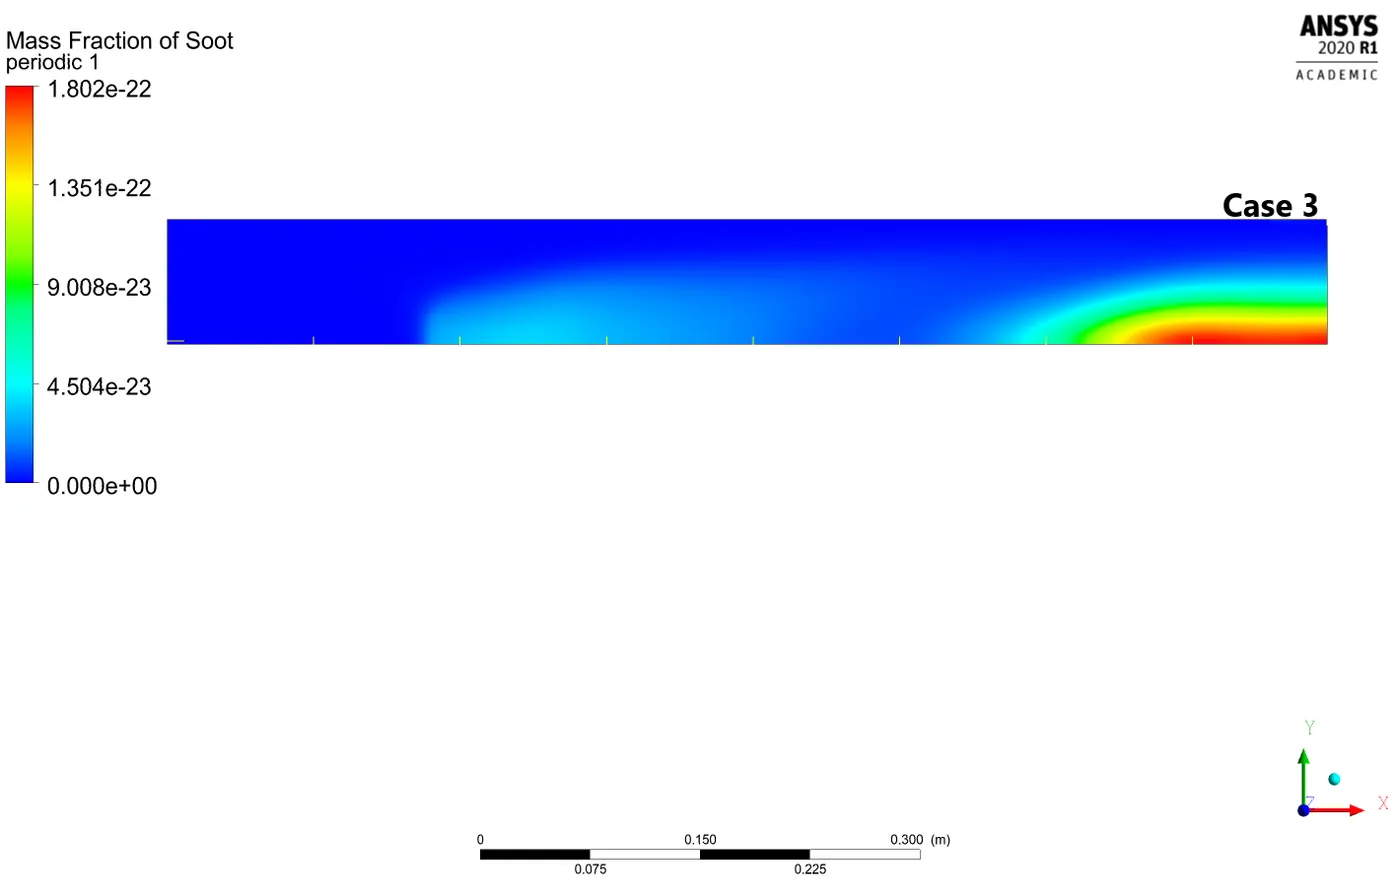
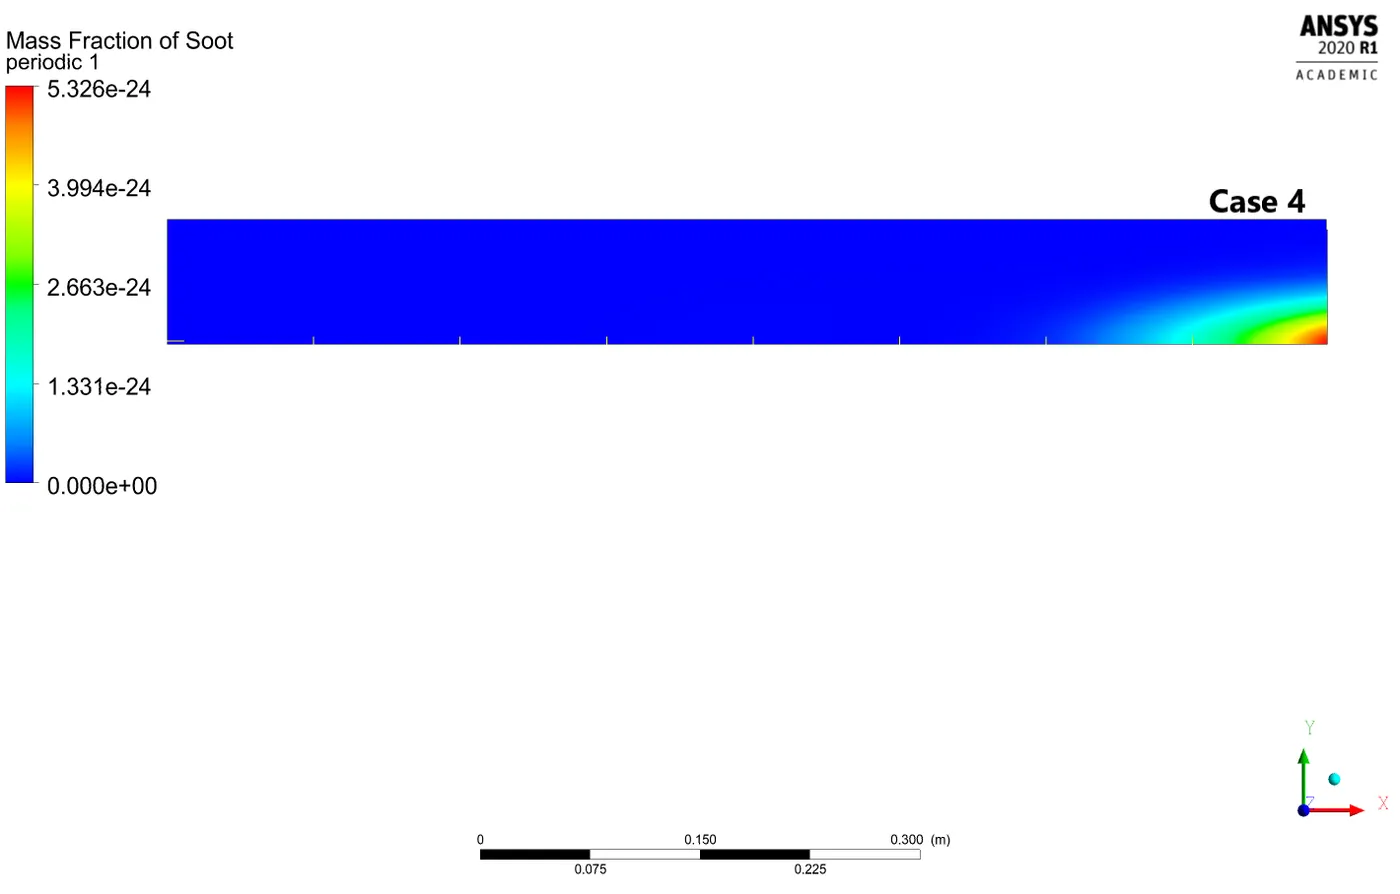
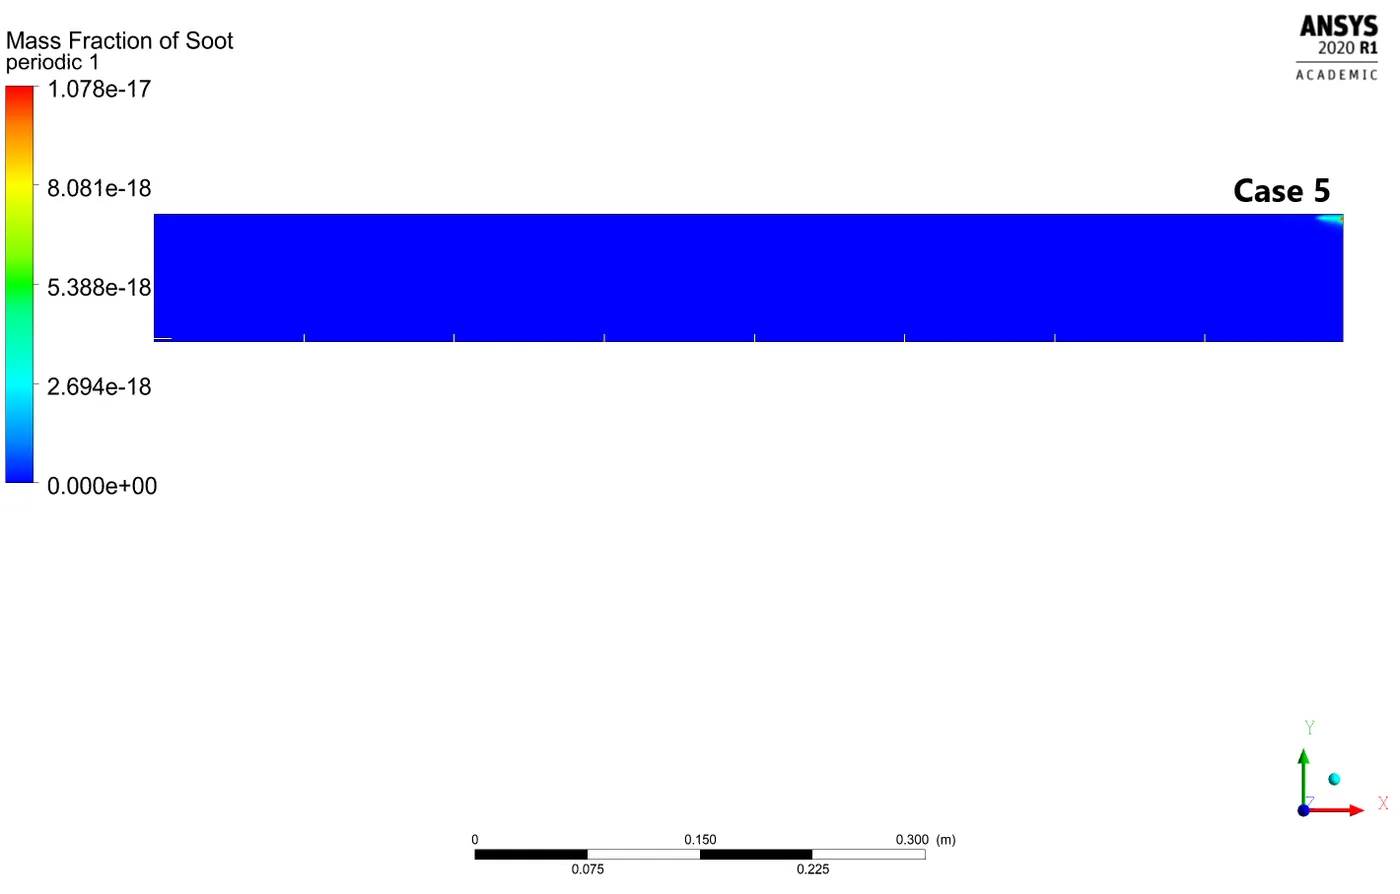
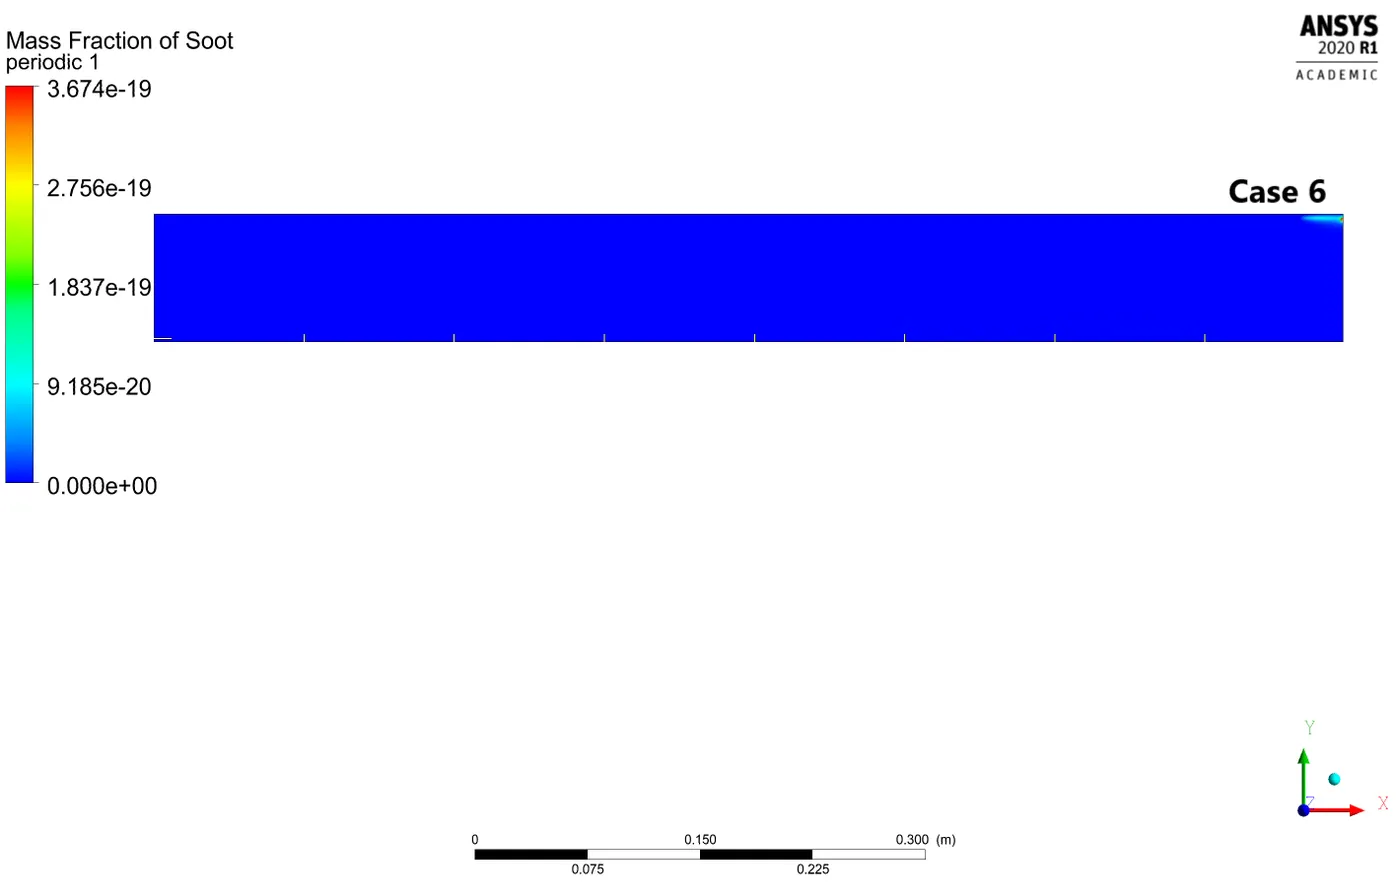
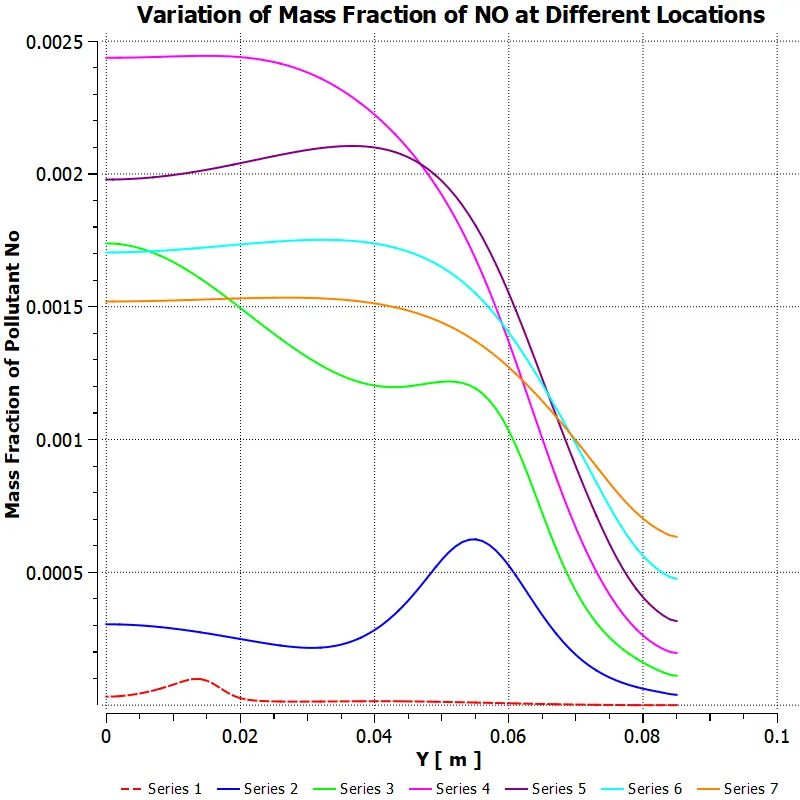
D. NO Emission Plot Across The Combustor
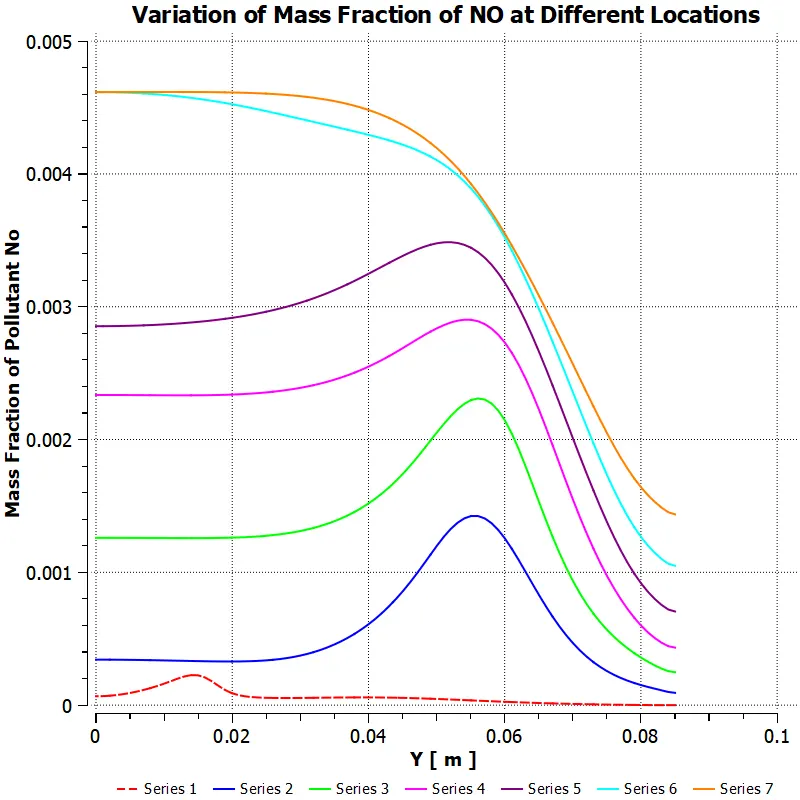
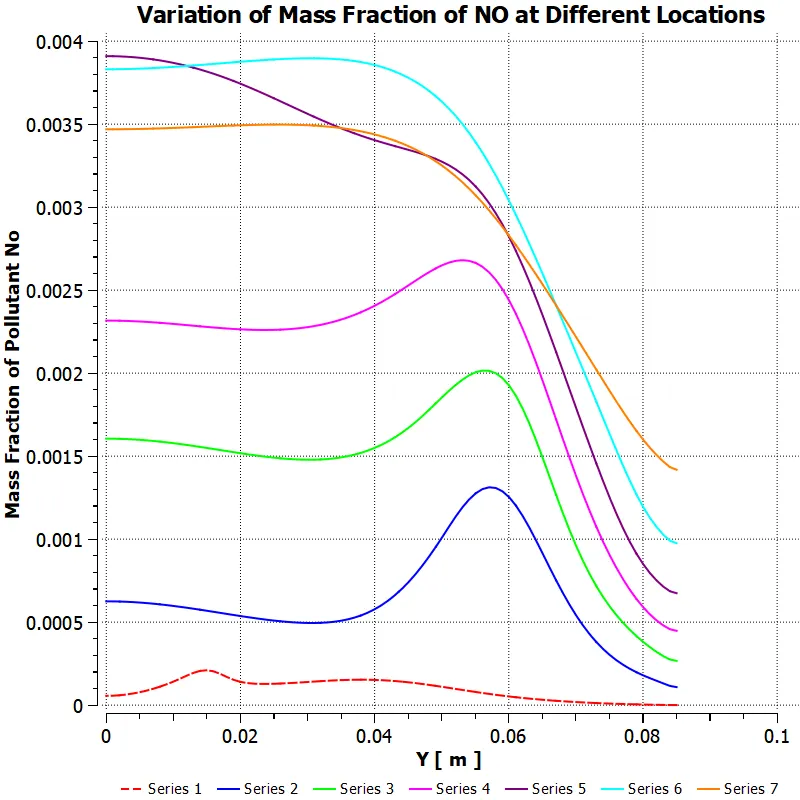
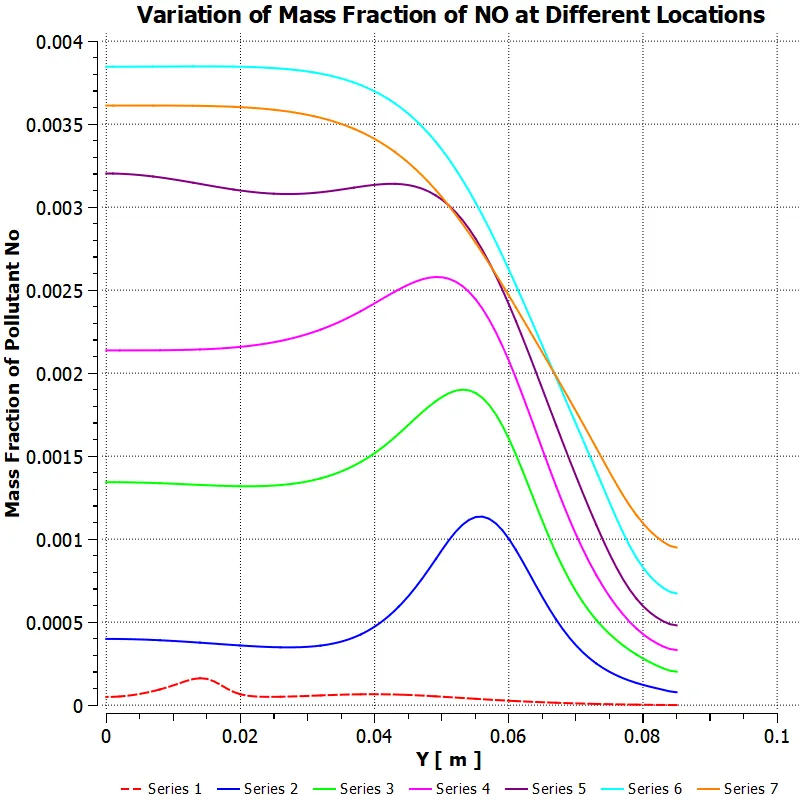
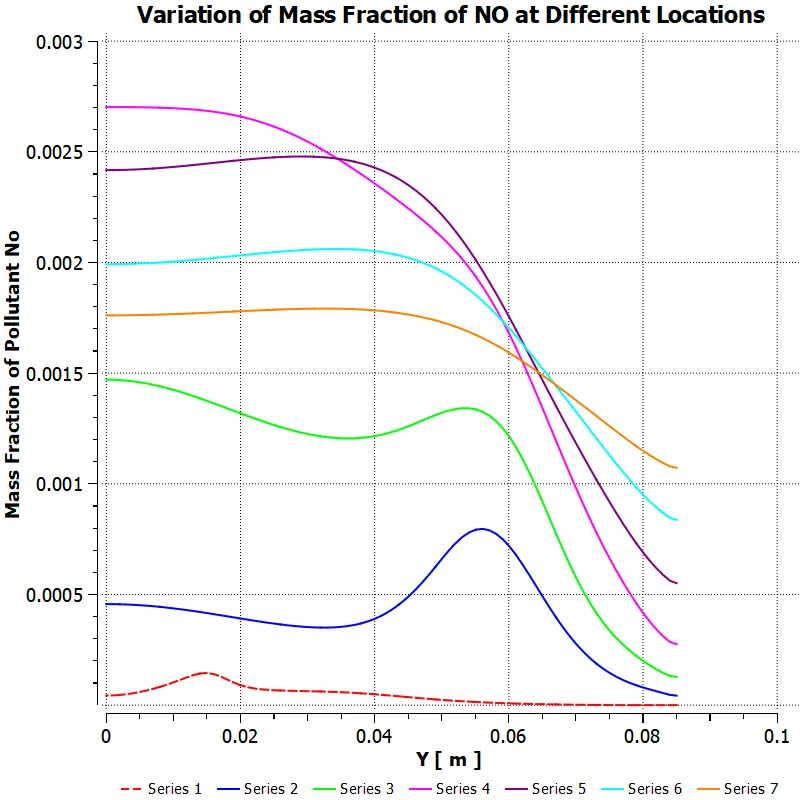
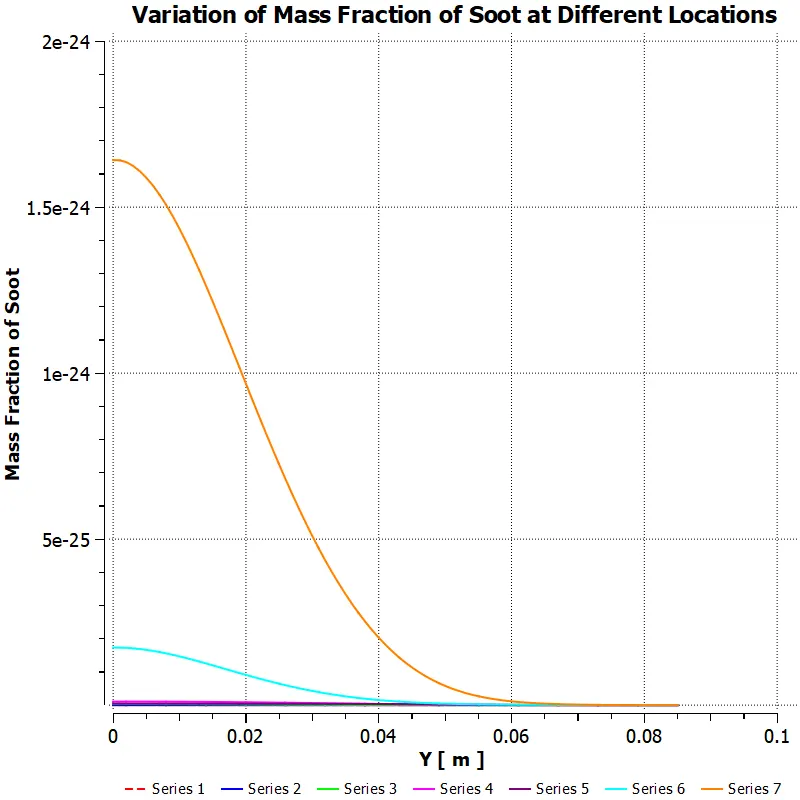
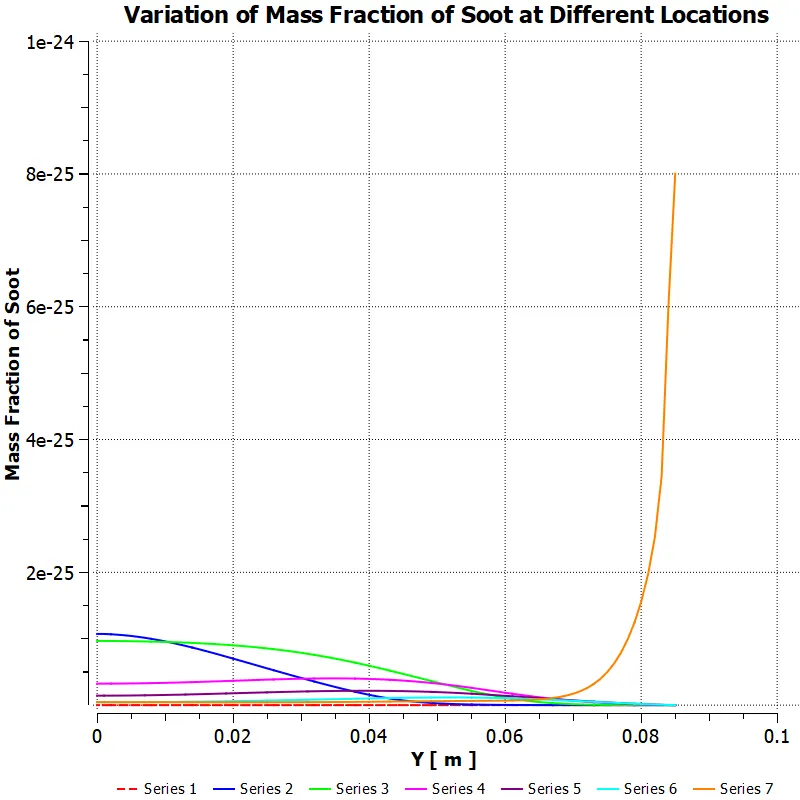
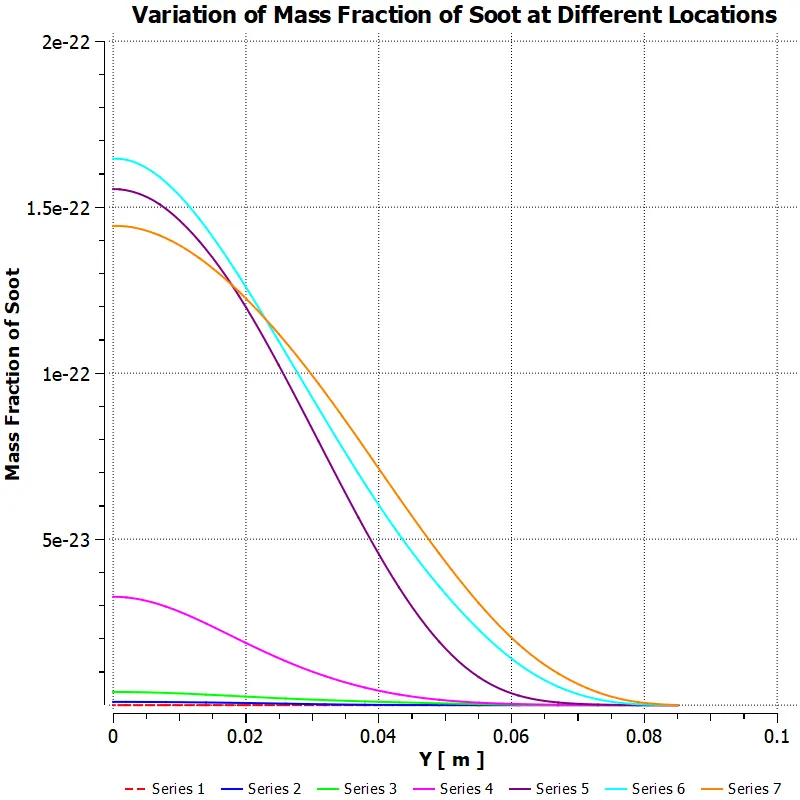
E. Soot Emission Plot Across The Combustor
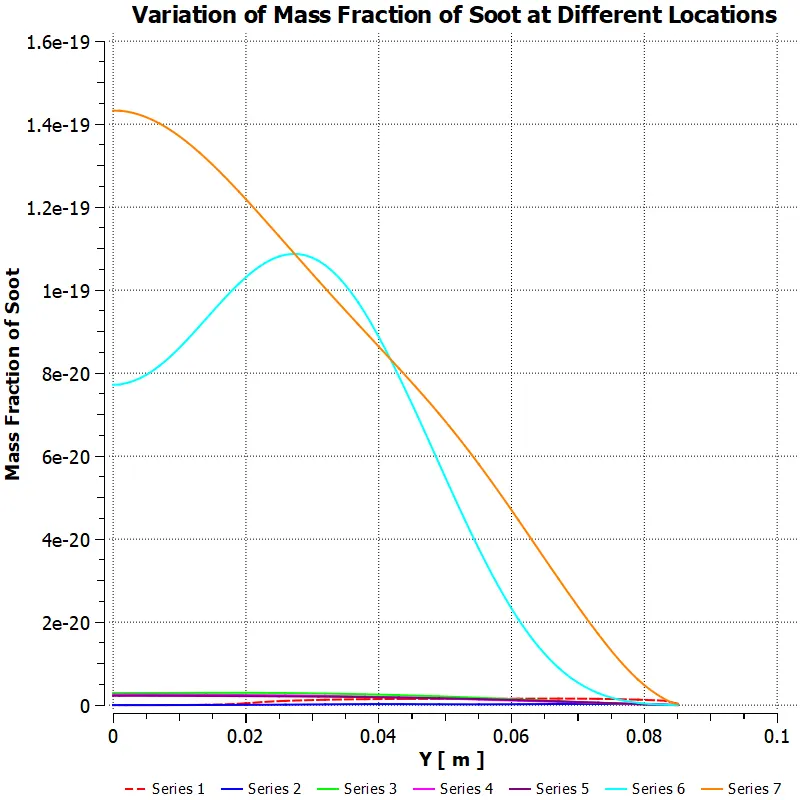
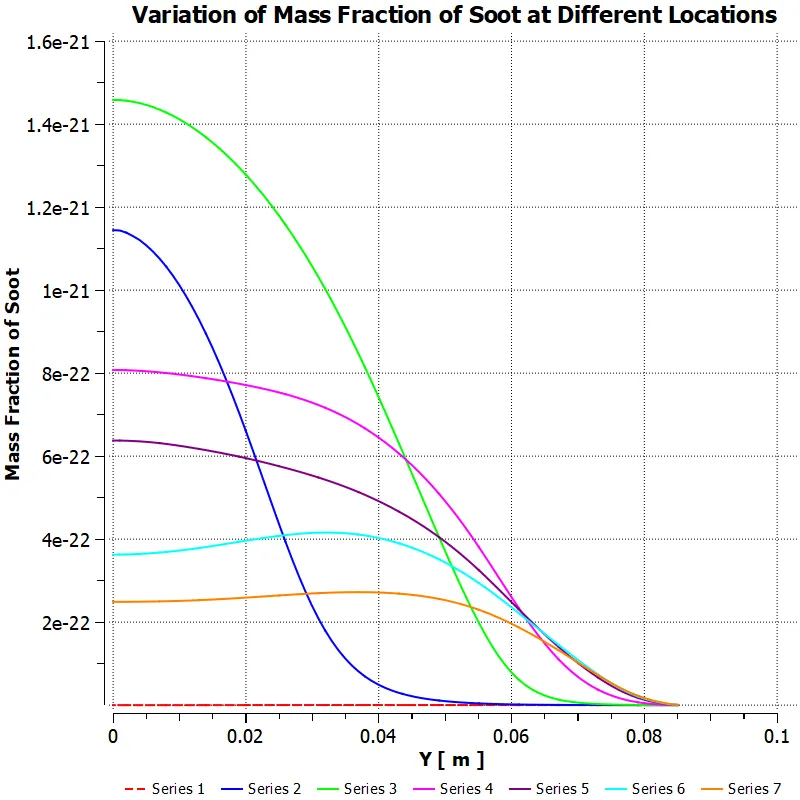
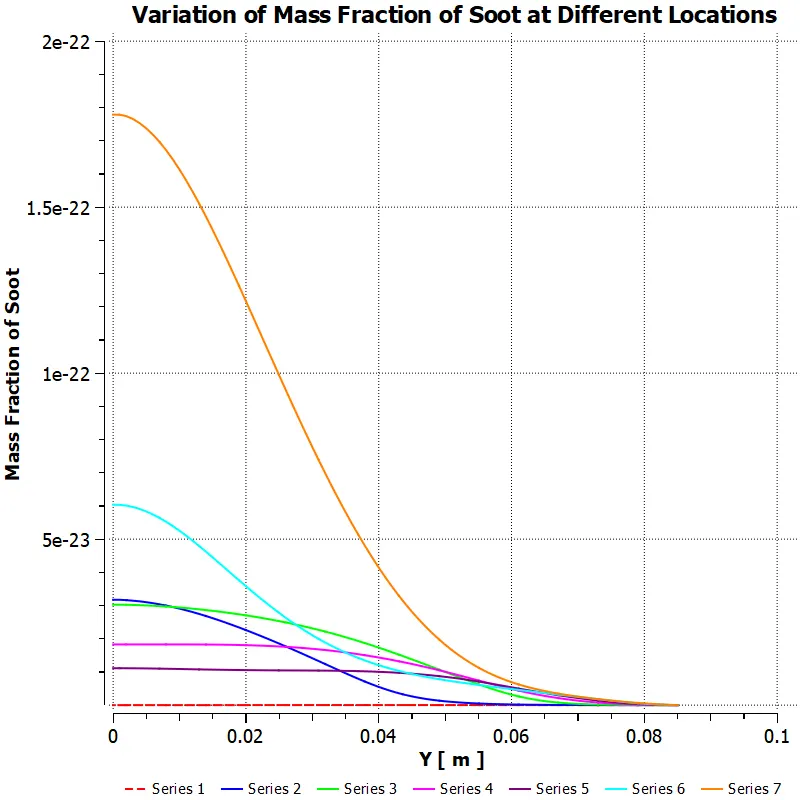
| CH4 Concentration | H20 Concentration | Average Temperature at Outlet (K) | NO Emission at Outlet | Soot Emission at Outlet | |
| 1. | 0.95 or 95% | 0.05 or 5% | 1347.847 | 0.0026018335 | 3.0972112e-20 |
| 2. | 0.90 or 90% | 0.10 or 10% | 1406.4474 | 0.0031790535 | 1.2400164e-22 |
| 3. | 0.85 or 85% | 0.15 or 15% | 1310.1621 | 0.0025571786 | 2.8492393e-23 |
| 4. | 0.80 or 80% | 0.20 or 20% | 1264.2241 | 0.0022642510 | 5.5211903e-25 |
| 5. | 0.75 or 75% | 0.25 or 25% | 1172.5717 | 0.0014765624 | 6.9817779e-19 |
| 6. | 0.70 or 70% | 0.30 or 30% | 1159.1049 | 0.0011425617 | 2.040467e-20 |