Menu


Modified on
How To Carry Out A Symmetry Operation?

Skill-Lync
A symmetry operation transforms an object that leaves it looking the same after processing it. For instance, rotation, reflection, and inversion are all symmetry operations since they involve changes to an object's spatial configuration. These symmetry operations are carried out in relation to symmetry components (for example, a point, line or plane). A symmetry operation in the context of molecular symmetry is an atom permutation that transforms a molecule or crystal into a state that is identical to the initial state.
From a design engineering perspective, this article will help us understand the operation with the help of an inner extract part of the hood model.
Steps Involved in Symmetry Operation
Step 1:
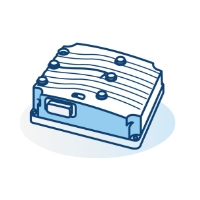
- Import the Hood model
_1672840985.png)
- We can see that, except for the latch top surface, all remaining surfaces are perfectly symmetrical.
Step 2:
- Delete the one half of the part that is symmetrical.
_1672841035.png)
Q: Why do we delete one-half of the symmetrical surface?
When you perform a symmetry operation in ANSA on a meshed part, it tries to reflect the CAD surface along with the mesh to the other side. So if the other half is not deleted, you can find a duplicated CAD surface on the other side of the geometry after reflection.
Step 3:
Now let's see how to start with the symmetry operation.
1. Where can we find the symmetry tool?
Function Name: Transform [COPY]
Summary: This function is used to Translate, Rotate, Transform, Scale, Symmetry or Mirror selected entities (Faces, Points, Elements etc). The selected entities are copied into the new position.
- Go to the Transform tab, which is present on the right side of the Quality criteria tab.
- Then click Copy
_1672841132.png)
Step 4:
- Selecting Copy will take you to the following dialog box.
_1672841169.png)
- Go for Entities selection mode and select the whole model surface except the top surface of the latch portion. It's recommended to hide the latch top surface before making the selection.
_1672841204.png)
Step 5:
- On a middle click confirmation, you can see a dialog box popping up from which you need to select the Symmetry tab.
_1672841244.png)
- Under the Symmetry tab, you can find various modes to carry out the symmetry operation.
Case 1: Mirror 3 points plane
Step 6:
- Here I will be proceeding with the Mirror 3 points plane method.
- You can see the following dialog where you have to fill in the respective coordinate values.
_1672841294.png)
- Place the cursor on X1 and select the node from the bottom location from the model as shown.
_1672841331.png)
- Place cursor on X2 and select the node from the middle location from the model as shown.
_1672841364.png)
- Place the cursor on X3 and select the node from the top location of the model as shown.
_1672841396.png)
- After selecting the three points, you can see the dialog box as shown below.
_1672841431.png)
Step 7:
- Click Apply, and you can see another dialog box pops-up. Click OK.
_1672841474.png)
- Now, you can see the CAD surface's reflection and mesh on the geometry.
_1672841509.png)
Step 8:
- Click Finish finally if the symmetry operation is performed correctly.
_1672841557.png)
Case 2: Default symmetry plane
We’ll also look at the Default symmetry plane option available under the symmetry tab.
NB: All the steps until Step 6 remain the same here as well.
Step 9: Select the default symmetry plane
_1672841658.png)
Step 10: Then select Apply, and you can see another dialog box popping up. Click OK.
_1672841695.png)
- Now you can see the reflection of the CAD surface as well as mesh on the geometry.
_1672841728.png)
If you need to reflect a part with respect to the global axis, you can go with the “Default symmetry plane”. If you want to specify the plane with which you need to reflect the part, proceed with the “mirror 3 points plane” option.
Finally, you will see the top surface of the latch part is left with free edges as we have hidden it.
_1672841770.png)
- These free edges (Red Cons) can be converted to Double Con (Yellow Cons) by carrying out a Faces > Topo operation.
- The mesh in the latch top surface and the nearby surface will get deleted when you do a Topo operation in the area.
_1672841804.png)
These areas need to be meshed eventually in order to finish the job.
Author

Navin Baskar
Author
Skill-Lync
Subscribe to Our Free Newsletter

Continue Reading
Related Blogs
Learn how to render a shock-tube-simulation and how to work on similar projects after enrolling into anyone of Skill-Lync's CAE courses.
09 May 2020
In this blog, read how to design the frontal BIW enclosure of a car (Bonnet) and learn how Skill-Lync Master's Program in Automotive Design using CATIA V5 will help you get employed as a design engineer.
09 May 2020
Tetrahedral is a four- nodded solid element that can be generated through the tria element by creating a volume and also through the existing volume of the geometry. These elements are used where the geometry has high thickness and complexity. The image attached below is a representation of a Tetra element. The Tetra element will have 4 triangular faces with four nodes joining them together
01 Aug 2022
A connector is a mechanism that specifies how an object (vertex, edge, or face) is connected to another object or the ground. By often simulating the desired behaviour without having to build the precise shape or specify contact circumstances, connectors make modeling simpler.
02 Aug 2022
One of the most crucial processes in carrying out an accurate simulation using FEA is meshing. A mesh is composed of elements that have nodes—coordinate positions in space that might change depending on the element type—that symbolise the geometry's shape.
03 Aug 2022
Author
Skill-Lync
Subscribe to Our Free Newsletter
Continue Reading
Related Blogs
Learn how to render a shock-tube-simulation and how to work on similar projects after enrolling into anyone of Skill-Lync's CAE courses.
09 May 2020
In this blog, read how to design the frontal BIW enclosure of a car (Bonnet) and learn how Skill-Lync Master's Program in Automotive Design using CATIA V5 will help you get employed as a design engineer.
09 May 2020
Tetrahedral is a four- nodded solid element that can be generated through the tria element by creating a volume and also through the existing volume of the geometry. These elements are used where the geometry has high thickness and complexity. The image attached below is a representation of a Tetra element. The Tetra element will have 4 triangular faces with four nodes joining them together
01 Aug 2022
A connector is a mechanism that specifies how an object (vertex, edge, or face) is connected to another object or the ground. By often simulating the desired behaviour without having to build the precise shape or specify contact circumstances, connectors make modeling simpler.
02 Aug 2022
One of the most crucial processes in carrying out an accurate simulation using FEA is meshing. A mesh is composed of elements that have nodes—coordinate positions in space that might change depending on the element type—that symbolise the geometry's shape.
03 Aug 2022
Related Courses