Week 4 ANSA
WEEK-4 PROJECT
MID SURFACE GENERATION AND MESHING OF PLASTIC COMPONENTS WITH VARYING THICKNESS (BOTTLE CAP)
OBJECTIVE:
- Import the CAD geometry of cap model
- Clean up the geometry until no topological error is found
- Extract Mid-Surface for the geometry
- Mesh geometry with target/average length of 1mm
|
S.NO |
QUALITY CRITERIA |
VALUE |
|
1 |
target/average length |
1 |
|
2 |
Minimum length |
0.4 |
|
3 |
Maximum length |
3 |
|
4 |
Aspect |
3 |
|
5 |
Warpage |
15 |
|
6 |
Jacobian |
0.7 |
|
7 |
Minimum Quad Angle |
45 |
|
8 |
Maximum Quad Angle |
135 |
|
9 |
Minimum Tria Angle |
30 |
|
10 |
Maximum Tria Angle |
120 |
|
11 |
Triangles Percentage |
15 |
ABSTRACT
- In this project a cap model is taken and mid surface is generated and then meshed according to the above mentioned quality criteria. This cap model consists of different features like spiral, teeth, ribs with varying thicknesses.
METHODOLOGY
- Import the CAD Geometry and do Geometry clean-up with no topological error.
- Assign the property ID (PID) and assign different PID for each surface
- Generate mid surface
- Setup Quality criteria
- Meshing and improvement of the mesh
INTRODUCTION
- A cap is used to seal the top of the bottle and prevent the beverages from leaking. It consists mainly of inner threads which help to seal the bottle tightly. We can also create different types of caps which consists of extra features.
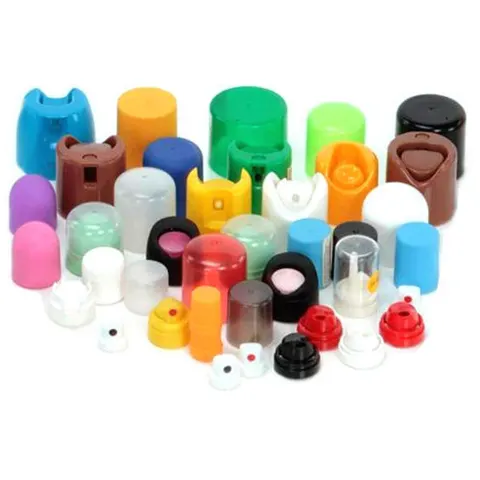
Different kinds of bottle caps
PROCEDURE:
- Geometry Clean-up
- After importing the geometry into ANSA there will be many topological errors. In order to prevent this, we do a geometry clean-up which is in the check’s manager.
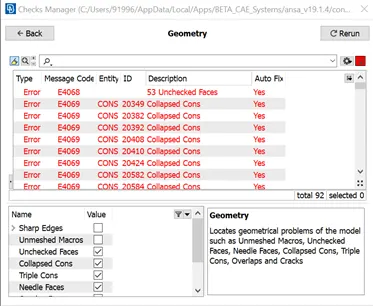
Checks Manager Dialog Box
- The errors in the above figure can be fixed automatically using FIX option or if the errors are not rectified, we must clear them manually.
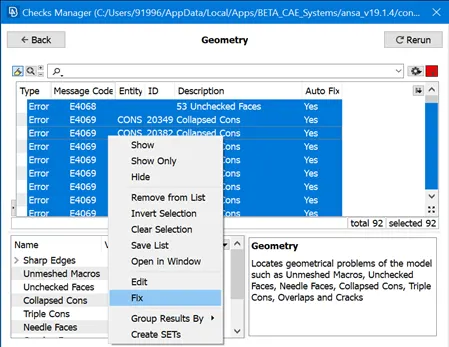
Checks Manager Dialog Box
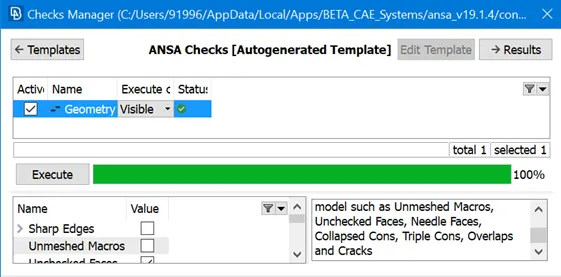
Checks Manager Dialog Box
- After all the error are rectified,if you check the geometry the exceution will be 100% then you can move forward.
2.ASSIGN PROPERTY ID (PID)
- Every part in the geometry has it’s own property. We can assign PID using ANSA. We have to select the part and click Apply, then we have to select the whole part using window selection to apply the PID. One can aslo assign different thicknesses for different parts in the PID manager.
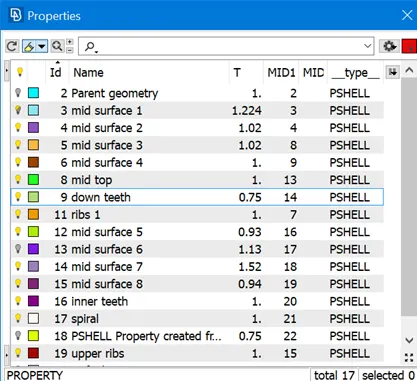
Property Identity(PID)
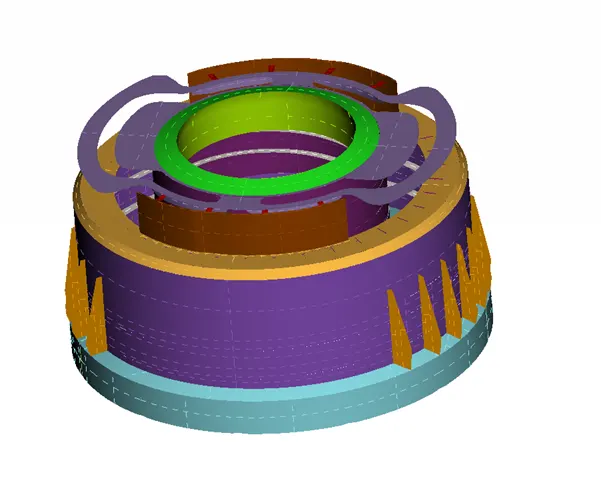
After assigning all the PIDs image of cap
3.GENERATE MID SURFACE
- We have to know why we are generating the mid surface. If you take any geometry, half of the thickness will be above the mid surface and other half will be below. So in order to represent the geometry we have to create mid surface. There are two ways to extract mid surface: 1)Using off-set 2)Using mid surface option.
1)Using off-set we can either create mid surface individually for each part or we can select the whole geometry using ‘Feature Selection’.Then give half the thickness for each surface selected.
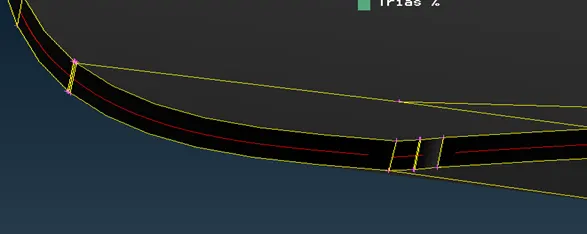
Mid surface after offsetting in red
2) Auto mid surface generation
- If the geometry is a closed one we can use this option. But it will delete the parent geometry after mid surface generation. This option is available under the midsurface tab. We have to select the whole geometry and confirm the mid location. A red line indicates the generation of mid surface which is shown in the figure below.We can also use multi mid where one surface is selected with red one with green and the thickness with blue.
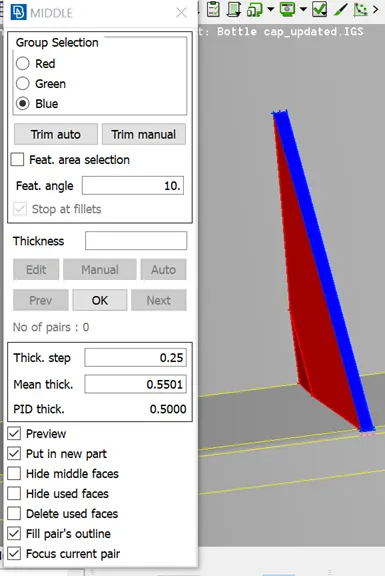
Select one side with red
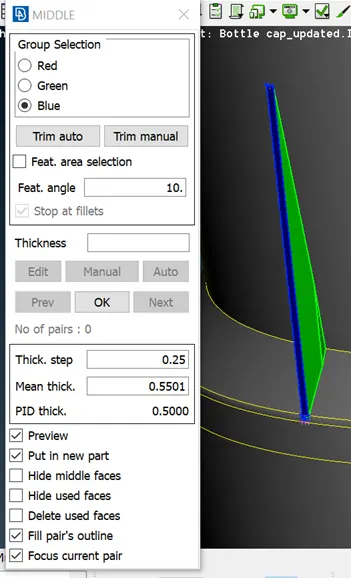
Select other side with green and thickness with blue
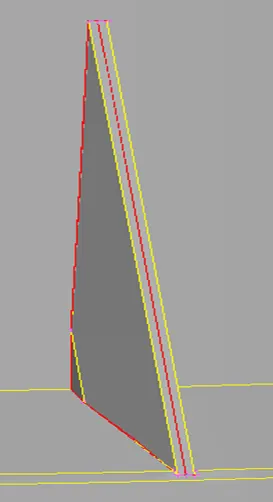
Mid surface generated
- Using all these options create mid surface for all the features and connect them. If there is any connectivity missing with some surfaces we can join them by creating new surfaces.In this cap model there are lot of features connected with same surfaces, as a result more triple cons can be formed.
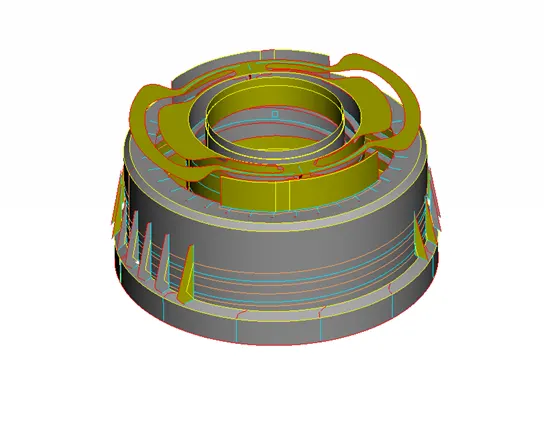
Full cap model mid surface
4.QUALITY CRITERIA
1)Aspect Ratio: It is defined as the ratio of maximum element edge length to the minimum element edge length. The ideal value is 1 but less than 5 is acceptable.
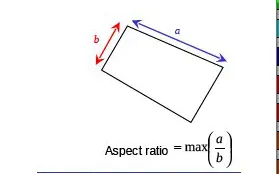
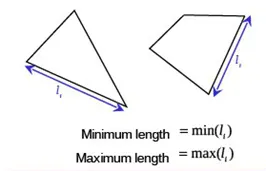
2)Minimum/Maximum element length: It is very important to check this error as it is used for crash analysis check.
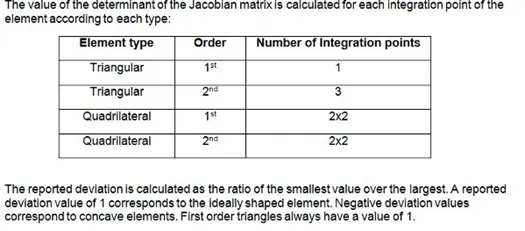
3)Jacobian: It is the scale factor used in the transformation of coordinated system. The ideal value is 1 but greater than 0.6 is acceptable.
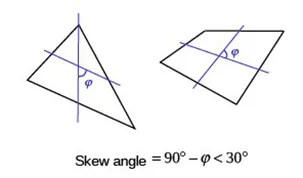
4)Skewness: If the quad element is not a square and has deformation, skewness is defined as 90 minus the minimum angle between the two lines joining the apposite mid sides of the element and similarly for the triangular element it is 90 minus the line between the each node of the opposing mid side. The ideal value is less than zero but 45 degree is acceptable.
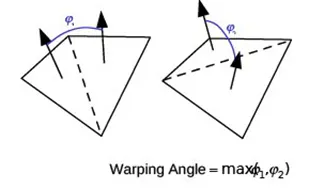
5)Warp Angle: It is defined as the angle between normals of two triangular planes formed by splitting the quad element along diagonals.
6)Target element length: It is the size of the element which we get should be nearer to the value compared to experimental value.
- Quality criteria can be accessed using F11 key. Now check the parameters which are required, give the values and then click apply.
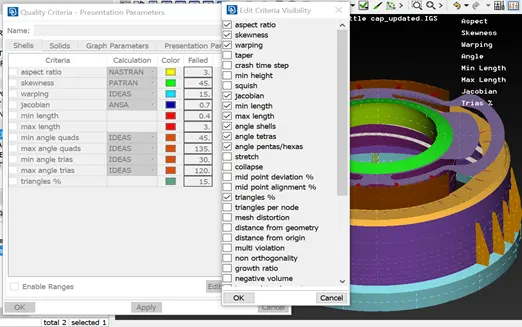
Quality criteria dialog box
- We must give both quality criteria and meshing parameters before starting with mesh.
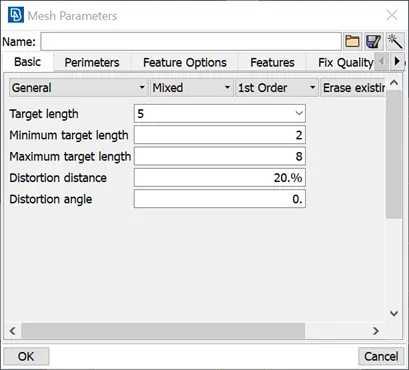
Mesh parameters dialog box
5.MESHING AND IMPORVEMENT OF THE MESH
- Now after asigining all the quality criterias and mesh parameters we can start 2D shell meshing. The type of elemets allowed in 2D meshing are of 4 categories.
1)Quad elements 2)Tria elements 3)Parabolic quad 4)Prabolic tria.
2D Elements Types
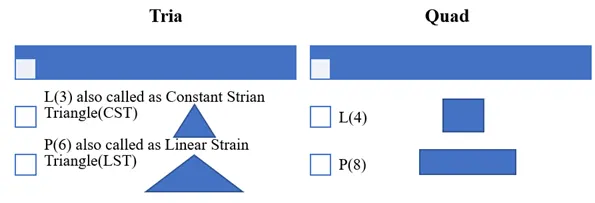
*L-Linear element *P-Parabolic element *()-Number of nodes
- The quad elements are usually better than triangular elements.
- For better merge transition we use tria elements at some places. It also provides good mesh flow.
- Trias at the edges and construction lines should be avoided for better mesh flow.
- We can recreate better mesh using reconstruction option which is in the shell mesh
- IMAGES OF BOTTLE CAP AFTER DRAWING SHELL AS SOLID
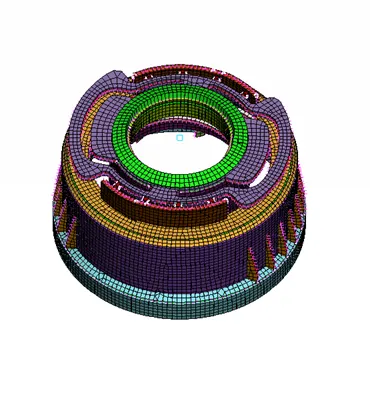
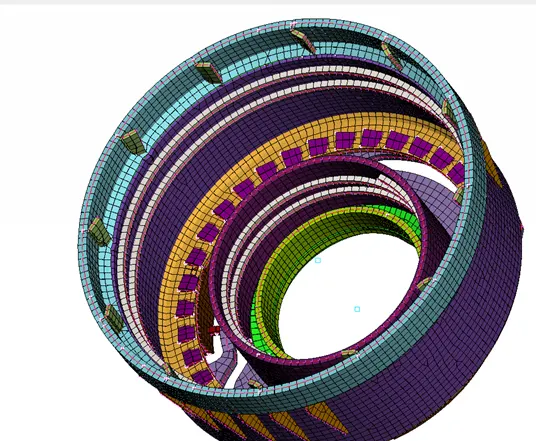
Top view after drawing shell as solid Bottom view after drawing shell as solid
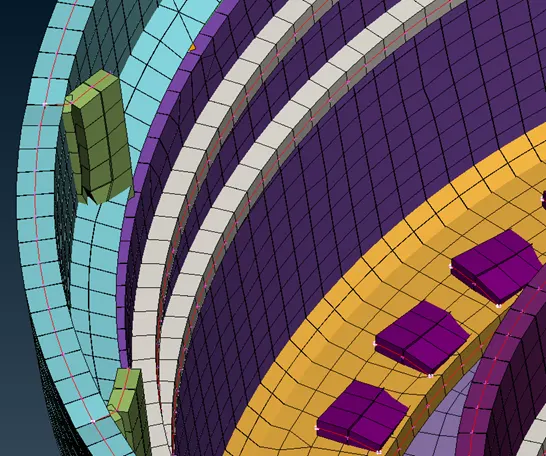
Teeth, Spiral after drawing shell as solid
- Options used for removing Trias
- Swap, Split and Paste options are used to remove trias originated on the geometry.
- Swap is available in mesh mode under elements tab. Swap is used to move the nodes as it rotates the common edge of two shells.
- Split is available in the mesh mode under elements tab. This option is used to split the trias into quad elements easily.
- Paste is available in the mesh mode under grids tab. It is used to paste the nodes manually/automatically.
- Holes feature should be even numbered and equally spaced.
- If there is any issue with the mesh extra hot points needs to be deleted on the geometry.
- In order to get better mesh flow, we need to cut faces using cut option which is in the Topo mode under Face grid. We can also create new faces.
- Rotating quads are not preferred.
- If there is any issue with a particular surface, one can always use universal delete option which is located under the search bar to delete that particular surface and create it using new fitted option.
- Mesh generated at some regions
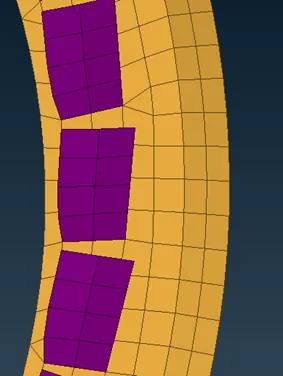
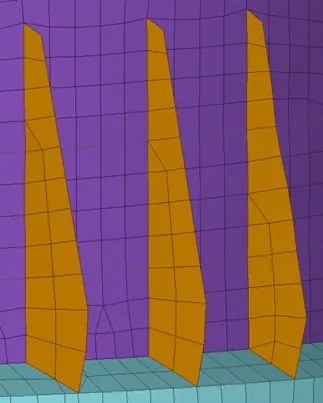
Mesh generation for teeth Mesh generation for ribs
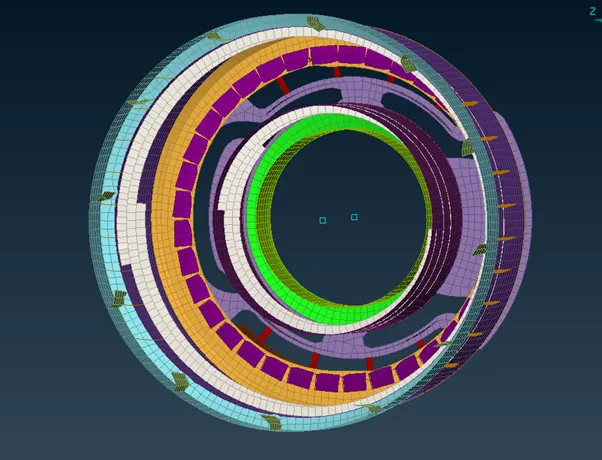
Mesh from bottom view
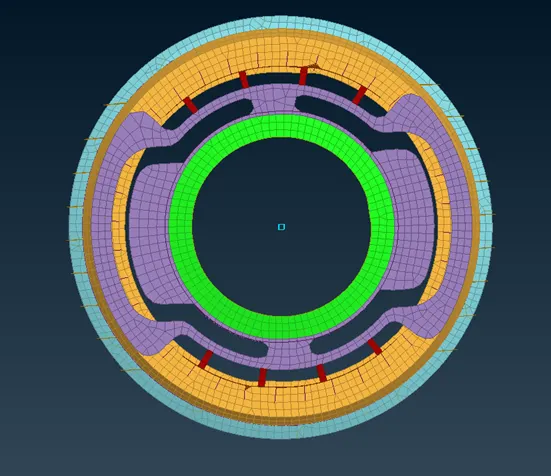
Mesh from top view
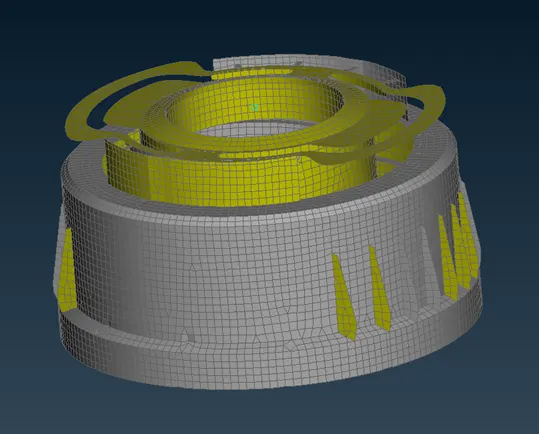
Mesh generated for CAP model
- As there are more triple cons of different features associated with same surfaces there will be some off elements in some areas. The length between each element will be less in these situations.
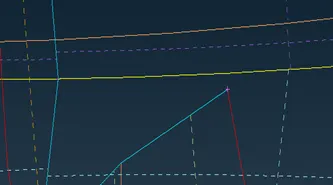
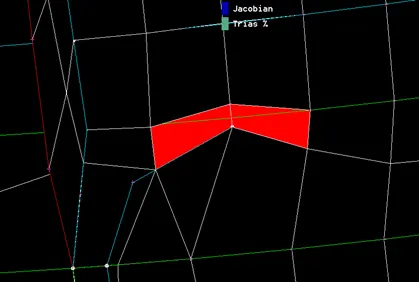
Triple con and Double con nearer to each other Off elements formed
- In this project 1 element is converted into 9335 elements in total, 1)Quad elements: 9106 which is 97.55% 2)tria elements 229 which Is 2.45%. There are 15 off elements.
Learning Outcomes:
- Able to do topological clean-up with no errors.
- Assigned separate PIDs for different surfaces.
- Able to generate mid surface for complex geometry with varying thicknesses.
- Aware of all the quality criterias and quality parameters during mesh generation.
- Understood about mesh generation and implemented mesh generation for complex geometry.
- Learned how to improve mesh flow and remove trias to achieve better mesh flow.
Conclusion:
From this project I can conclude, method of generating mesh for any geometry is very similar in case of shell meshing. I followed all the procedure mentioned in the grading policy. Practiced all the command in ANSA. Generated mid surfaces for different features like spiral,ribs,teeth etc with varying thicknesses. Able to defeature and do line adujstments in some areas. Able to mesh them successfully without any off elements. The majority of elements must be kept near to target length.
Hood Model of ANSA file link : https://drive.google.com/file/d/1OJzGRkO1K-dSqHAqO8OGwSlJ9dq-6x5C/view?usp=sharing