Week - 3 Drop test Challenge
OBJECTIVE :
To Simulate the Dropping of the Phone on the Rigid floor Using the INTIAL Velocity card for the Cell Phone in the given .k file and creating the Input deck from the scratch.
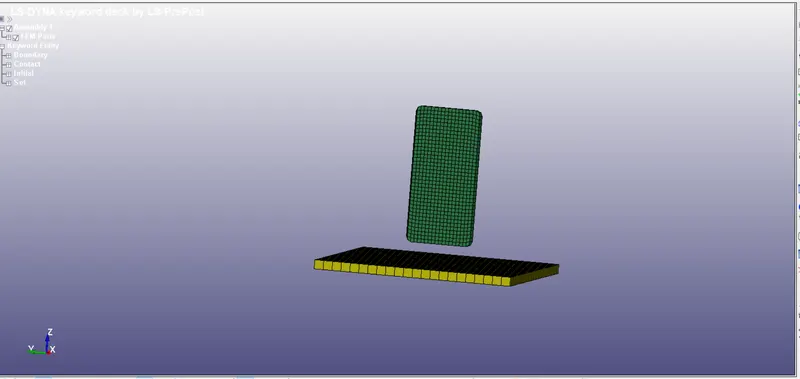
Fig 1 Given Cell Phone Model with Floor mesh
CASE SET UP :
1. Importing the Keyword (.k) file
The given file is imported in to the LS-Dyna Pre-post using the Import option in the Menubar.
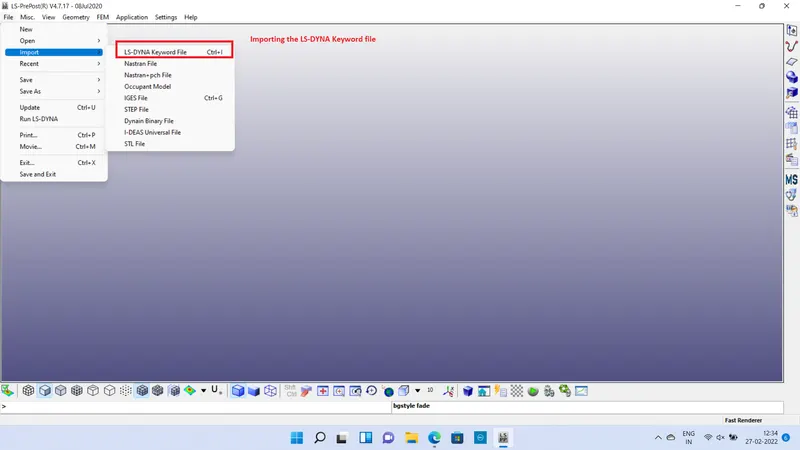
Fig 2 Importing the Keyword File
2. Giving Single Point Constraint using the SPC-Set in the BOUNDARY keyword
i. Creating the Node Set ID for the Floor
The Node Set Id for the floor is created in the create entity option with correct ID and all the elements of the Floor are selected.
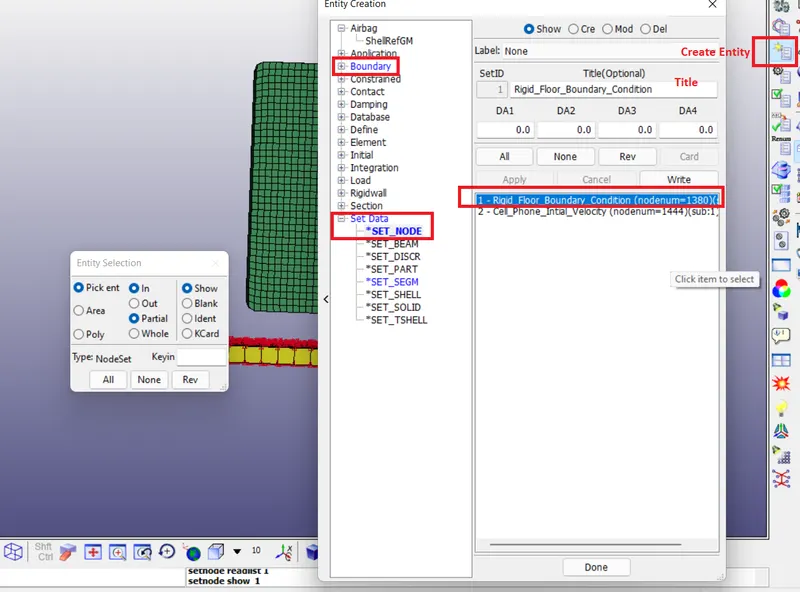
Fig 3 Creating the Node Set for the Rigid floor Boundary Condition
ii. Creating the boundary condition for the Floor using the SPC-Set .
The SPC-SET keyword under the Boundary Keyword in the Keyword manager is created using the Node Set ID for the Created for the Rigid Floor and the degrees of freedom are constrained in all the direction for the Floor.
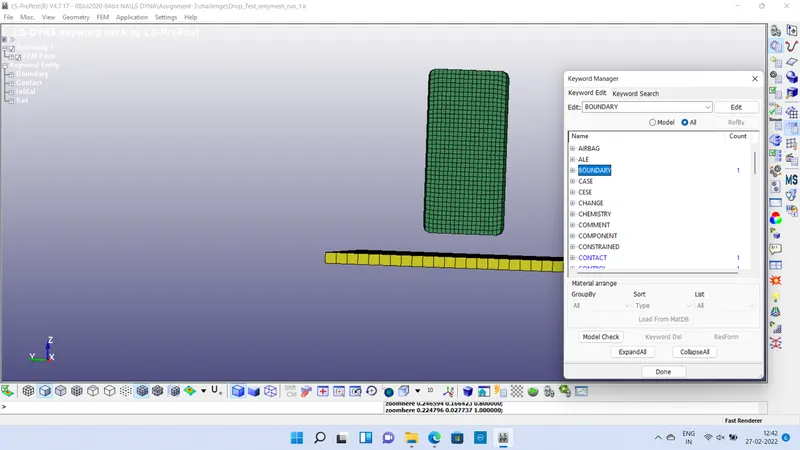
Fig 4 Boundary Keyword in keyword manager
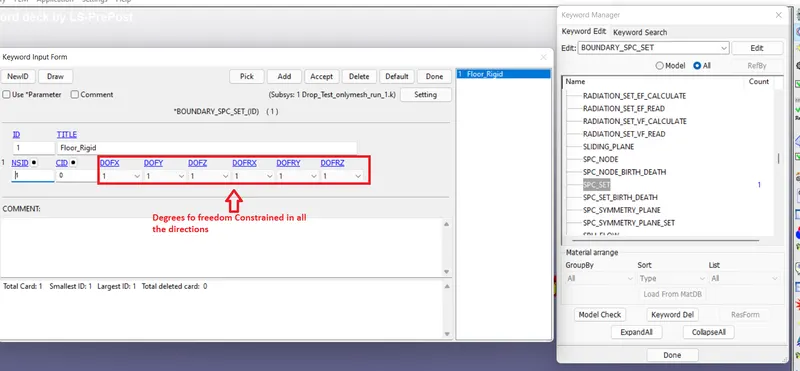
Fig 5 Creating the SPC Set for the Floor
3.Applying the Intial Velocity to the Phone
The Intial velocity is applied to the Cell phone by creating the veolcity card under the Intial Keyword. The node set for the Phone to which the intial velocity is to be applied is created and the Intial velocity of "-15.64 mm/ms " is applied in the Z-direction.
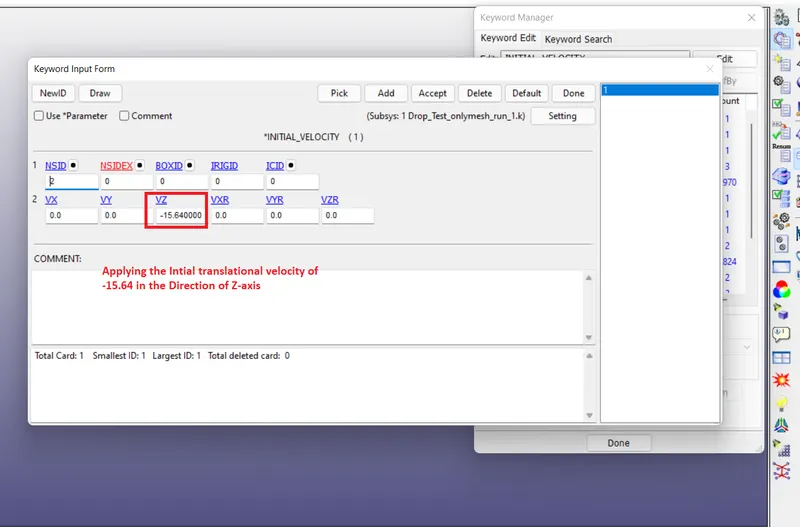
Fig 6 Applying the Initial Velocity to the Phone
4. Creating the Material Keyword
The Material Keyword for the both Floor as well as the cell phone are created in the keyword manager. The material type chosen for the floor is 020 rigid where as for the Cell phone it is 024 Piecewise_Linear_Plasticity. All the properties of the materials such as Young's Modulus, Density, Poisson's ratio, Yield strength and Tangent modulus are entered.
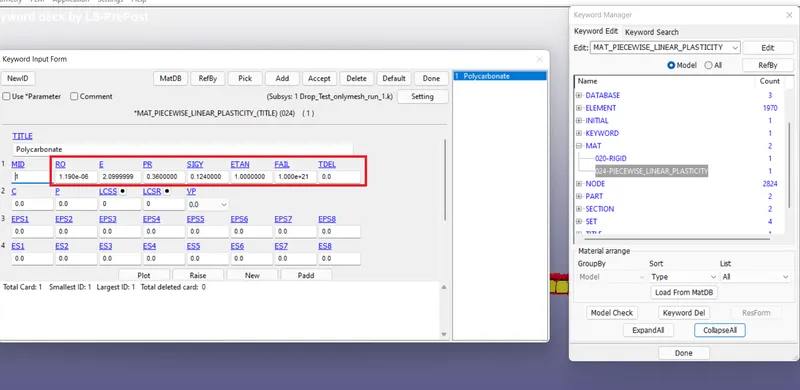
Fig 7 Creating the Material Keyword
5.Creating the Section Keyword
The Section Keyword for the Solid Elements of both Floor and the Cell phone are created in the Keyword Manager with the Element form.
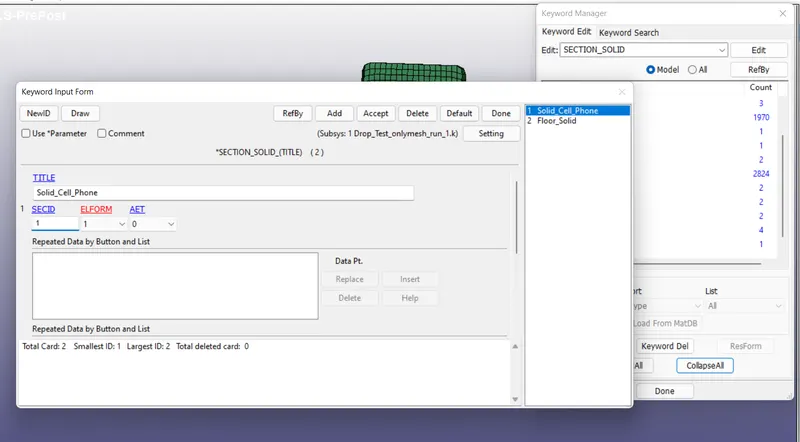
Fig 8 Creating the Section Keyword
6. Assigning the Mateial and the Section keywords to the Parts
The Created Material and Section keywords are assigned to the respective parts in the Parts keywords.
7. Creating the Contact between the Phone and the floor
The contact beween the Phone and the Floor is created through the following Steps
i. Creating the Element sets for the Slave and the Master
The Set of elements that would behave as slaves and then the set of elements that would behave as masters are created as the Element sets in the Keyword managers. Here the Elements languishing at the bottom of the phone are selected to form as the slave element sets where as the elements from the floor that are most likely to get in touch with the phone are selected as master set of elements.
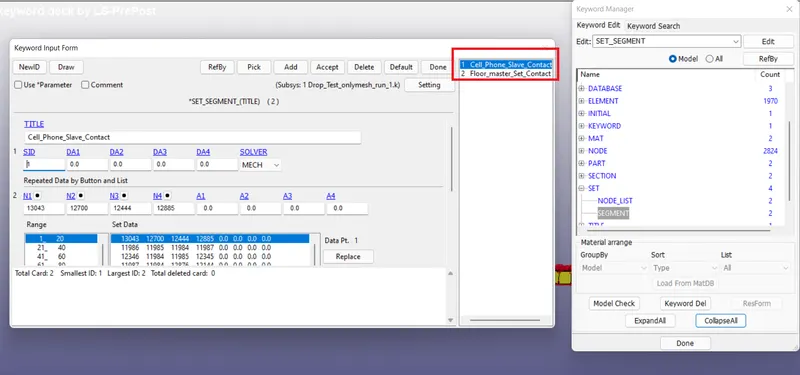
Fig 9 Creating the master and slave segment sets
ii. Creating the Surface to Surface contact keyword in the Keyword manager
The Surface to surface contact keyword is created in the keyword manager in which the Master and the Slave Element set created are selected and the
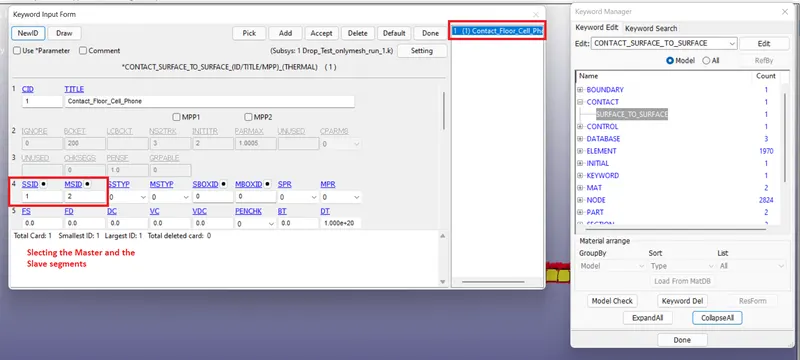
Fig 10 Creating the Surface to Surface contact
8. Giving the Output requests
The Output requests are given by creating the Database cards and selecting the ASCII keywords for the type of the requests that are required as well as the Binary Plots for the animation. The timestep for which these results are to be plotted are entered.
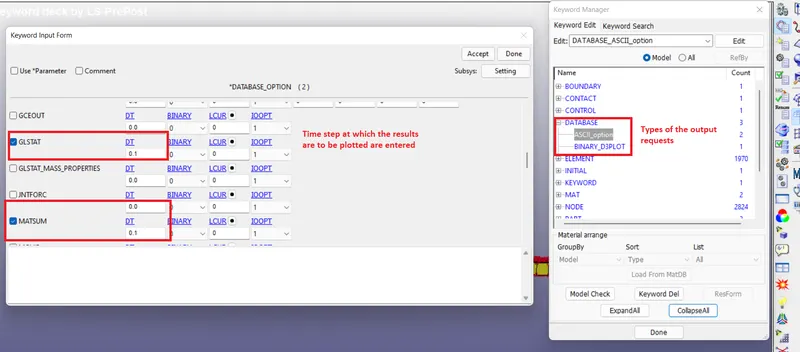
Fig 11 Types of the output requests in the database keyword
9. Creating the Control Termination Keyword for deciding the Simulation run time
The Control termination keyword is created in the Keyword manager for the termination time or the time for which the simulation should be run is entered in the ENDTIM column of the termination card.
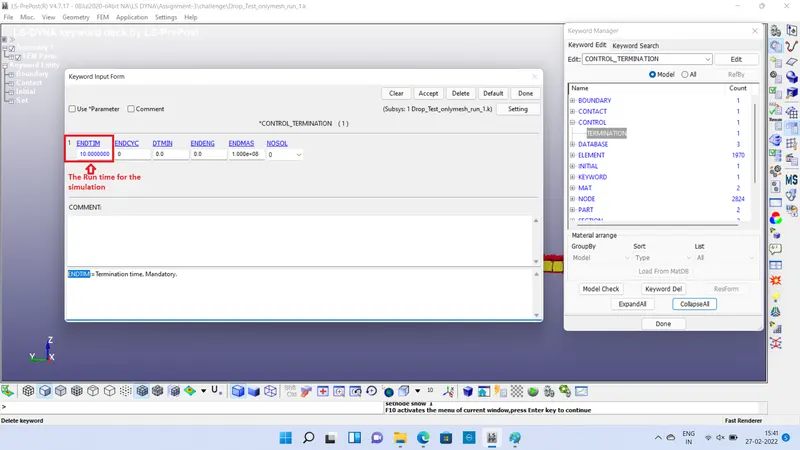
Fig 12 Runtime for the simulation
EXECUTION :
The keyword file is then saved and the file is run in the LS_RUN for Solution.
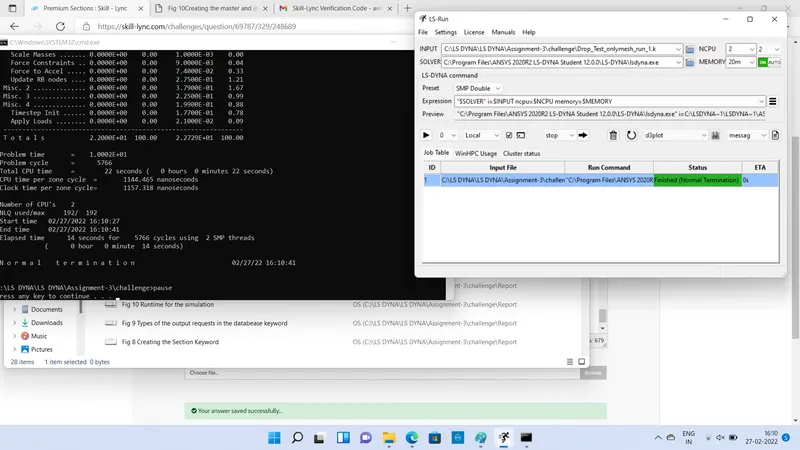
Fig 13 Running the Input deck in the LS-RUN
RESULTS :
1. Binary d3h plot
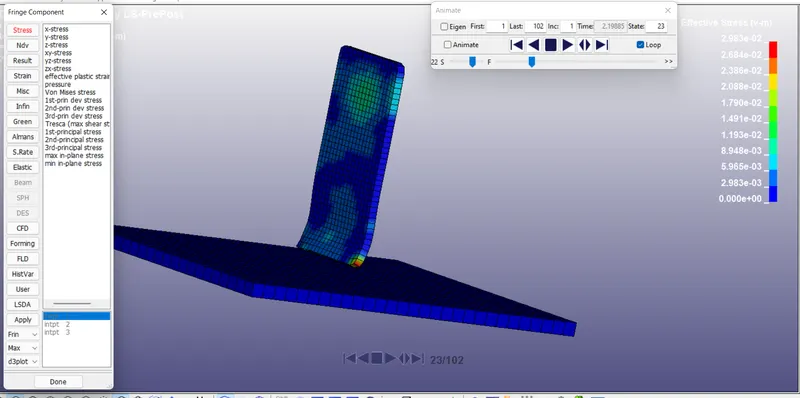
Fig 14 d3plot
2. Gl Stat Plots
i. Kinetic Energy Plot
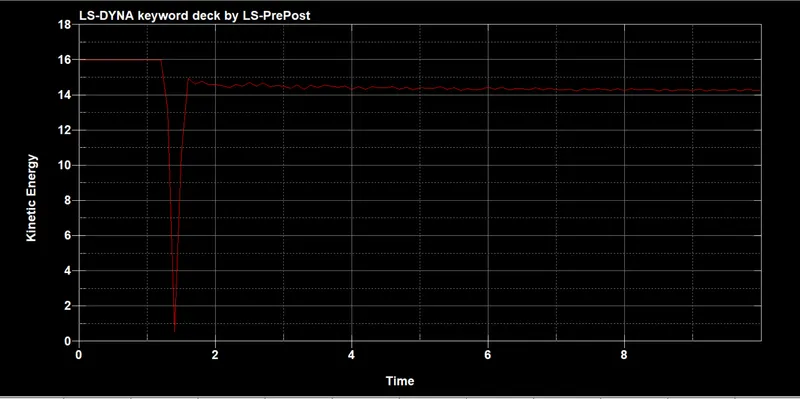
Fig 15 Kinetic Energy Plot
ii. Internal Energy Plot
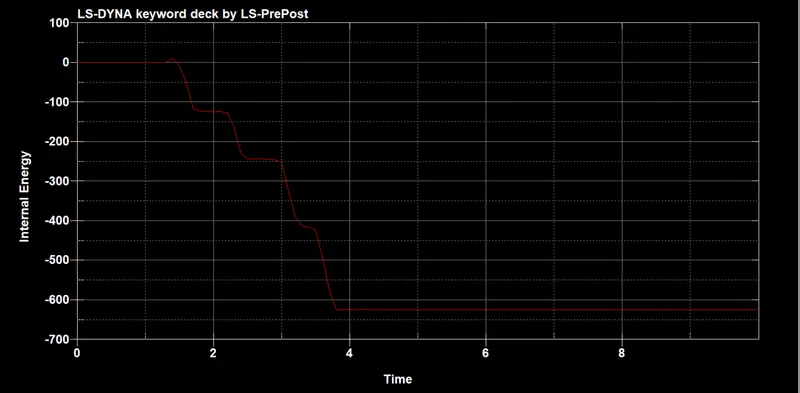
Fig 16 Internal Energy Plot
iii. Total Energy Plot
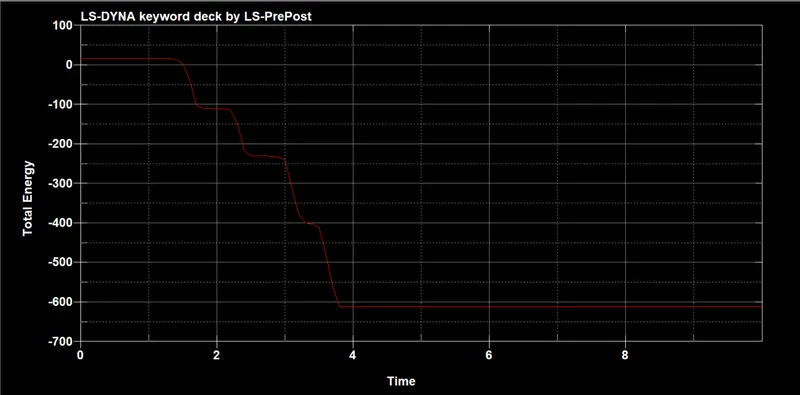
Fig 17 Total Energy Plot
3. MAt Sum Plots
i. Kinetic Energy Plot
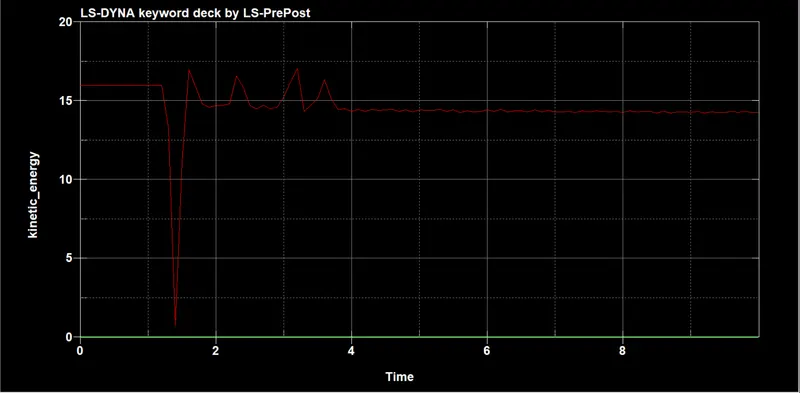
Fig 18 Kinetic Energy Plot _ MATSUM
ii. Internal Energy Plot
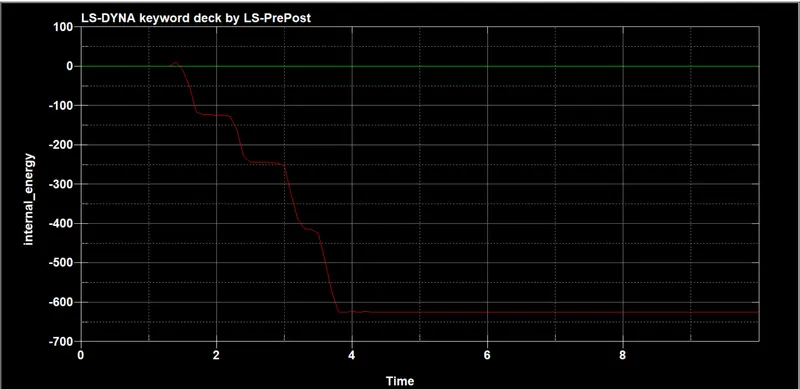
Fig 19 Internal Energy_MATSUM
CONCLUSION :
The Simulation Run for the Given model was run Successfully after creating the Input Deck from the scratch including the INTIAL Velocity Keyword and the results were obtained successfully.