Hood design-Week 2
AIM:
To Design Hood outer panel, inner panel and the necessary reinforcements by following the Master section mentioned with the design parameter explained in the videos. Submit an assembly of Hood inner panel, outer panel, latch, hinge and the reinforcements
INTRODUCTION:
HOOD:
A car hood, also referred to as a bonnet in some other countries, is the hinged cover that rests over the engine of a front-engine vehicle. Its purpose is to provide access to the engine for repair and maintenance. A concealed latch is typically used to hold down the hood. On vehicles with an aftermarket hood and on racecars, hood pins may be used to hold down the car hood. Hoods sometimes also contain a hood scoop, wiper jets, power bulge, and/or hood ornament. Car hoods are typically constructed from steel and sometimes from aluminum. Aftermarket car hoods may be constructed from various other materials, including carbon fiber, fiberglass, or dry carbon. The hood design may vary from one make and model to another, including SUV,truck, minivan and passenger-car models.
Concerns regarding the severity of a potential pedestrian head injury during a collision with a motor vehicle have led to advanced hood designs on many models. Such designs may include a multi-cone inner hood panel design. An active structure that is capable of pushing the surface of the hood away from the vehicle's hard motor components in the event of a pedestrian crash is also in use. Pyrotechnic or spring force designs are often used in active-hood design.
HOOD DESIGN CONSIDERATION:
The hood of a car is considered as the frontal BIW enclosure component. Bonnets are designed to reduce air resistance as the air flows around the car. Apart from this, bonnets are also designed to meet several other requirements. They serve a great deal of purpose in protecting the passengers inside the car & the pedestrians in the event of an accident. It also acts as the cover for the engine.
The European New Car Assessment Programme (Euro NCAP) is a European car safety performance assessment program which has developed test specifications & rating systems for assessing pedestrian injuries during impacts with the front of vehicles such test include a series of tests using impacts designed to bio-mimic a collision at speed of 40 km/h.
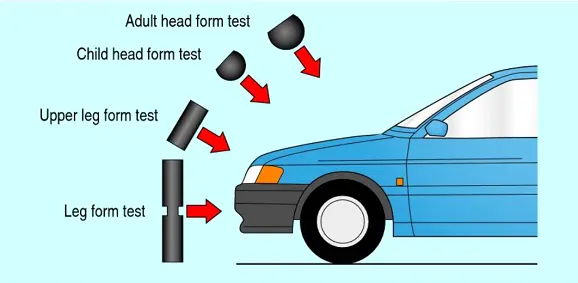
- They describe a situation in which a pedestrian is situated laterally & a car first hits one of his legs. Test are conducted on the leg, upper leg & most importantly the head, as head trauma is most commonly responsible for casualties.
- So to avoid severe injuries to the head, the high impact area for adults & children are subjected to less thickness. Also no reinforcement should be provided in that area as during head collision, the hood will absrob the head impact energy leading to collapse of the hood & thus protecting severe head injury.
- Another important criteria for the hood design is the protection of the occupants inside the car during front collision. The design of the hood should be in a such a way that the during the collision, the force should travel in the upward direction through the embosses & directed towards the body of car. Thus protecting the occupants inside.
Heming:
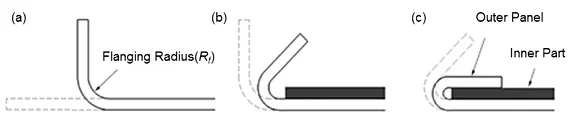
Hemming is a forming operation in which the edges of the sheet are folded or folded over another part in order to achieve a tight fit. Normally hemming operations are used to connect parts together, to improve the appearance of a part and to reinforce part edges.
In car part production, hemming is used in assembly as a secondary operation after deep drawing, trimming and flanging operations to join two sheet metal parts (outer and inner) together. Typical parts for this type of assembly are hoods, doors, trunk lids and fenders.
The accuracy of the hemming operation is very important since it affects the appearance of the surface and surface quality. Material deformations, which occur during the hemming process, can lead to dimensional variations and other defects in parts. Typical hemming defects are splits or wrinkles in the flange, material overlaps in the corner areas or material roll-in. This is why it is important to use simulation tools in order to, on the one hand, better understand the hemming process and, on the other hand, significantly reduce the number of “trial and error” loops during tryout und production.
Deep drawing:
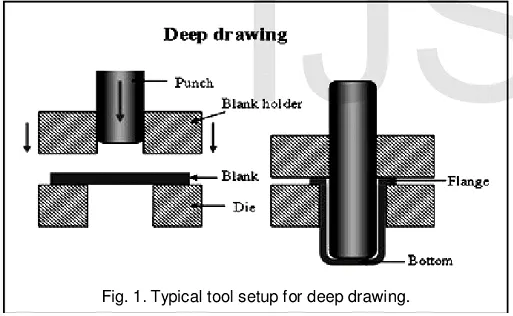
Deep drawing is a sheet metal forming process in which a sheet metal blank is radially drawn into a forming die by the mechanical action of a punch. It is thus a shape transformation process with material retention. The process is considered "deep" drawing when the depth of the drawn part exceeds its diameter.
PROCEDURES OF DESIGN HOOD:
Hood is one of the major components of Vehicle body. It mainly covers 2 major power transmitting components i.e. Engine and Radiator assembly. Along with covering them through its inner panel, hood outer panel also serves major role in aesthetics and ergonomics of vehicle.
It has 3 supportive components Viz.
- A) Hinges- for easy opening and closing of hood
- B) Latch- to keep hood in correct closed position &
- C) Support Rod- helps in keeping hood in open position.
We will be mainly discussing
- Hood outer panel
- Hood inner panel
- Hinge Assembly
- Latch assembly
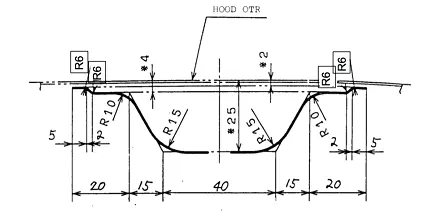
Hood inner panel is designed as per given Master Section sketch with reference to Hood outer skin provided.
HOOD INNER PANEL:
- In the inner panel only we can research & implement the safety of pedestrians & as well as the driver. In this panel only we can attach the reinforcement, embossed, mastic points etc.
- It is an object of the present invention to provide a hood inner panel capable of reduction of a reaction force of the hood inner panel even if a level of deformation of a hood of a vehicle increases, & ensuring a sufficient energy absorption capacity.
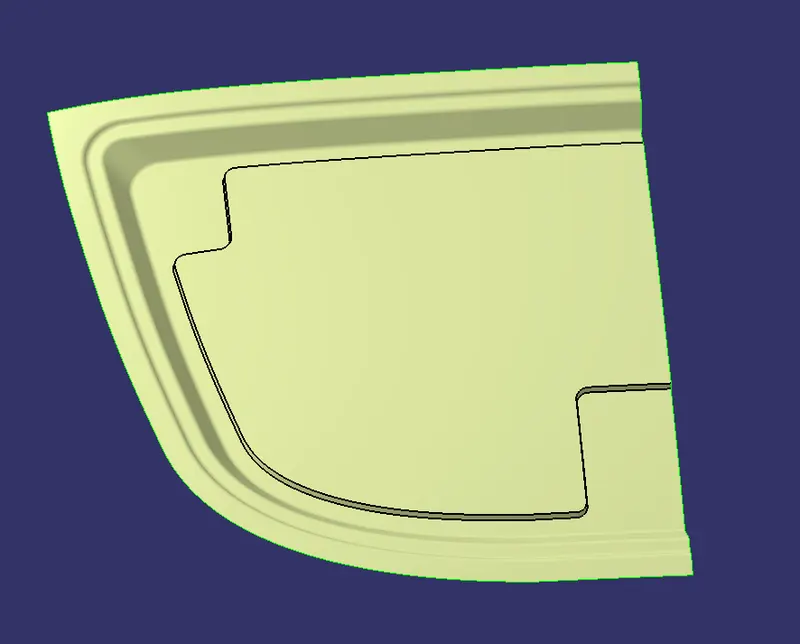
First, we have to create hood inner panel with given master section and create embosses for forces impact in the hood.
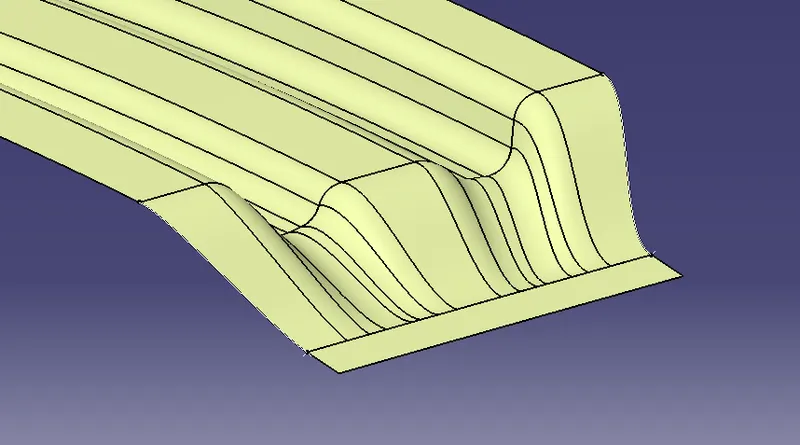
Offsets the given outer panel which given master section 1.7mm,4.7mm,26.5mm and 21.5 mm. split the offsets surfaces by using paralle curve, in first offset surface 15mm form edge, second surface between 17mm and 30 mm from the edge, third surface 50mm from the outer edge. Using multi section tool from the splitted edges and join three surface with surface fillet option.The fillet value is min 3mm and max 5mm in the sheet metal.
Then for emboss surface draw a skectch with excluding are for hinge and latch emboss position. extrude the sketch and split joined surface offsettd surface. Create sweep inth splitted edges and trim with 21.5mm offseted surface.
Necessity of Emboss and its Designing:
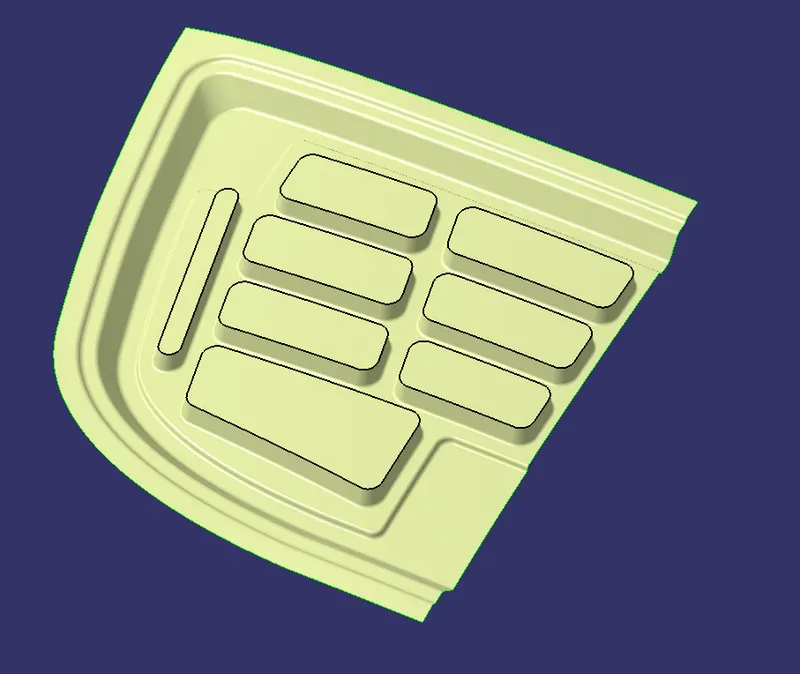
After basic master layout is done we have to provide emboss sections to dissipate the collision force to outer corners toward hinge portions. Thus impact force passing to passenger cabin be reduced majorly.
While creating these embosses we have to keep in mind about draft direction and draft angle so that stamping tool will create proper embossed structures on panel. Consider following image for reference of embossed sections on inner panel.
Create a sketch for emboss in the above trimmed surface. As same extrude the sketch and split with surfaces, sweep emboss splitted edges with angle of 7 degree with respect to surface. Trim with 5.7 mm offset surface.
Mastic creation:
Mastic Data
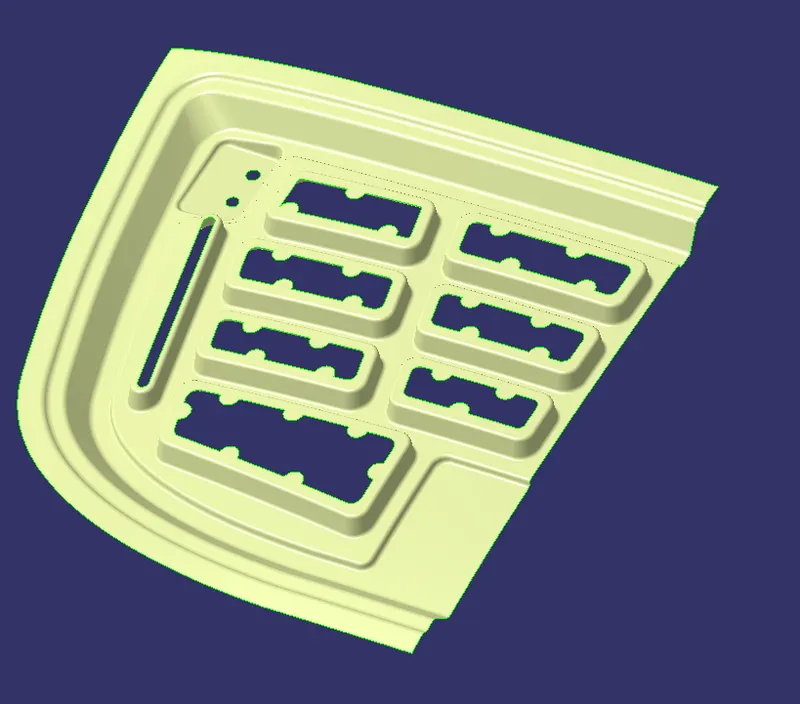
To reduce NVH i.e. noise vibration and hardness between hood inner panel and outer one, mastic sealants are need to be applied. Every mastic sealant improves the strength locally around 80mm. It joins the inner panel with outer panel also reducing the vibrating noise.
Thus while designing embosses on inner panel we have to design mastic portions where sealant can be applied as shown in image: Mastic Data.
Mastic regions are designed such that these will be closer to outer panel. Rubber sealant is applied on the mastic regions of Hood inner panel which will glue both panels together.
Hinge Positioning:
Hinge positioning is needed to be properly designed so that opening and closing of hood will occur in correct manner. Also it will decide if latch and striker get closed correctly or not.
To have proper hinge location, align hinges on inner panel such that midpoint of axis passing through both hinges with striker centre point be radius which will create a trajectory.
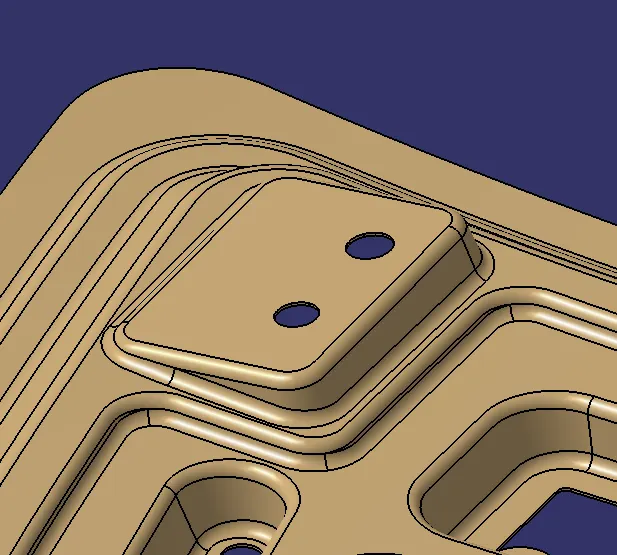
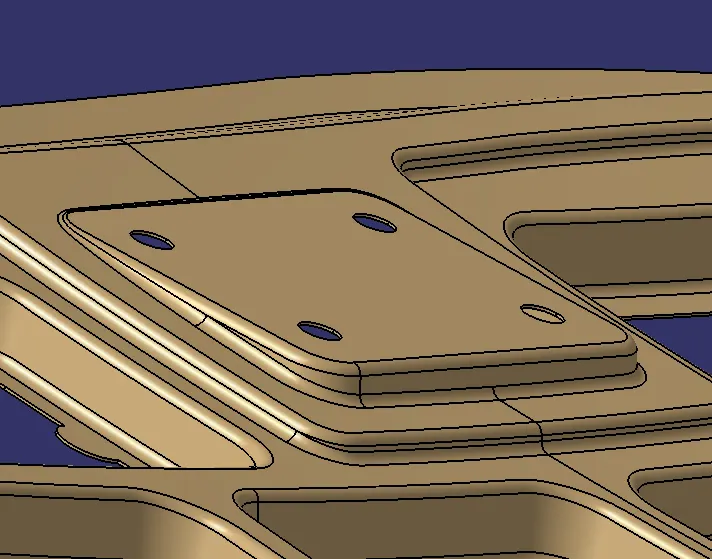
Latch Emboss- Similar to hinge emboss we have to design latch emboss to improve local strength of inner panel providing support structure for latch mounting.
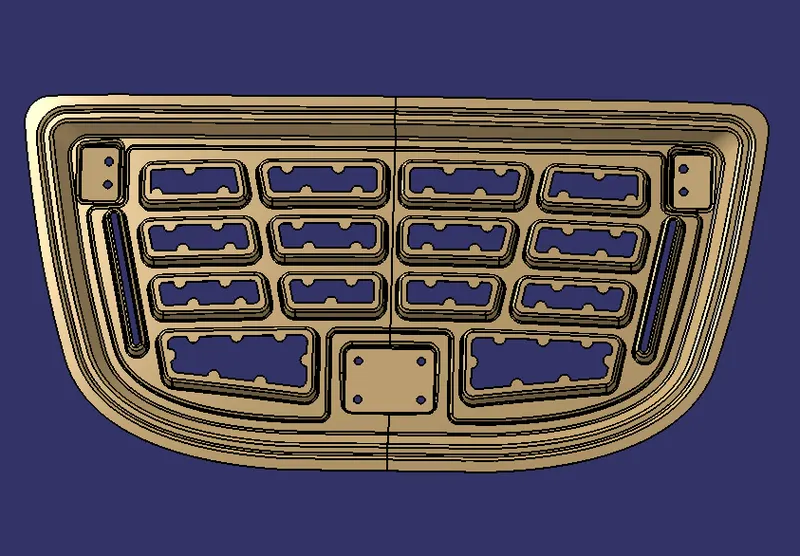
Inner Panel of Hood
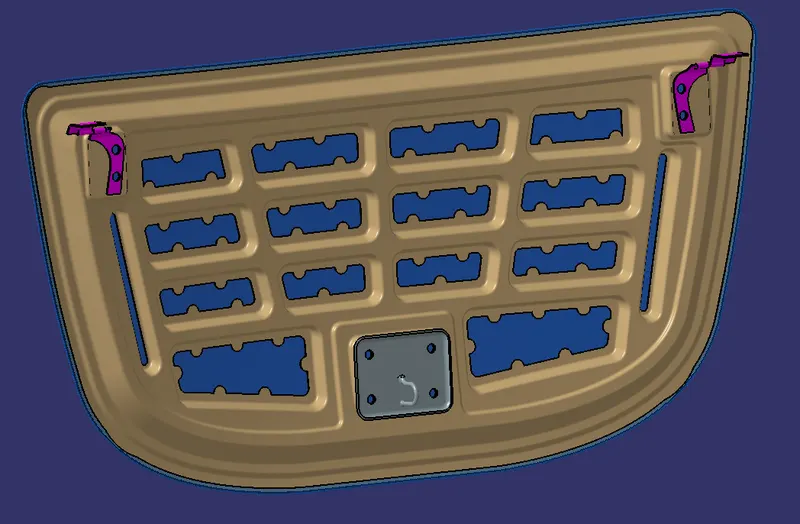
This is the final inner panel of hood with emboss, cut out and hinge emboss and latch emboss.
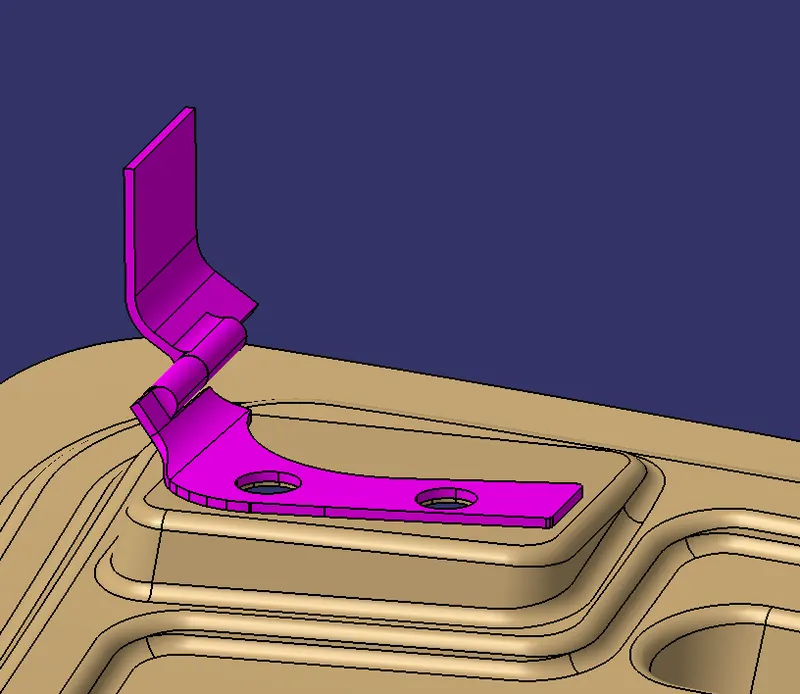
Hinge Assembly:
Hinge is a component that fixes the hood to the fenders of the car. The latch must be fixed perpendicular to the hinge axis so that the hood opens or closes properly.
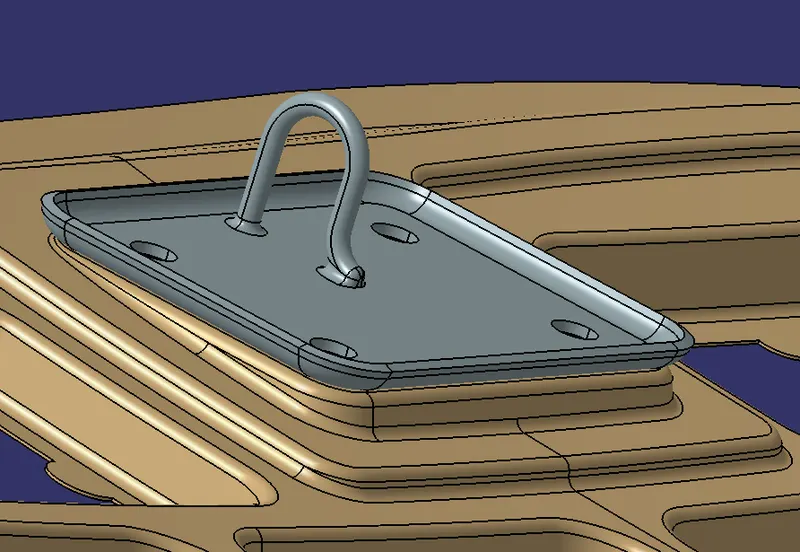
Latch Assembly:
Latch & striker is used for locking the hood with the car. It is usually placed on the space provided on the inner panel.
REINFORCEMENT:
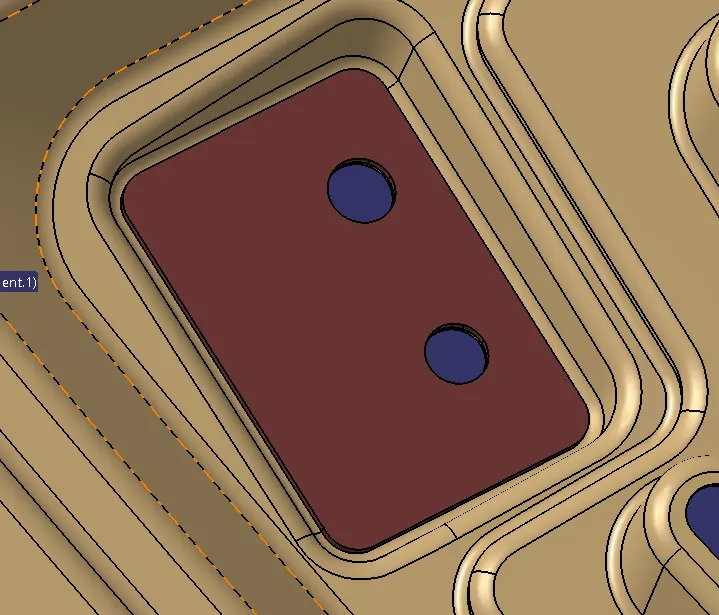
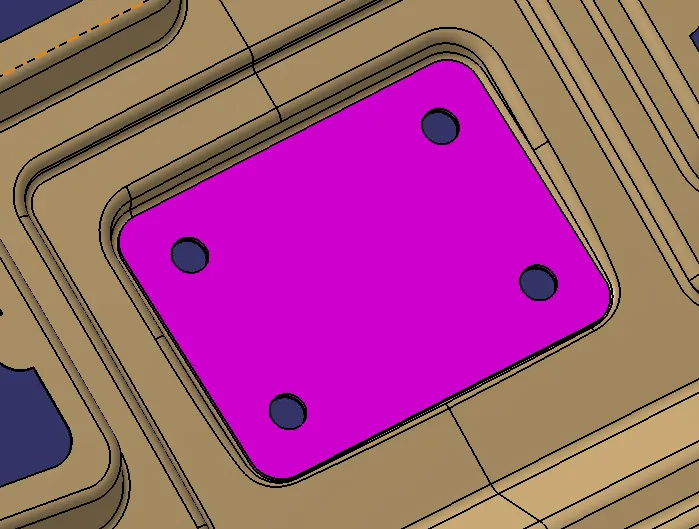
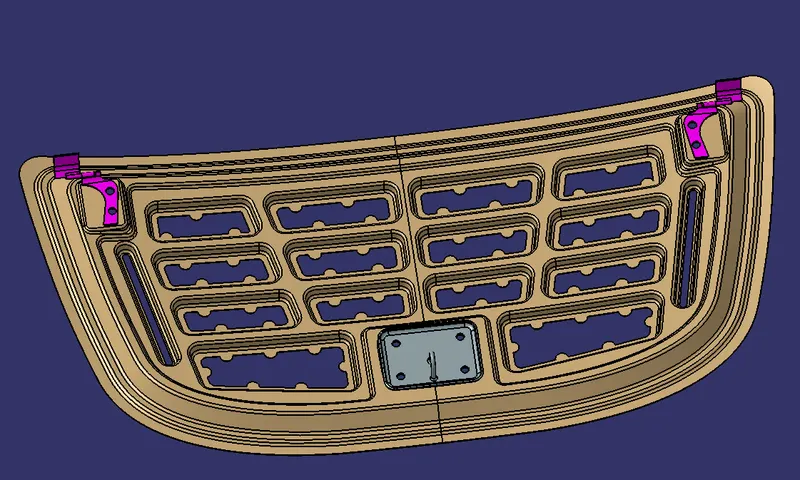
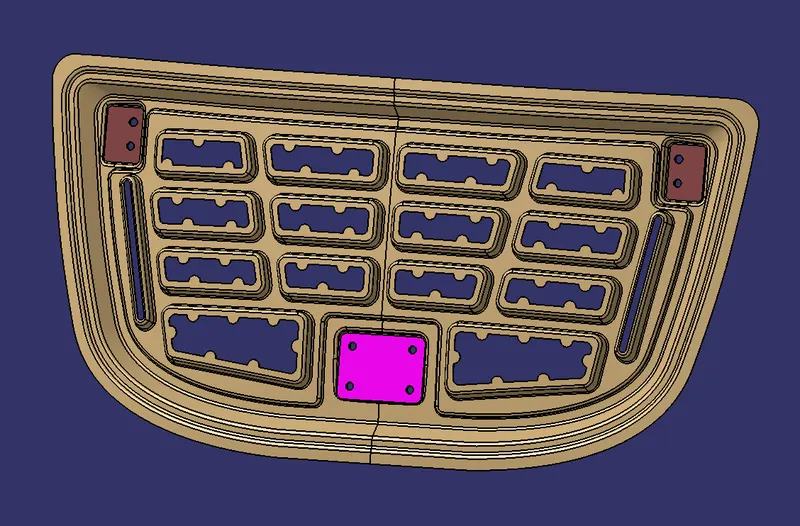
To furthermore reduce the impact to the occupants inside the car, additional latch and hinge reinforcement to the hood. When latch and striker are placed, there is drop in strength at that position thus reinforcement is required. Also stiffness pads are placed to reduce NVH. Hinge and latch reinforcement thickness is kept at 1.5 mm but it may vary.
Hinge Reinforcement
Latch reinforcemnet
Inner panel with hinge and Latch assemble
Inner panel with hinge and Latch Reiforcement.
Hemming:
Hemming is the process in which the edge is rolled flush to itself, while a seam joins the edges of two materials. Normally hemming operations are used to connect parts together, to improve the appearance of a part and to reinforce part edges. In hood design, hemming is used in assembly as a secondary operation after deep drawing, trimming and flanging operations to join two sheet metal parts (outer and inner) together. Dimensions of hemming are given below.
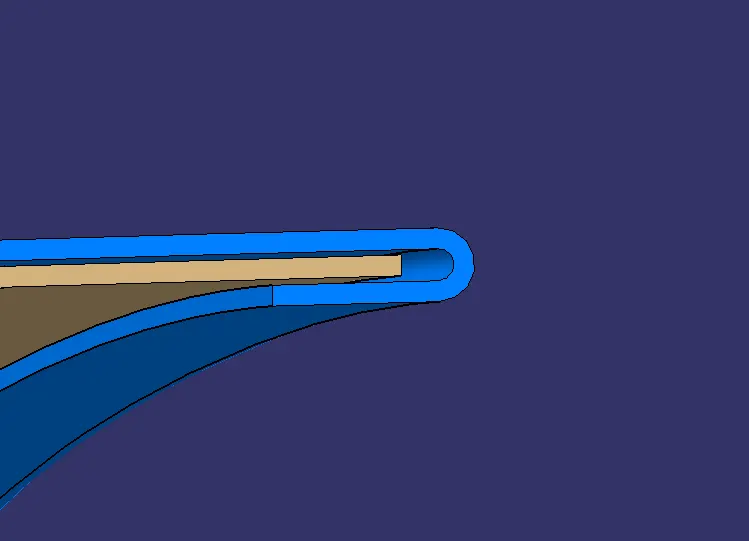
Offset outer panel 2.65mm and create parallel curve for 7.325mm from the outer edge and split the surface.
Relief data:
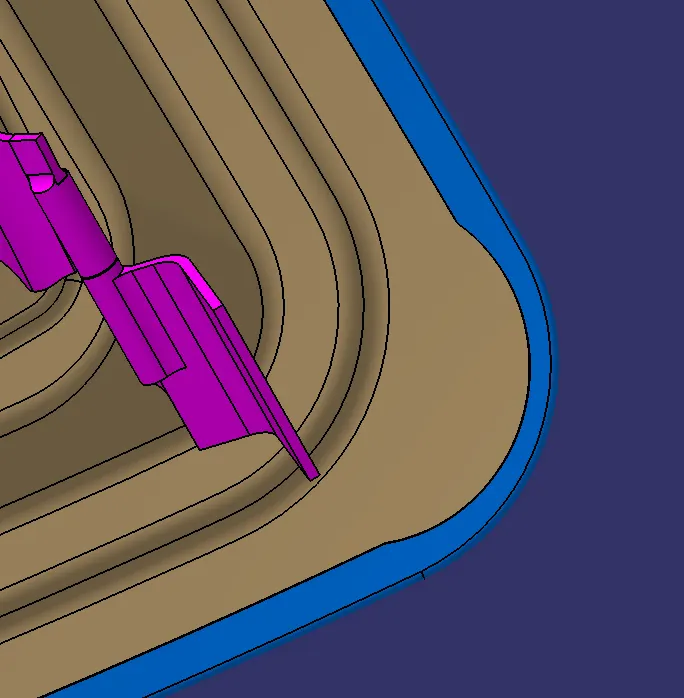
Relief is provided onto the part or component in order to remove any stresses developed in a particular area i.e sharp corners that takes place during the hemming process is carried out. Thus corners are rounded or chamfered.
Front Relief
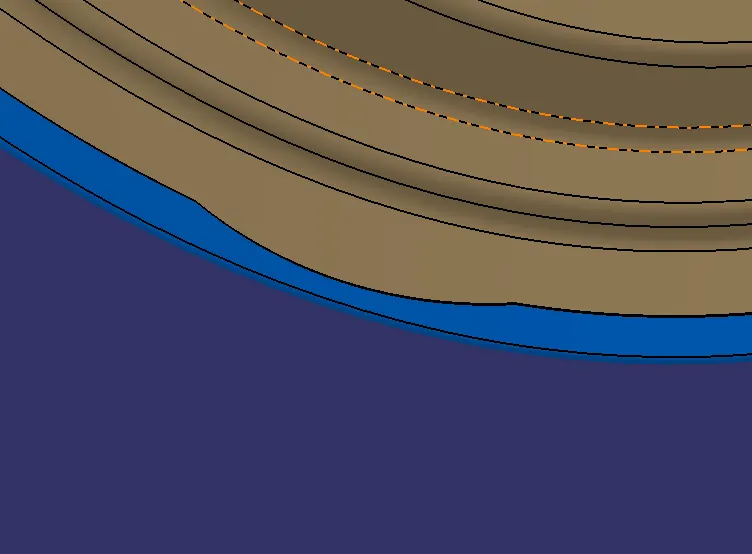
Rear Relief
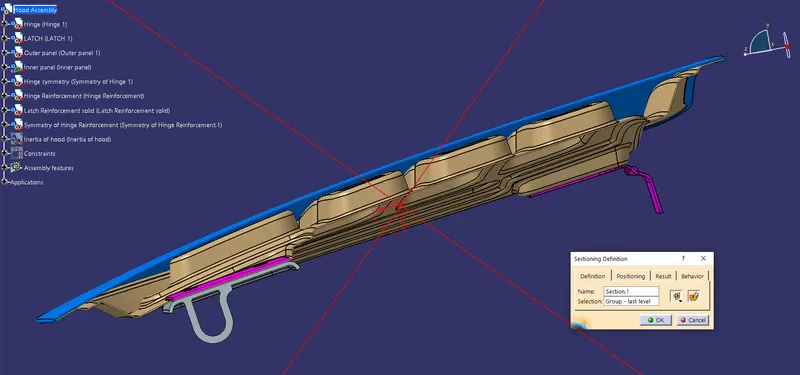
Outer panel heming:
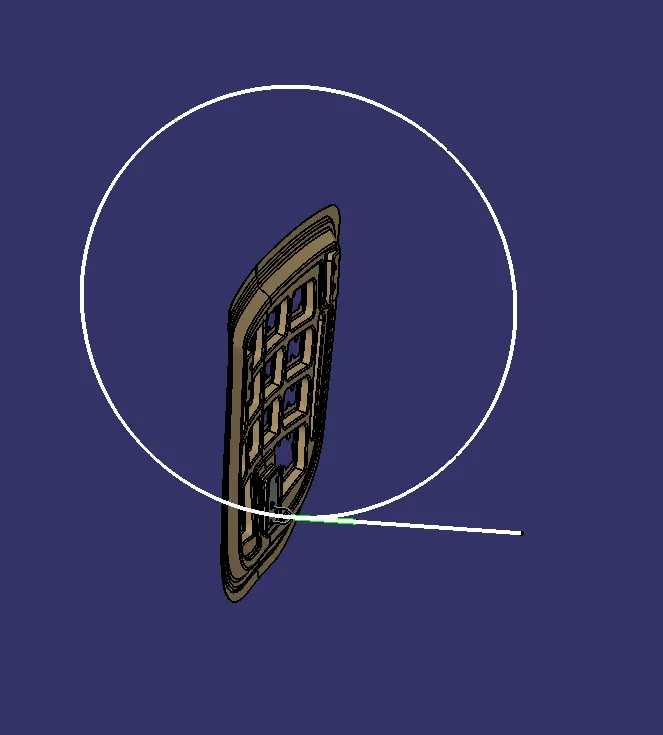
Latch trajectory motion:
while opening or closing hood, the latch should be perfectly alingned with fixing or striker point. For that , latch trajectory must be perpendicular to the hinge axis.
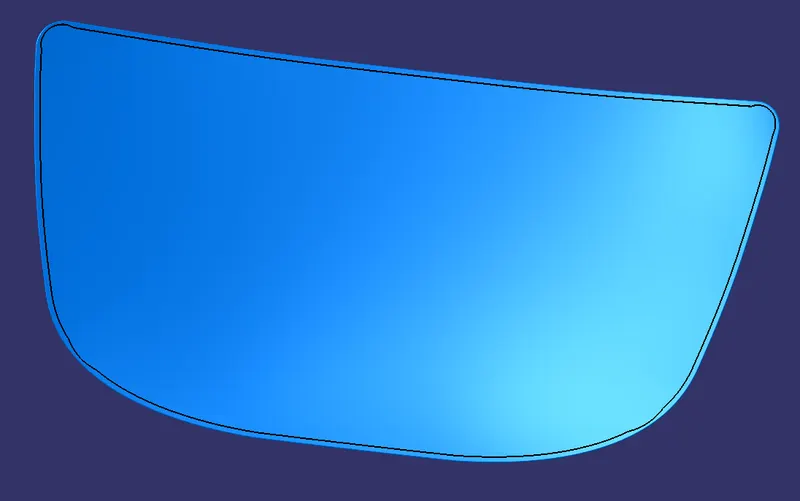
OUTER PANEL:
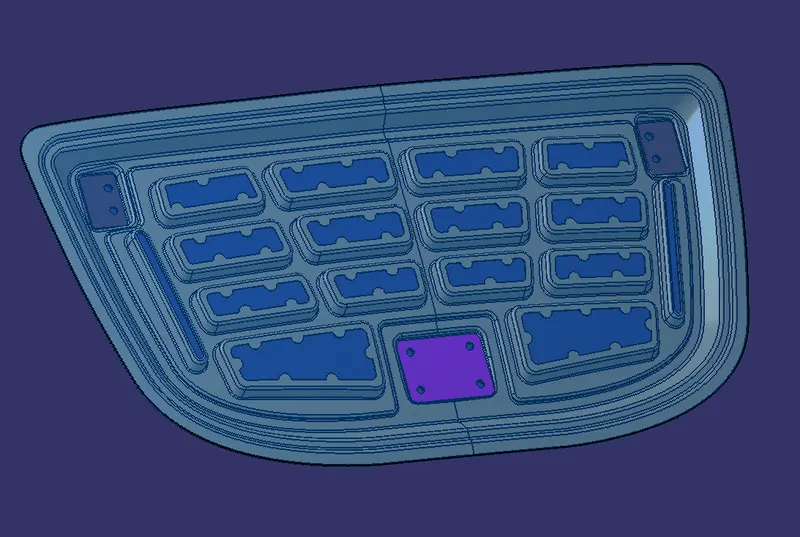
MULTI VIEWS OF HOOD ASSEMBLY:
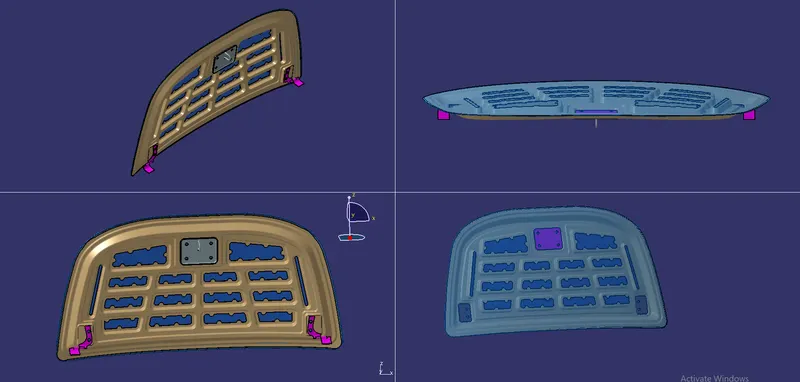
HOOD ASSEMBLY:
Conclusion:
Therefore, we designed Hood outer panel, inner panel and the necessary reinforcements by following the Master section mentioned with the design parameter. Submitted an assembly of Hood inner panel, outer panel, latch, hinge and the reinforcements.