Creating Levels, Grids, Layout and model elements for a residential unit using REVIT
1. What is BIM? Summarize the features of BIM and benefits of using BIM over 2D CAD tools.
AIM:- To understand the BIM process and to summarise the features of BIM and benefits of using BIM over CAD tools
EXPLANATION:-
A) Definition of BIM:- BIM refers Building Information Modelling which is a concept that was invoked by Autodesk. Building Information Modeling is a process supported by various tools, technologies and contracts involving the generation and management of digital representations of physical and functional characteristics of places. Building information models (BIMs) are computer files which can be extracted, exchanged or networked to support decision-making regarding a built asset. BIM software is used by individuals, businesses and government agencies who plan, design, construct, operate and maintain buildings and diverse physical infrastructures such as water, refuse, electricity, gas, communication utilities, roads, railways, bridges, ports and tunnels. ( Source:- Wikipedia)
B)Features of BIM:- The main features of BIM are a) Coordination and b) Computation
a) Coordination:- It helps in coordination between different projects such as architectural,mechanical and structural engineers and come together to work together in a single project. Although they work independently but they achieving the project as a whole unit.
b) Computation:- Revit also helps in performing computation such as material schedule or quantity schedule, to perform the energy evaluation, to analyse the structure independently having different software tools comes with Autodesk package such as Robot Structural Analysis that helps in computing to response the loads under different load conditions.
C)Benefits of Revit over 2D CAD tools:- The main benefits of Revit over CAD tools that are:-
a) Revit is designed for architects,engineer,contractors and developers whereas AutoCAD is basically designed for widespread commercial use of 2D and 3D
b) Revit is used for creating comprehensive models that use real-life information whereas AutoCAD is used for creating basic geometries to represent real life
c) Revit is recommended for modeling, cost scheduling, clash detection and change management whereas AutoCAD is mostly recommended for precise 2D line work. Example:- elevation detail drawings
RESULT:- BIM process and also summarise the features of BIM and features of BIM and benefits of using BIM over CAD tools have been explained.
2. Understand the concept of Categories, Families, Elements, Instances in Revit. Go to Insert Tab, choose a category. Pick a family and element. Understand the instances and insert it to Revit model
AIM:- To understand the concept of categories, families, elements and instances in Revit and to undestand the instance and insert it to Revit model
INTRODUCTION:- The concept of categories, families,elements and instances in Revit is explained and also explained how to insert it into Revit model
EXPLANATION:-
a) Families can be simply defined as a group of elements with a common set of properties called Parameters and the related graphical representation.The Revit Categories can be broadly classified into two categories as Annotation Categories and Model Categories. The model categories comprise of all elements confined to building model like doors, windows, floors, walls etc. whereas the annotation categories consist of elements like texts, tags and dimensions. (Source:-Bimex)
b) Categories can be defined as the properties that are already been predefined by the revit software. For example:- wall,doors, windows etc
c) Elements:- Revit Architecture project uses three types of elements such as model elements, annotation elements and datum elements. Model elements represents the actual 3D representation of building. Annotation elements help to document the building and datum element are non physical items that used to establish project context. (Source:- Google Chrome)
d) Instances:- Instances are individual graphical or geometric elements placed in a Revit model. For example:- a single wall or a single door
PROCEDURE:-
- Click on Revit 2022
- Click on New under the model options
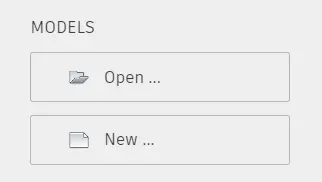
- Select the new project from the model option
- Click new project>template file>select construction template>press OK
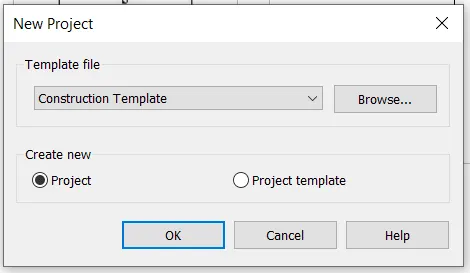
- Click on the file tab
- Click on Save option
- Specify the location where user wanted to save
- Click on SAVE
- Click on Insert tab

- Click on load family option
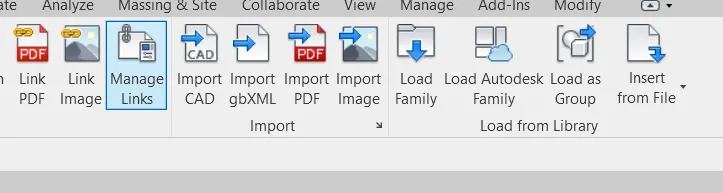
- In the load family browse open to libraries
- Go to project
- Click on families
- Click on windows
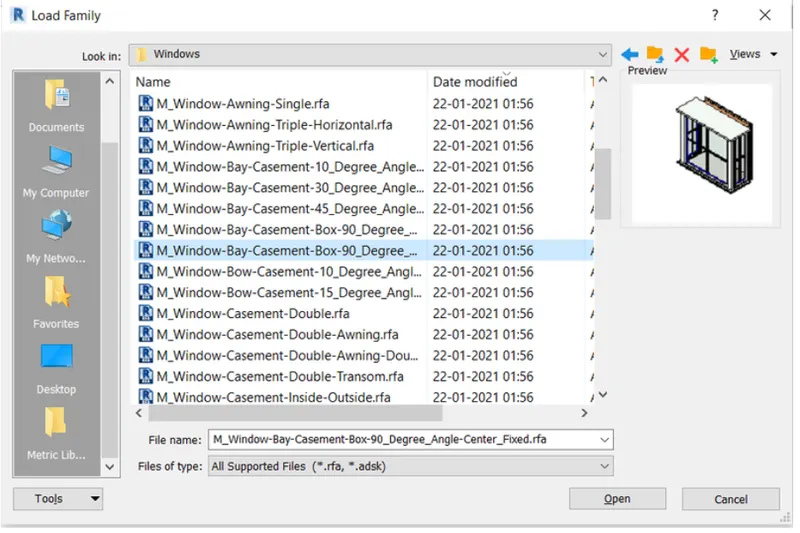
- Go to project browser
- Click on Family
- Click on Windows
- Select the element and drag it to an nearest location
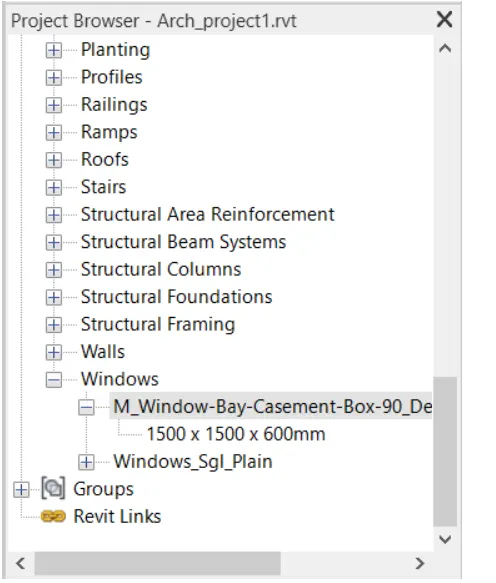
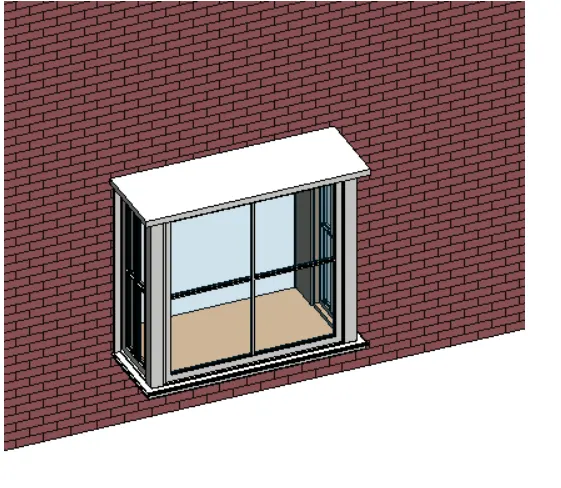
RESULT:- The concept of categories,elements, families and categories were clearly been explained. It was clearly been demostrated the instances and insert it to Revit model.
3. Setting up a Project – Open a project file with architectural template. Save the file with appropriate name. Set up the project units to Imperial / Metric based on your convenience of modelling. Complete the project information under Manage tab. Set up the maximum backups for project file to 3
AIM:- To open a project file with architectural template and to save the file with appropriate name, setting up the project units to imperial/metric units based on modelling, to complete the project information under manage tab and to setting the maximum backups for project file to 3.
INTRODUCTION:- The procedure of setting up a project is explained in detail
PROCEDURE:-
- Go to start menu Click on Revit 2022
- In the Revit click new options under the model options
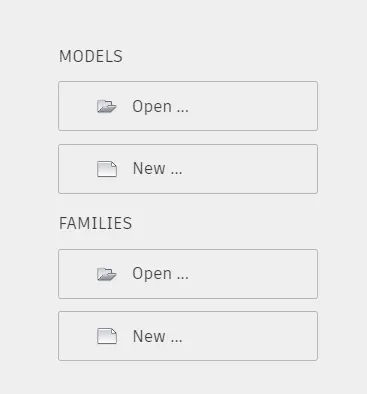
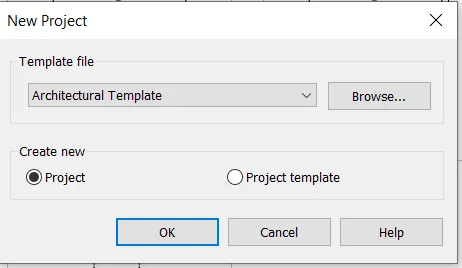
- In the new project select architectural template from the drop down list
- Create new project
- Click OK
- Click on the file tab
- Click on Save option
- Specify the location to save the file
- Click on Save
- Go to manage tab

- Click on to the project units
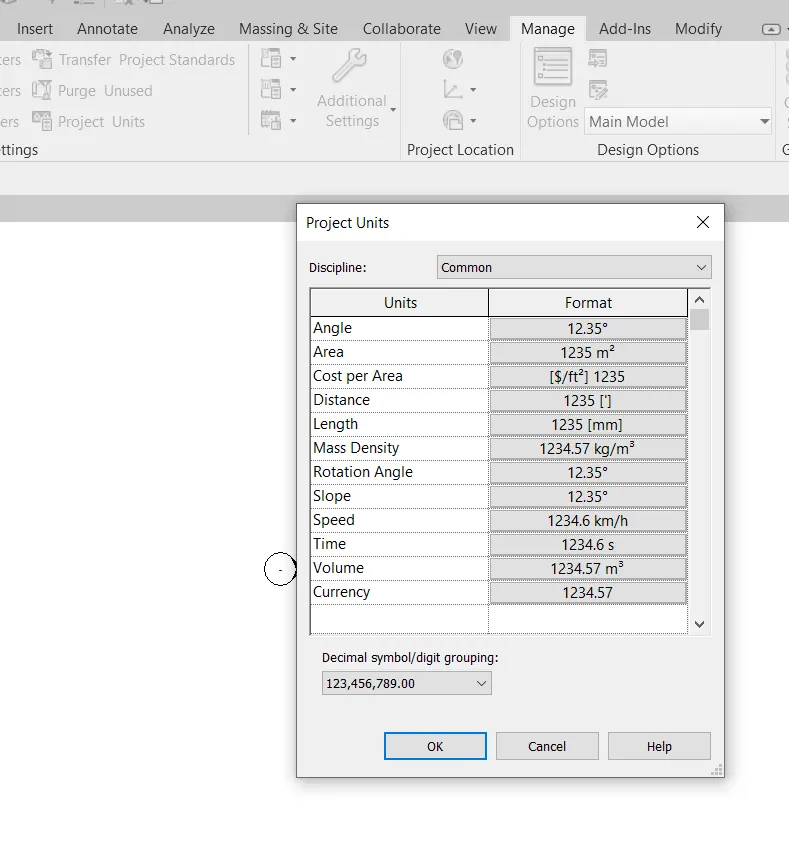
- Again click on manage tab
- Click on to the Project Information icon
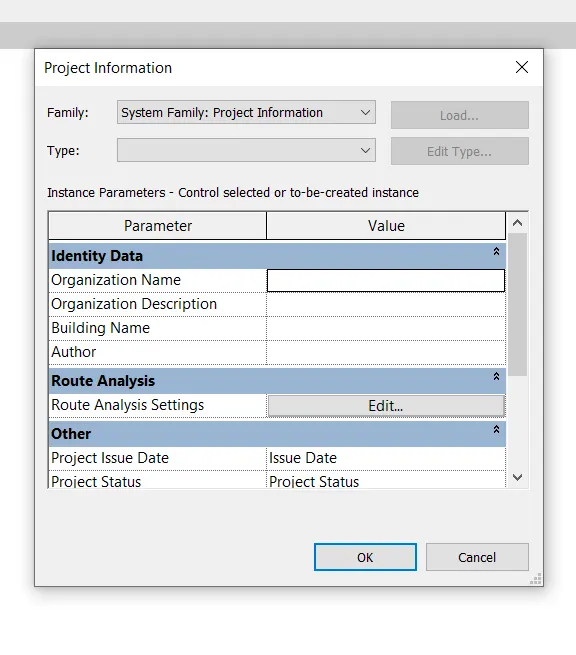
- Fill down the Project Information, Organisation name, Organisation description, Building Name etc
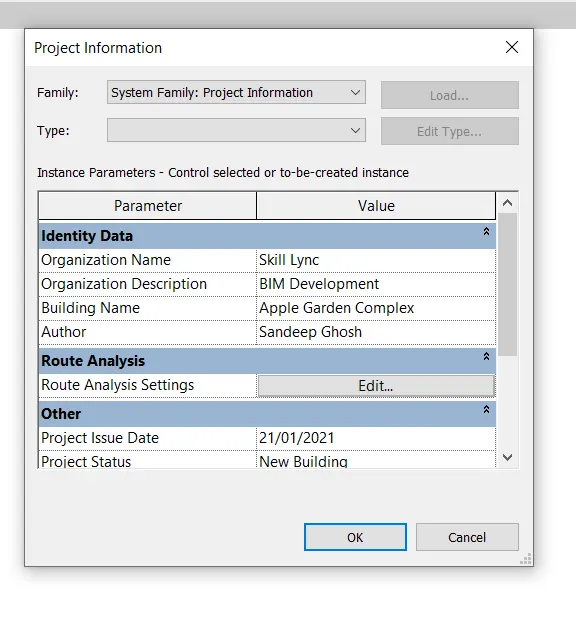
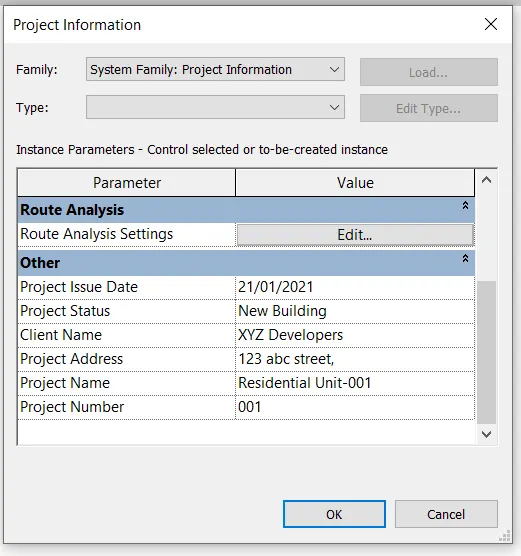
- Click OK
- Click on to the file tab
- Click on Save as options
- In the file save options dialog click enter maximum options as 3
- Click OK
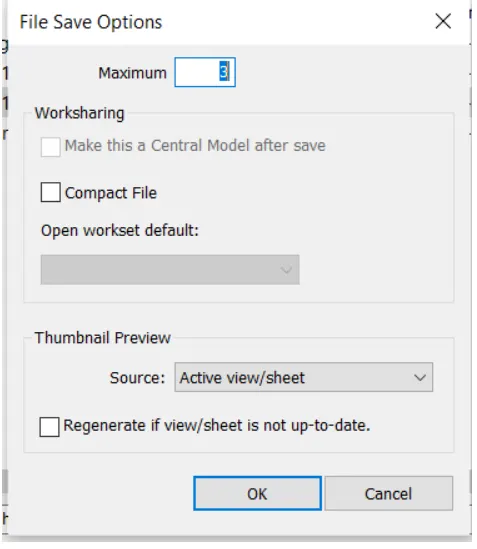
RESULT:- The project file was successfully been created with appropriate file name, project units to basic units and also the project information has successfully been created and set up the maximumm file locations to 3.
4. Understand the concept of Levels and Grids. Follow the naming and conventions. Create the following Levels: ( Convert to metric equivalents if metric is your units)
Ground Floor @ 0’
First Floor @ 10’
Second Floor @ 20’
Roof @ 30’
Grids Transverse Grids A, B,C,D, E @ 10’ spacing
Longitudinal Grids from 1 to 10 @ 20’ spacing
AIM:- To understand the concept of grids and levels, follow the names and conventions and to create the following levels convert to metric equivalents if metric is your units.
INTRODUCTION:-The concept of levels and grids is explained and the procedure to create the following levels
EXPLANATION:-
LEVELS AND GRIDS:- Levels and grids are the skeleton of building projects. Levels in Revit are used to indicate the location of floors, foundations and the roofs of a building in section and elevation. Grids are used to host column and walls.
Grids are lines that represent finite planes. The conventional practice is to place either grid from left to right or from right to left. It can be placed either numbers or alphabets. Grids can be placed along the boundary walls elements or modal elements. Grid line is very much important to locate the modal elements as well as for coordination purpose.
PROCEDURE:-
- Open Revit 2022 software
- In the Revit click new options under the model options
- Go to Project Browser
- Click on + sign
- Select East view
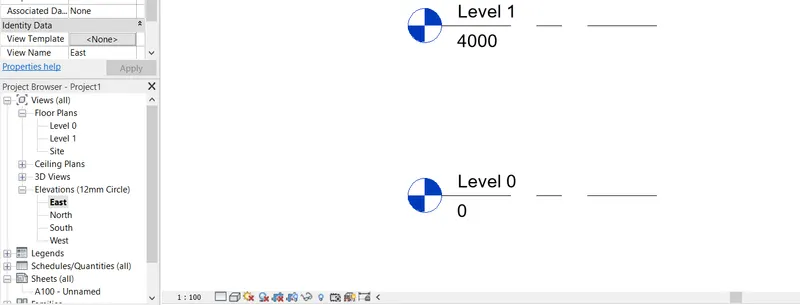
- Go to manage
- Select Project Units
- Change units it into feet
- Go to Datum panel to add levels
- Click on level
- Add levels to 0',10',20' and 30'
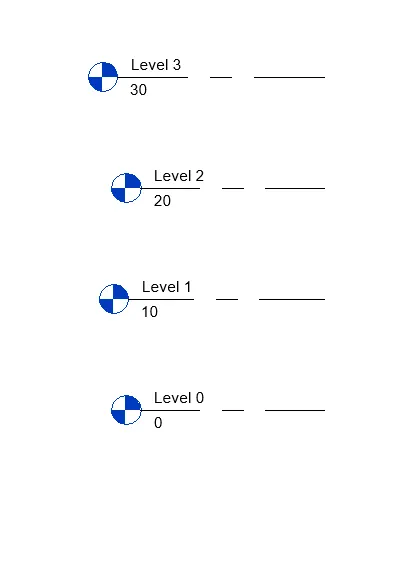
- Rename the level to first floor, second floor, third floor and roof floor
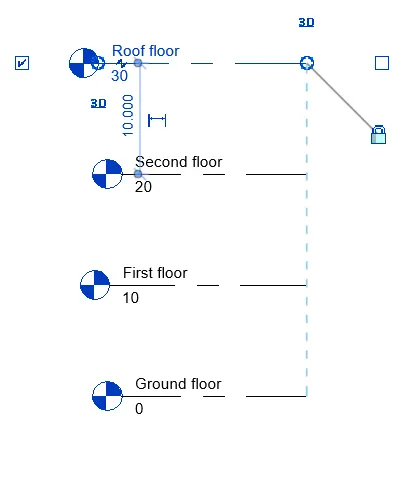
- Go to Datum Panel to add grids
- Click on Grid
- Create a verticall grid at each top of the place
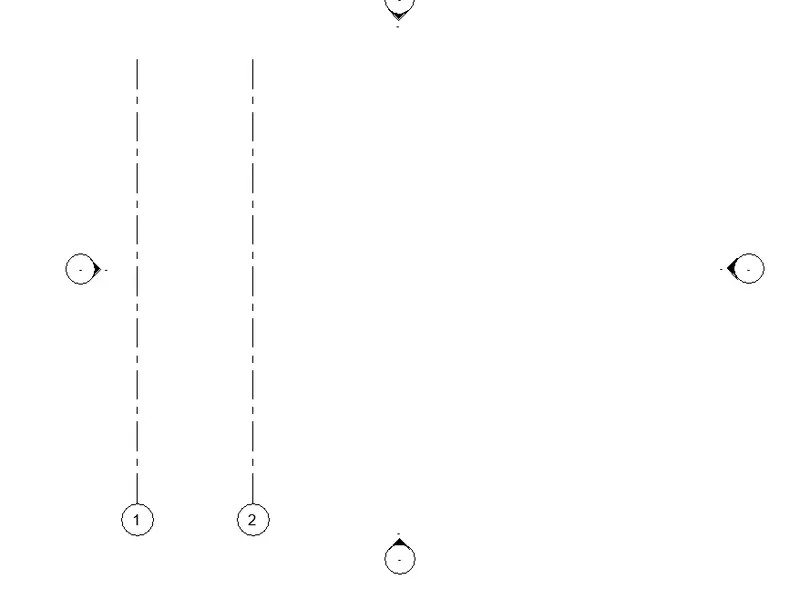
- Similarly create a horizontal grid at each top of the place of the grid line
RESULT:- The concept of grid and level is clearly explained. Procedure wise of grid and level has been explained properly with the use of Revit 2022
5. 3D modelling of residential unit – From looking at your house / or a place you aspire. Create a conceptual layout of the residential unit. You can measure using a tape oryou can access your residential plan to create a similar layout.
AIM:- To create a 3D modelling of residential unit
INTRODUCTION:- The procedure of creating a modeling of 3D residential unit in Revit 2022 is explained in detail
PROCEDURE:-
- Open Revit 2022 software
- In the Revit click new options under the model options
- Go to Project Browser
- Select the wall type as architectural
- From the properties select basic wall as exterior
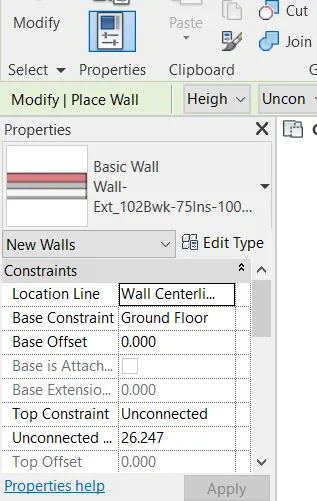
- Specify location line>finish face exterior
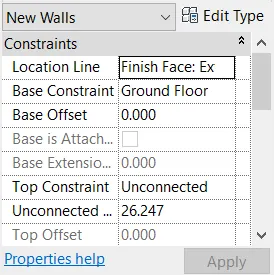
- Click at the desired starting point for the end wall
- Enter 10000 as length and 12000 as breadth of the wall
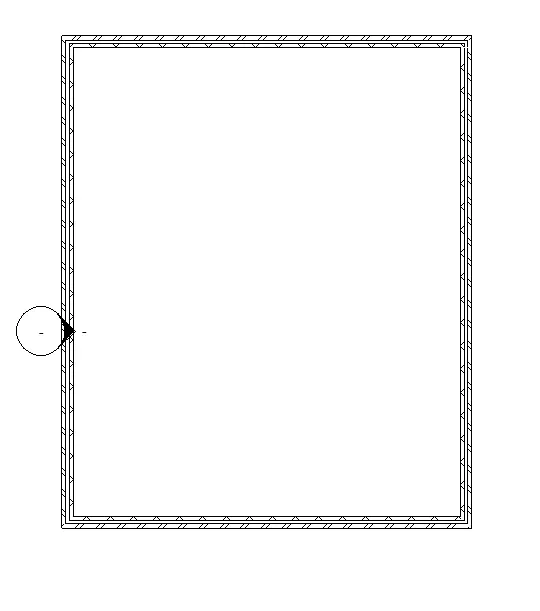
- Go to annotate tab
- Select the linear dimension tool
- Place the dimension along to the exterior face of the wall
- Take dimensions along to the length and breadth face of the wall
- Save the project file
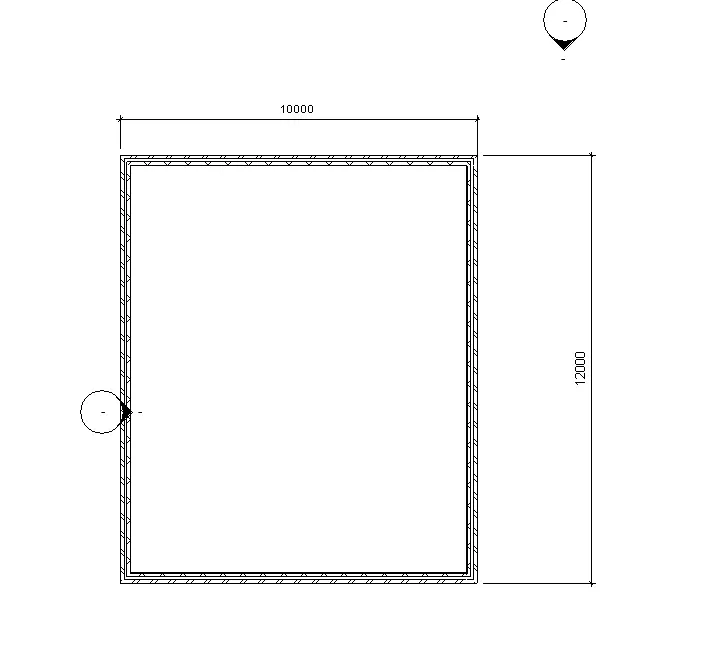
- To get 3D View, View>3D view
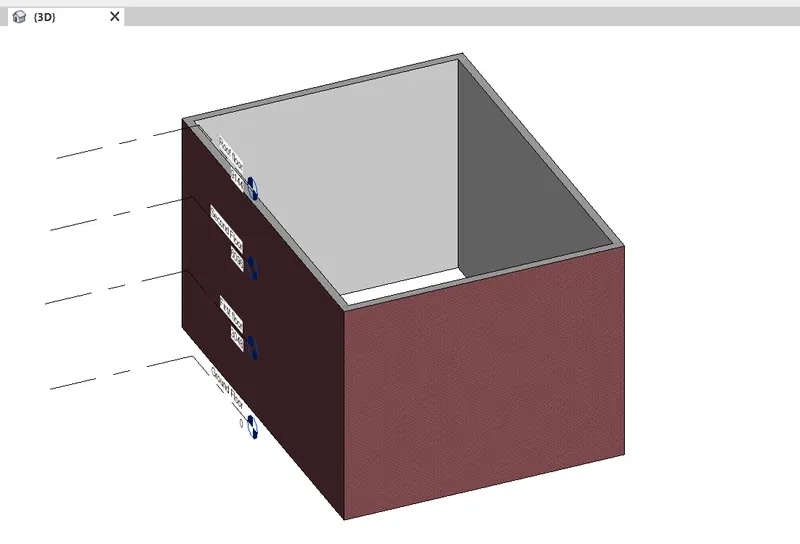
RESULT:- The conceptula layout of the 3D has been created with the use of Revit 2022
6. In the layout created draft the level of details you are planning to include – Dimensions of room, components you plan to add in the residential unit.
AIM:- To provide dimensions of room, plan and components to added in the residential unit
INTRODUCTION:- The procedure is explained to provide dimensions of room, plan and components with the use of Revit 2022
PROCEDURE:-
- Open Revit 2022 software
- In the Revit click new options under the model options
- Select and open the previously file saved project
- Go to Project Browser
- Select the wall type as architectural
- From properties select the wall type as basic interior
- Select height>first floor
- Draw the interior wall
- Press Esc
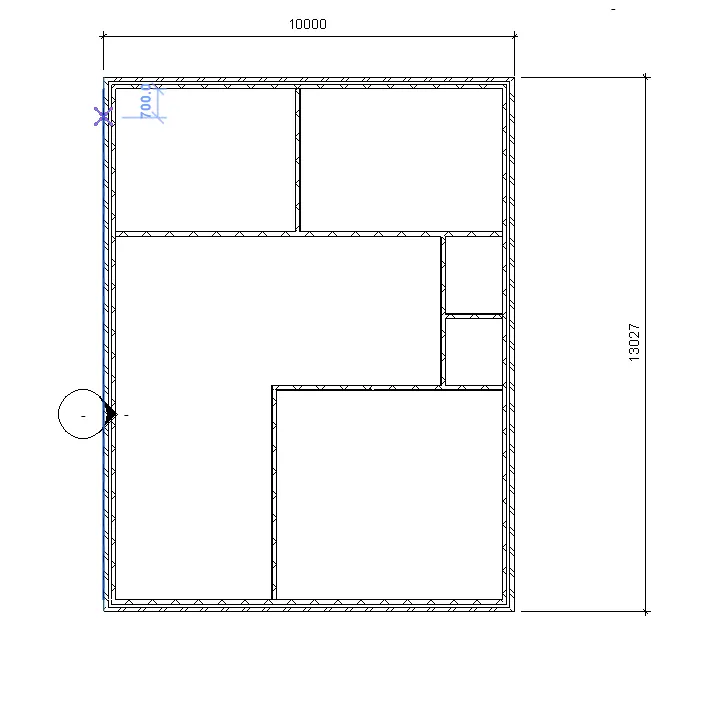
- Go to annotate tab
- Select the linear dimension tool
- Specify the location of the dimension line
- Take dimension of both the adjacent side of the wall
- Go to architecture>Room
- Using room tool create all room in the layout
- Using room seperator dram seperatr lines where no room exist
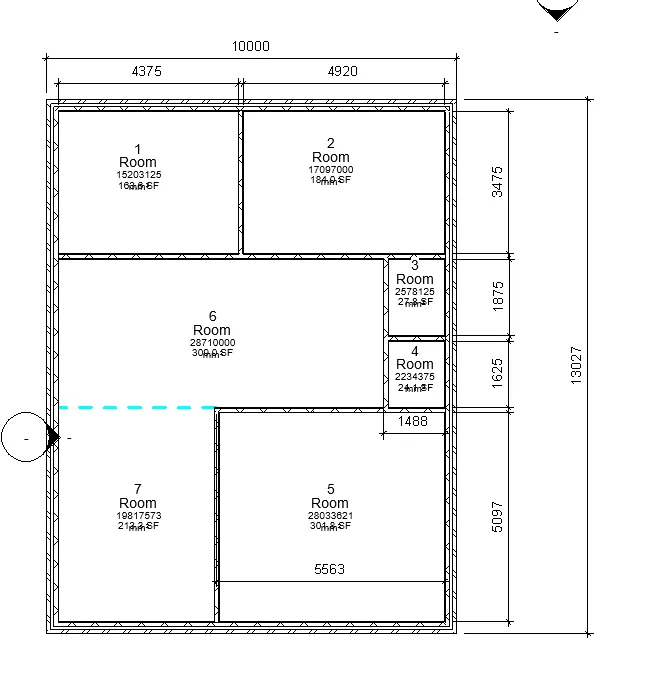
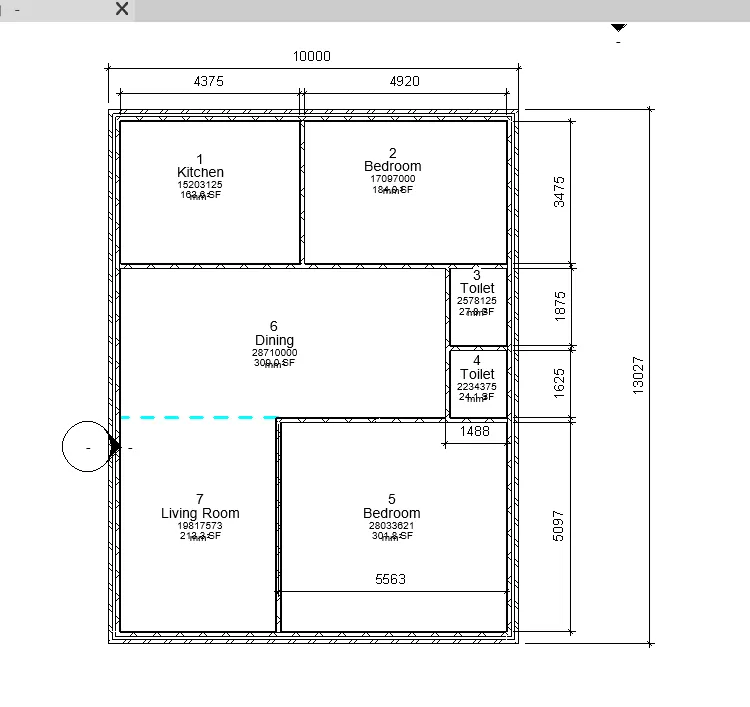
RESULT:-Details have been created with the the use of Revit 2022
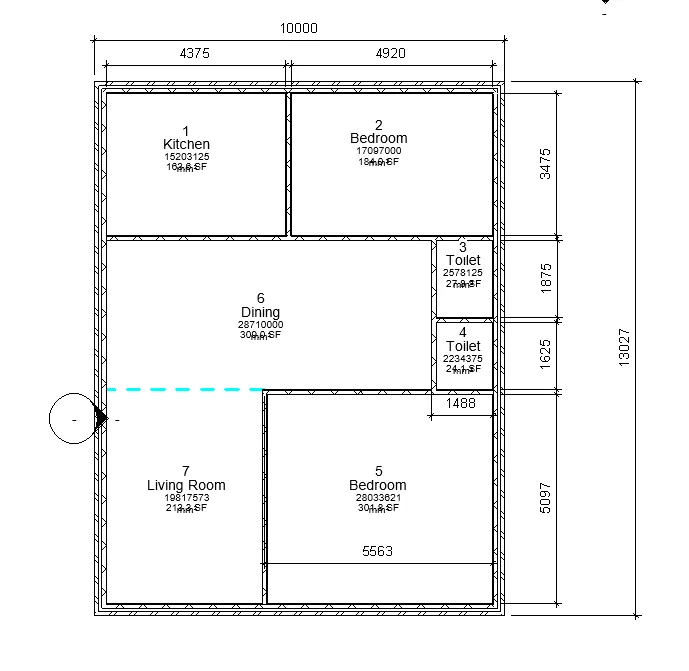
7. Identify the residential model elements such as Door, Windows, Tables, Chair, Couch, Bed, Lamps from the library and insert them to the model . Save the project for use
for Assignment 3
AIM:- To insert the residential model element such as Door,Windows, Tables, Chair, Couch, Bed, Lamps etc and saves the project for further assignment 3
INTRODUCTION:- The procedure of inserting the residential model is explained in detail with the use of AutoCAD 2022
PROCEDURE:-
- Open Revit 2022 software
- Select and open the previously file saved project
- Go to Load family
- Insert load families into the architecture layout
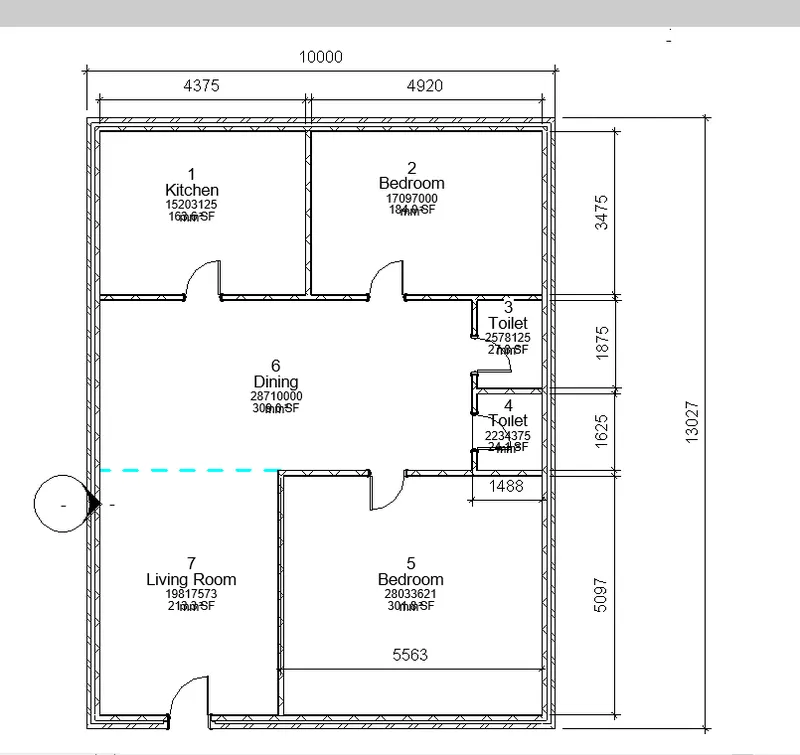
- Go to view > 3D view
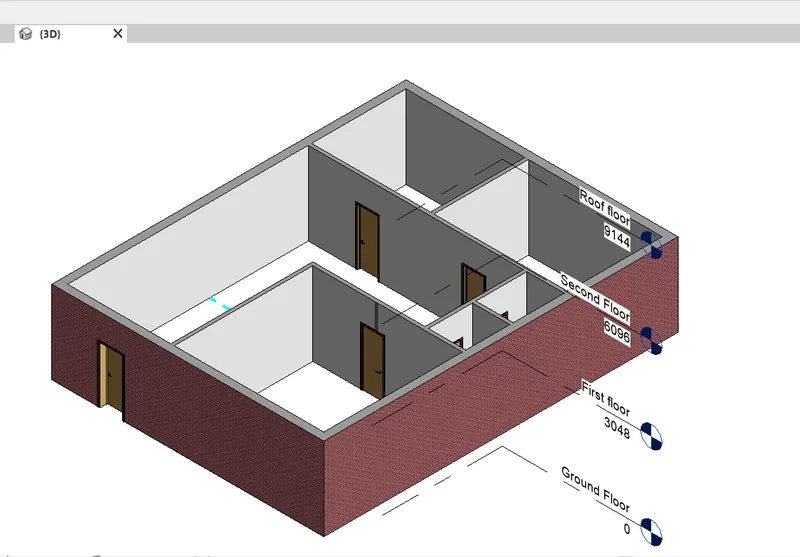
- Insert the door of various sizes by load family option
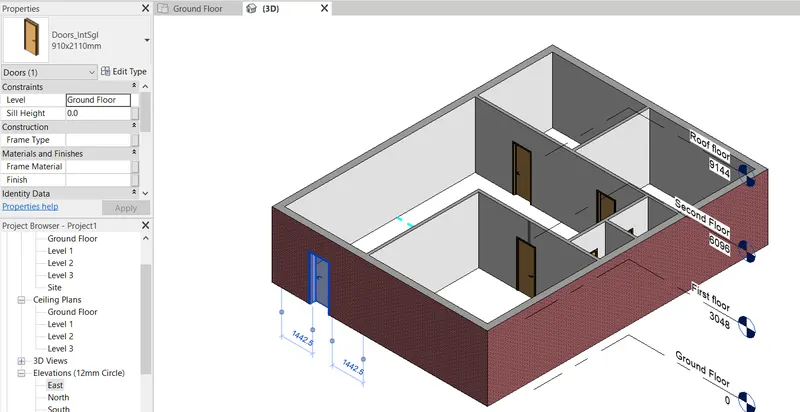
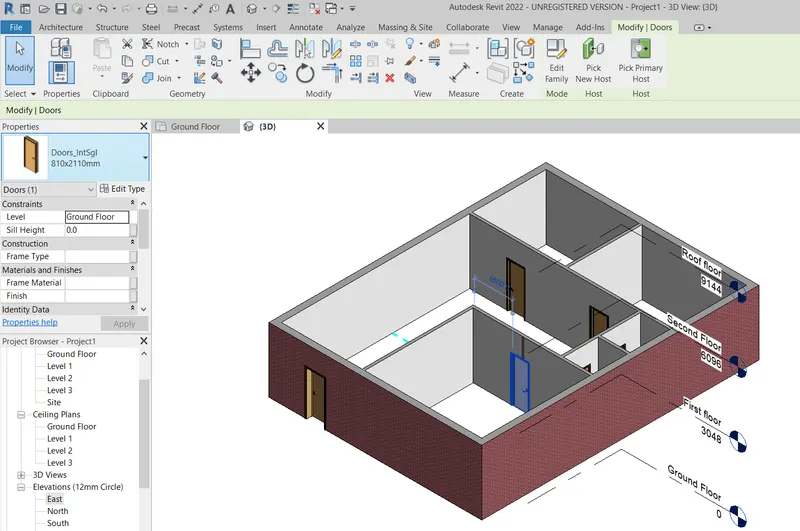
- Insert other families such as furniture ,windows etc by using load family option
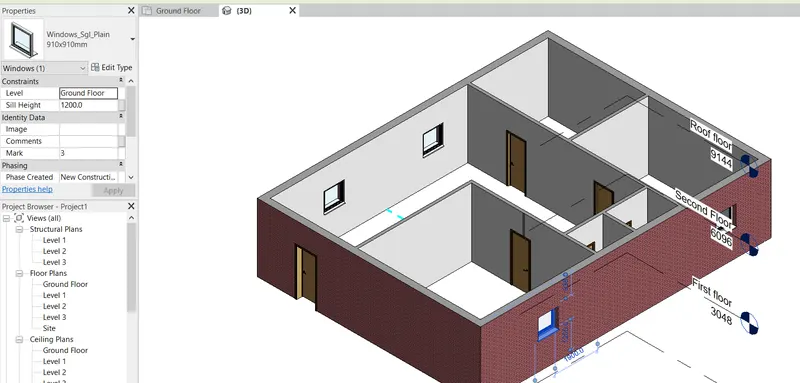
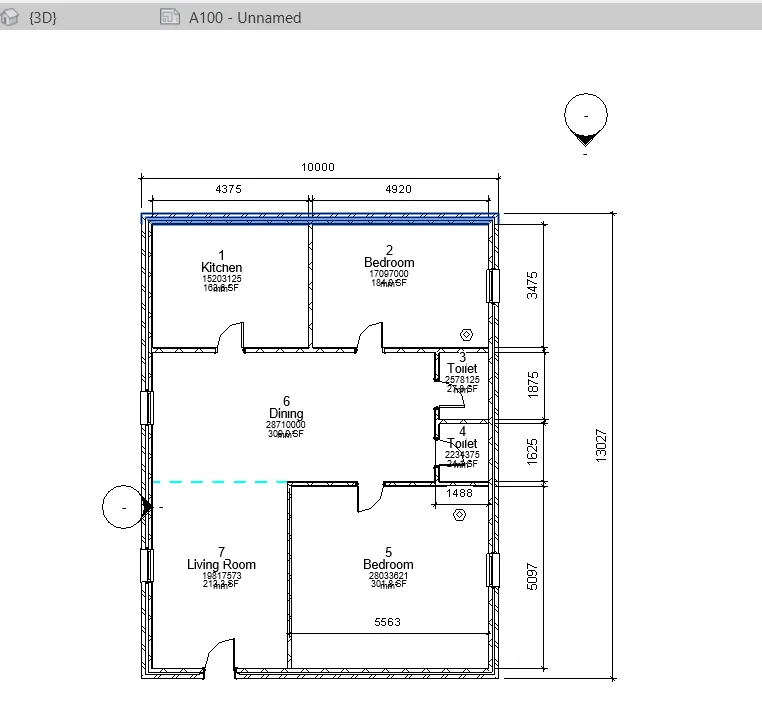
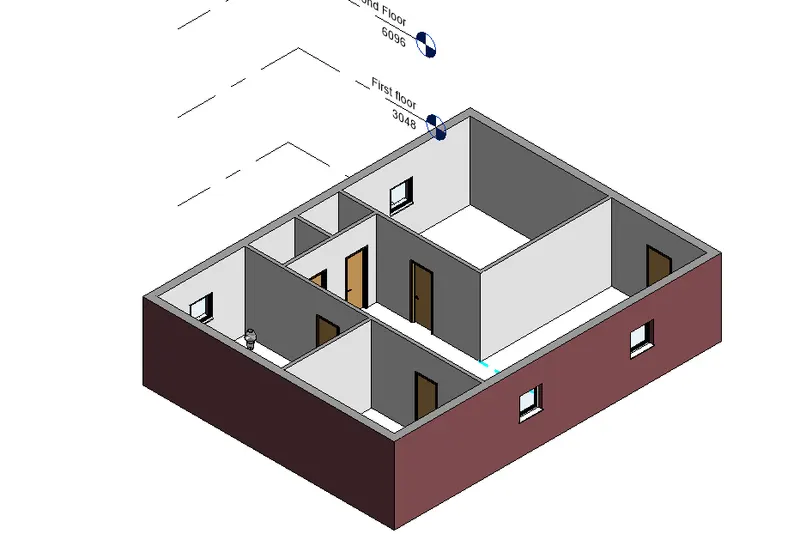
RESULT:-
The whole architecture plan of 3D along with plan has been drawn with the use of Revit 2022 including its components