Week 1 - 2R Robotic Arm Simulator
Python for Mechanical Engineers
Week 1 - 2R Robotic Arm Simulator
AIM : Python program to simulate the forward kinematics of a 2R Robotic Arm.
Objective
To simulate the forward kinematics of a 2R Robotic Arm using
Python program
Theory
Robotic Arm
A robotic arm is a type of mechanical arm, usually programmable, with similar functions to a human arm. The arm may be sum total of the mechanism or may
be part of a more complex robot. The links of such a manipulator are connected by joints allowing either rotational motion(such as in an atriculated robot) or translational(linear) displacement. The links of the manipulator can be considered to form a kinematic chain. The terminus of a kinematic chain of the manipulator is called the end effector and it is analogous to the human hand.
Application
The robotic arm are used in various applications such as
-Welding
-Painting
-Automotive Robot Solution
-Food,Beverage,Sanitation
-Package Industry
A manipulator/end effector movement determines the workspace where the robotic arm can be applicable. Our motive is to animate the movement of robotic arm with the subsequent relative motion between the two-comprising links.
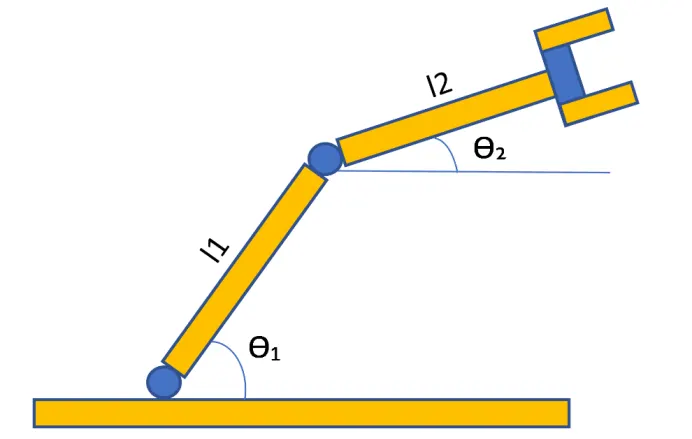
INPUTS:
(x0, y0) = starting point of link1
(x1, y1) = end point of link1 / starting point of link 2
(x2, y2) = end point of link 2
l1 = length of link attached to the base
l2 = length of link between the first link and the end effector
theta1 = angle made by link 1 with x-axis
theta2 = angle made by link 2 with x-axis
PROGRAM:
import math
import matplotlib.pyplot as plt


n=10

x0=0
y0=0

l1=1.2
l2=1.8

theta_start=0
theta_end=(math.pi)/2

theta_1=[]
theta_2=[]

for i in range(0,n):
	t1=theta_start+ i*(theta_end-theta_start)/(n-1)
	theta_1.append(t1)
	theta_2.append(t1)


ct=1
for w1 in theta_1:
	for w2 in theta_2:

		x1=l1*math.cos(w1)
		y1=l1*math.sin(w1)

		x2=x1+l2*math.cos(w2)
		y2=y1+l2*math.sin(w2)


		filename=str(ct)  +  '.png'
		ct=ct+1
		#print(filename)


		plt.figure()
		plt.plot([x0,x1],[y0,y1])
		plt.plot([x1,x2],[y1,y2])
		plt.xlim([0,2])
		plt.ylim([0,2])
		plt.savefig(filename)
OUTPUT
The output is obtained in the form of an animated video clip which can be viewed from the youtube link below :
NOTE
-The angles theta1 and theta2 take 10 values each in the range of 0 to 90 degrees.
-The length of the links are taken as 1 m and 0.5 m respectively.
-The coordinates of point1 are taken at origin i.e. (0,0).
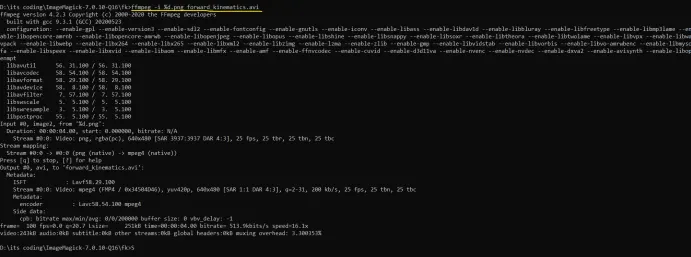
-FFmpeg software is used to generate the video from the pictures using the following command in the command prompt.
ffmpeg -i %d.png forward_kinematics.avi
-Use the command only after getting into the parent folder where all the images have been saved in proper sequence.