Git and GitHub basics and Initialize a git repository of cavity and then pushing this repository to GitHub
Introduction : When you write a code and want to share with many people and even world wide then you can't share it through mail for everyone .If they reviewed and asked to change something and if you change it and again you need to send them .If this process takes many a times they it is difficult to connect with mail .There needs to be somekind of means for all the people can share each other .This is where git use comes .Even when you want to go to previous code you can go back easily .This offeres version control .Even if 30 or more people working together and they want to share information together and sync with each other then git is the best and efficient way for this .
Github is something something that makes git to represent in a better way . It is something that offers cloud version control for git .
Version control is something we can have history of our code through repositories .which stores all the data and versions . The use of version control is if you have versions V1 and V2 then if you do any mistake in V2 then you can easilt go back to V1 ,so that you can correctly write your code again from there .This is the advantage of this version control .
Repositories : It is something , which is like a folder which has our code and its version control (i.e., tracking will happen) .
Git : Git is a free and opensource distributed version control system .
Centralized version control system :
- Centralized version control system is that each of the contributor (here system A and system B ) need to connect with the central version control .Everything needs to be shared with central (here server repositary) version control repository .There is no seperate repository for each of the contributor .If something happens to the central VC then every data will be gone .So to tackle this distributed VC system is there .
Eg : Subversion
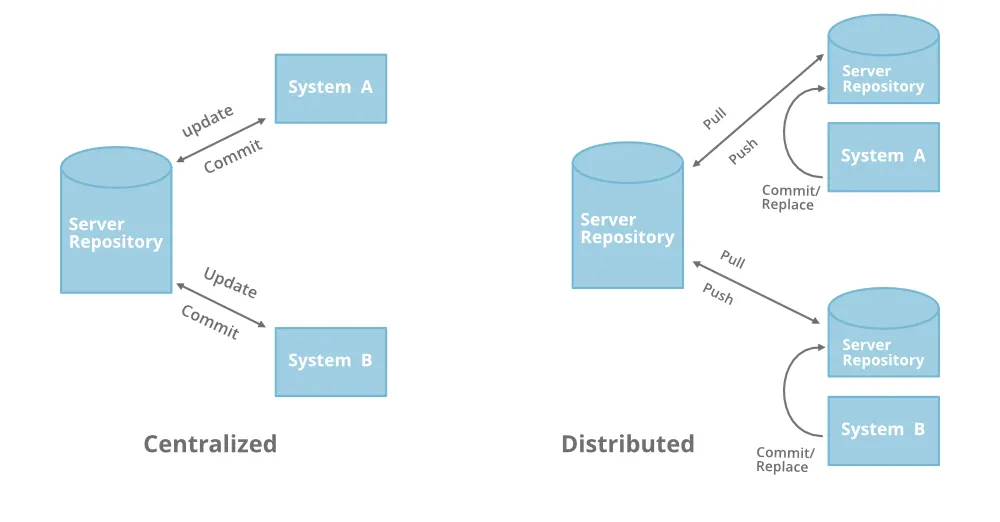
Distributed version control system :
- Distributed version control system is that each of the contributor will have their own local repository .These local version control or repository has every history of A and they can sync with the main central repository to share the data if needed .Even if main repository crashes you will have the data in your local server repository .If main crashes then we can make any of the contributor as central repository and other can connect to this as local server repository and contribute to it .
- Eg : git
Main difference between Git and Github :
- Git is something where it has or can create local and remote repository , but if we have the remote repository in our system so it will be difficult to share it online and remote to other contributors .This is where github help comes. Github is where ,the remote repository created it the local machine is connected with the repository of github .So it acts as a main central repository/server repository online ,where everyone can access it and can contribute to it in a easy manner .
- So github is some kind of central/server repository which stores all the data and git can be treated as local server repository .
Initialize a git repository of cavity by copying $FOAM_TUTORIALS/incompressible/icoFoam/cavity/ to a local folder and commit a test code to it, and then pushing this repository to GitHub :
- First we start by copying the cavity folder to local run folder .
- Then we need to initialize a git folder in it by using git init .This will initialize empty Git repository in our cavity folder .
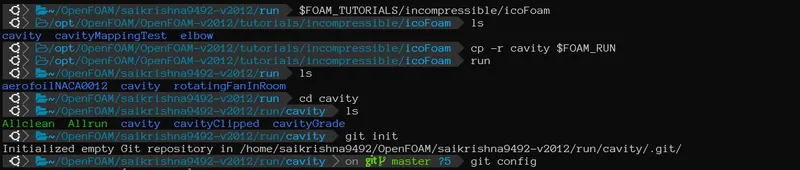
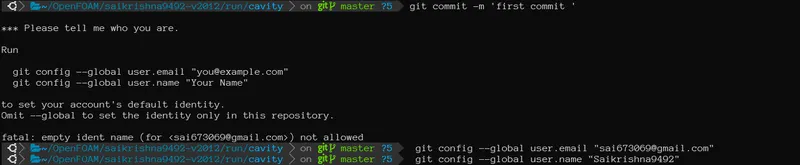
- To make our local version to centralized version control first we need to update our files in the local repository . So , the next thing is to do is to update our local repositorywe have made changes . So for that we need to commit(that is to update our local repository ) .when we do commit it shows that tell me who you are i.e., its asking to configure our Git . To configure get we use the command git config.
- we configure by giving the username and email ID .
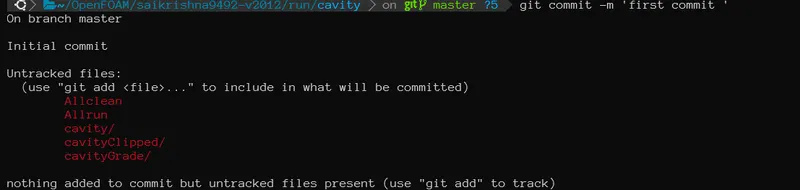
- Then after configure when we do commit it shows that nothing to commit but there are untracked files . So it asks us to to use git add , it means we need to take the files to staging area. So for that we use git add command .
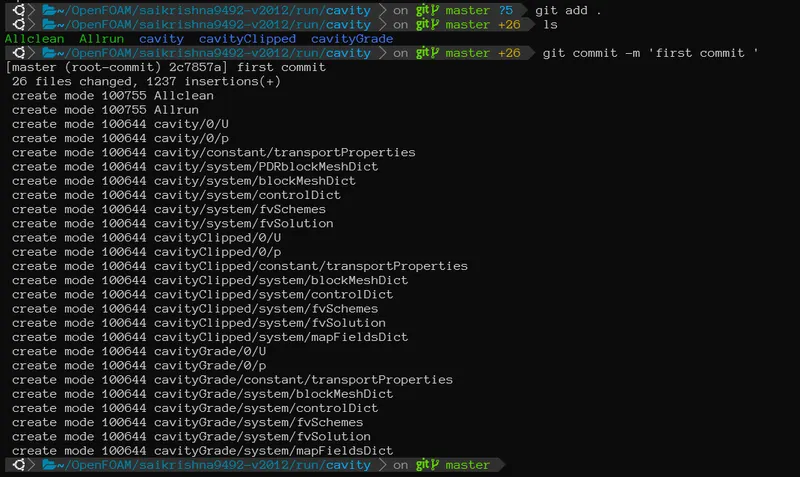
- By using git add it will move all the files in the current folder to Staging area . Then the next thing to do is commit . For commit we use commit command as shown in the below image. We can commit by using a message to be displayed for that commit .Then you will see that all files are committed that means our local repository is updated .
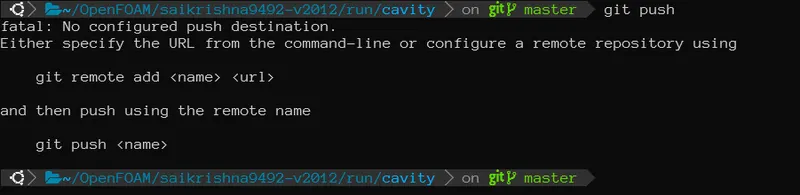
- Now we need to update this to our central version control / Central server . For that we use git pull command .But when you use push it shows an error that no destination to push it means that you don't have any Central/remote repository created to push .For that what we do is , we go to GitHub and then we create a repository over there and also remote repository in our git and then we will link that repository to our local repository. The above two operations can be performed by using a single command and after that comment we need to the paste the link of the repository that we are going to create in the GitHub in the same command .For that we use git remote command . By using this GIT remote what happen says it create a a central repository in our git and then it connect that to the repository in the GitHub . So now github acts as a central or main repository . By this means we passing our data to central repository , so it acts as a cloud storage for our local repository . In a similar way many contributors like us can I access that Central repository and contribute to this code.
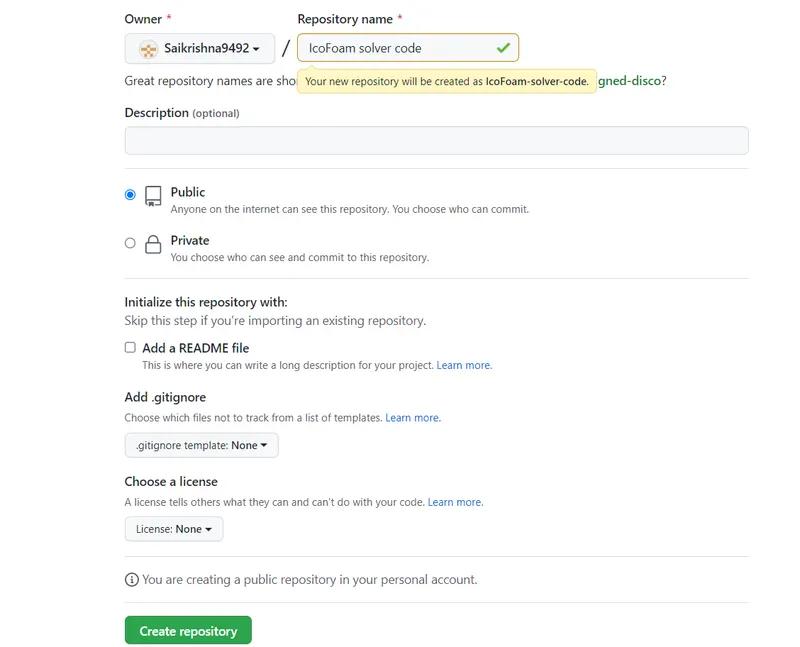
- In the below image you can see how a gitHub repository is created .
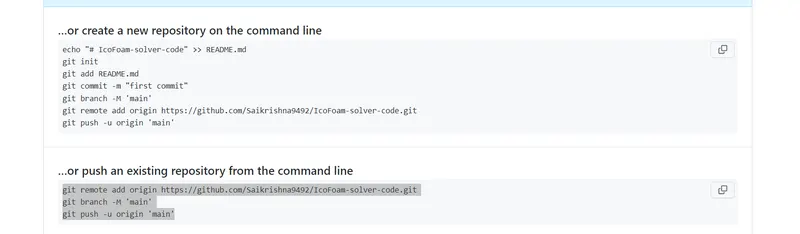
- So now as we have created a remote repository and also we have an existing repository in our git , we can pass our local repository data in git to main/central repository in GitHub .Here we set our local repository branch to main . Then we push to remote repository main origin by using the command git push . We follow the commands as highlighted in the below image . These commands will be shown when we create a repository in the GitHub .
Then after typing the git push it asks for username and password .we have to give the username of GitHub and its password . But it shows error that support for password authentication was removed on August 13 . It asks ask to use personal access token instead off the password . The same thing you can see in the below image .

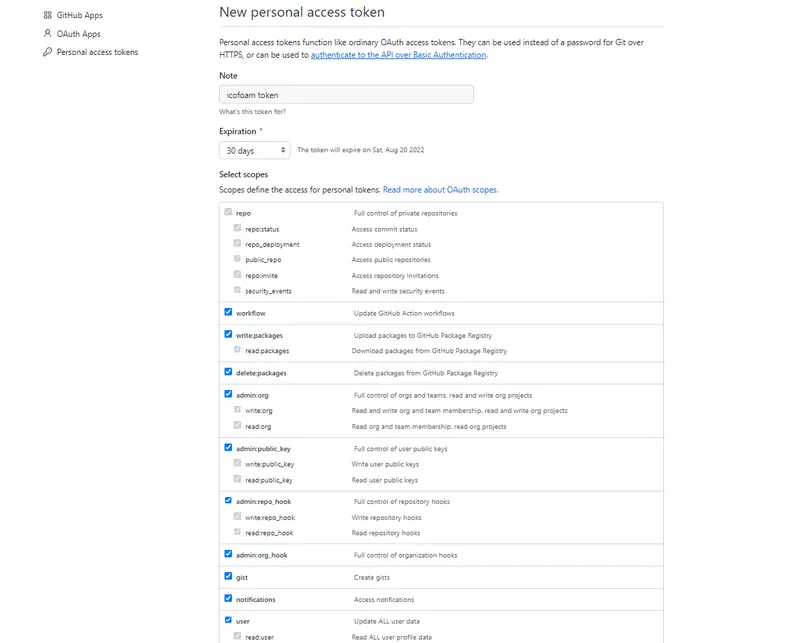
- Now we need to create a personal access token and type that token in the place of password to make our push successful .To create a token we need to go to GitHub -> then settings -> after that we need to go to developer settings in the settings menu -> then you can see personal access tokens then we need to generate a new token and after generating a new token , a token link will be created we need to copy that and paste at the place of password for pushing .In the below image you can see have a token is created .
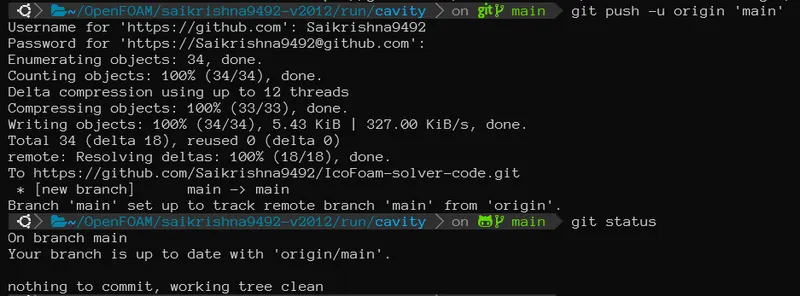
- Now if you do push and type the username and at the password if you type this personal access token then you will see that the push is successful .You can see the same thing in the below image . Now if you type git status you will see that our branch is up to date with the original/main that is we are up to date with the central repository of GitHub .
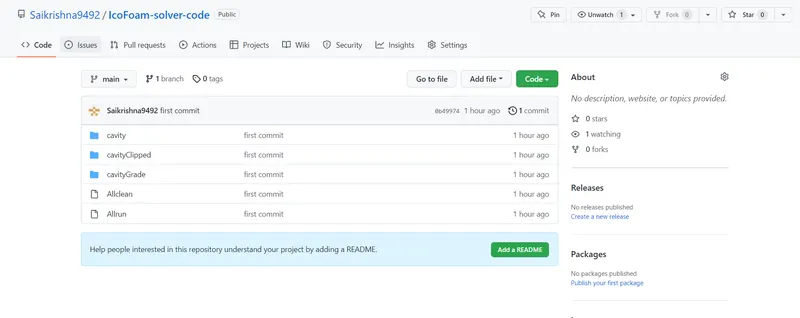
- Now if you go to GitHub and refresh the repository you will see that the files which we have used in the git are are now available in the GitHub that means we have successfully passed our data from the local repository in the git to the central/ main repository that is to the GitHub .
- Let us finally add a readme file so that whoever read or look through our repository they will get an idea that this is icoFoam solver code of cavity tutorial . So we need to create a readme file and add the required details of the above code/files . Finally we need to commit . But when you come it now there will not be any Staging area and push the reason for this is because you are directly doing or creating this readme file in the main central repository so that's the reason you don't have any steps you can directly create readme file and commit .
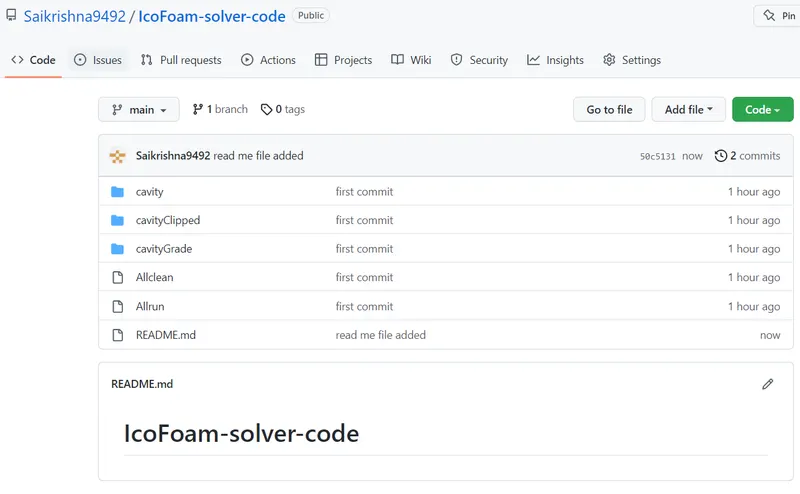
Link to git hub repository : https://github.com/Saikrishna9492/IcoFoam-solver-code
- When you perform the same operation in the Visual Studio instead of this staging and commit you directly click a tick mark and a option to include message . And you will have a option to push . When you click that option it will ask for username and password when you press that it directly send our data from the local repository to the central / Main repository to the GitHub .