Creating a Residence Layout, Seating plan, Toilet and Utility room plan using AutoCad
Project: sketch residence layout with interior architechtures aminities using autoCAD
Aim: Creating a Residence Layout, Seating plan, Toilet and Utility room plan using AutoCad
Introduction: we create a residential plan, seating plan and toilet and utility rooms by using auto cad 2019, by using various commands like layers, matching, Lines, filet, chamfer etc.
Residence Plan:
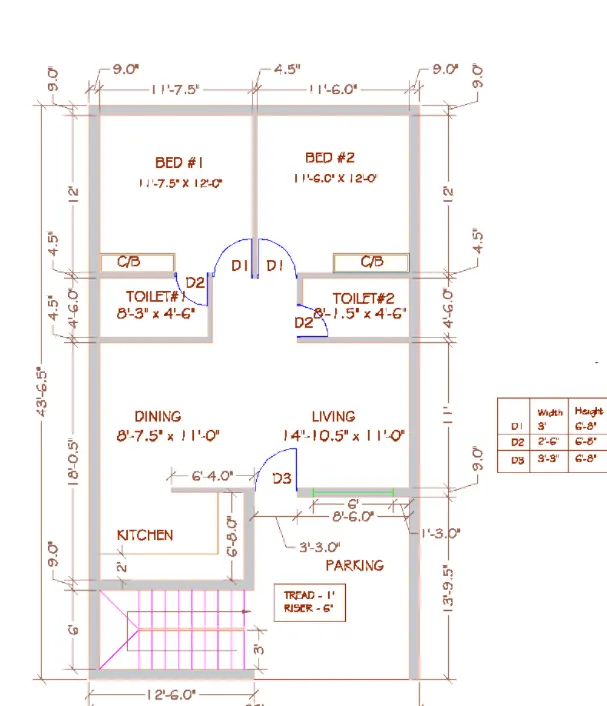
Aim: Sketch the layout of a residence as shown in the Figure Consider all dimensions as reference to sketch the unit plan. Also the text in the layout are only for reference. Assume the missing dimensions. Also, refer the schedule for size of the doors.
Procedure:
- choose a xline command
- xline>horizontal
- and draw a horizontal line
- choose a xline command
- xline> verticle
- draw a verticle line with y axis
- then from horixontal axis
- select offset command and
- offset 9" as wall thickness
- then offset 6'
- then offset 9" for wall thickness
- then offset 6'8" for kitchen room
- offset 4.5" as internal wall thickness
- then offset at a distance 11'
- then again 4.5" for internal wall
- then again offset 4'6" for toilet
- then 4.5" offset for wall thickness
- then offset for bed 12'
- then again offset 9" for external wall thickness
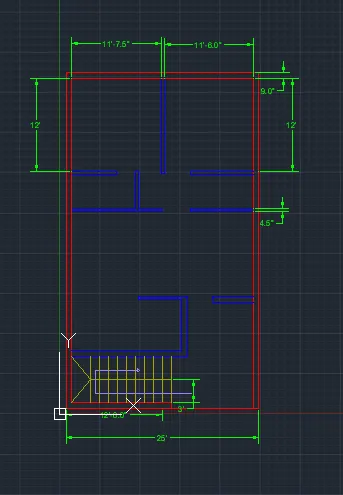
- now come to verticle line, y axis
- take offset 9" as wall thickness
- agin take 11'7.5" for bed room
- and agin 4.5" for internal wall thickness
- then agian 11'6" for bed room 2
- and give offset with 9" for external wall
- come to toilet block
- go with verticle axis and take offset of 8'6" for toilet
- again offset 4.5" for internal wall
- then go for another, right side last wall on toilet location
- and offset at left side with 8'1.5"
- and then 4.5" for internal wall thickness
- then come to parking
- from left side internal wall
- take offset of 8'6" for parking area
- and another offset 9" for wall thickness
- then go bottom towards staircase
- draw staires with 1'2" risers
- and give all openings as per dimensions provided
- and give dimensions
Procedure:
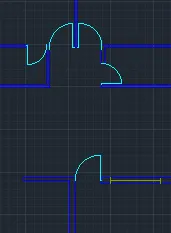
- draw all windows and doors with diffrent line layers
- first slect layer for doors and draw it as per dimensions
- then select layer for window and draw it
procedure:
- give all dimensions and naming the all units
- by using diffrent layers
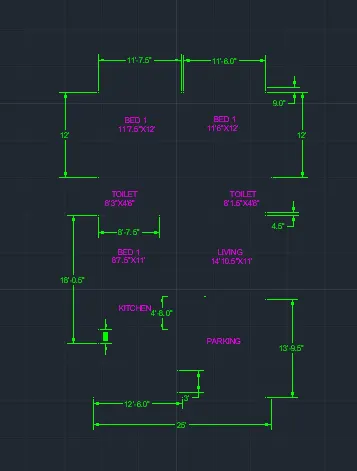
Refrence:
- we draw a residential layout by using layers command, and draw it by three parts and finally merged it
- and use diffrent colours for diffrent lines to make layers
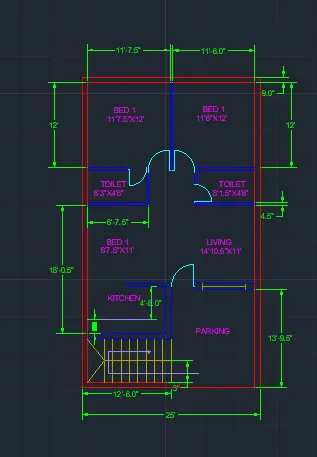
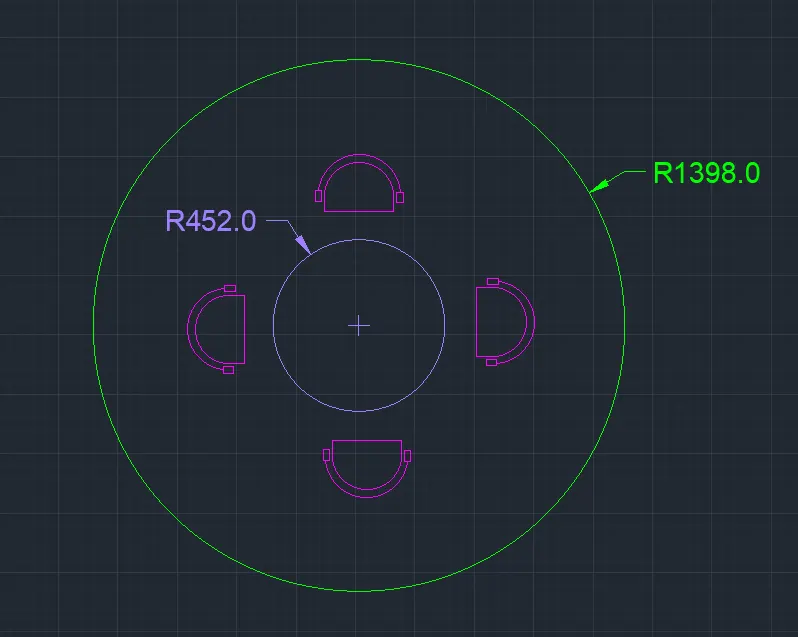
2) Aim: Sketch the seating plan for an outdoor canopy. Assume the dimensions for the seating. Also, consider the dimensions in mm by using auto cad with usuable cammands
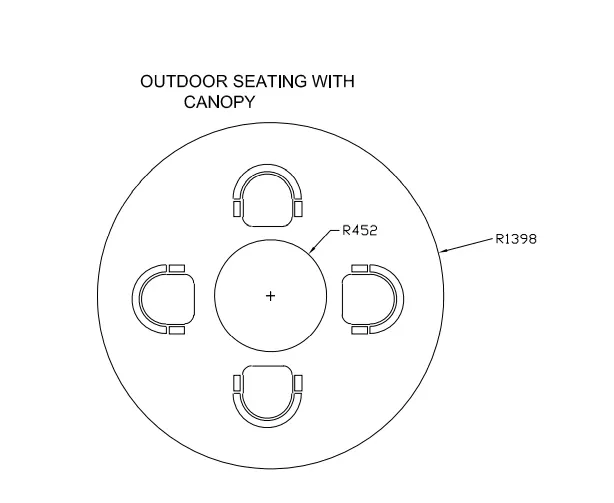
procedure: draw a circle
- choose a circle command from toolbar
- draw a circle with radius R1398
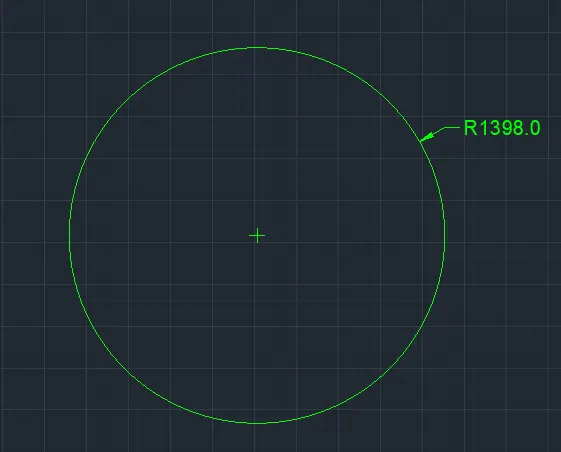
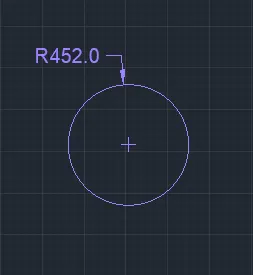
Procedure: draw a inner cicle
- choose a circle draw a inner cicle
- with radius R452 at a refrence on first circle center
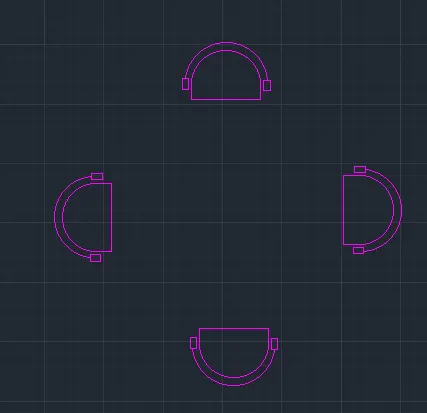
procedure: draw a chairs
- draw a chairs of table'
- by using line and arc, circle command
- make 1 chair and copy it throught
Refrence
we draw the outdoor seating with canopy, we draw this sketch in three steps, by using line layers, arc, and circle command
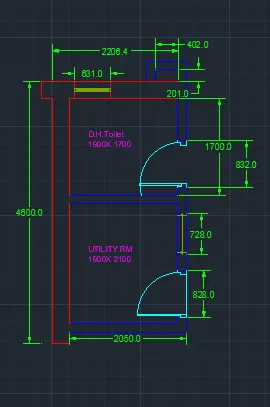
3) Aim: Sketch the part plan for the toilers and utilities room. Consider the outer wall thickness as 300mm and inner wall thickness as 150mm. Also, assume the missing dimension, Texts, dimensions, and hatches are only for references. Also, symbols for toilets and w/c are also for references.
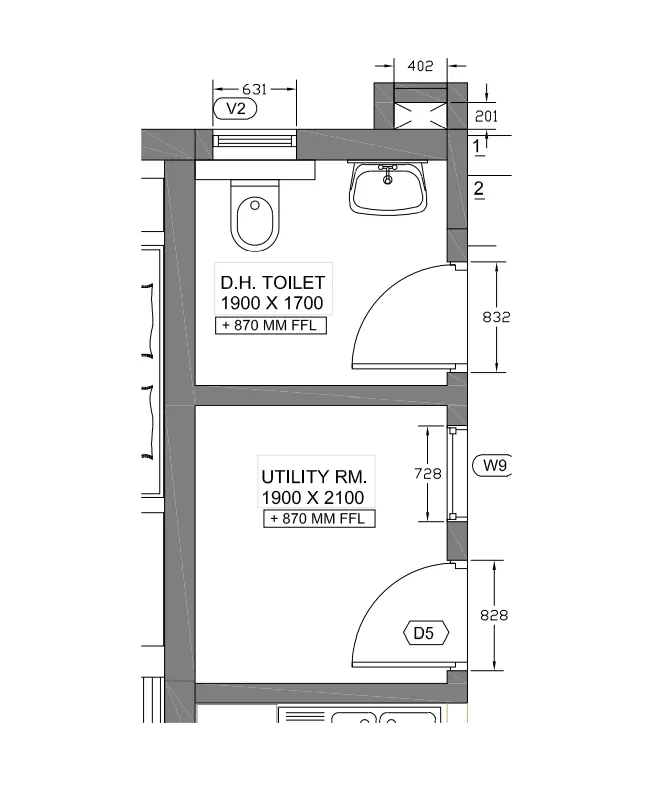
Procedure: for drawing toilet and utility room
- choose line command
- and draw a horizontal line
- by using Xline at horizontal
- offset with 300mm wall thickness
- again offset with 2100 room length
- again offset 150 mm using offset command for internal wall thickness
- again 1700mm offset for toilet room
- again offset 150mm for wall thickness
- then go to verticle side
- draw verticle line by using Xline command
- offset 300mm for external wall thickness
- agin offset 1900 mm
- then again offset with 150mm internal wall thickness
- then give outer projection 200X300mm as shown in image
- and draw 402X201 box at upper side
- with wall thickness 150mm
- and choose ldiffrent layers for external and internal walls
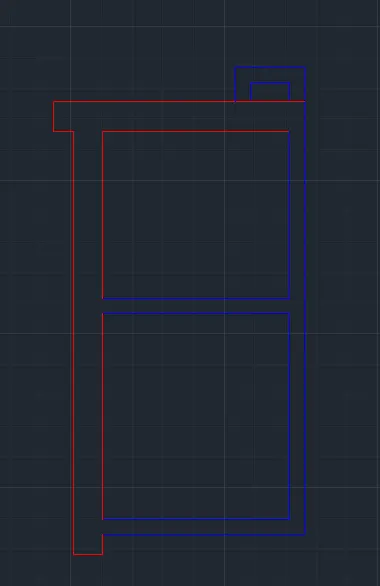
procedure
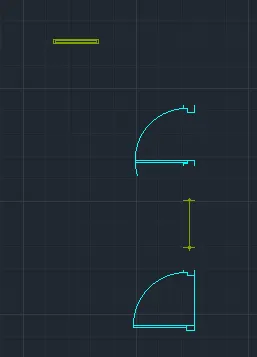
- then draw doors and windows
- using line and circle command
- with diffrent layers
Procedure: naming and dimensioning
- name the units and gives all dimensions using diffrent layers
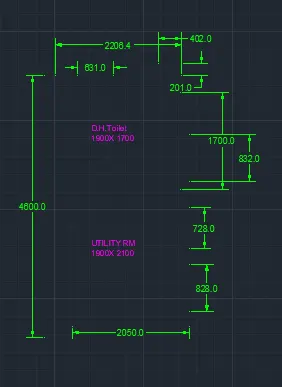
Refrence: we draw a utility and toilet room skrtch by using diffrents layers and draw it in three parts and merged it