Modified on
Worksheet Option in Ansys Workbench

Skill-Lync
Although not widely used in an ANSYS workbench, the worksheet is an option which displays information about an object in the form of charts, tables and text in addition to the details view. In other words, it produces summarized data for the selected object. Here objects mean the analysis settings, contacts, and solution options that are present in the outline tree.
- As mentioned earlier, based on the selection of the object the worksheet presents its contents, the worksheet has multiple purposes. One can find the worksheet option inside the HOME tab under the TOOLS division.
_1665581414.png)
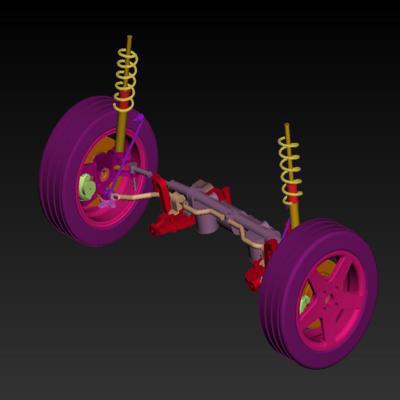
- The worksheet option will be available to select only if that option has a worksheet associated with it. If that particular object has nothing to do with the worksheet, the worksheet option is not available for selection. Now let's go through the worksheet option for various objects one by one. We have taken an example of bevel gear simulation for our discussion.
Worksheet for Geometry:
- When you click on the geometry scheme on the outline, the worksheet option gets activated. When clicked on the worksheet option, more details on the geometry are displayed as shown below,
_1665581474.png)
- From the image above, the overall details about the geometry are displayed. The details contain the material assignment, the model's volume, the model's mass, the number of elements present in the model, the mass moment of inertia at X, Y, and Z and the stiffness behaviour of the bodies. As the number of models/bodies increases, respective details are displayed. So this option provides comprehensive information on a single page.
Worksheet for Coordinate system
- The worksheet option gets activated when you click on the coordinate system scheme on the outline. When clicked on the worksheet option, more details on the geometry are displayed, as shown below,
_1665581522.png)
- The image above shows the overall details of the coordinate system. The details contain the type of the coordinate system, origin X, Y, and Z axis data, scope data and status. One cannot change the values present in the details; it only displays the information.
Worksheet for Connections
- The worksheet option gets activated when you click on the connections scheme on the outline. On clicking the worksheet option, more details on the geometry are displayed as shown below,
_1665581587.png)
- From the image above, the two options are available. The ‘show preferences’ option will show what kind of contact information must be displayed as shown below,
_1665581648.png)
- After selecting the required information, once generate option is clicked, the information is displayed as shown below,
_1665581702.png)
- The contact information displays the information about the frictional contact created. It displays type, scope, friction coefficient, scope mode, trim contact, behaviour, normal stiffness etc.
- The Joint DOF checker information provides how many DOFs are fixed, how many DOFs are available and the free DOF. This displays the free DOFs. In the image above, there are 2 bodies in the model, a 3D model as 6 DOF, hence the total DOF of 2 parts shows as 12. In the bevel gear, revolute joints are created where the revolute joint has only rotational DOF and other DOFs are fixed, hence 5 DOFs are fixed, for 2 bodies which are 10. So 12 minus the 10 gives us 2 free DOFs.
- The joint information shows the number of joints created and their attributes.
Worksheet for Analysis Settings
- The worksheet option gets activated when you click on the Analysis Settings scheme on the outline. Once when clicked on the worksheet option, more details on the geometry are displayed as shown below,
_1665581763.png)
- In the bevel gear, we have given analysis settings of 6 steps and added the time steps. The analysis settings information for the model for all the steps is displayed. This information cannot be changed only the display can be altered. Once the settings are changed and pressed on the worksheet button, the details are updated as per the new settings.
Worksheet for Solution:
- When you click on the Solutions scheme on the outline, the worksheet option gets activated. Once when clicked on the worksheet option, more details on the geometry are displayed as shown below,
_1665581837.png)
- The worksheet for the solution gives a lot of options. From the above image, the worksheet for the solution option displays all the available solutions. It contains type, data type, component, expression and output unit. The type and data type is the quantity present and its type like nodal, element nodal. The data style is whether the quantity is scalar or vector. The component indicates the direction in which the quantity is created—expression and the output unit show which unit the output follows.
- These result options can be created as a user-defined result by just right-clicking on the type and clicking on the ‘create user-defined result’ as shown below,
_1665581885.png)
- This particular result is created as a user-defined result, the expression is the type you have selected and the component that you have chosen.
- Their corresponding output units are displayed in the output unit box.
_1665581927.png)
- When selected, the result summary option displays all the results you have calculated and their information.
Author

Navin Baskar
Author
Skill-Lync
Subscribe to Our Free Newsletter

Continue Reading
Related Blogs
Learn how to render a shock-tube-simulation and how to work on similar projects after enrolling into anyone of Skill-Lync's CAE courses.
09 May 2020
In this blog, read how to design the frontal BIW enclosure of a car (Bonnet) and learn how Skill-Lync Master's Program in Automotive Design using CATIA V5 will help you get employed as a design engineer.
09 May 2020
Tetrahedral is a four- nodded solid element that can be generated through the tria element by creating a volume and also through the existing volume of the geometry. These elements are used where the geometry has high thickness and complexity. The image attached below is a representation of a Tetra element. The Tetra element will have 4 triangular faces with four nodes joining them together
01 Aug 2022
A connector is a mechanism that specifies how an object (vertex, edge, or face) is connected to another object or the ground. By often simulating the desired behaviour without having to build the precise shape or specify contact circumstances, connectors make modeling simpler.
02 Aug 2022
One of the most crucial processes in carrying out an accurate simulation using FEA is meshing. A mesh is composed of elements that have nodes—coordinate positions in space that might change depending on the element type—that symbolise the geometry's shape.
03 Aug 2022
Author
Skill-Lync
Subscribe to Our Free Newsletter
Continue Reading
Related Blogs
Learn how to render a shock-tube-simulation and how to work on similar projects after enrolling into anyone of Skill-Lync's CAE courses.
09 May 2020
In this blog, read how to design the frontal BIW enclosure of a car (Bonnet) and learn how Skill-Lync Master's Program in Automotive Design using CATIA V5 will help you get employed as a design engineer.
09 May 2020
Tetrahedral is a four- nodded solid element that can be generated through the tria element by creating a volume and also through the existing volume of the geometry. These elements are used where the geometry has high thickness and complexity. The image attached below is a representation of a Tetra element. The Tetra element will have 4 triangular faces with four nodes joining them together
01 Aug 2022
A connector is a mechanism that specifies how an object (vertex, edge, or face) is connected to another object or the ground. By often simulating the desired behaviour without having to build the precise shape or specify contact circumstances, connectors make modeling simpler.
02 Aug 2022
One of the most crucial processes in carrying out an accurate simulation using FEA is meshing. A mesh is composed of elements that have nodes—coordinate positions in space that might change depending on the element type—that symbolise the geometry's shape.
03 Aug 2022
Related Courses