Base Bracket Design using CATIA V5
BASE BRACKET DESIGN
OBJECTIVE
To perform draft analysis on a Class-A surface model of a base bracket and create a solid model from the surface using B and C surfaces
INTRODUCTION
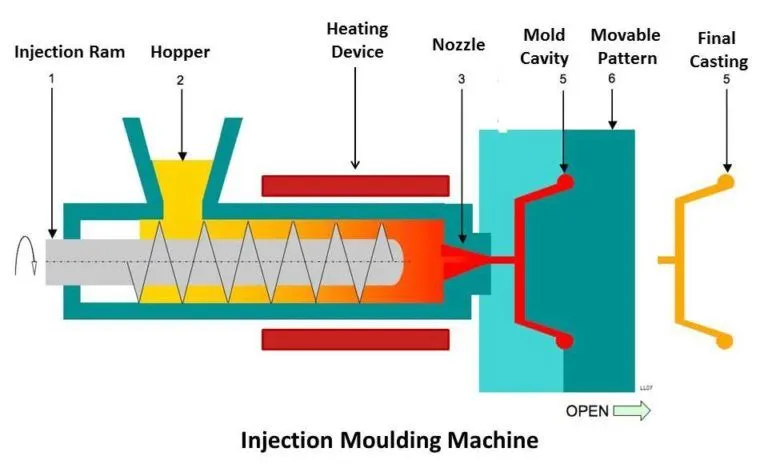
Injection Molding
It is a manufacturing process used for the mass production of plastic components. It works by injecting molten material (plastic) into a mold. Under the application of heat and pressure, the material solidifies into the required shape. Once the product cools, it is ejected from the mold with the help of ejector pins.
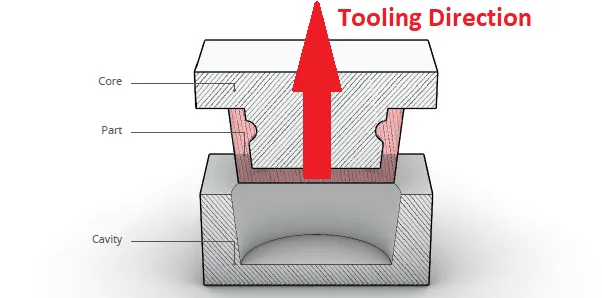
Tooling direction
The direction along which the core pulls apart from the cavity is termed as the Dyeline or the Tooling direction.
Draft
To facilitate easy removal of components from the mold, it is necessary to add a taper all along the surface with reference to the tooling direction. This taper is termed as a draft and its value ranges from 0.5 degrees to 3 degrees, with the latter being the most widely accepted norm.
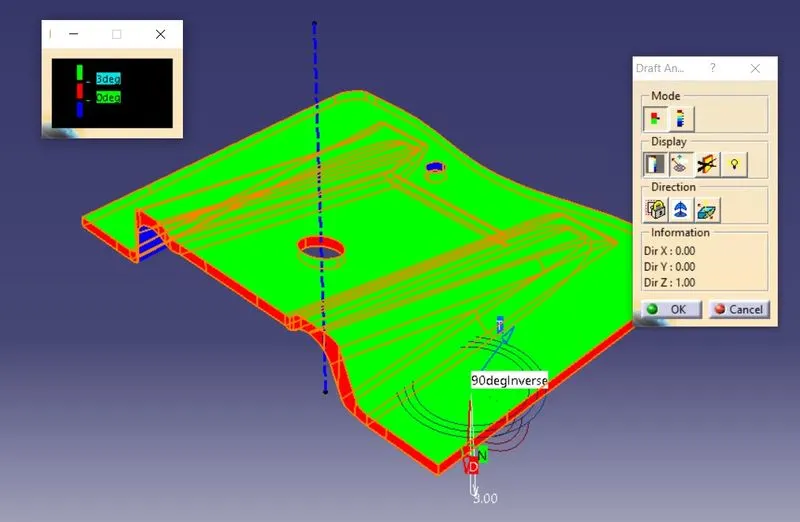
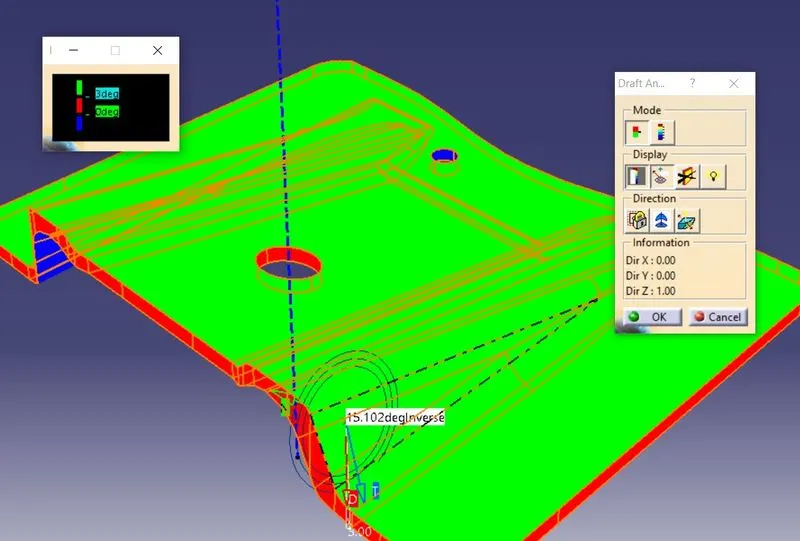
The Draft analysis command in CATIA enables to detect if the drafted part can be removed in an easy manner. This analysis is performed based on colour ranges identifying zones on the analyzed element where the deviation from the draft direction at any point, corresponds to specified values.
Class-A Surfaces
The aesthetic/free-form surface which constitutes the visible outer layer of a component can be termed as a Class-A Surface. In this project, the Class-A surface of a Base Bracket model which is composed only of curvature continuous surfaces is used as the input for performing the draft analysis.
B and C Surfaces
The B surface forms the inner components and acts as a base for the Class-A surface. C surface connects the A and B surfaces and thereby provides a thickness for the final component
OVERVIEW OF THE PROJECT
BISECTING LINE METHOD
Since draft is measured with reference to a tooling axis, the first step after importing the model into CATIA was the creation of a tooling axis. To incorporate for tool clearances due to the presence of tapered surfaces in the part, the bisecting line method was used to create the tooling axis.
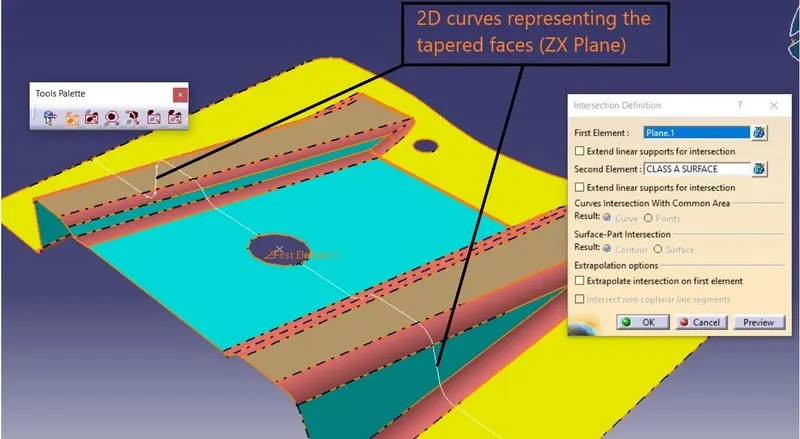
After converting the surface into a 2D profile using the Intersection command from the surface workbench, two inclined lines were created using the endpoints of the 2D curves which represented the tapered faces. Using a bisecting line type, a third line was created along the centre point which signified the coincidence of the tapered faces. This line was the required tooling axis for this component.
DRAFT ANALYSIS
The draft analysis command in CATIA helps to detect whether the drafts provided in the model will facilitate easy removal of the component during manufacture.
This analysis is performed based on colour ranges identifying zones on the analyzed element where the deviation from the draft at any point, corresponds to specified values.
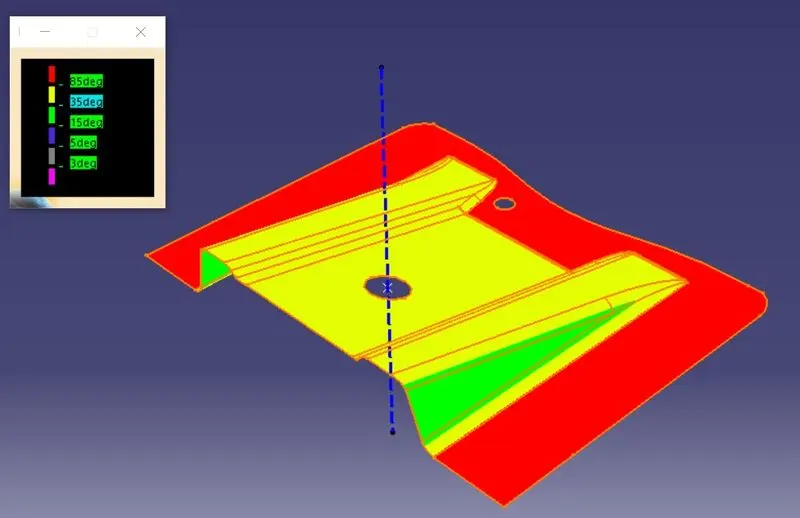
-
When the draft angle value of the surface is equal or smaller than a graduated value, the color below the graduated value is applied
-
When the draft angle value of the surface is greater than the greatest graduated value, the color above this graduated value is applied
In this project, the required draft for all surfaces were chosen as 3 degrees and hence the quick mode option in draft analysis was chosen which incorporated two different colours for two input values.
B AND C SURFACE CREATION
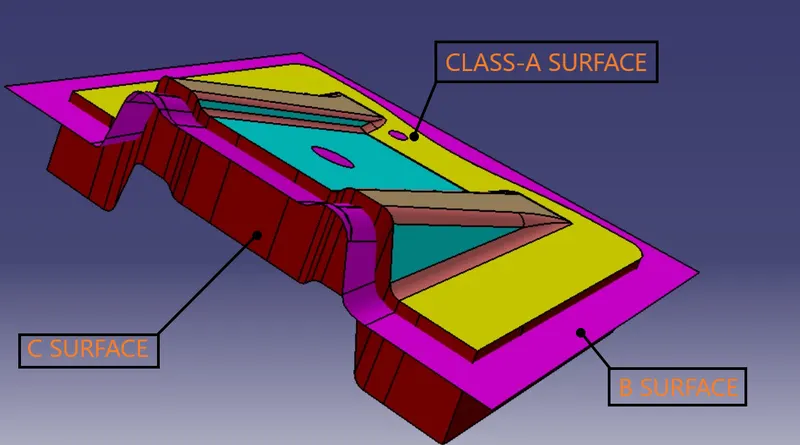
The B surface was created by offsetting the Class-A surface and then extrapolating it to accommodate the entire area of the Class-A surface.
The C surface provided the thickness and acted as the joining surface between Class A and B surfaces.
The Class A and C surfaces were made into a single surface using the Join command in the surface workbench. This was then trimmed using the B surface to create the final component. The model was then converted into a solid using the Close Surface command.
DETAILED PROCEDURE
1. Importing the Class-A Surface
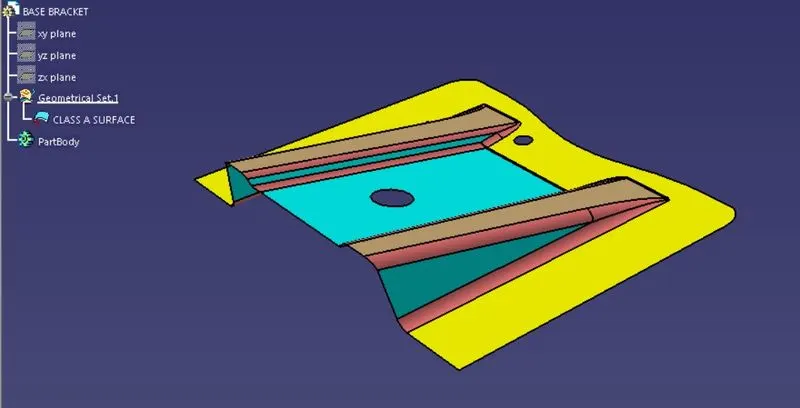
- The surface model of the Base Bracket was imported into the CATIA workspace for further procedures
- Using the Join command in the surface workbench, the surface was checked for any continuity errors
2. Creation of a dummy tooling axis
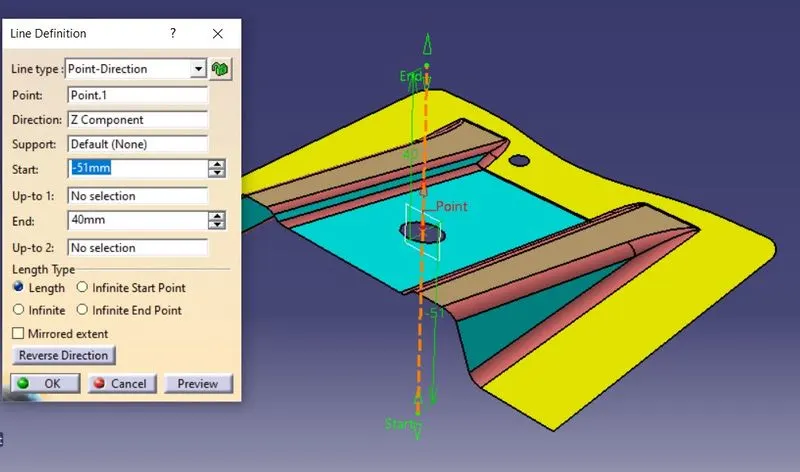
- Using a centre point for the top hole a line was created which represented the approximate position and orientation for the tooling axis
- This line was considered as the dummy tooling axis
3. Creation of the tooling axis
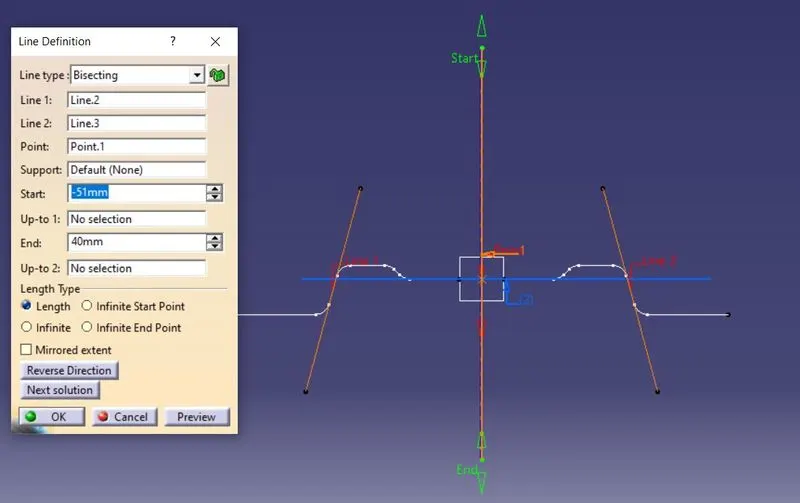
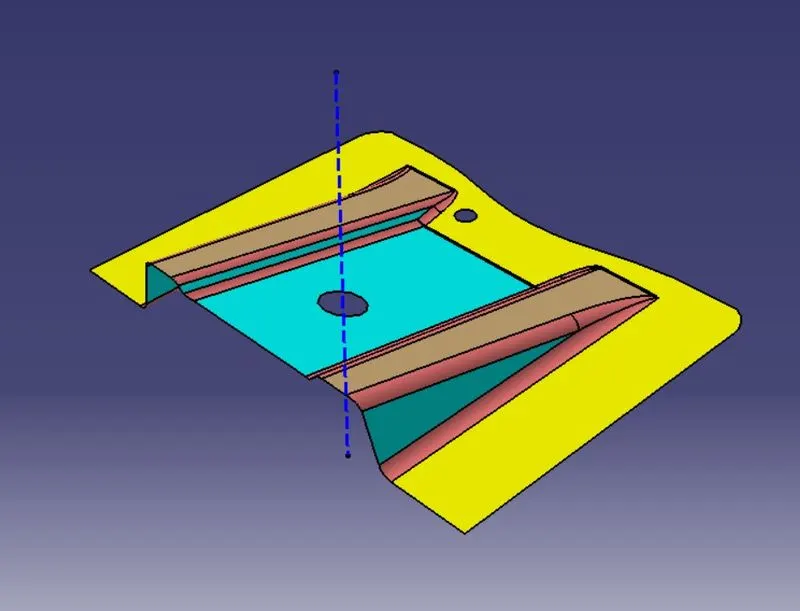
- Using the centre point and a plane parallel to the ZX plane, a set of 2D curves were created using the Intersection command to represent the profile of the Class-A surface
- Two sets of inclined lines were then created from the endpoints of the 2D curves which represented the tapered faces
- Using these lines and the centre point a line was created at their joining point by choosing the Bisecting line type in the options
- This line represented the actual tooling axis for the component
4. Performing draft analysis of the Class-A component
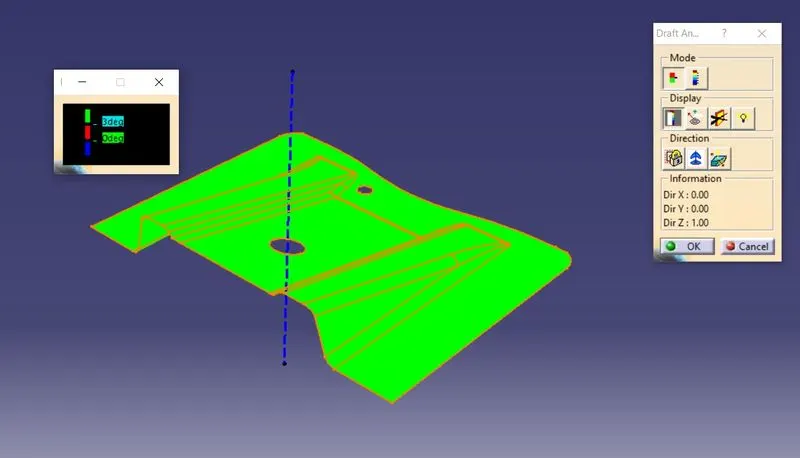
- The draft analysis was then performed on the Class-A surface using the Feature Draft Analysis tool in CATIA
- The draft direction was chosen by dragging the compass and coinciding it with the tooling axis
- The quick analysis mode was chosen since the draft value chosen for this project was 3 degrees for all the surfaces of the component
- A light green colour was chosen to represent a minimum 3 degree draft and all the surfaces successfully returned proper results
5. Creation of B surface
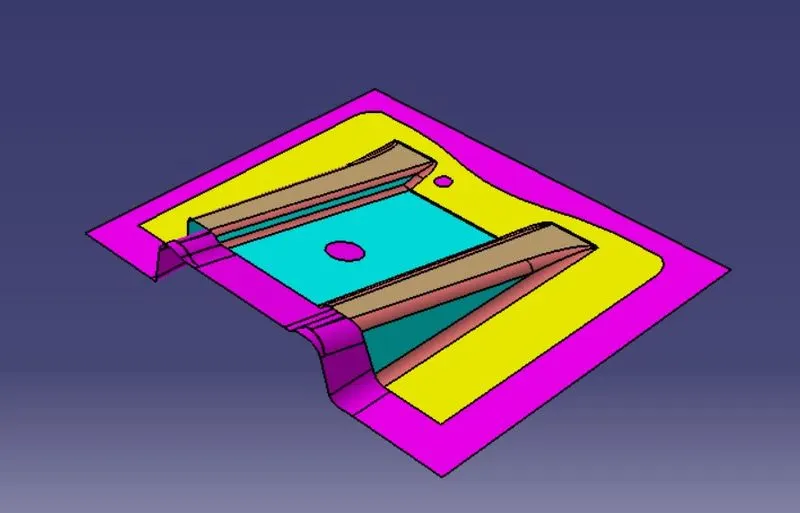
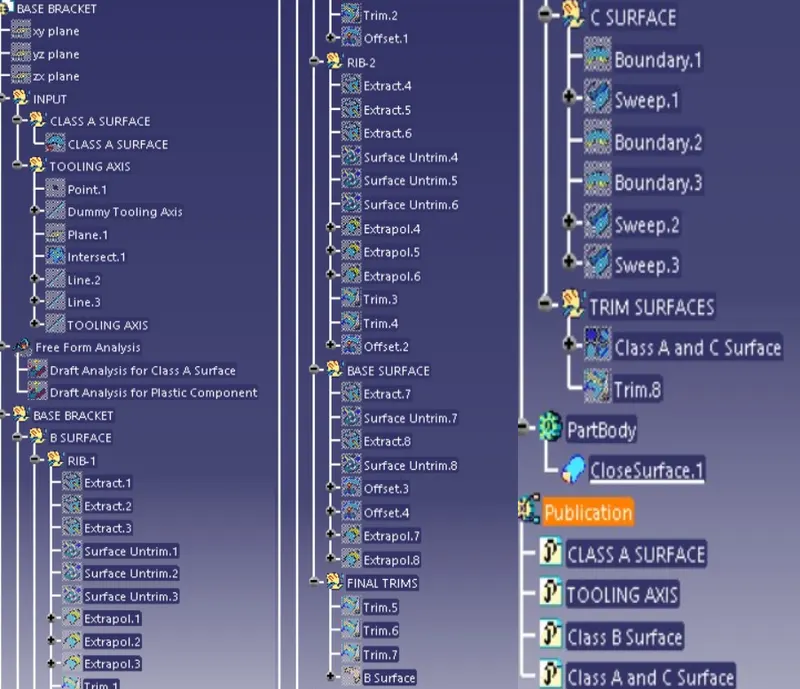
- The surfaces which form two ribs and the base were identified and then extracted from the class A surface using the Extract command
- Before working on these surfaces, the surfaces were separated using the Untrim command
- The three surfaces which made up the rib, were Extrapolated and then Trimmed to create the rib on for the B-Surface
- The process was repeated for both the other rib and the base surface
- The sharp edges were removed from the surface with the help of Fillet command with appropriate values (Existing fillet value+Required thickness)
- This surface was then given an appropriate colour to distinguish it as the B Surface
6. Creation of C surface
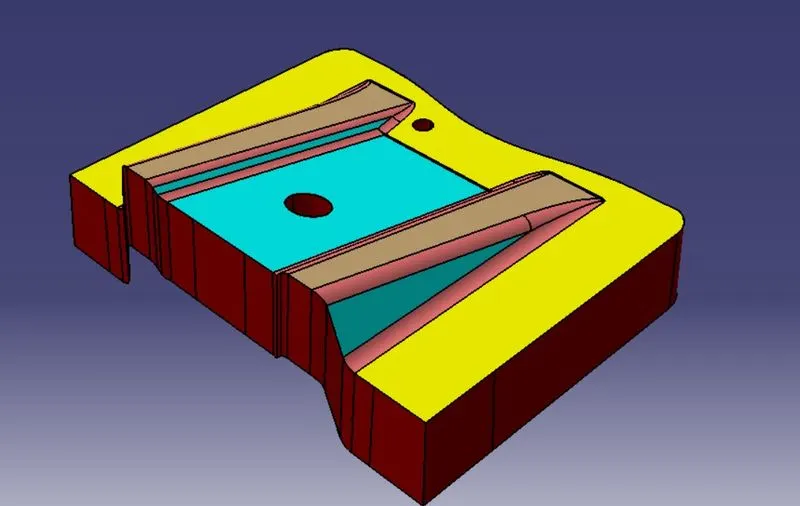
- The outside boundary of the Class A surface was chosen and converted into 2D profiles using the Boundary command
- Since C surface connects both the A and B surface, it essentially signifies the thickness and hence the Swept Surface command was used to create it
- The profile type was chosen as line and the subtype was chosen as 'with draft direction' in the Swept Boundary Surface command window and the 2D surface and the tooling axis were chosen as the inputs for profile and draft direction respectively
- A draft of 3 degrees in the negative Z direction was chosen and the C-Surface according to the 2D profile was created
- The same procedure was repeated for the two holes in the surface
7. Final trim
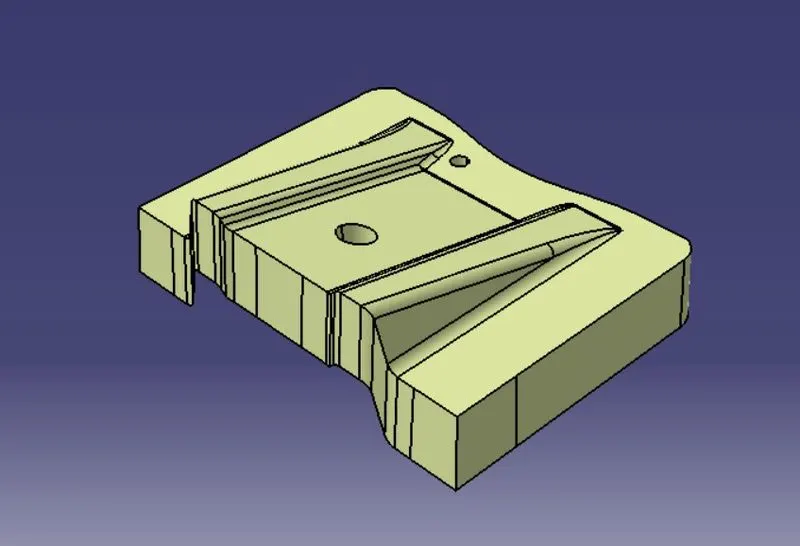
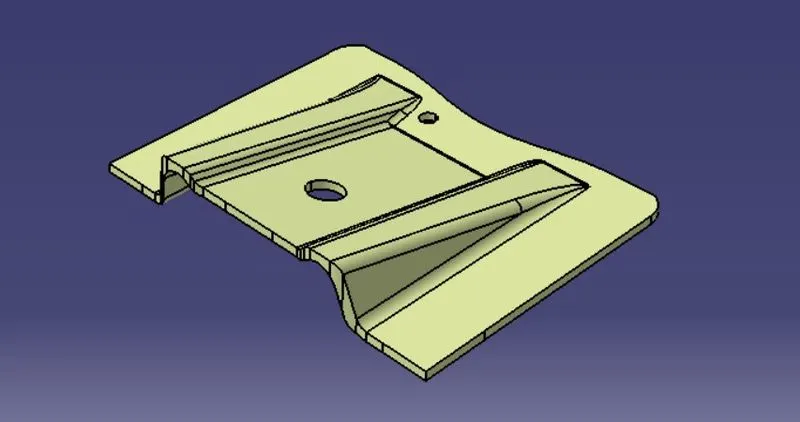
- The Class A and C surfaces were then joined together to create a single surface using the Join command
- This surface was then trimmed using the B Surface to create the final component with the required thickness
8. Converting the surface model to a solid model
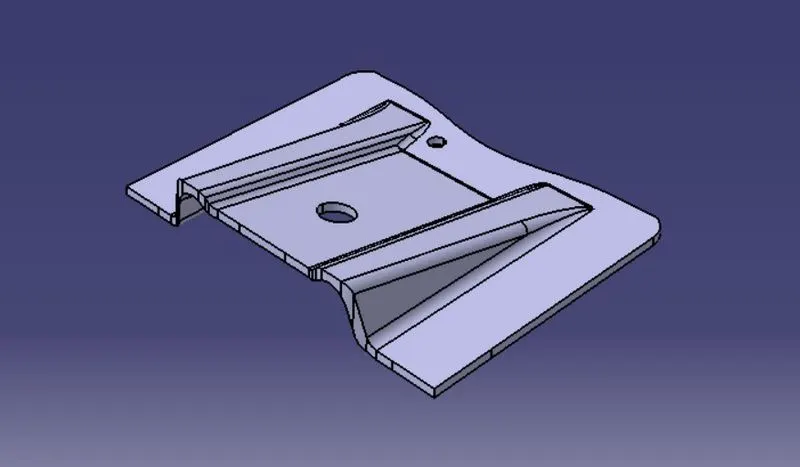
- To complete the model, the Close Surface command from the part workbench was used thereby creating a solid model
9. Performing the Draft analysis on the final Plastic component
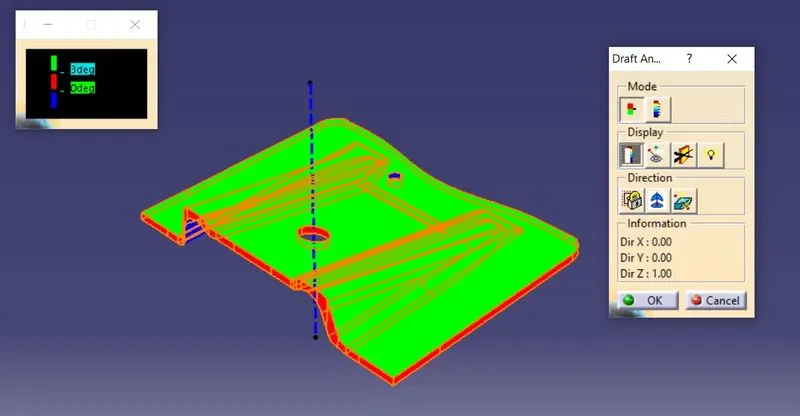
- The draft analysis was then performed on the plastic component using the Feature Draft Analysis tool
- The draft direction was chosen by dragging the compass and coinciding it with the tooling axis
- The quick analysis mode was chosen since the draft value chosen for this project was 3 degrees for all the surfaces of the component
- A light green colour was chosen to represent a minimum 3 degree draft and all the surfaces successfully returned proper results
10. Publishing the required elements
- Publishing geometrical elements makes them available for different users and is important from an assembly context
- In this project, the Class-A, B, C surfaces and the tooling axis were published
DRAFT ANALYSIS: RESULTS
QUICK ANALYSIS: COLOUR SCALE DISPLAY
ANALYSIS UNDER THE RUNNING POINT
FEATURE TREE
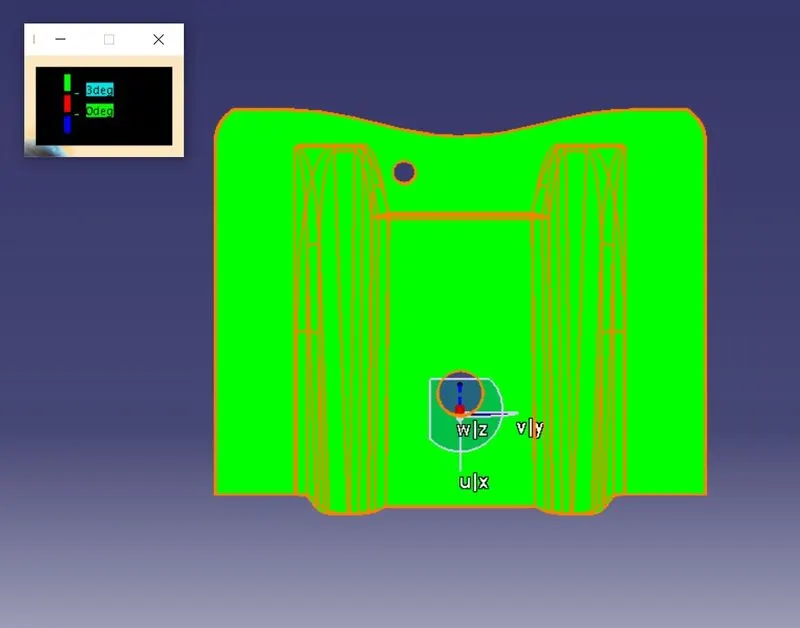
STANDARD VIEWS OF THE MODEL
TOP VIEW
FRONT VIEW
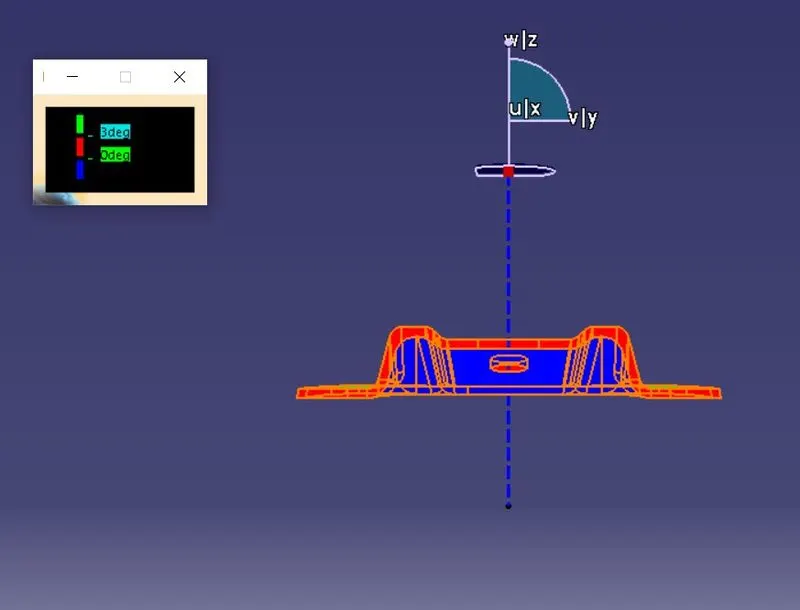
SIDE VIEW (RIGHT)
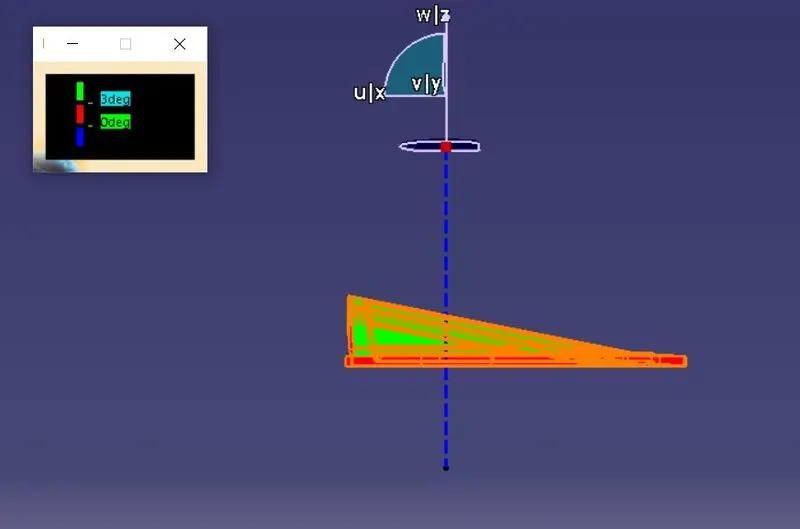
ISOMETRIC VIEW
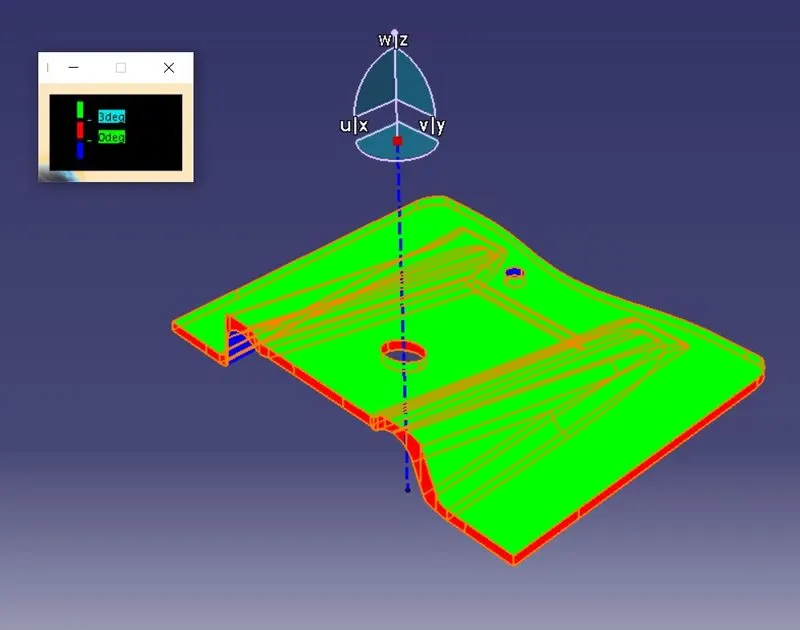
CONCLUSION
This project imparted a great deal of knowledge regarding the creation of tooling axis and performing proper draft analysis on a component which are essential steps to ensure a design is fit for manufacture. It also provided valuable insights on the design of a plastic component using Class A, B and C surfaces using CATIA.